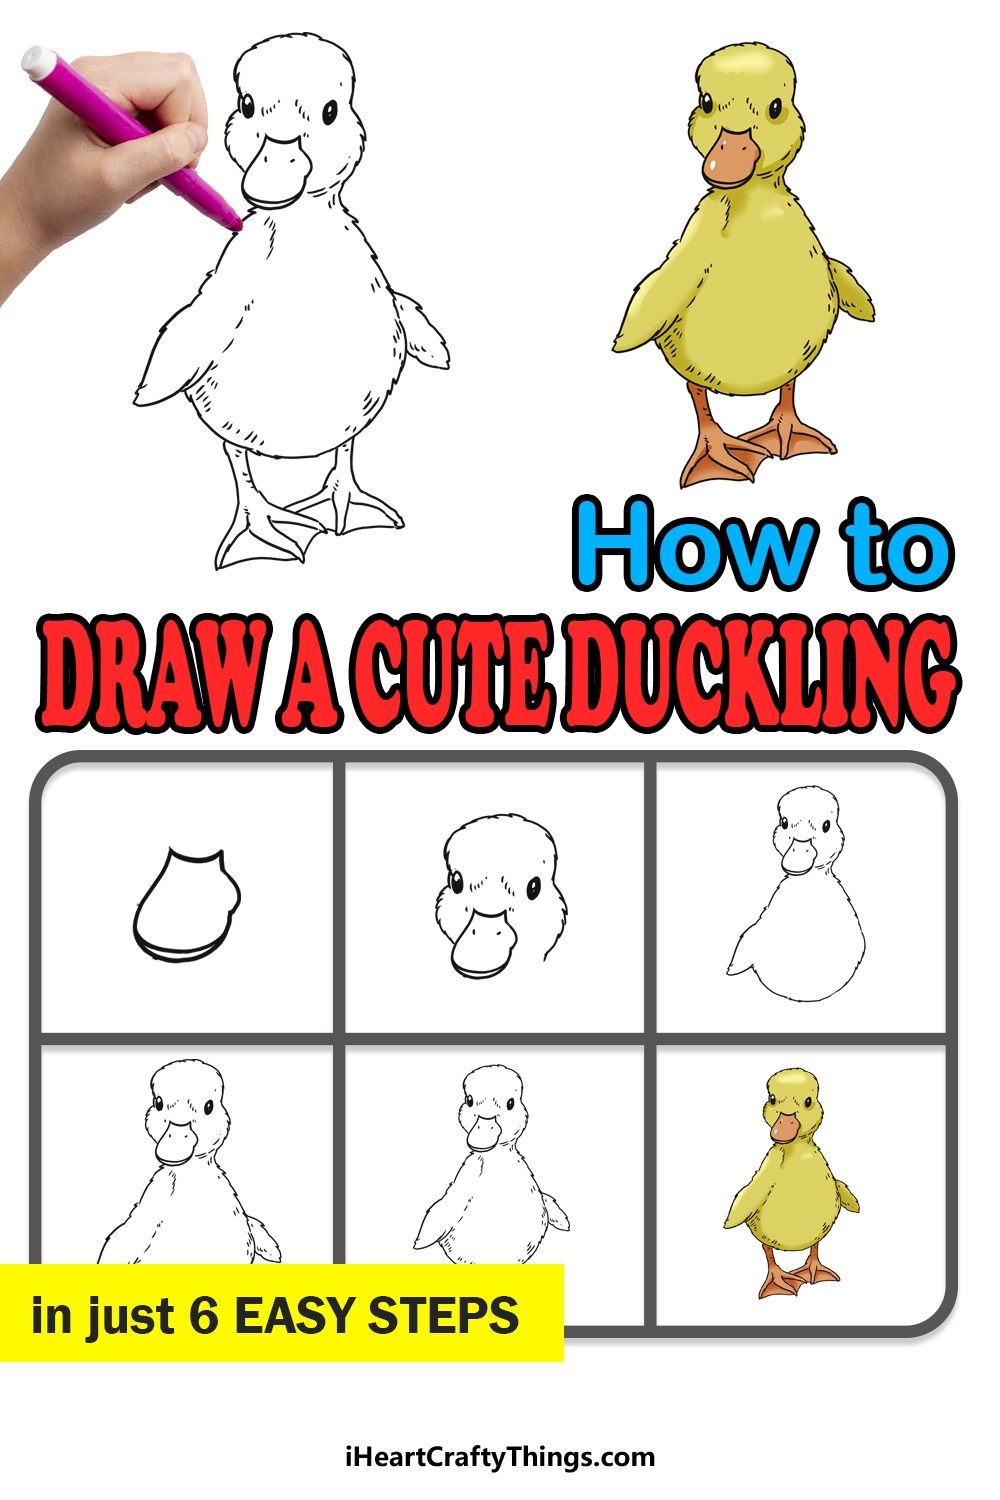
Learning how to draw a cute duckling has never been easier thanks to this guide for kids! Discover the easiest way to make this adorable character.
Ducklings are just too sweet. I can’t help but stop and watch when I see a mother duck leading her ducklings in a little row.
I’m not alone in this, as many people love ducklings. People who feel the same as me often try to draw ducklings only to find that it’s not as easy as all that.
In this guide, you will see how to draw a duckling that is not only cute but also very detailed. Don’t let that detail intimidate you, as I will show you the best way to draw all of these details.
Once it’s done, you could then add any ideas and background elements you can think of!
Watch How To Make Your Cute Duckling Drawing
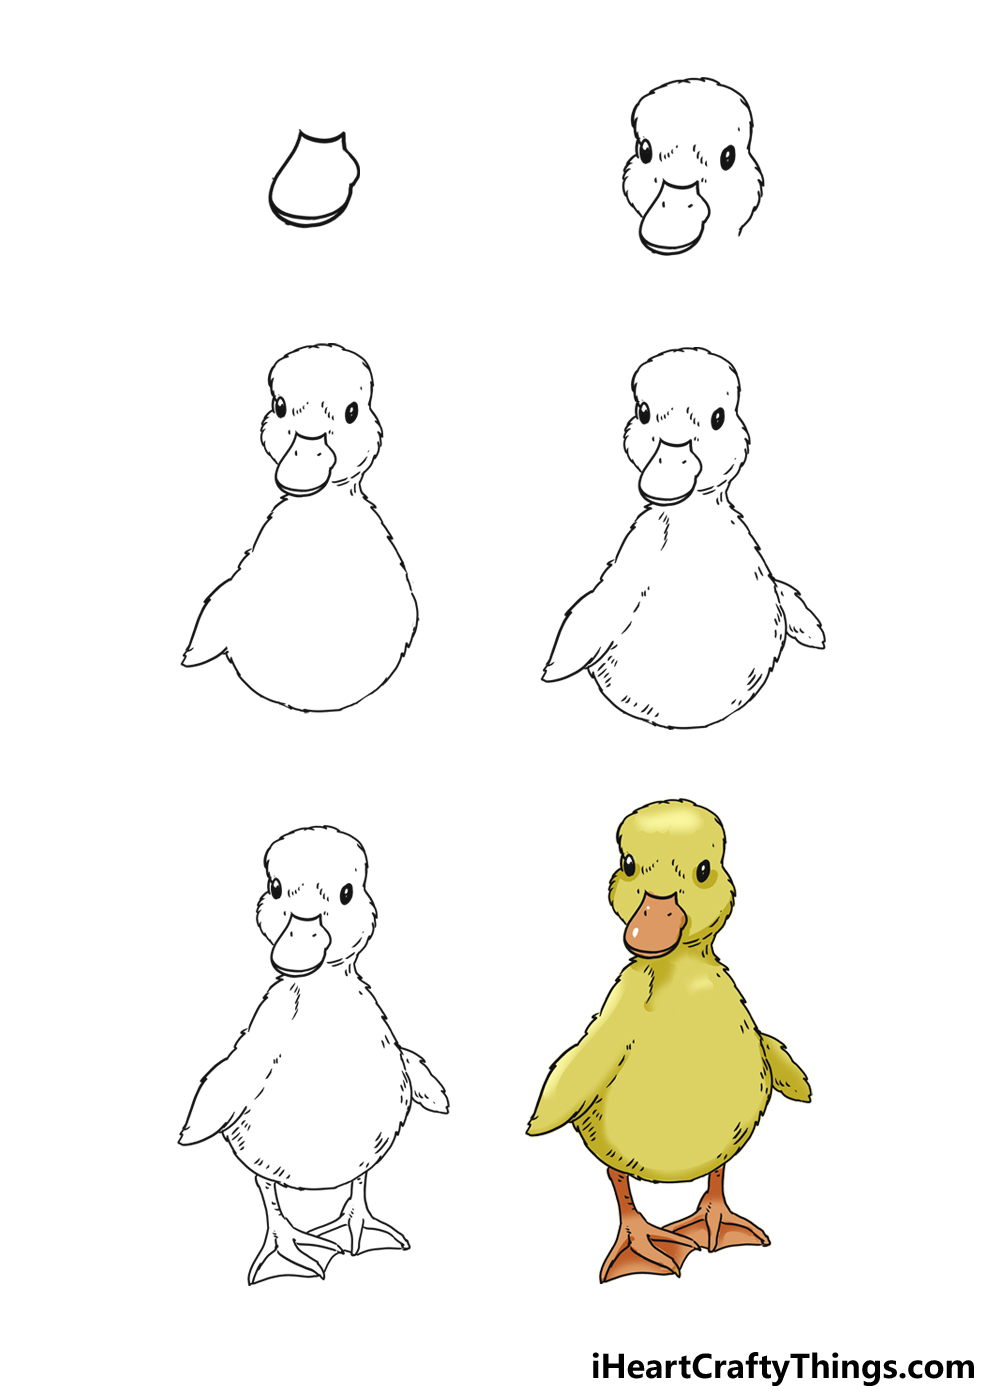
How to Draw A Cute Duckling – Let’s Get Started!
Step 1

‘You can’t have a duck without a duck’s beak’ is a saying that was created moments ago for this guide, but it rings true nonetheless.
That is to say that a duck’s beak is probably its most recognizable feature.
A duck’s beak (or bill if you want to be more accurate) is fairly long, flat and orange. It seems fitting that we will begin this guide with the bill of the duck.
A duck’s beak is fairly simple, but it will look a bit more complex thanks to the angle we will be drawing it. You can start with a slightly curved vertical line at the top of the beak.
This will be where the bill connects to the face later on. The left side of the beak is a fairly long curved line that is pretty smooth.
The left side of the beak will extend to the curved base of the beak, which will also be the tip of the beak.
You will see that the beak on the right-hand side is not a single smooth line like the outline of the beak on the left.
Instead, there will be a small bump on the right side, as you will see in the reference image. Finally, we will add the bottom side of the beak with a curved line at the base.
That’s all there is to it for the beak, at least for now. In the next step, we will start adding the head and facial features of this cute duckling, so let’s go ahead and do that.
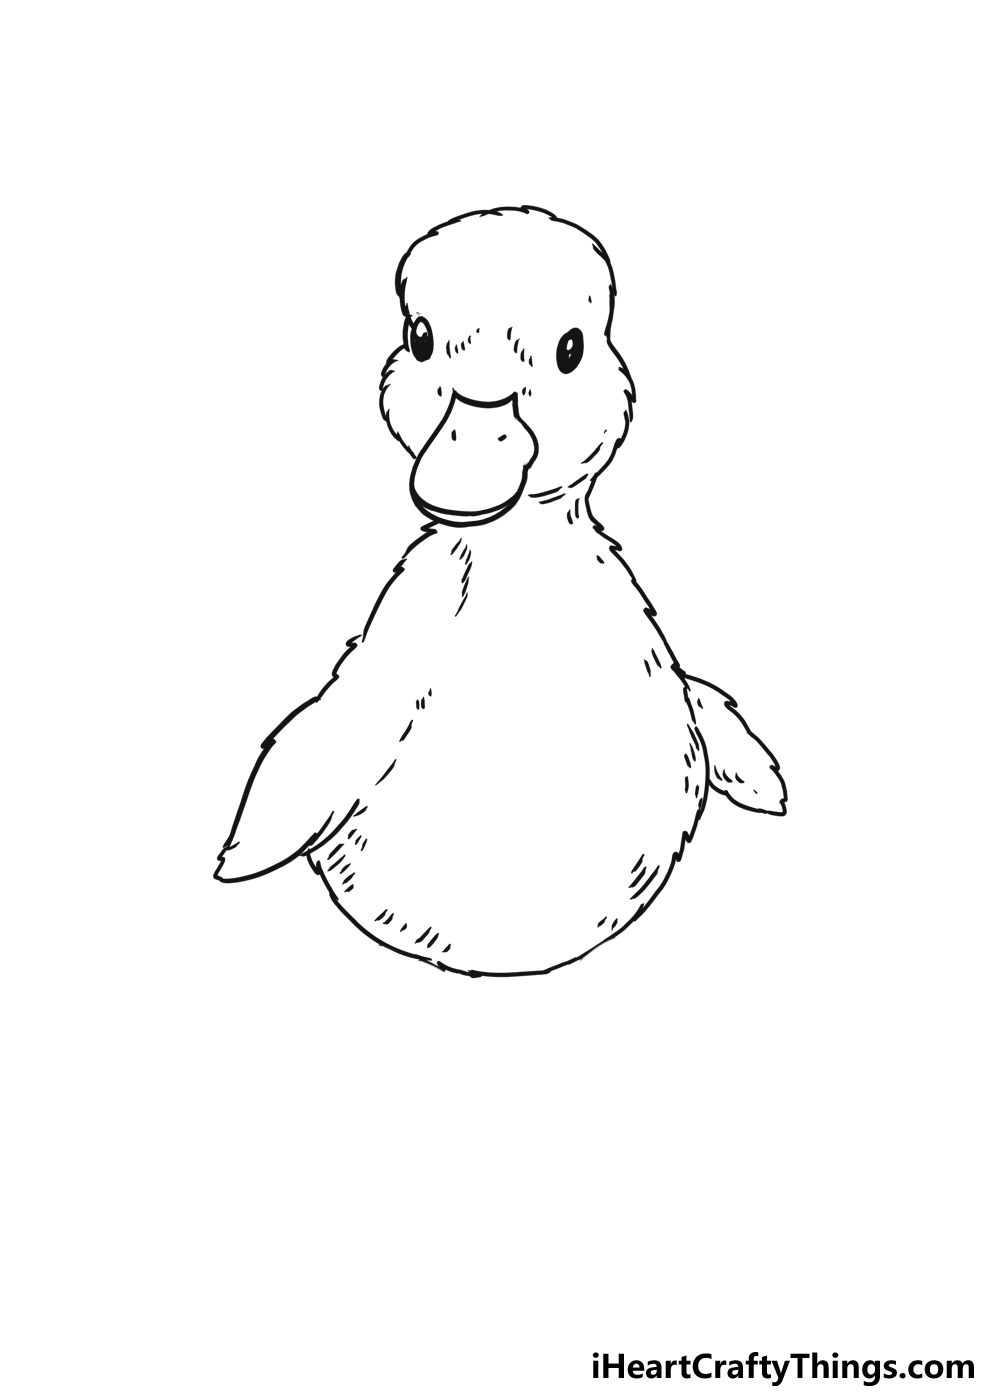
Step 2: Draw the head of the duck
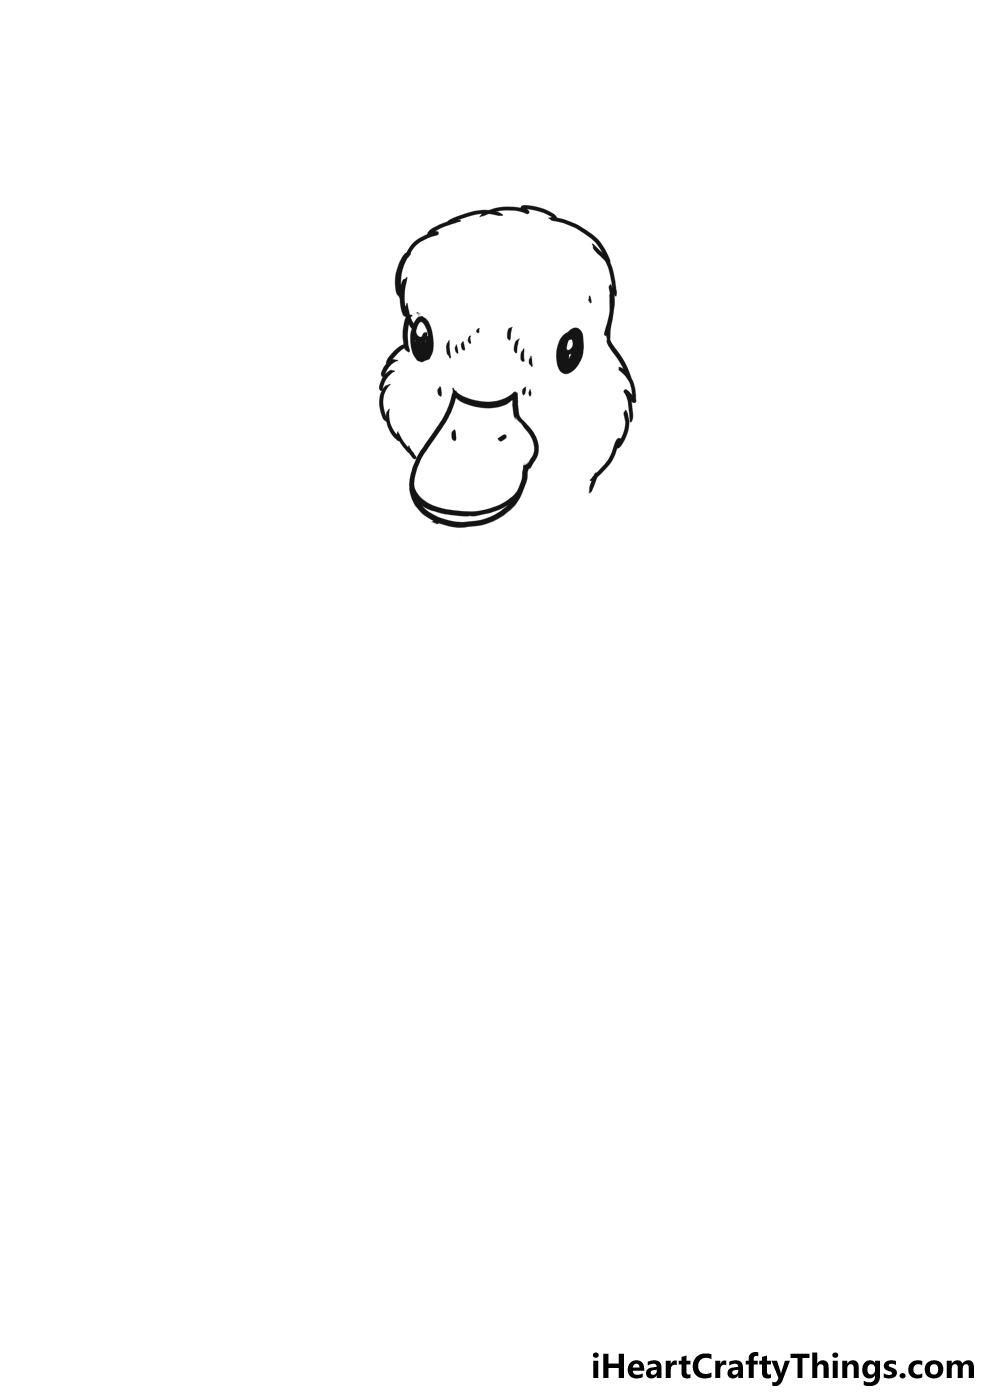
You have the beak of the duck drawn, and next we will draw the head that it is attached to. When drawing the head, we want to recreate that fluffy look that real ducklings have.
We will do this by not using a smooth line but instead using an outline with lots of bumps incorporated. The head of the duckling is thinner at the top half and get’s wider around the beak.
The beak will also look pretty small compared to the rest of the head, but not so small that it looks weird. Try to replicate the size difference we show in our reference image if you can.
Once you have drawn the outline of the head, we can start adding some of the facial features for this cute duckling. We will start with the eyes of the duckling.
These look quite simple, and they will go on opposite ends of the face. To draw each eye, start with a simple oval shape.
Then, draw a smaller white spot inside each eye to show a glint in the eye. Finally, color in the eyes with solid black except for the small white ovals.
Finally, we will add some feathery texture detail to the face of the duck with some small, simple line details on the face.
Once you have drawn these, we will be done with the second step and can move on to part 3 of the guide.
Step 3: Add the body of the duckling
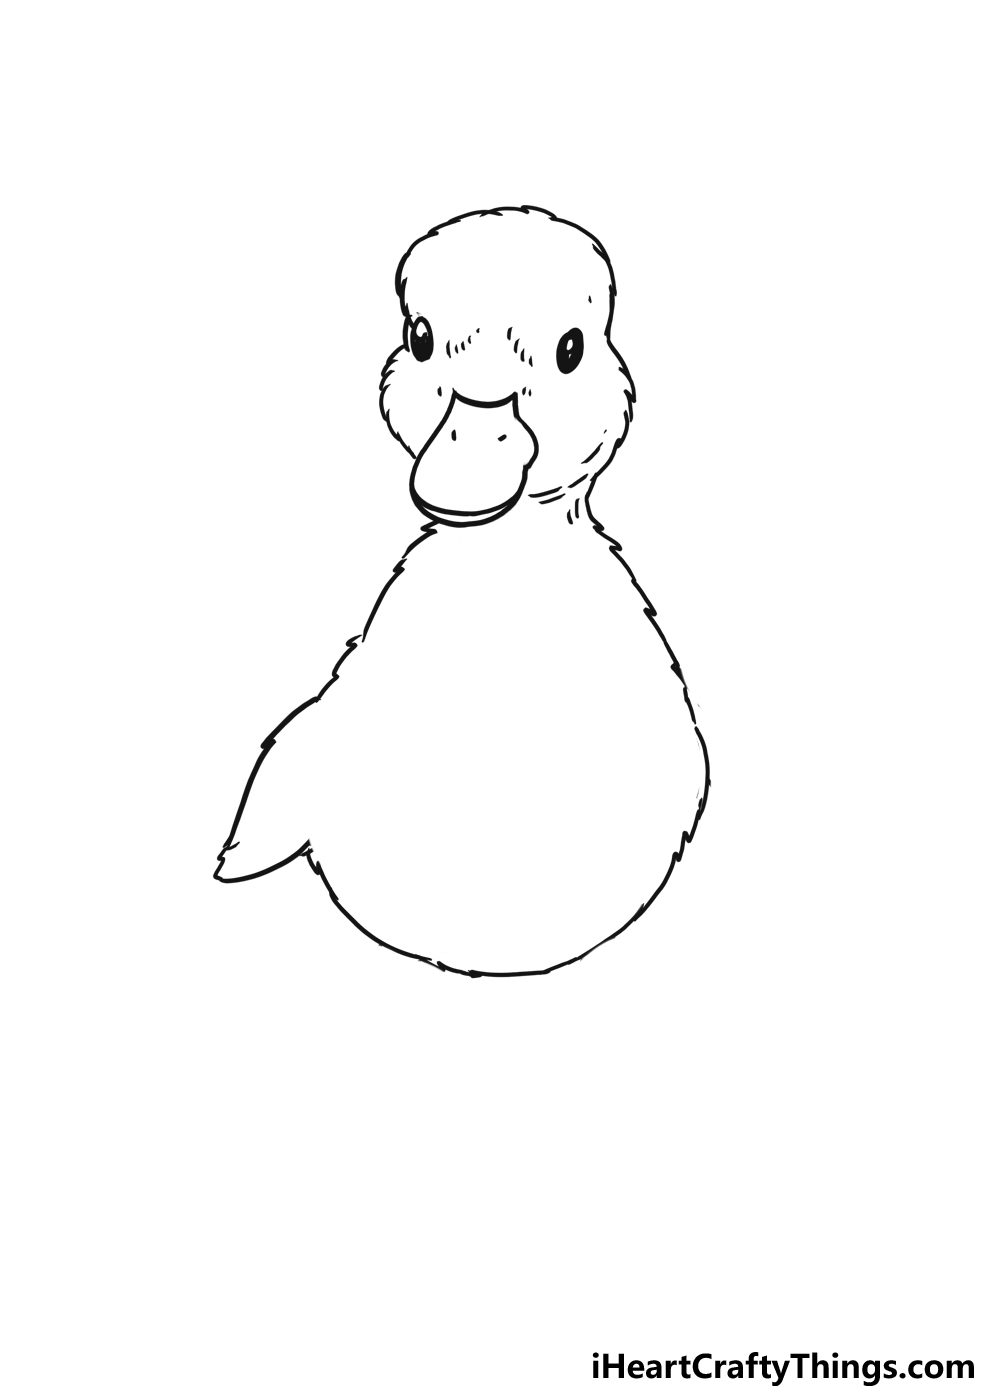
In this third part of your cute duckling drawing, we will be adding the body for this adorable little duckling.
This outline will connect directly to the head outline you have just drawn, and it will largely be a single rounded shape.
This body outline will be drawn with a similar line style to the one that we used for the head outline.
That means that we will be using a bumpy line that will make it look like the duck is fluffy like a real duckling.
Before you start drawing the body outline, you may want to take a pencil and gently map out the outline of the body and wing to make sure that you maintain the proportions of the duckling as a whole.
If you decide to do this, we would recommend pressing very softly with your pencil and following the general shape you see later on in the guide.
Then you can draw the oval shape of the body. It will be much thinner higher up on the body than lower down, as you will see in the example.
We will also be adding a small wing poking off the left side of the body. Much like a real duckling, it will be small, certainly too small to use to fly.
When you’re happy with how the body looks, you can then move on to the next step of the guide.
Step 4: Now draw the other wing and some feather details
We have the head and body outline of this cute duckling complete, and next we will add some extra little details to help make the duckling look a little more realistic.
Let’s begin by adding the second wing of the duckling. This will go on the right-hand side of the duckling’s body, and because of the perspective it will look much smaller than the one on the left.
It will otherwise be rather similar, and will be drawn with the same bumpy outline that the rest of the duckling has been drawn with.
Now that we have the final piece of the body outline drawn, we can focus on adding some details.
These details should be rather minimal, and you don’t want to overdo it as it will make the image look a bit messy. Essentially, we want to add some fluff texture to the body and head of the duckling.
This can be done by adding a series of small lines all throughout the interior of the outline. These will mostly go close to the inner outline of the duckling to make it look fluffier.
We have shown you where we would place these details, but you should feel free to place more details wherever you would like them. When you have added these final touches, we will be ready for step 5!
Make sure that everything is as you want it so far, as we will finish up the final details and ideas in the next step of the guide.
Step 5: Draw The feet of the cute duckling and any final details
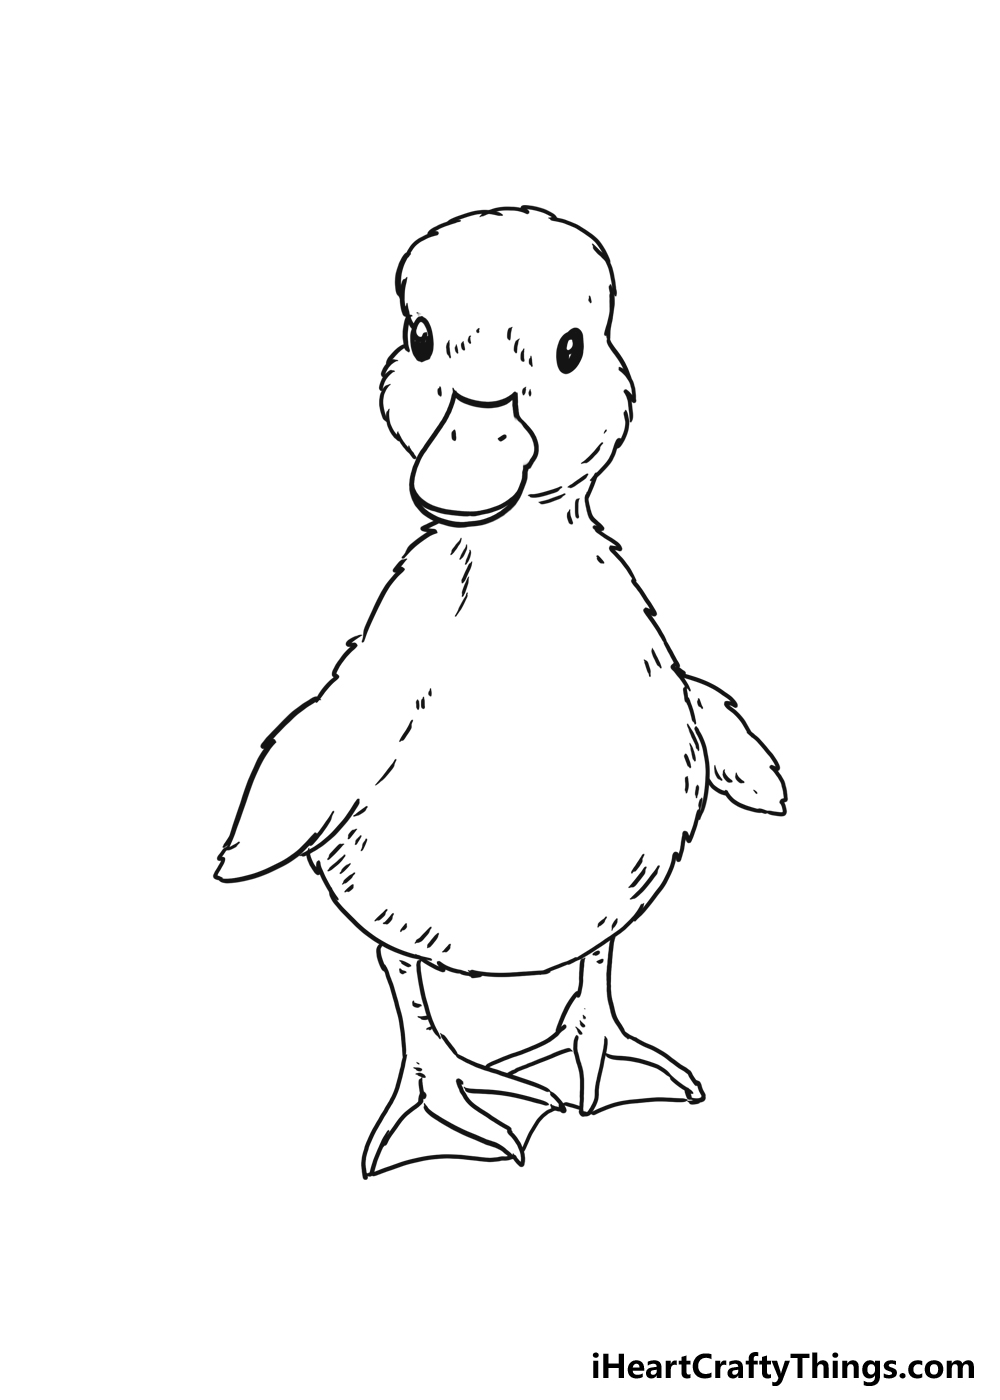
It’s time to finish off the final details, touches and ideas for this drawing before we move on to the final step of this guide on how to draw a cute duckling.
We mentioned that the beak of a duck is one of its most notable physical characteristics, and the feet are probably the second most notable.
The reason for this is because of a duck’s distinctive webbed feet.
That is the final piece of the drawing that we need to add before we add any extra details or elements. You may not think it, but the legs and feet are rather tricky to draw.
The one on the left will be overlapping the one on the right a little, which makes this duckling even cuter somehow. The legs are drawn at an angle, and are very thin.
Then, each leg will have three toes that are long and pointy, as shown in our reference image. You can then connect the toes with a simple, slightly curved line.
These lines will serve as the webbing between the toes. With the leg outlines complete, we can add some small line details to them to make them look a bit more textured.
With those done, you can now add some extras to the image! For example, you could draw a tranquil lake in the background or add any other setting you would like.
Now that you know how to draw this duckling, you could add some duck friends for it to hang out with. Or, maybe you would like some other birds or small creatures for some friends!
These are a few ideas, but how else could you go about adding to this adorable scene?
Step 6: Now, finish off with some color
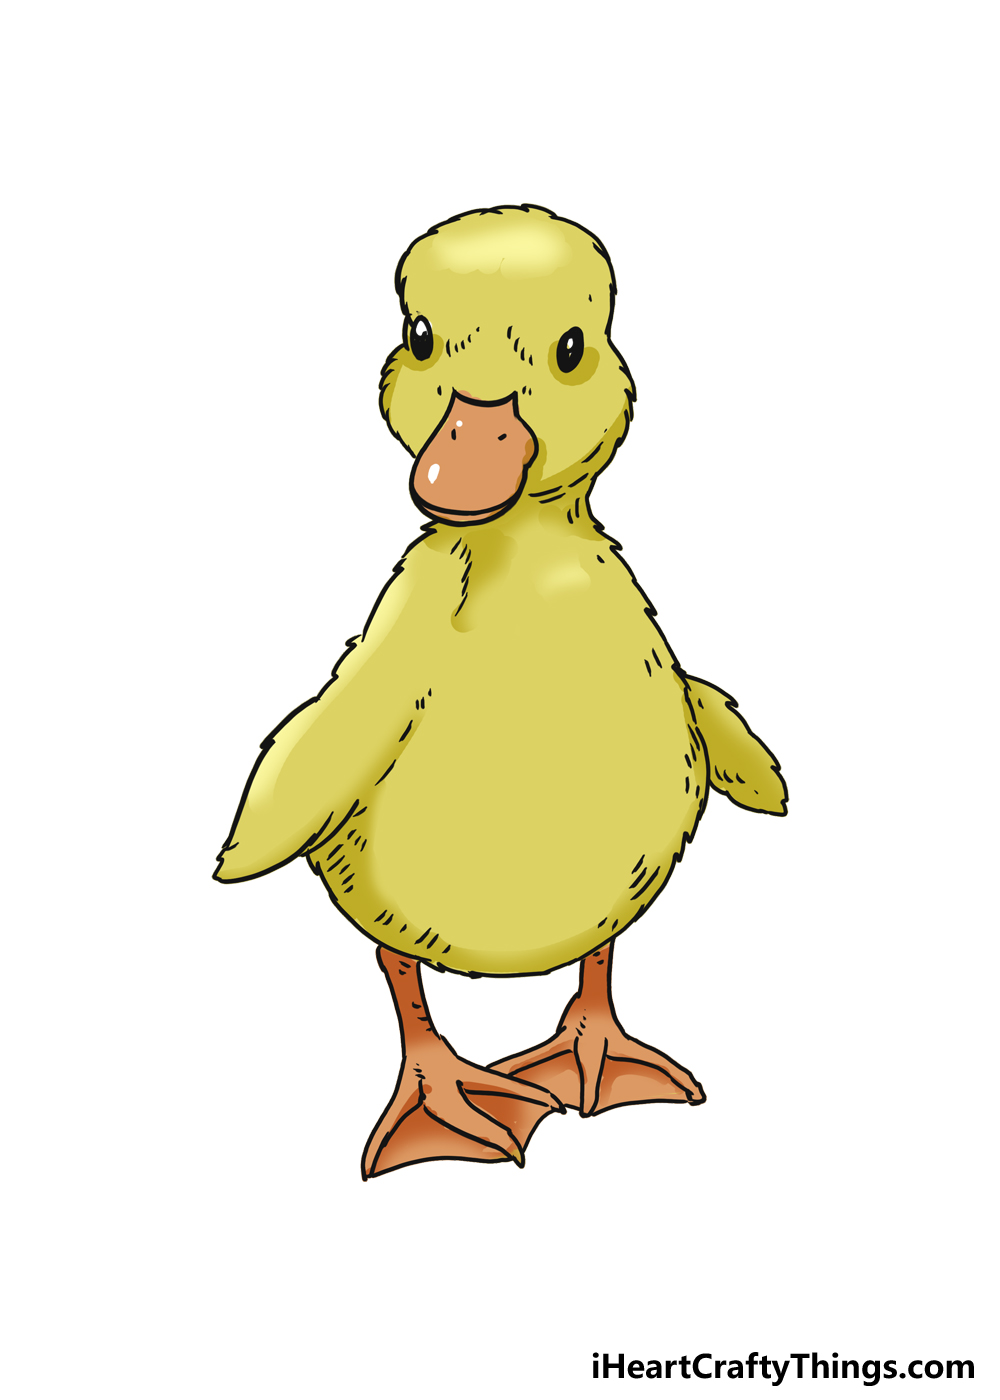
This is the final step of this guide, and in it we will finish off by adding some colors to your artwork.
Even though the two primary colors of this composition are yellow and orange, we kept them a bit more muted.
The beak and legs are orange while the feathers of the duck are various shades of yellow. Darker shades of either of these colors can be used to show shading and texture.
If you wanted to replicate the lighter look of the colors, then you could use mediums such as watercolor paints or colored pencils. These would give the colors a lovely soft tone.
If you would prefer colors that pop a bit more, then you could use colored pens, markers or darker kinds of paint.
There are so many options to go for, and you can experiment with different mediums and combinations.
You could go for similar colors to the ones we chose for our example, but you should feel free to try out any colors you like. They don’t even have to be realistic, necessarily.
When you color in, don’t forget to fill in the background as well! If you added any background details, then you have something to color in already.
If not, you could fill it with solid colors or some shapes, for example. Now it’s up to you! Which colors, art tools and coloring techniques will you use to finish off this artwork?
Your Cute Duckling Drawing is Complete!
Ducklings are so cute, and this drawing of a cute duckling that you created is no exception! We hope that you enjoyed replicating this adorable little duckling to create your own artwork.
We wanted to make sure that drawing this little guy would be fun and easy, so hopefully you faced minimal frustration when following the steps.
Showing you how to draw this cute duckling was not our only goal, though.
We wanted to leave it open enough that you would be able to bring in your own ideas and additions. If you struggle with any of the steps, remember that you can try as many times as you need to.
Practice makes perfect, so you can keep trying and do as many attempts as you need. When you really have the hang of it, that’s when you can take it so much further and add so many fun ideas.
We can’t wait to see what you decide to do to make this drawing even more unique! With that said, we would love to see how it turns out.
You can share your finished drawing on our Facebook and Pinterest pages for us to see. It will be great to see how you depicted this cute duckling!