There are so many different kinds of fruits and berries, and everyone has their favorites. A blueberry is a simple little berry, but it is a favorite for many people due to how tasty they are.
Not only can they be enjoyed as a juicy snack, but they have many other uses as well. They can be made into juices, jams or baked into pies to name a few.
While simple, they are also pretty little berries, and so it can be fun to incorporate them into various kinds of artwork. They can also be surprisingly hard to draw, however.
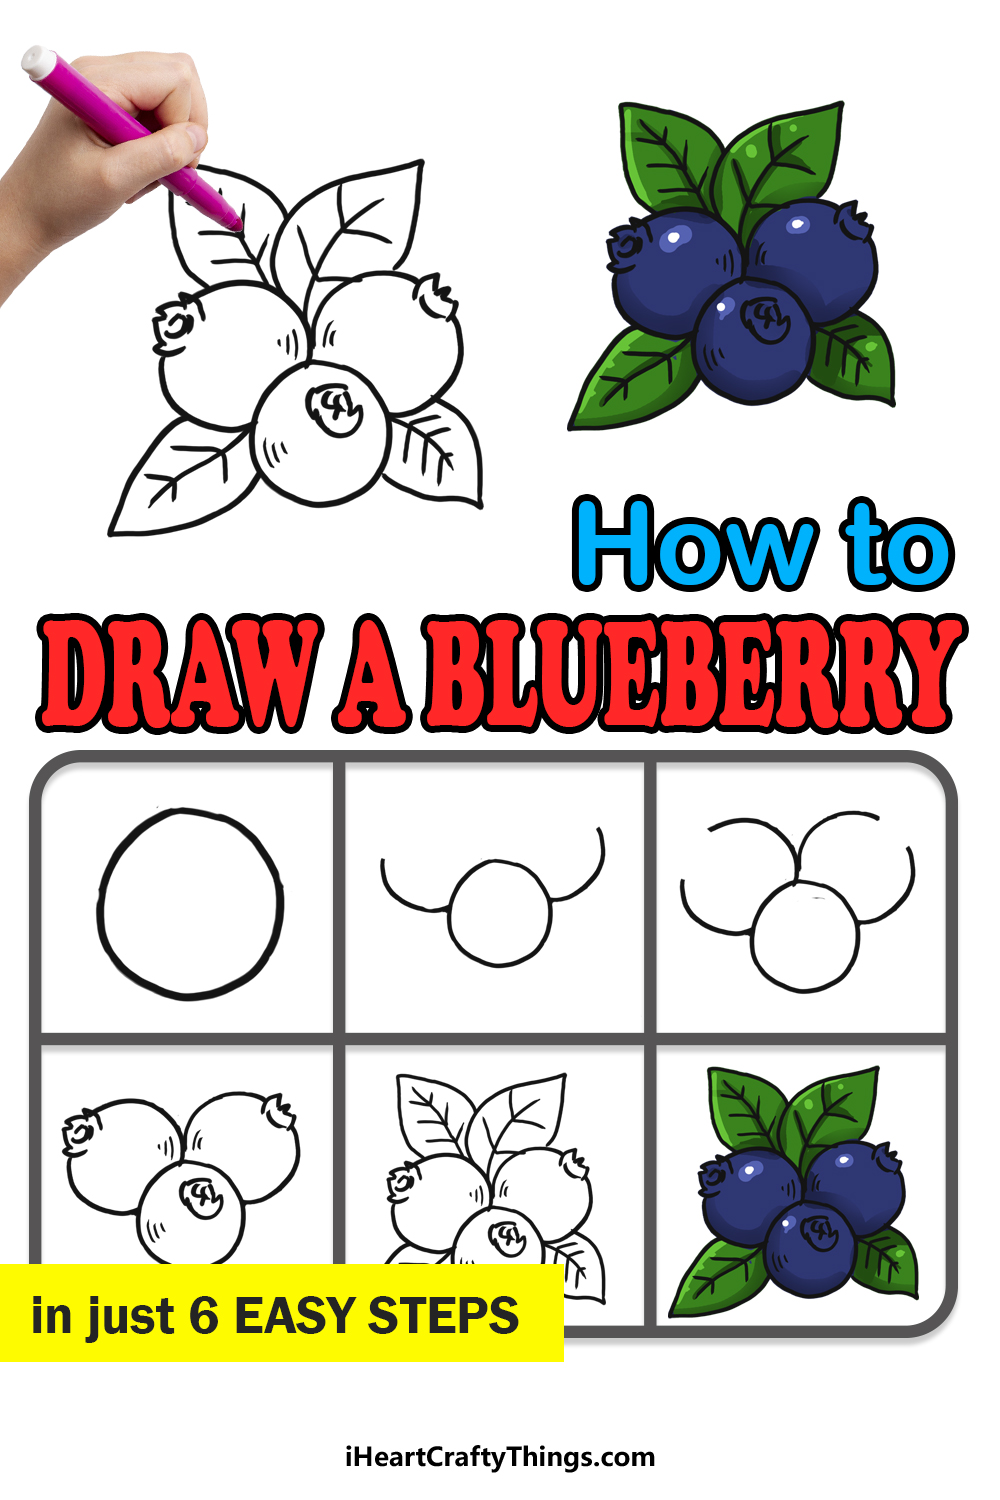
That’s where this guide comes in, as we will be showing you how to draw a blueberry. This will be done in 6 steps, and by the end of it you will see how fun and easy it can be.
We will also go over a few ways that you can make your drawing even more unique, so there is plenty of fun to be had here! Without further ado, let’s begin by doing the first step.
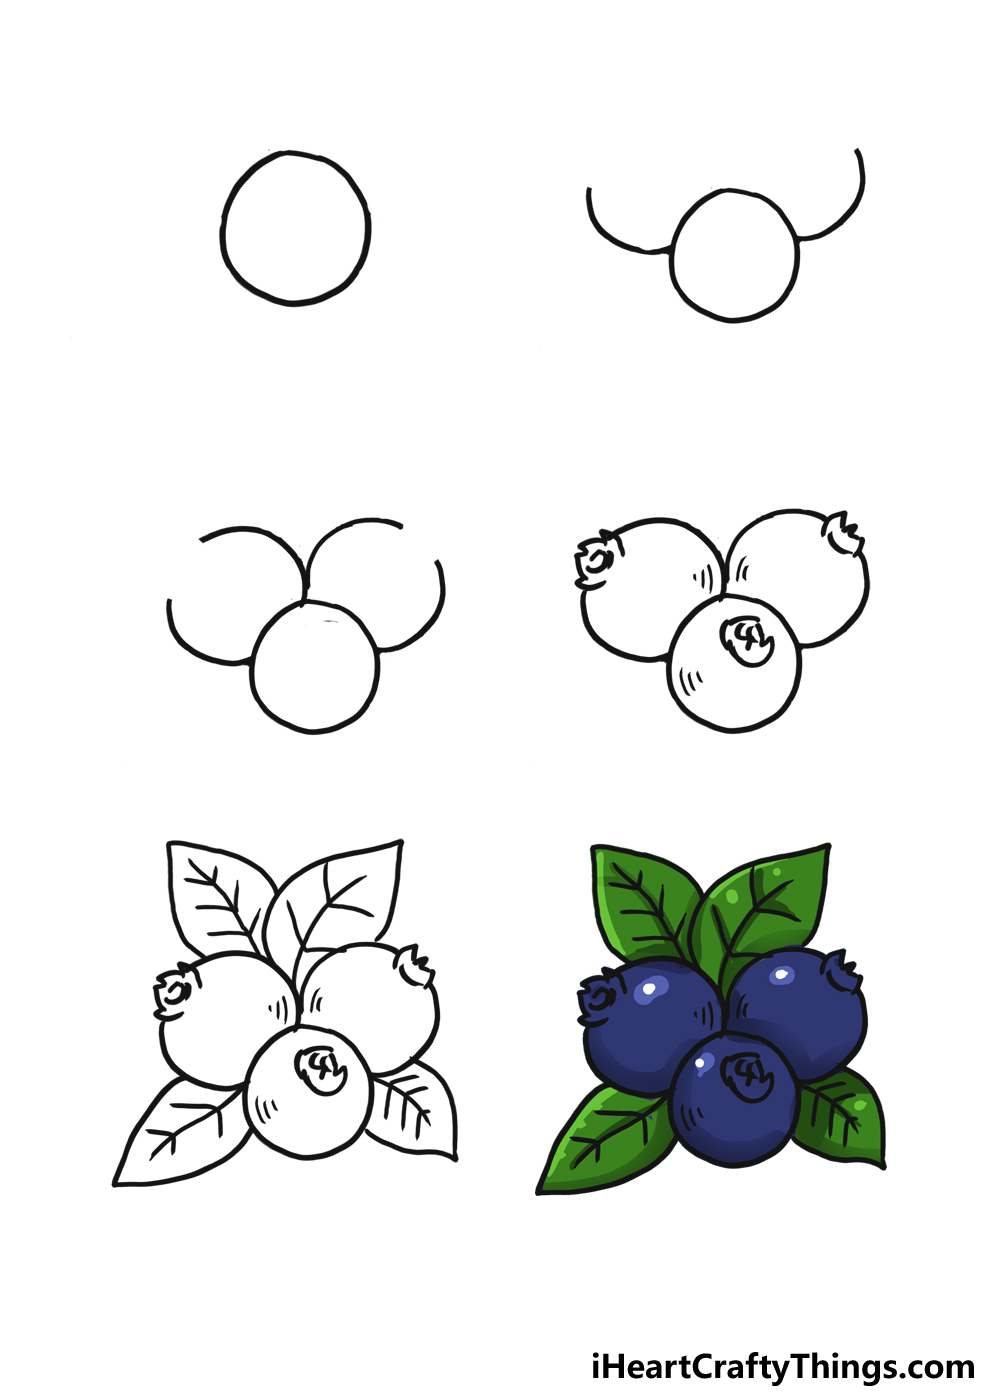
How to Draw A Blueberry – Let’s Get Started!
Step 1

As we mentioned before, blueberries are not the most complex of berries in the world.
That being said, there are still some small details that can be tricky and they are slightly more complicated than you may think.
We will also not only be drawing one blueberry in this guide, and we will add two more to finish off the composition. This will also include a few leaves to add to the design.
That will all come later, however, so don’t worry about all that for now. For this first step, we will focus on the central blueberry.
This is the only blueberry in the arrangement that we will see the entirety of, so it will be the main focus of the image. Luckily, the first step of drawing this blueberry should be pretty easy.
In fact, we will simply be drawing a circle for this first one. Not only that, but it doesn’t have to be perfect.
As you will see in the reference image, we are aiming for a slightly bumpy line for this outline.
Normally when drawing a circle, we will recommend using a tool such as a drawing compass to make the circle perfect. In this case, we would advice drawing it freehand.
That’s really all there is to it for this step, and then we can move on to the second step where we will start drawing the next two blueberries in this arrangement.
Step 2: Draw the beginning of the next two blueberries
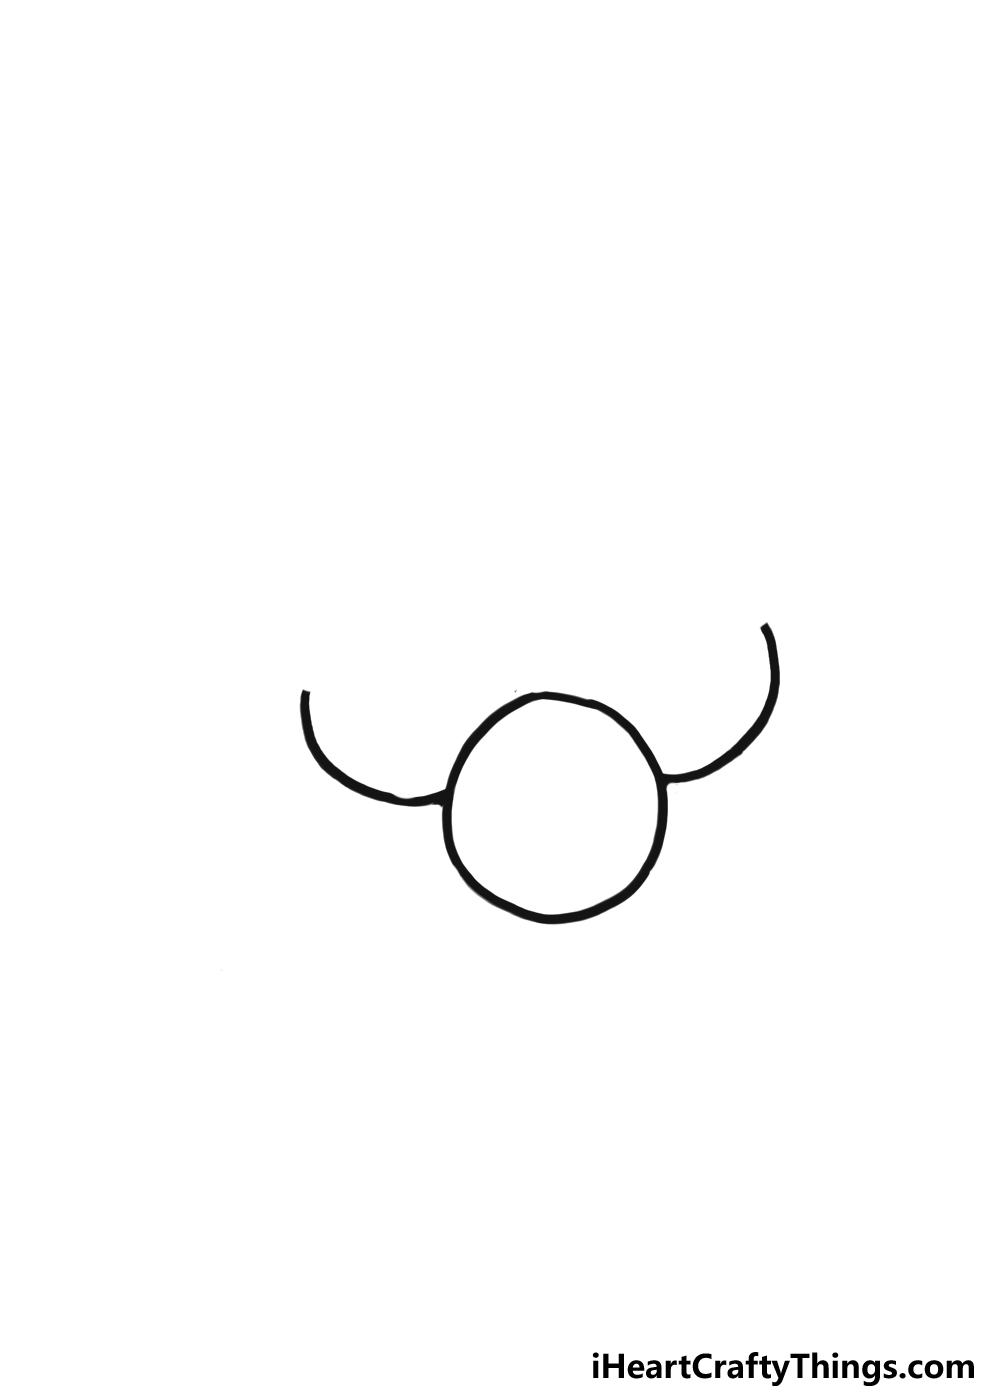
Now that we have the central blueberry drawn, we will start adding the next two. While this will be easier than the first one, these will be a little more complicated.
For that reason, we would recommend planning out these next ones with some pencil lines. If you do this, try to either use a really light pencil or press very softly with whatever pencil you have.
Then, using the reference images to help you, draw two circles ‘behind’ the first blueberry that we drew. Once again, these don’t have to be perfect, especially now that they’re just in pencil.
This may seem like a simple and even unnecessary step, but you will see how much this kind of preparation can help very shortly.
Once you have drawn these planning circles, we can start drawing the actual blueberries.
For now, we will just be drawing the lower portions of the blueberries. This will be done with some simple curved lines that extend out from the first blueberry.
If you drew those pencil circles, you will be able to visualize these ones behind the first one easier. That’s all there is to it for now!
These two blueberries look a bit weird now, but worry not! In the next few steps we will add some more to the outlines and add some extra details that will make them look like tasty blueberries in no time.
So when you’re ready, let’s head to step 3 and add to these little berries!
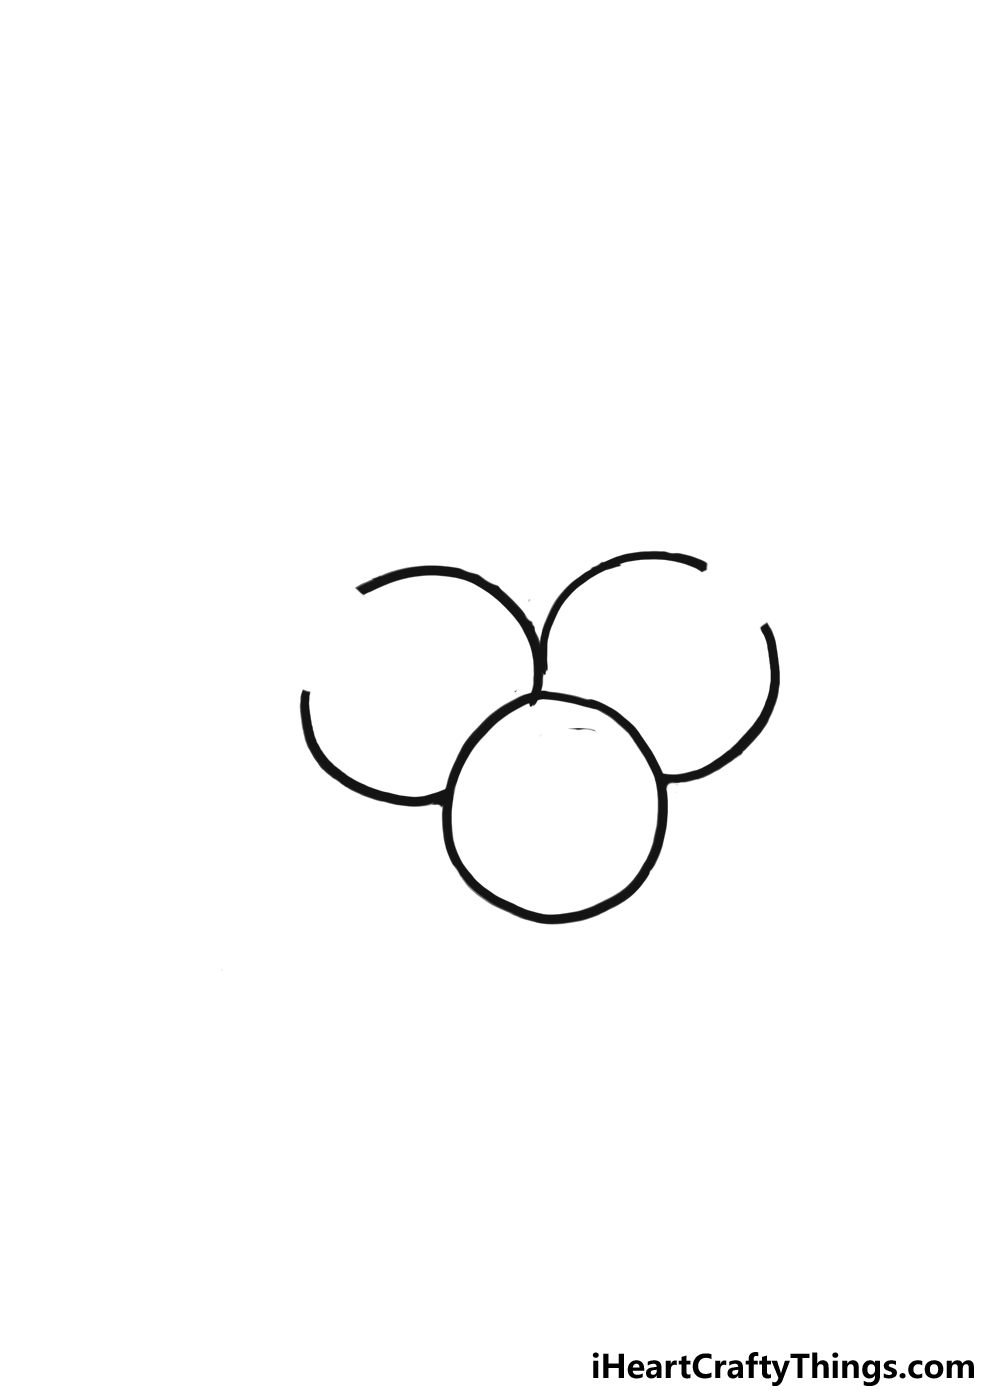
Step 3: Add the next part of the berry outlines
For this third step of this blueberry drawing, you may assume that we will draw the rest of the circular outlines for each blueberry.
You would only think that if you haven’t looked at the reference image, as that is not what we will be doing.
This is another step where you will be glad that you added some pencil circles if you decided to take that advice!
As you will see in the reference image, we will be leaving some small gaps in these circles for the blueberries in the background.
The reason why we’re doing that is a mystery that will have to wait until the next step to be solved, but for now we will focus on the upper lines of these blueberries.
Whether you drew some planning circles or not, try to envision what it would look like to have three blueberries in a clump like this in real life.
With that in mind, we will draw the first curved line extending up from around the center of the top of the blueberry in the foreground.
As mentioned, be sure to leave a gap between this line and the lower one from step 2.
Then, we will do the same for the blueberry on the right. As you will see, these two lines will touch each other close to where they start on the central blueberry.
Once it looks as it does in our reference image, you will be ready to add some more details, so let’s move on to step 4!
Step 4: Now draw some details on the blueberries
Now that we have most of the outlines for these blueberries done, we can start adding some small details. This will also be where we find out why we left those gaps earlier.
In those gaps, we will be adding small little leaf stubs. That’s a very simple and inaccurate way of describing them, as this part of the blueberry is actually called a calyx.
Hopefully, you still knew what we were referring to! Before we draw these little details, you can go ahead and erase those pencil lines if you added them, as we won’t be needing them.
Just be careful, as you may smudge ink or erase things you don’t want to! Now let’s draw the first calyx on the central blueberry.
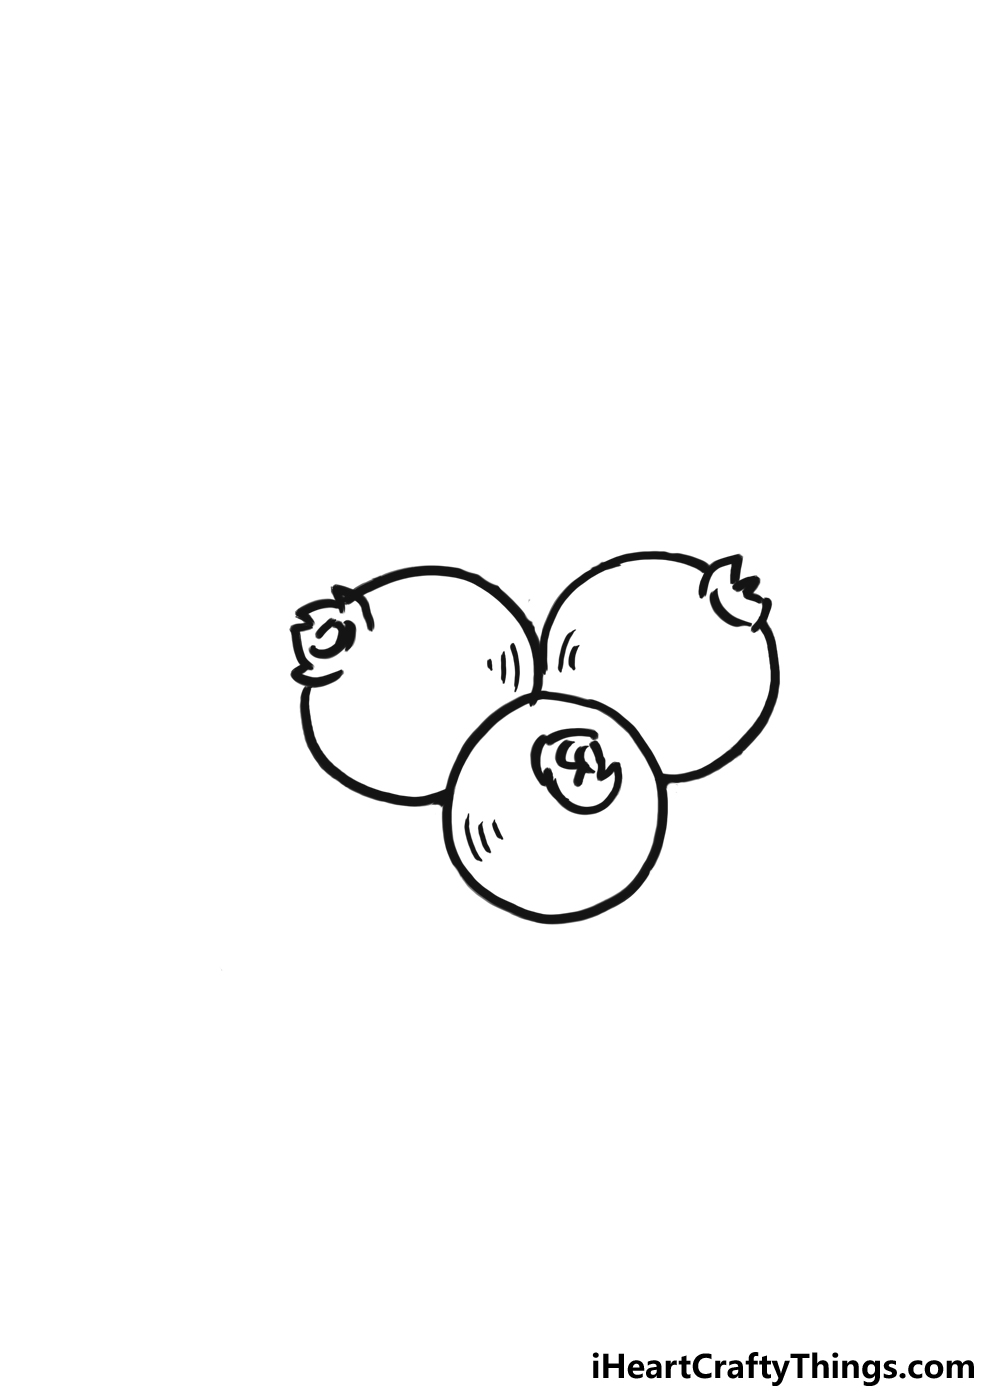
This is a simple rounded shape that has some pointy little line details in it. Next, we will add the other two to fill in the gaps on the other two blueberries.
Because of the angle, these ones will have some pointy outlines sticking out. Simply use some small curved lines with pointy edges to create these other little calyxes and fill in the gaps.
You can then finish off this step with a few simple line details inside the blueberry outlines to add some texture. With that, we have the outlines for the blueberries ready to go!
We’re not quite done though, as we have a few more final details to add in the next step, so let’s go ahead and do that.
Step 5: Draw the final details

This should be a fun step of this guide on how to draw a blueberry, as we will not only finish off the final details and elements but also add any extra ideas you may have to make it even cooler!
The main thing to add in this step to finish off the design is some leaves. Luckily, blueberry leaves are rather simple to draw.
As you will see in the reference image, we will be adding four leaves to the design. There will be two on top next to each other, and two more separated at the base.
The leaves are drawn with some slightly curved lines that end in some pointy tips. Then, we will add another curved line to the center of each one, and these will have shorter lines poking off.
This will represent the veins of the leaves, and you can refer to the reference image to help you as you draw. With these leaves, we’re technically done!
You don’t have to move on quite yet, however, as there are some ways to customize this drawing. One would be to add some more fruit to the image.
You could stick to blueberries, or you could add other kinds of fruit that you enjoy. Earlier in the guide, we spoke about how blueberries can be used in many other kinds of food.
You could show this by drawing a jar of blueberry jam behind these blueberries or maybe a pie with a slice cut out, showing the blueberries within.
Can you think of any other kinds of food that a blueberry can go in? You can also draw a background to give this even more of a sense of place.
Step 6: Now, finish off with some color for this blueberry
It all comes down to this, the final step of the guide. This is the step where we will color in your artwork to really bring it to life.
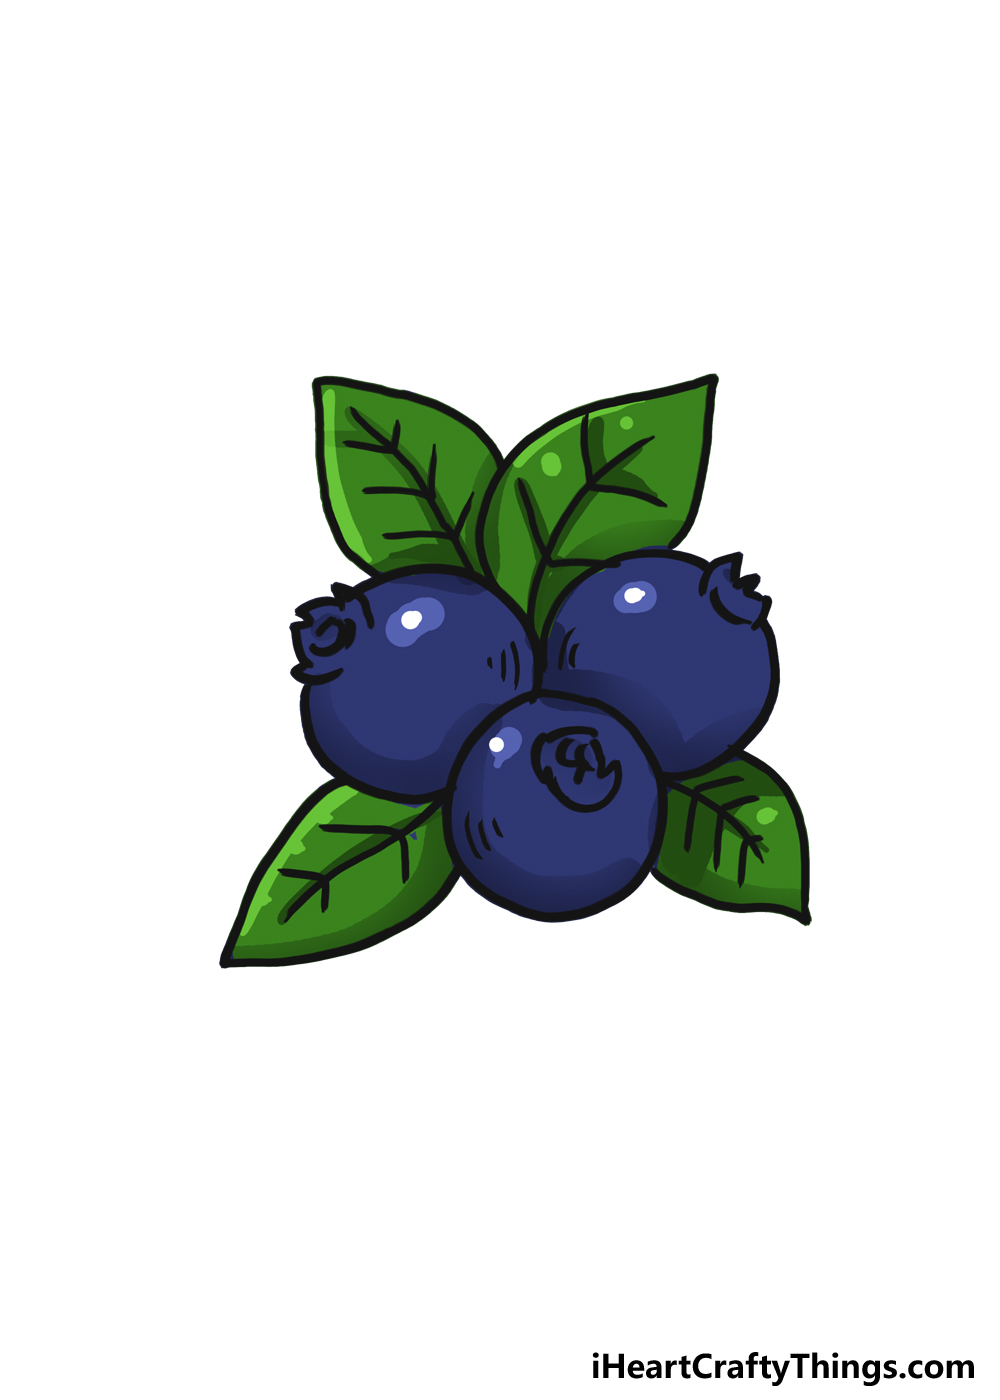
You may assume from the name blueberry that you will only need blue colors for this drawing, but that is not the case. Even for the blueberries themselves, we will be using lots of different shades.
You can use one shade of blue if you want, but the blueberry won’t look as dynamic. We used some dark blues and purples around the edges of the blueberries to create a shading effect.
The blue and purple shades we used for the rest of the berries get lighter the further in you go. To create a look of light reflecting on the berries, we left some white spots higher up on the berries.
Then, we colored in the leaves with shades of green. Once again, we didn’t stick to just one shade, instead we used light and dark greens to make the leaves more dynamic.
The colors you use are up to you, and you don’t have to stick to our choices exactly! Not only can you choose the colors, but also the art tools and mediums that you use.
If you want a lighter, soft look to the colors then watercolor paint or colored pencils would be a good bet. Colored pens and markers would make the colors really pop, however!
These are just a few examples, but there are so many more you could use! What colors and art mediums will you choose?
Your Blueberry Drawing is Complete!
We hope that you had an amazing time working with us on this guide to creating your very own drawing of a blueberry.
At the end of it, you should see how easy and fun it can be to create a tasty artwork featuring these berries.
While they’re fairly simple, we’re sure that you can see it can be a bit more complicated than you may think when you don’t know what to do. Now that you’ve mastered it, you can show off what you can do!
We went over some ways that you can customize your drawing with extra details and color choices, but now it’s your turn to show off what you can do. Be sure to let your creativity run free!
When you have finished your blueberry artwork, we hope that you will go ahead and share it on our
Facebook and Pinterest pages. This is the easiest way to show off your artwork, and we would love to see how it turned out!