The image of a cross is one of the most recognizable and cherished symbols in the world. It is a central symbol for Christianity and is featured in other forms like Celtic art as well.
It may be interpreted in many different ways, but it’s still recognizable for what it is, and crosses bring comfort and serenity to people around the world.
Combining a cross with wings takes the image even further. Wings are often associated with angels, and combining these two images creates a new one entirely.
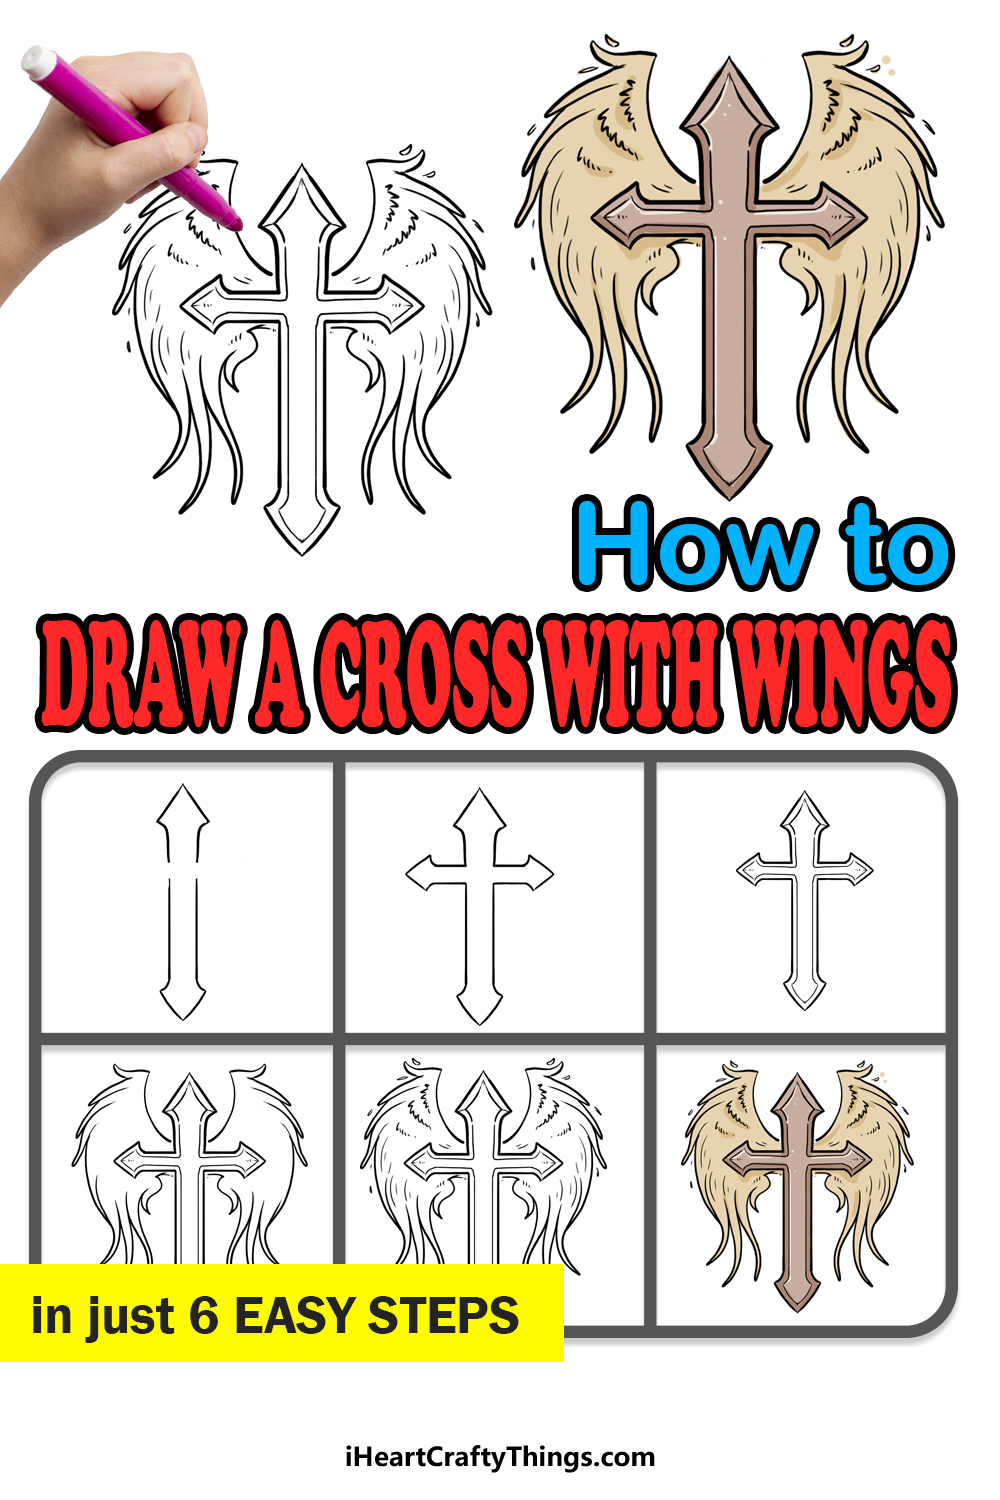
In this guide on how to draw a cross with wings, we will be showing you how to create your own version of this impactful image.
The cross is beautifully detailed, and you will be able to customize it with your own details as well.
We will also go over how you can color and decorate your drawing, so there is a lot to go over in this guide. As long as you follow the steps and go slowly, you’ll definitely be able to do it!
By the end, you will have an amazing drawing of a cross with wings to show off. So let’s begin with the first of 6 steps that will show you how it’s done.
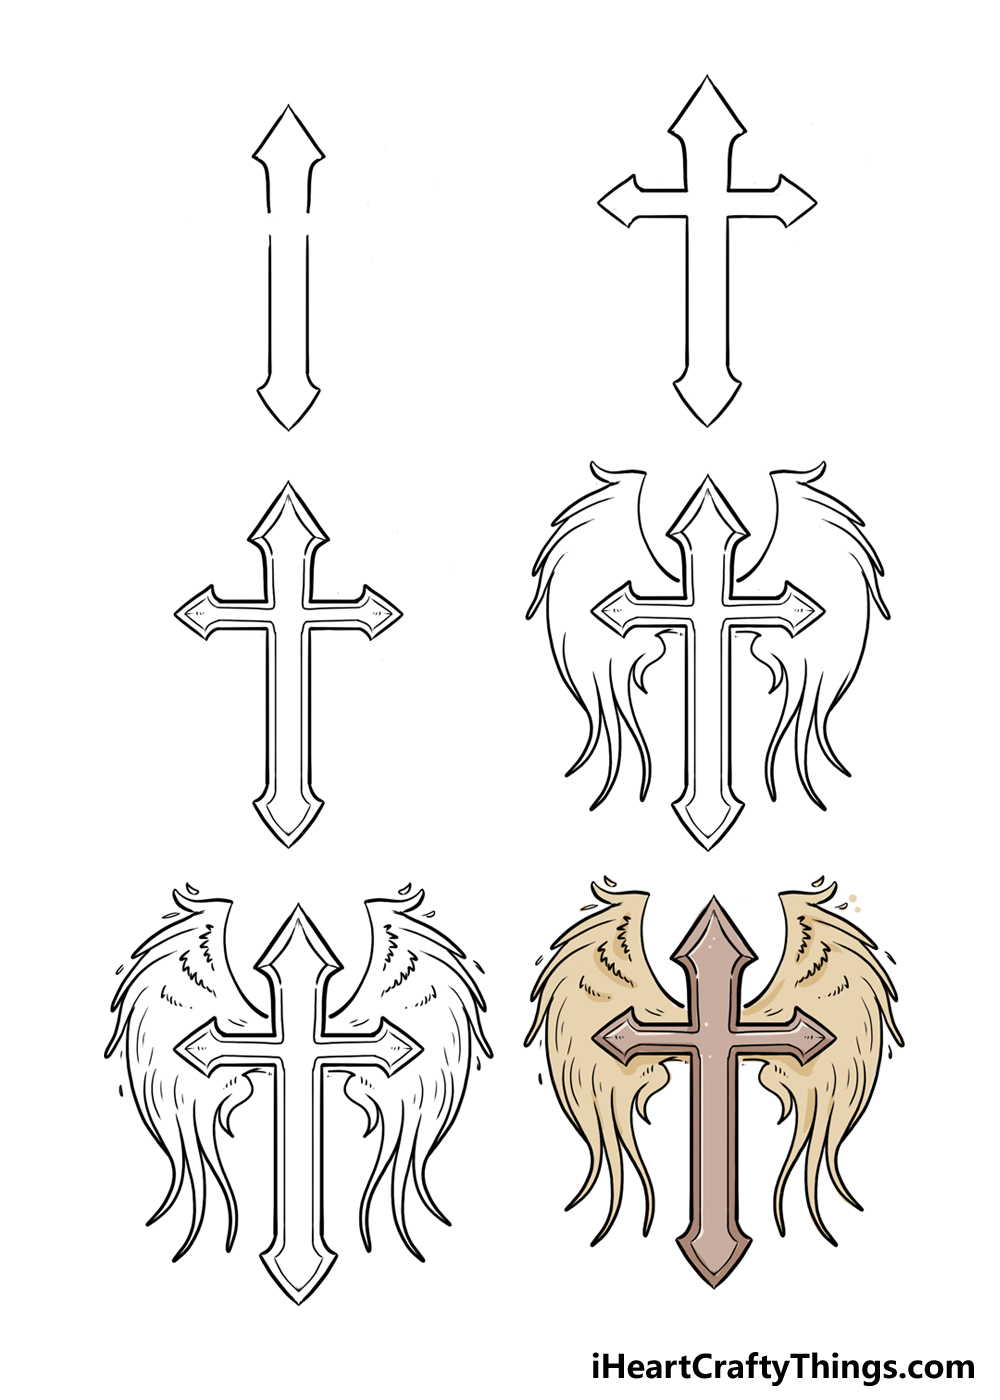
How to Draw A Cross With Wings – Let’s Get Started!
Step 1
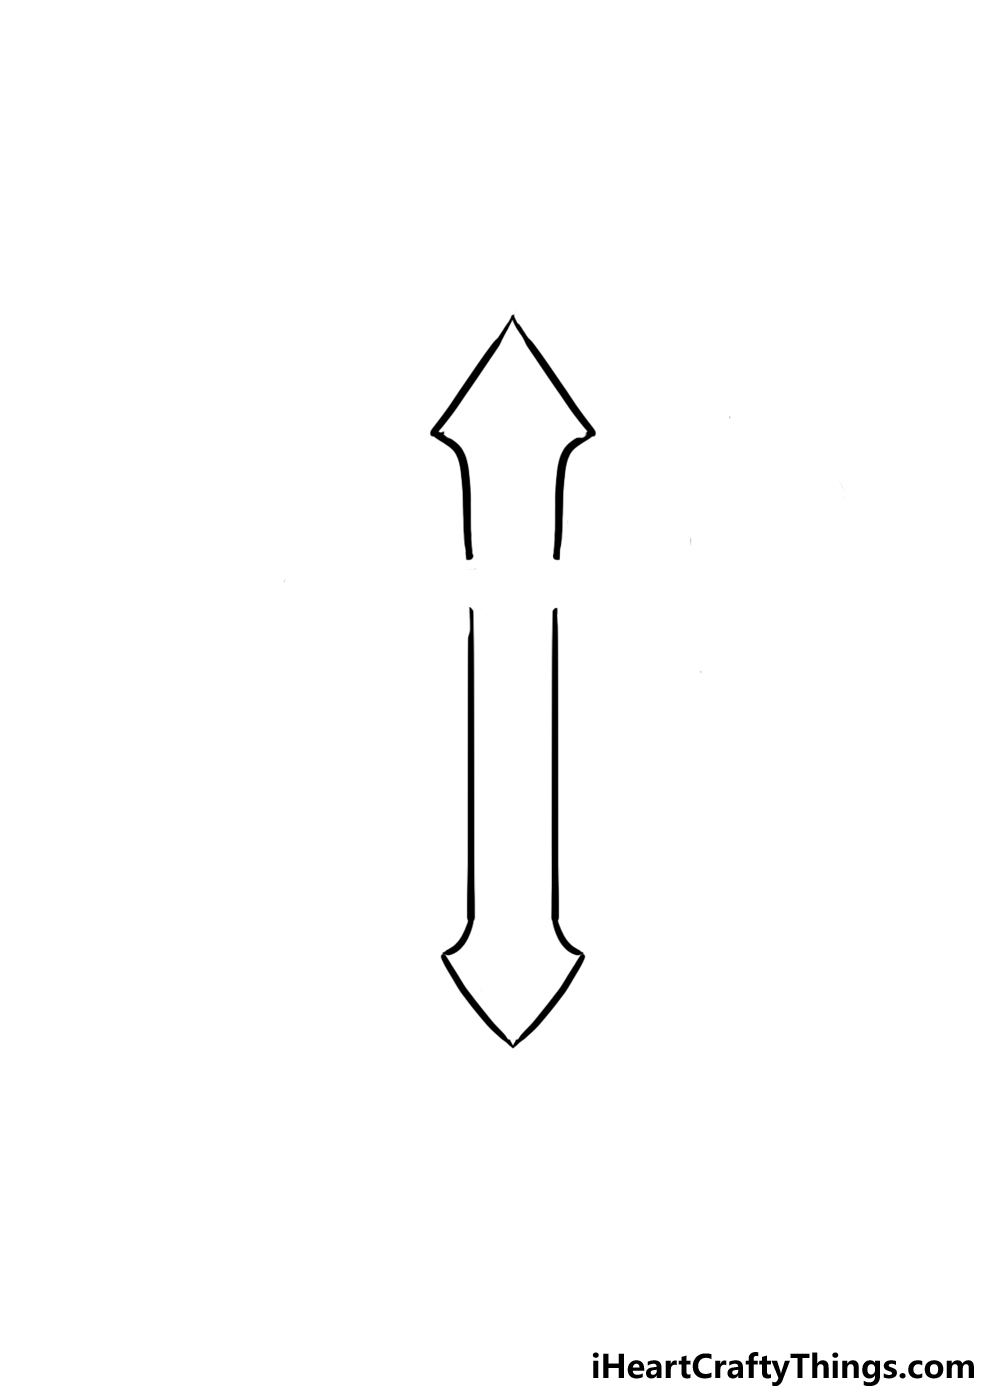
The cross portion of this cross with wings is a nice mix of being simple and ornate. In order to prepare for this portion of the drawing, you could use a pencil and a ruler to draw a rough cross.
This could even just be some simple lines over one another to form this simple cross.
Then, you could use your pencil to draw a squared outline around these lines in order to make a more conventional cross.
Once you have this rough cross drawn, we can start drawing the actual outline of the final cross. When drawing the actual cross, we would definitely recommend using a ruler.
There are some curved lines on the design, but the main edges are perfectly straight. For now, we will be drawing the main central pillar of the cross.
The sides will be straight, but they will be ever so slightly angled so that the upper portion of the cross is a little wider than the lowest point.
Each point of the cross will have a pointy section. This can be drawn with a slightly curved line flaring out and then in again to form a pointy portion.
You will see that there is a small gap left on the cross near the top, and this will be where we add the horizontal portions later on in the guide.
Speaking of those horizontal portions, let’s head to step 2 and add those.
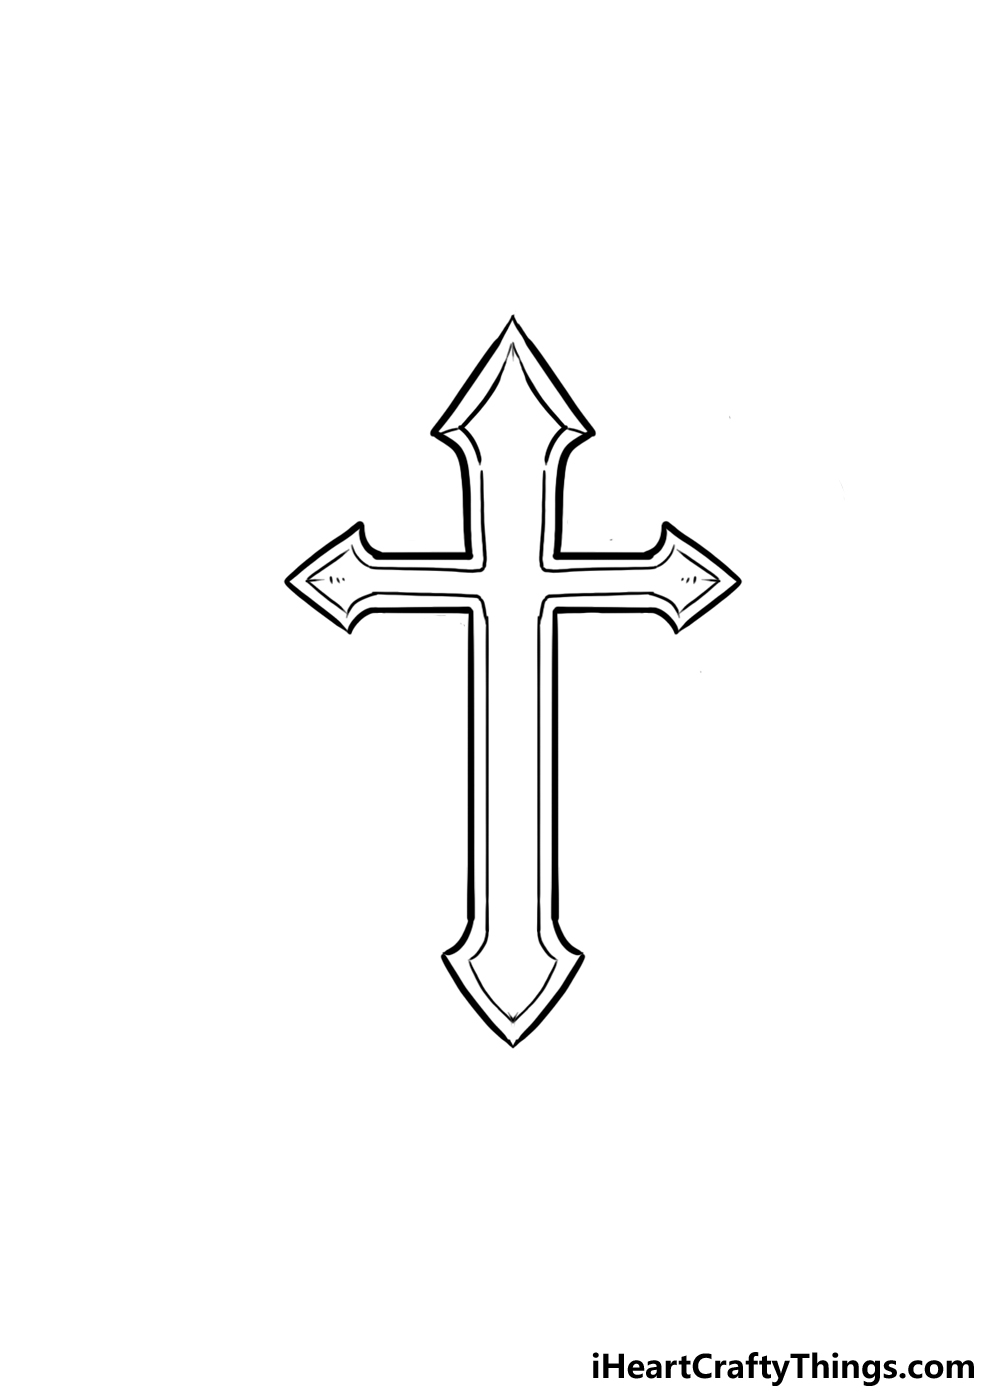
Step 2: Draw the horizontal pillars of the cross

In this step, we will essentially be doing what we did in the first part of this cross with wings drawing.
The main differences will be that this time it’s horizontal instead of vertical, and these pillars will be smaller.
Other than that, the idea is more or less the same. That means that we will be using a ruler for the straight edges of the pillars once more.
If you drew a pencil guide, then you will see how we will be drawing these horizontal pillars. You will also see that they will fill in the gaps left previously.
In the first step, the sides of the vertical pillars were very slightly horizontal, but this time they will be perfectly level.
As mentioned earlier, these pillars will also be significantly shorter than the main vertical pillar. Some crosses will have longer horizontal pillars, but the style we’re going for here will have really short ones.
You could make them a bit longer if you wanted to, however! No matter the length, you can draw the sides with your ruler and pen.
Much like the vertical pillar, these ones will each end in a spearhead-like design. These can again be drawn using some curved lines that then culminate in a pointy tip.
When drawing these horizontal pillars, try to make them as symmetrical as possible. You can even measure the straight edges with your ruler to make sure they’re the same length.
Once you’re happy with how these pillars look, we can move on to step 3 to add some interior details to the cross.
Step 3: Add the first interior details for this cross with wings
The cross with wings that we are drawing here is naturally flat on the page. Ideally, we want it to look like a physical object, and we can achieve this goal with a few simple line details.
These line details are simple, but they will help to make this cross with wings drawing look more like it’s carved out of stone or molded in metal.
You will be able to decide the material you would like the cross to be made of later, when we add color.
For now, let’s focus on the line details that will create the 3D illusion. To do this, we will essentially be drawing a smaller version of the cross that you drew in the first two steps.
There will be a few differences, however. For example, if you can then you should aim to make the lines for this inner cross a bit thinner than the ones for the main outline.
Also, if you look at the horizontal points at the top tip of the cross, you will notice that there are some extra small lines that extend out to the outer outline.
It’s a simple touch, but it will help to make the cross look a little more three dimensional. There are also a few small dots on the horizontal pillars that will add some texture.
That’s all there is to it, and then we can move on to step 4 of the guide to continue.
Step 4: Now draw the outline for the wings
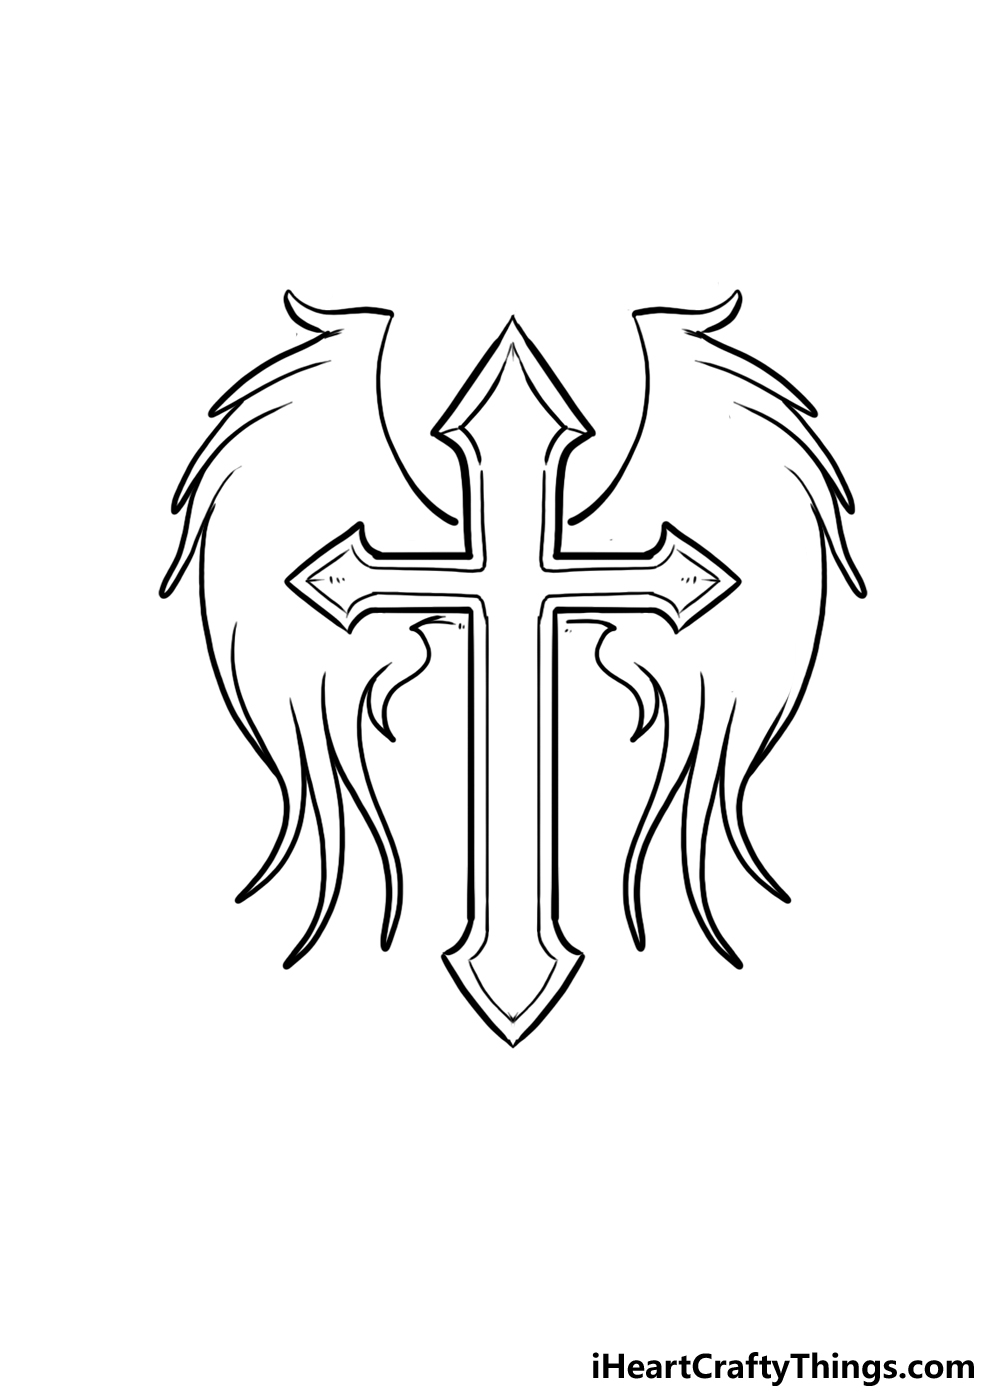
So far in this guide on how to draw a cross with wings, we have created a really pretty cross. However, it’s missing the second aspect of this design, the wings!
The wings may look simple, but they can be surprisingly tricky. Perhaps the most difficult part of this aspect is that we ideally want them to be symmetrical.
This can be harder than you think, so it’s a good idea to take it slowly and follow the reference image closely. We would recommend starting from the sides of the top pillar.
Each side will have a curved line extending out from this portion. The tips of these curves should be more or less level with the top tip of the cross pillar.
This is where it can get a bit tricky, as there are lots of thin little feather details. The easiest way to do these details is to do each small little detail at a time and then alternate on both sides.
This is another step where we would suggest taking your pencil and drawing a rough version. Only this time, the rough version should maybe be a bit more detailed to prepare for the final outlines.
The bases of each wing have some thin portions dropping down, and these are symmetrical as well. With the wing outlines drawn, we can then move on to some inner details for the wings.
We will take care of those details along with any extra ideas you may have in the next step of the guide.
Step 5: Draw the final details for this cross with wings
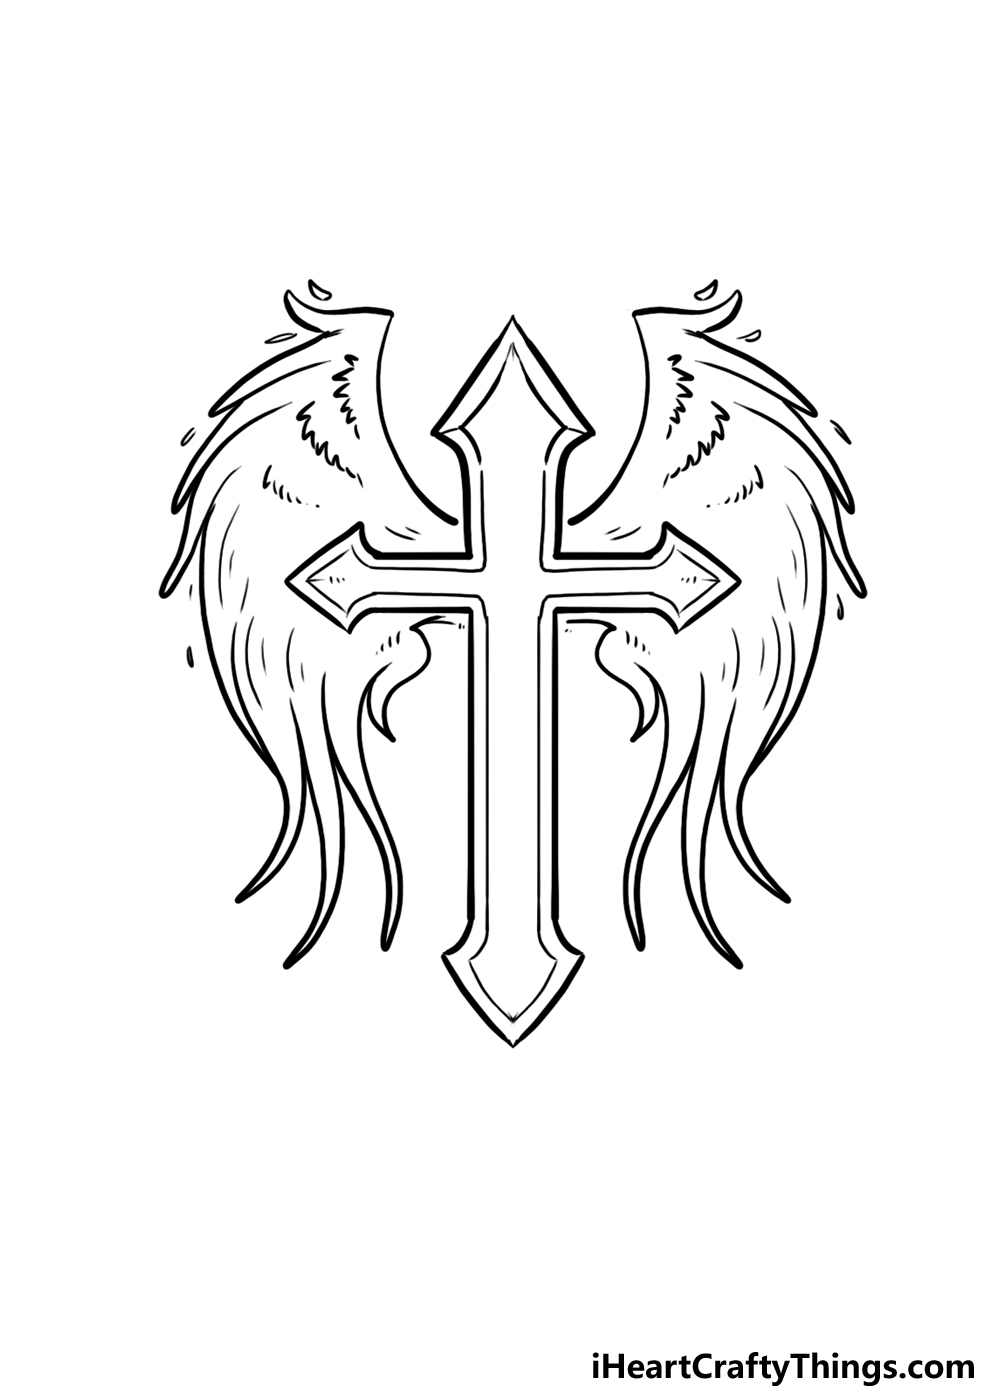
Now we’re ready to finish off this drawing of a cross with wings to prepare you for some coloring fun in the final step.
We will show you the final details to finish off our design, but this is a step where you can also add your own ideas.
Before we start drawing these details, you should first erase any pencil lines that you drew to plan out the drawing. They won’t be needed anymore from this point, and they may just get in the way.
The details we are adding in this step will be inside the wings. They’re all simple and small details, but they will help to make the wings look more textured and realistic.
These details should also ideally be symmetrical, but you can change it up a bit if you wanted to. Before moving on to the final step, you could also add some of your own ideas to the drawing.
There are so many ways that you could get creative with this! One idea would be to draw some light rays around the cross with wings in order to highlight the spiritual aspect of the design.
You could also draw a background, or maybe write an inspirational message in a fancy font. These are just a few ideas, but we’re sure that you have many more that you could use!
How will you finish off this drawing before we move on to the final step and add some color to this drawing?
Step 6: Now, finish off with some color for this cross with wings
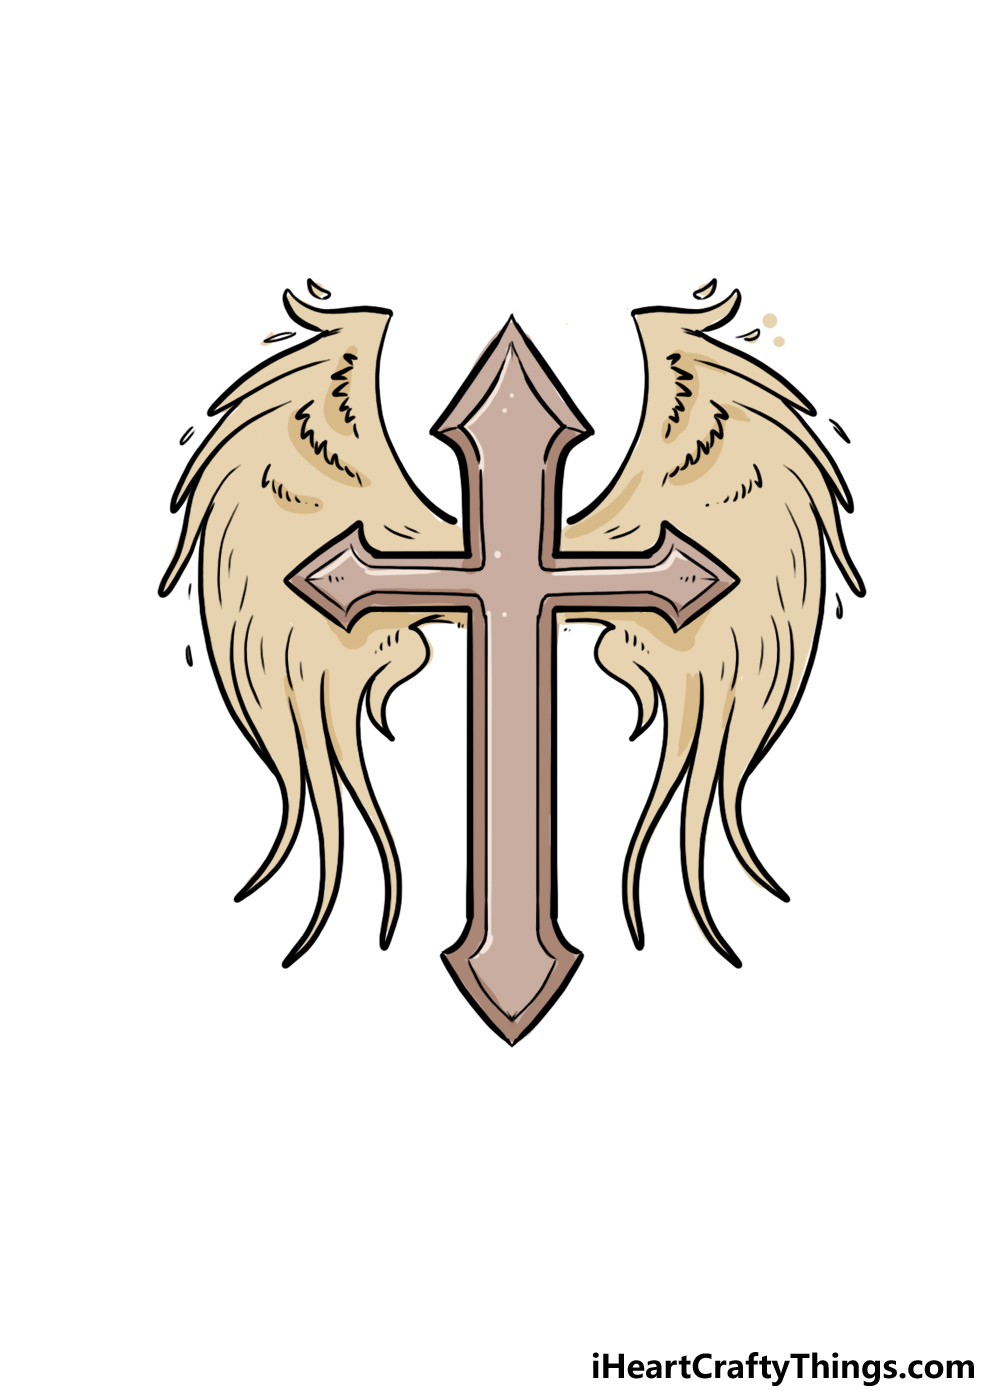
In our version of this cross with wings drawing, we kept the colors a bit more somber and muted.
Earlier, we mentioned how you can decide what kind of material you would like the cross to be made of.
In our drawing, we went for a grey color scheme that makes it look like the cross is made of stone, or maybe carved in stone. This is a great look that you could replicate for your own drawing.
Even the wings look like they’re carved out of stone, as we used some light greys. Varying the colors with light and dark tones can help to make the colors look more dynamic.
You can also add some shading this way, and it can be done no matter which colors you choose. There are so many other colors you could use for this drawing too.
For instance, maybe you would prefer a brighter look to the image, in which case you could use some gold for the cross instead.
You could also paint some yellows around the cross to make it look like it’s glowing.
Using different art tools, mediums and techniques can be a great way to create different looks for the colors, and you can achieve some interesting results.
Using crafts like glitter can also bring a very real sparkle to the image. These are some suggestions to get you started, but we encourage you to experiment with all your favorite mediums and see what you come up with!
Your Cross With Wings Drawing is Complete!
You have finished all six steps of this guide on how to draw a cross with wings, and you’ve done an amazing job on it.
There were some tricky details in this drawing, but they all contribute towards a more unique image.
Now that you have mastered this design, you can change and add to it in any ways that you like.
This could be in the form of extra details, different color choices or anything else you would like to add.
It’s your drawing, so you’re in charge! Anything you do will look great in its own way, so don’t be shy about letting your creativity run free to see what happens.
We would be very interested to see how you decided to draw this cross with wings, so hopefully you’ll show us by sharing your drawing on our Facebook and Pinterest pages.
That will allow us to see how it turned out, and it would be great to see how you finished it!