There are few things as relaxing as sitting underneath a tree on a lovely day.
They are also a beautiful addition to any yard or landscape, and they come in many different species, shapes and sizes.
Trees can also be a valuable resource, and that has made them very important to many people from around the world.
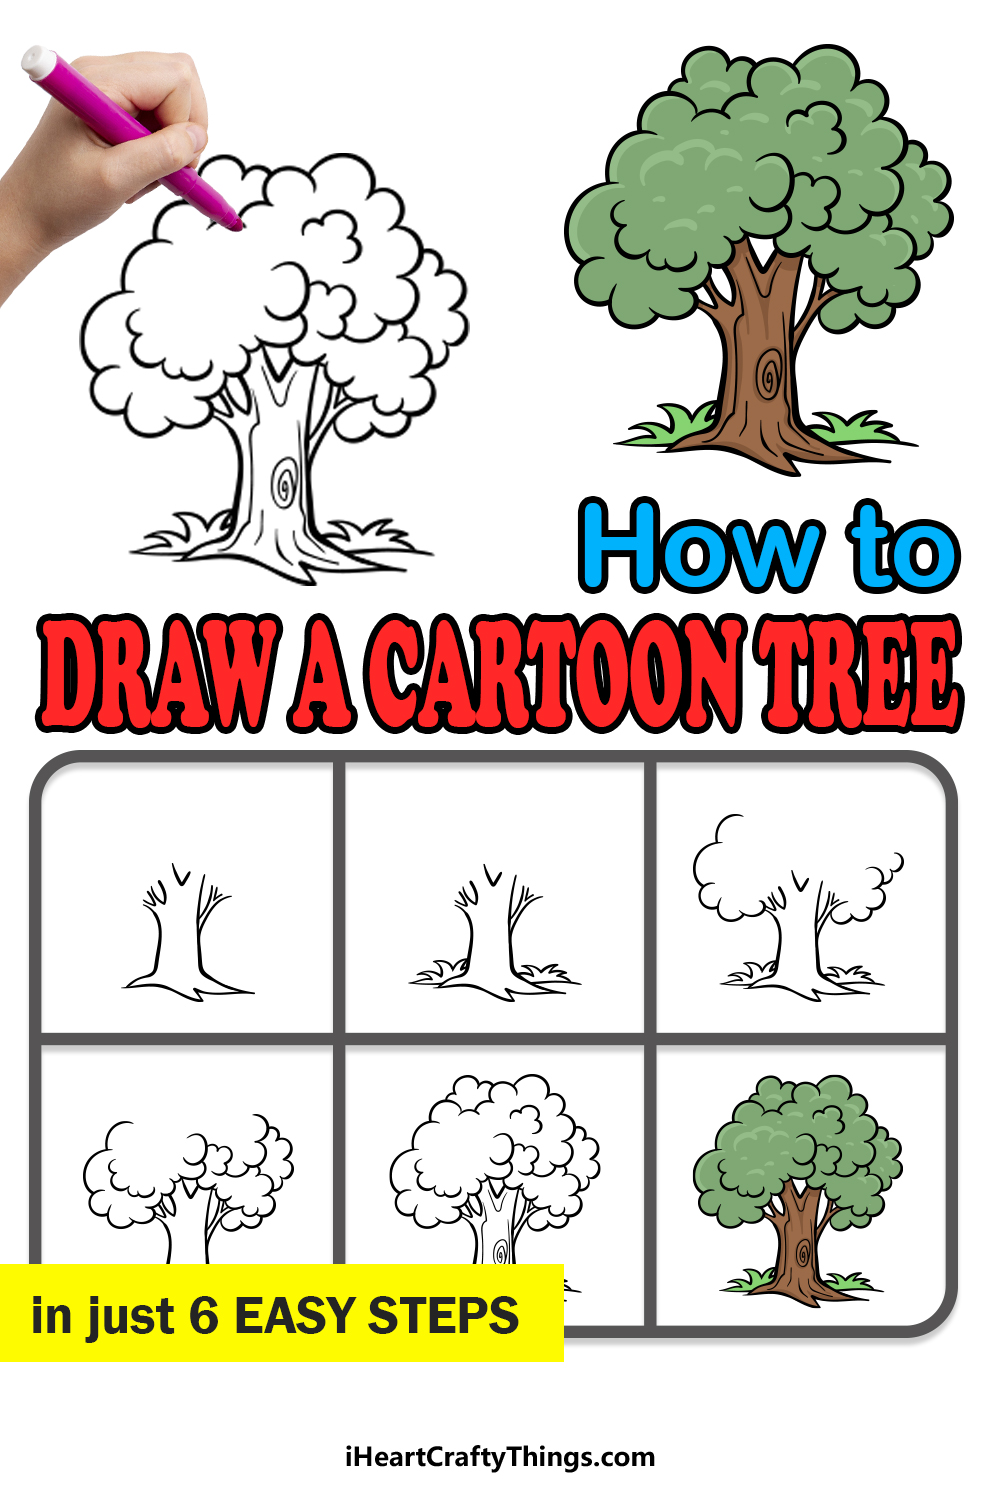
Lots of people also like to learn how to draw a cartoon tree so that they can represent their favorite one!
If you would like to know how this is done, then you have definitely come to the right tutorial! We are going to show you just how fun and easy it can be.
Get ready to climb into this step-by-step guide on how to draw a cartoon tree in just 6 fun and easy steps!
How to Draw A Cartoon Tree – Let’s Get Started!
Step 1
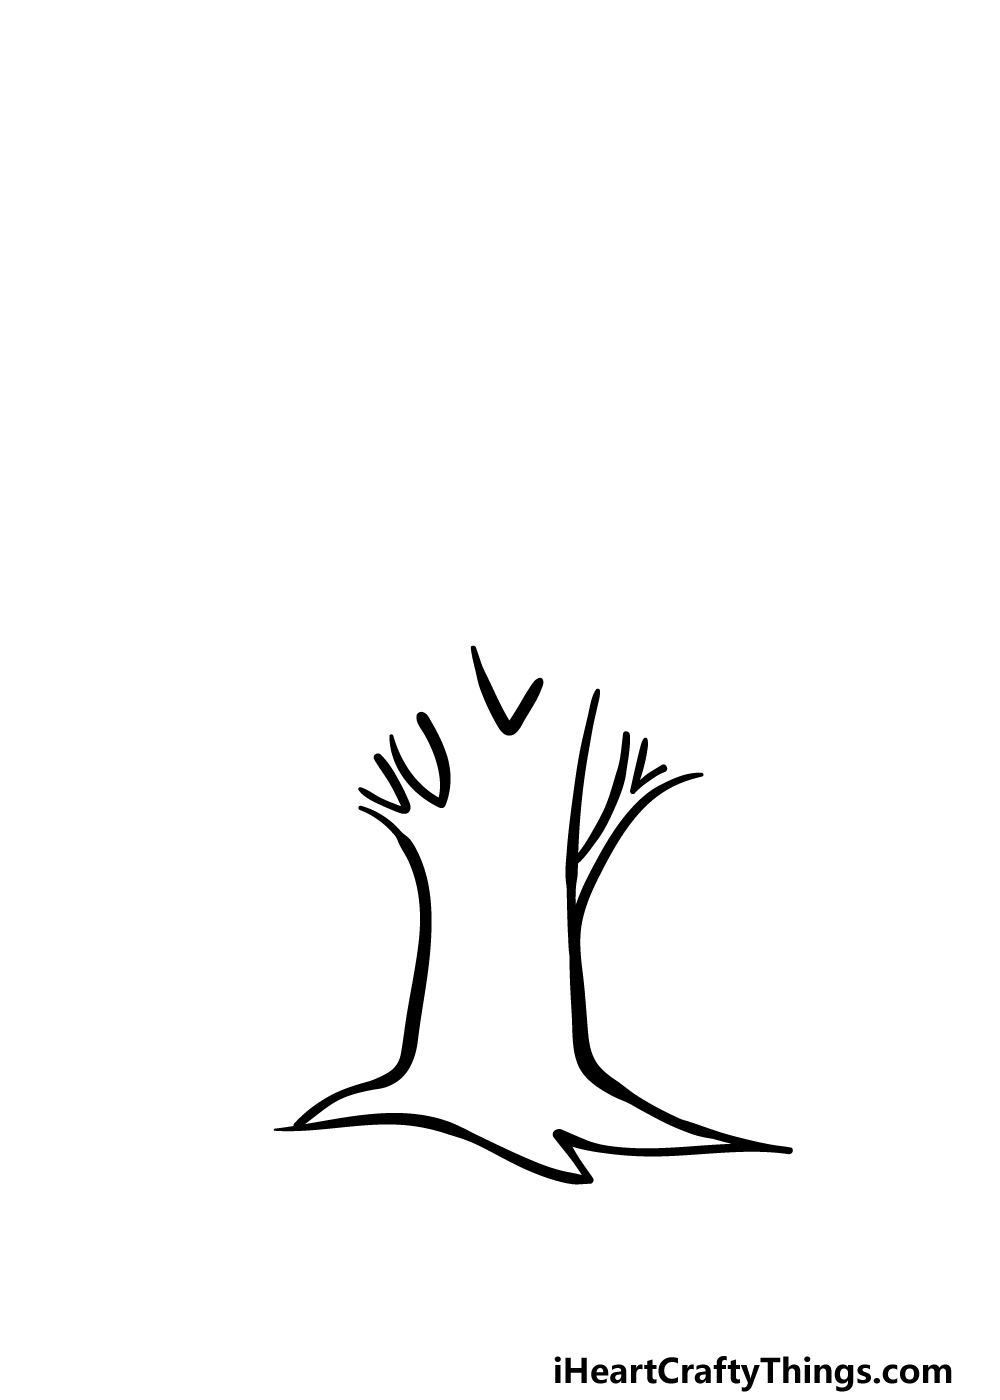
Normally you want to take things from the top, but for this cartoon tree drawing we will start from the bottom!
We will be drawing the roots, trunk and the start of the branches in this first step of the guide. To get this going, we will first draw the roots.
These will be made up of some lightly curved lines that culminate in three pointy tips.
Then, you can draw some slightly curved lines coming up from the roots for the sides of the trees. These lines will then curve outward to form the branches.
The branches on the sides will be thinner, while the central ones will be thicker.
That’s all there is to it, and when you have it looking like our reference image we can proceed!
Step 2 – Now, draw some bushes around the base of the tree
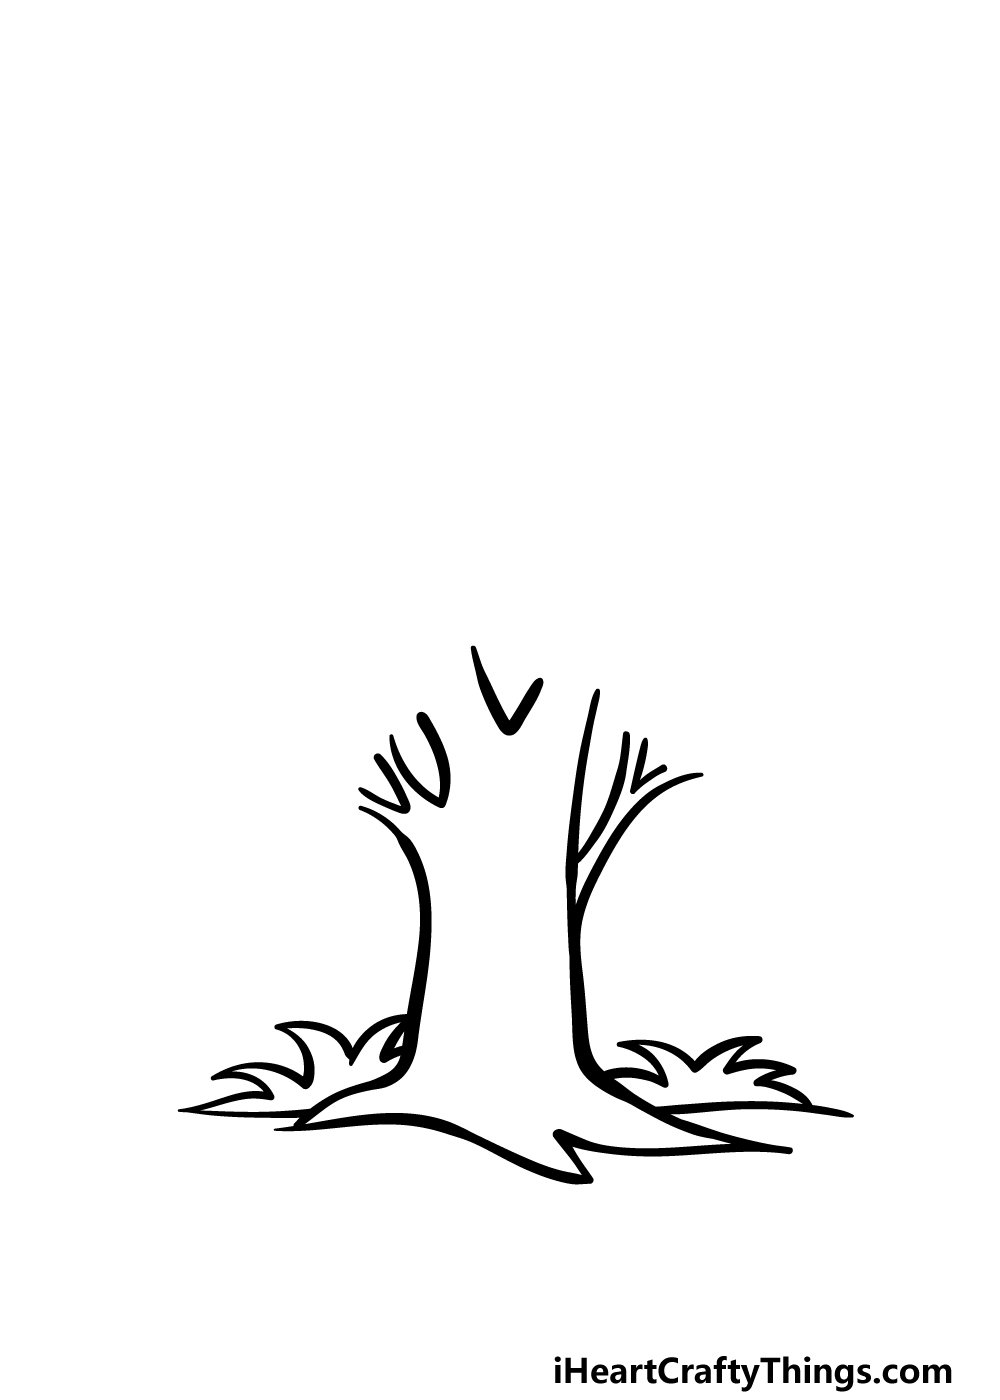
Before we keep adding some more to the tree itself, we shall add some small bushes in this step of our guide on how to draw a cartoon tree.
These will be rather small and flat, and they will be drawn with some more sharply curving lines. There will be one bush on either side of the tree’s base.
Each bush will also have a few pointy tips poking up, as shown in the reference picture. Once you have added these little bushes, it’s on to step 3!
Step 3 – Next, start drawing the tree canopy
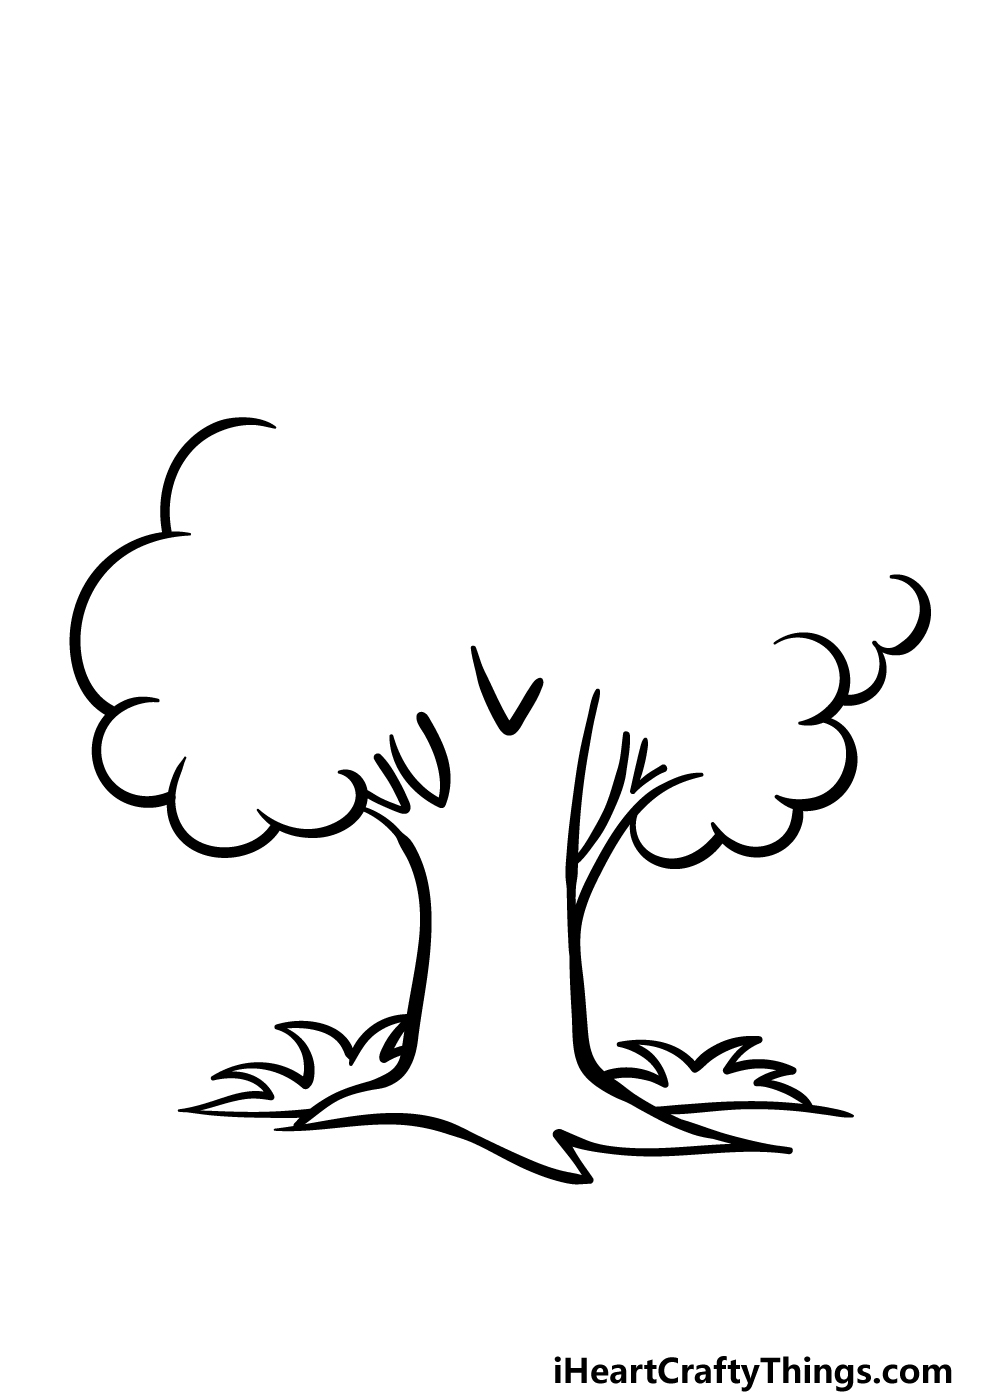
We’re heading back to the tree as we start to add the leafy canopy. For now, we will be focusing on the bottom and sides of the canopy.
It will be drawn using some curved, bumpy lines that connect to one another, and some of these will be larger than others.
You could draw these bumps to be the same sizes as our example, but you can also draw them bigger or smaller as you prefer!
Step 4 – Now, draw some more of the canopy outline
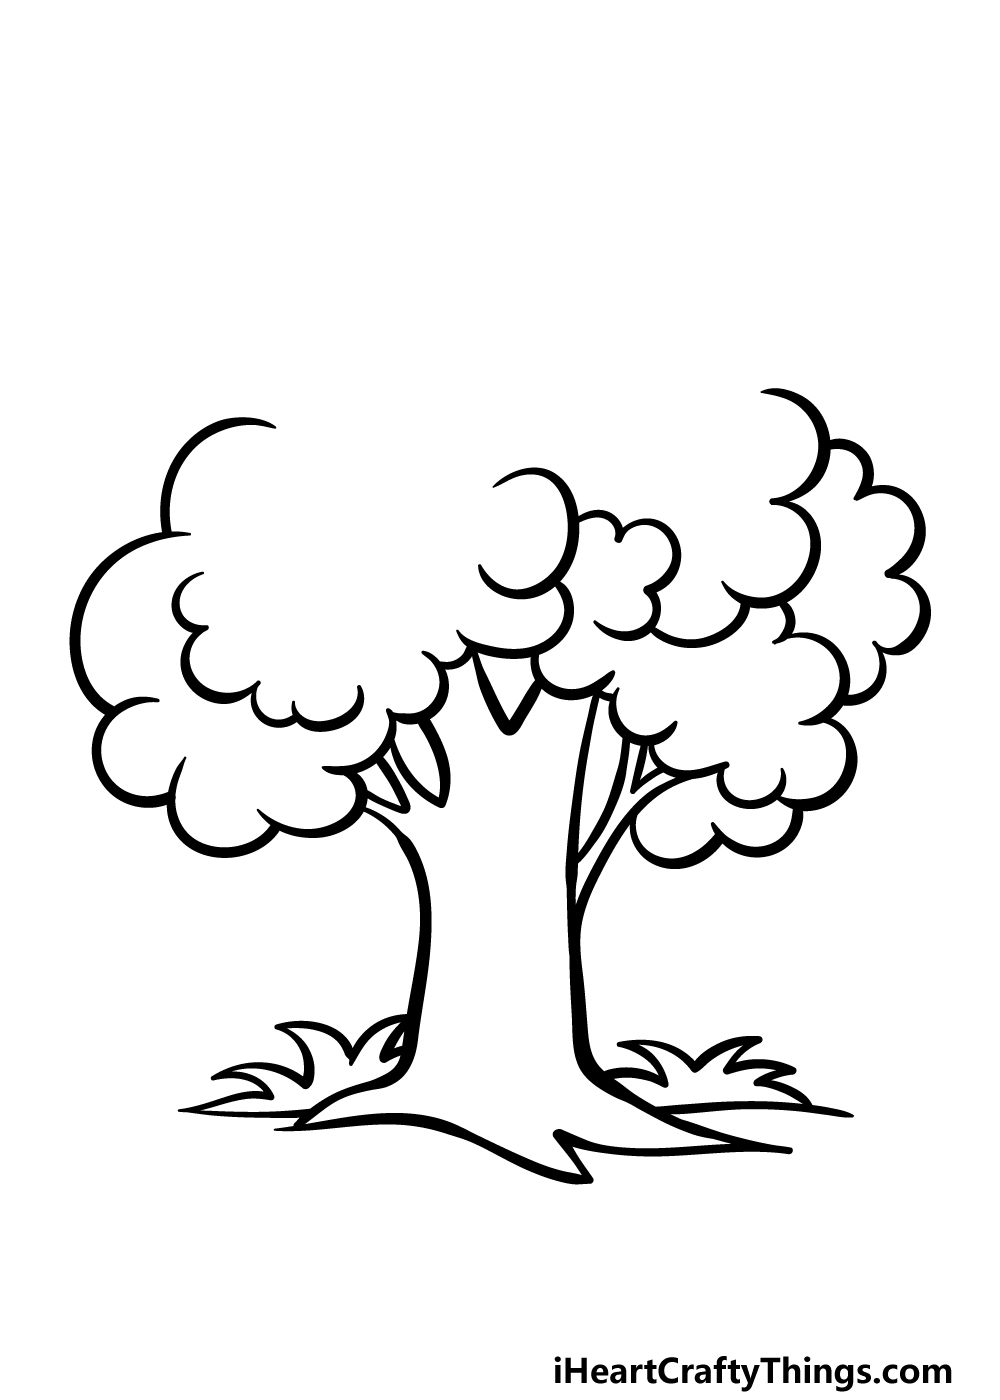
Continuing with this cartoon tree drawing, we will be adding some more of the canopy outlines of this tree.
These ones will be focused on the central portion of the tree, and they will go over the ends of the branches that you drew all the way back in step one.
The previous parts of the canopy were much larger, but these ones will be much smaller and drawn in some clumps.
There will be a gap left at the top, but we will fill that in along with any final details as we move on to the fifth step of the guide.
Step 5 – Add the final details to your drawing
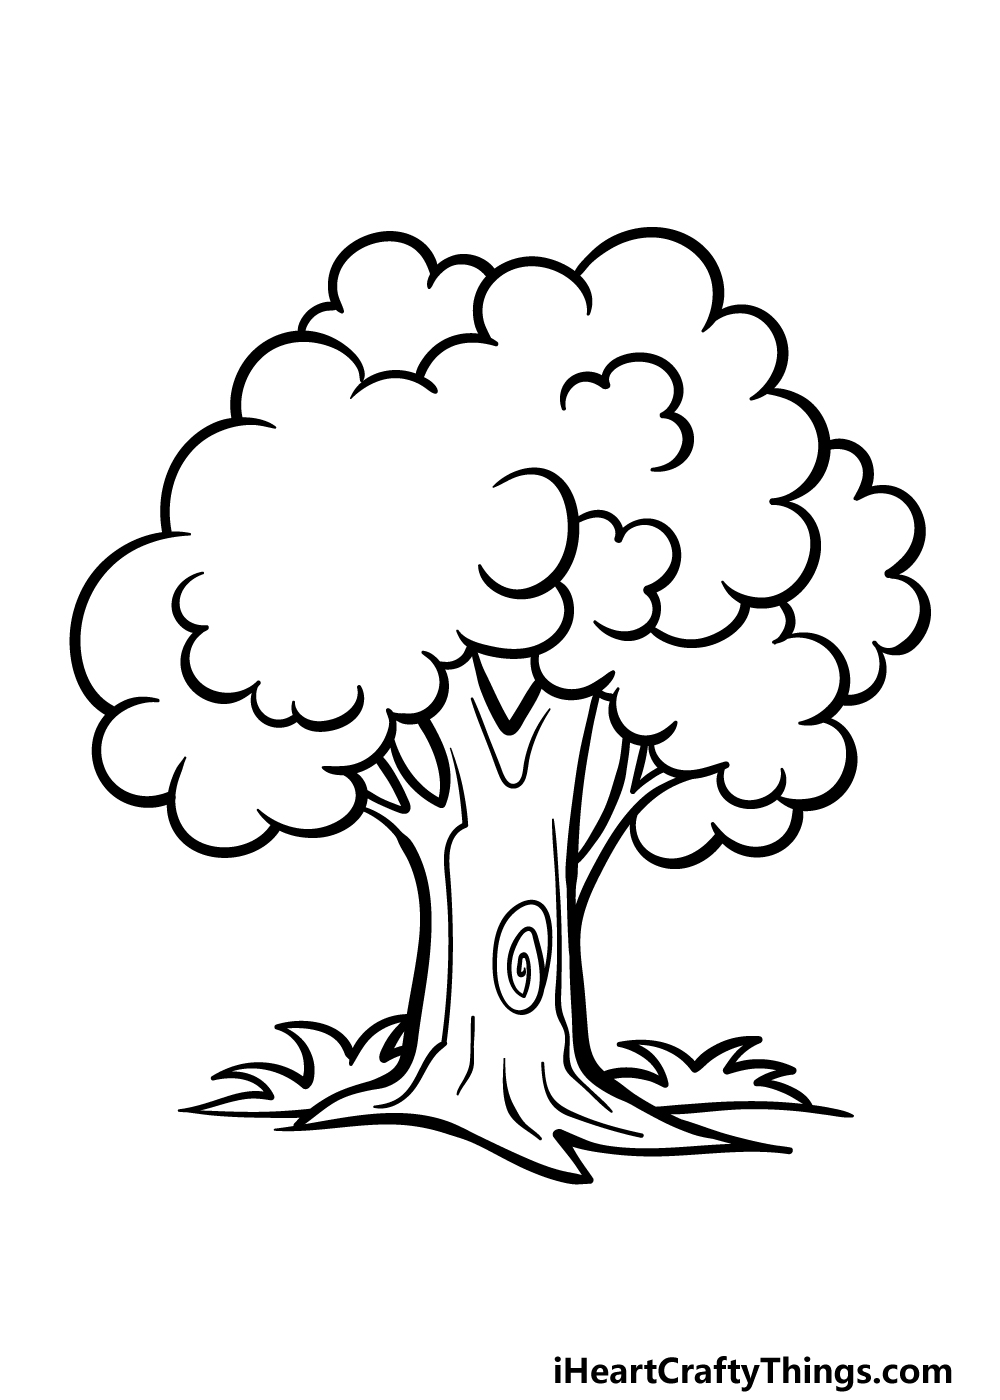
Now it’s time to finish off the final details before you get to the final step of this guide on how to draw a cartoon tree! First, we will focus on finishing off the canopy above the tree.
You know what to do here, as we will be adding more of those curved, bumpy lines to fill in the last space at the top of the tree.
‘Once that is drawn, you can then add some details to the trunk and branches.
First, we will add a swirling shape onto the trunk of the tree. Then, you can surround that with some straighter lines that curve at the bottom on the sides of this swirling shape.
Once you have drawn these final touches, you can add some details of your own! These could be as simple as drawing some fruit on the tree or maybe showing some people relaxing under it.
What can you think of to finish off this tree?
Bonus: Try Out These Extra Tips To Add A Treehouse
If you’ve got a tree in your backyard, then it’s probable that at some point you have thought about the possibilities it presents. If you have, then these possibilities would be open for this cartoon tree drawing!
Therefore, they could be added to the drawing to make it even more amazing. For example, a tree is always made better with a cool treehouse.
You can probably see where we’re going with this, as we think it would be awesome to have a treehouse on this cartoon tree. When drawing something like this, it can take a bit of preparation.
You may be lucky enough to have a real tree house or know someone who does, in which case you have the perfect reference material! If not, there are a few ways that you could still design one.
You could start by looking up pictures of treehouses online. They wouldn’t need to be copied directly, but using them as inspiration can help you to design your own.
If you’re feeling extra creative, then you could design one totally from your own imagination. To do this, you may want to use some rulers and other drawing tools to aid you.
These can help to keep the lines straight and neat. Also remember that the treehouse doesn’t have to obey the laws of physics, as it is all from your imagination!
That means that the treehouse could tower high above the tree or have dozens of rooms. You could even have futuristic gadgets that we could only dream of.
Whatever you do, we encourage you to have fun with it and see what happens. We know it will look incredible! Our main question now is what would your own ideal treehouse look like?
Step 6 – Finish off your drawing with color
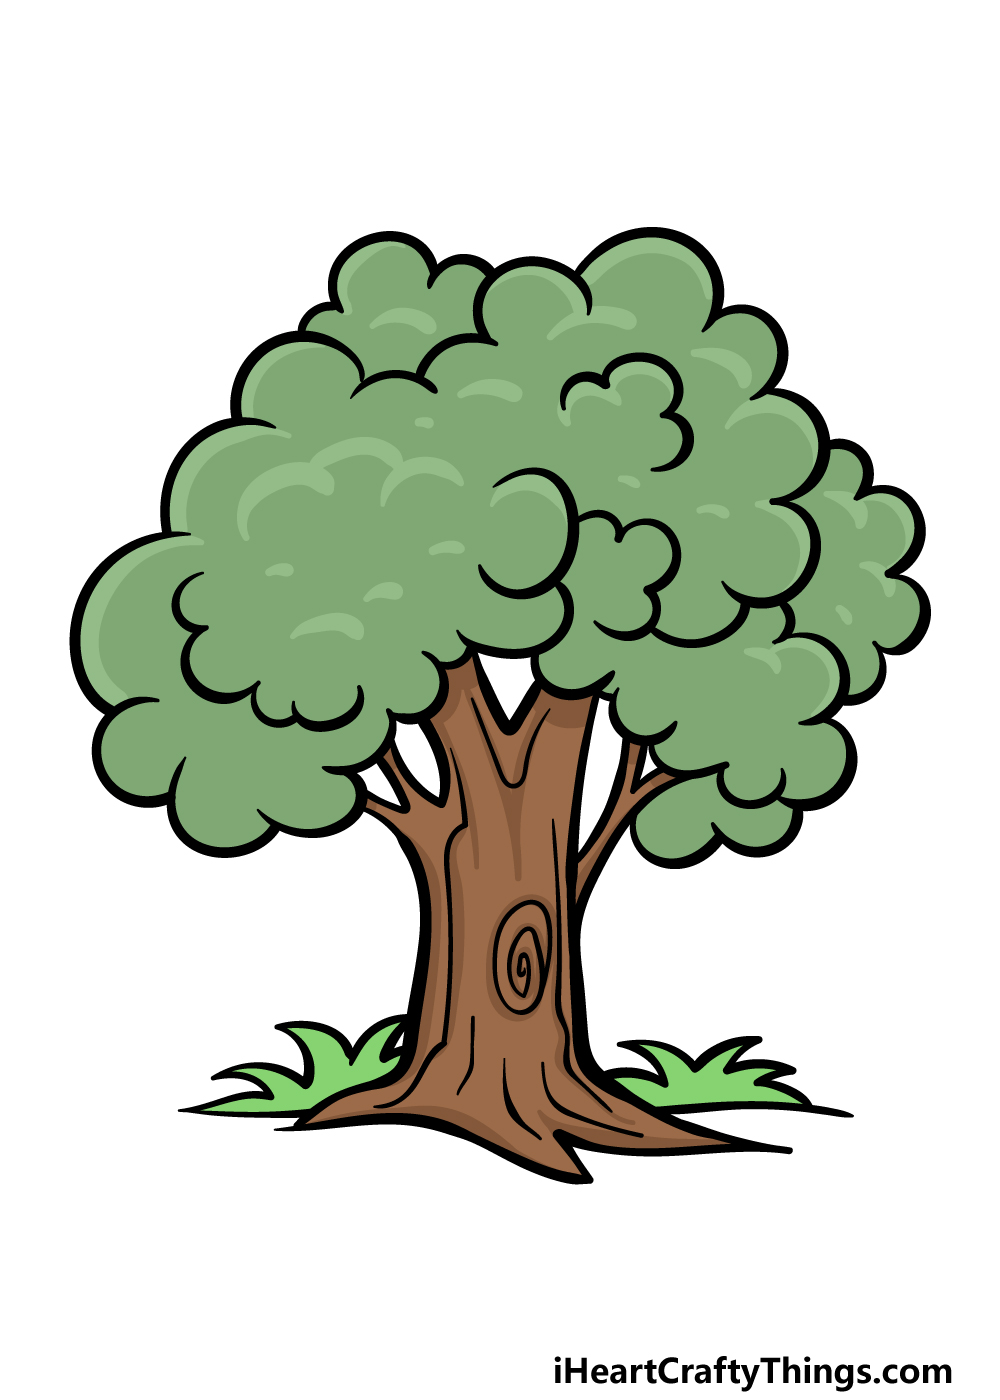
For the final step of this guide, we will slow down and enjoy some coloring fun. In our reference image, we showed you one of the ways you could color this amazing tree.
We used various shades of greens for the leaves of the tree, and by varying the shades you can create some volume and depth.
Then, we alternated using light and dark shades of browns for the trunk. You could use similar colors for your own image, but don’t be afraid to experiment!
There are many different colors, art mediums and techniques that you could use to finish off this cartoon tree, so have fun with it and see what happens!
5 Tips To Make Your Cartoon Tree Drawing Even Better!
These tips for your cartoon tree sketch are sure to grow on you!
One tree is a great sight, but seeing a few trees is even better. This is one way you can easily make your drawing of a cartoon tree even better!
You have learned everything you need to know about drawing this cartoon tree, so now you could add as many more as you like.
It could be a small clump of trees or an entire forest if you wanted!
If you were to add some more trees, they would not need to be the same kind as the one created in this guide. If you’re feeling extra creative then you could add some other distinctive tree species.
You could add any of your favorites, and they will help to make the drawing look even more distinct!
Bringing the focus back to the original cartoon tree drawing we created, you could make it look even better with some simple additions. For example, you could add some apples growing on the tree.
Doing this would not only make it more visually distinct but would also allow you to add some small dots of bright colors. What other small details could you add?
Another way of adding some life to this artwork would be by adding some living creatures! This could be anything from squirrels and birds to something more unusual like a monkey.
It could also be fun to add some human characters climbing on or enjoying the shade of the tree. These characters could even be based on real people that you know!
Finally, you could finish off this cartoon tree sketch by adding a background setting. This could be anything from a house behind the tree to a full on forest backdrop.
You could also take it further by adding a structure like a tree house to the tree. This would be especially great if you added some humans to the image.
Where do you think this tree could be growing?
Your Cartoon Tree Drawing is Complete!
That will conclude this wonderful step-by-step guide on how to draw a cartoon tree! We hope that you had a fun and peaceful time as you worked on recreating this beautiful tree.
Our goal was to make sure that this drawing would be fun and easy for you to replicate, and hopefully we achieved that!
We also wanted to leave things open for you to add your own awesome details and extra elements, and we will be interested to see how you go about finishing it off.
We mentioned a few details and additions you could draw, but now it’s up to you to show off how creative you can be!
Then, when you’re ready to find a new drawing challenge to take on, you can check out our website for many more drawing guides and other activities.
Be sure to check in often, as we will upload new ones soon!
We would also love to see your finished cartoon tree drawing, so please share your creation on our Facebook and Pinterest pages for us to enjoy!