Crocodiles are incredible creatures that can be found on several continents around the world.
These reptilian predators are probably the closest thing we have to a living dinosaur, and that has helped to make them a popular animal.
That popularity has made many people wonder how they can learn how to draw a crocodile to help celebrate their admiration for this animal.
It may seem like an intimidating task, but you’re in the right place if you’d like to learn how to do it yourself!
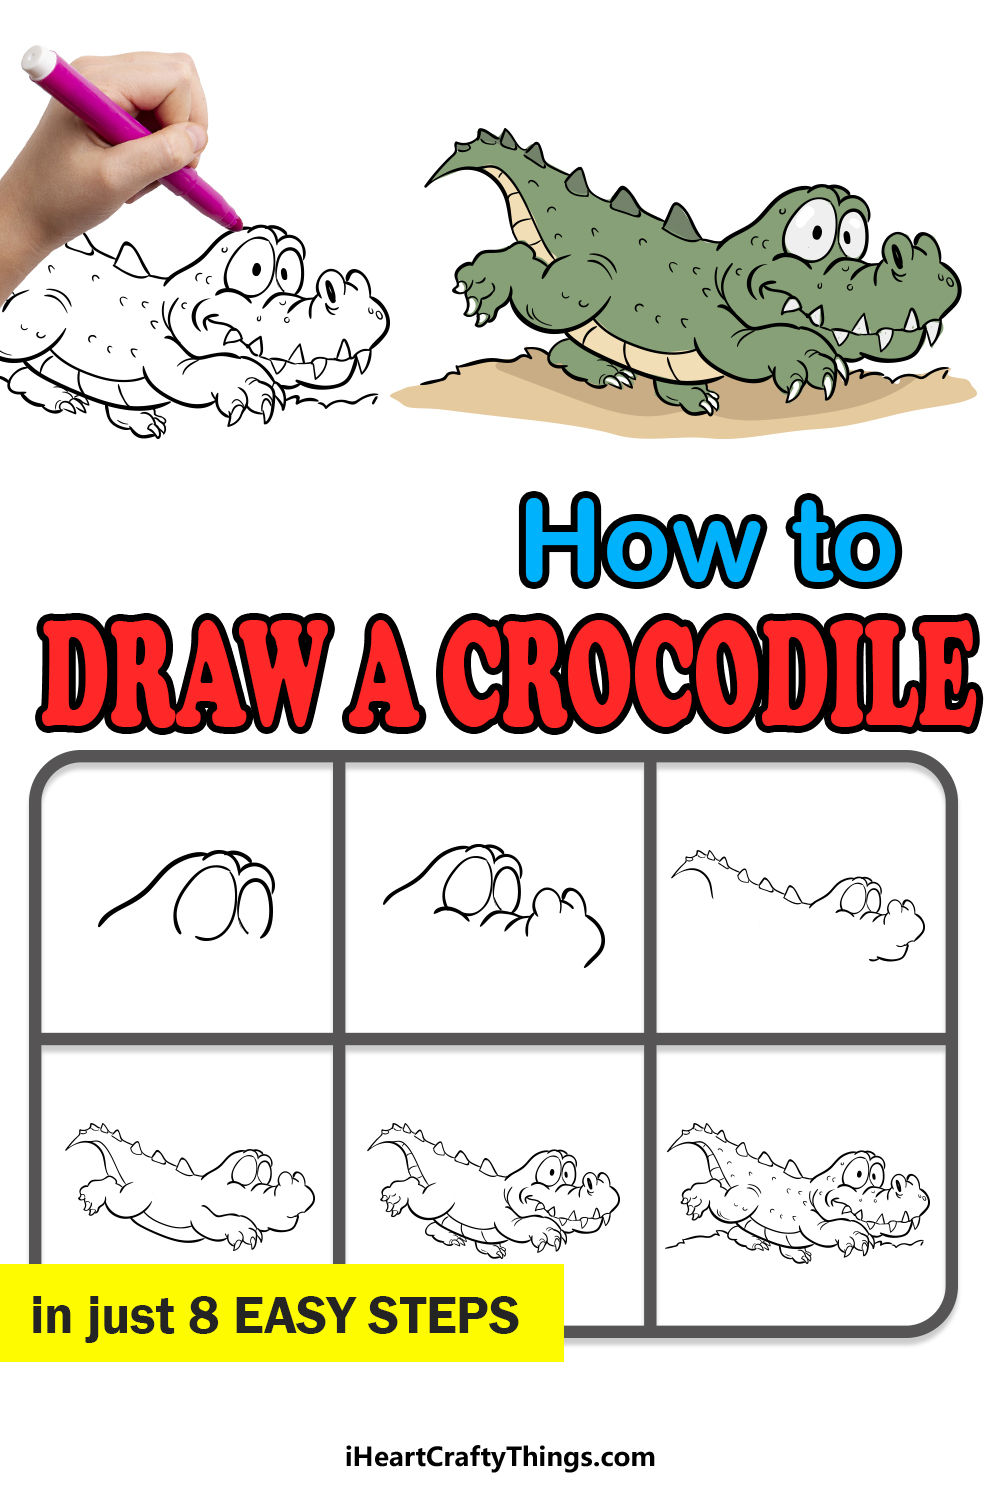
This fun step-by-step guide on how to draw a crocodile will have you drawing one of these amazing reptiles in no time!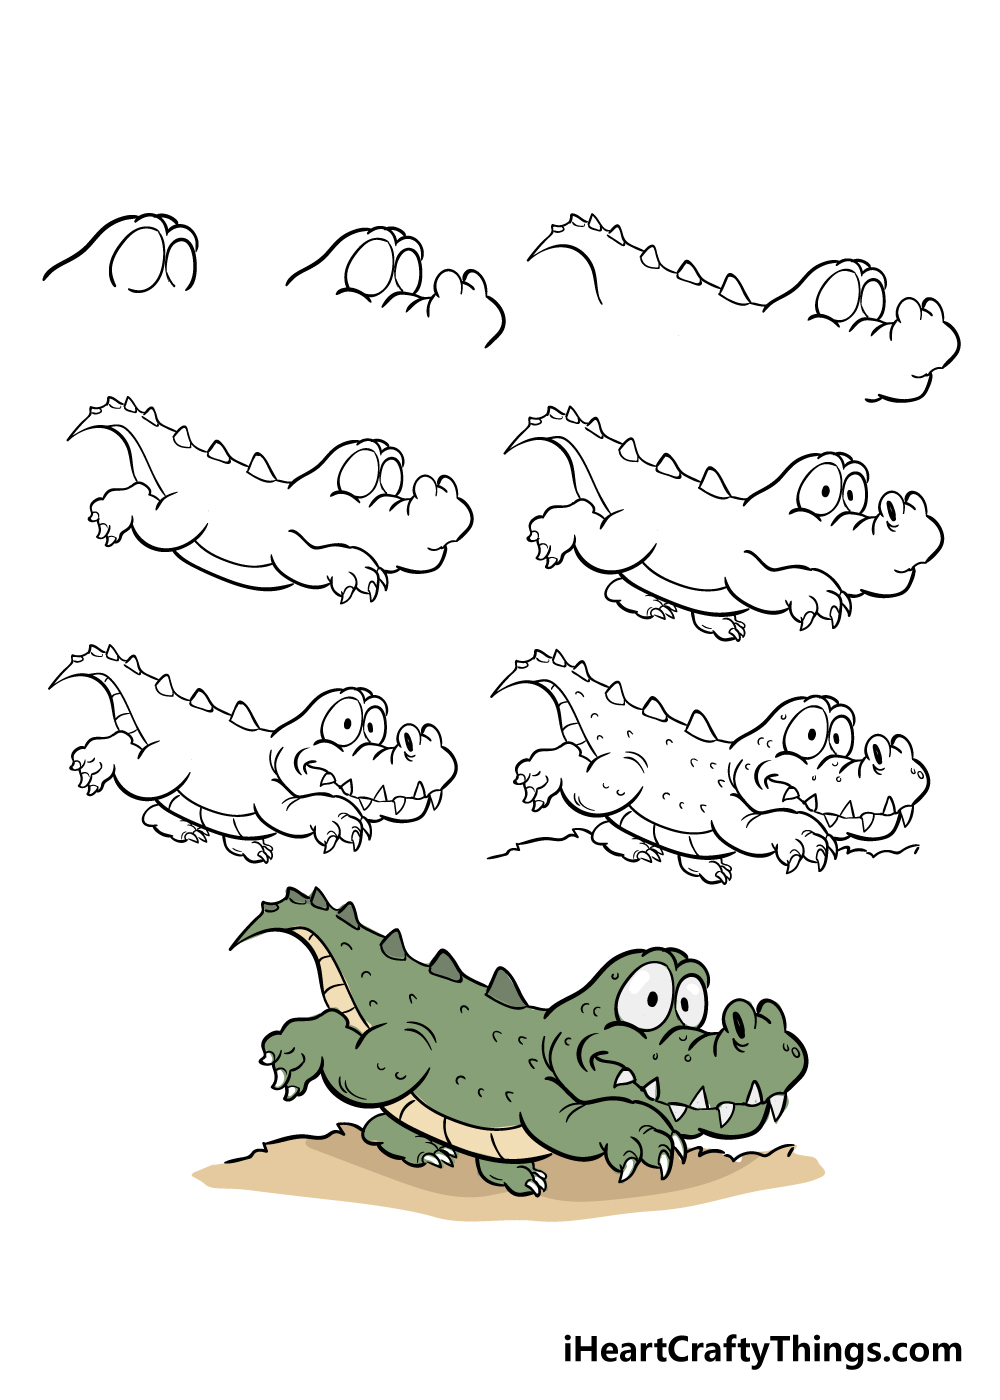
How to Draw A Crocodile – Let’s get Started!
Step 1
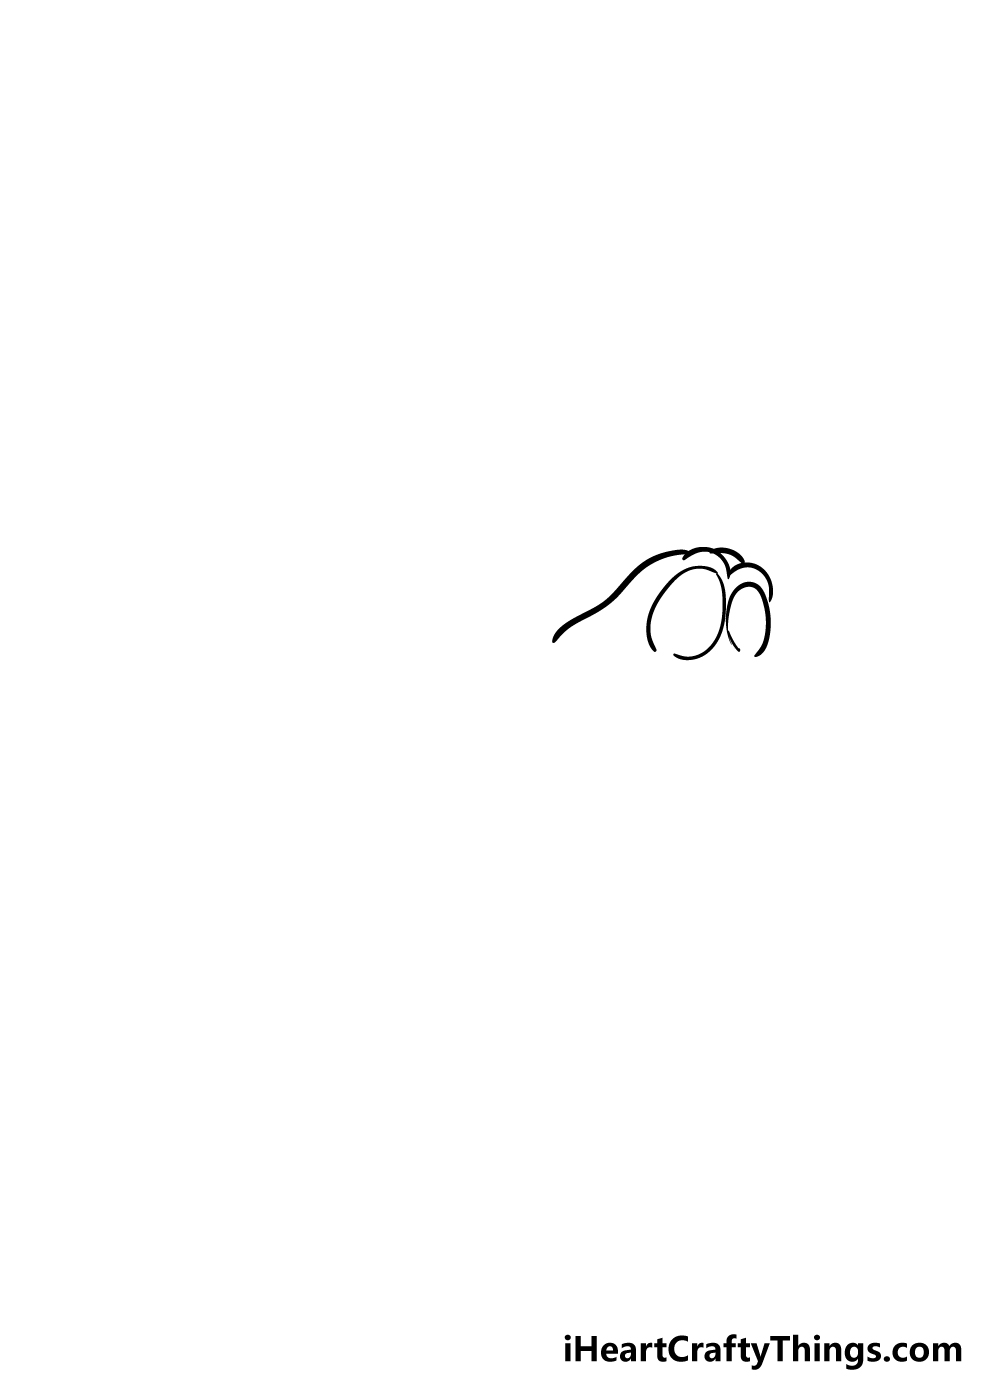
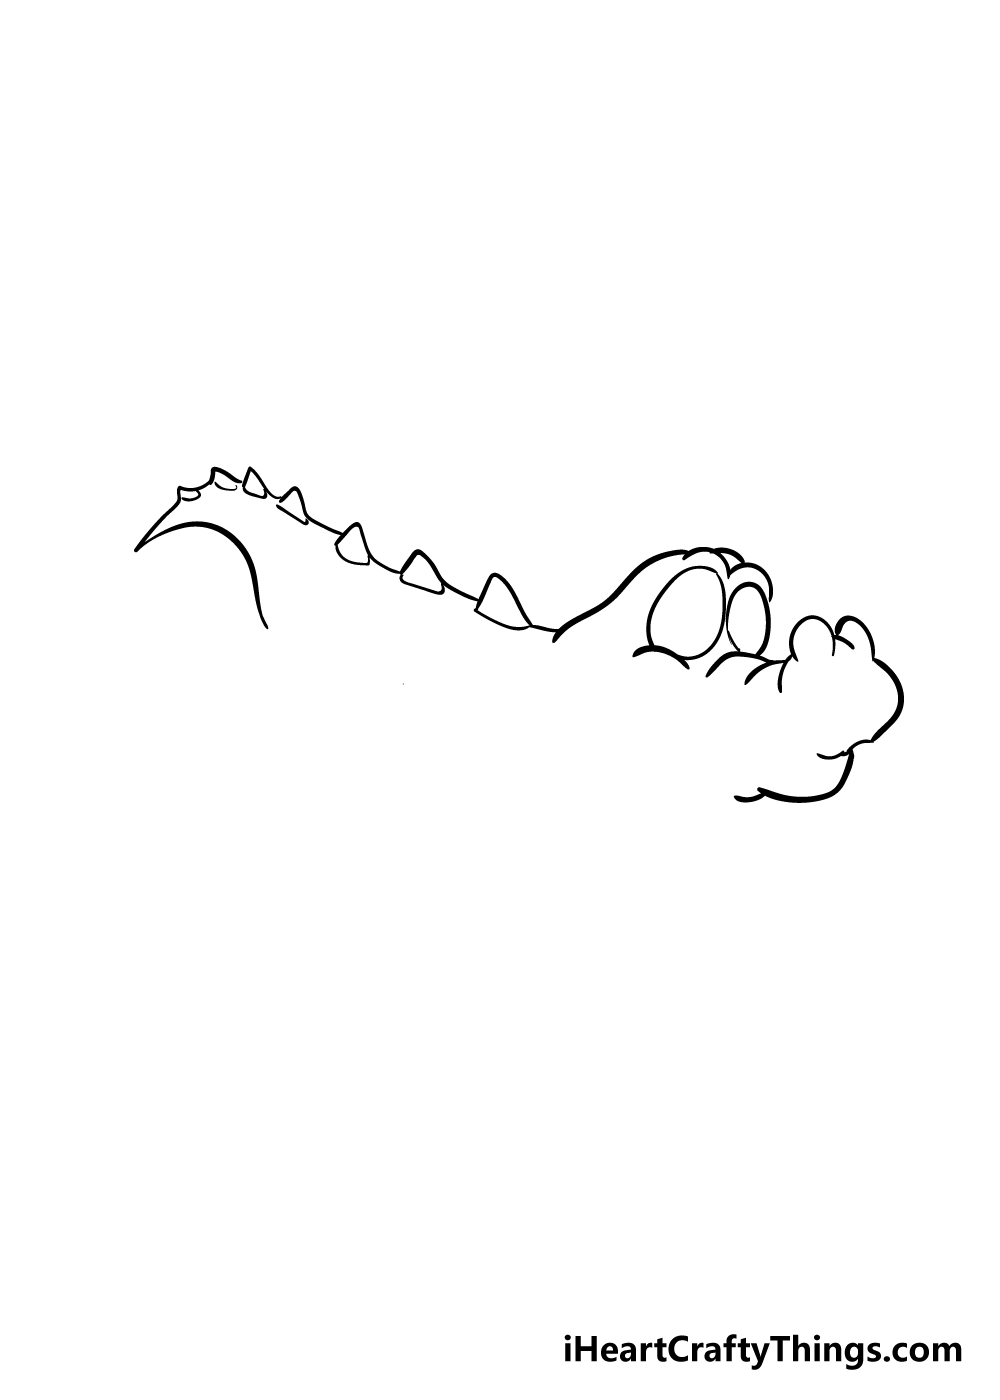
We shall start with the eyes and the top of the head in this first step of our guide on how to draw a crocodile.
To draw the eyes, you can draw some oval shapes close to one another as you can see in the reference image. Be sure to leave a tiny gap at the bottom of the eyes!
Once you have the eyes draw, you can use some curved lines over them for the eyelids and then draw a line going backward for the start of the head.
Step 2 – Next, start drawing the snout of the crocodile
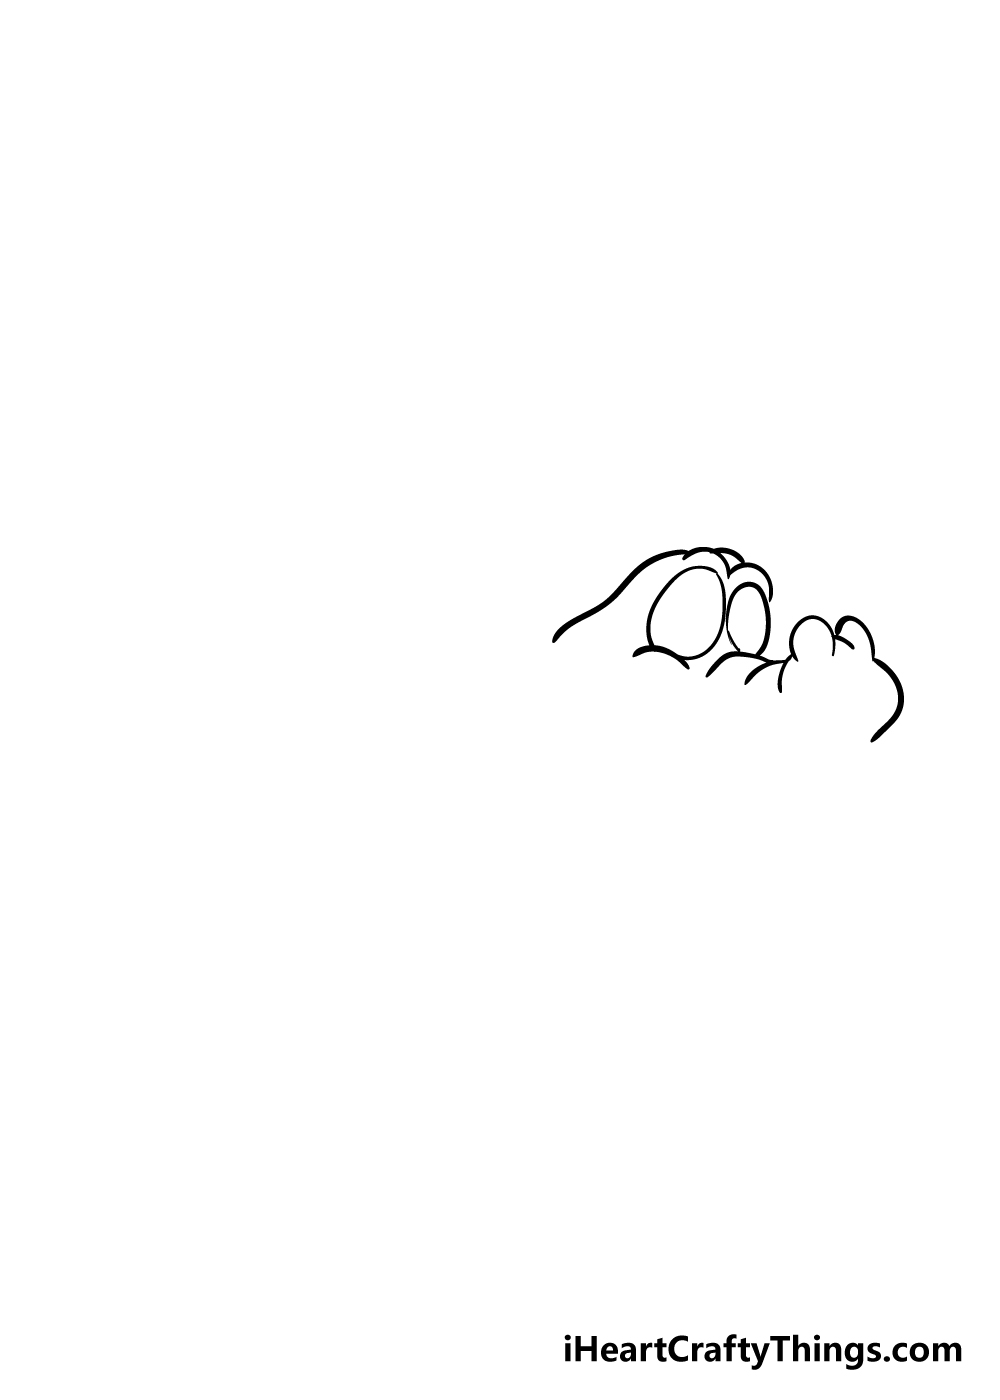
In this part of your crocodile drawing, you can start to draw the snout of the croc. First, you can use a curved line underneath the eye on the left which will fill the gap you left at the bottom of the eye.
Then, you can refer to the reference picture to use some more curved and rounded lines to form the snout.
This part can be a bit tricky, so be sure to carefully follow the guide image!
Step 3 – Now, draw the back of your crocodile
For this step of our guide on how to draw a crocodile, we shall focus on the back of the crocodile.
There will be a series of triangular spikes along it, and you can use a line between each one to form the back and start of the tail.
You can then use a sharply curved line for the end of the tail. Don’t forget to draw the bottom of the mouth as well!
Step 4 – Next, draw the legs of your crocodile
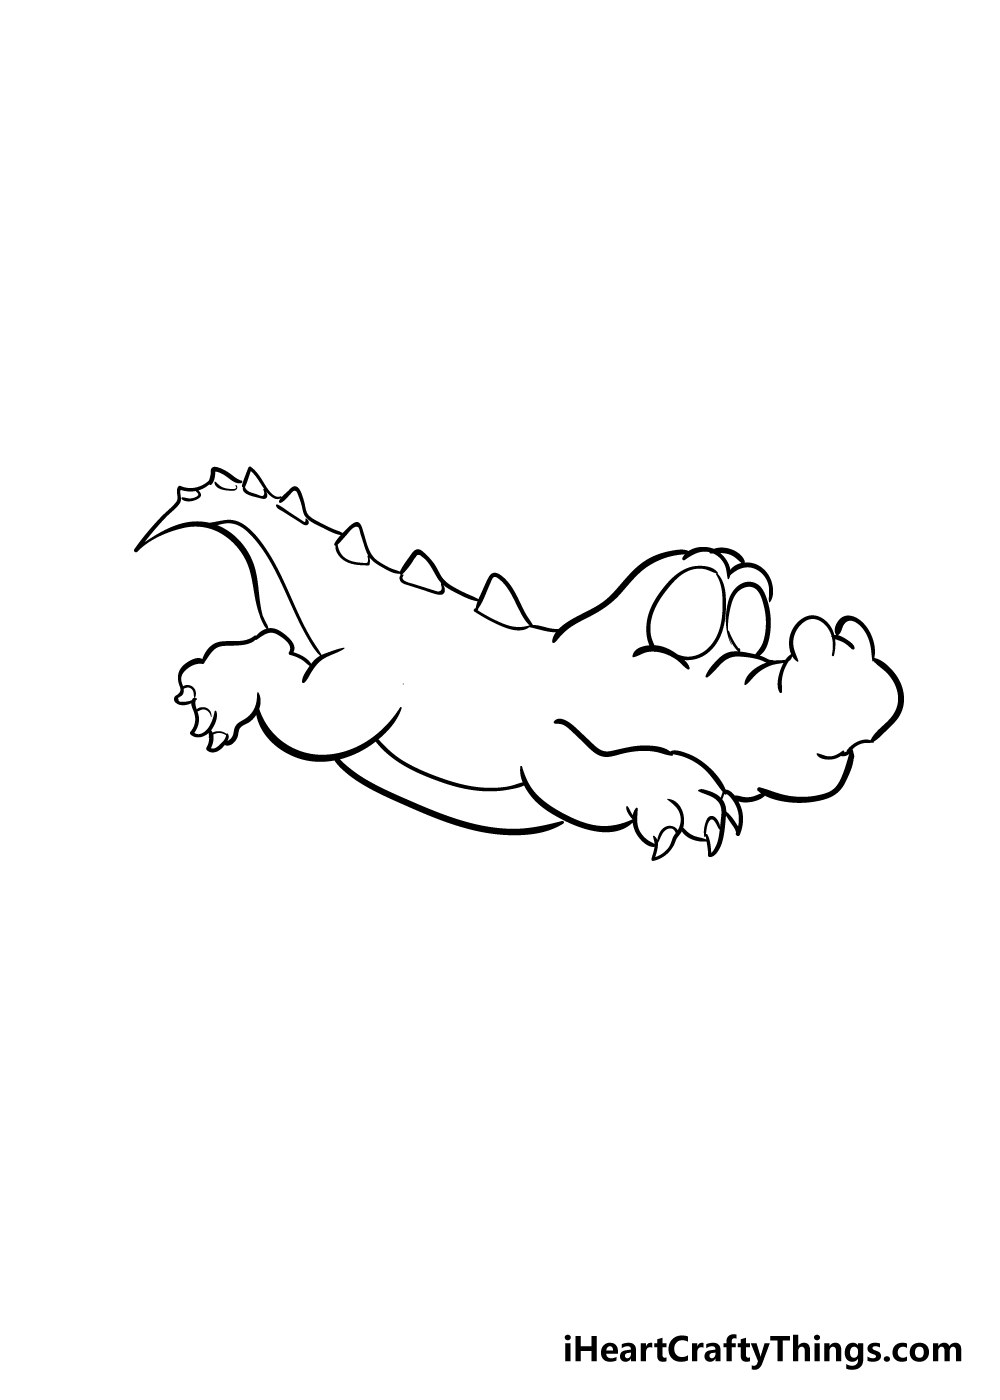
We will be adding the legs and belly of your crocodile drawing in this next step. The legs are quite short and rounded, and there are sharp claws at the end.
The leg at the front of the crocodile will extend forward, whereas the back one will be bent back. Then you can draw the bottom of the tail and the belly to finish off this step.
Step 5 – Now, draw the other feet and some other details

In this step of our guide on how to draw a crocodile, you can draw the feet on the other side of the body.
These will appear quite small to give some perspective. Then, use some dots for the pupils and then draw in some nostrils.
Step 6 – Next, draw the mouth and other details
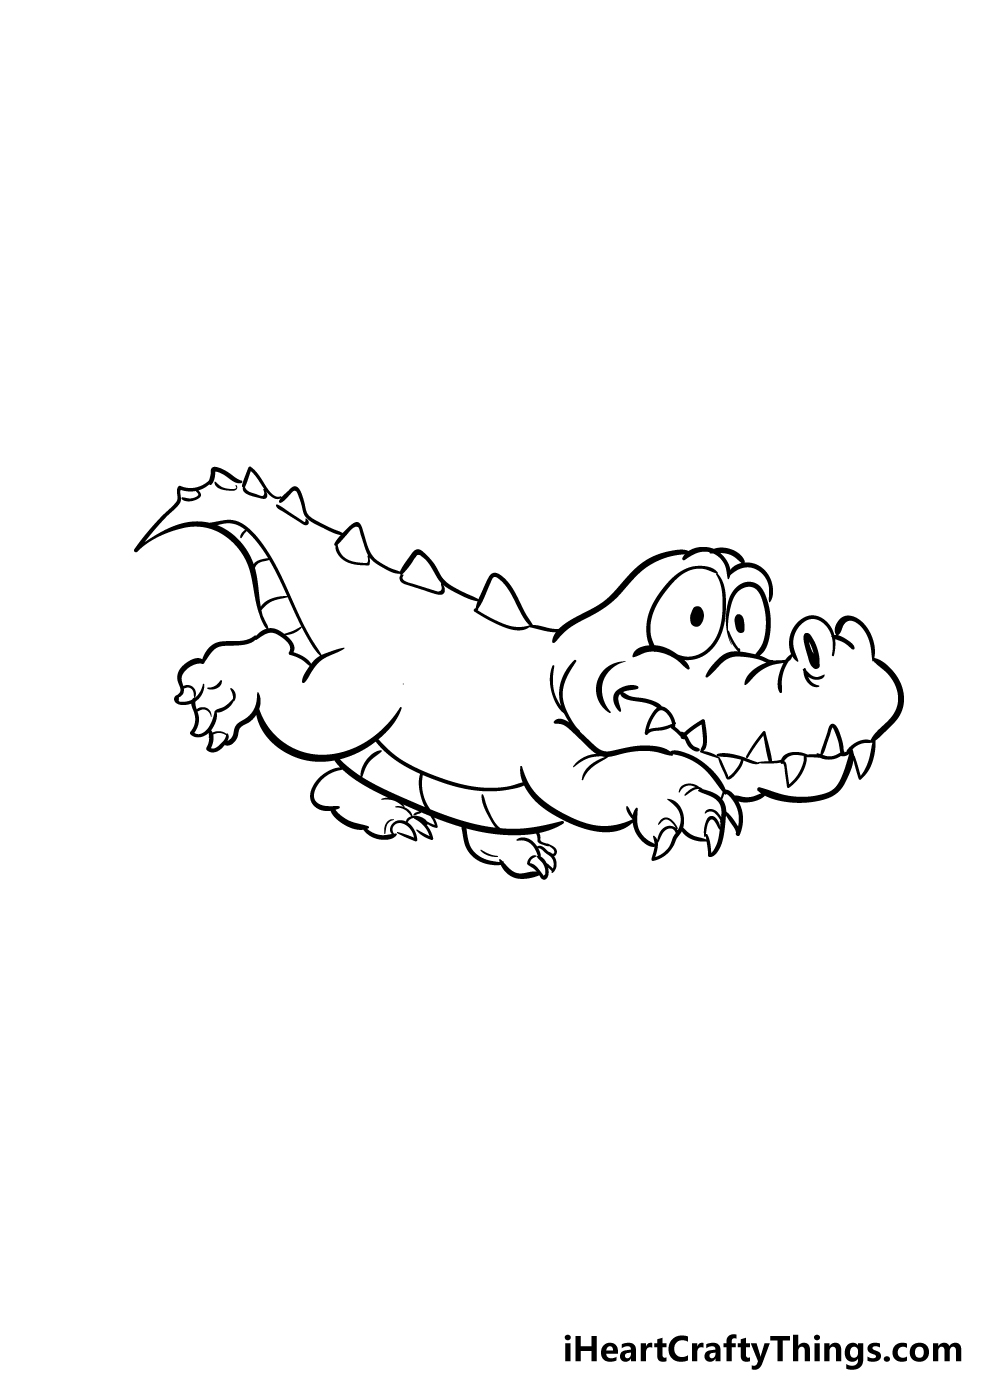
Every crocodile needs a jaw full of sharp teeth, so let’s add some to your crocodile drawing in this step!
You can draw in a slightly jagged line for his mouth, and then add some sharp teeth above and below it.
Once you have the mouth drawn, you can draw the extra details shown in our reference image, such as lines across the underbelly and some more on the face and legs for some more skin texture.
Step 7 – Draw the final details of your crocodile
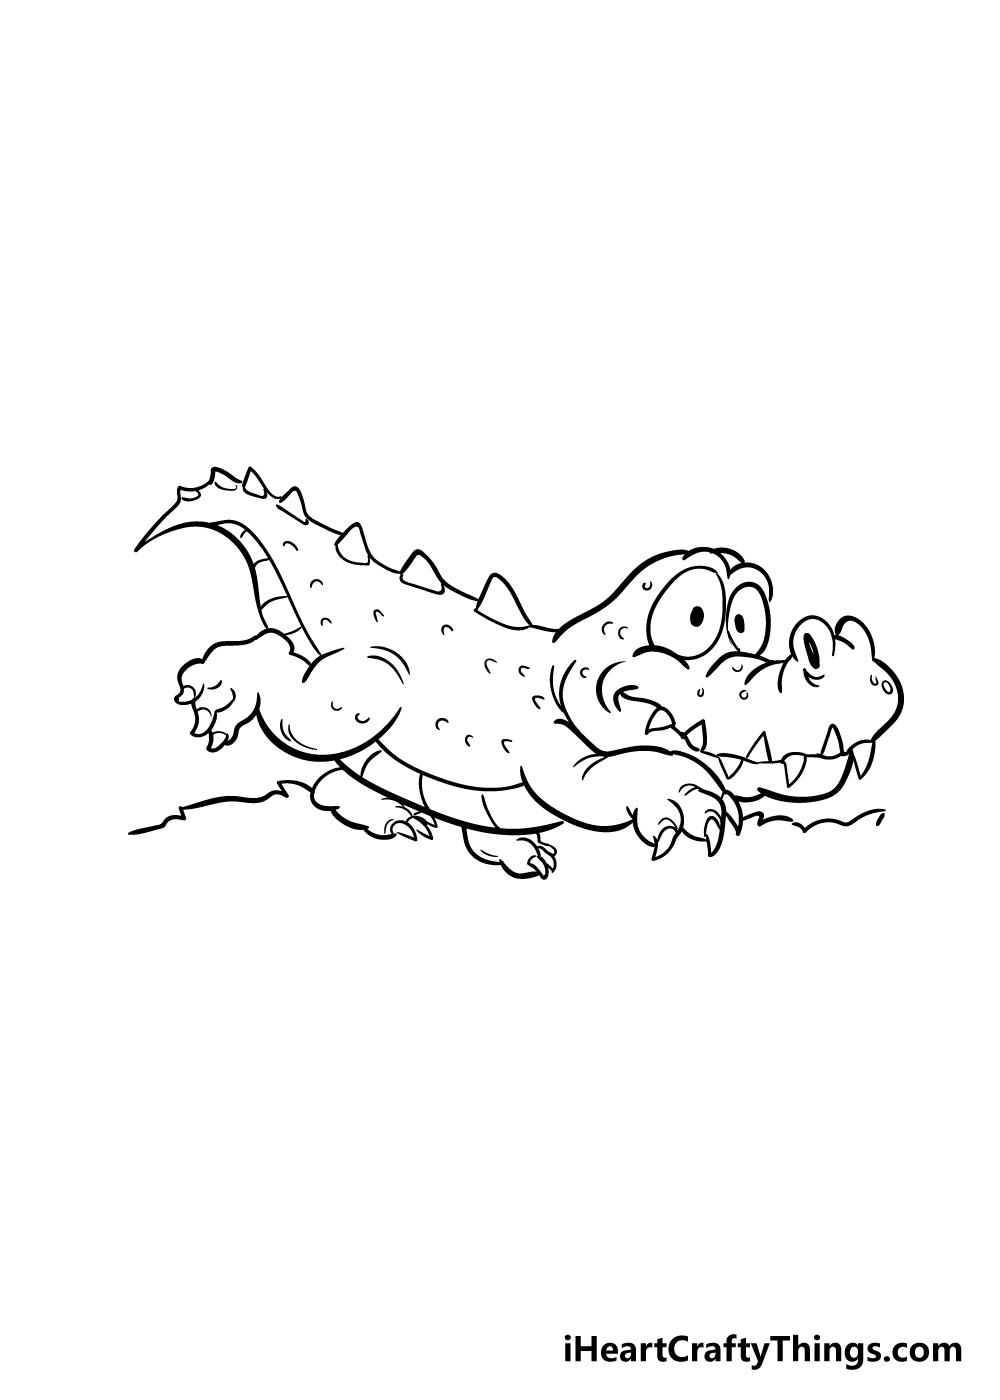
We will draw some final small details before moving on to the final step of this guide on how to draw a crocodile.
We used some small lines all over the body to create some skin texture for the crocodile. Then, you can draw some jagged lines to create a grassy base for your crocodile.
Before you move on, be sure to add any details that you would like for this image! Perhaps you could extend the background to show what kind of setting this croc is living in.
Step 8 – Now finish off your crocodile drawing with some color
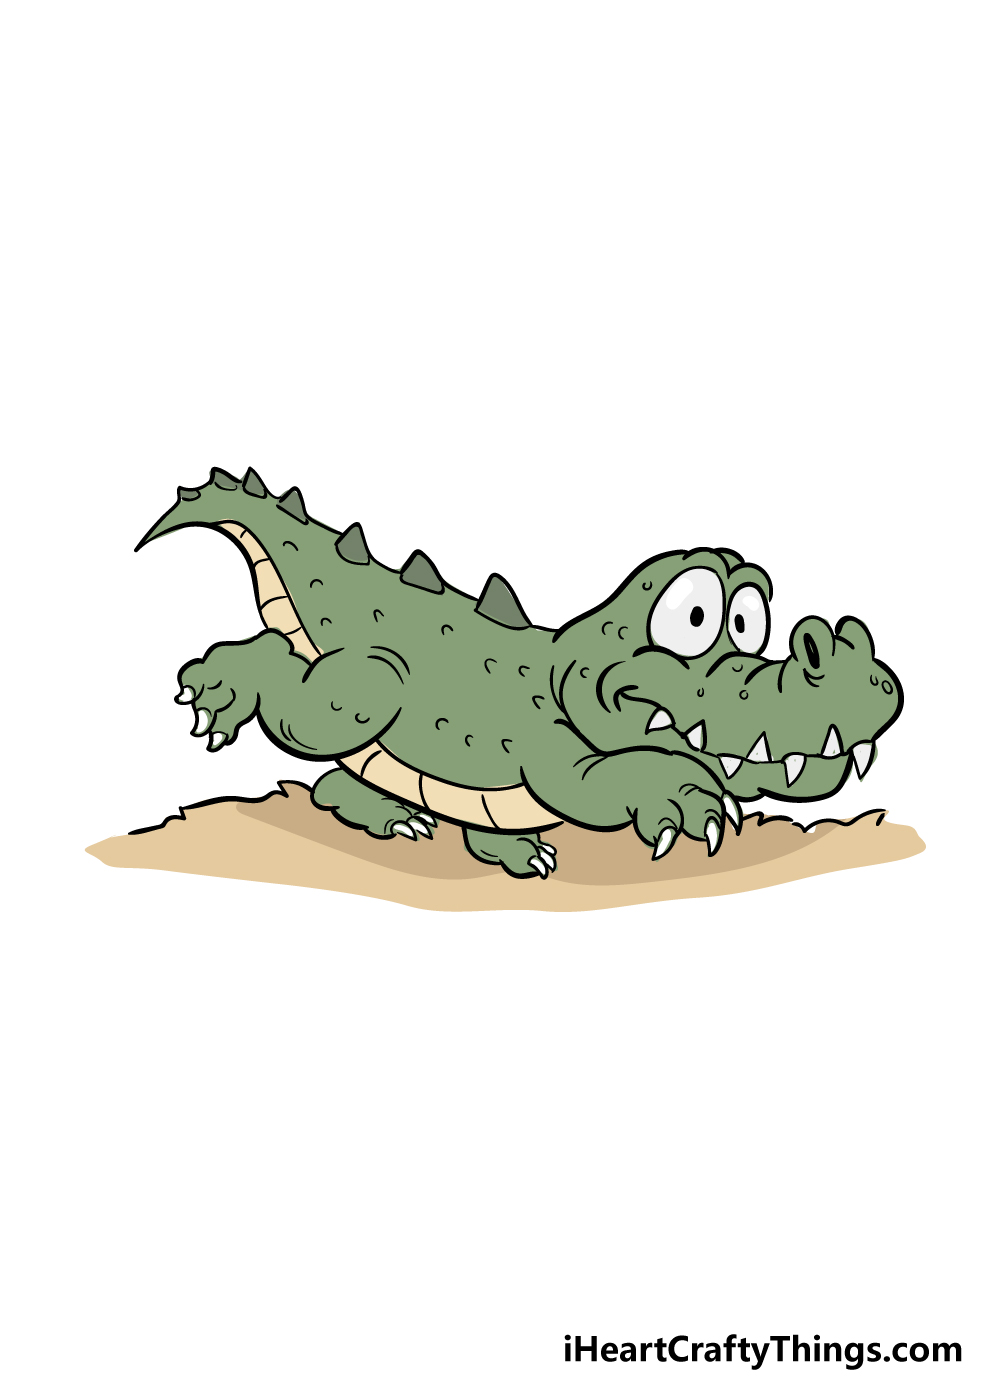
Now that you have finished your crocodile drawing, there’s just one more fun step and that is adding some amazing colors!
We used a green and yellow color scheme for our image, but this is a step where you can really let your creativity take over!
You could use a similar color scheme to our one, but you could also use any other colors that you want for it!
You could try to use some more muted, realistic colors but you could also use some bright and vibrant ones for a more stylistic image.
Don’t forget to color in the background and extra details that you may have drawn as well!
Which art mediums will you use for your picture? I would use some watercolor paints for a softer picture if I were coloring this in, but I know anything you choose will look amazing!
3 More tips to make your crocodile drawing easy!
These 3 tips for your crocodile sketch will show you how to make it so much easier!
This drawing of a crocodile that we created is drawn in a cartoon style, but it is still very detailed despite this. We would recommend trying your best to draw it as it appears in our guide.
If you find yourself struggling to draw some of these details, then you could remove or simplify some of them. What you change or remove would depend on what you are specifically struggling with.
Once you have created a version of the drawing that is more comfortable, you can always make new versions with some of the details restored.
Making several attempts is a great way to get the hang of the drawing!
Even though this crocodile drawing isn’t realistic, you could use a photo of a real crocodile to help you as you draw.
To do this, you would want to try and find a photo that is posed relatively similarly to the one in our guide.
Even if you can’t find one that is similar, any photo of a crocodile will help you to draw some of the details and proportions of this one.
Plus, you could use it to help you draw a more realistic crocodile if that is a style you prefer.
Finally, adding some background elements and details to this crocodile sketch can actually be a way to make it easier.
This may seem confusing, but adding extra elements can be used to conceal difficult parts of the drawing.
For example, you may struggle with drawing the legs of the crocodile. If this is the case, you could draw a lake setting for this crocodile to be in.
That way, the crocodile could be partially submerged in the water and you wouldn’t have to draw that part you struggled with. Not only can this help you to overcome difficult parts of the drawing, but will also make your drawing more interesting.
You could look up images of a crocodile’s natural habitat to help as you draw.
Your Crocodile Drawing is Complete!
You have reached the end of this step-by-step guide on how to draw a crocodile! You should be very proud of the incredible drawing that you created alongside us for this guide.
We hope that this tutorial showed you that this drawing was easier than you expected, and we also hope you had a lot of fun using it!
Now that your crocodile drawing is finished, there’s still fun to be had with how you finish up with some final details.
Whether you draw some more elements, add some details or get creative with your colors and art mediums, we look forward to seeing how you finish off this image!
Our website is jam-packed with tons of awesome step-by-step guides such as this one for you to enjoy!
We will be uploading many more all the time, so be sure to visit us often to catch all of our new guides as they come out.
Once your crocodile drawing is complete, we would love to see what you did! Please be sure to share your drawing on our Facebook and Pinterest pages for us to enjoy.
We can’t wait to see your creative and colorful croc!