A box can contain anything you can think of! You may use a box to house a present for a loved one, use it to transport your dearest belongings to a new house or even use one as a makeshift fort!
We’ve all used boxes for something at some point, but due to their 3D design it can make it difficult to learn how to draw a box.
That is, it can be difficult unless you have a guide like the one before you!
Our step-by-step guide on how to draw a box will show you how easy it can be when you know what to do.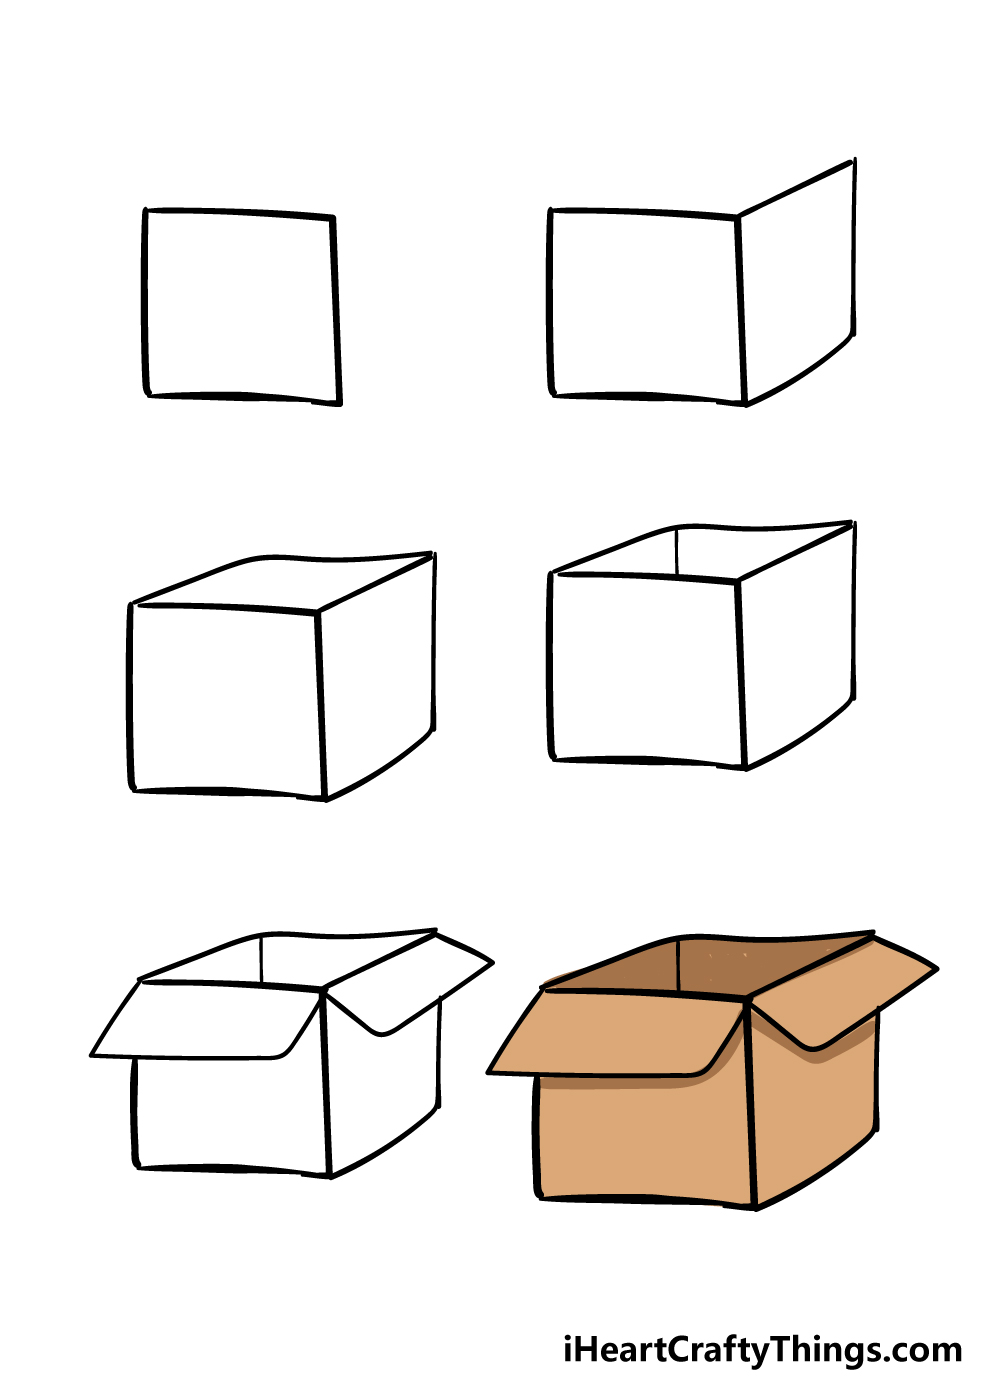
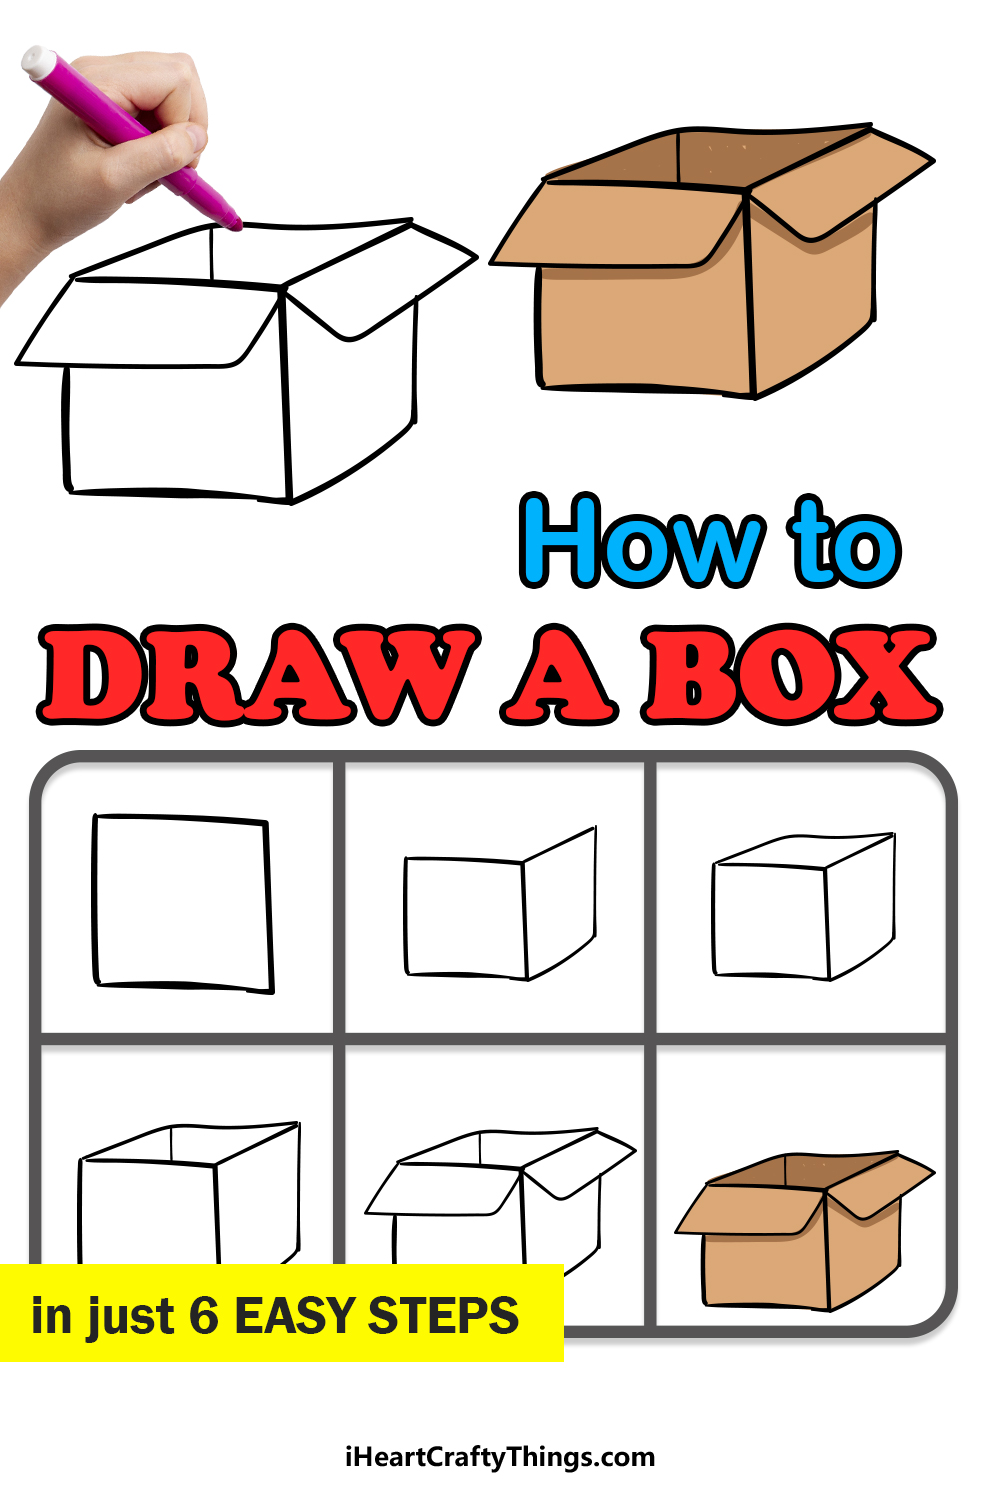
How to Draw A Box – Let’s Get Started!
Step 1
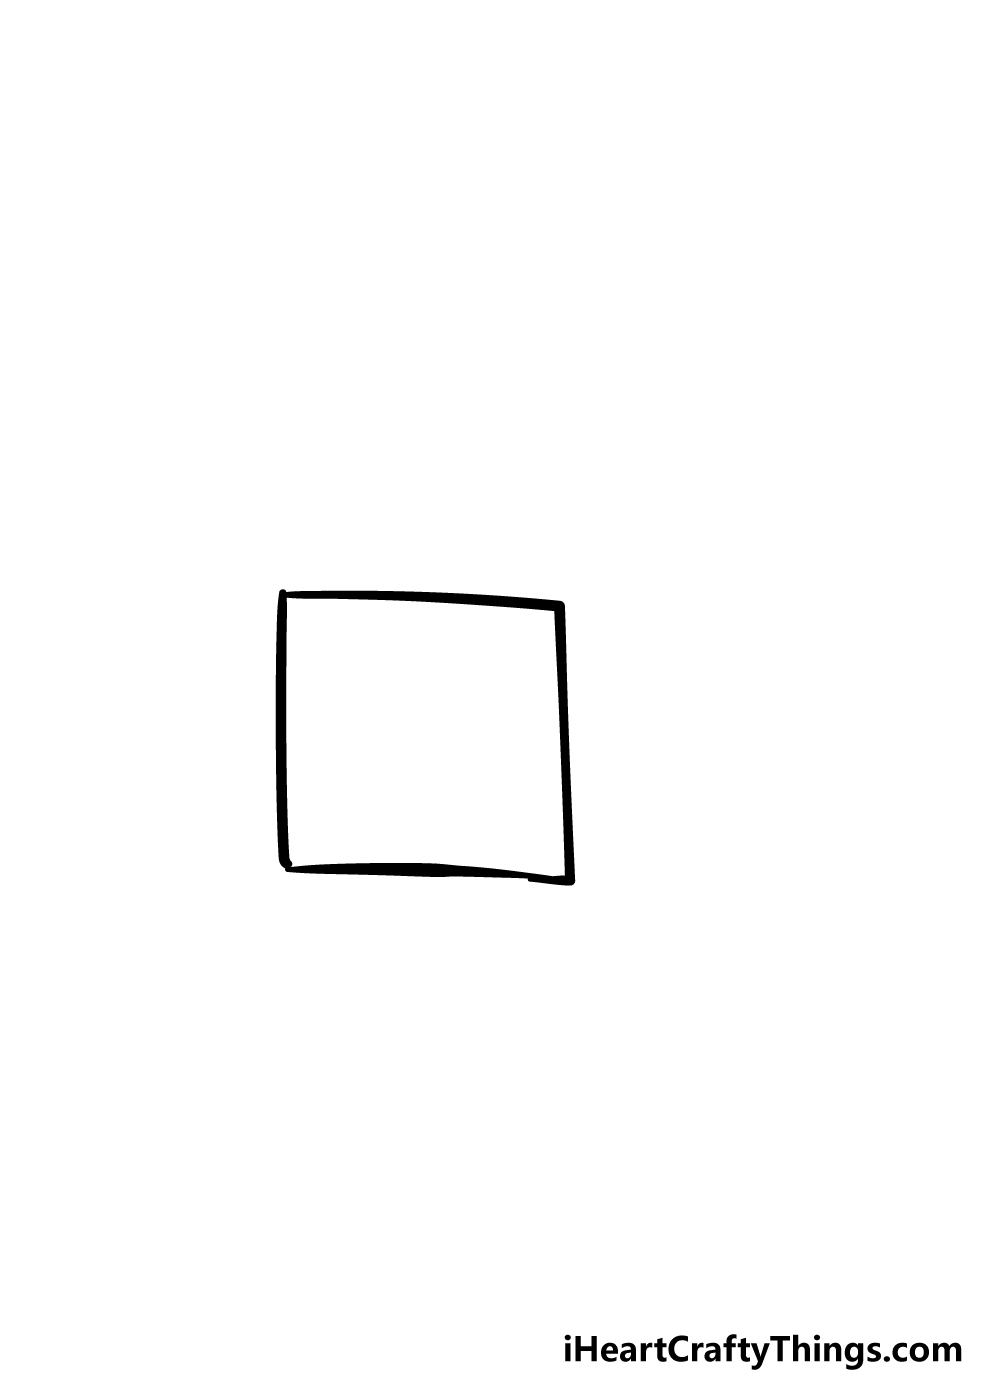
When drawing any 3D shape on a 2D page, it’s always a good idea to draw the basic shape first.
Therefore, that is what we shall do for this step of our guide on how to draw a box!
Normally when drawing a square shape it would be recommended to use a ruler, but while you could use one if you want a perfect box.
For this step, you should try to use a light pencil for now, as there will be overlapping lines in the next few steps. We will let you know when it’s safe to start using your pen!
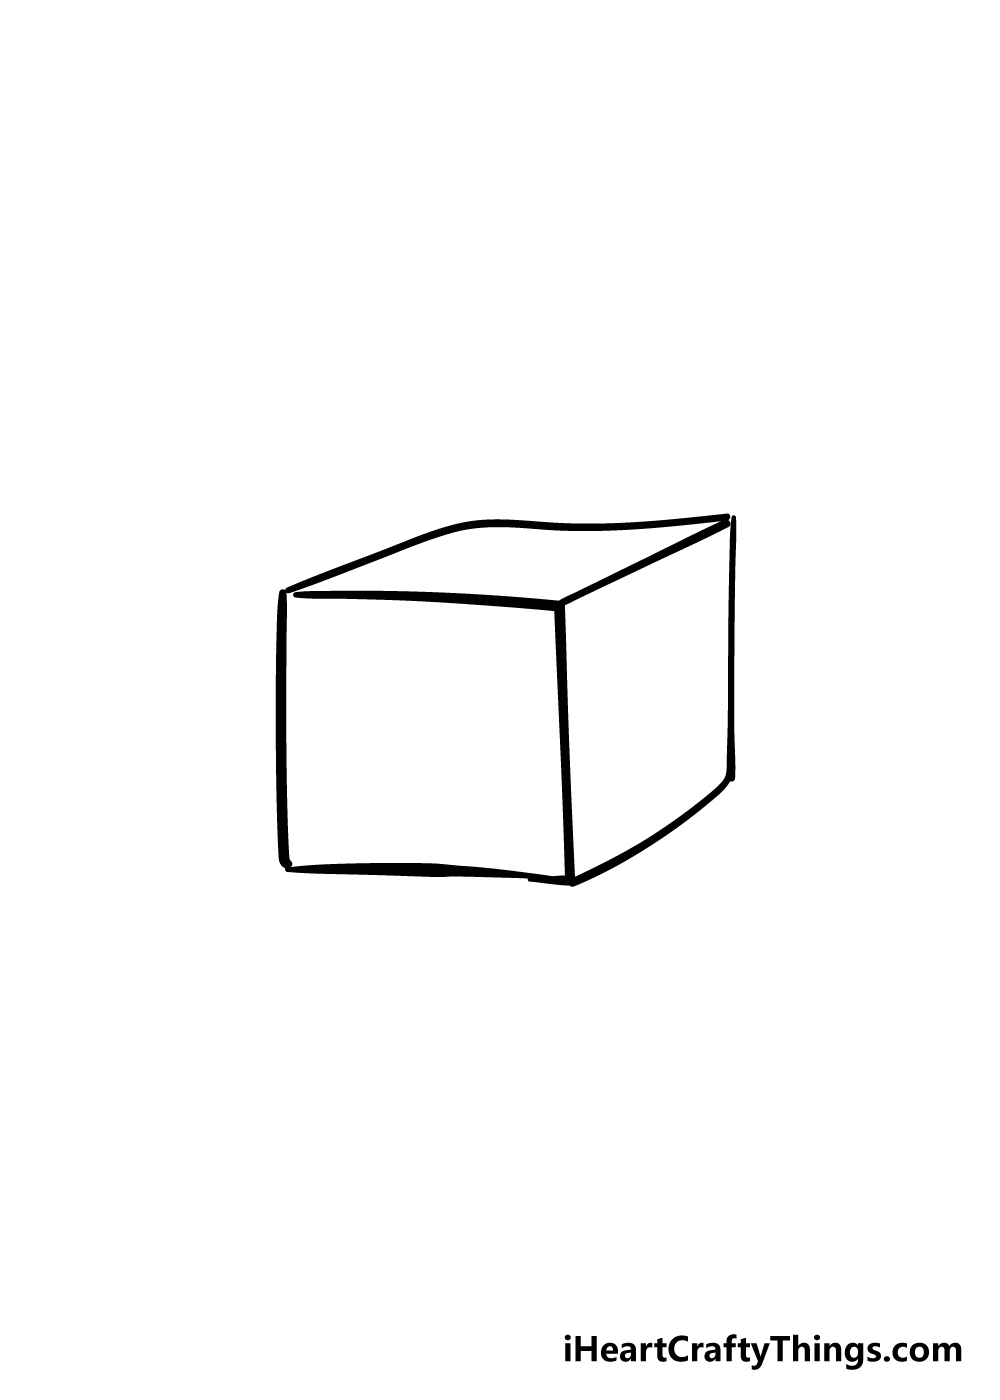
Step 2 – Draw some more of the box in this step
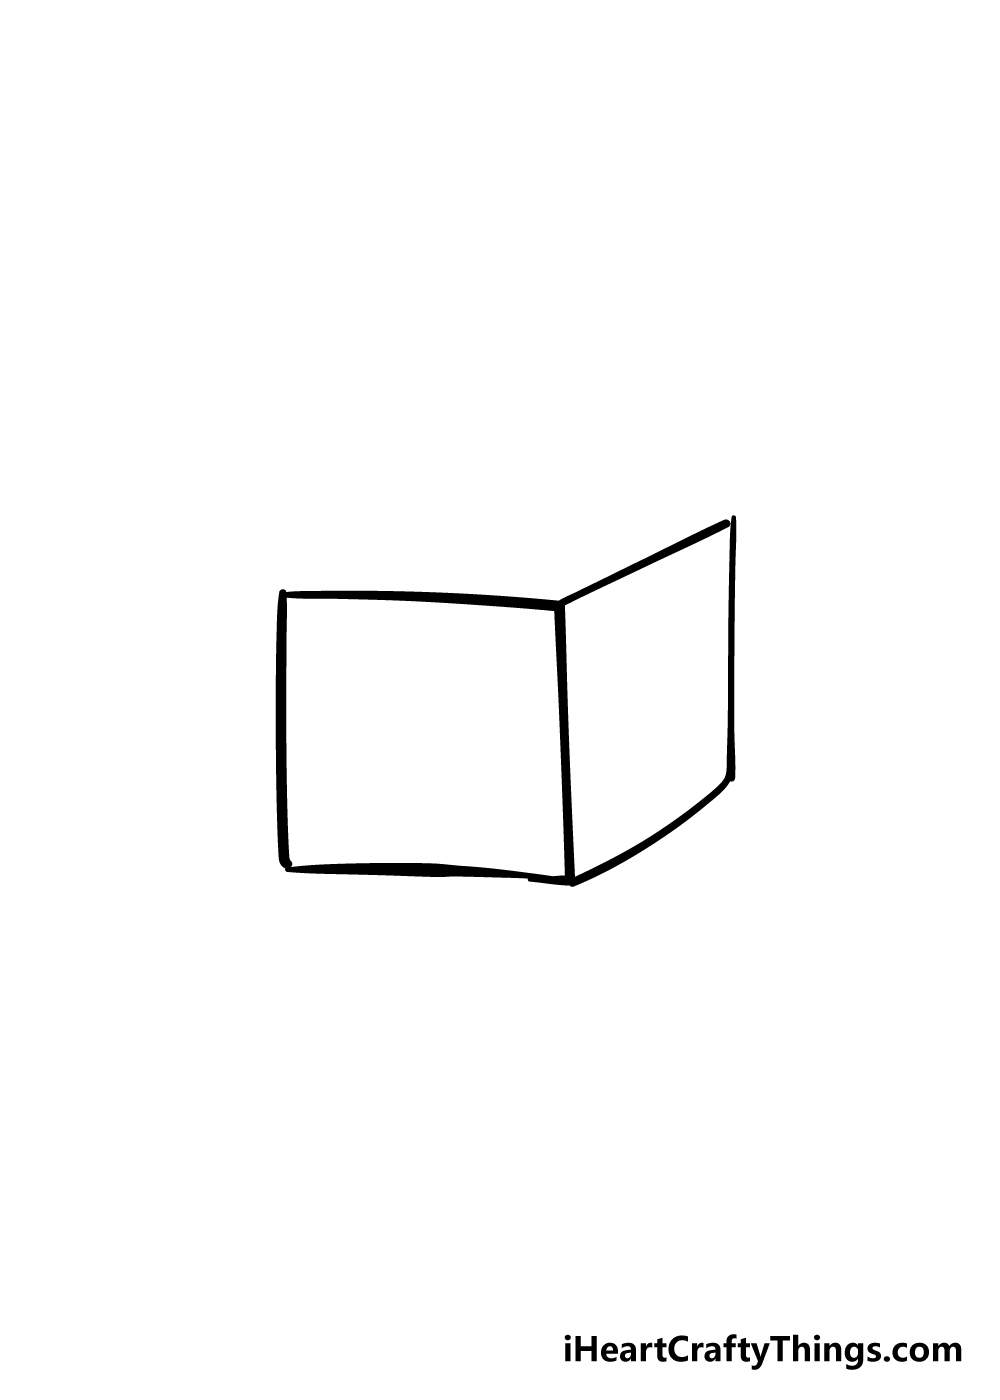
For this part of your box drawing, we shall start drawing “backward” into the picture to start creating the 3D effect.
To do this, you can draw a line from the top right-hand corners of the box at a slightly diagonal angle.
Then, you can connect these two lines with a vertical line. It would still b recommended to use your pencil for this step as well.
Step 3 – Draw the other side of the box opening
For this step of our guide on how to draw a box, we shall be drawing the remaining edge of the box’s opening.
To do this, simply draw a sharply curved line with mostly straight edges from the top left to the top right of the box. The curve will be at the corner of the box, as you can see in the reference image.
Step 4 – Next, add the inner corner of the box
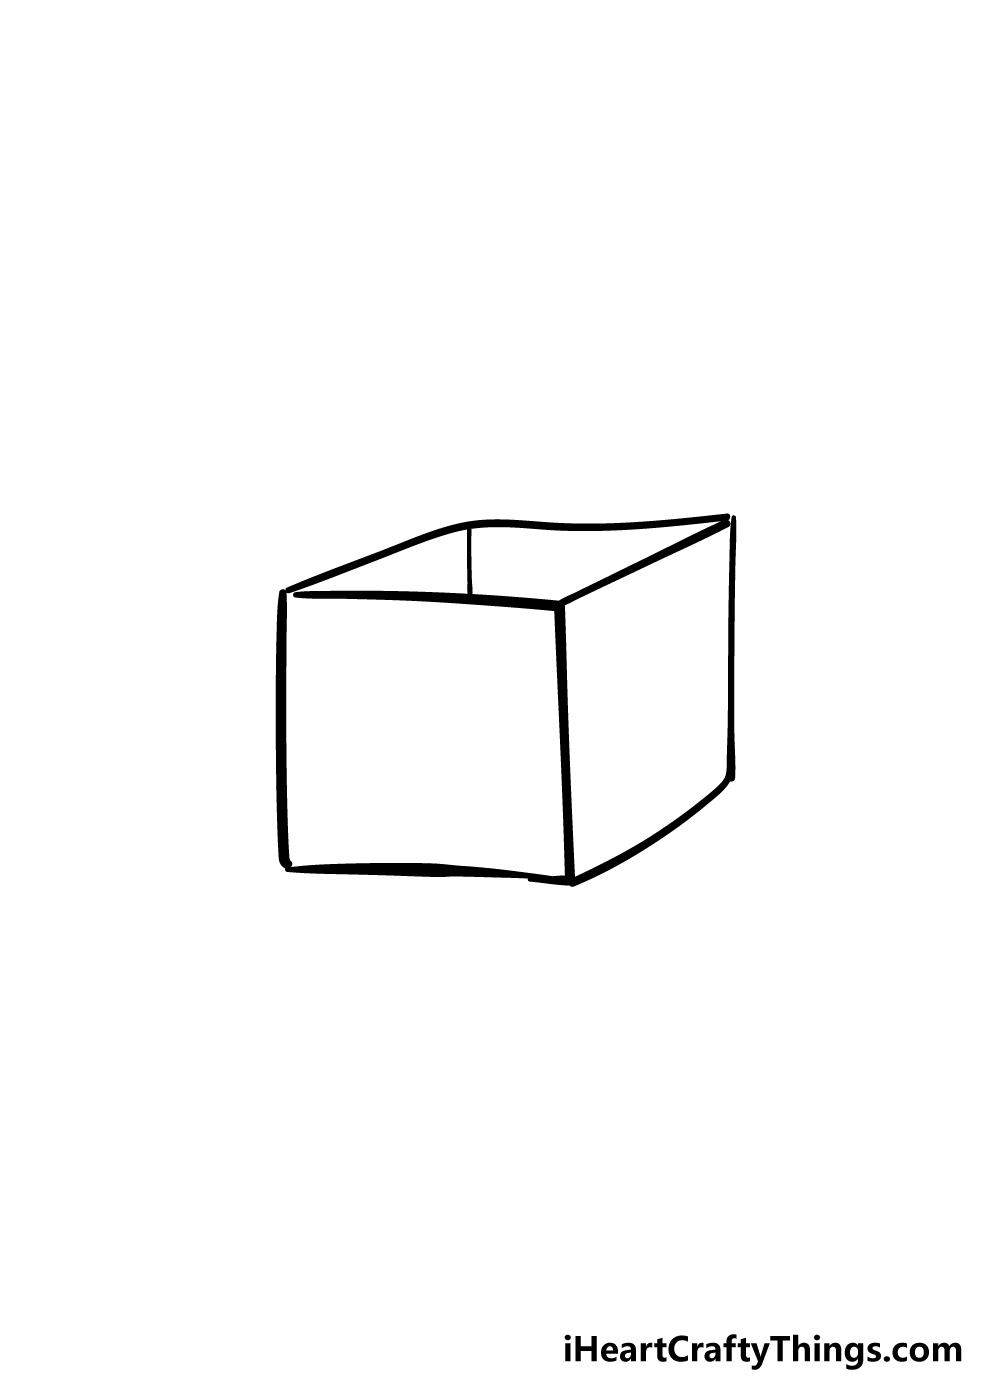
This part of your box drawing should be quite simple for you to do! All you need to do for this step is to draw a line coming down from the top left corner of the box down into the box interior.
It’s as simple as that, and you’re ready for the final touches now!
Step 5 – Finish off with the flaps of your box drawing
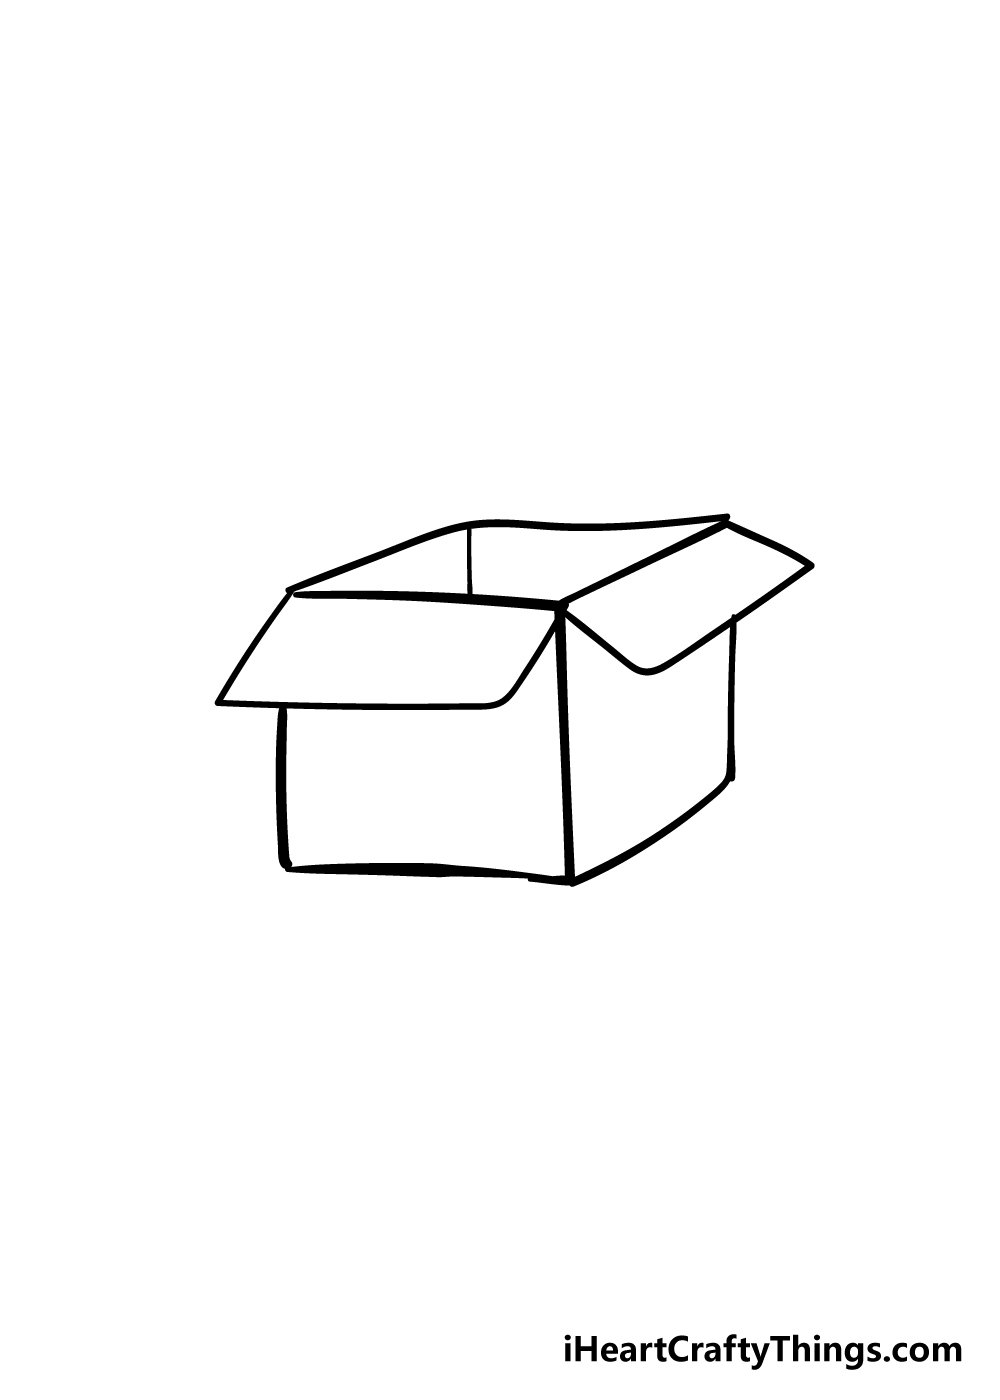
Before we move on to the coloring step of this guide on how to draw a box, you will need to add some flaps to the box.
This is also the step where you can start to draw with your pen!
The flaps will be drawn on the edges of the opening that are on the two sides facing us.
The reason that we were using pencil up until now was that the flaps will come out over the corner lines of the box, as you can see in the reference image.
Once you’re happy with how the box looks, you can draw over the lines with your pen and then erase any pencil lines that you won’t be needing. When you do your erasing, be sure to let the pen ink dry before doing so!
Before you move on to the final step, be sure to add any extra details that you would like! There are lots of things that you can do to really bring your picture to life.
For example, you could show what is stored inside the box, or you could draw a pattern onto the box to make it look like a birthday present wrapped in some wrapping paper.
You could also draw a background for your picture as an extra fun aspect! How will you finish off your box drawing before the final step?
Step 6 – Finish off your Box drawing with some color
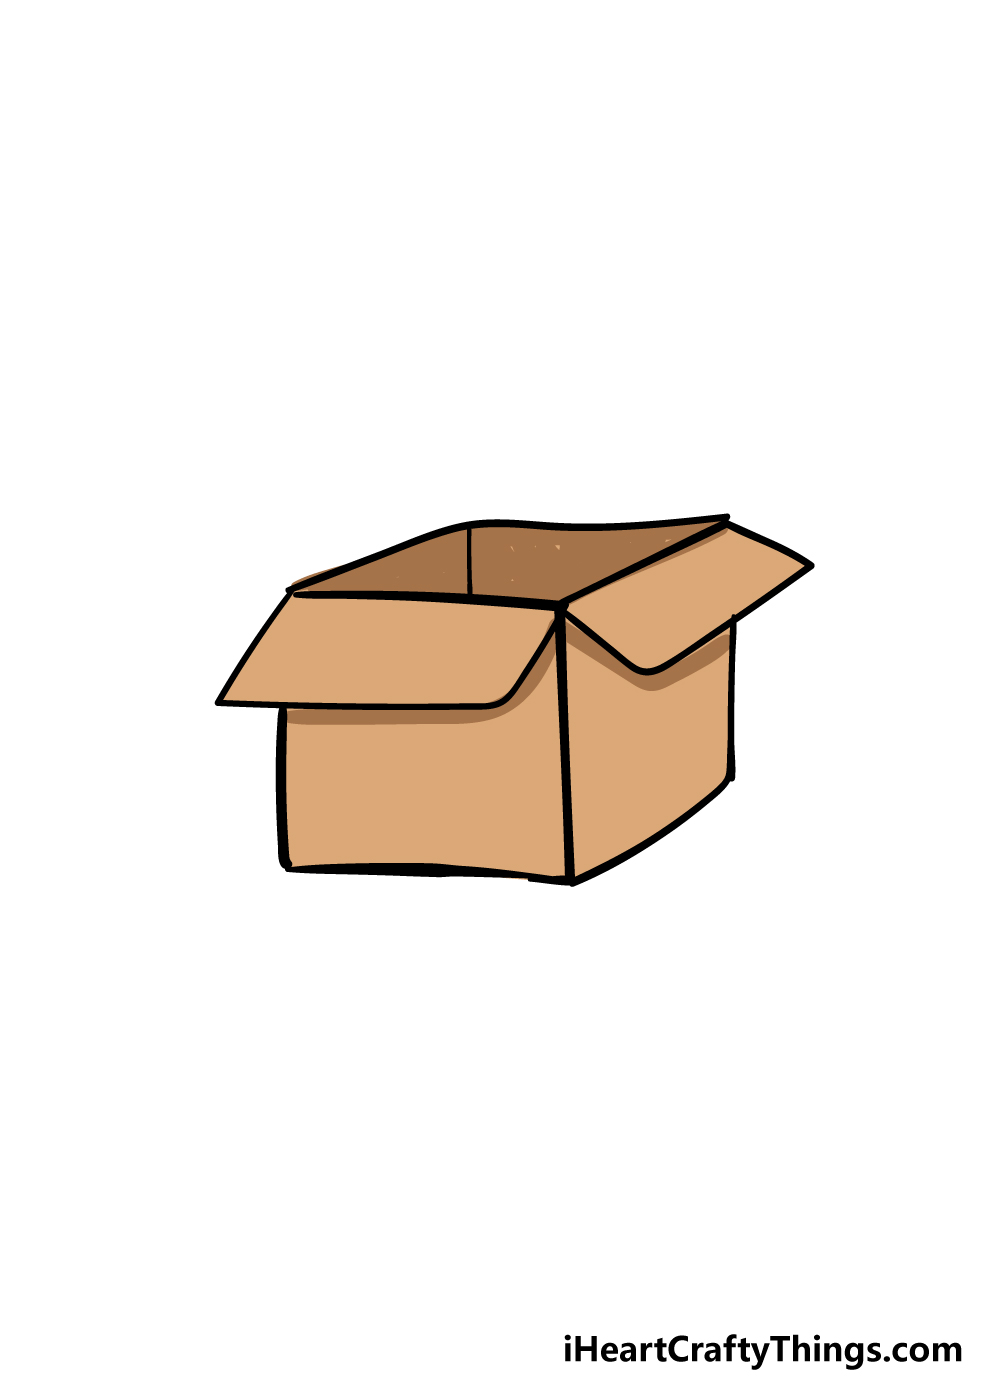
Now that you have reached the end of your box drawing, you can have lots of fun coloring in your picture!
This is a step where you can really show off your creative talents and let your imagination run wild.
Boxes can come in all manner of colors and have any decoration that you can think of, so there are no wrong answers to how you can decorate this drawing.
If you drew any background details or objects for your picture, you can color them in as well for even more color vibrancy!
Once you know which colors you would like to incorporate into your drawing, the only thing left to decide is which art mediums you will use to finish off your drawing.
You can use different mediums depending on what kind of look you want for your drawing.
If you want a brighter color scheme, then you could use something like colored pens or acrylic paint for colors that pop!
Alternatively, you could use watercolor paints or colored pencils for a softer, more muted look. How will you finish your box drawing off with color?
Do this to take your box drawing to the next level
Unpack these tips we have for how to make your box sketch even better!
Boxes will often have different labels and pictures on them to show what is inside. You could add these kinds of details to your box drawing!
If you were to add details like this, you could keep it to a simple small label, but you could also add more elaborate patterns to the box. It all depends on what you want to be contained within the box!
What kinds of additions would you like to add to this box to make it more distinct?
Next, you can show what is inside this drawing of a box by, well, showing what is inside it! Adding labels is one way of showing it, but you could draw the contents poking out the top.
This could be anything you can imagine. For a few examples, it could be filled with toys, food or maybe even candy!
This is something you can really get imaginative with, so what would you add to the inside of this box?
You can also make your box sketch more distinct by adding a background to it. If you were to do this, you could make the background match what you put in the box.
For example, if you went without idea of adding toys to the box, you could have the background be a toy store. This is just one idea, but what do you think you might choose for the background?
The final way you can finish off this box drawing in style is by choosing the right colors. On top of that, you can also think about the art tools and mediums you will use for your chosen colors.
In our example, we went with a simple brown to replicate the look of cardboard. You could go for something similar, but the more details you added the more colors you can use!
Incorporating some different art tools and crafts can also be a great way to make the colors pop even more.
Your Box Drawing is Complete!
With the final details and colors added, you have successfully completed this guide on how to draw a box!
We hope that drawing this 3D object was made not only much easier but also more fun when you had our guide to work with.
We aimed to make this guide easy and enjoyable for you, so we hope that it was both of those for you!
Now you can take over and show us how creative you can be with how you finish off your drawing.
Be sure to go wild with any extra details, colors pr backgrounds you want to use and create!
When you’re ready for more drawing fun, be sure to check out our website! We have tons of awesome drawing guides for you to enjoy!
We also upload new guides all the time, so checking in frequently is the best way to never miss out.
We would love to see the creative ways that you completed your box drawing, so once it’s done please do share it on our Facebook and Pinterest pages for us to admire!