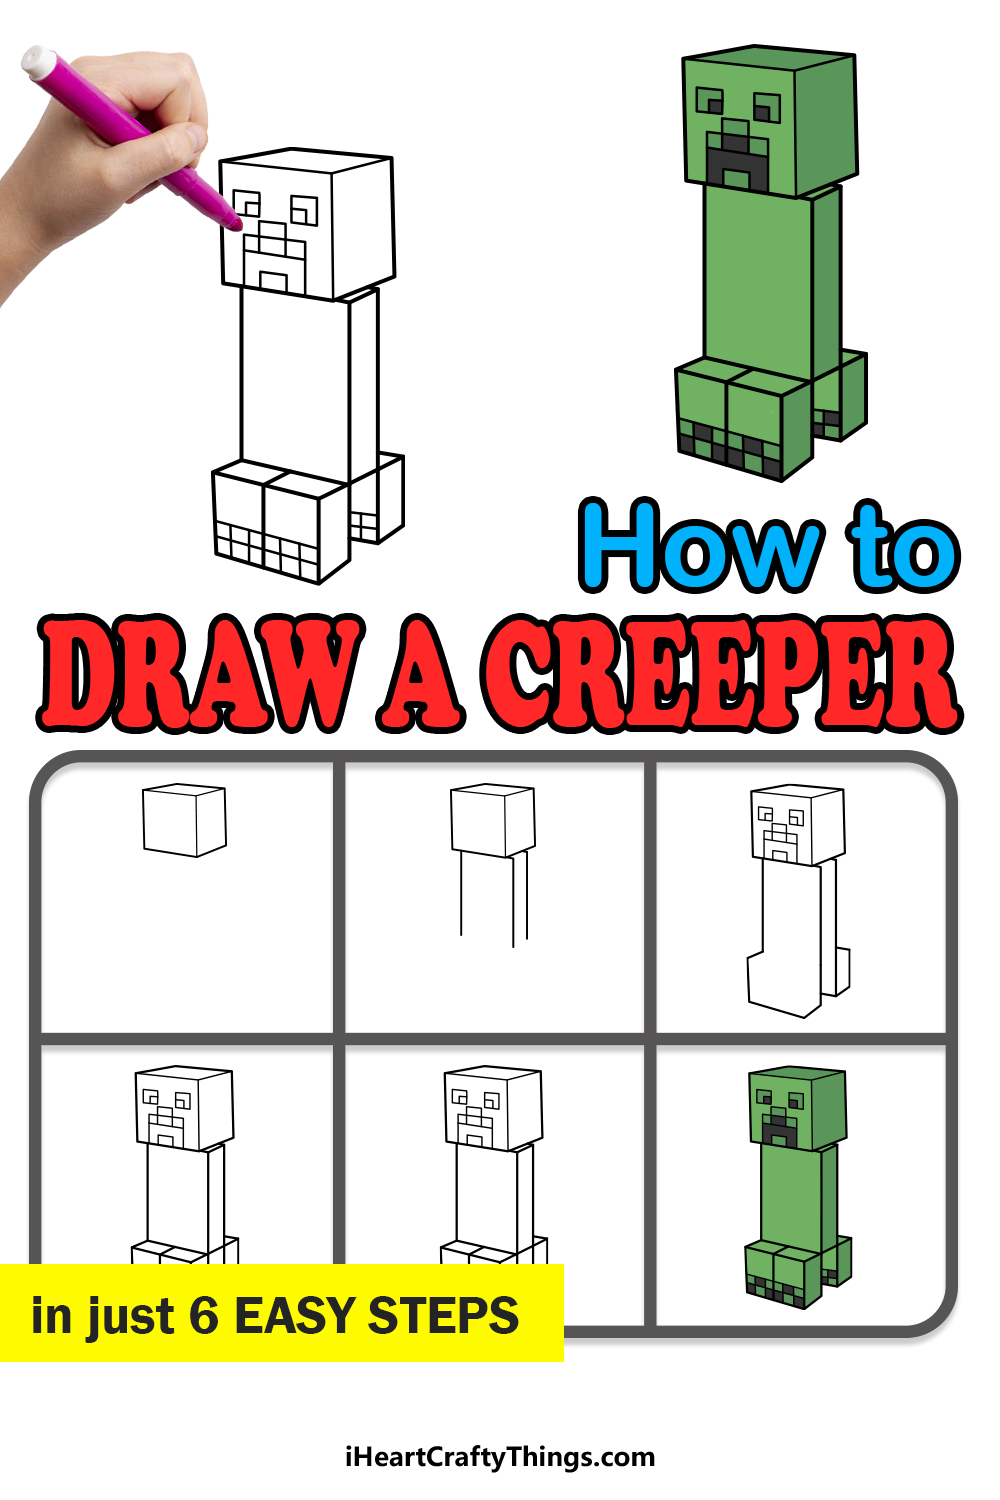
Minecraft is one of the most popular games in the world, with millions of fans playing it every day. It is a game that allows for unlimited creativity and potential thousands of hours of playtime.
When playing the game, there is one character that can turn up that’s enough to ruin anyone’s day.
The Creeper lives up to its name by not only looking really creepy but also by the fact that they can appear out of nowhere to present a major threat to any player.
Despite not being a welcome sight, many people still love this character due to its cool look.
Learning how to draw a Creeper is a great way to create some cool artwork featuring one of these terrifying creatures!
This step-by-step guide on how to draw a Creeper in just 6 steps will show you everything you need to know about recreating this scary being.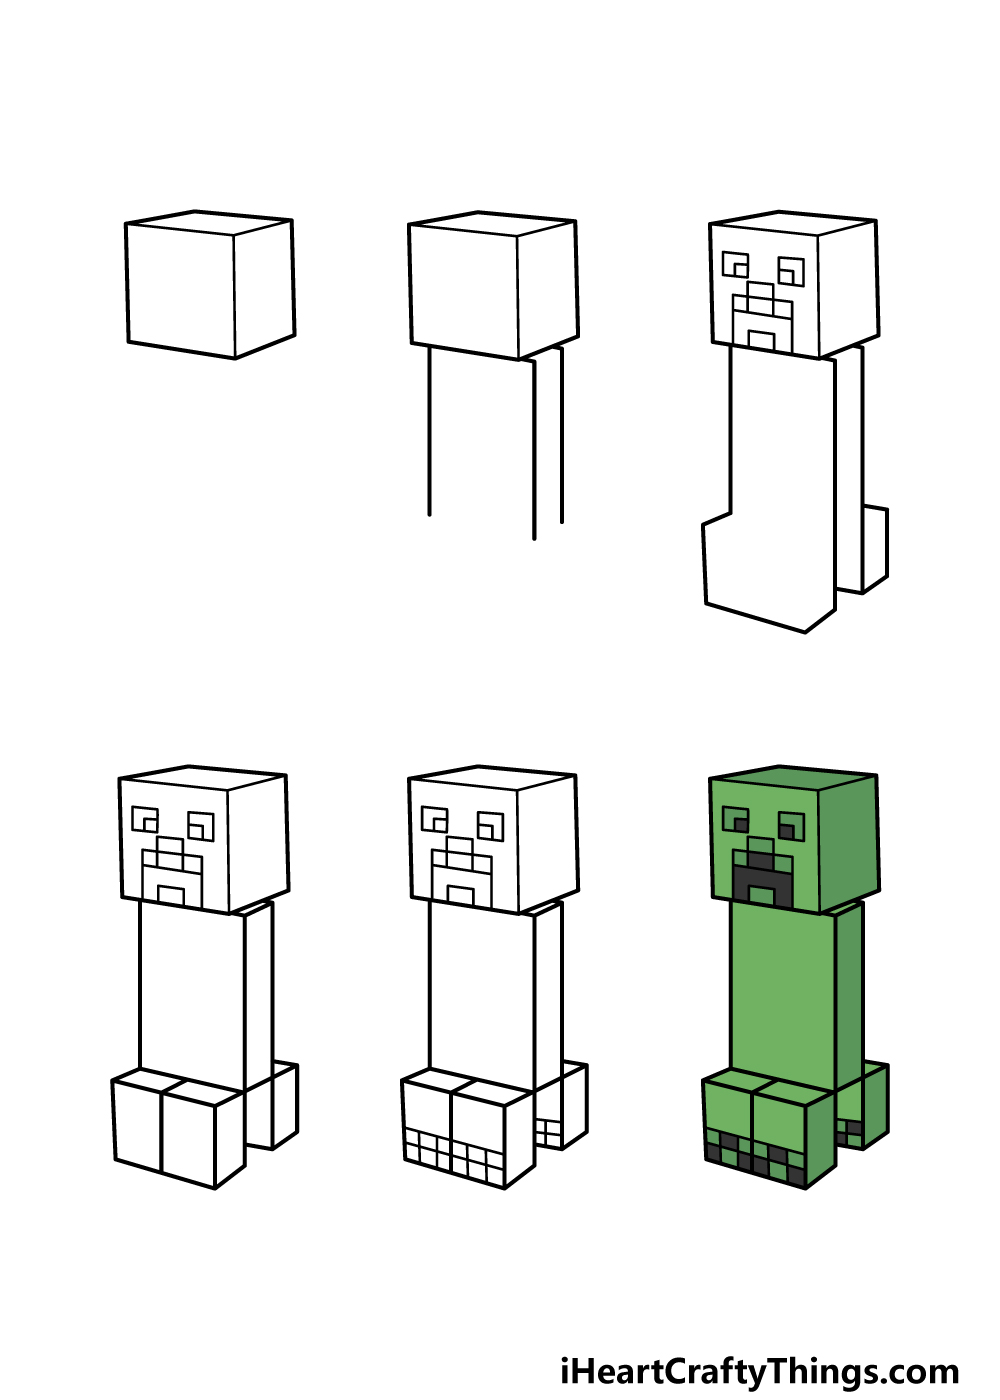
How to Draw A Creeper – Let’s Get Started!
Step 1
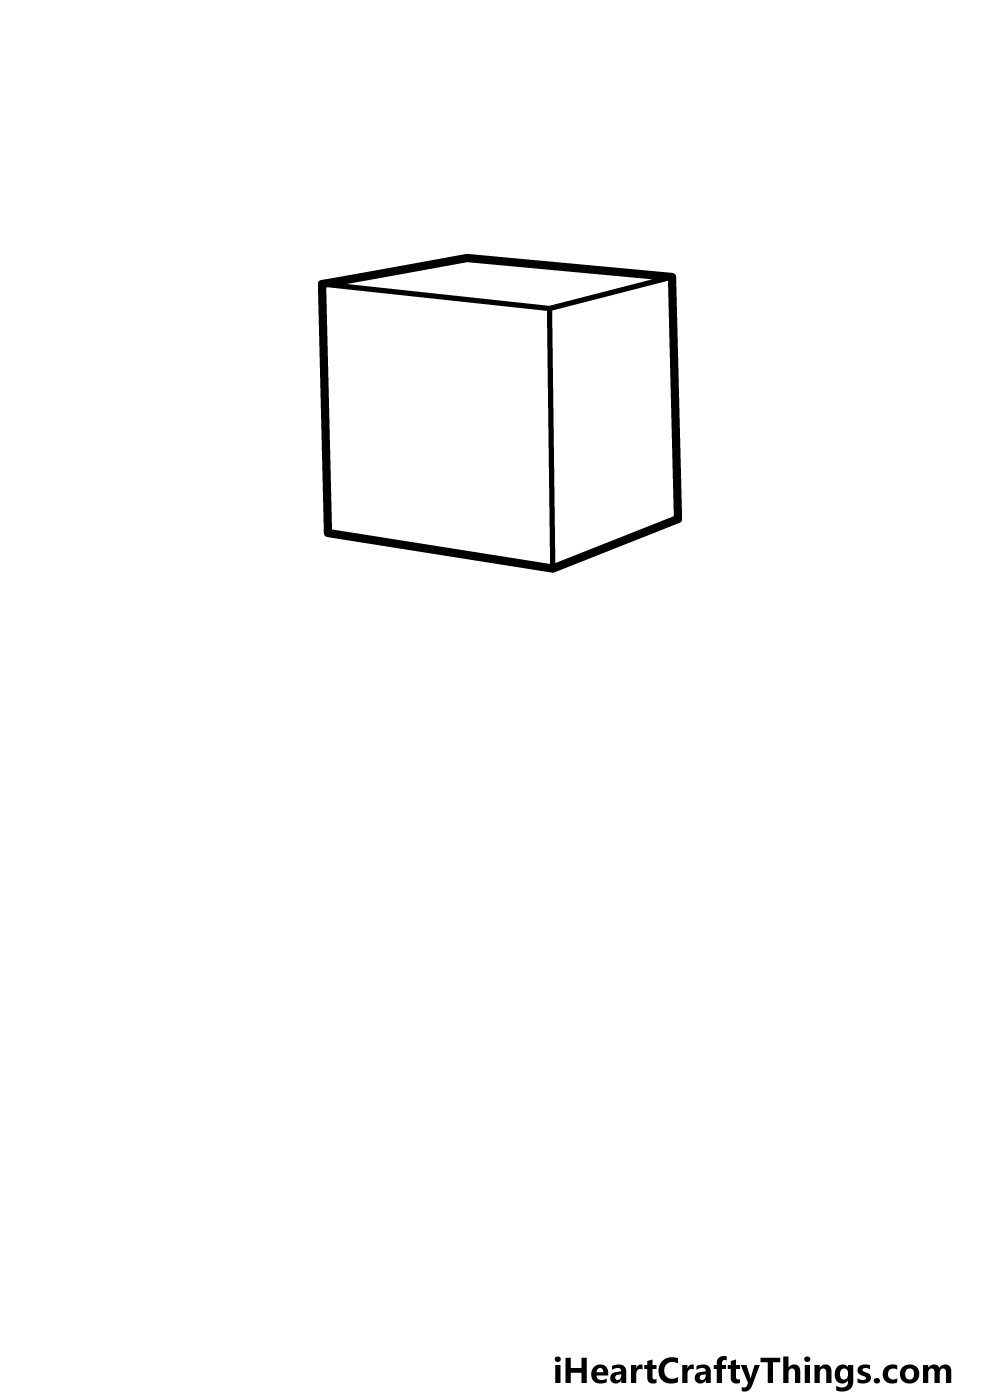
As with pretty much anything in Minecraft, the Creeper is made up primarily of square blocks and cubes.
For that reason, you may want to have a ruler on hand as you work on this guide on how to draw a Creeper. This will make all of the straight edges much easier to draw properly!
With that in mind, we will begin by drawing a cube shape for the head of the Creeper. Start by drawing a square that’s at a bit of an angle for the front of the Creeper’s head.
Then, draw a shorter square shape for the side and the top of the head to give it a cube shape. This can be surprisingly tricky, so try to copy our example image as closely as possible!
Then we can move on to step 2!
Step 2 – Now, draw the start of the body for the Creeper
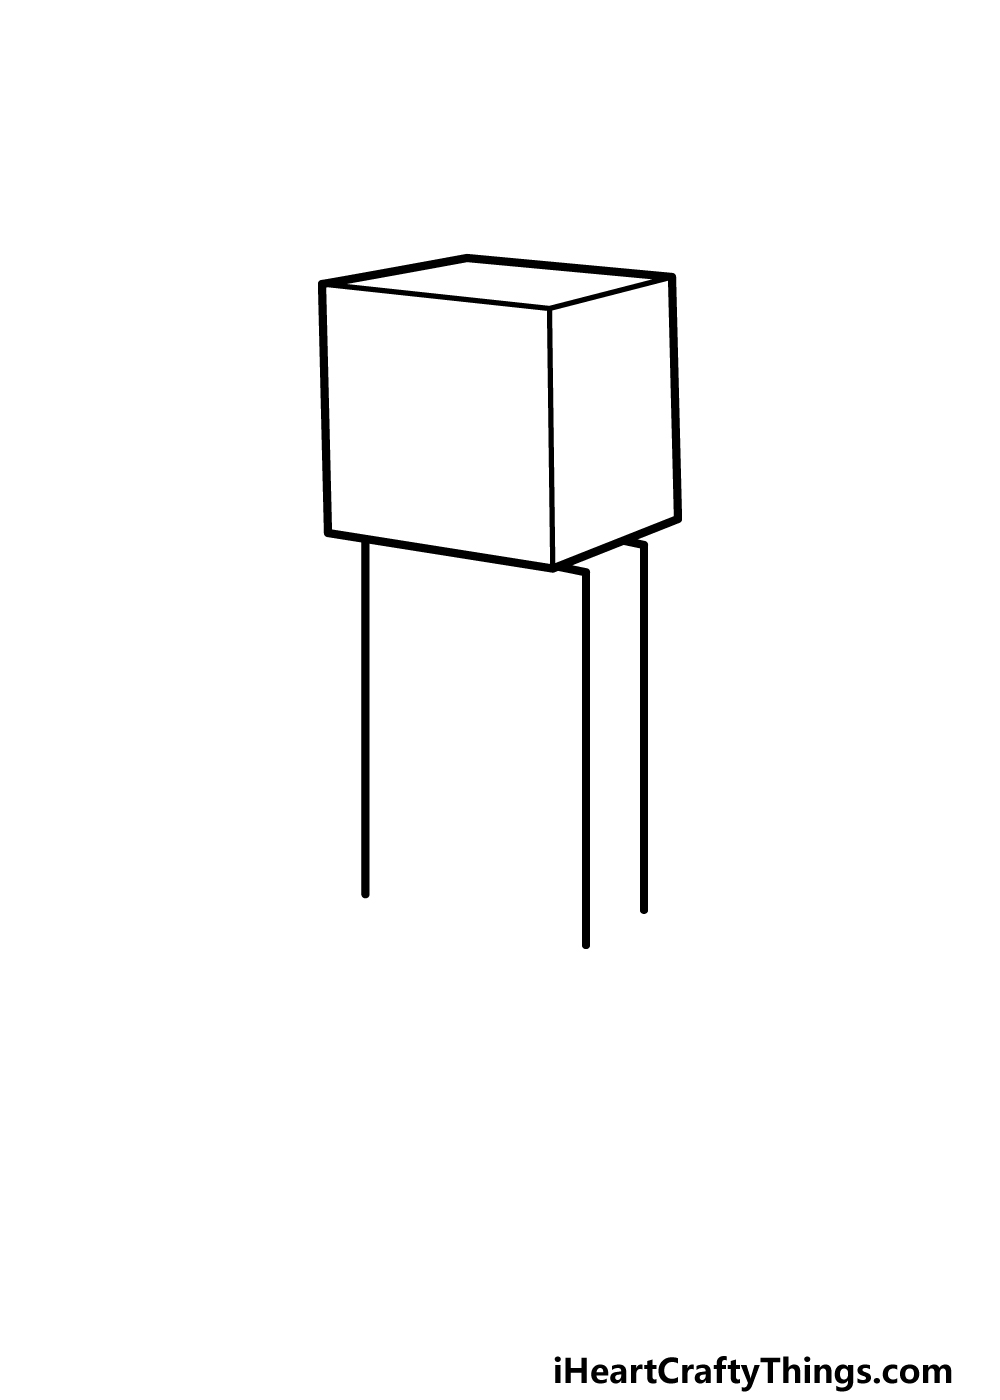
The body of this character is quite long and thin, and this is the part we will be starting for this part of your Creeper drawing.
Once again, this is a step where using a ruler would make your life much easier! To start this, draw two lines coming down to form the long, rectangular body for the Creeper.
Then, add another line running parallel to the right of the body to give it some more depth. There will be an empty space left at the bottom of the body, but that will be an area that we will fill in soon!
Step 3 – Draw the facial details and foot outlines
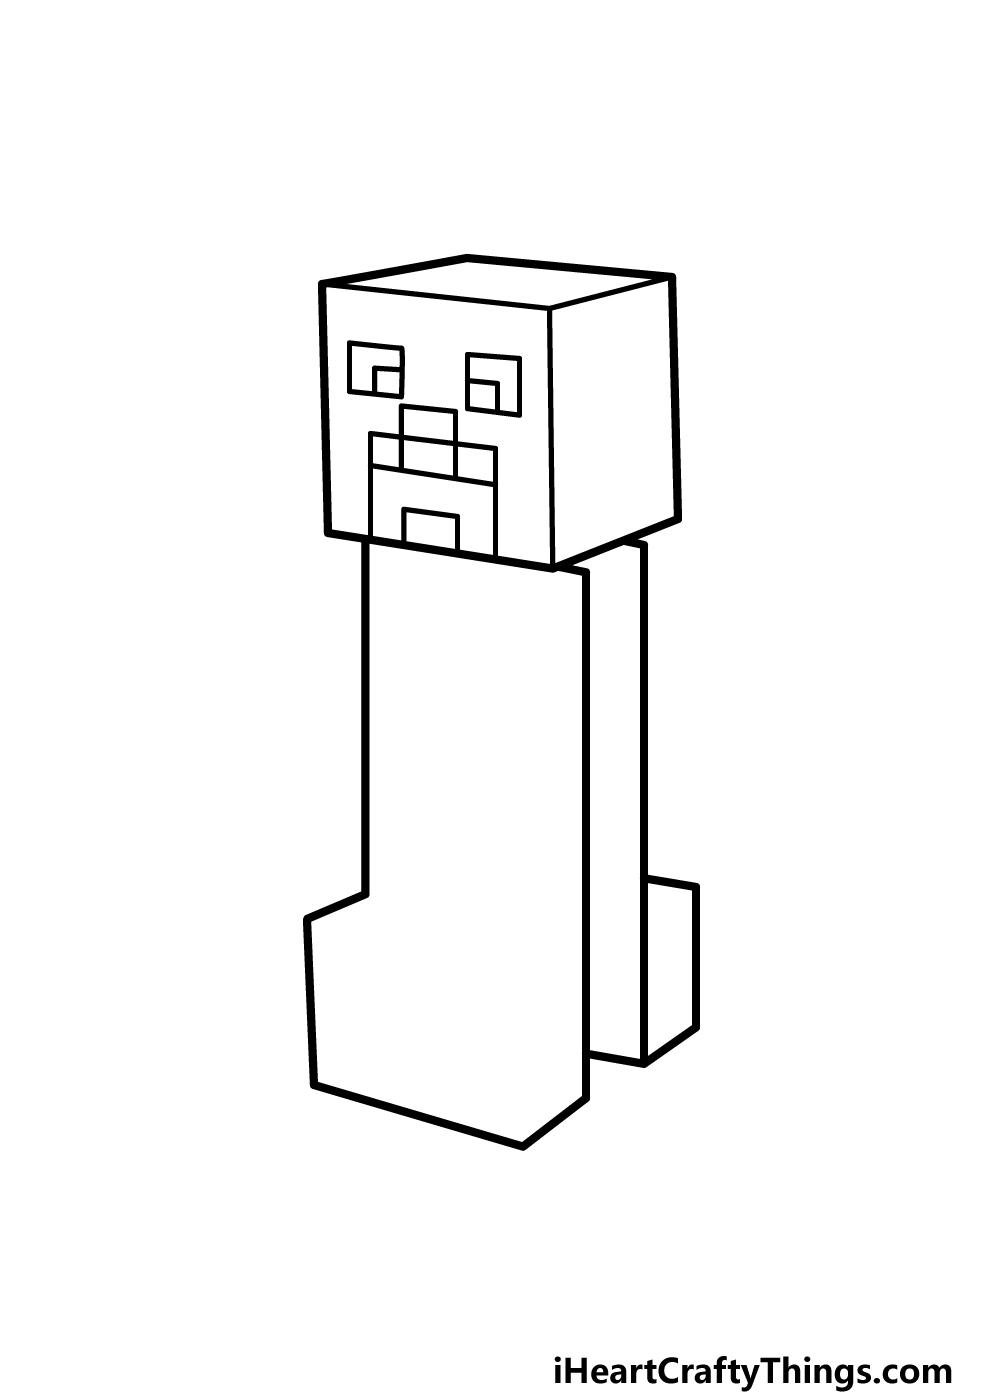
The Creeper has a really specific face design that is simple yet effective. This is what we will be drawing in this step of our guide on how to draw a Creeper.
For the eyes, draw two fairly small square shapes near the center of the face. These will then have two even smaller squares inside the bottom inner corners of the eyes for the pupils.
For the mouth, you can then start with four small squares against one another. Draw a horizontal rectangular shape under these, and then add a small square inside of it.
Finally, use some straight lines for the squared feet of the Creeper as they appear in the reference image.
Step 4 – Next, draw some details for the feet
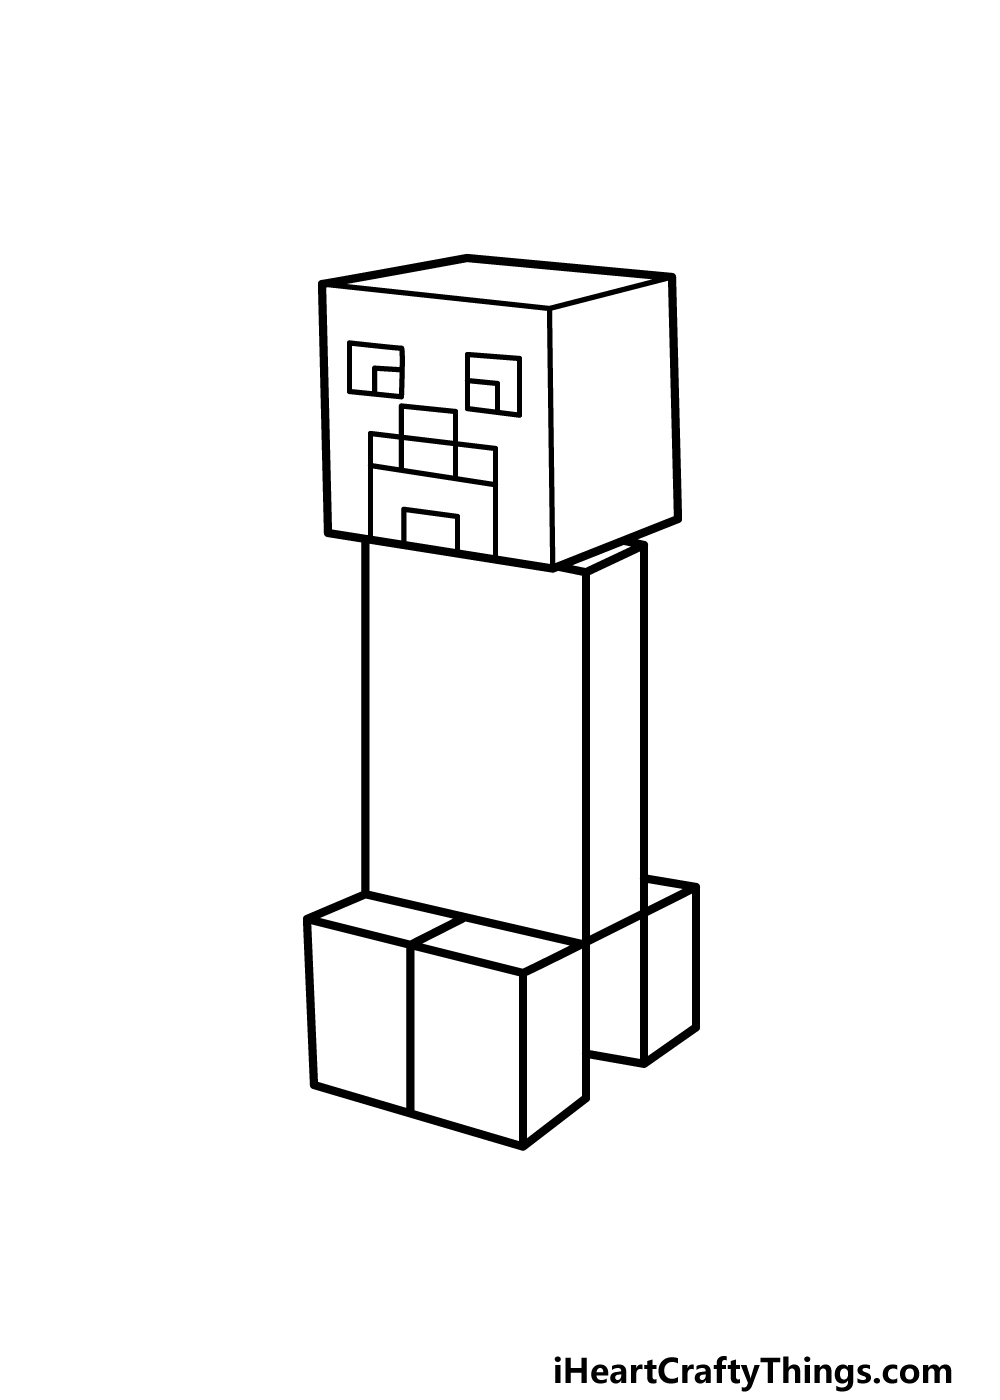
Continuing with this Creeper drawing, we will now be finishing off the outlines for the feet.
We want the feet to look like two rectangular blocks next to one another, so using the outlines you started in the previous step we can add some more straight lines to finish the effect.
There will also be one more short, straight line added near the top of the body to make it look more rectangular as well.
Once these lines have been added, we can then proceed to the final details in the fifth step of the guide.
Step 5 – Add the final details to your Creeper drawing
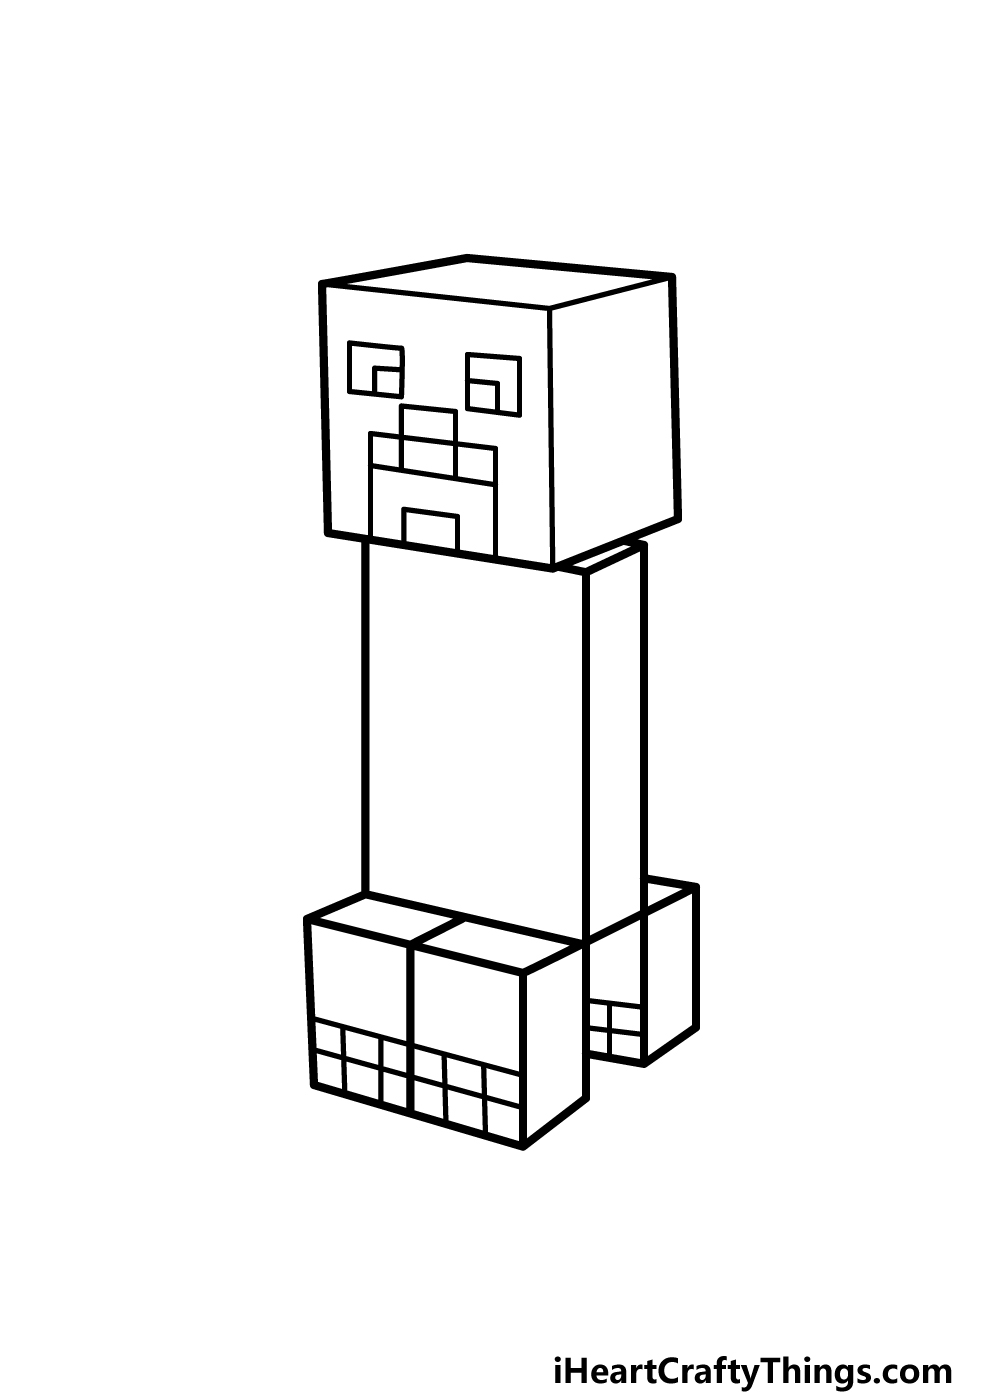
This step of our guide on how to draw a Creeper will be all about finishing off some of the finer details to complete it.
o do this, we will first be adding a small grid pattern near the base of the feet. This can be done by drawing six small squares at the bottom of each foot for this grid pattern.
There will be similar grids on the back feet bases as well.
Once these details are drawn, you can then finish off the image by adding your own extra details as well.
You could draw a background to show off the Minecraft environment that this Creeper is haunting! What kind of setting can you imagine for this spooky Creeper?
Step 6 – Finish off your Creeper drawing with color
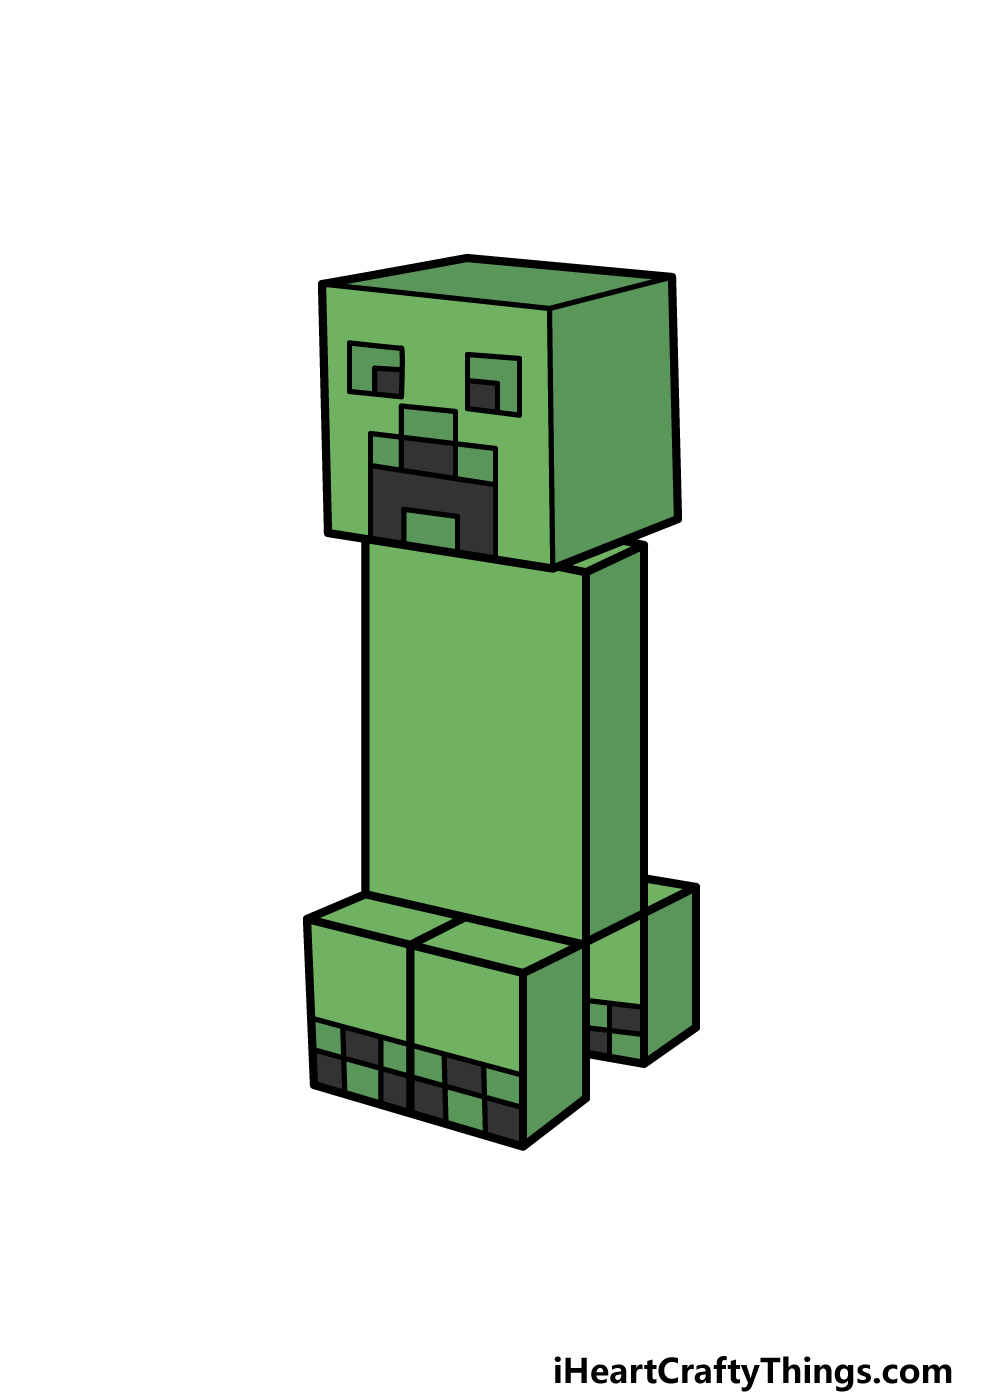
The Creepers in Minecraft have a distinctive green color scheme, and that is what we went with in our example image for this Creeper drawing.
This reference picture can serve as a great blueprint for you if you want to portray the Creeper in its typical color scheme!
Even though it is entirely green, you can still get some color variations by changing up the shades of green that you go for.
While you could create an accurate portrayal of the Creeper, you could also create a unique variation of your own by changing up the colors!
Whichever approach you end up going for, you can also have some fun with the various art mediums that you use to accomplish them.
What colors and mediums will you choose for it?
4 More Ways To Make Your Creeper Drawing Unique
These 4 tips for your Creeper sketch will show you how to make it even greater!
The Creeper is one of many characters and creatures you will encounter in the game of Minecraft. To further fit the theme, you could add some of these characters to this drawing of a Creeper.
These could be one of the many animals you encounter in the game, or maybe some of the other creepy creatures such as the skeletons. Those are just a few of the characters you could add, but there are many more!
If you decide to add more characters and are a player of Minecraft in general, you could add some of your own characters to the drawing. For instance, you could replicate your character avatar into the picture.
This would be a great way to not only make it more unique, but also more personalized to your own Minecraft adventure. Can you think of any other ways you could bring elements of your own gameplay to this picture?
Once you really have the hang of this Creeper drawing, you could create a swarm of the fearsome creatures! If you were to do this, there would be a few ways that you could make them look distinct.
One simple way would be to draw them facing in different directions. Luckily the Creeper is made up of basic shapes, so changing these details shouldn’t be too difficult to do.
The only question is how many Creepers will you include in this horde?
Finally, it would be awesome to finish up with a background for your Creeper sketch. There are many environments, biomes and locations that you can explore in the game.
This means that you would have many options available to you if you wanted to add a background. It could be a snowy tundra, a hot desert or maybe a lush forest.
These are just a few suggestions, but there are so many more you could use for a background. What other locations can you think of for the background?
Your Creeper Drawing is Complete!
That brings you to the end of this guide on how to draw a Creeper! At the end of it, you have a fantastic portrayal of this classic Minecraft monster.
We hope that this guide made it easier and more fun for you to recreate this famous Minecraft monster!
When you have learned how to draw this creature, remember that you can also keep it going by adding your own additional ideas, details and creative choices.
How will you finish off this picture with your own creativity?
You can also find many more awesome drawing guides to enjoy on our website!
These guides cover a wide range of different subject matter and objects, so be sure to check in often as we also upload new guides frequently!
We also hope you will share your finished Creeper drawing on our Facebook and Pinterest pages for us to enjoy!