It’s always a thrill to get to see a live sporting match and be part of an excited crowd.
There are many ways that the levels of excitement are driven even higher at these events, from loud music to confetti and mascots.
Often cheerleaders will also help to keep the energy levels high, and they will perform elaborate dances and tricks to wow the audience and motivate the players.
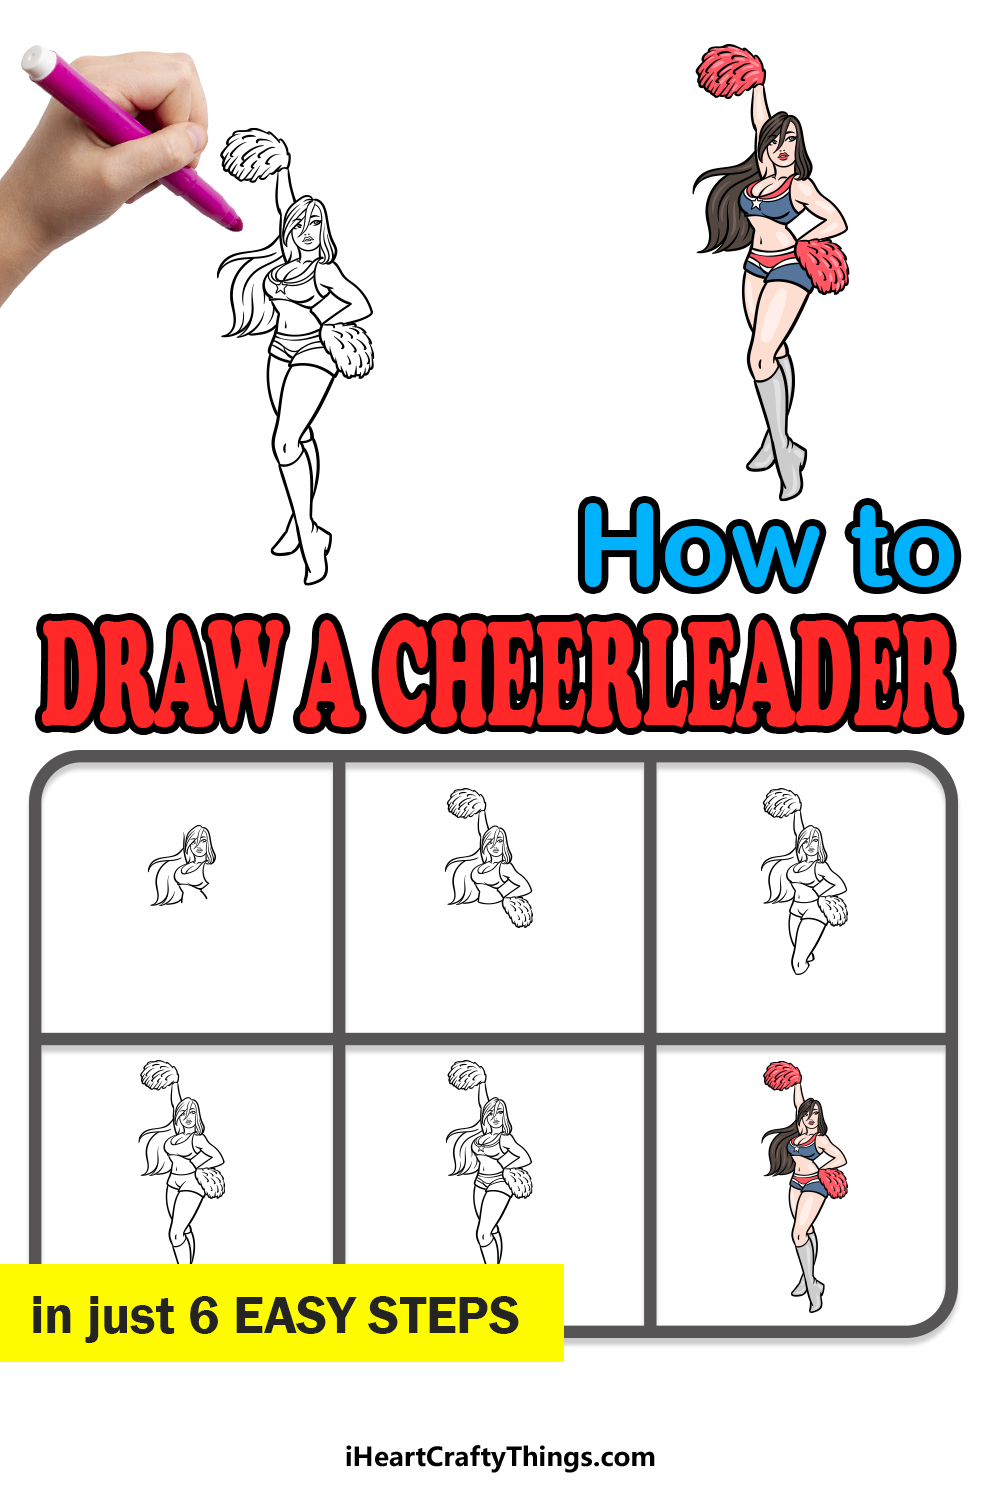
Learning how to draw a cheerleader can be a great way to recreate the excitement of a live sports match.
This tutorial you have in front of you will show you everything you need to know to make this a reality!
Get ready for some high-energy art fun as we get this step-by-step guide on how to draw a cheerleader started!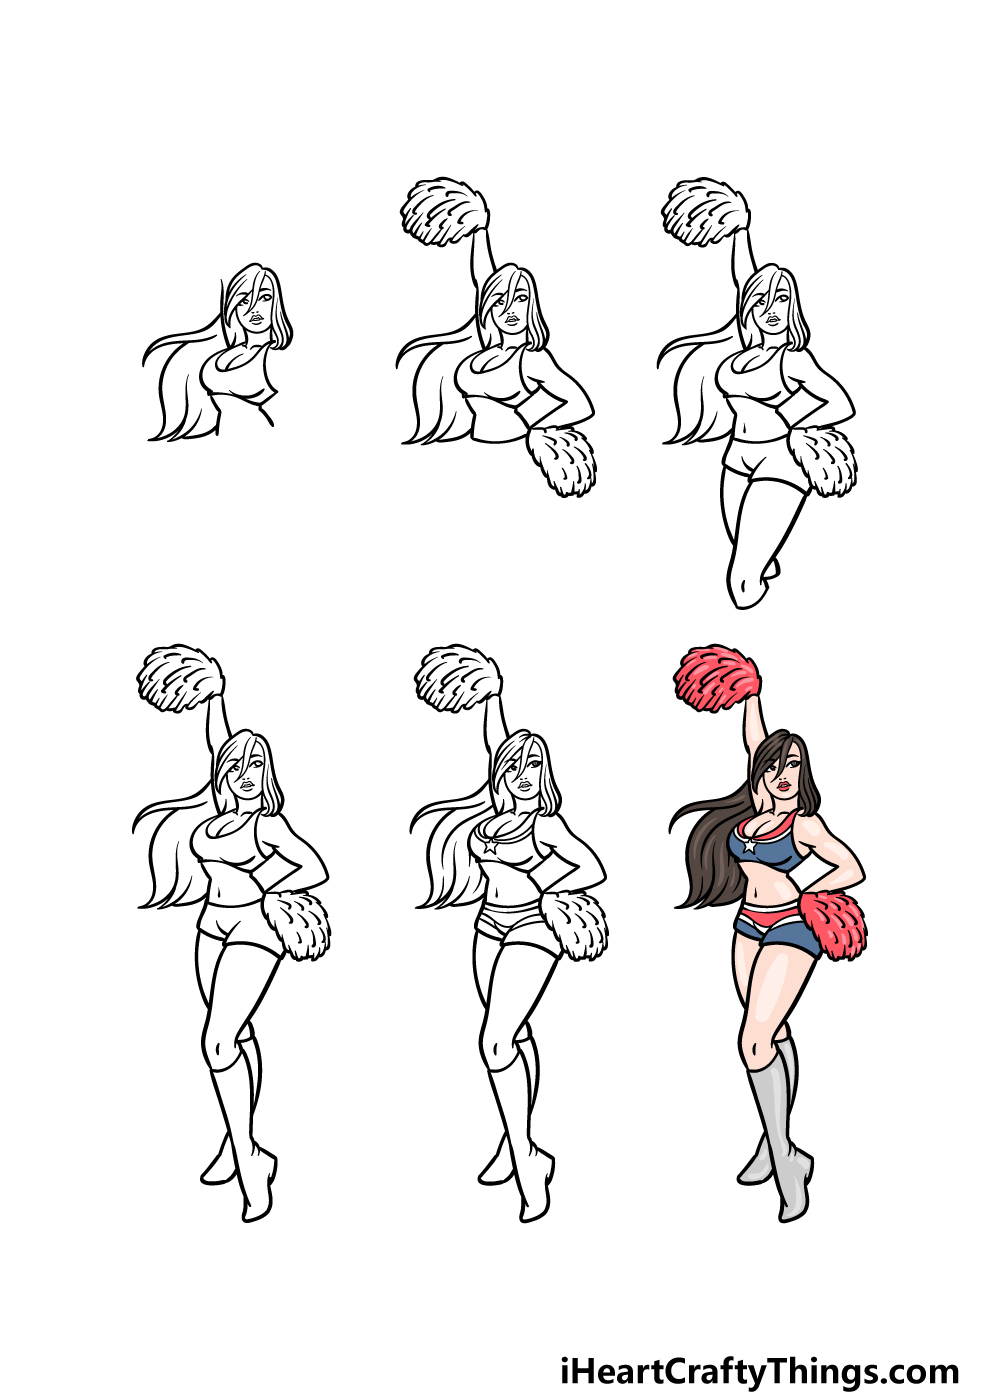
How to Draw A Cheerleader – Let’s Get Started!
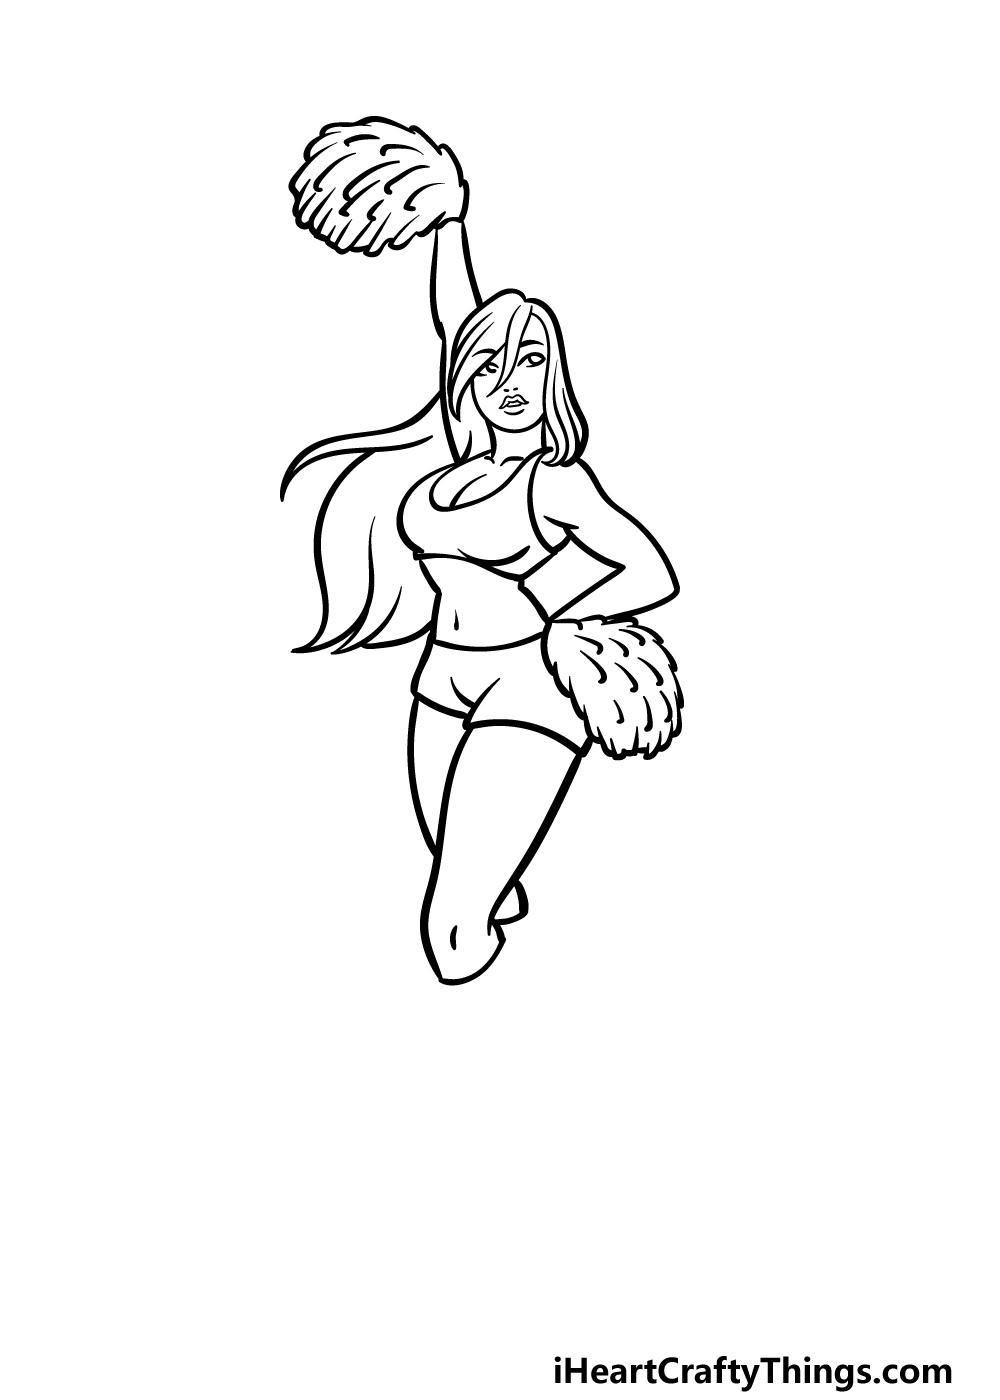
Step 1
Drawing humans is never a straightforward task, and this is true even if the style is a bit cartoony.
This difficulty is made even stronger when drawing a human in a dynamic pose, but there’s no need to worry!
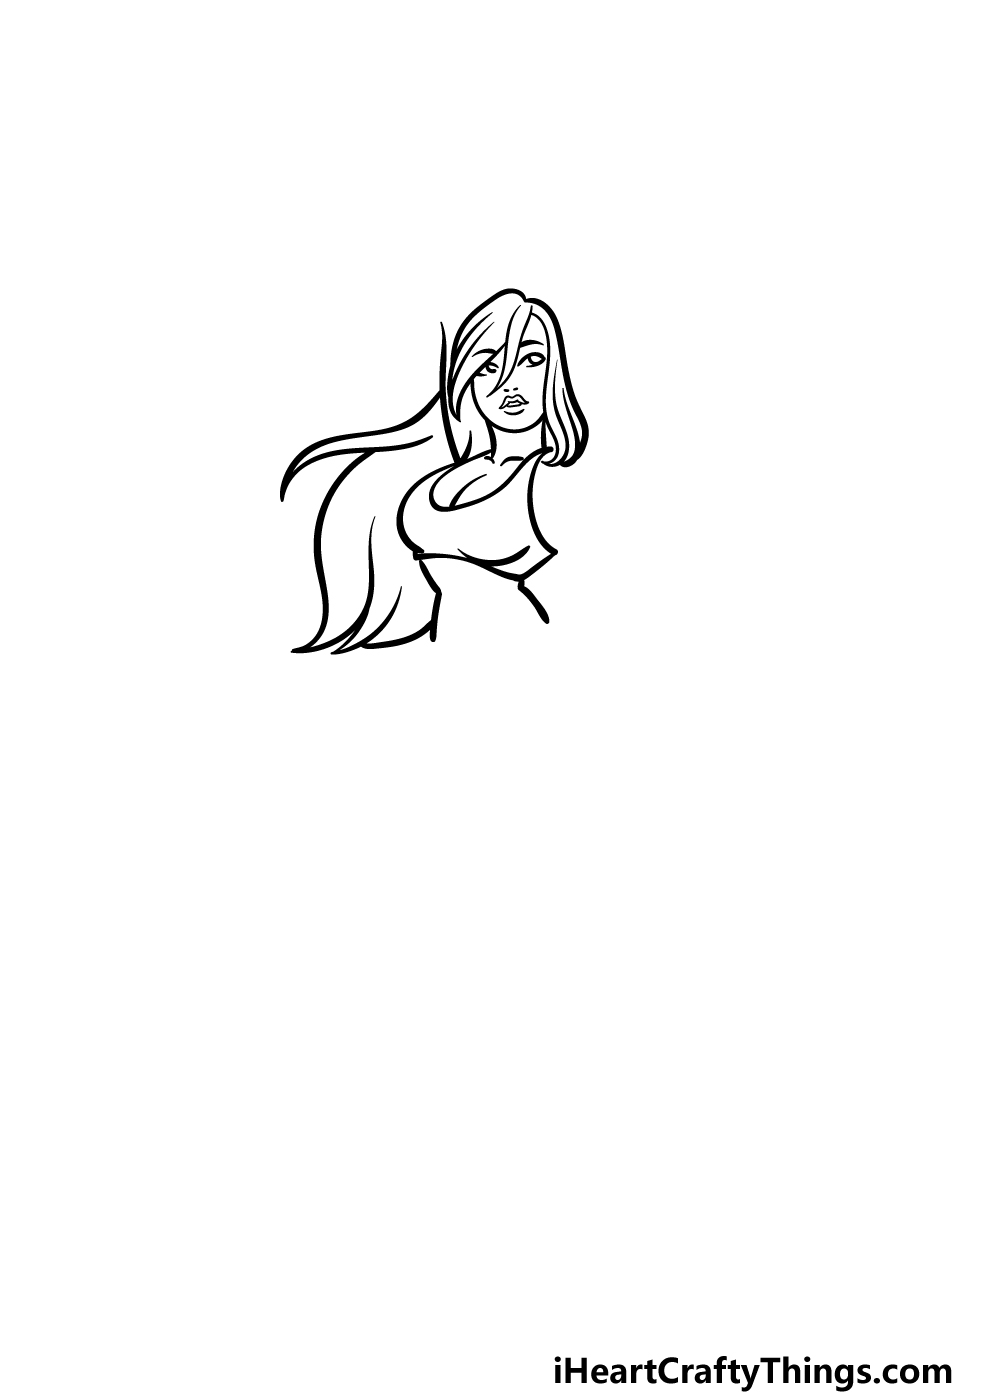
In this guide on how to draw a cheerleader, we will be breaking it down into smaller steps to make it easier to manage. For this first step, we will focus on her head, hair and chest.
Start off by drawing a simple curved line for the bottom of her face. Then, we will be using some wavy lines with pointy tips for the hair surrounding her face.
You can finish off that portion with some simple facial details.
Use some more curved lines for the outline of her chest and the top that she is wearing, and then you can dra some more of her hair flowing around her head.
Finish off with some lines for her waist, and then we can proceed!
Step 2 – Now, draw her arms and pompoms
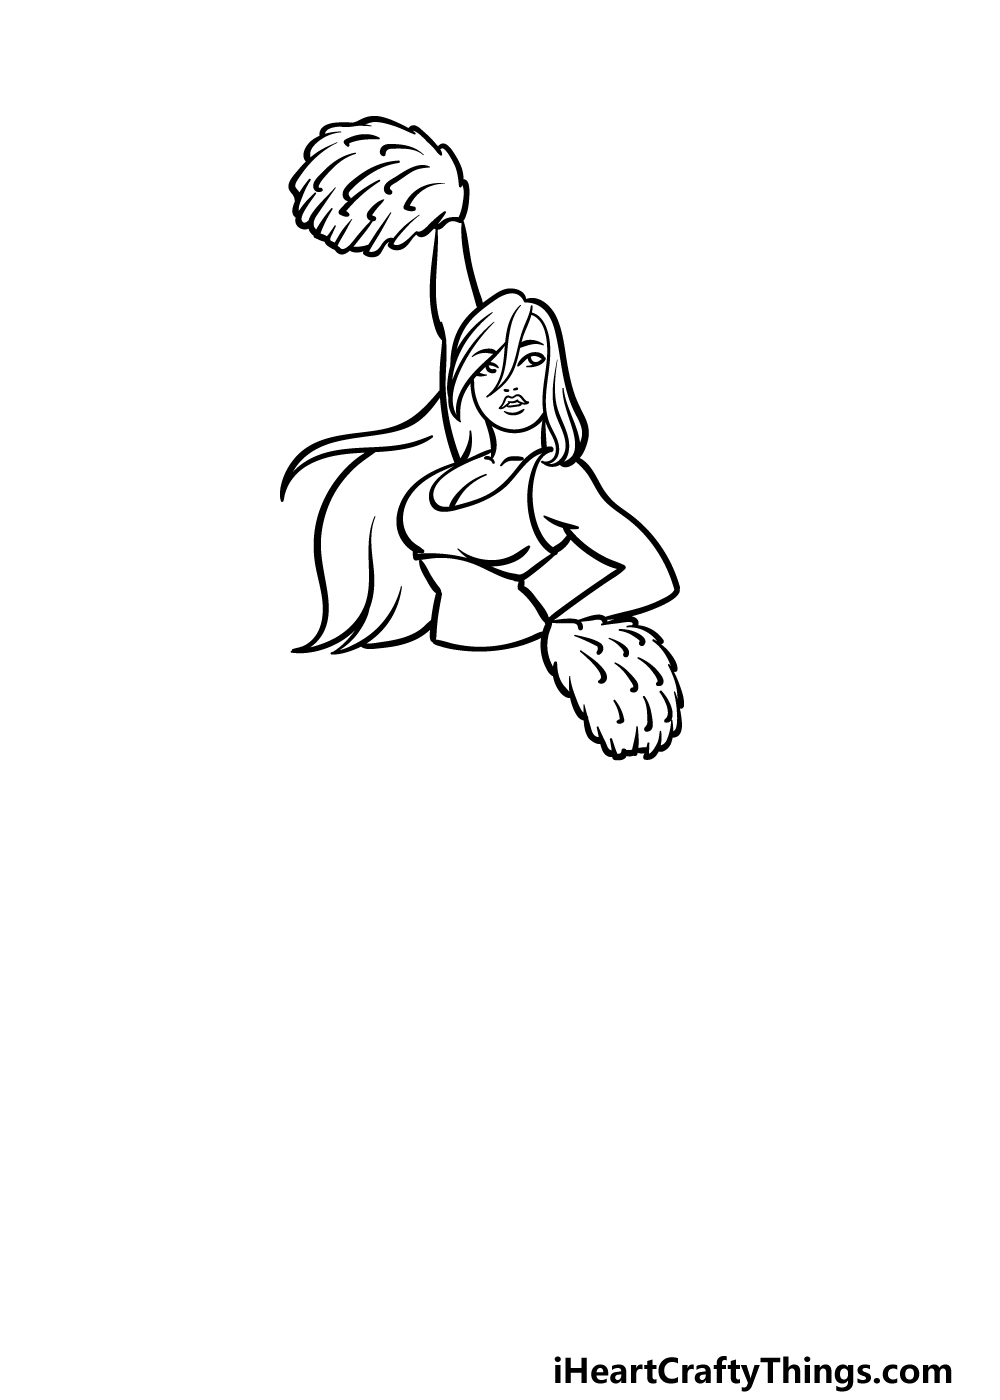
Continuing with this cheerleader drawing, we will now be adding her arms and the pompoms attached to the ends of them.
The arm on the left will be extending up, whereas the one on the right will be bent to her waist.
Then, use some jagged lines for the outlines of the pompoms, and add some details inside of these outlines to make them look like they are nice and fluffy.
That’s all there is to it, and then we can move on to step 3!
Step 3 – Draw the start of her legs in this step
For the third step of this guide on how to draw a cheerleader, we will begin drawing her legs. First, we will be drawing the shorts that she is wearing.
Then, use some rounded lines for the top halves of her legs. The leg on the right will be crossed over the one on the left a bit, as shown in our reference image.
Step 4 – Next, draw the rest of her legs
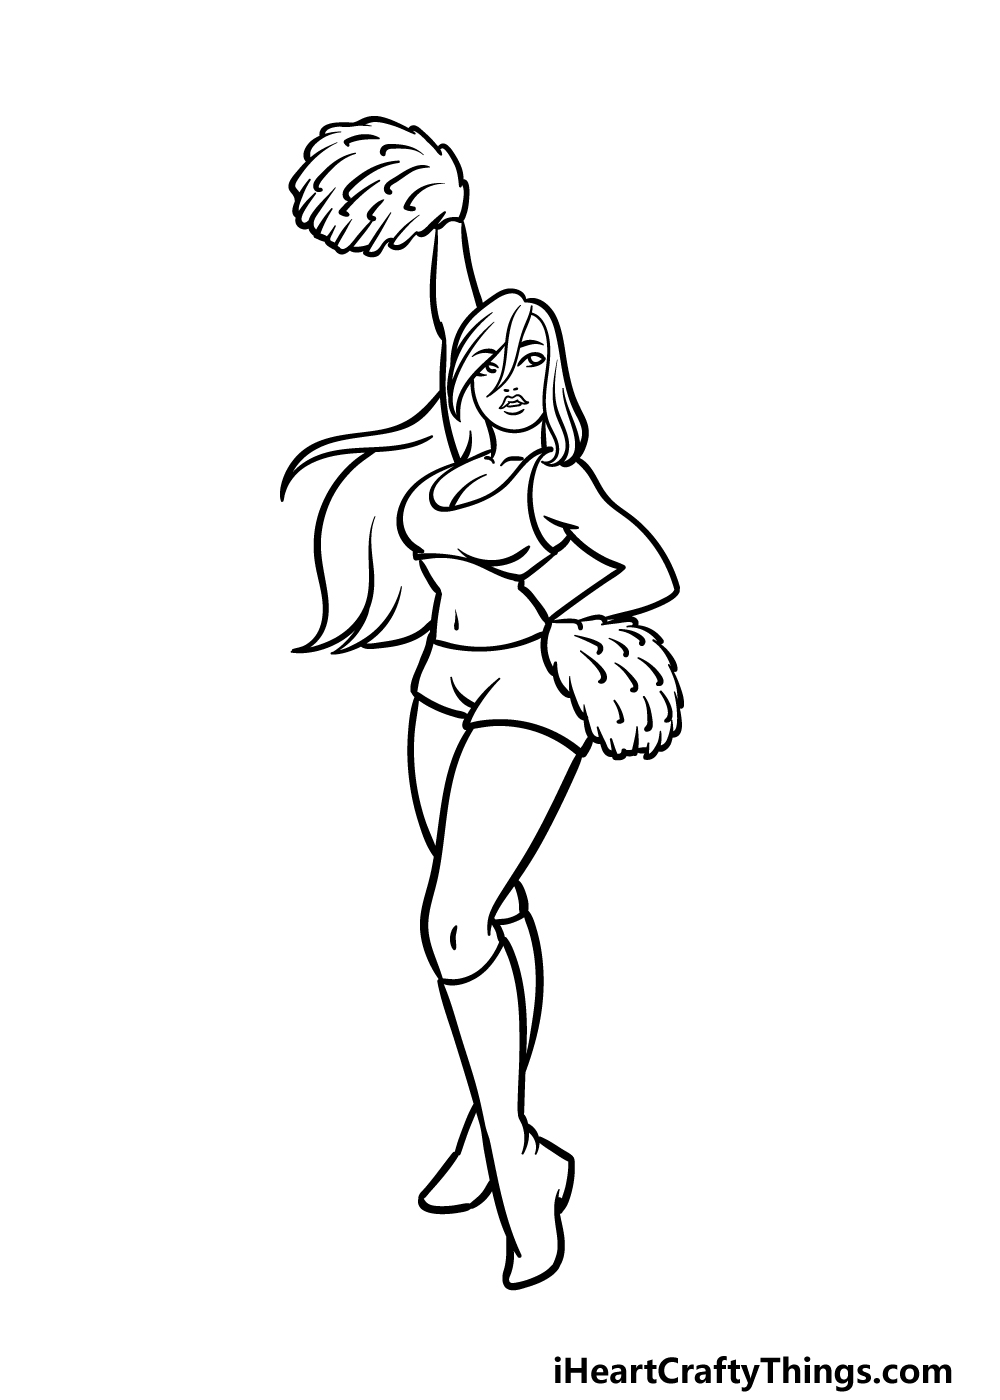
You started the legs of your cheerleader drawing in the previous step, and we will finish them off in this part.
She will be wearing some boots that extend to just underneath her knees, and you can use some slightly curved lines to draw these boots.
Because of the way her legs are positioned, we won’t really see much of the leg on the left.
Once you have completed these boots, we shall be ready for the final touches in the next step!
Step 5 – Add the final details to your cheerleader drawing
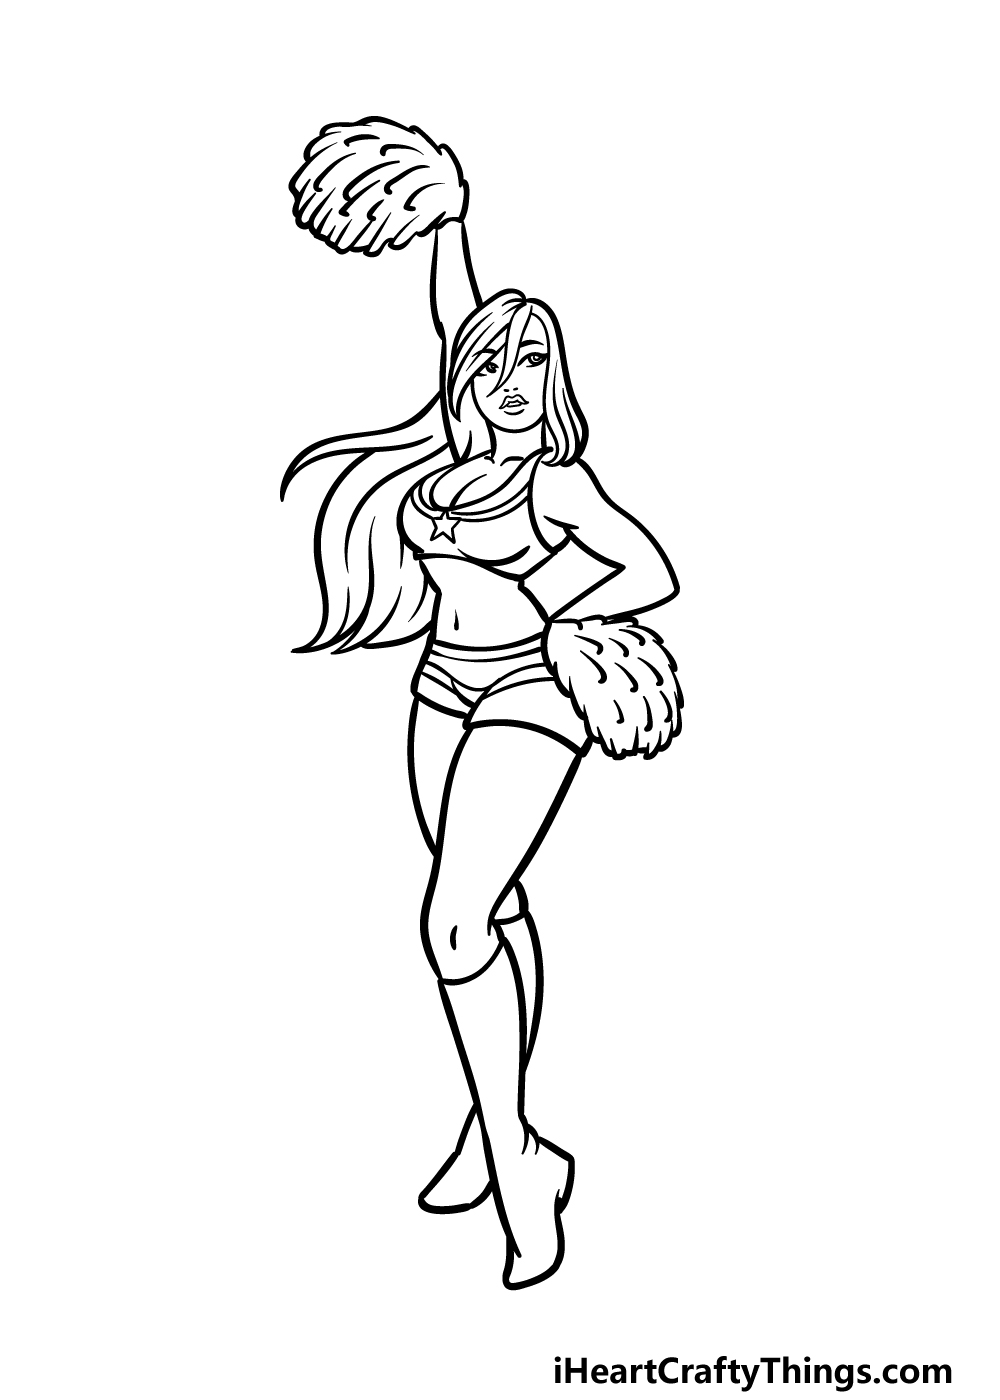
Most of the drawing is complete now, but before we will move on to the final step of this guide on how to draw a cheerleader, there will be a few final details to add.
These details will mainly be focused on her outfit, but there will also be some opportunity for you to add details and ideas of your own!
First, we will add some simple line details to her hair and her eyes to give them a bit more depth.
Next, we added some stripes and a star to the top that she is wearing, and we also added a stripe to her shorts.
These are the details that we added, but if you have different ideas for the decoration and style of the clothes she’s wearing, then you should definitely go for it!
You could even draw a background, and if you do that then what sort of background can you imagine for her?
Step 6 – Finish off your cheerleader drawing with color
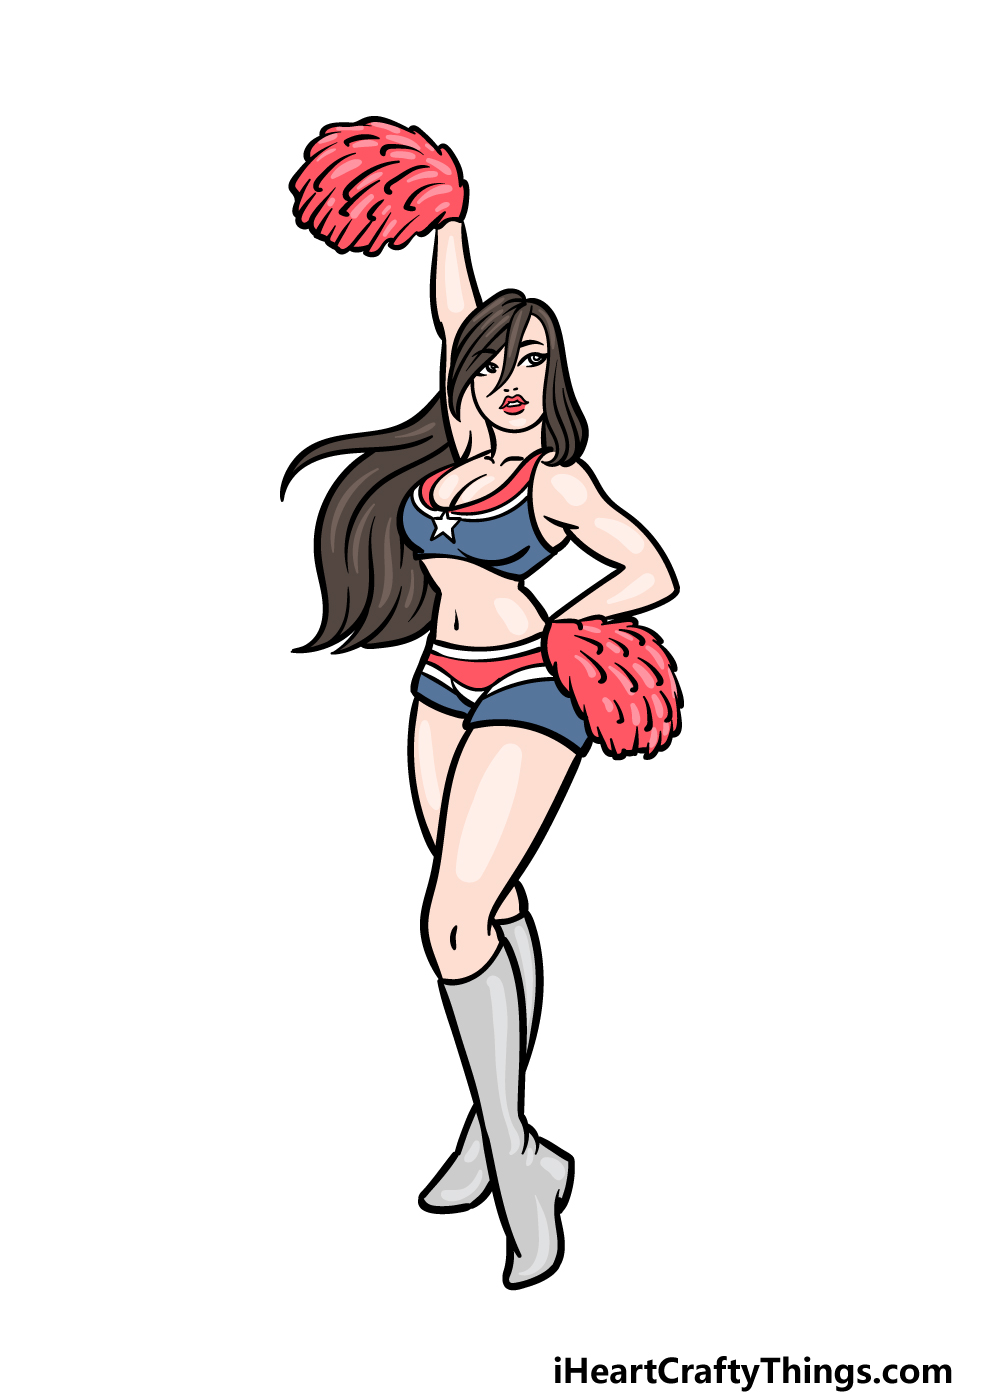
You have now arrived at the final step of your cheerleader drawing, and in this one you can unwind with some coloring fun!
Cheerleaders will often be decked out in bright colors to make them stand out even more, and we certainly went with this approach in our reference image.
We went with some blues and reds for her outfit, and we used a similar pinkish-red color for her pompoms.
These are some great colors for this kind of outfit, but there are plenty more that you could go for!
If you have a favorite sports team or even play for one yourself, you could change up the colors to match those of your team.
What colors do you think would best suit this awesome cheerleader?
3 More tips to make your cheerleader drawing easy!
You’re sure to cheer when you see how much easier this cheerleader sketch can be!
This drawing of a cheerleader may be done in a cartoony style, but she is still rather detailed. One way you could make it easier would be by using a simpler style.
For example, you could go for something even more cartoony and stylized to make it simpler. Not only would this make it easier, but you could also go for an art style that you prefer.
You could also draw more cheerleaders beside her, as this would make them smaller and thus require fewer details. What other art styles could you use for this drawing to make it easier?
One of the best ways you could make this cheerleader drawing easy to do would be to use some additional references. The best way to do this would be to use a real person as a model.
If you happen to know someone who is a cheerleader or who even has a similar build to the cheerleader in this image, then you could get them to pose for you.
If not, then you could look up some images of real cheerleaders online. They don’t have to match the design perfectly, but the closer the look and pose are the better.
These could also help you with creating different poses and looks for the cheerleader.
This final tip for your cheerleader sketch would go really well with the previous one. Whether you use real people and photos or not, using a pencil to map out your drawing can help a lot.
Using your pencil, try to break down the design into simple shapes. This can help to keep the proportions looking accurate.
Then, you can add layers of details with your pencil. Using a pencil can make it easier as you don’t have to worry about making mistakes.
Then, you can add your pen lines when you’re happy with how it looks and then erase the pencil to complete the design.
Your Cheerleader Drawing is Complete!
Give yourself a triumphant cheer, as you have completed this guide on how to draw a cheerleader!
As we mentioned earlier, drawing the human form is always a bit of a challenge, and this is especially true when it is in any kind of dynamic position.
Hopefully this was made much easier for you to accomplish when it was broken down into smaller, more manageable steps!
Now you can add to the composition by drawing some more details. You could add a background, change her outfit or even draw some more cheerleaders for just a few ideas!
These are just a few of the ways you could go about it, so be sure to let your creativity flow as you finish up this drawing.
You can then check out our huge selection of amazing drawing guides that are waiting for you on our website. You can expect many more in the future, so be sure to keep checking in for more.
It would be great if you would also share your finished cheerleader drawing on our Facebook and Pinterest pages so we can see how it turned out!