The rope is a deceptively simple object. It doesn’t look that complex on the surface, but a rope is made up of thousands upon thousands of smaller fibers that come together to form a strong singular object.
Rope can serve many different purposes, from holding things in place to helping people scale sheer cliff faces.
Because it may seem so simple, it can often surprise people that learning how to draw rope can be quite a challenge.
While it’s not always easy, it can be easier when you have the right steps to follow!
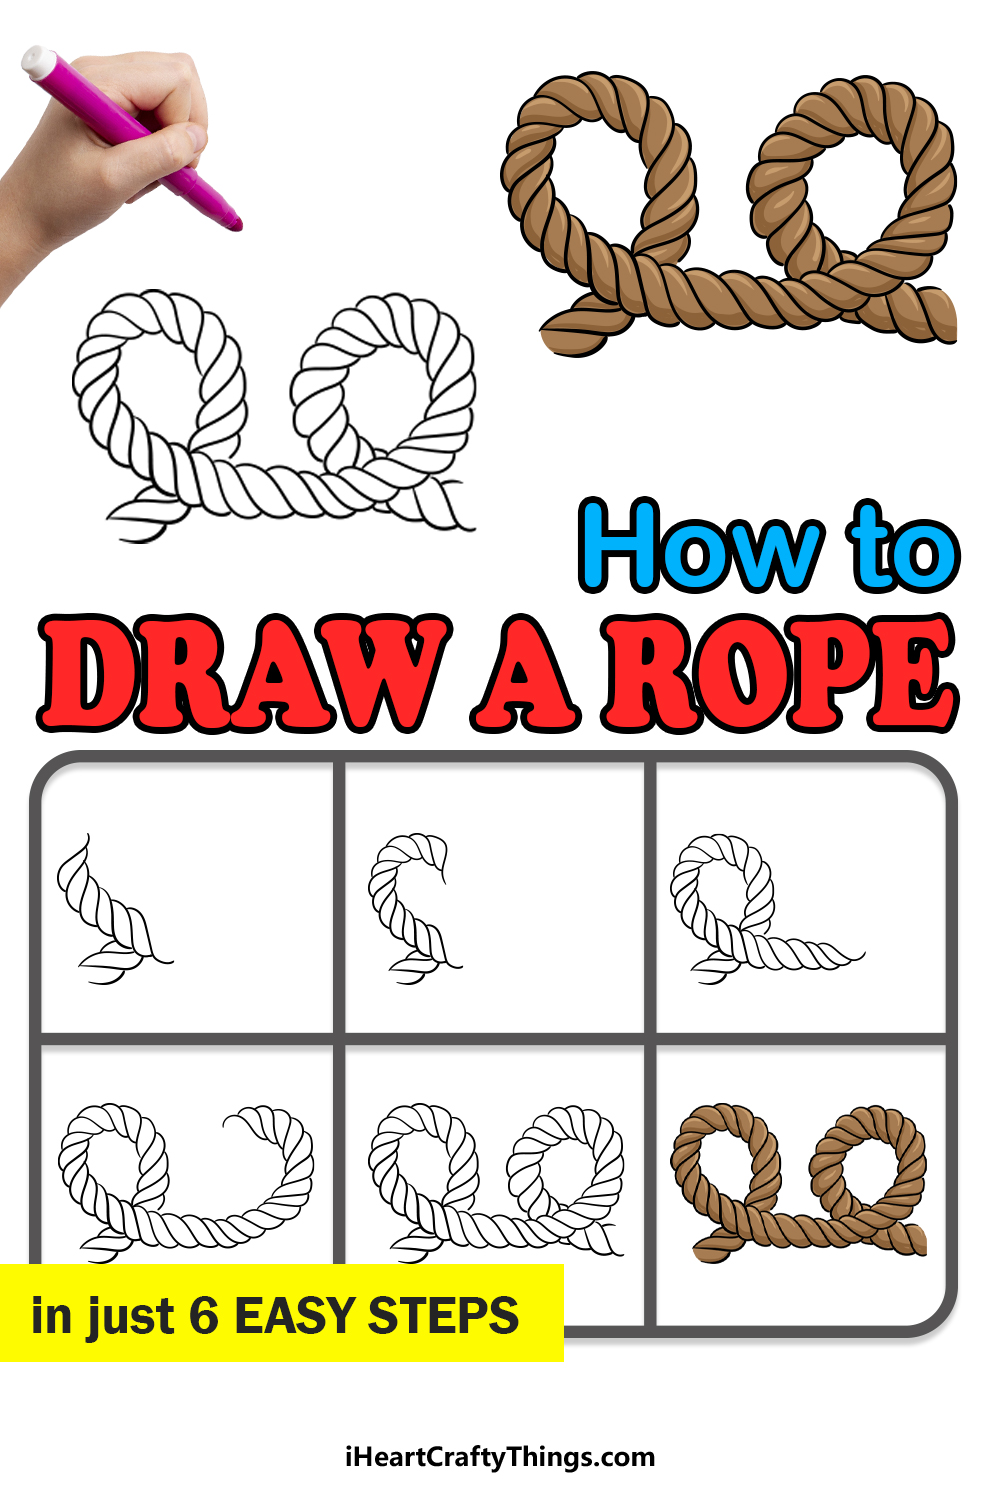
This step-by-step guide on how to draw a rope will help to show you how easy and fun it can be.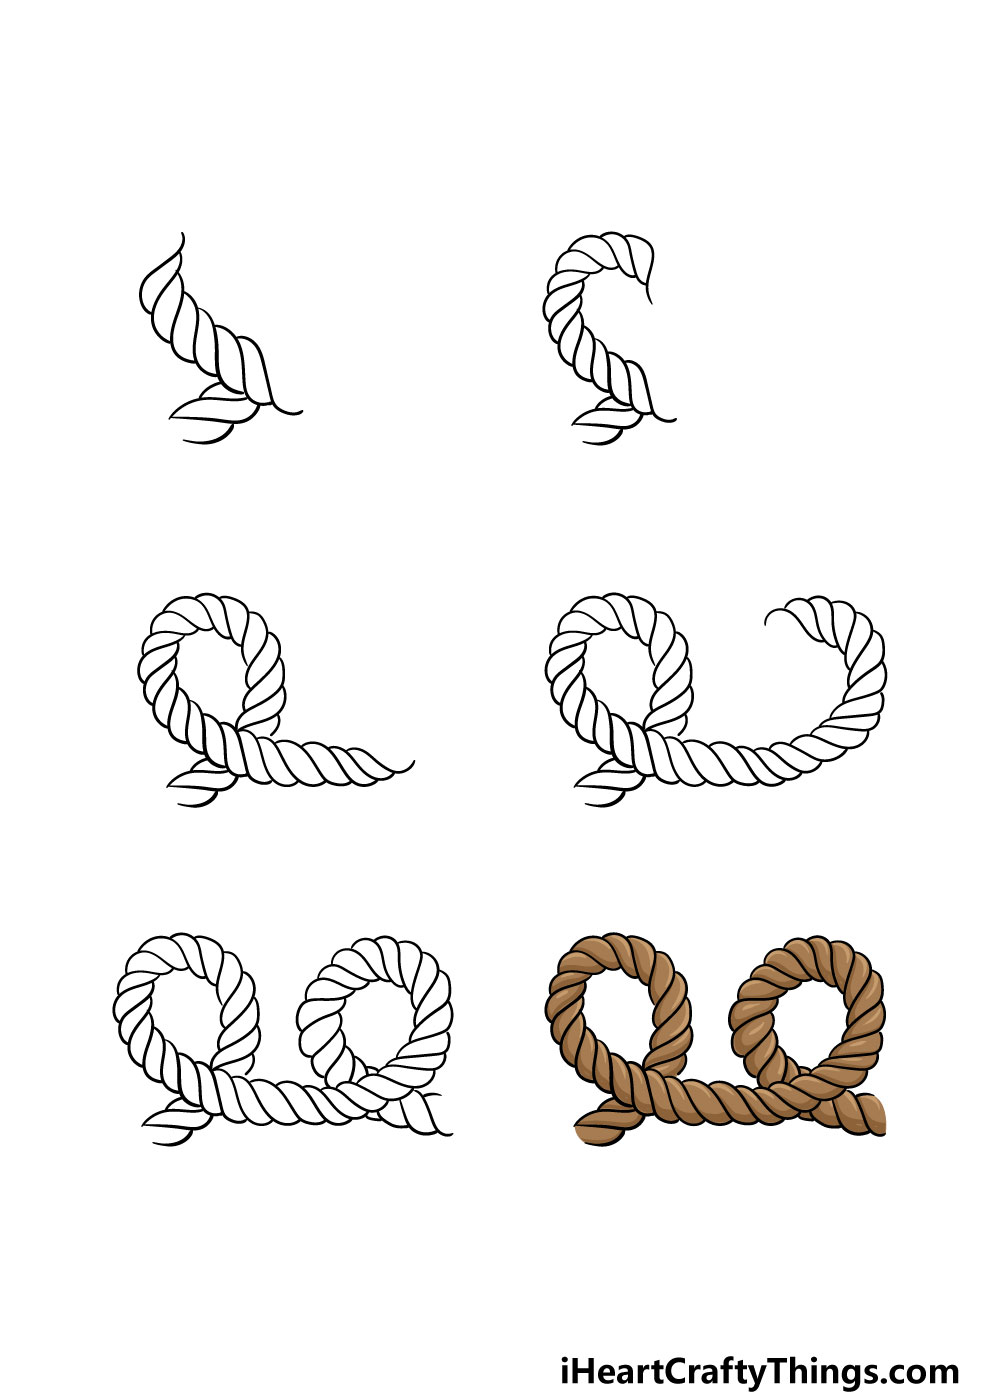
How to Draw A Rope – Let’s get Started!
Step 1
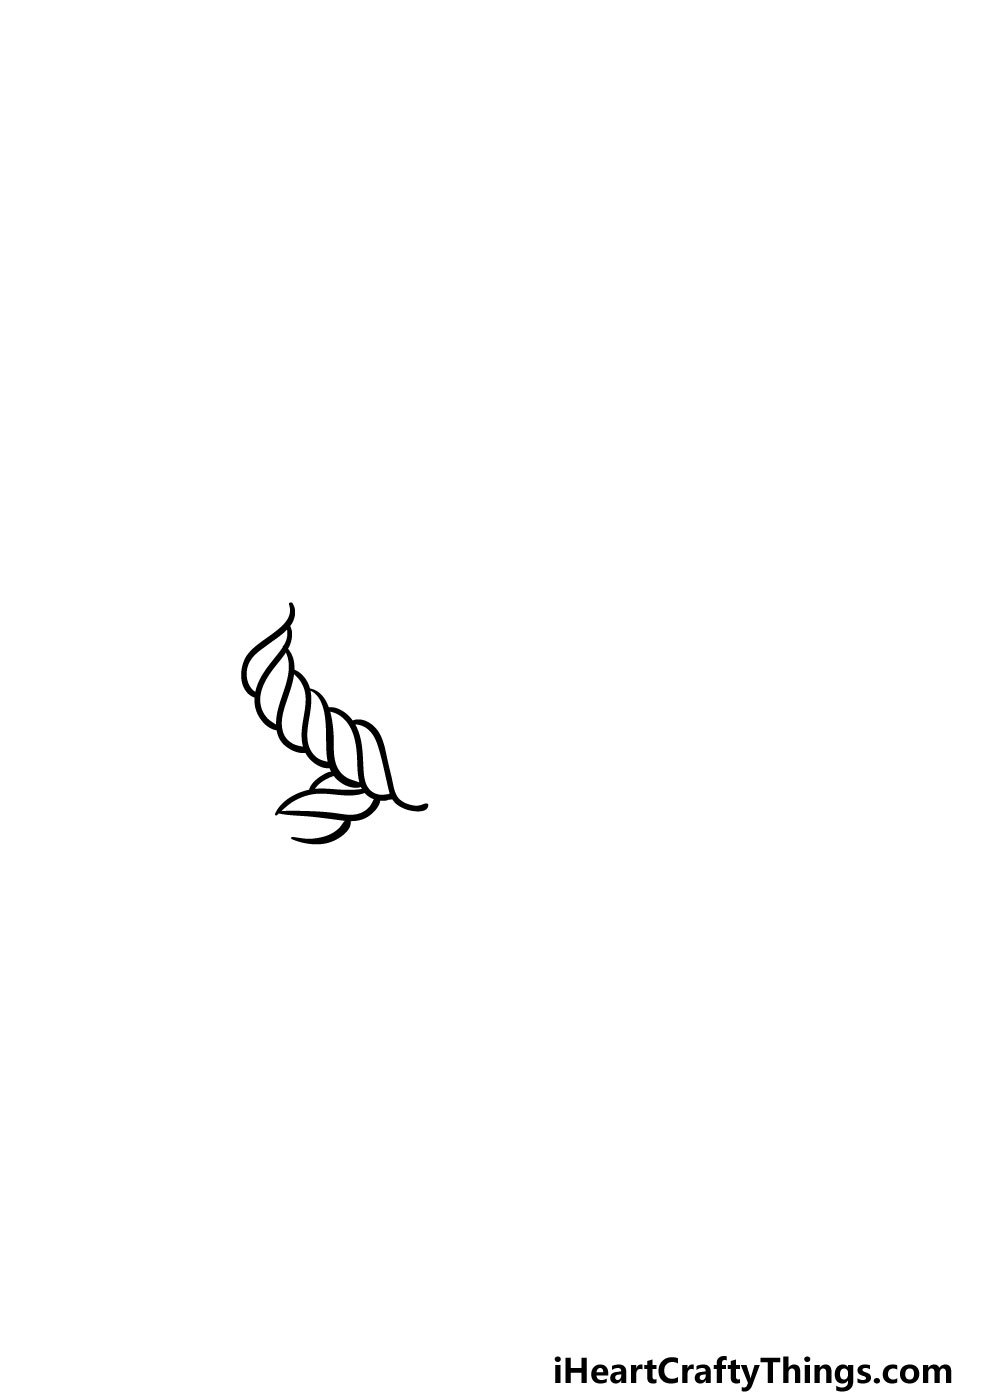
The trick to learning how to draw a rope is in knowing that rope is made up of many smaller segments. That’s something that we will be keeping in mind as we work on this guide.
As you can see in the guide, the rope will be taking on a sort of pretzel shape. If you want to make things easier for yourself, you could start by using a pencil to draw a line in the shape that the rope will be taking and then draw over it.
For now, we will be drawing the left-hand side of the rope where it overlaps on itself to form the loop.
You will do this by drawing lots of smaller segments to form the rope, as seen in the reference image. This is a drawing where patience will be your most useful tool, so be sure to take it slow as you draw!
Step 2 – Draw the first loop of the rope
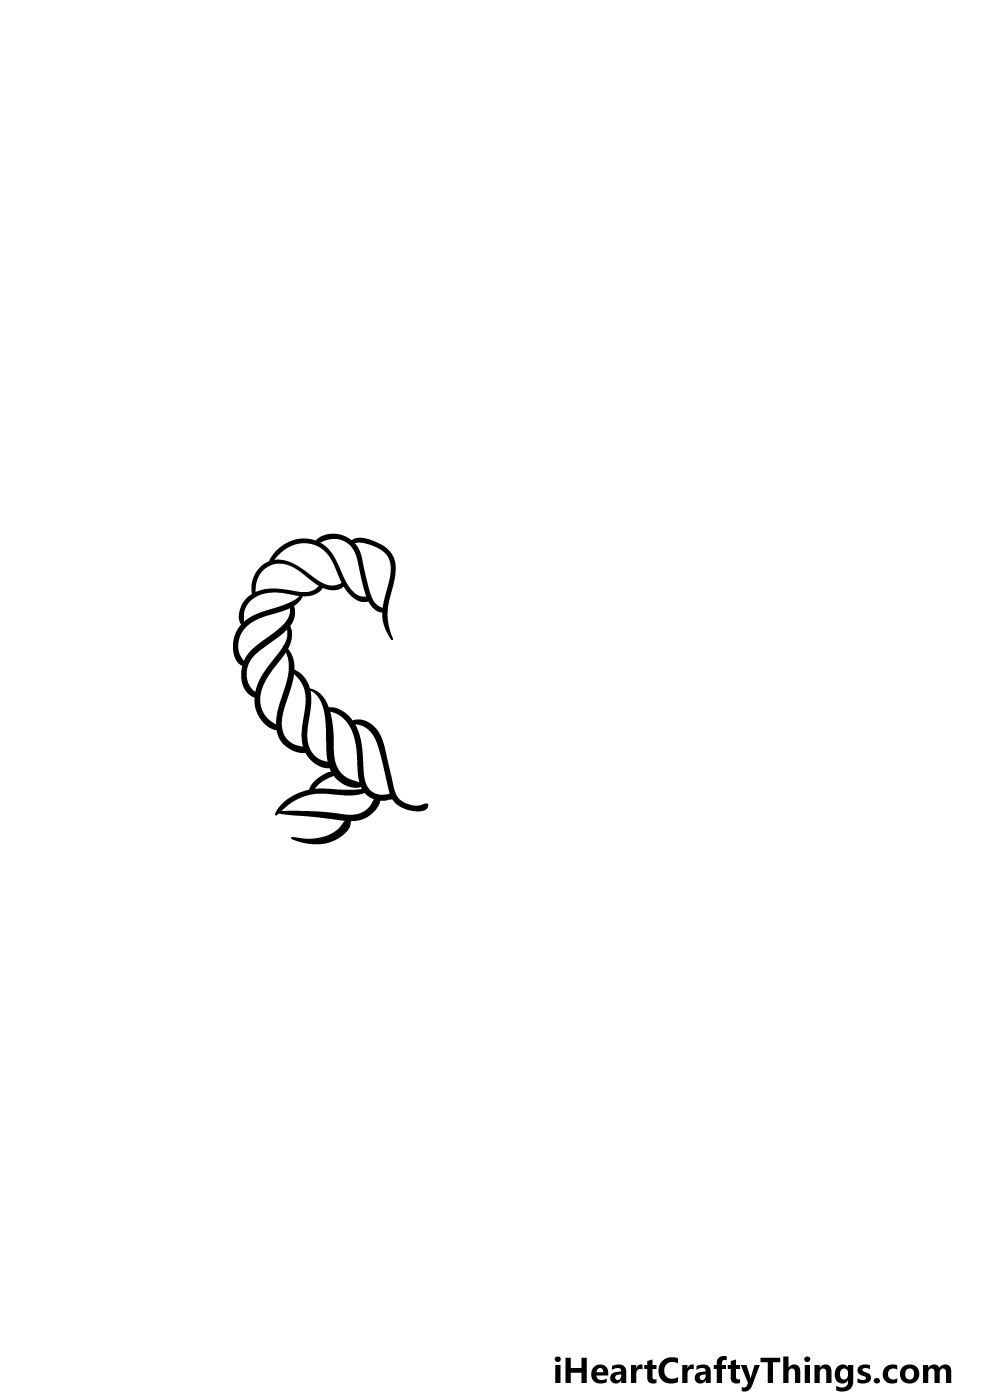
For this part of your rope drawing, we will continue to draw the smaller segments to build on to the rope some more.
We will be focusing on the small area that serves as the first loop on the top left-hand side of the rope. Once you have that drawn we’re ready to move on!
Step 3 – Now, finish off the loop of the rope
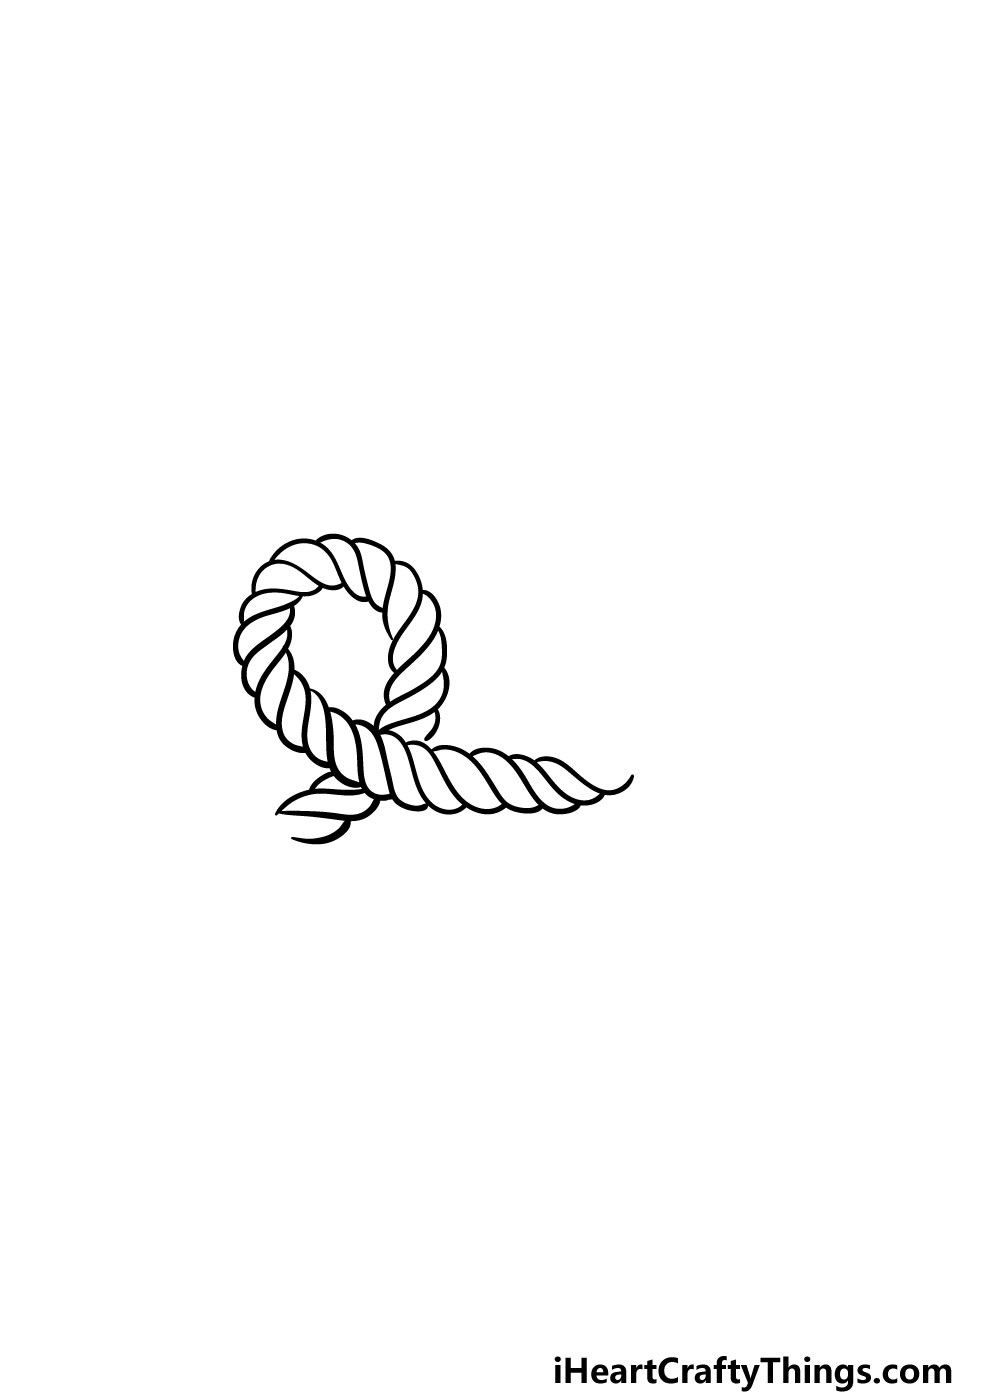
We will be finishing off the first loop of the rope in this third step of our guide on how to draw a rope.
To do this, you simply need to extend the portions of the rope on the inner section of the rope shape as a whole. If that sounds confusing, then the reference image will guide you as you draw!
Once you finish this step, you will have drawn the entirety of the first proper loop in the rope.
Step 4 – Next, draw the second loop of the rope
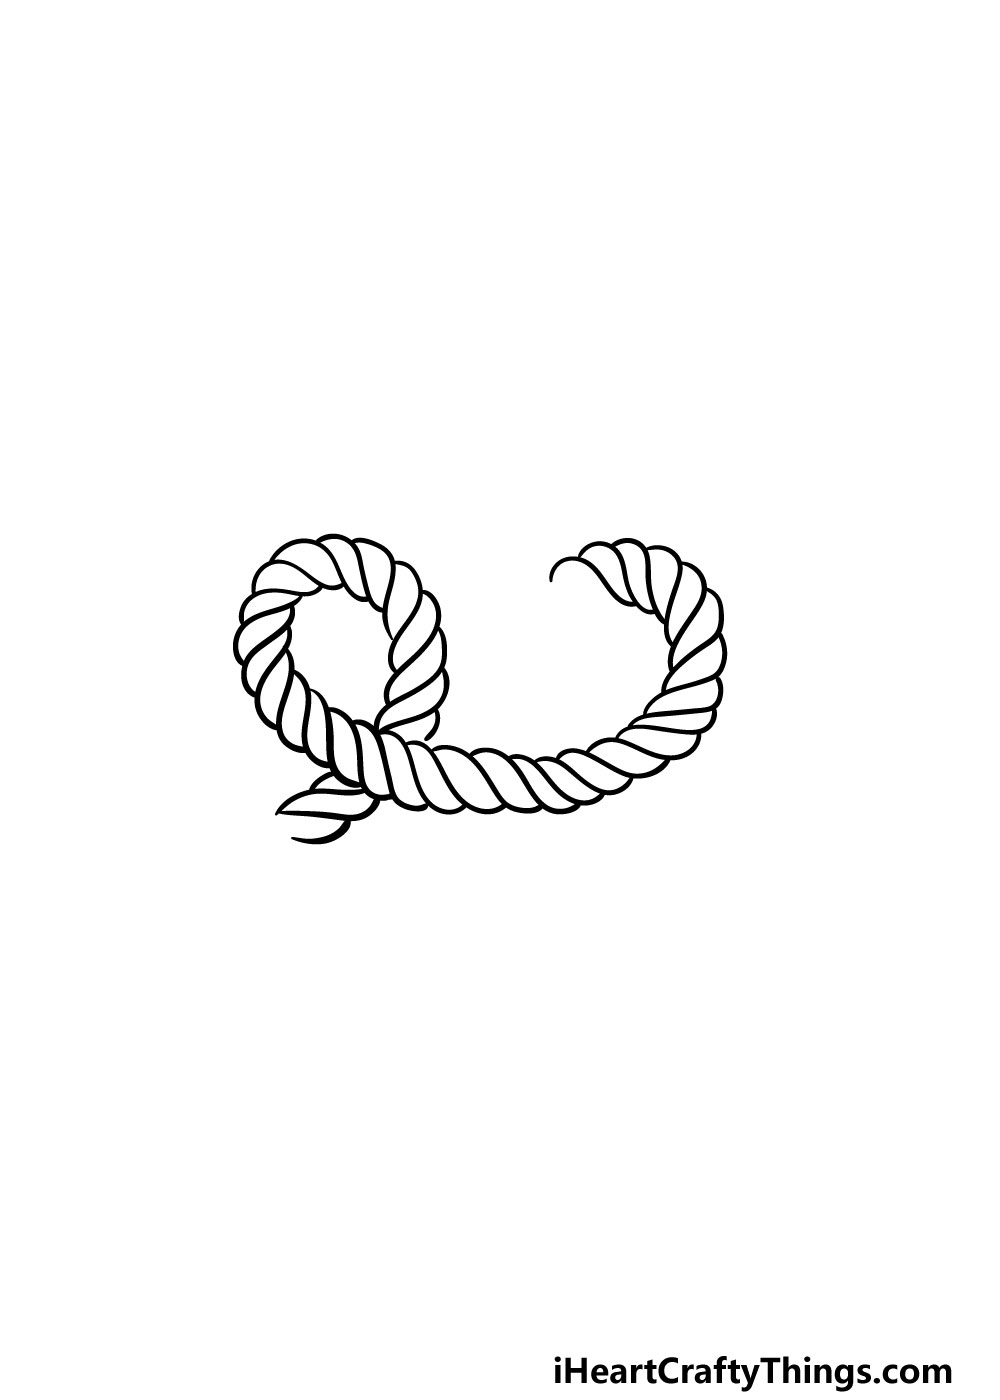
The next two steps of your rope drawing will be all about doing the second loop of the rope. As we mentioned in the first step, by the end of it your rope will take a bit of a pretzel shape.
To do this, you will essentially be mirroring everything that you did in the previous steps. For this part, you will keep extending the center of the rope up until the top of the loop on the right.
Then, we will be able to finish it off in the next step!
Step 5 – Now, you can finish off the second loop
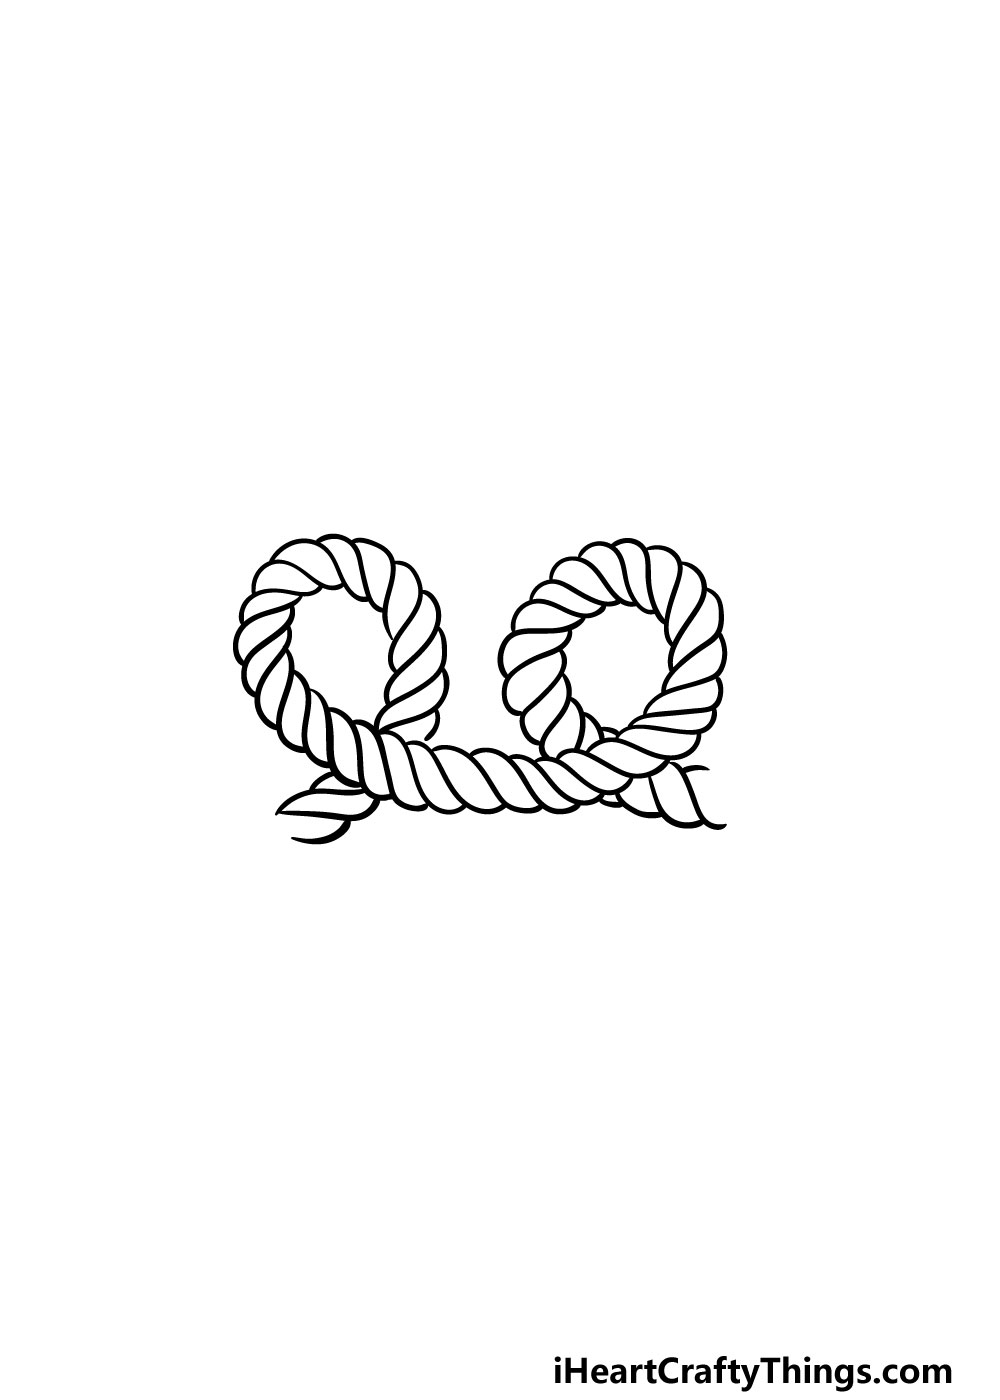
It’s time to finish off this looping rope before the final coloring step of this guide on how to draw a rope!
All you need to do for this step is keep the rope loop going until you reach the end of that pretzel shape that we mentioned earlier.
If you used a pencil to draw a guiding line at the beginning you probably saw why it is such a useful thing to do! Once you have finished drawing the rope, you can then erase this pencil line if you did use one.
That will then bring you to the end of the drawing portion of the guide! Be
fore you move on to the final step, however, you can also add any additional details of your own. There are a few things that you could do to put your own spin on the drawing.
You could extend the rope even more to create more loops or different loops and shapes. Perhaps you could also add some knots or even add something like an anchor onto it!
What cool ideas can you think of to add to this image?
Step 6 – Finish off your Rope drawing with some color
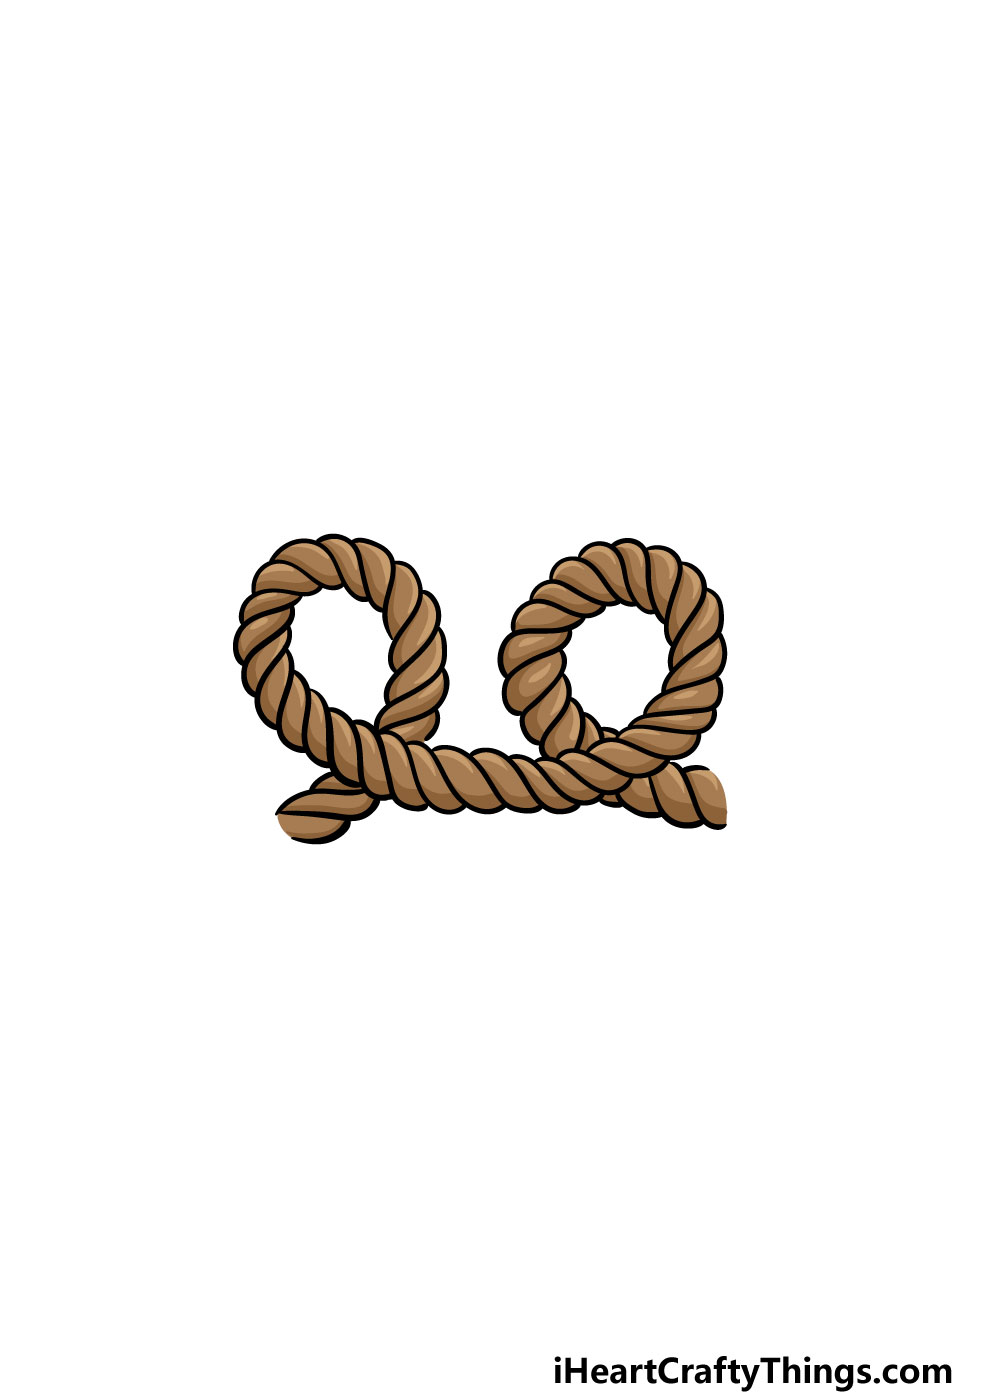
This final step of your rope drawing will be all about adding some amazing color in order to really bring it to life.
You may think that a rope isn’t something that gives you a lot of freedom with regards to how you can color it in, but that doesn’t have to be the case!
We used a more muted brown color for the rope, and even if you go for a similar color there are ways you can incorporate some brighter colors.
The best way to add some brighter colors to a more muted object like this is with the background. If you drew any background elements or other details then you can color those in for some variation.
You could also use some bright colors for some background shapes or simply make this a bright and cheerfully colored rope!
How will you finish off this rope drawing with your colors?
Do this to take your rope drawing to the next level
Find out how you can make this rope sketch even better as we show you some fun tips.
For this rope drawing, we portrayed it in a fairly simple pretzel shape. This is just one of the ways that you could present it, however!
Ropes can be tied into all sorts of different knots, and you could show them in this drawing. Once you have the hang of drawing the rope, you could look up some knots online to help you with drawing them.
If you’ve ever been in a group like the Scouts, you may already know some you could use!
Another way to make your drawing of a rope to the next level would be to make it longer. You could do this whether you draw it into a different knot or keep it as it looks in our design.
This should be easy enough to do once you have finished the guide, as by then you will know the basics of the rope’s structure. If you were to do this, the only thing limiting you would be the space on the page and how patient you are feeling!
Ropes are used for all sorts of purposes, and you could show some of them for this rope sketch. Some examples would be for rigging on old ships or to help secure large crates that are being transported.
These are just two examples you could go for, but what else do you think that you could use this rope for?
You can also use crafts to take your rope drawing to a whole new level! Some of these could include art tools and mediums such as colored pens to give the colors a unique look.
However, there are even more fun ways you can show this rope’s colors and textures. For example, you can buy some small pieces of rope-like strands from craft stores.
Carefully draw out the outline of the rope shape you want, and then you can glue the strands over the outline to give it a properly textured look!
Your Rope Drawing is Complete!
With those final details and colors added, that means that you have made it through this step-by-step guide on how to draw a rope!
As we mentioned at the beginning, it can be a bit harder than one might expect to draw a rope, but we hope that this guide made it easier and more fun for you.
Once you have mastered this guide, don’t forget that you could change some elements and also add some of your own!
You could make the rope form different shapes or even add objects onto it. These along with the colors and art mediums that you use can make a huge difference to your image.
When you’re ready for more, we have your next drawing guide ready for you on our website! We upload new guides covering a huge variety of subjects, so be sure to visit often to find your next fun guide!
Once your rope drawing is finished, we would also love to see it! You can let us see it by sharing it on our Facebook and Pinterest pages.