There are certain foods and treats that have come to be associated with certain events and places.
Cotton candy is one of these, as this sweet treat is often associated with carnivals, parties and other joyful occasions.
This treat is technically quite simple, as it is essentially fluffed up sugar. However, the way it’s made and the tastiness it offers has made it a delight for many.
It can also come in many sizes and colors, and learning how to draw cotton candy is a great way to recapture that carnival feel!
If you love this sweet treat and would like to know how you can recreate it in some artwork, then this tutorial will be perfect for you.
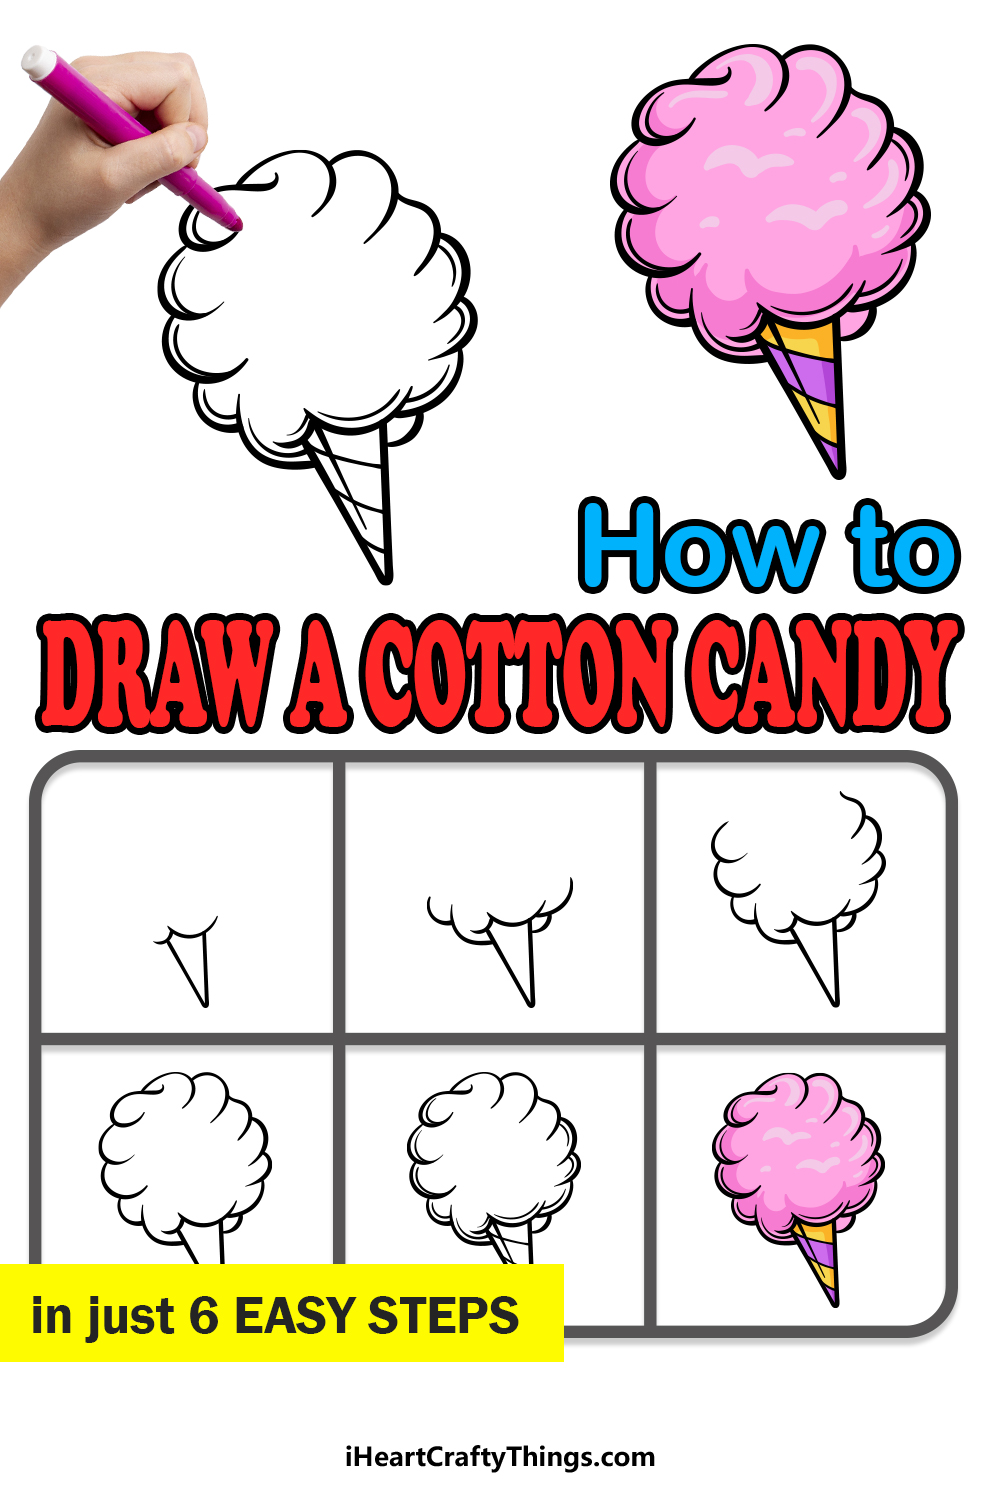
Our step-by-step guide on how to draw cotton candy in just 6 steps will show you how fun and easy it can be!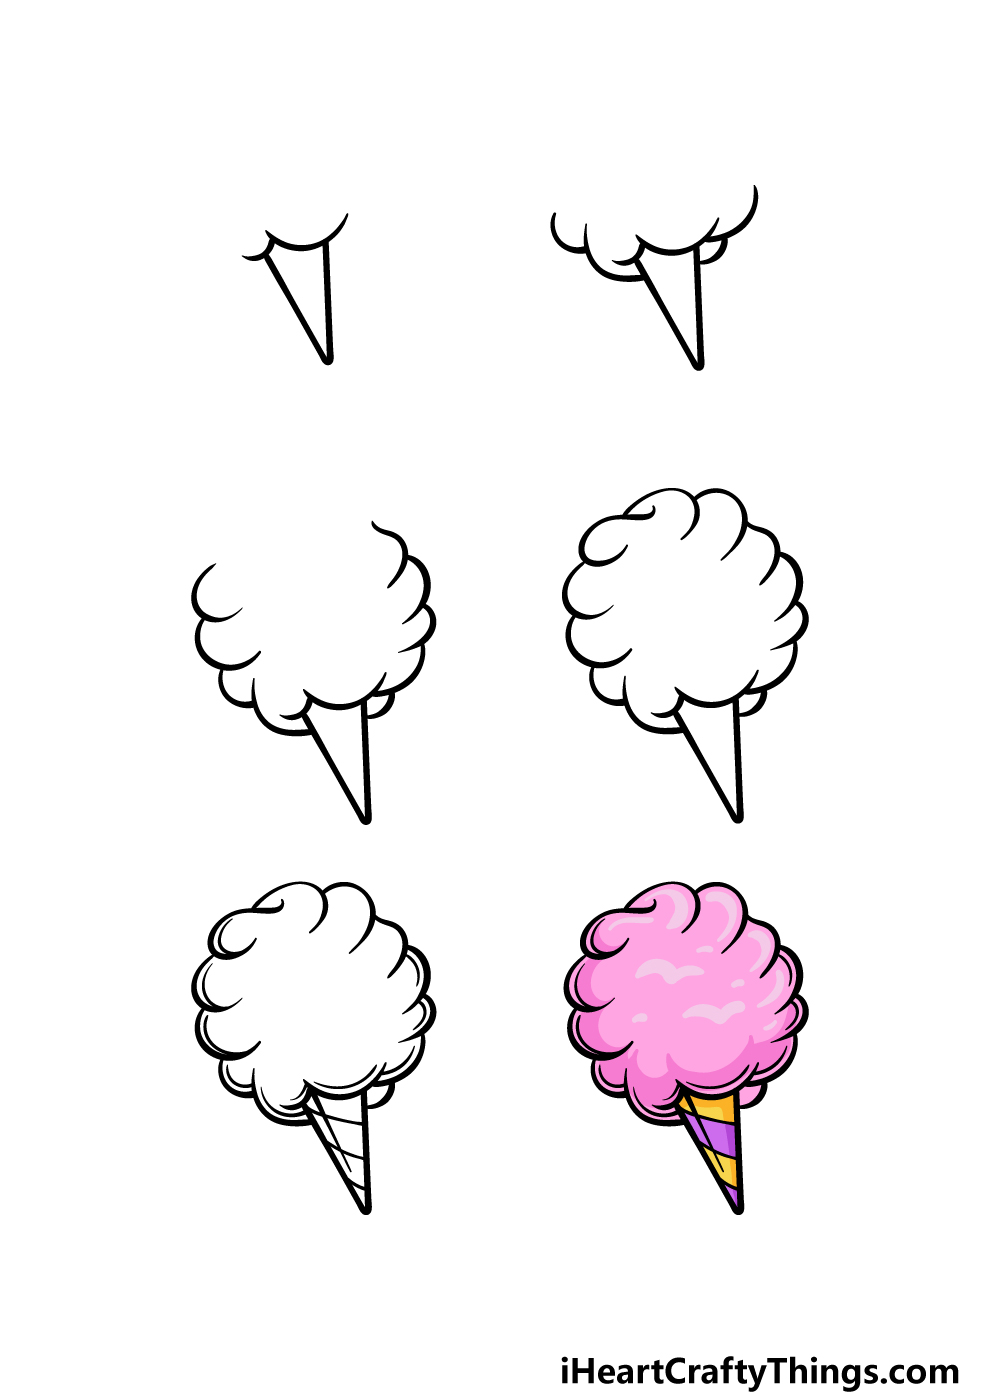
How to Draw Cotton Candy – Let’s Get Started!
Step 1

When enjoying cotton candy, it can be consumed in a number of ways. Sometimes it will be wrapped around a thin wooden stick, and other times it can be enjoyed from a paper cone.
We will be going for this second option in this guide on how to draw cotton candy, and we will start with that aspect.
This should be pretty simple, as all you need to do is draw two straight lines that have a slight curve at the tip.
Once these are drawn, you can then add some rounded lines on top of this cone shape for the base of the cotton candy itself. Then we can move on to step 2 of the guide!
Step 2 – Now, draw the next section of the cotton candy
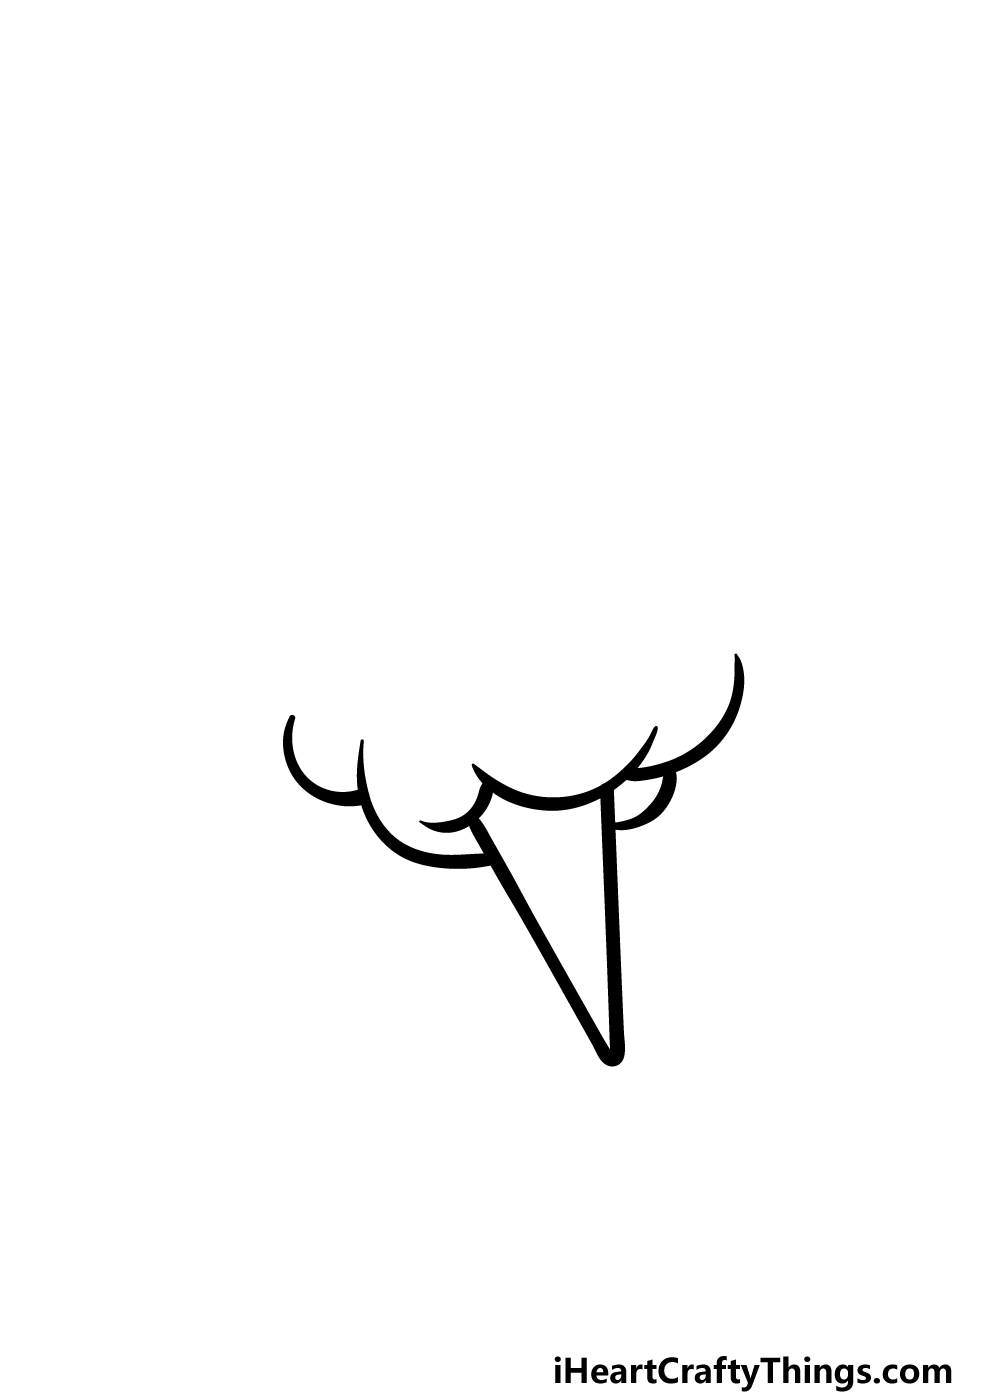
In this second part of your cotton candy drawing, you will be adding the next section to build it up a bit.
To do this, we will be adding some more curved, rounded lines to the base of the cotton candy.
These lines will look similar to the previous ones that you used for the base. Some of them will overlap with one another, as this will make it look fluffier.
For now, we will only be drawing cotton candy at the base, but we will be adding more sections as we proceed to future steps.
Step 3 – Draw the sides of the cotton candy

Continuing with this guide on how to draw cotton candy, we shall now be adding the sides of the fluffy treat.
These lines will be very similar to the previous ones that you drew, and they will be very bumpy.
Drawing the lines this way will help to make it look nice and puffy.
When drawing the sides of the cotton candy, try to have them curve outwards a bit, as we’re aiming for a rounded shape to the cotton candy as a whole.
When you have drawn these side sections, we can then move on to step 4 of the guide!
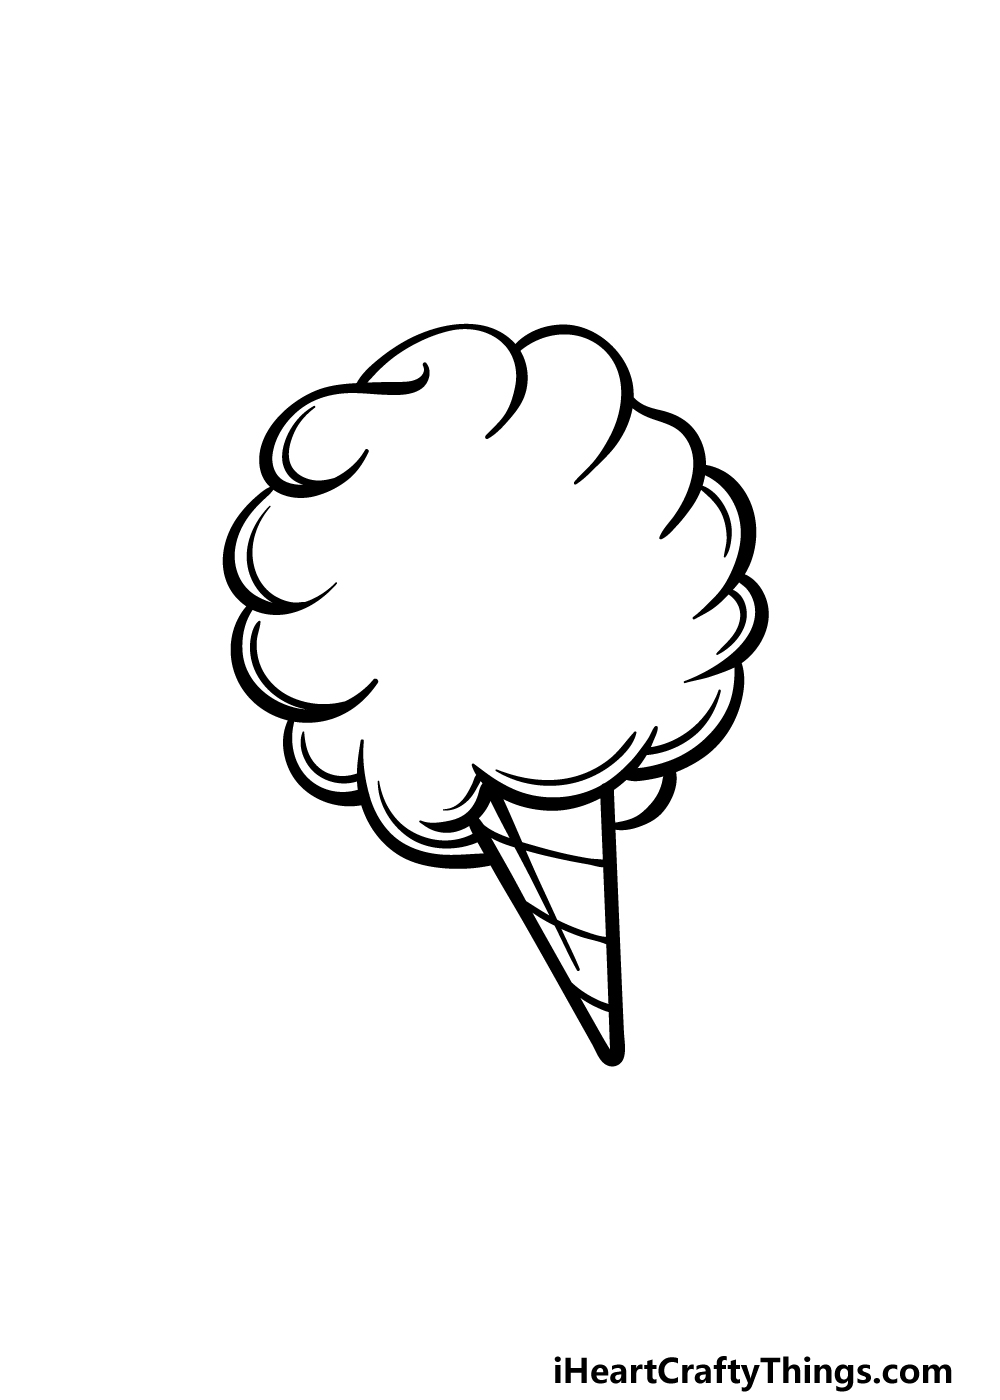
Step 4 – Next, draw the rest of the outline for this cotton candy

This part of your cotton candy drawing will see you finishing up the outline before you add some final details in the next step.
First, draw some more curved lines to finish off the outline for the top of this cotton candy.
The two uppermost lines will overlap with one another as shown in our reference image, and this will help to make the form of the cotton candy look a bit more dynamic.
Once this outline is complete, you will be ready for those final details that we mentioned, so let’s move on!
Step 5 – Add the final details to your cotton candy drawing
Now you’re ready to finish off the final details and touches before the final step of this guide on how to draw cotton candy!
These details will be fairly minor, but they will make a huge difference in making this image more dynamic.
First, add some curved lines along the inner edges of the sides of the cotton candy to add some depth.
Then, we will be adding some stripes along the cone that you drew earlier to give it a bit more of a carnival feel.
Once you have added these details, you could also add some unique ones of your own!
One idea would be to draw a background, and this would be a great way to show off what location you would like to enjoy this cotton candy at. What kind of setting would you place this treat in?
Step 6 – Finish off your cotton candy drawing with color
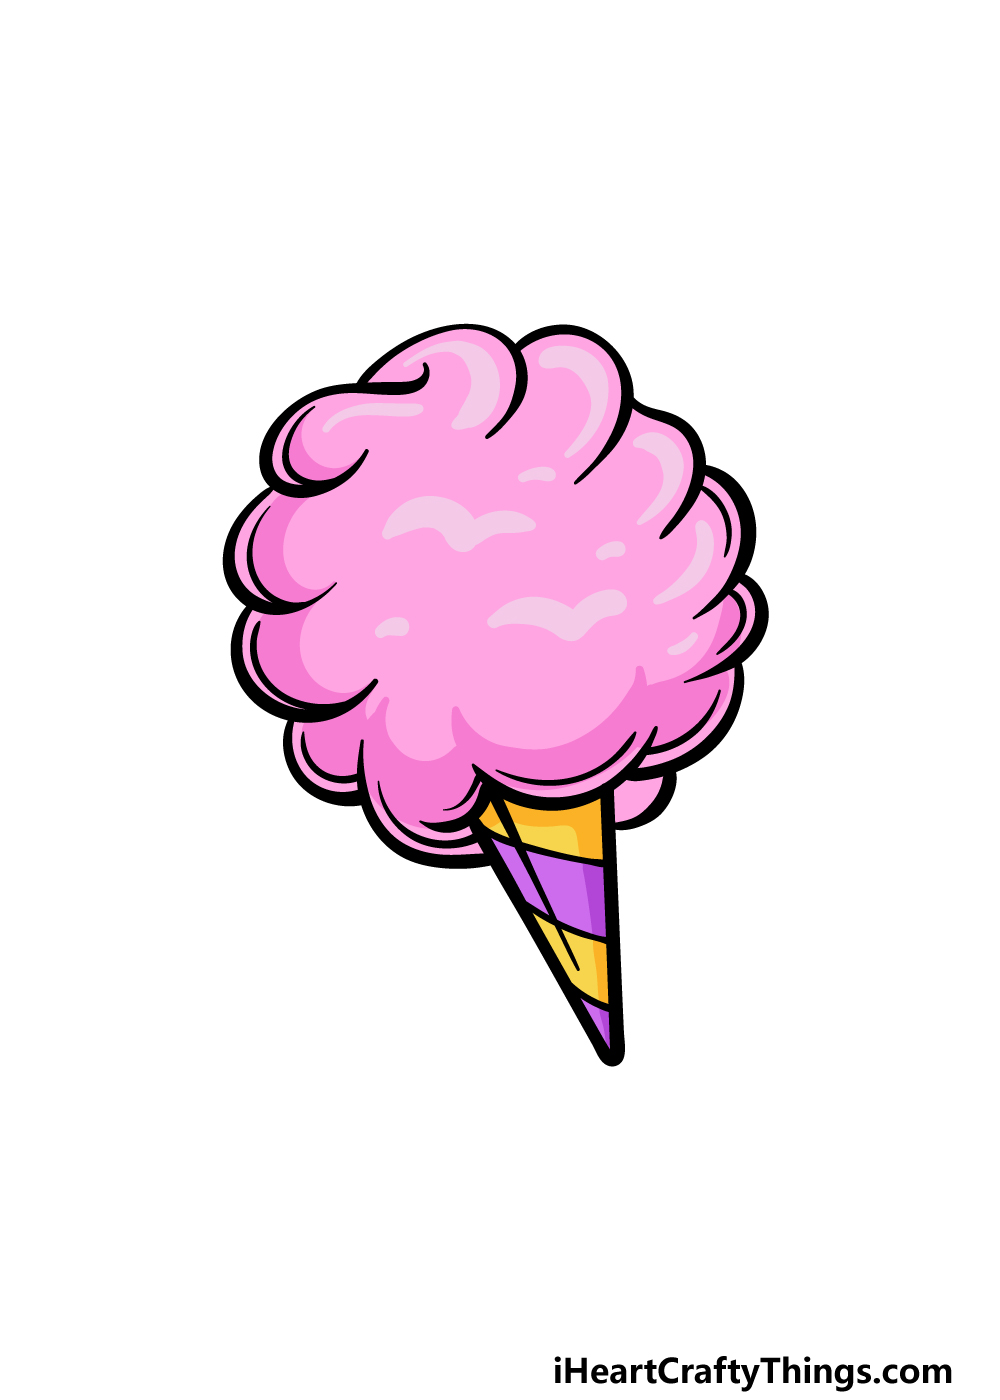
Now it’s time to finish off this cotton candy drawing with some color. This food is usually colored in bright, cheerful tones, and this gives you a lot of freedom with how you can color it.
In our reference image, we used various tones of pink for the cotton candy itself, and then for the cone we used yellow and purple alternating.
This is a drawing where you could use any colors you love, however! You could even mix various different colors for a rainbow effect to the cotton candy.
Our suggestion would be to use some watercolor paints for a softer look to the colors, but anything you use will look uniquely great! What colors and mediums will you go with?
4 More Ways To Make Your Cotton Candy Drawing Unique
Create some tasty art as we make your cotton candy sketch even better!
In real life, cotton candy can come in many colors and flavors. This drawing of cotton candy shows a pink variant, as this is a common color for cotton candy.
While it looks great, you could also use any other colors for the tasty treat. Other common colors would include blue or green, and sometimes there will even be a rainbow effect.
These are a few examples, but you should be sure to go with any colors that you love to create your own perfect cotton candy!
When enjoying cotton candy, there are many other treats that are great to enjoy with it. These could also be added to the drawing!
Some examples would be a giant pretzel or maybe a bag of popcorn. If you need a beverage to wash it all down with, then a big cup of soda would be the perfect addition.
Of course, these are just a few suggestions, and you could add any other treats you would like!
Next, you could show where you would like to enjoy the treats in this cotton candy drawing by adding a background.
Cotton candy is often sold at carnivals or fun fairs, so these would be some great background locations.
Adding these kinds of locations would be a great way to add some cool rides, attractions and characters to the background as well.
We listed a few common ideas, but where else could you enjoy some cotton candy?
Finally, you can have some fun experimenting with unique art mediums to bring this cotton candy sketch to life.
Cotton candy is, by its nature, very soft, so you would ideally want to show off this side with the mediums you use.
For instance, watercolor paints would be perfect for giving the cotton candy a softer look.
Or, you could even use a lump of colored cotton wool and then stick it over the cotton candy to give it a 3D feeling!
Your Cotton Candy Drawing is Complete!
With those 6 steps of our guide on how to draw cotton candy complete, you have finished this sweet artwork!
We hope that working on this guide provided a fun and informative experience that made recreating this carnival food a breeze!
As long as you follow all of the steps we laid out, you should have no problems completing this image.
Be sure to express your creativity even further as you add your own awesome details to this image to really finish it off! What can you think of to put your own spin on it?
Then, when you have finished this design, you can find many more drawing guides to enjoy on our website. We have a huge selection that we add to all the time, so keep checking in ti never miss out!
When your cotton candy drawing is all finished up, please be sure to share your artwork on our Facebook and Pinterest pages.
This is the best way to show off how your incredible artwork turned out!