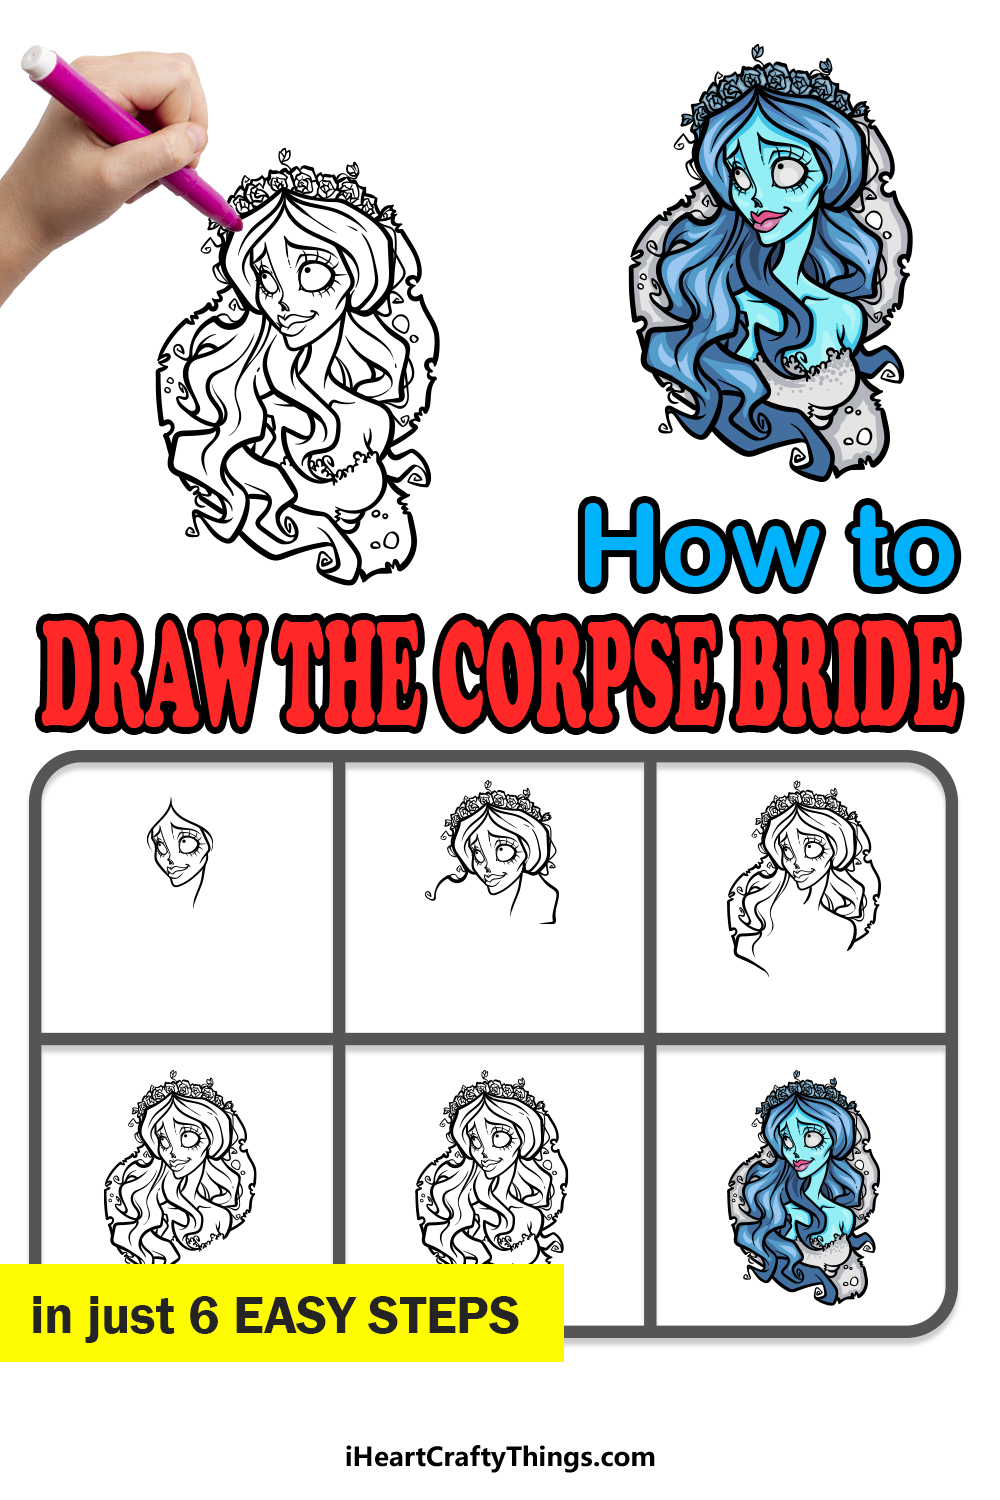
The Corpse Bride is one of the most unique animated films ever created. Co-directed by Tim Burton, it tells a dark, twisted and yet charming tale of love.
It is also well known for its unique stop-motion animation style and unique characters.
Perhaps the most recognizable character from the film is the Corpse Bride herself, as she sports a rather interesting design.
This design can also make it tricky for fans of the film to learn how to draw the Corpse Bride, however.
If you are one of those fans and are eager to learn how to do it, then this is the tutorial for you!
Our step-by-step guide on how to draw the Corpse Bride in just 6 steps will show you how to have a great time drawing this classic character.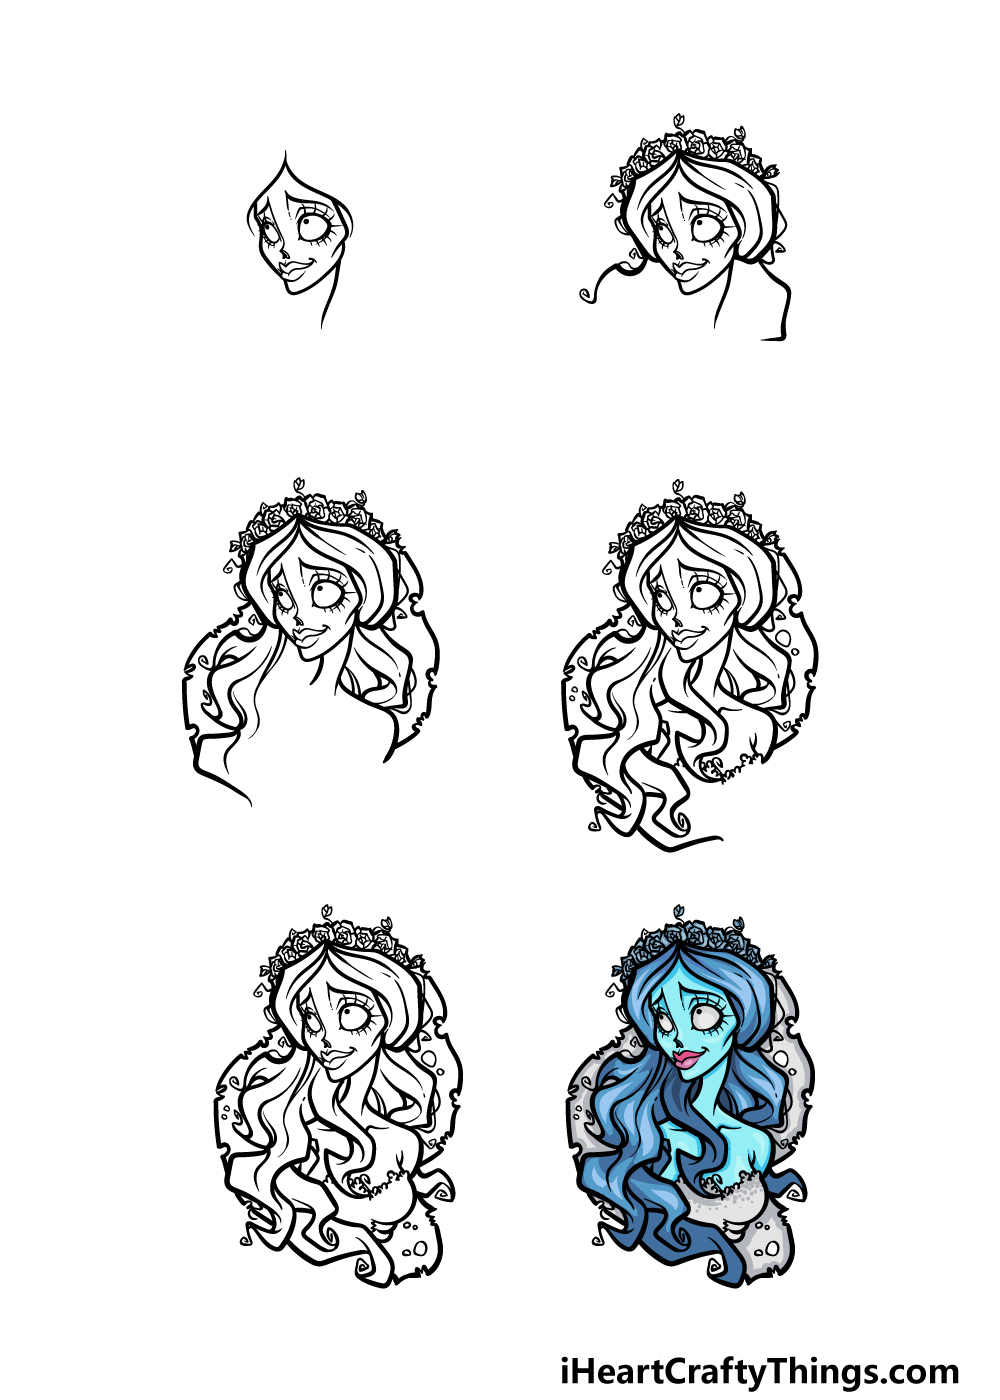
How to Draw The Corpse Bride – Let’s Get Started!
Step 1
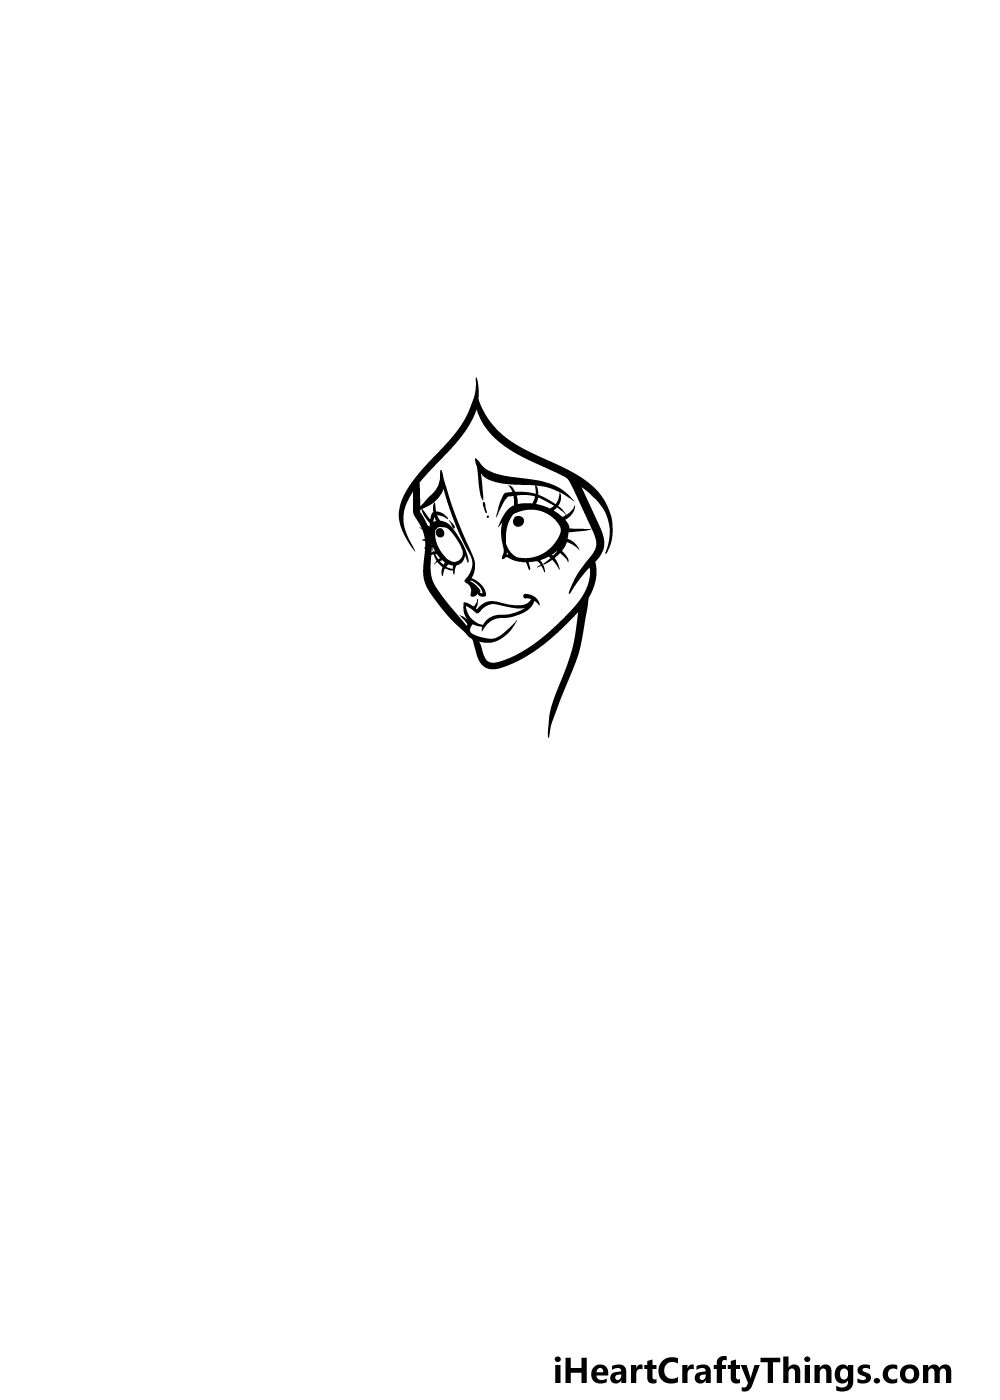
We will start by drawing the face in this first step of our guide on how to draw the Corpse Bride.
She has a rather distinct, angular face that fits nicely into Tim Burton’s typical style of animated characters.
Another feature she shares with other characters associated with him is that she has large, round eyes. These are what you can start with, and you can draw them as round shapes with little corners.
Then, use some angular lines for her eyebrows and nose between her eyes. She has some large, smiling lips, and once those are drawn you can also use some angular curved lines for her face outline.
Finish off by drawing the start of her hair and then add some eyelashes around her eyes.
Step 2 – Now, draw some hair and a flower crown for the Corpse Bride
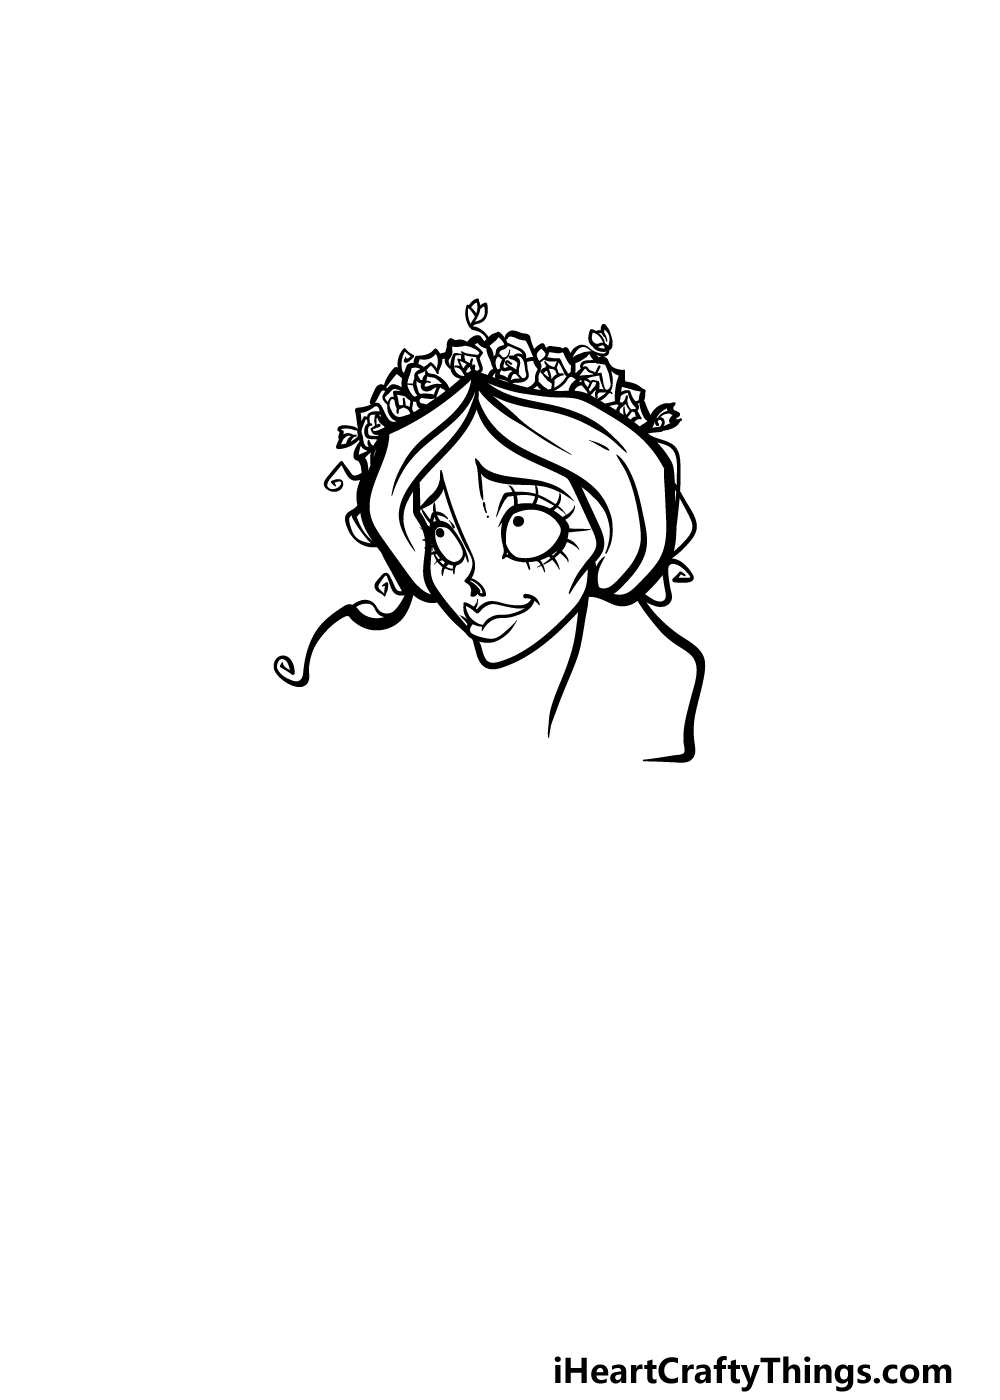
In this second part of your Corpse Bride drawing, you can start drawing her hair and give her a flower crown atop her head.
First, use some curved lines to draw the start of her hair outline surrounding her face, and then draw some thick line details within this outline.
Then, you will be ready to draw the flower crown on her head. We will be using some delicately curved lines to draw each individual flower sitting on her head to finish off this aspect.
Once you’re happy with how it looks, we will be ready for step 3!
Step 3 – Next, draw more of her hair and start her veil
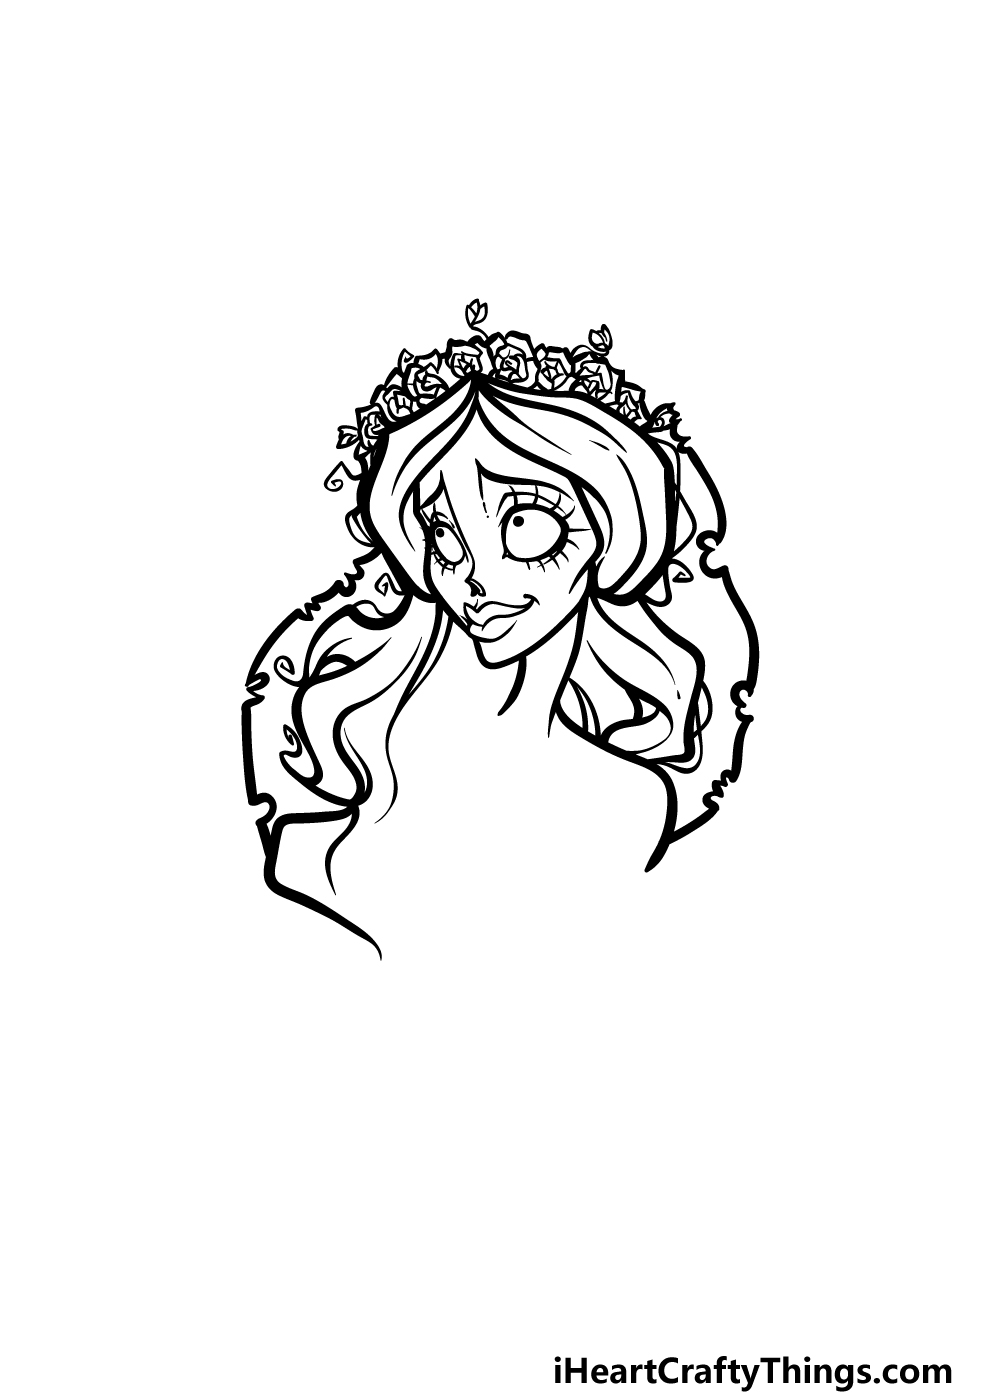
You can now keep adding to her hair while drawing the start of the veil as you start this step of our guide on how to draw Corpse Bride.
Use some more wavy lines coming down from her head to portray her hair dropping down. We will also be adding another curved line for her shoulder on the right-hand side.
Then, we will be drawing her veil dropping down behind her head. It will be drawn with a thick line that will have lots of little nicks and dips in it to make it look a bit more ragged.
That’s all there is to it for this step, and now it’s on to step 4 of the guide.
Step 4 – Now, draw some more locks of hair coming down
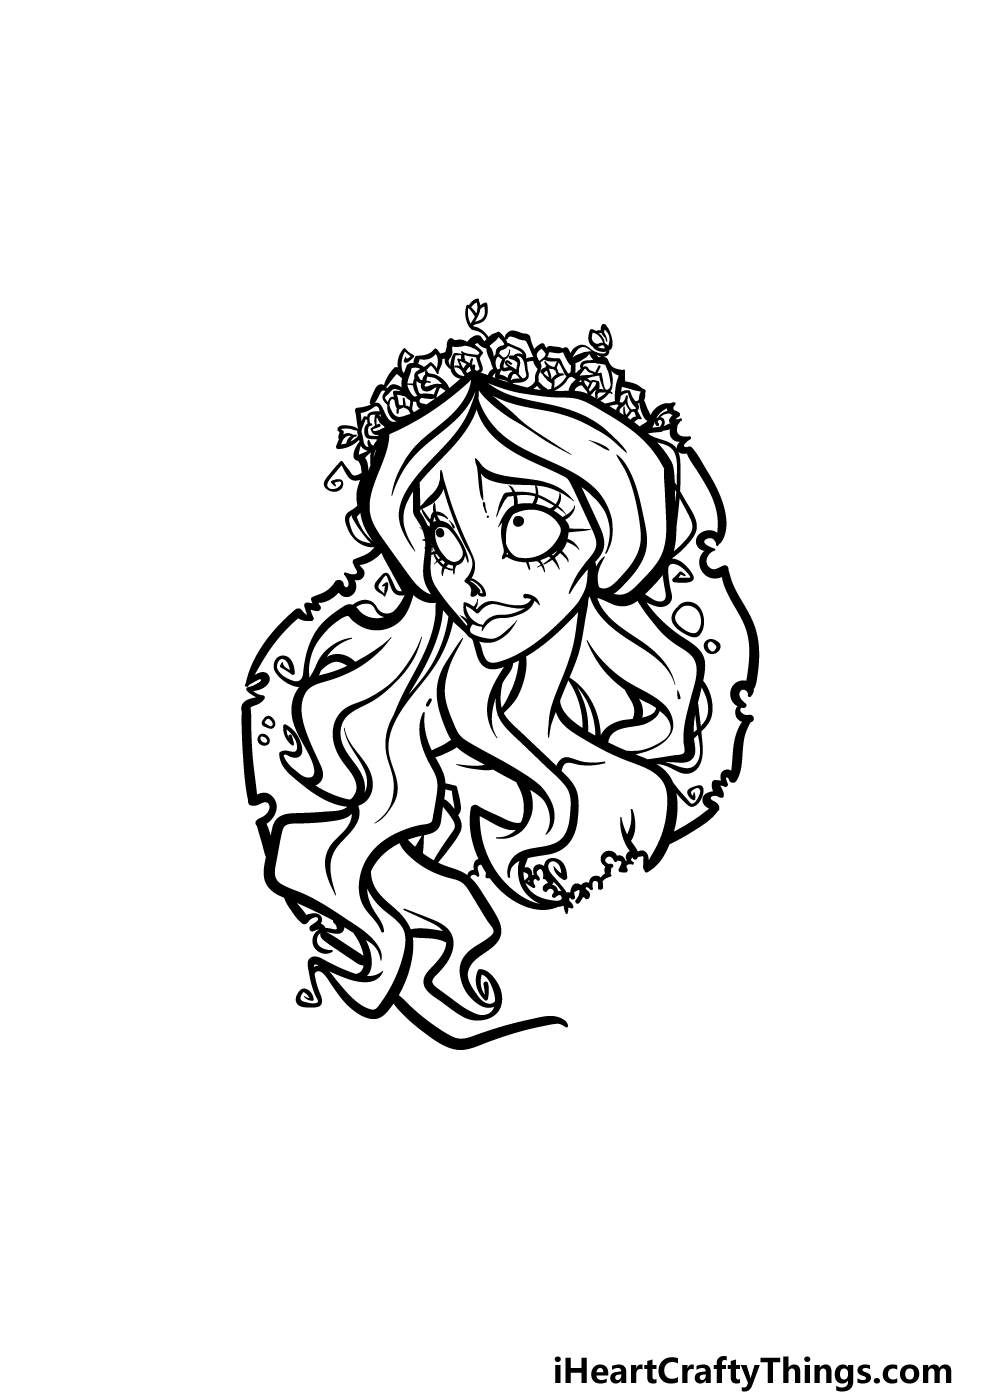
We will be adding more locks of hair to your Corpse Bride drawing in this next step of the guide.
This should be pretty easy for you, as we will be drawing these locks of hair in a similar fashion to how you have been drawing the rest of her hair.
That means that you will be extending some thin, wavy shapes coming down from her head, as shown in the reference image.
Once the last of the hair is drawn, we will just have a few final details to draw as we move on to the next step.
Step 5 – Add the final details to your Corpse Bride drawing
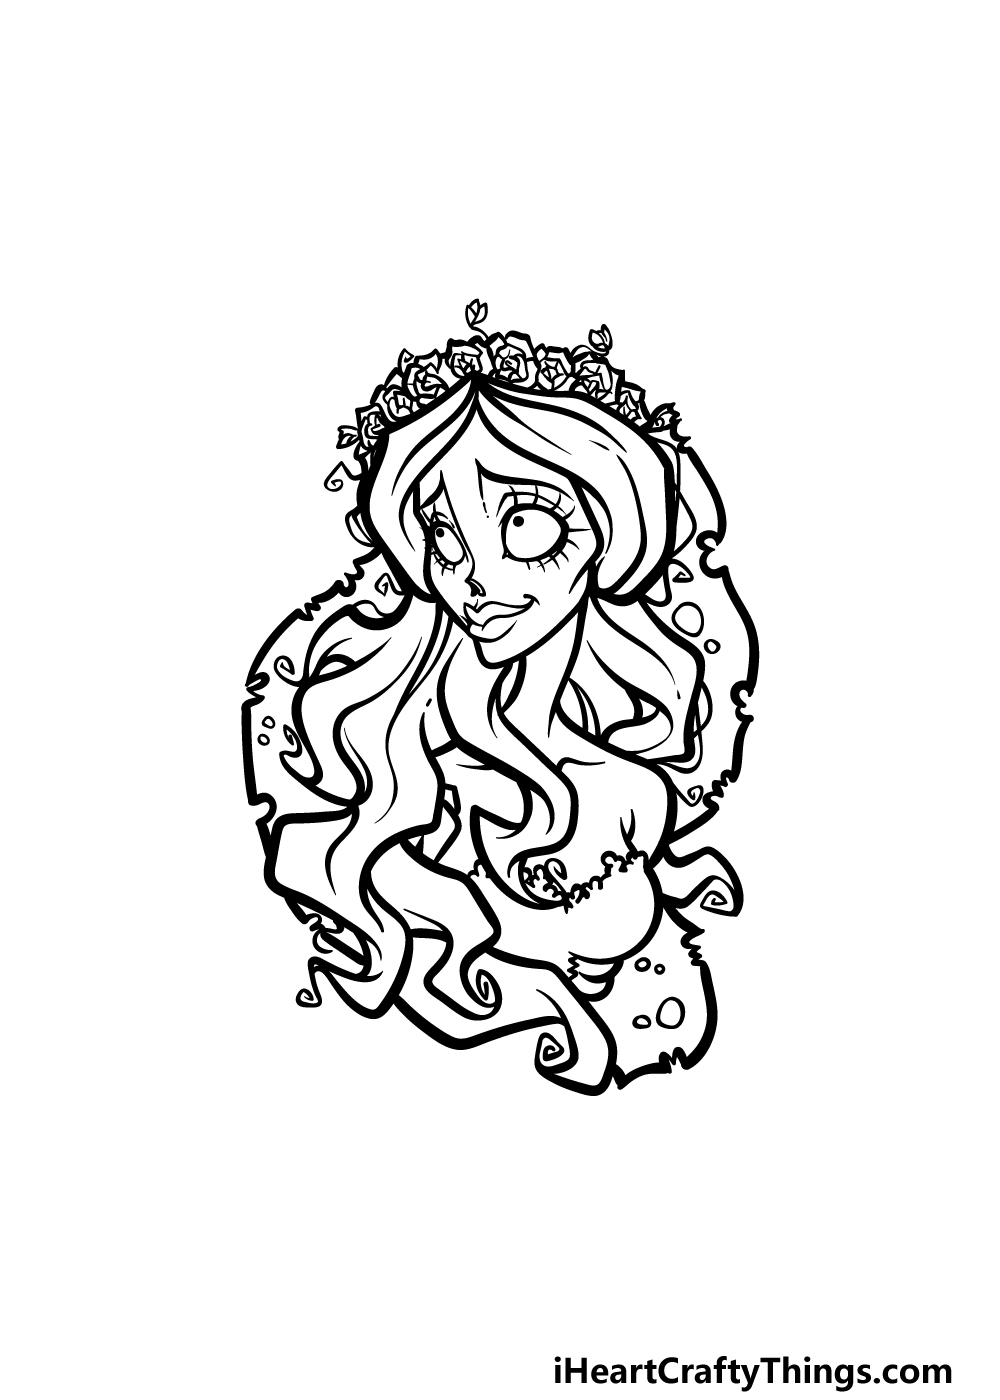
This fifth step of our guide on how to draw the Corpse Bride will see you finishing off with some final details before you color your creation in.
The main elements that we will be drawing in this step will be the rest of her chest along with some more of the ragged veil on the right-hand side.
Once you have drawn these elements, you will be ready to move on to the final step! You can also go ahead and draw any additional details that you may like for this picture.
One idea is to draw a background, and by doing this you can represent your favorite scenes and characters from the film.
You could also draw more of her body or maybe even change elements like her facial expression, what other ideas can you think of to finish this off?
Step 6 – Finish off your Corpse Bride drawing with color
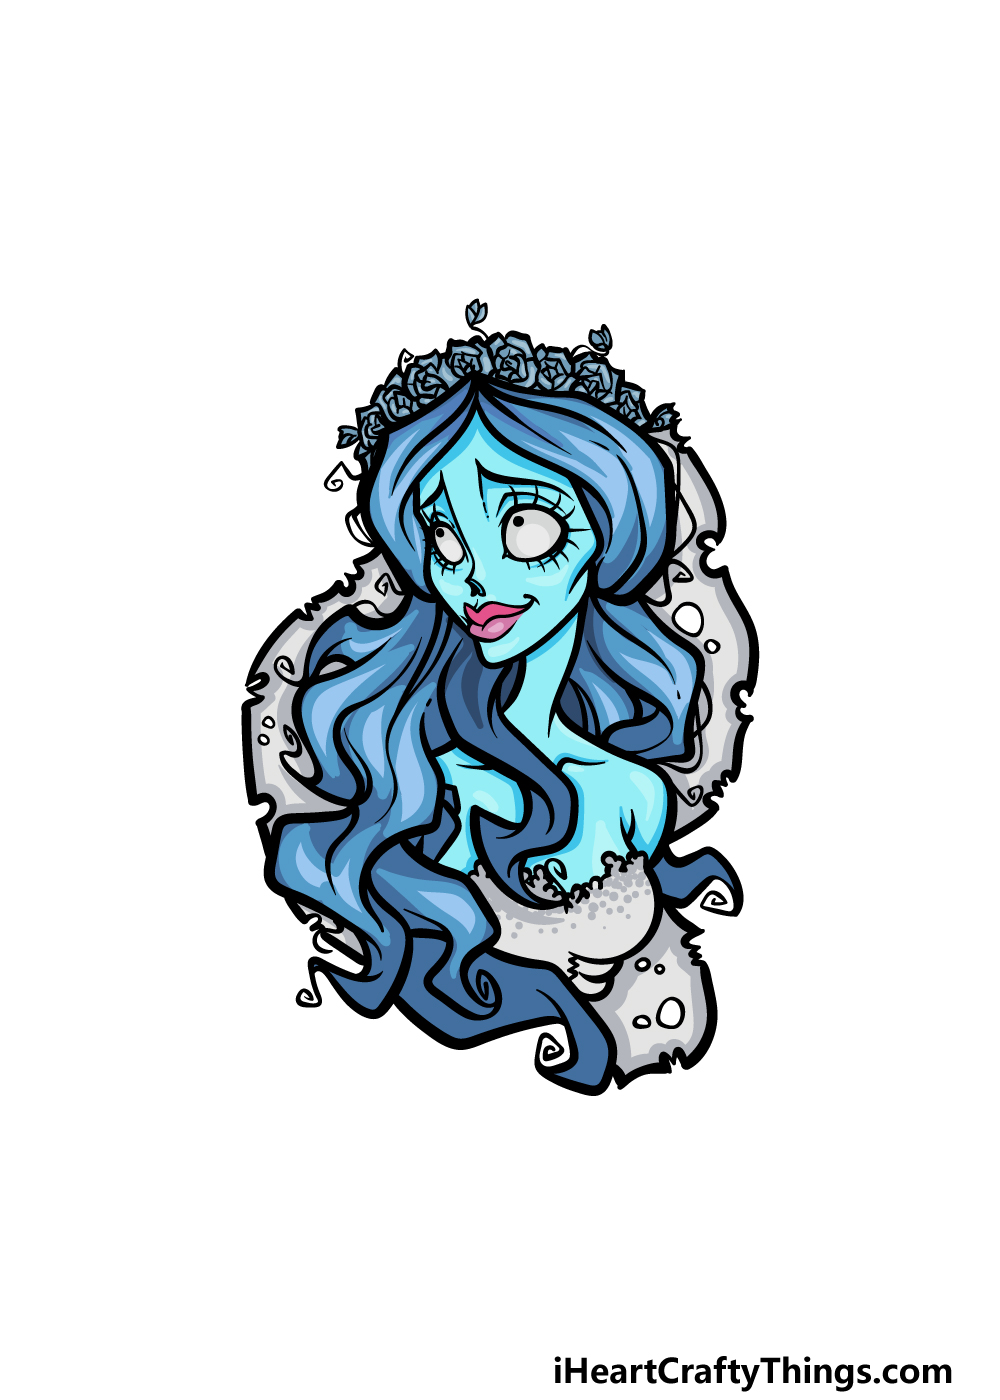
You’ve worked hard on this Corpse Bride drawing, so now it’s time to finish it off by having some coloring fun! In our reference image, we showed you what colors we would use to represent her appearance in the film.
That means that we used various shades of blues and greys to color her in. By using different shades of the same colors, you can create a more dynamic image.
You could use similar colors for your own drawing, but you could also change it up and use some color choices of your own!
What colors and art mediums do you think you will use for your amazing drawing?
4 More Ways To Make Your Corpse Bride Drawing Unique
Bring this Corpse Bride sketch to life with these 4 fun ideas!
This drawing of the Corpse Bride shows a cool interpretation that shows a small portion of her character design.
It is a great look, but you could make it look even cooler by adding more of her body.
To do this, you may want to use the film itself or look up some pictures of her full character design.
Doing this would also allow you to create some cool poses for this depiction.
What are some fun poses you could potentially create?
If you like the depiction of the Corpse Bride as it appears in our example, then you could take a different approach to our first tip. To do this, you could make the border around her more elaborate.
You could use elements such as dead flowers, tree branches and other macabre imagery to make the border surrounding her more complete.
Incorporating text would be another great way to add to the surroundings!
The Corpse Bride herself is one of many iconic characters from the film. She is far from the only one, however!
You could make this Corpse Bride drawing more complete by adding another character from the movie to join her. The obvious example would be to add the human character Victor Van Dort.
Portrayed by Johnny Depp in the film, he is the co-lead character of the film and would be a perfect addition. What are some other characters from the film that you could add?
The Corpse Bride movie has many famous scenes and settings. Any of these would make a perfect background for your Corpse Bride sketch!
If you have some favorite scenes, then you could look at the backgrounds of the scenes and try to incorporate them into your drawing.
When doing this, the background could be as elaborate or simple as you wish.
There are so many creative ways to add a background, so do you have some settings in mind that you could work with to finish the image?
Your Corpse Bride Drawing is Complete!
That concludes this guide on how to draw the Corpse Bride! It may have seemed like a difficult drawing to take on at first as there were many details to draw, but hopefully this guide made it fun and easy to do!
When you have completed the drawing, be sure to have some more fun incorporating your own additional ideas, details and color choices to really finish it off.
We can’t wait to see the creative touches that you will bring to this drawing!
You can then head over to our website for more drawing fun. We have plenty of incredible drawing guides to enjoy there, and we will be uploading new ones often as well.
Please also make sure to share your finished Corpse Bride drawing on our Facebook and Pinterest pages for us to enjoy. We will be very interested to see how it came out!