Cliffs can have a very different feel to them depending on the situation. That means that sometimes they are a breathtaking piece of scenery to gaze upon and gaze off of, but they can also be dangerous and treacherous.
Even with that in mind, they are always a majestic sight to behold, and many people have tried to capture that beauty by learning how to draw a cliff.
If you would like to immortalize a beautiful cliff with your own drawing, then this is the guide for you.
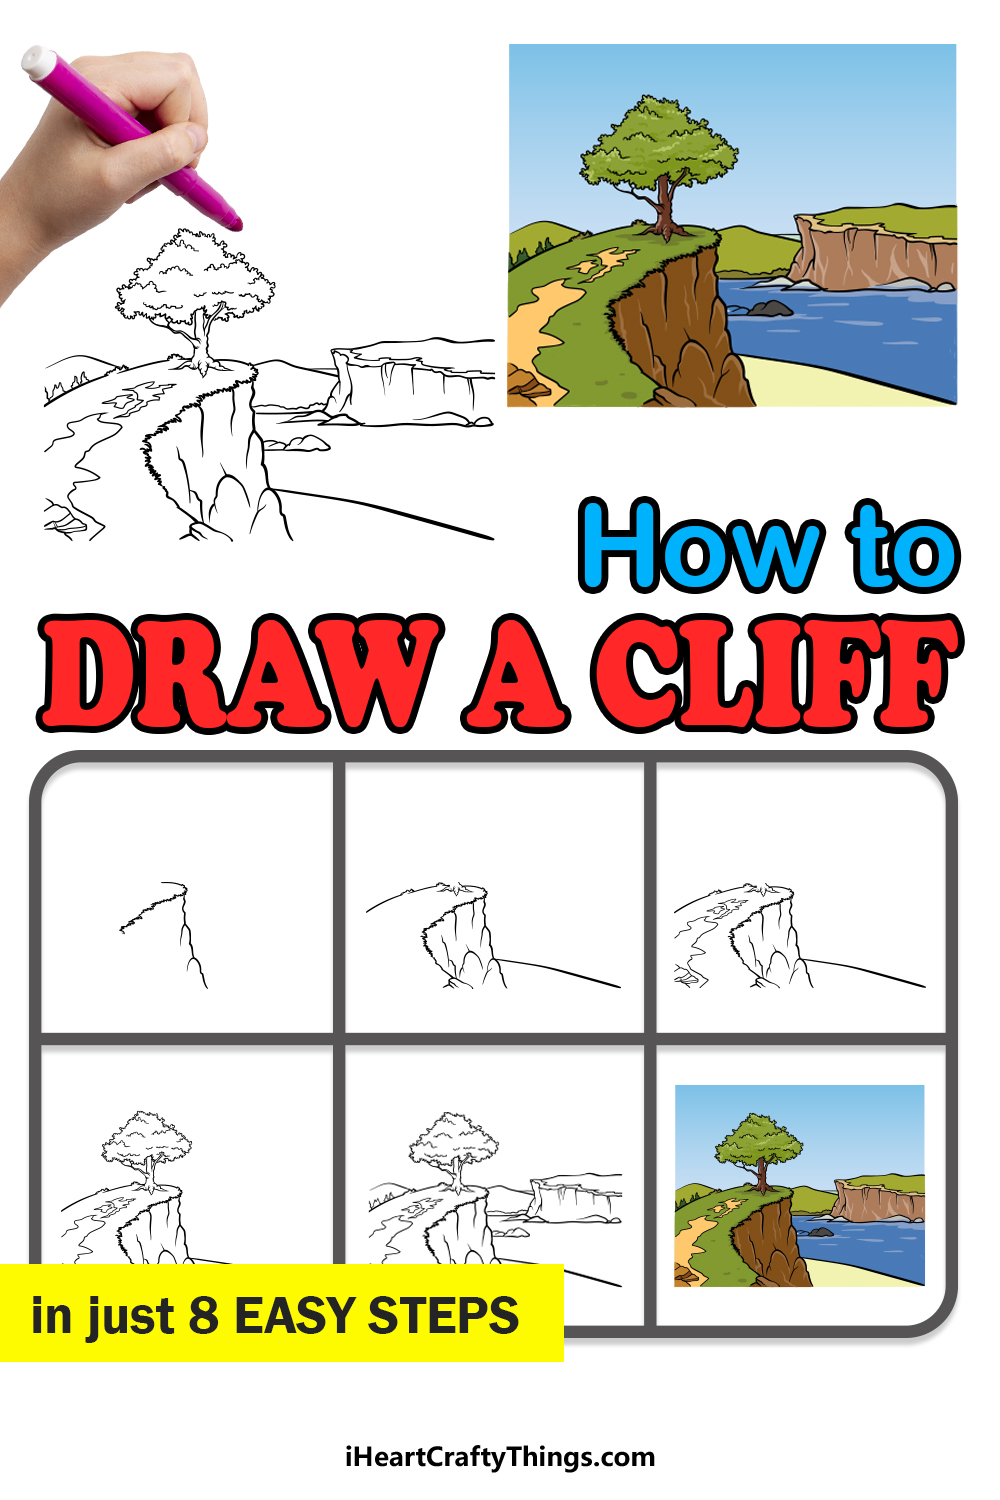
Our step-by-step guide on how to draw a cliff will guide you through the entire process and show you how to recreate this majestic cliff!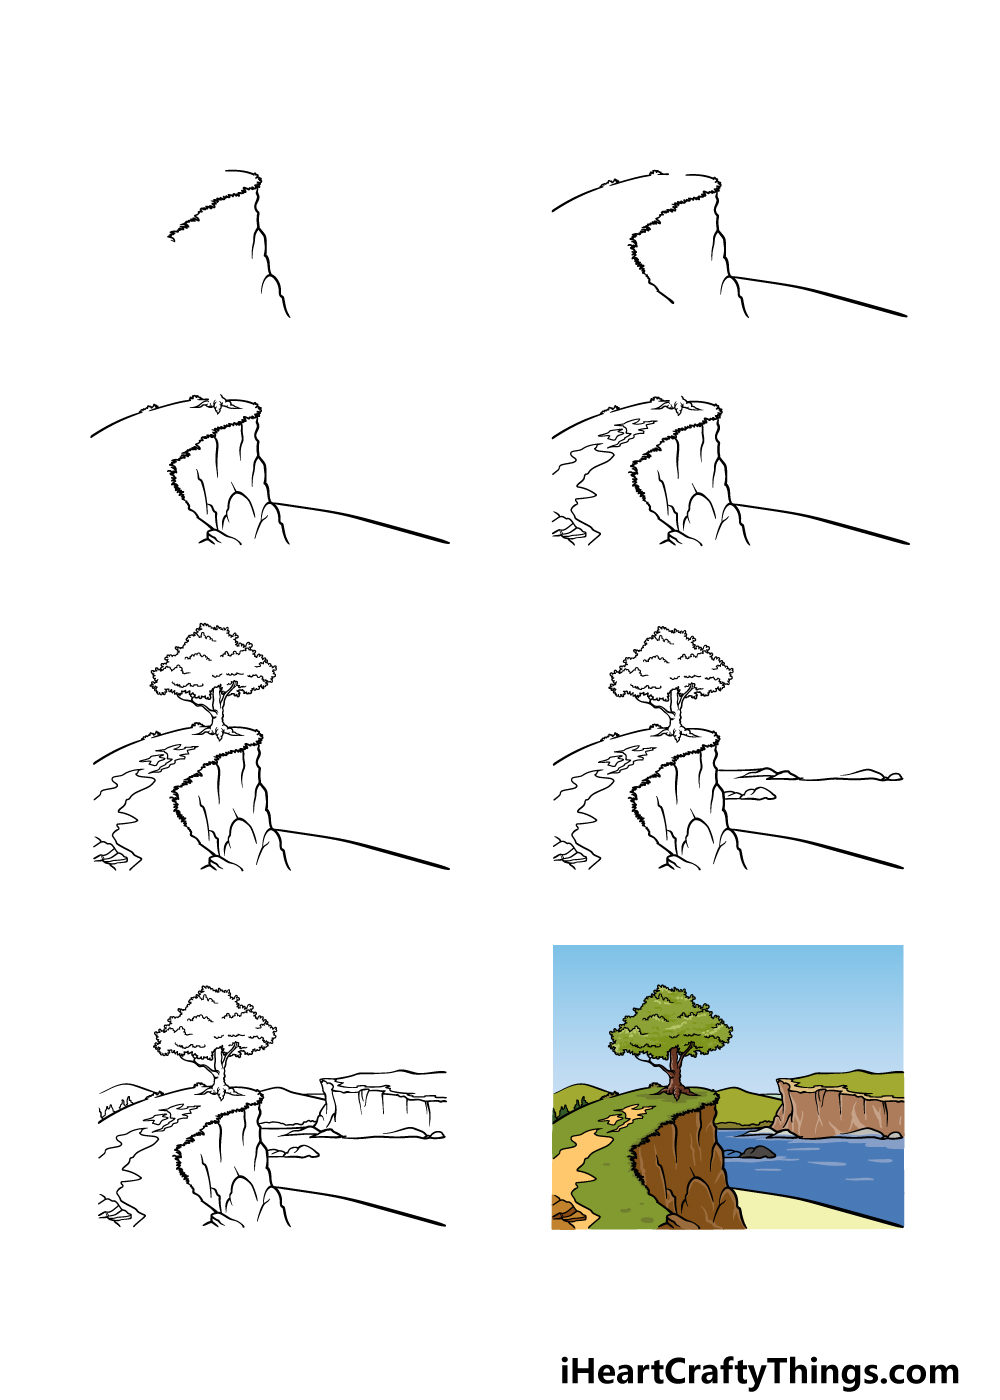
How to Draw A Cliff – Let’s get Started!
Step 1
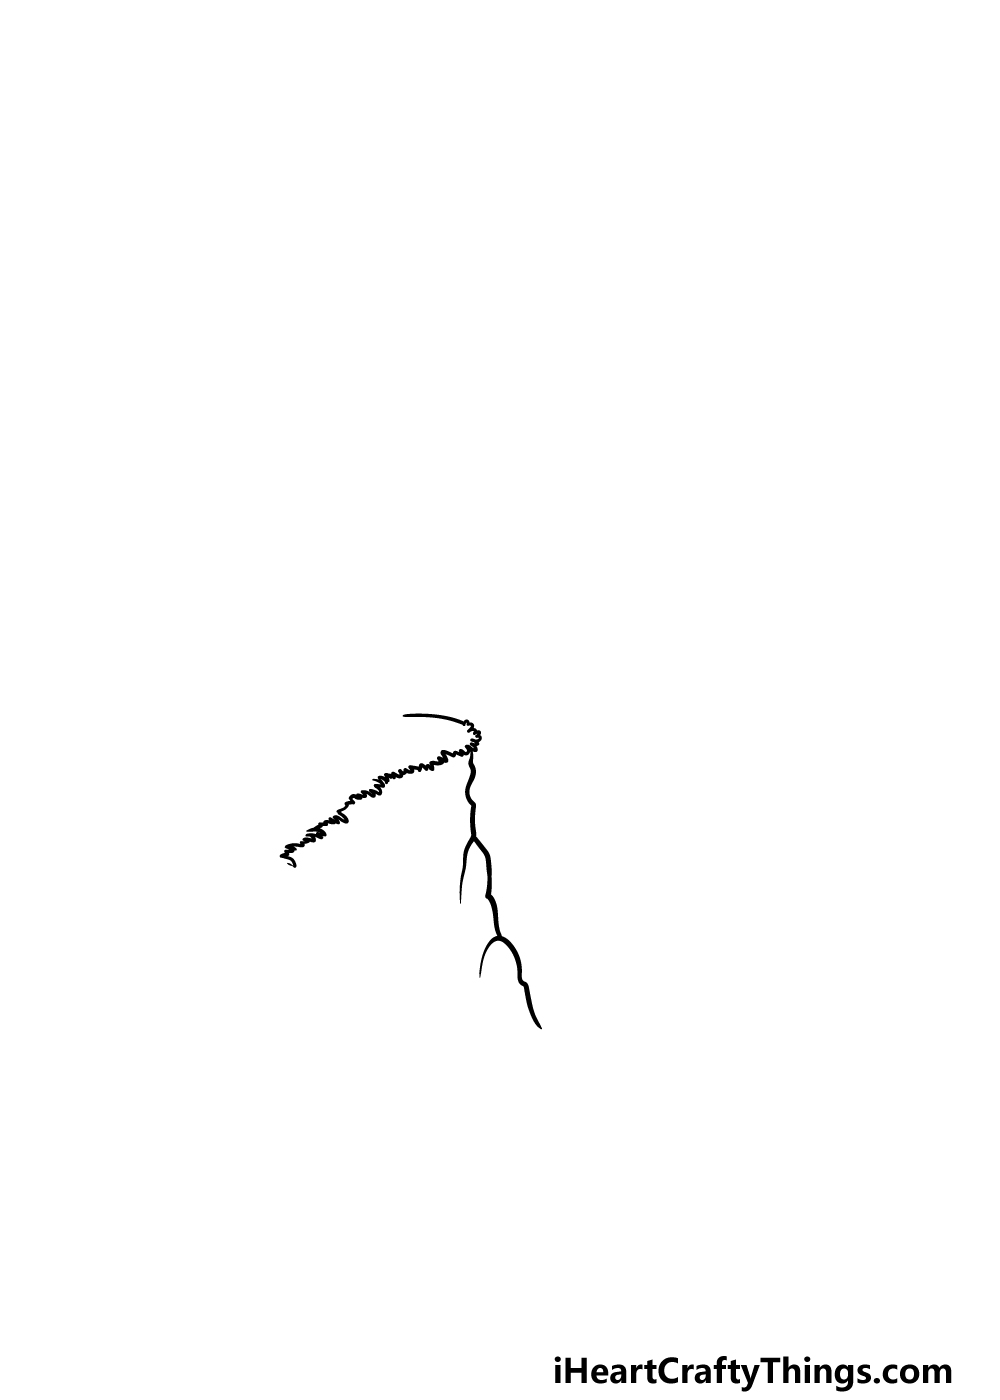
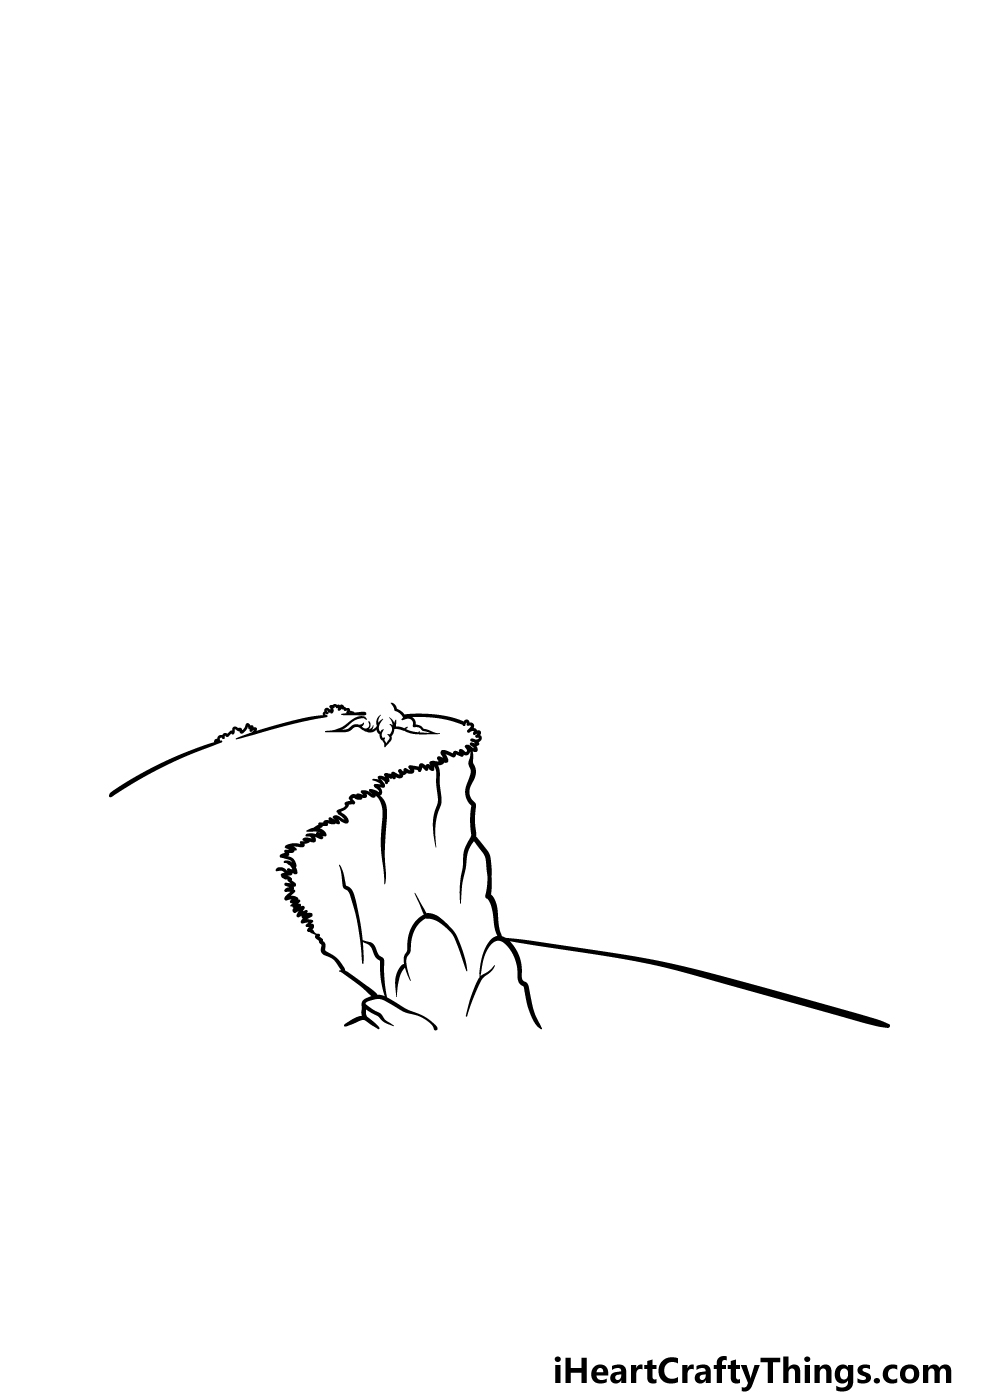
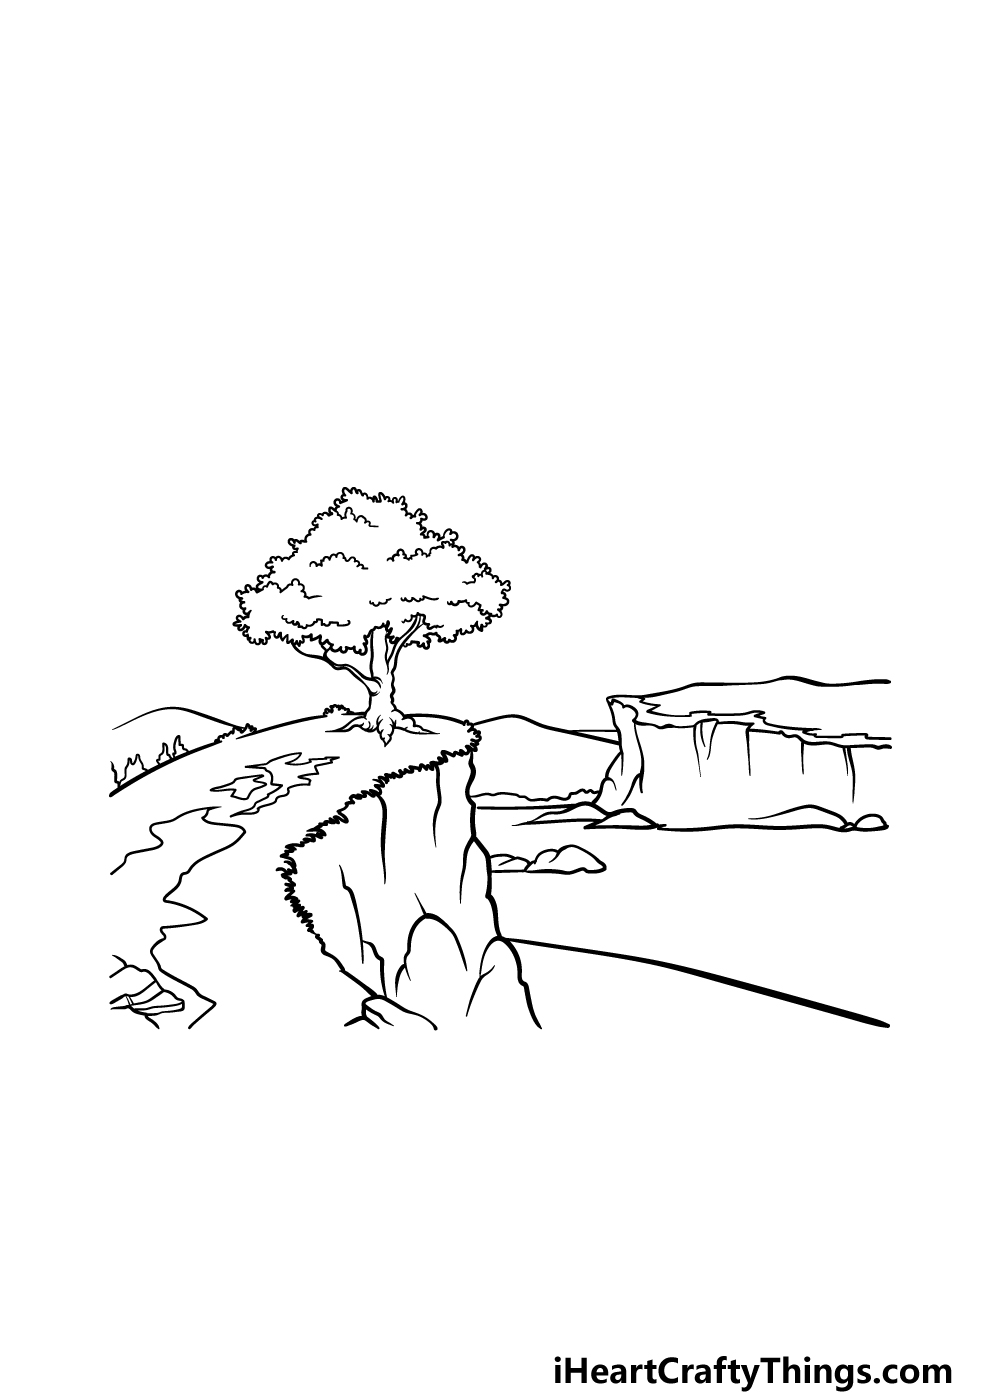
We will be keeping it fairly simple in this first step of our guide on how to draw a cliff. We will start with the grassy top of the cliff by using some thin, jagged lines for the outline of this area.
There will be a big empty space on top of it, but we will fill that in later on. Once that is done, we will then draw some curved yet slightly jagged lines for the side of the cliff.
We will draw it like this to make the cliff face look nice and rocky.
Step 2 – Next, draw some more of the cliff
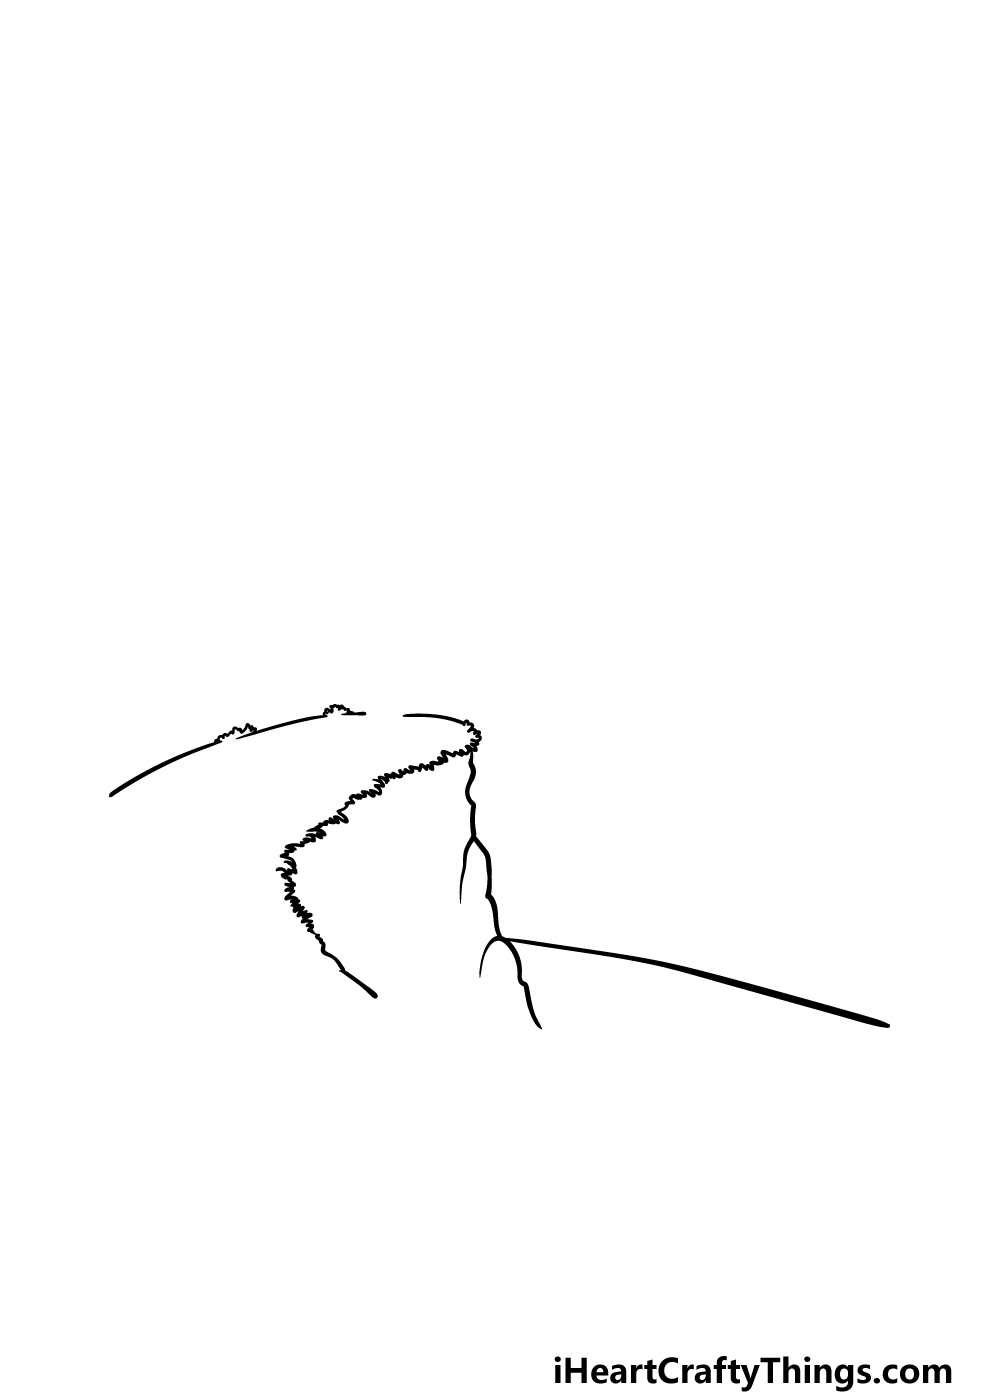
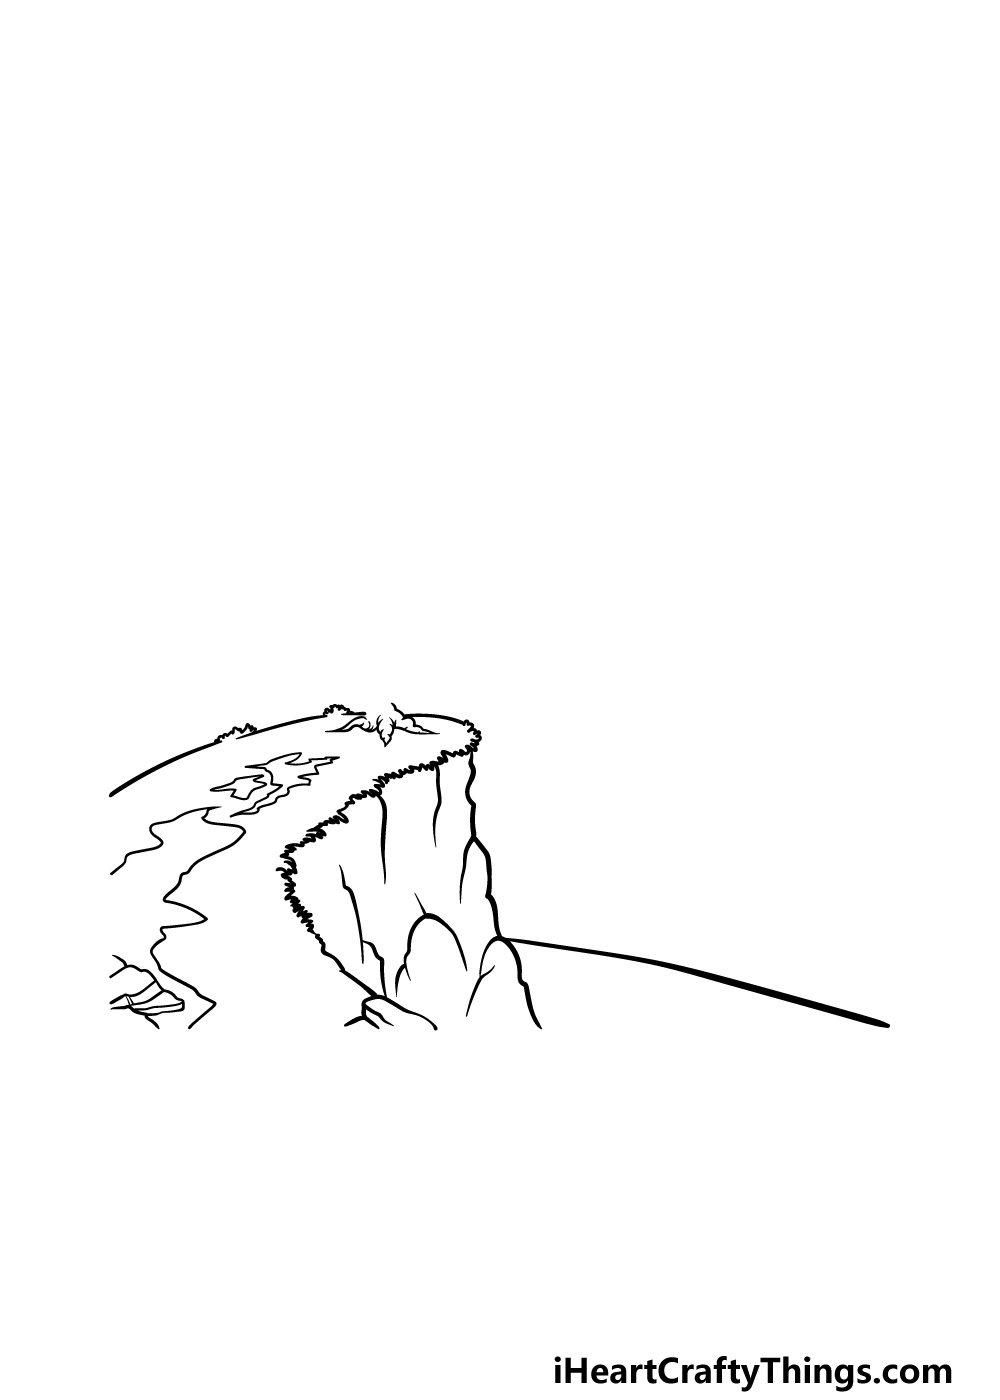
This second step of your cliff drawing will see you adding some more to the cliff and the surrounding scenery. Start by drawing some more curved lines for the top of the cliff.
You can add some small little jagged parts for some grass poking off the top as well. There will be one small gap left where we will be adding a tree later.
Finally for this step, we will be drawing the start of the beach underneath the cliff by drawing a long curved line beneath it. That’s all for this part, so now let’s move on to step 3!
Step 3 – Now, draw some more details for the cliff
In step 3 of this guide on how to draw a cliff, we will keep adding some details to the various areas of it.
We will start this by drawing the roots of the base of the tree into that empty space that we left earlier.
Then, you can finish off this step by adding some more rounded lines inside the outline of the side of the cliff face, as shown in the reference image.
Step 4 – Next, draw some more details for the top of the cliff
We shall be adding some dry patches into the grass on top of the cliff drawing in this next part. To do this, we will be drawing some irregular shapes on top of the cliff using some wavy lines.
This is the kind of effect that should be used in moderation, as we don’t want the top of the cliff to look too bare.
We struck a nice balance in our reference image, so try your best to get it looking like our version if you can!
Step 5 – Now, draw the rest of the tree
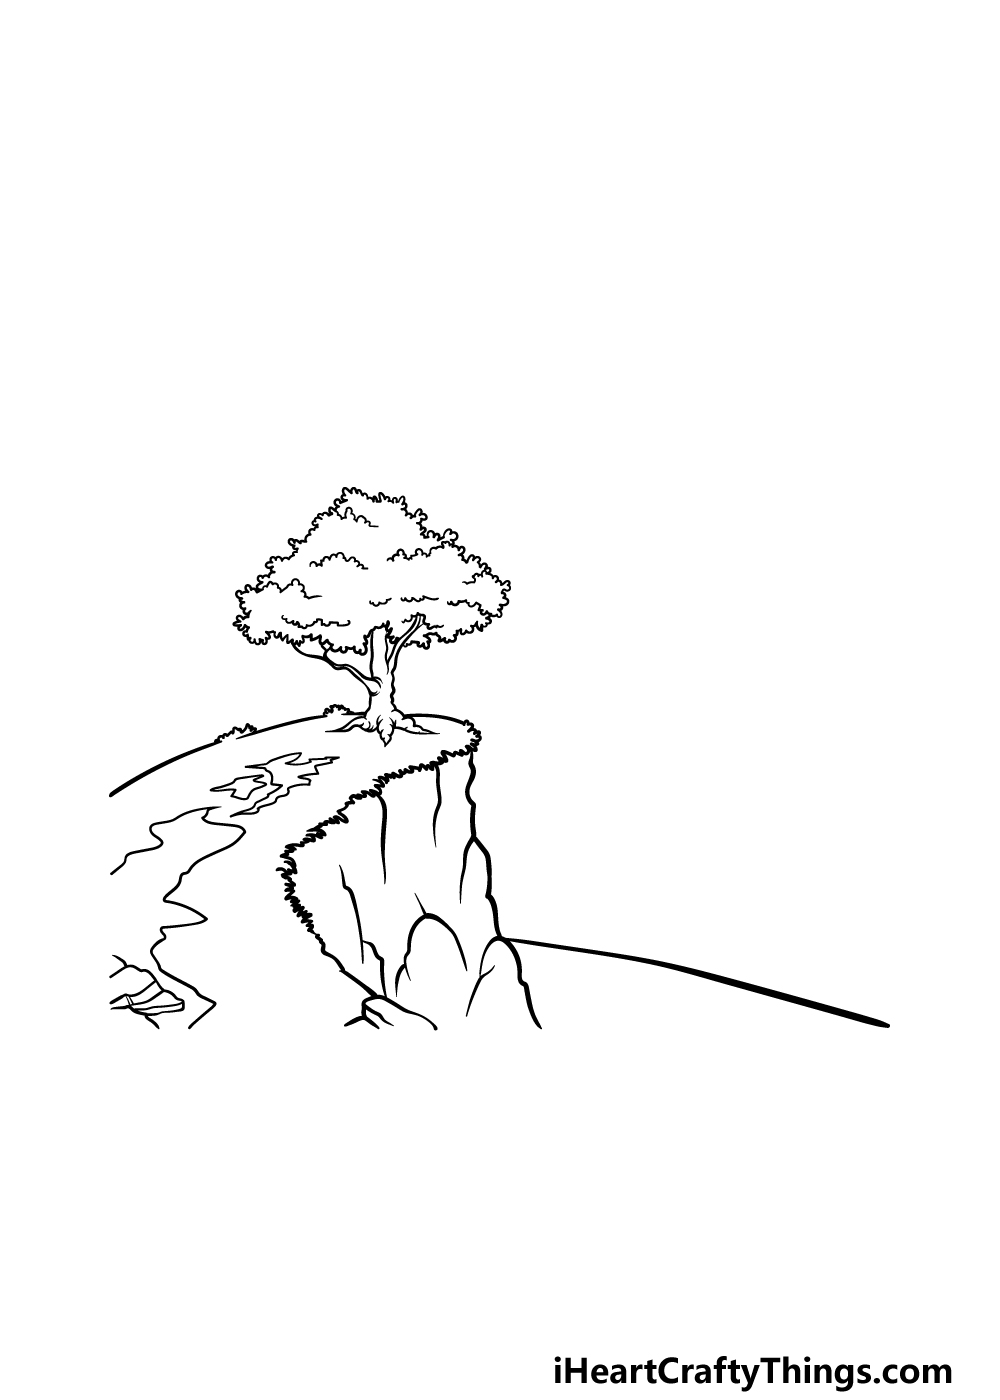
Let’s return to the tree that you started to draw earlier in this guide on how to draw a cliff. Using the base, extend the trunk up a bit and then add some branches poking out.
We will then draw the outline of the leafy top of the tree using another bumpy line forming the overall shape of the tree canopy.
That’s all for now, so let’s move on to step 6.
Step 6 – Next, draw more of the scenery
For this and the next part of your cliff drawing, we will be focusing more on the surrounding scenery than the cliff itself.
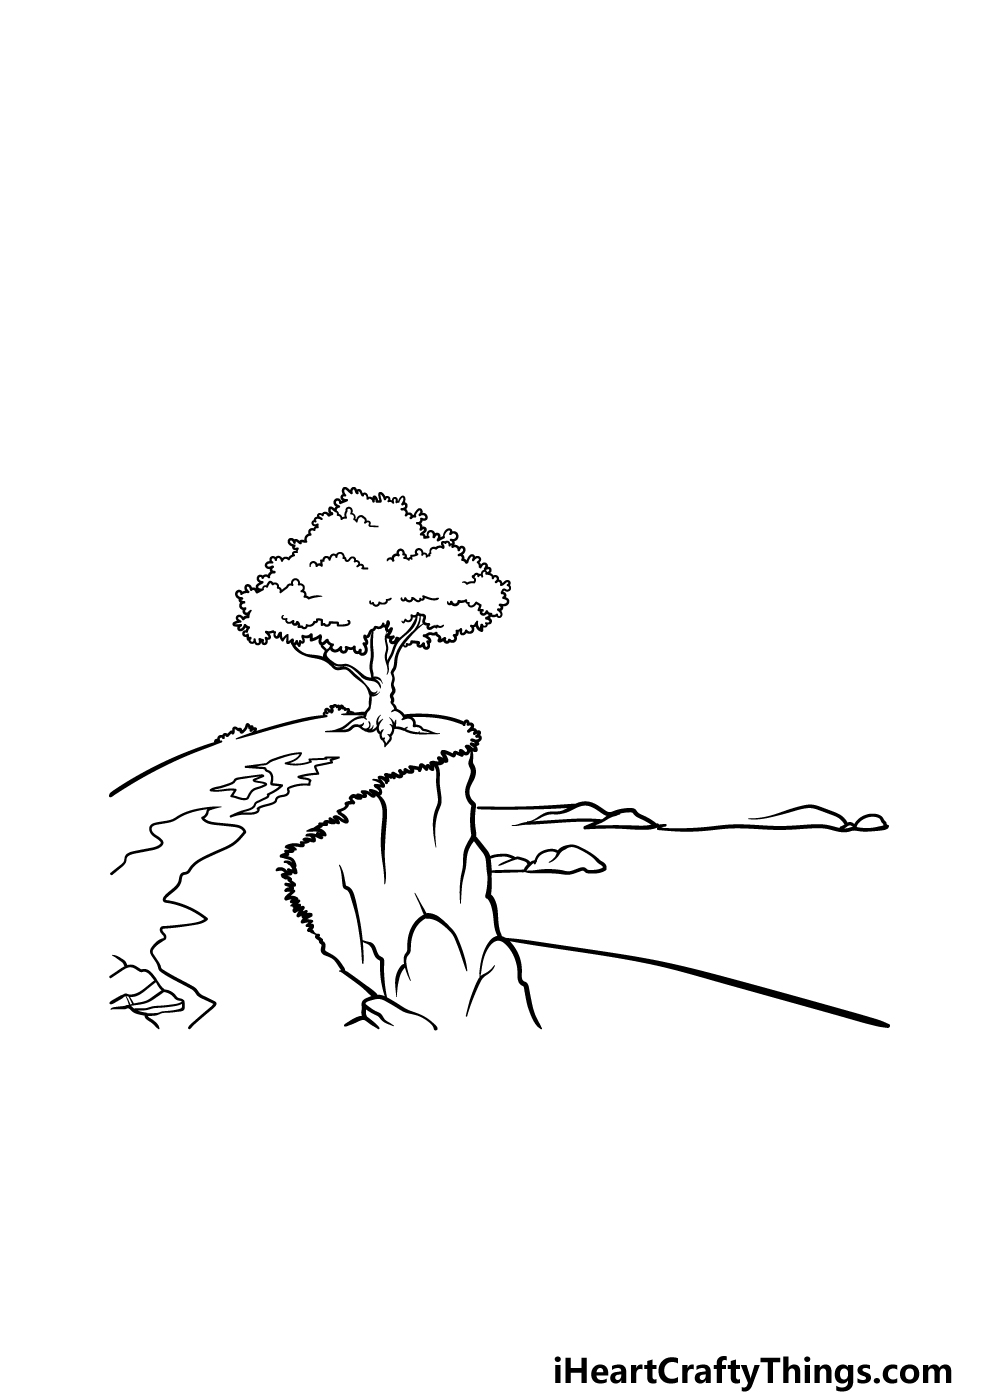
For now we will be drawing the ocean or maybe the lake that the cliff is overlooking. Start this by drawing some rounded shapes for some large rocks near the top of the body of water.
Then, finish off with some more straight lines for the top of the waterline.
Step 7 – Finish off the rest of the scenery
Before you color in this amazing artwork of yours, we shall first finish off the final touches in this step of our guide on how to draw a cliff.
This means that we will be adding some more to the surrounding scenery. On the other side of the body of water, we added a smaller cliff that also has some grass on top of it.
Then we used some curved lines for some small mountains on the horizon. You could also add some additional elements and details of your own, so what would you add to this perfect scene?
Step 8 – Now finish it off with some color
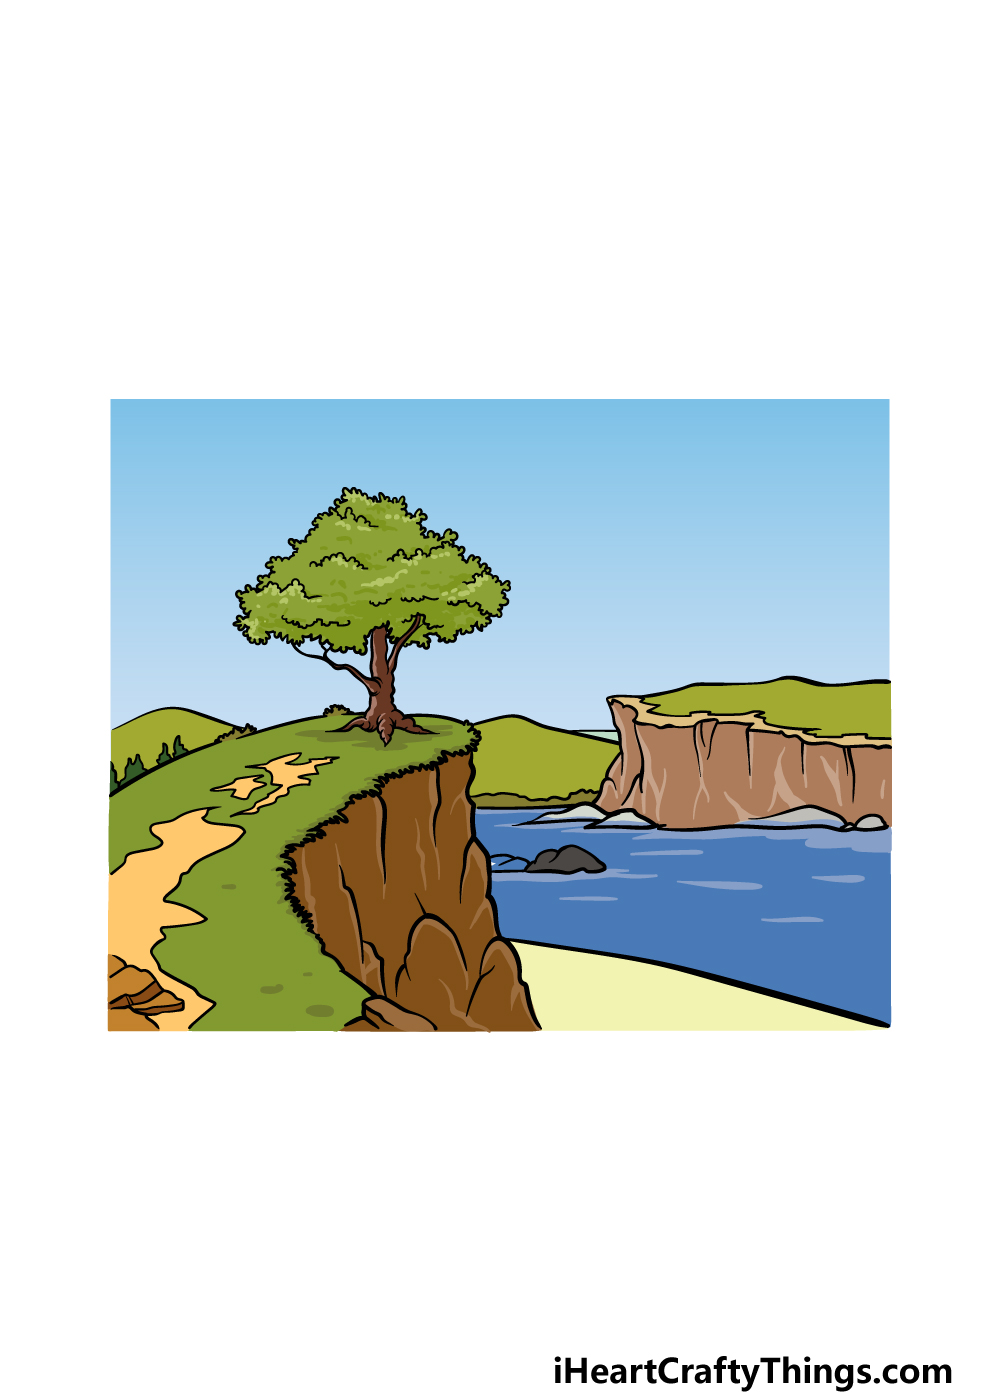
The final part of your cliff drawing will see you finishing off with some amazing colors. We showed you just one way that you could go about doing this in our reference image, as we kept the colors nice and bright with lots of blues and greens.
You could create a whole different look for this image just with the colors you use, for example you could make it look like a rainy day by using lots of greys.
Once you know what colors you would like, it’s just a matter of choosing which art mediums you will use! Watercolors can be great for landscape pictures like this, but anything you use will look great!
5 Tips To Make Your Cliff Drawing Even Better!
Get ready for 5 fun tips on how to make this cliff sketch even better!
In this cliff drawing, we have a single tree at the edge of the cliff. This creates a really cool look, but you may also want to add a few more trees to the image.
These additional trees could be similar to the one that’s already there. Or, you may want to include a variety of different tree species around the scene.
We also get a good look at the water in this drawing of a cliff. This is an area where you could add all kinds of fun little details!
For example, you could have some fish or even bigger creatures like a whale swimming in it. That would be a great way to add some life to this image!
We have focused on additions that are nature-oriented for the tips we have given so far. You could also add some human characters to this cliff sketch as another way to make it more alive!
They could be having a picnic on the shore or maybe even diving into the water. What other scenes could you create if you were to add some human characters to this landscape?
There are other ways you can add some human activity to the artwork without adding characters. For one idea, you could add a small sailboat lazily drifting across the water.
Or, you could even add a small cottage or something bigger like a lighthouse. These are just a few suggestions, but what other signs of human activity could you add to this scene we have created?
Finally, you can bring it all together by adding some fun colors to this cliff drawing. We showed you one way that you could color the image with a few suggestions for art tools.
The best part of adding colors is that there are no wrong ways to do it! You can really let your inspiration take over as you pick the colors you want.
Your Cliff Drawing is Complete!
This is a really fantastic cliff that we worked on in this guide on how to draw a cliff! We hope that this guide made you surprise yourself with what you could do, and that you had lots of fun doing it.
You can also keep expressing your creativity for this drawing, and you can do this by adding your own extra details and additions. Be sure to have fun as you finish off this picture!
There are plenty more guides like this one for you to enjoy on our website, with more on the way soon. You’ll want to keep checking in to never miss out!
We would love to see your rendition of this cliff drawing, so when it is complete please do share it on our Facebook and Pinterest pages for us to admire!