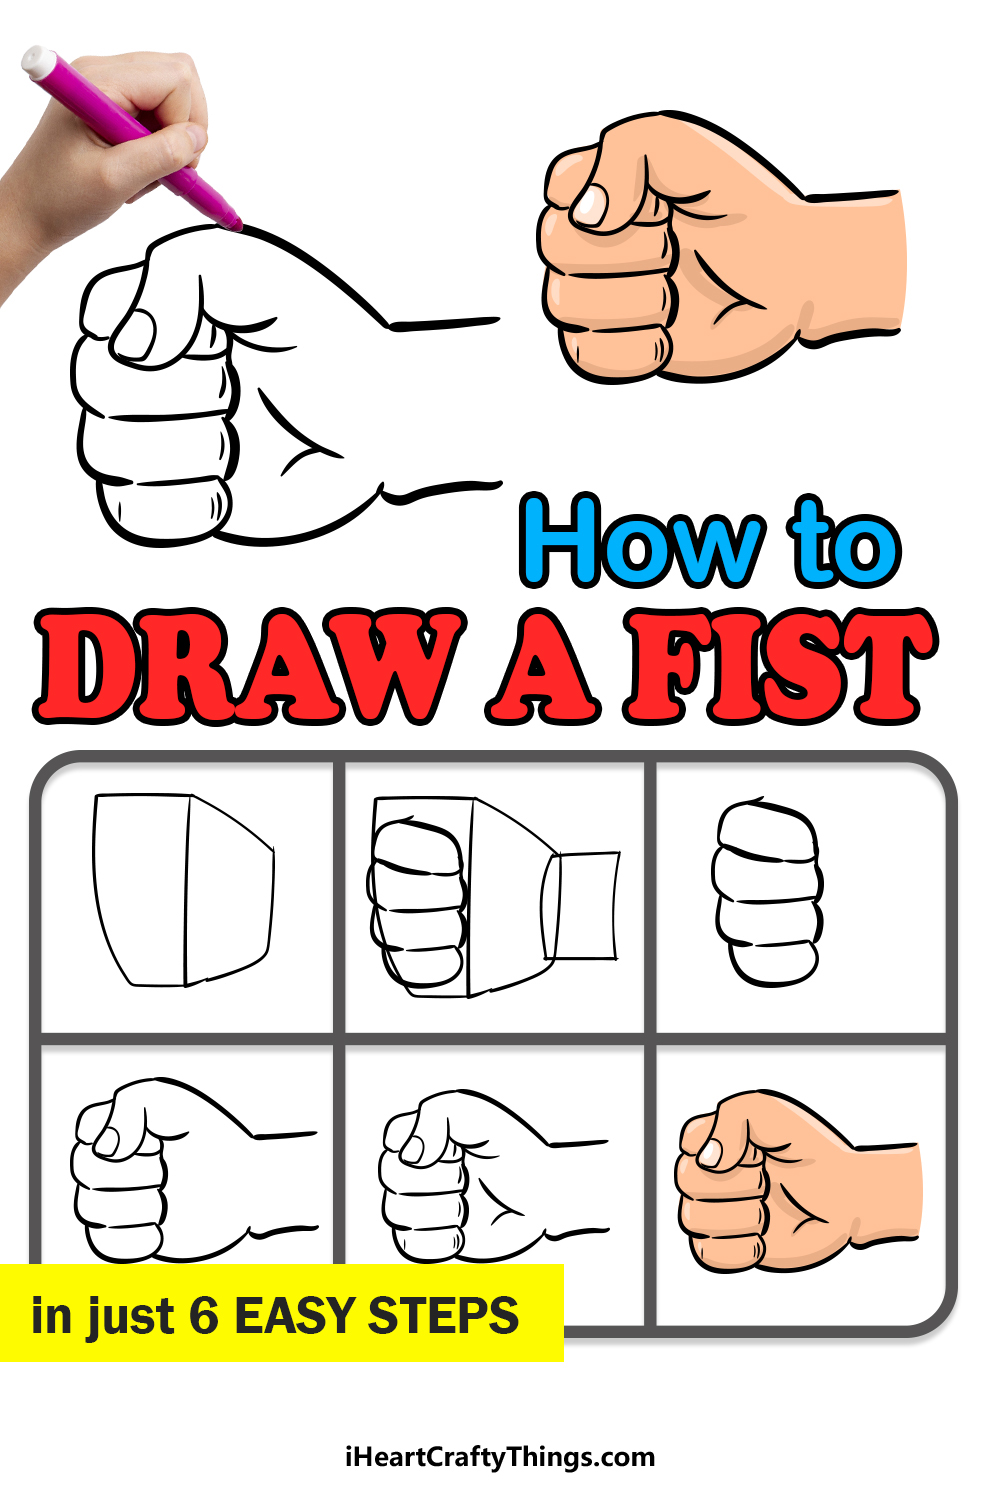
It’s easier than ever to learn how to draw a fist thanks to this guide for kids! Read on to see how to conquer this tricky drawing.
Hands are difficult to draw at the best of times. You may not think it would be the case, but anyone who has ever tried will tell you it’s really tricky.
I even know of experienced artists who will draw characters with hands behind their backs to avoid drawing the hands! It’s not made any easier when the hand is in a dynamic pose like a fist.
In this guide, I will show you some nifty tricks to make it much easier. First, we will map out the drawing with a pencil, and then you can add some final details to end up with a fantastic picture.
With a bit of practice, drawing a fist will be like second nature!
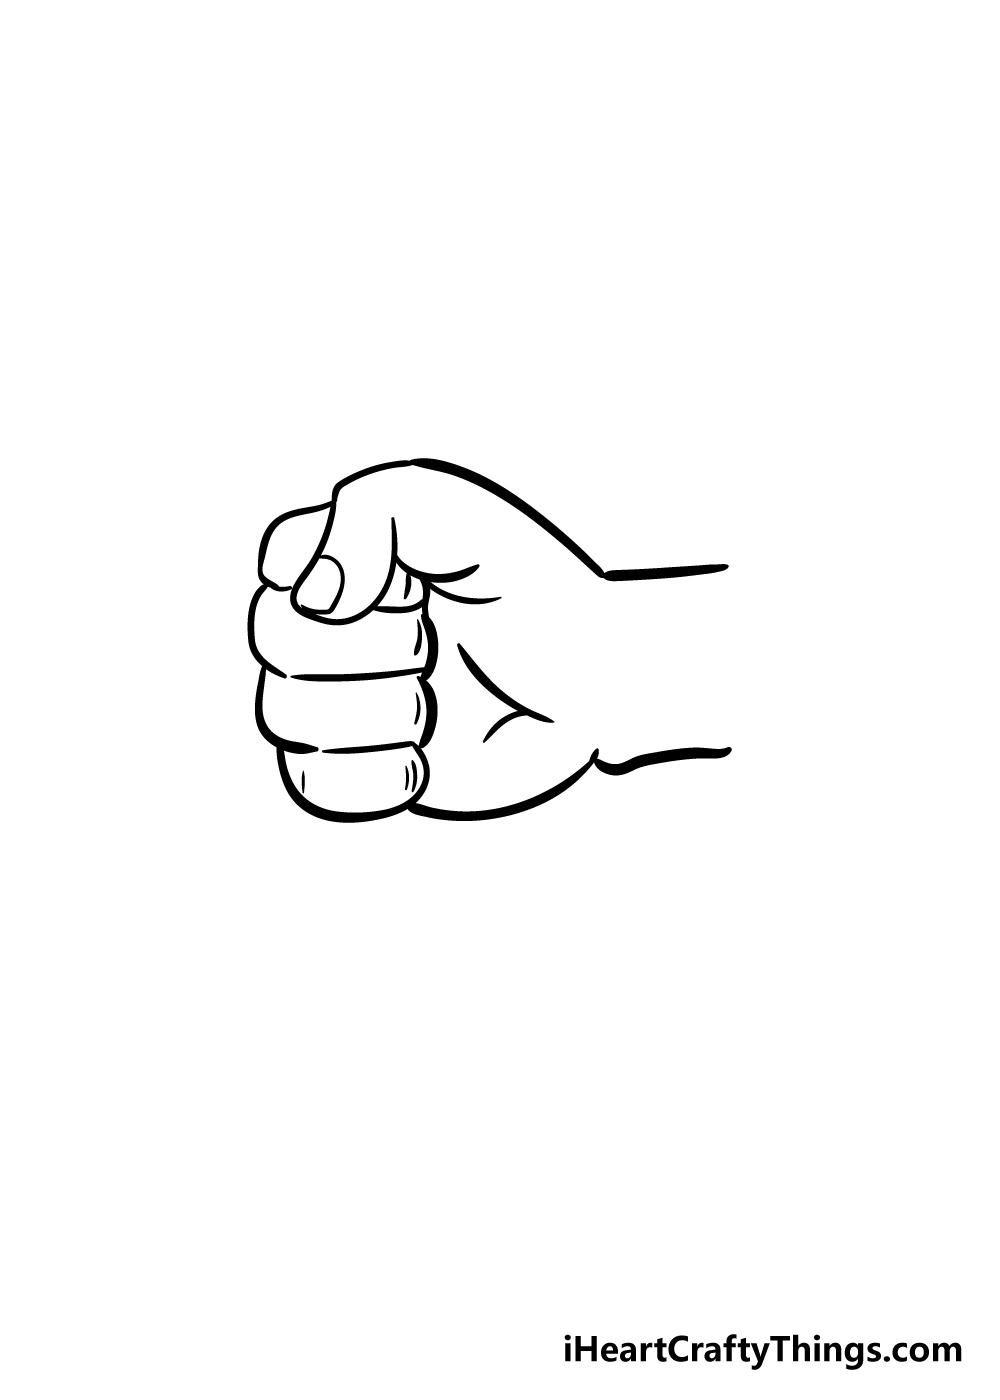
See How To Easily Make A Fist Drawing
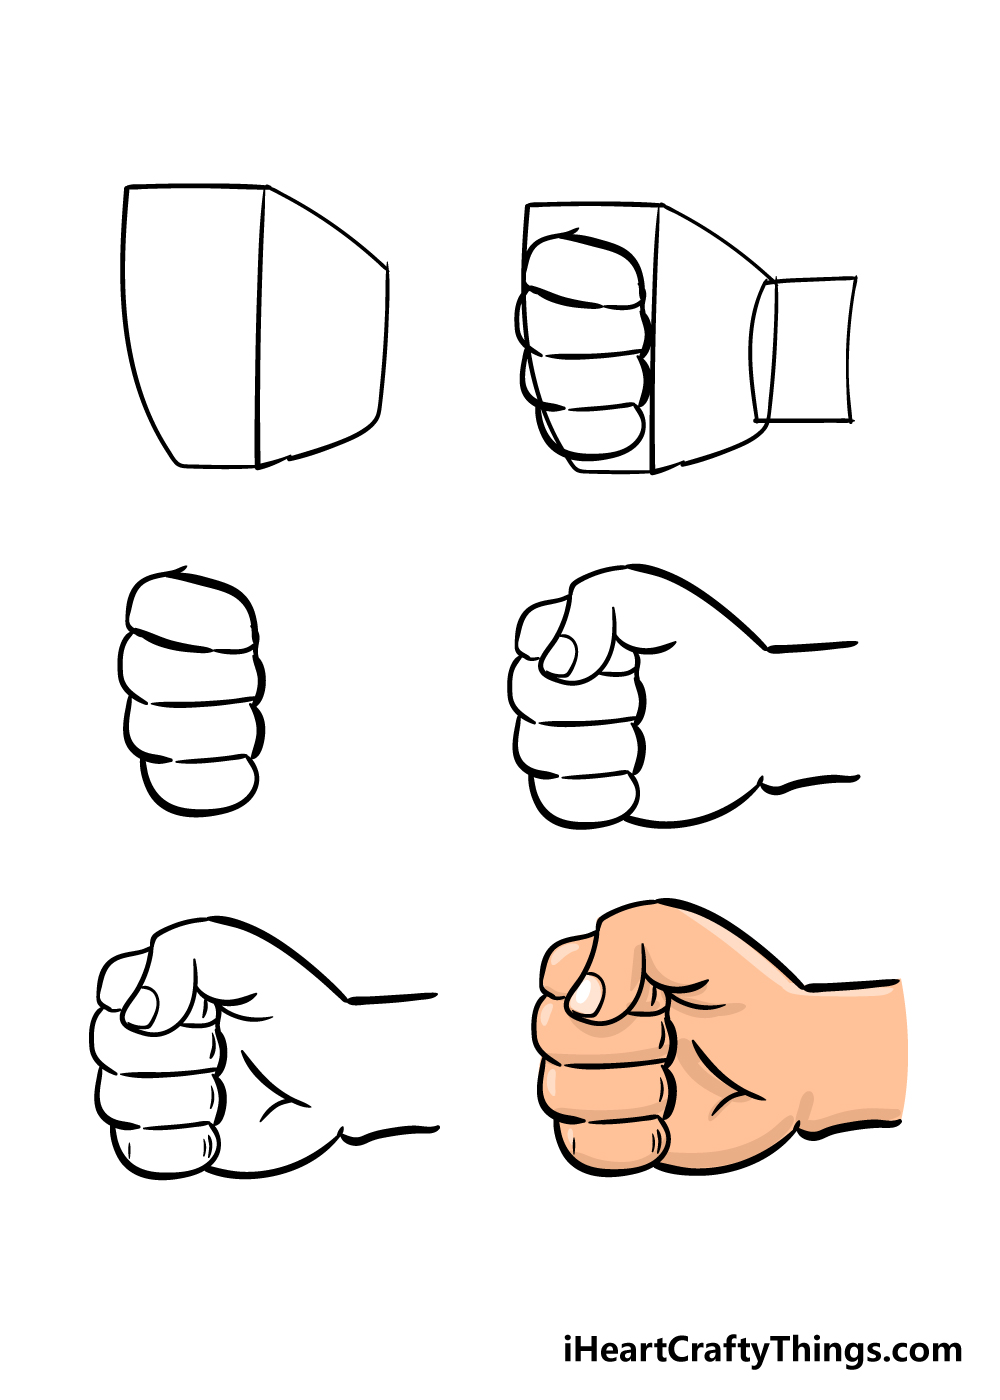
How to Draw A Fist – Let’s get Started!
Step 1
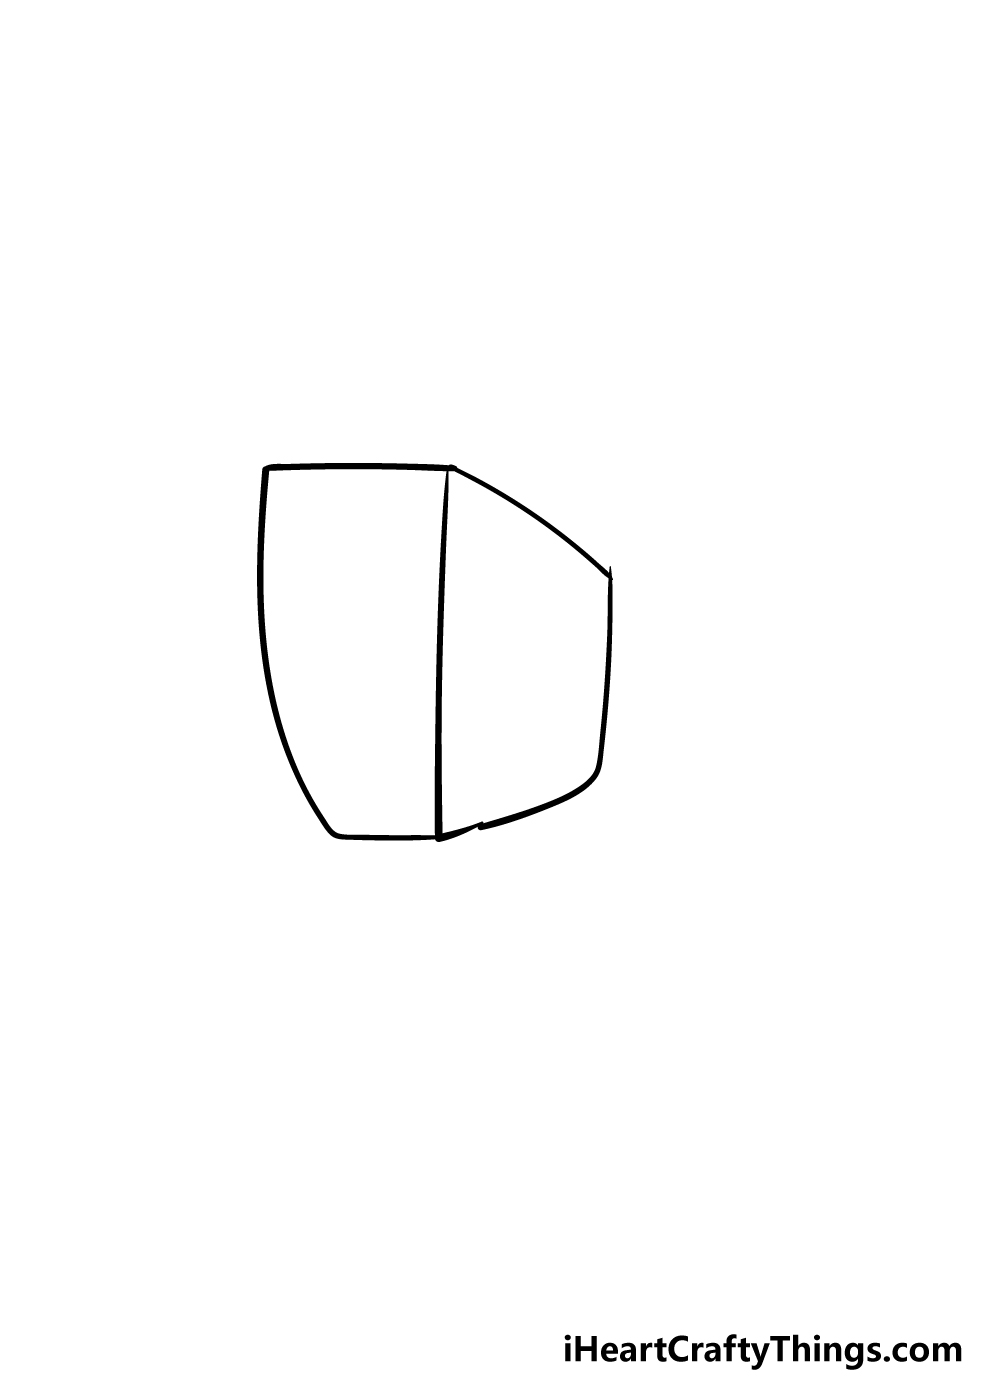
In this first step of our guide on how to draw a fist, we actually won’t start drawing the final image quite yet.
Instead, we will be drawing a shape that will guide you when you do start drawing the final hand.
For this step, it would be highly recommended to use a light pencil, as you will be erasing these lines later.
Using the reference picture we provided as a guide, carefully draw the shape using your pencil. It’s divided into two sections, and the left section will be much wider than the right one.
Once you’ve drawn these shapes using your pencil, we can move on to step 2 of your fist drawing.
Step 2 – Start drawing the fingers of the fist

We shall use the pencil guide that you drew in the previous step of your fist drawing to start adding some fingers to your picture.
It would still be recommended to use a pencil for this step, as you will have lines going over the fingers in later steps.
To start, draw four curved, sausage-like shapes within the left shape that you drew in the previous step.
Then, once you have the fingers drawn, use your pencil to draw a curved rectangle shape to the right of the guide shape. This will help you when you draw the wrist in a future step.
Step 3 – Next, start to erase the guide shapes

In the next few steps, we will start to erase the pencil guides that you drew and begin going over in pen.
We removed the guiding pencil shapes for this image of our guide on how to draw a fist to show you how it will look without them, however I would recommend keeping them in until the next step.
Once you have a good idea of how you’ll be proceeding, we can move on to step 4 of your fist drawing.
Step 4 – Start going over in pen for this step
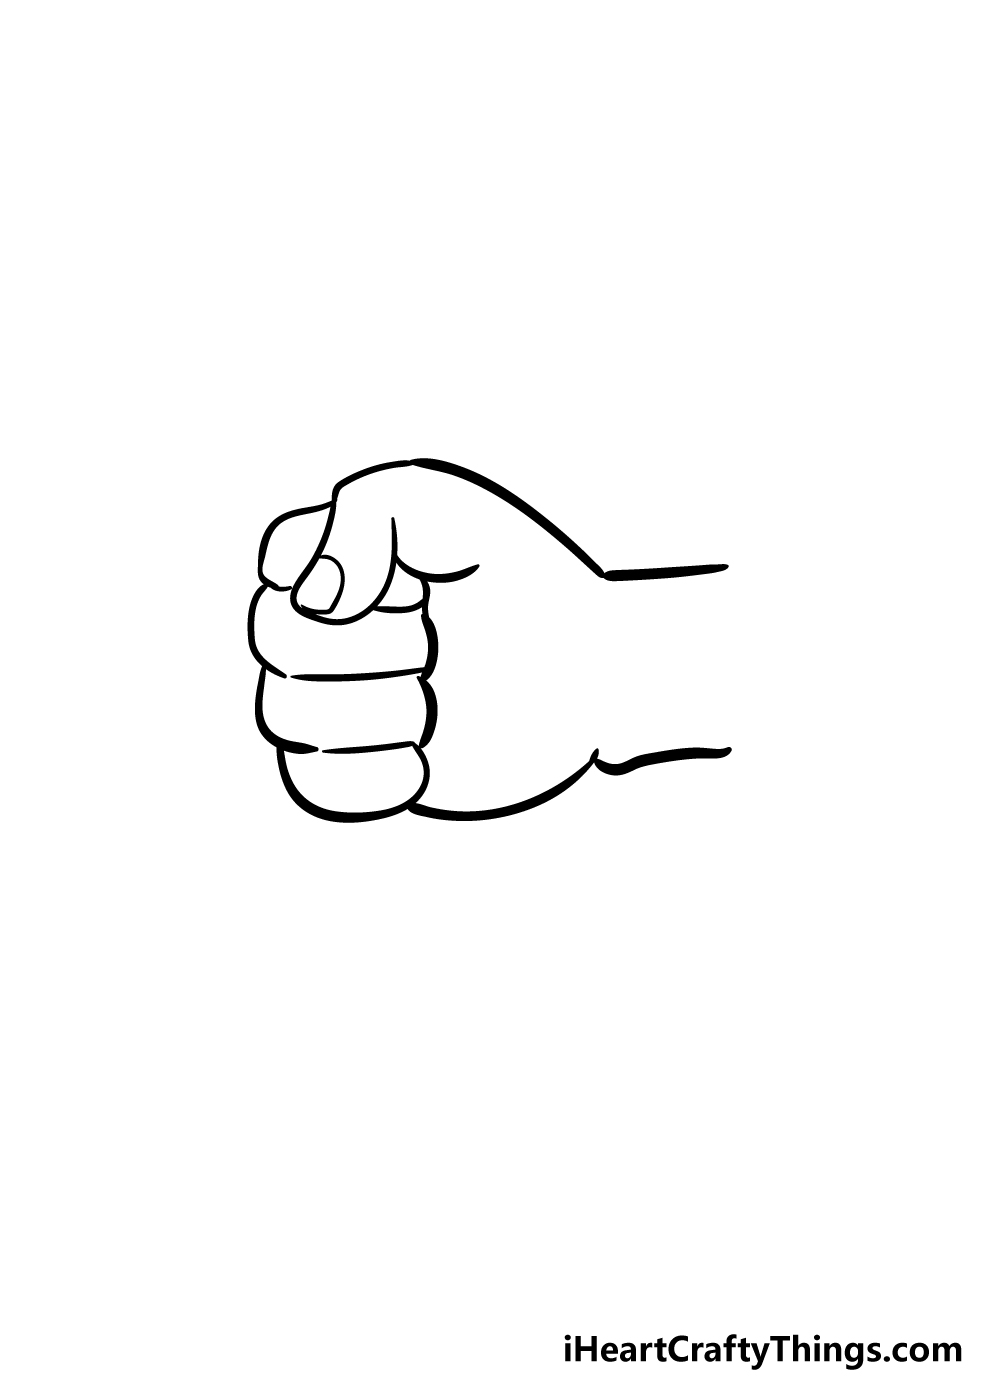
In this part of your fist drawing, we will start on the final lines and erase some of the pencil guides.
Using what you’ve drawn in previous steps, carefully add a thumb coming down over the four fingers you already have.
The thumb will then slope down with a curved line towards the wrist. Another curved line will slope up from the bottom of the four fingers to the bottom of the wrist.
Speaking of the wrist, we shall draw that in using some straight lines coming out from the hand. Now, you can start to see the fist forming!
Carefully go over the lines using a pen or a darker pencil, and be sure to use the reference images we have provided to make sure you go over the right lines.
Once you’re happy with it, you can erase all of the pencil lines. Be sure to let the pen ink dry fully before you start erasing, though!
Step 5 – Draw in some final details
You’re almost ready for some coloring fun, but before that we shall add some final details in this step of our guide on how to draw a fist.
If you look at your own hand right now, you will see there are many lines on it, and these only become more pronounced when you move it in different positions. To start, draw two large, curved lines to the palm of the hand.
Then, draw some smaller lines to show the upper knuckles of the fingers. Don’t forget to draw a fingernail onto the thumb, too!
These are the details that we added for this image, but don’t be afraid to add some of your own!
You could draw a pretty ring onto one of the fingers or the sleeve of a sweater for a few ideas! What fun details can you think of for this image?
Step 6 – Finish off your fist with some colors
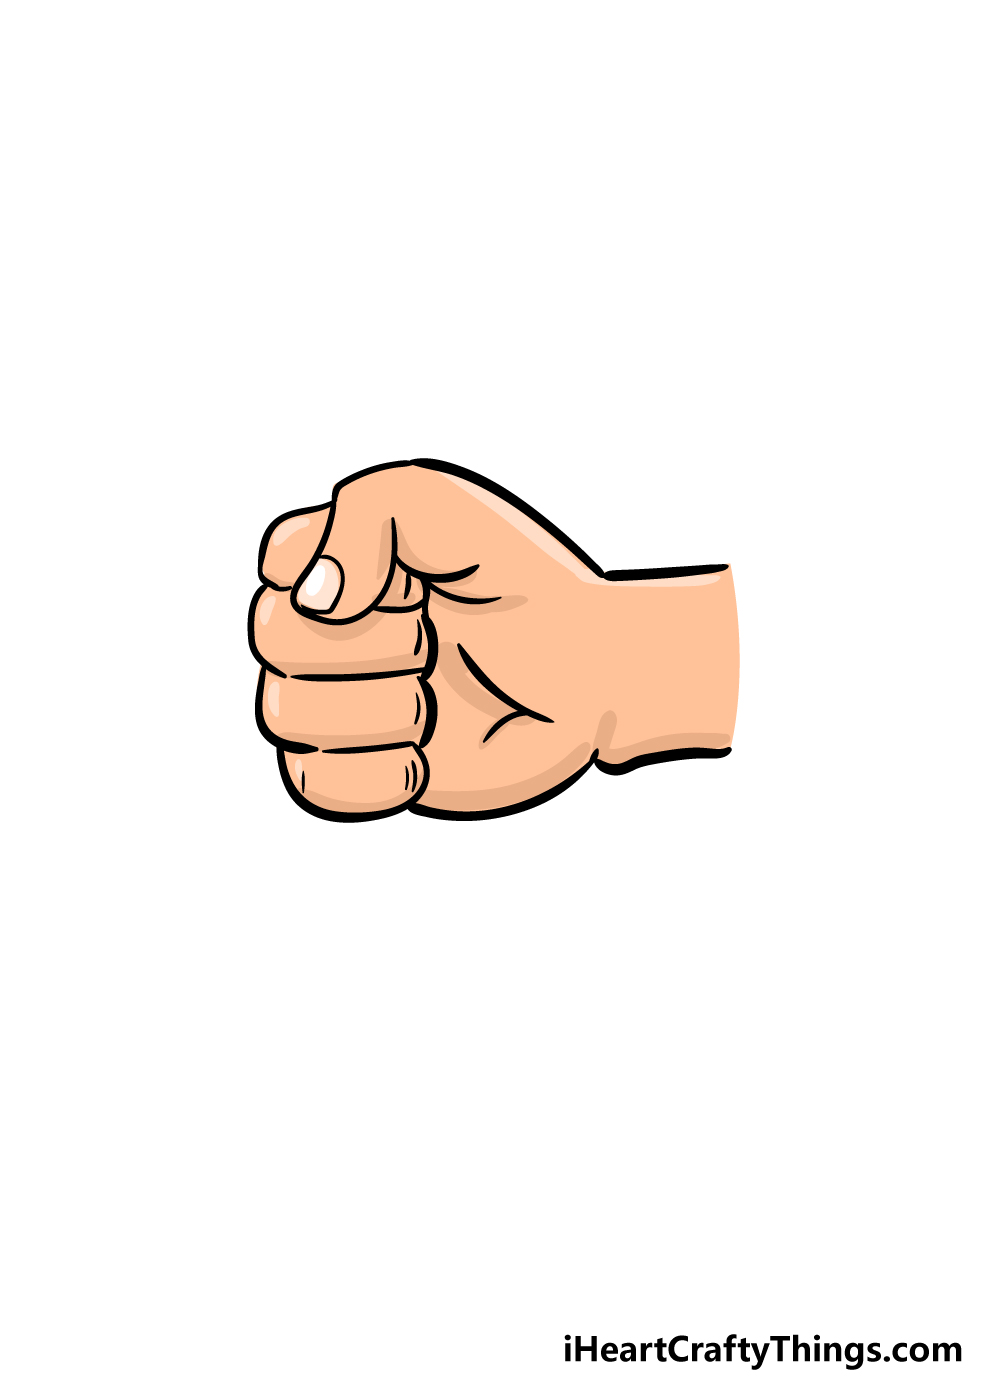
We’ve reached the final step of your fist drawing, and it’s a fun one! For this part, you can bring your drawing to life using some beautiful colors.
This is a step where you can really show off your creativity and have some fun finishing off your incredible drawing.
You have many options with how you could color this in! You could try to make it look like your own hand, or use any of your favorite colors to finish it off.
There’s also fun to be had with the art mediums you choose for your image.
There are paint options such as acrylic paint and watercolors that you could use, or perhaps you could go with crayons, colored pens or pencils.
Which of your favorite art tools will you use for your drawing?
5 Tips To Make Your Fist Drawing Even Better!
Grab your favorite art tools in your hand and make this fist sketch even better!
One of the easiest ways to make your drawing of a fist even better would be by adding more of the arm it is attached to. How much more of the arm you add would be up to you and your preference!
It could just be more of the forearm, or you could go all the way to the elbow or even shoulder. This is a fun and easy way of adding more context to this fist!
Even if you keep to the general fist shape we drew here, you could change the gesture of the hand by changing just a few details!
For instance, you could have the pointer finger sticking out to make it look like this hand is pointing.
If you were to do this, you could use your own hand to help with the shape and positioning of the finger.
Many people will wear rings and other decorative accessories on their fingers. You could make this fist drawing even more unique by adding a ring to one or more of the fingers.
If you don’t own any rings, your parents or friends might have some that you could borrow as models.
Adding a background setting would be another interesting way of making your fist sketch even better. You could show this fist in a tense fight scene for one idea.
Or, maybe the fist could be banging down on a table in a courtroom scene. These are just a few ideas, but what other scenarios can you think to create around this fist?
Another way of decorating the fist without adding accessories would be by drawing some tattoo patterns.
Doing this would not only allow you to come up with your own pattern designs but would allow give you the chance to add any colors you like.
This is a great way to make this drawing even more striking, so what kinds of tattoos would you add?
Your Fist Drawing is Complete
As we mentioned in the intro, drawing hands can strike fear into the hearts of many an artist, but you have managed to conquer this drawing challenge!
We really hope that this step-by-step guide on how to draw a fist helped to show you that even tough subjects such as this can be made much easier if you take it step by step.
Following this guide is just part of the fun though, and now it’s up to you to use your creativity to finish it off and make it your own!
Whether you draw some extra elements and details, get experimental with your art mediums or create a beautiful background, we know you will end up with a beautiful picture.
We have many more fun step-by-step drawing guides in store for you on our site, so be sure to check in often as we will be uploading more guides frequently!
Hopefully, you will share your finished fist drawing on our Facebook and Pinterest pages for us to see! We can’t wait to see how you finished your awesome drawing.