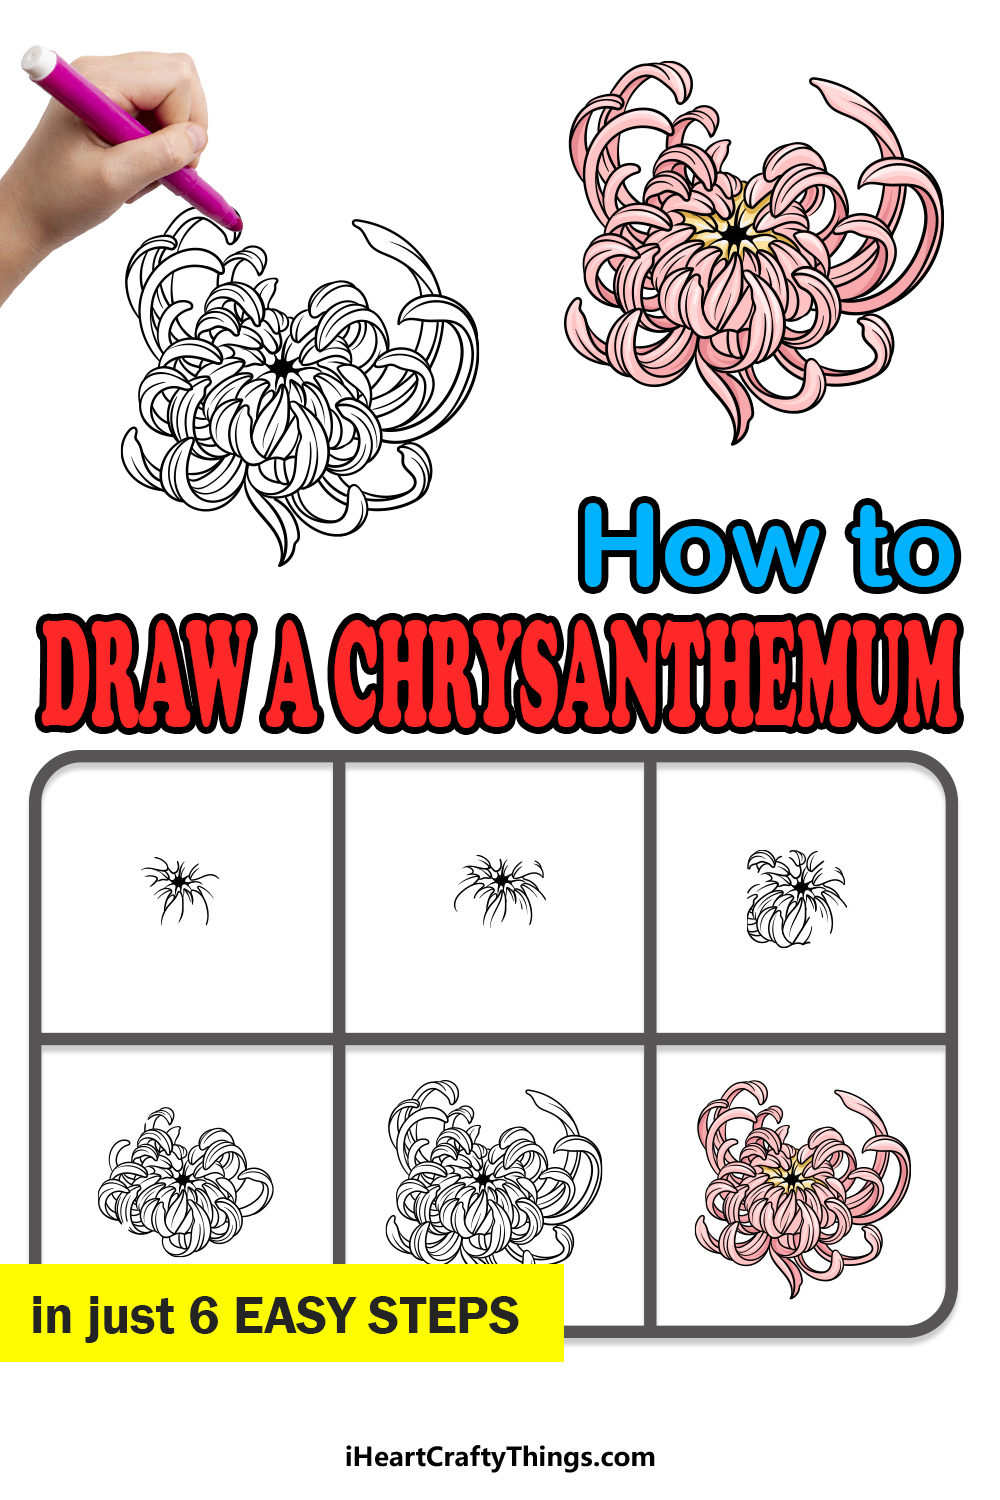
This guide on how to draw a chrysanthemum will make it easier to draw this notoriously tricky flower. It can be difficult when you don’t know what to do, but I’ll show you everything you need to know.
The complexity of a flower can make it more popular, but it can also mean that depicting it in art becomes a major challenge. Some may want to give up on their mission to draw a chrysanthemum because of this complexity.
The goal of this guide is to show you the best way to make it simpler for yourself. I will take you through each and every step so you can see that it is indeed possible to depict this flower.
Once you have completed the guide, you can then add your own details and elements as well.
Watch These Tips To Make Your Chrysanthemum Drawing
How to Draw A Chrysanthemum – Let’s Get Started!
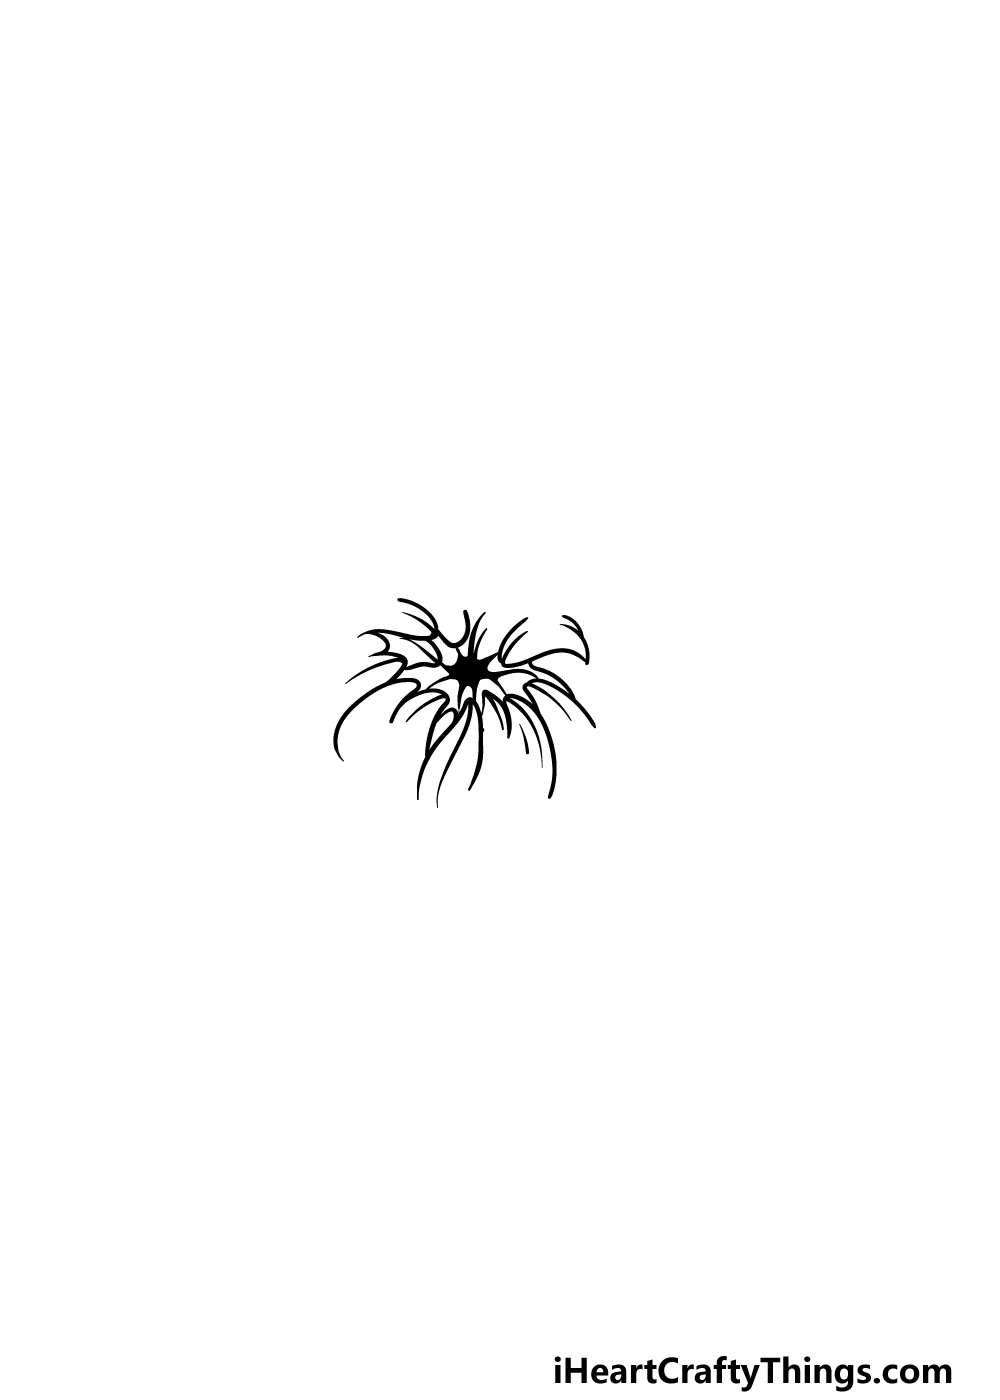
Step 1

As mentioned before, the chrysanthemum is made up of many thin, curled petals that give it a really intricate look to it.
We will be starting off with the center of the flower, which you can draw with a rounded black shape with lines coming off of it.
Once you have drawn that central shape, you can then draw some rounded lines curving inward towards it. These will form the tips of the innermost petals of the flower.
We can then start adding even more to these petals in the next few steps, so let’s move on!
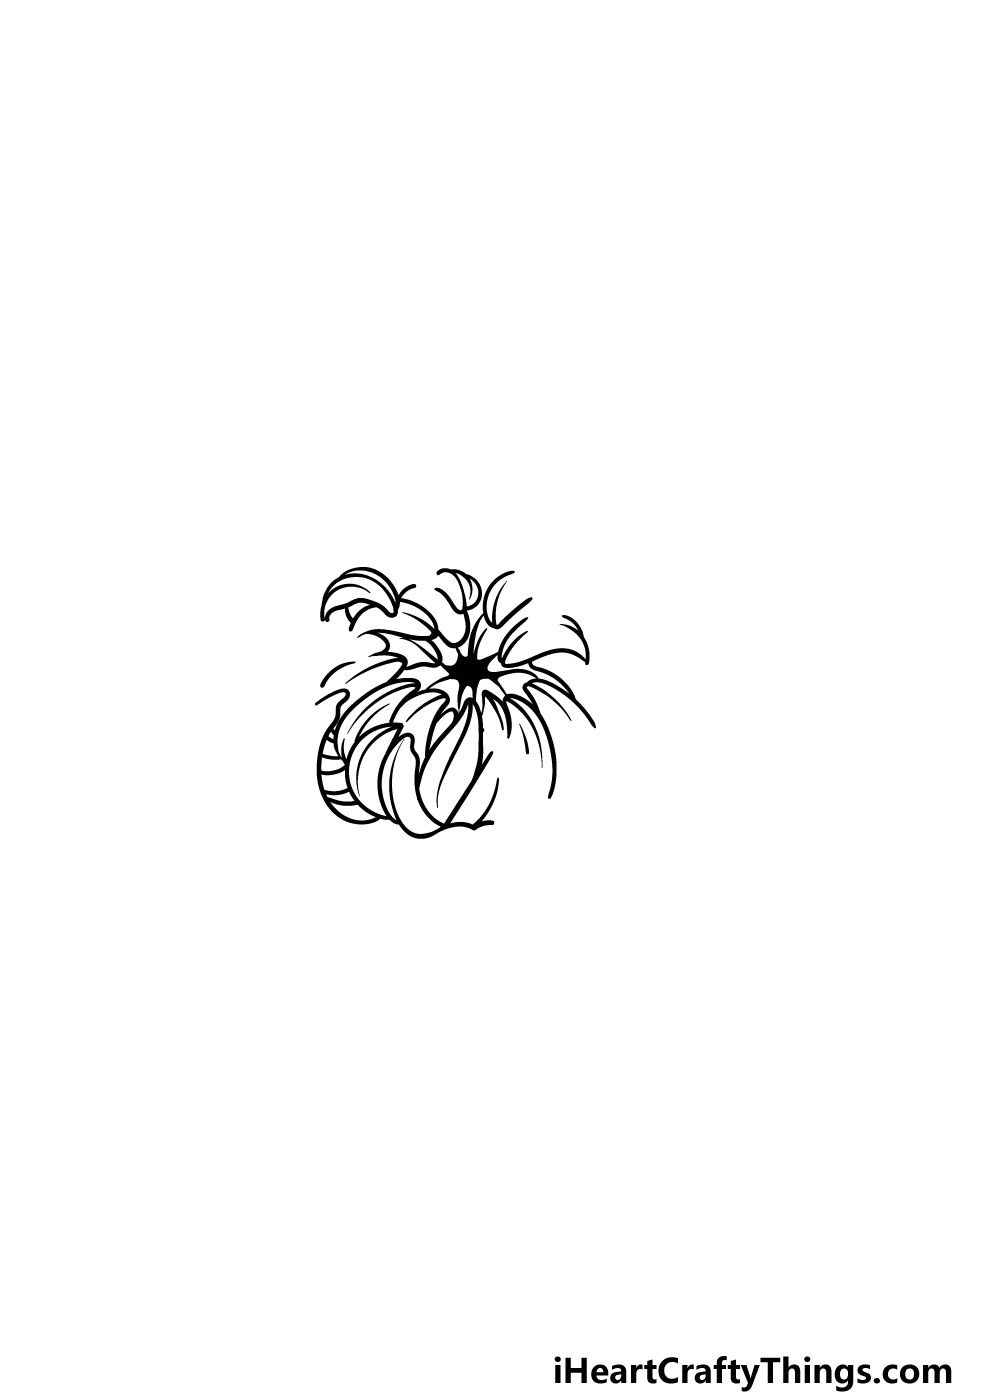
Step 2 – Next, draw some more details for the petals
In this second part of your chrysanthemum drawing, we will be adding some details to the petal tips that you drew in the previous step.
First, draw some more short, rounded lines for more petal tips surrounding this central part of the flower.
Then, we will be adding some line detail to all of the petals that you have drawn so far.
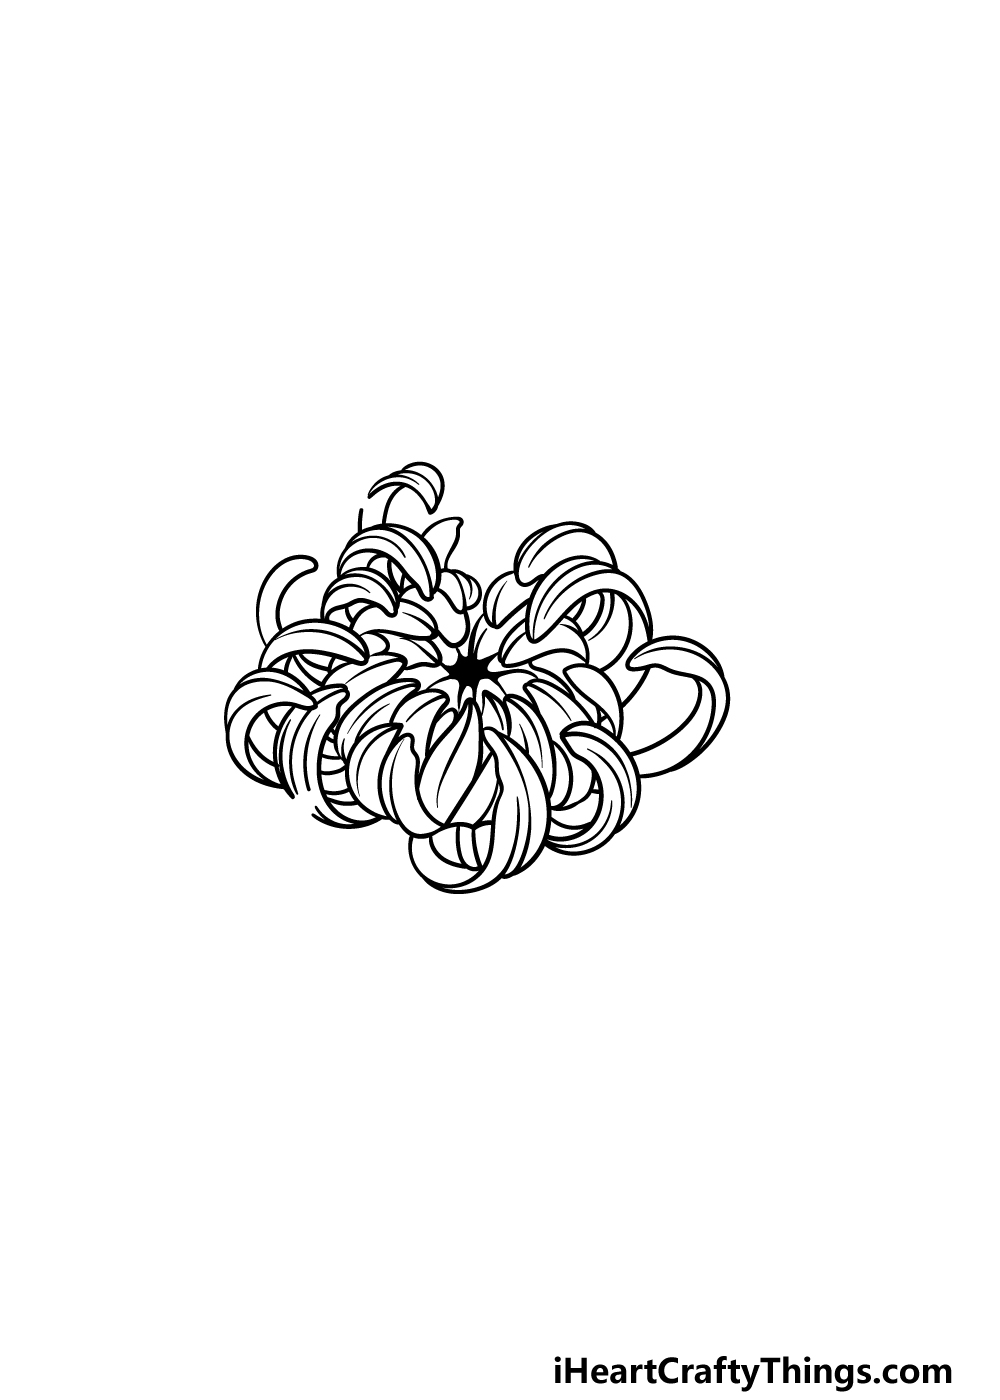
Step 3 – Draw some more petals for the flower
We will be adding some more curved petals in this third step of our guide on how to draw a chrysanthemum.
To do this, simply draw more of those curved petal outlines surrounding the center of the flower near the lower left-hand side of the flower.
There will also be a few petals added to the upper left-hand side as well. The idea is that we will be building up layers of these petals to make the flower as a whole.
Then you will be ready to add some outer petals in the next step, so let’s move on!
Step 4 – Draw some more petals for the outer section of the flower
This step of your chrysanthemum drawing will see you adding some larger outer petals for the flower.
We will be adding quite a lot of petals in this step, and they will all be significantly longer than the ones you have been drawing previously.
They will also extend from the outer edges of the flower, as shown in the reference image.
These petals will really help with the volume of the chrysanthemum. They will also have some similar curved line detailing on them that you have been adding to the previous petals.
Then it will just be a matter of adding some final details in the next step before you add some beautiful colors to your chrysanthemum drawing!
Step 5 – Finish off your chrysanthemum drawing
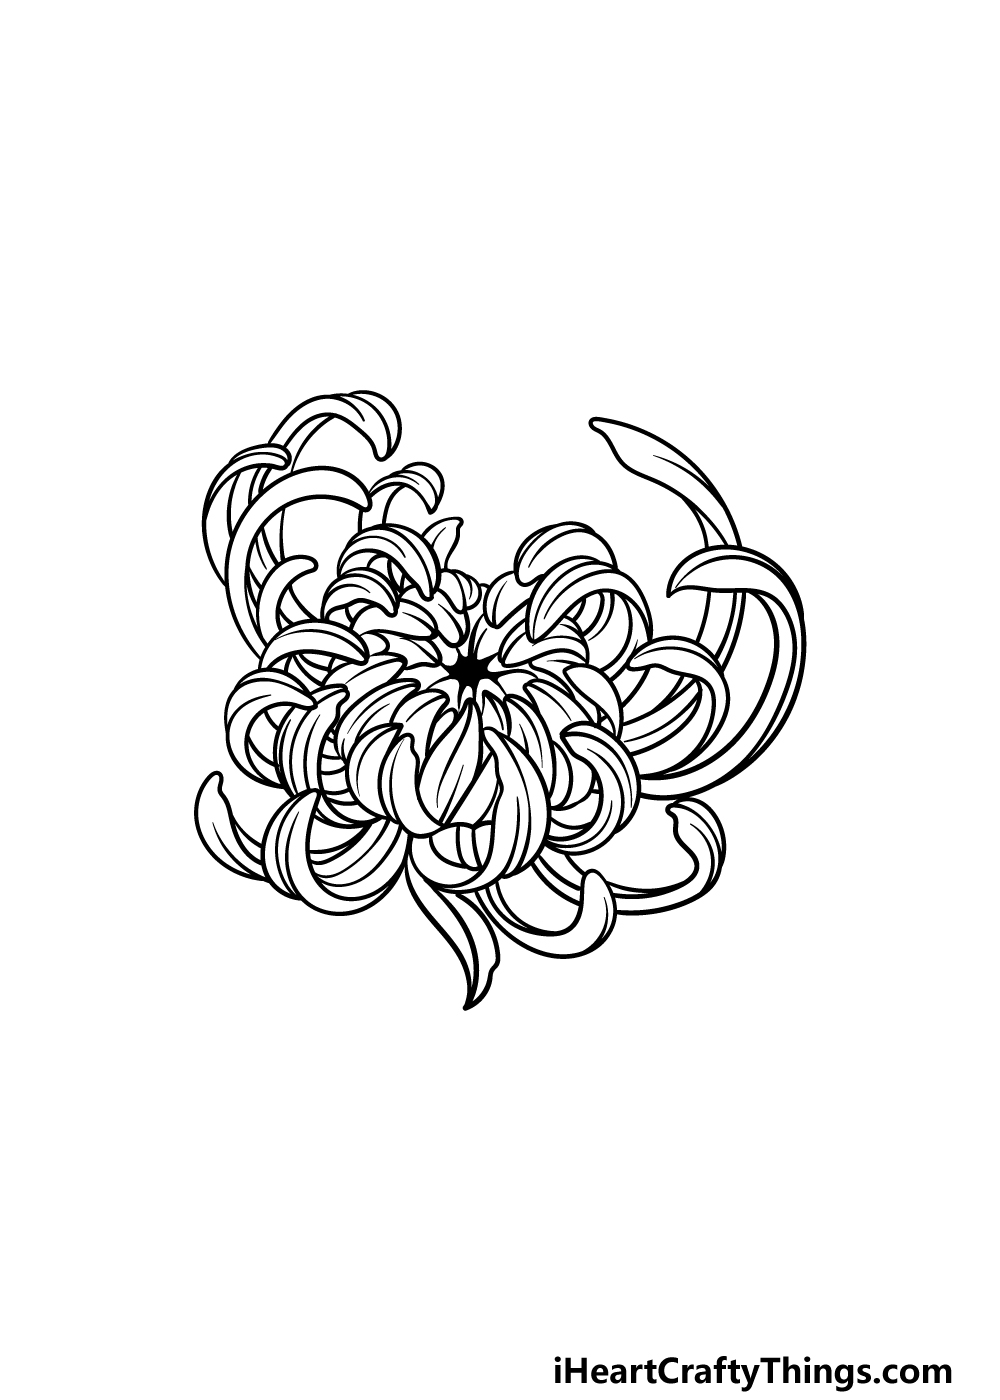
We will be finishing off the final details in this fifth step of our guide on how to draw a chrysanthemum.
To do this, we will mainly be drawing some more outer petals for the flower, and these ones will be the largest and curliest of any petals drawn so far.
They will be going on the left, right and base sides of the flower to finish off that layered look that we have been building up so far.
Then you will have finished all the details in the guide! Before you move on to the final step, this will also be your chance to add any details of your own to put your own spin on it.
One thing that is always really great for a drawing is to add a background, as this is a perfect way to add to the image while providing some context for it as well.
You could draw a garden setting for this chrysanthemum, and doing this would be a good opportunity to add more chrysanthemum flowers or some other flowers you love.
There are plenty of amazing backgrounds you could draw as well, so this is your chance to get creative and have fun with it!
You could also change up some details of the flower to create your own variations. We look forward to seeing how you finish off this picture!
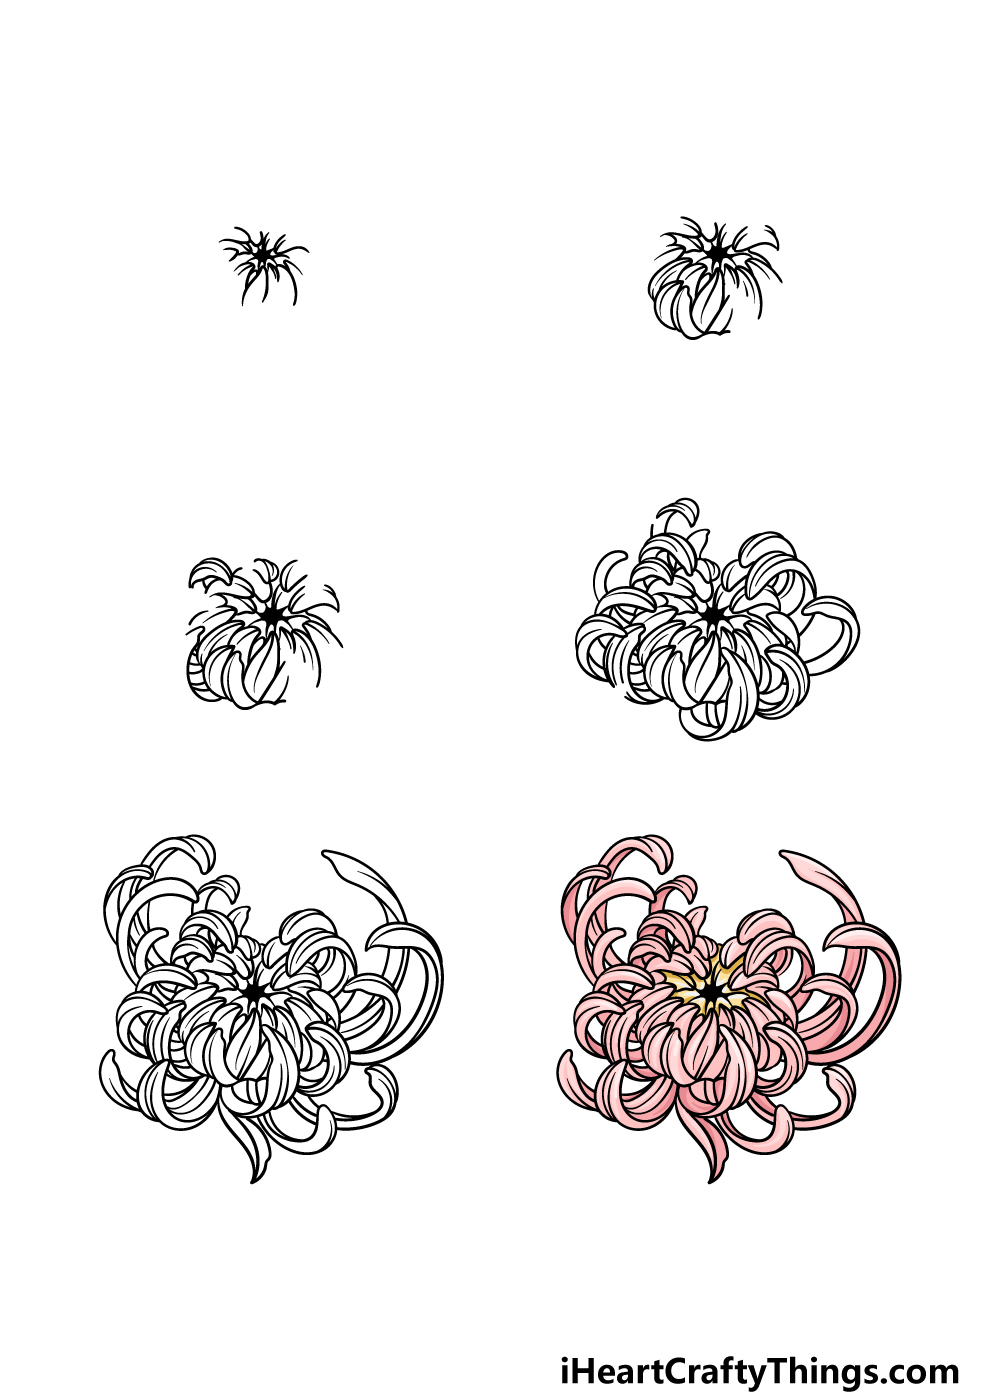
Step 6 – Finish off your chrysanthemum drawing with some color
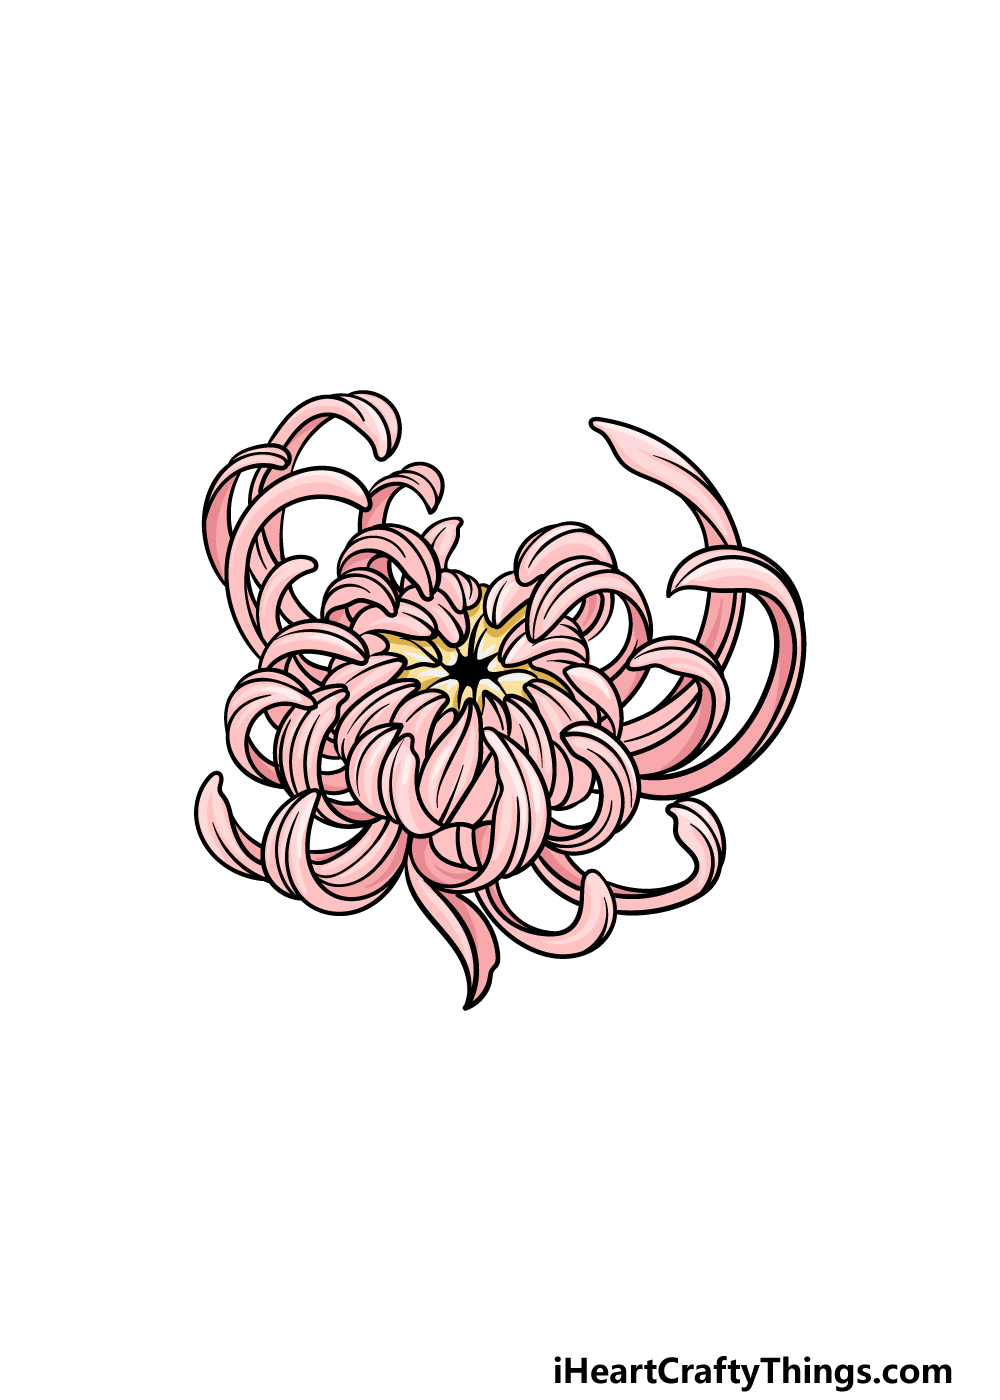
This chrysanthemum drawing wouldn’t be complete without some amazing colors, so that is what we will take care of in this final step!
A chrysanthemum can come in many different colors and shades, so you could essentially use any colors that you like for it.
In our reference image, we used some lovely subtle pinks for the flower with some mild yellow in the center. These colors are just a suggestion, however, so let your creativity run wild!
You can also have lots of fun choosing the art mediums and tools that you use for the colors.
There are painterly mediums such as acrylic and watercolors and others like colored pens and pencils, so have fun experimenting as you finish up this picture!
Do this to take your chrysanthemum drawing to the next level
Create a floral artwork with these tips on how to make your chrysanthemum drawing amazing
This beautiful and intricate flower will often grow in some stunning bunches, and that brings us to the first suggestion for this chrysanthemum sketch.
Once you have the hang of drawing this flower, you could draw many more around it!
This would be quite an undertaking that would require a lot of patience, but it would be worth it. If you were to use lots of different colors for the various chrysanthemums, that would make it even more incredible.
Adding some more chrysanthemums would be great, but you could also surround it with other flowers. You would certainly have lots to choose from if you wanted to do this!
These flowers could include anything from roses to sunflowers, daisies or tulips. It all depends on which flowers you love, and you could include as many as you can.
Doing this would also bring even more amazing color opportunities to your chrysanthemum drawing! What favorite flowers and plants would you like to add to this bouquet?
Another option for surrounding this chrysanthemum sketch would be to draw a background setting. This could go nicely with the previous step as well!
One of the obvious suggestions would be to draw a garden setting that features the other flowers and plants. Or it could be part of a wedding display or be displayed at a flower show.
These are just a few ideas, but what other settings can you think of?
Drawing a background is a big way to make this drawing of a chrysanthemum more unique, but you can also zoom in for smaller details. For instance, flowers will often have ants, bees and other small insects on them.
These could be great to add to the flowers to make them look even more interesting! Some of these details can also be added using the art tools and mediums you use to color the drawing.
The smallest of details can make the biggest difference, so have fun experimenting!
Your Chrysanthemum Drawing is Complete!
There were loads of intricate petals and details to cover in this guide on how to draw a chrysanthemum, so you should be very proud of completing this drawing!
This guide was designed to break it down into more manageable steps to make sure that this complex flower would be easy and fun to draw.
This guide also allowed for some input and creativity from you, and you can really finish it off by adding some great details, background elements and color choices of your own.
This is your chance to show off how creative you can be!
Once you are ready for more fun, you can check out more of our drawing guides on our website. We update the guides on the site frequently, so be sure to check in often!
We would also love to see your beautiful chrysanthemum drawing, so please do share it on our Facebook and Pinterest pages when it is complete!