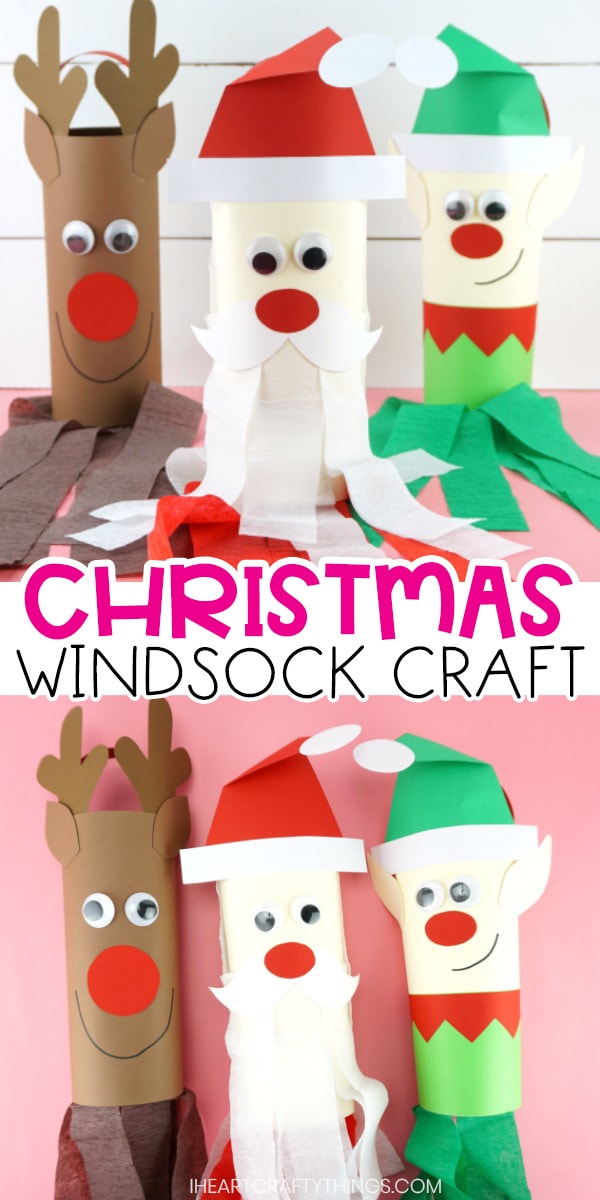
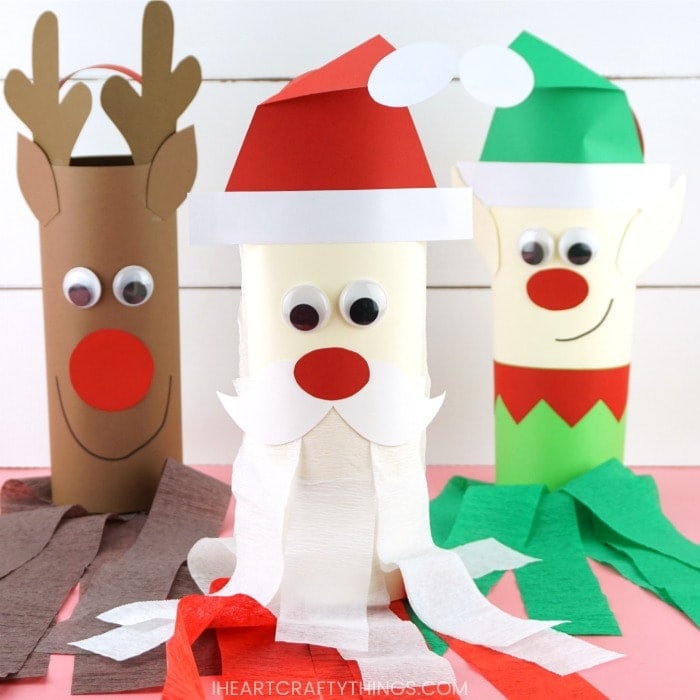
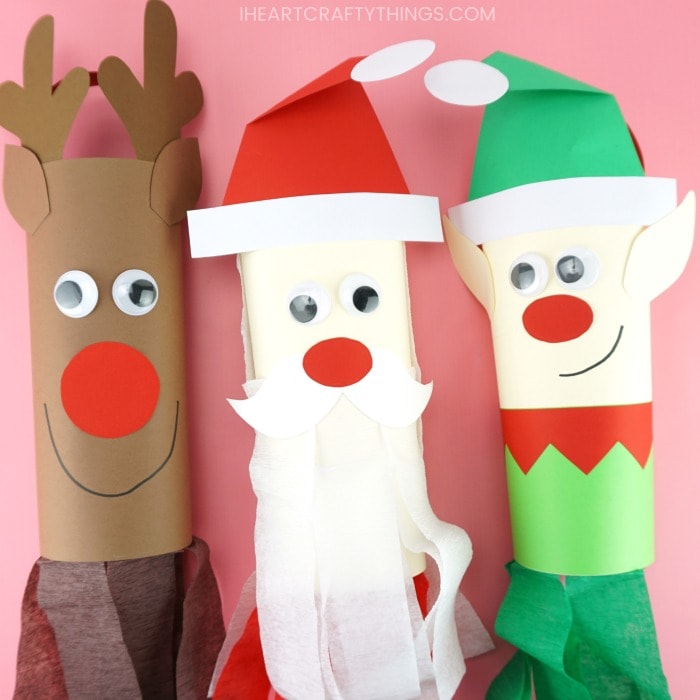
Your heart is about to explode with cuteness when you take a look at our Christmas Windsock Craft. Kids will have a blast creating one or all three of these fun holiday-themed windsocks.
Our handy craft template will make creating your adorable Santa, elf and reindeer windsock crafts a breeze!
Christmas is one of my favorite holidays for sitting down and crafting. My children love decorating with Santas, reindeer and cute elves inside and outside the home for visitors who come by.
These easy-to-make Christmas windsocks look super cute hung under a covered front porch to blow around in the winter wind, or hung anywhere inside the home. They would also look fantastic hung up on display in a classroom for Christmas decorations too.
Supplies needed for making your Christmas Windsocks:
- Windsock Crafts Template <—– Get theTemplate HERE
- colored cardstock paper (cream, brown, red, green, white)
- crepe paper (red, white, green, brown)
- googly eyes
- black marker
- glue stick
- stapler
- pencil (for tracing)
- scissors
How to Make a Santa Windsock
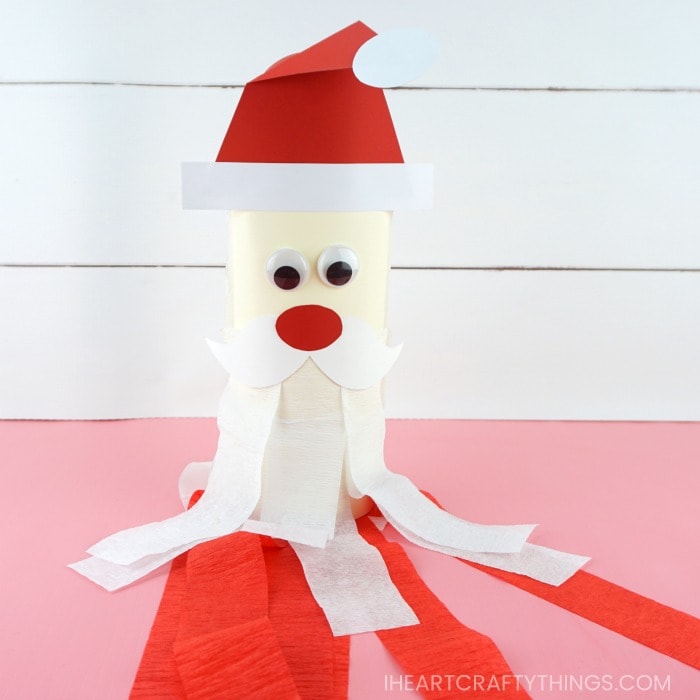
Santa’s long white, flowy beard makes this Christmas windsock craft my favorite! Kids will love watching their Santa blow around in the wind for Christmas.
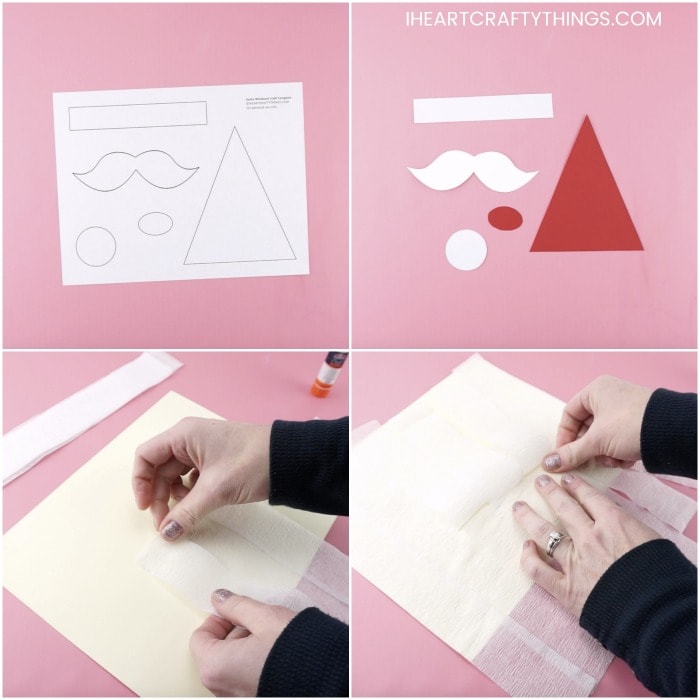
1. Trace and cut out Santa windsock pieces
Use our printable template to trace and cut out the Santa windsock pieces from red and white cardstock paper or construction paper.
2. Create Santa’s beard and hair
Cut six strips of white crepe paper 8-inches in length and four strips of white crepe 12-inches in length. Using an extra strength glue stick, glue the six 8-inch strips in two layers in the center of your cream cardstock paper. This will be Santa’s beard.
Then glue two 12-inch white crepe paper strips on each side of the beard to make Santa’s white hair.
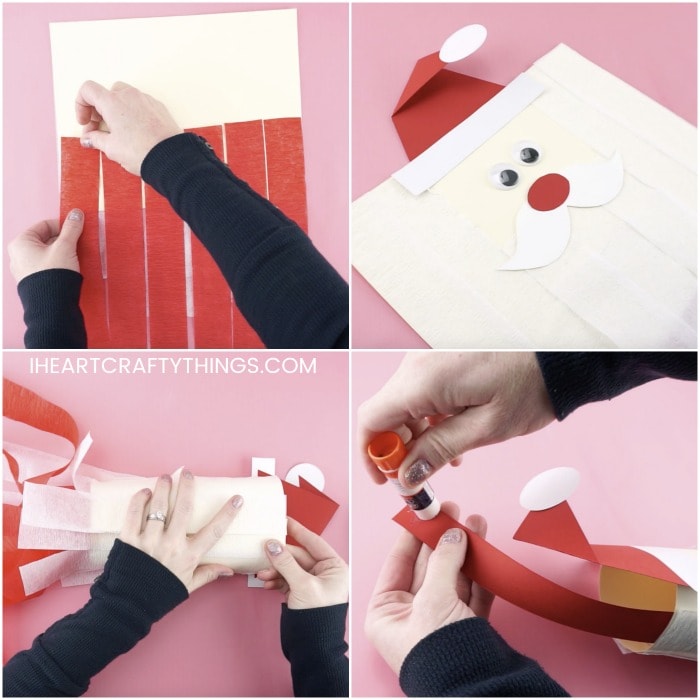
3. Cut out red strips and glue them along the bottom of the back of cardstock paper
Turn your Santa windsock face down. Cut out six 18-inch strips of red crepe paper. Add glue along the bottom one-third of the back of your cream cardstock paper and glue the six strips of red crepe paper onto it.
4. Create Santa’s hat
Turn your Santa windsock face up. Glue the red Santa hat and hat trim at the top of your cream cardstock paper.
Bend down and crease the top of the hat. Then glue the white circle at the end of the hat.
5. Add mustache, red nose and eyes
Glue the white mustache, red nose and large googly eyes onto your windsock.
6. Bend Santa into a circle and staple ends together
Bend your Santa into a circle, connecting the ends together. Place two staples at the top and bottom of the windsock to join the ends together.
7. Create windsock handle
Cut a length of red cardstock 1-inch by 11-inches for a handle. Add a generous amount of extra strength glue stick on one end of the paper strip and attach it inside the top of the windsock. Add glue on the opposite end of the red paper strip and attach it to the opposite end of the windsock to create your handle.

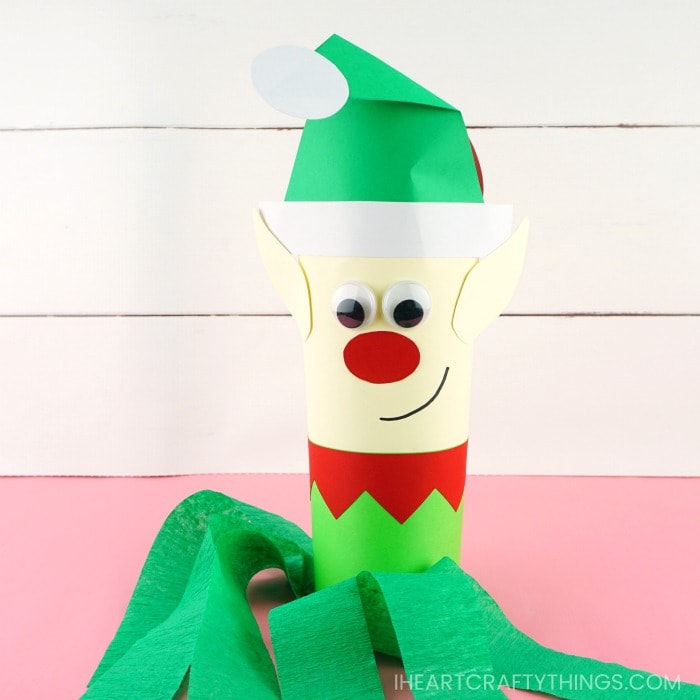
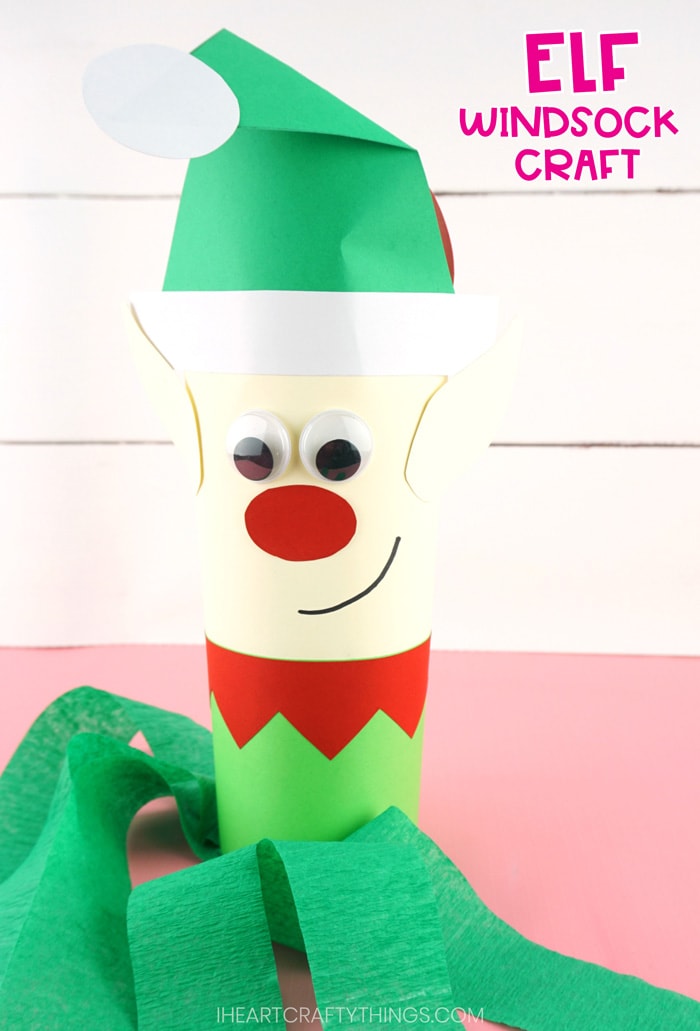
How to Make an Elf Windsock
Christmas wouldn’t be complete without including some of Santa’s little helpers. These cute little elves are a perfect compliment to Santa and would look darling hung up inside the home or classroom for a fun Christmas display.
1. Trace and cut out elf windsock pieces
Use our printable template to trace and cut out the elf windsock pieces from red, white, green and cream cardstock paper or construction paper.
2. Cut out green strips and glue them along the bottom of the back of cardstock paper
Cut out six strips of 18-inch green crepe paper strips. Add glue along the bottom one-third of the back of your cream cardstock paper and glue the six strips of green crepe paper onto it.
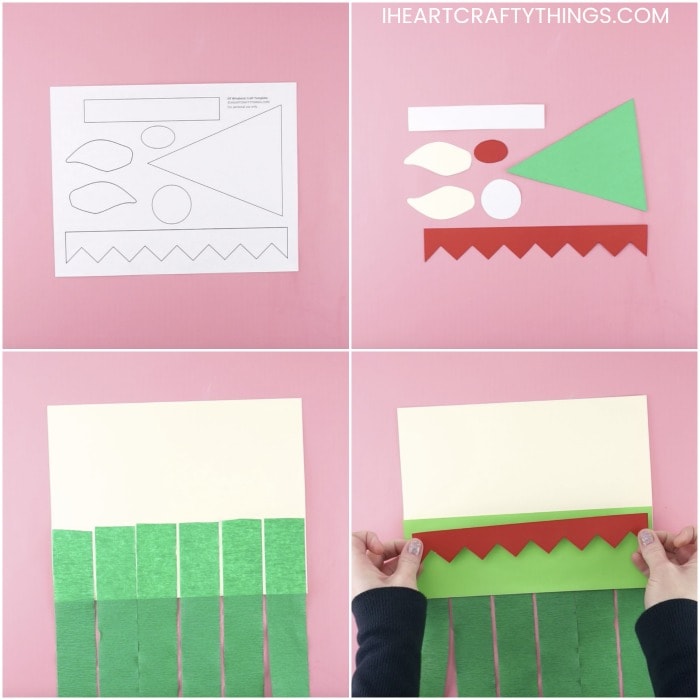
3. Cut out green and red pieces, glue them onto cream cardstock
Turn your elf windsock face up. Cut a length of light green cardstock 3 1/2-inches by 11 inches. Glue it onto the bottom of your cream cardstock. Then glue the red elf trim from the template at the top of the light green cardstock.
4. Create hat
Glue the green elf hat and hat trim at the top of your cream cardstock paper. Bend down and crease the top of the hat. Then glue the white circle at the end of the hat.
5. Glue nose and eyes, draw a smile
Glue the red elf nose and googly eyes onto your elf. Then use a black marker to draw a smile on your elf.
6. Bend elf into a circle and staple ends together
Bend your elf into a circle, connecting the ends together. Place two staples at the top and bottom of the windsock to join the ends together.
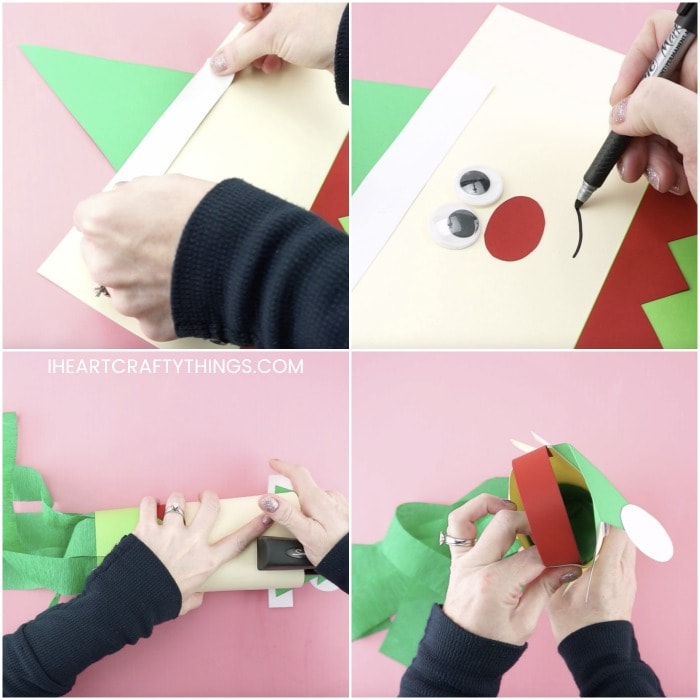
7. Glue elf ears on the sides of windsock
Add glue on the back of the elf ears and glue them on the sides of your elf windsock.
8. Create windsock handle
Cut a length of red cardstock 1-inch by 11-inches for a handle. Add a generous amount of extra strength glue stick on one end of the paper strip and attach it inside the top of the windsock. Add glue on the opposite end of the red paper strip and attach it to the opposite end of the windsock to create your handle.
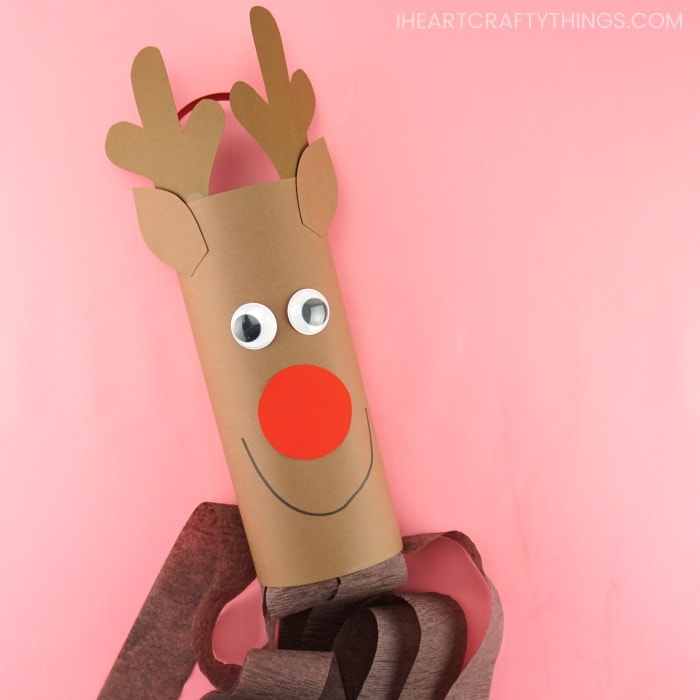
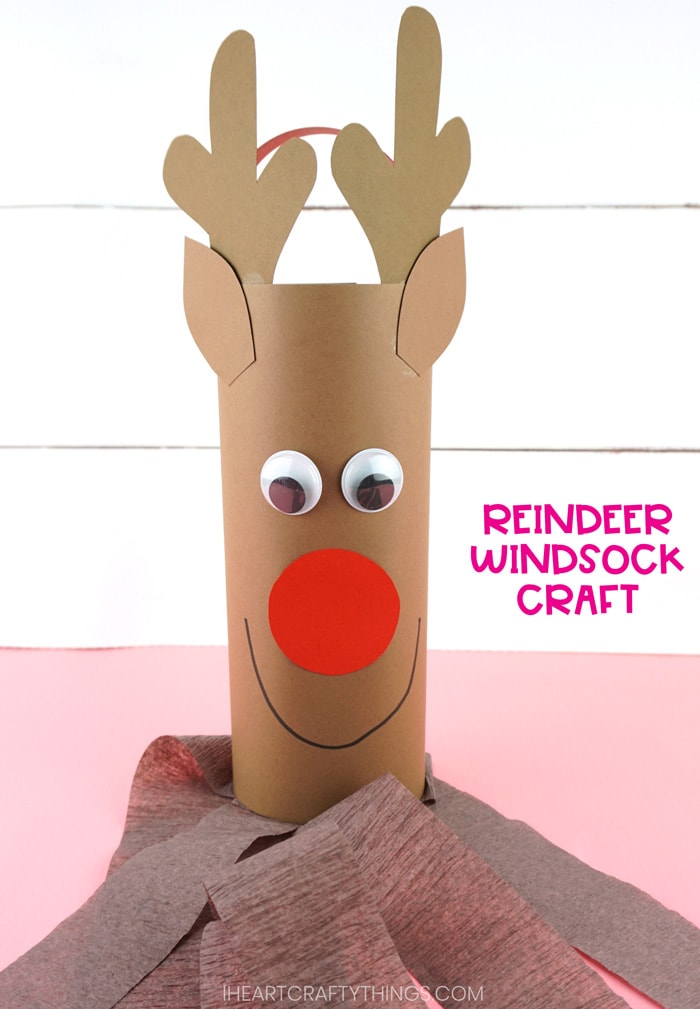
How to Make a Reindeer Windsock
It doesn’t get any more festive for Christmas than having some of Santa’s reindeer hanging from the ceiling. This simple reindeer windsock is a great craft for a Christmas class party, especially with our easy template.
1. Trace and cut out reindeer windsock pieces
Use our printable template to trace and cut out the reindeer windsock pieces from red and brown cardstock paper or construction paper.
2. Cut out brown strips and glue them along the bottom of the back of cardstock paper
Cut out six strips of 18-inch brown crepe paper strips. Add glue along the bottom one-third of the back of your brown cardstock paper and glue the six strips of brown crepe paper onto it.

3. Glue nose and eyes, draw smile
Turn your reindeer windsock face up. Glue the red reindeer nose in the center of the windsock and then glue your googly eyes on your reindeer. Use a black marker to draw a smile on your reindeer.
4. Bend reindeer into a circle and staple ends together
Bend your reindeer into a circle, connecting the ends together. Place two staples at the top and bottom of the windsock to join the ends together.
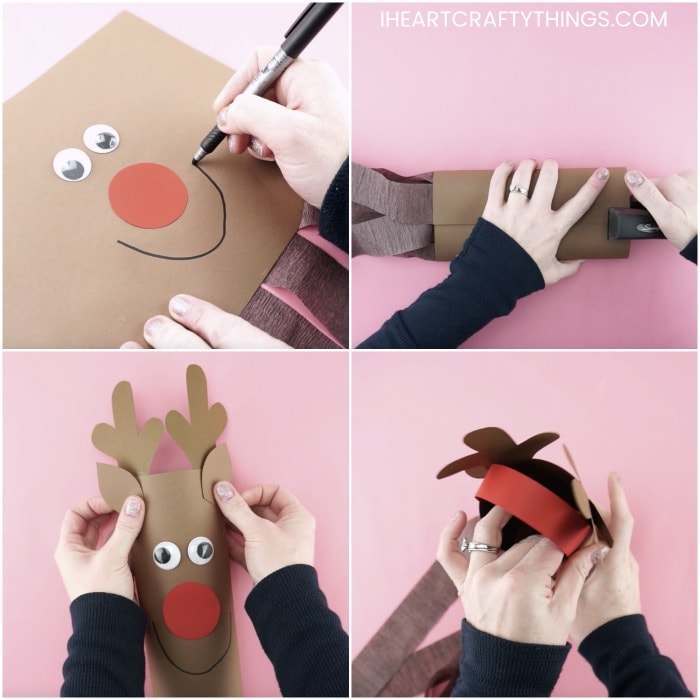
5. Glue reindeer antlers and ears
Add glue at the bottom of your reindeer antlers and glue them on the inside top of the windsock. Then glue the reindeer ears on your windsock.
6. Create windsock handle
Cut a length of red cardstock 1-inch by 11-inches for a handle. Add a generous amount of extra strength glue stick on one end of the paper strip and attach it inside the top of the windsock. Add glue on the opposite end of the red paper strip and attach it to the opposite end of the windsock to create your handle.
Video Tutorial: Step-by-Step guide for making a Christmas Windsock Craft
Before you get started making your cute Christmas windsocks, watch the video below for a quick step-by-step guide on how to make them.
Find more Christmas craft ideas, paper crafts and easy craft ideas for kids by browsing the categories at the top menu bar of our website.