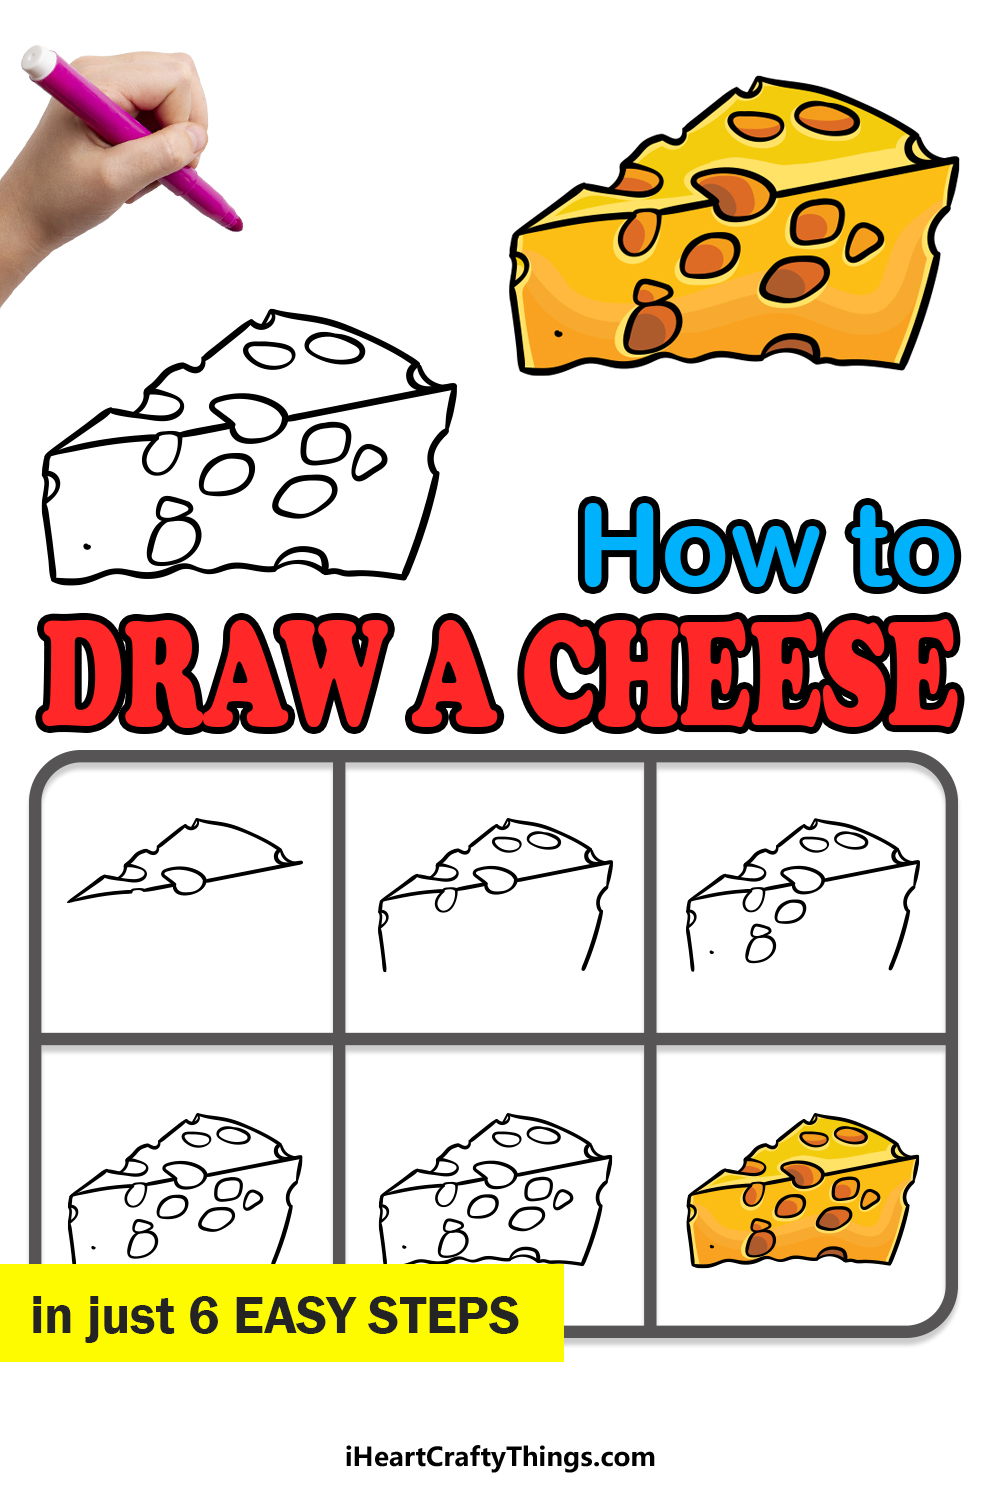
Find out how to draw cheese as we work on this guide for kids together! You won’t need to have any ingredients other than your pencil and your imagination to make it happen.
Cheese is something that billions of people enjoy every day. It’s most commonly made with dairy, but there are some alternatives to that for people with dietary restrictions.
We can see it on pizzas, burgers and in the fanciest restaurants. There is a different kind of cheese for every taste and preference, and now you can create one of your own.
The cheese we are creating here is in the style of Swiss cheese, but you could change it to match your own favorite kind of cheese if you prefer.
So let’s begin and make some tasty art!
Watch And Learn How To Make Your Cheese Drawing
How to Draw Cheese – Let’s Get Started!
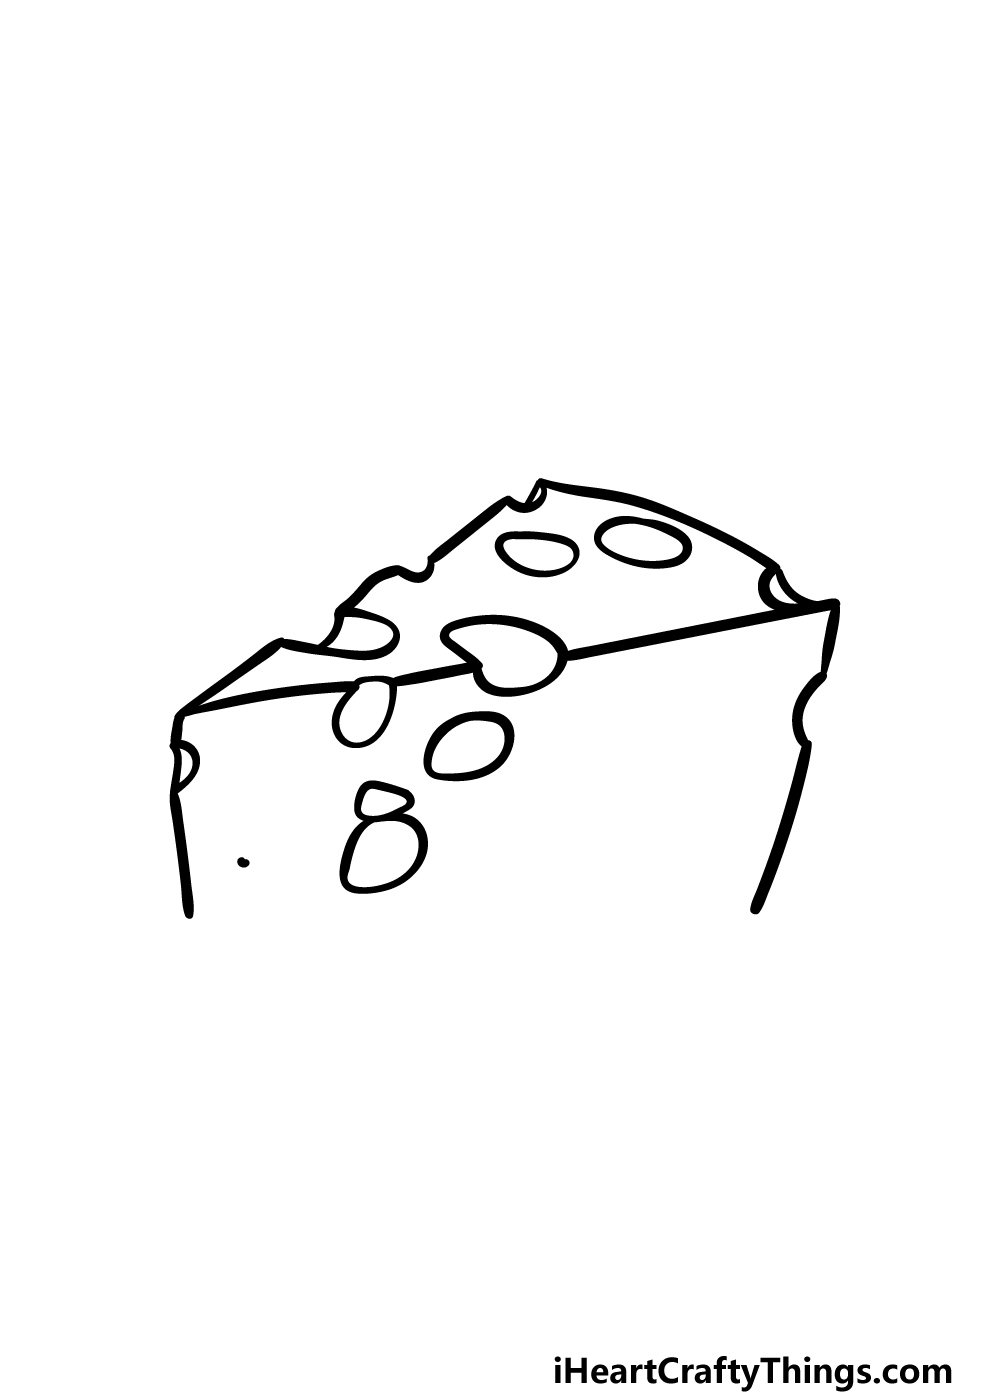
Step 1
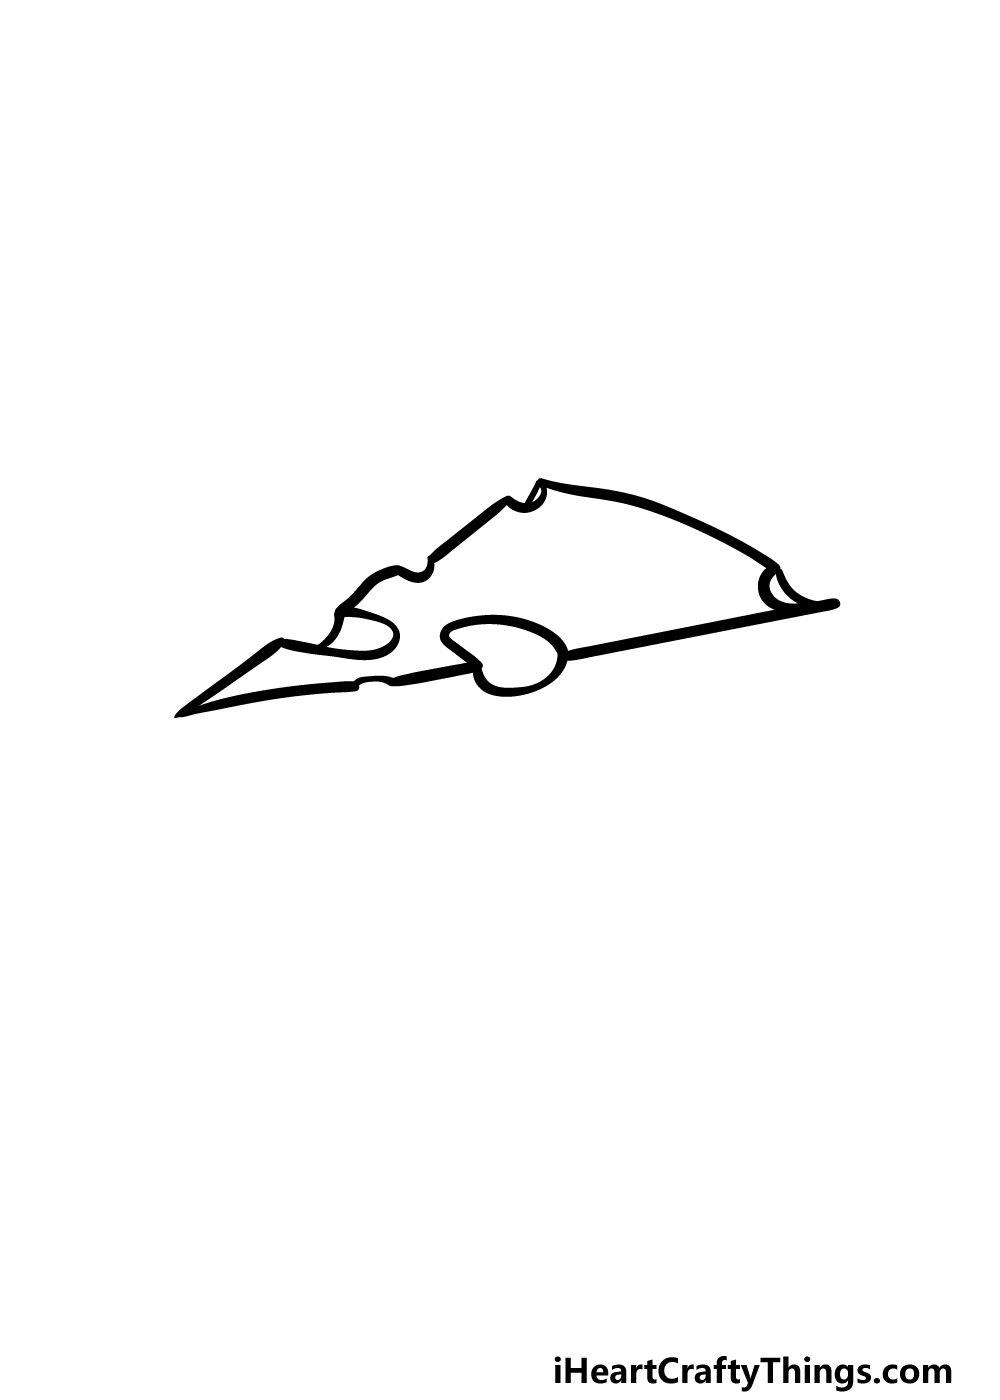
In this guide on how to draw cheese, we will be drawing some Swiss cheese with lots of holes in it!
We will be adding these holes throughout the guide, but if you want a more solid hunk of cheese you could also leave out the holes and fill in the gaps.
Whether you decide to go with our design or change it up, we will be starting by drawing a triangular shape.
To make this easier for yourself, you could start by using a light pencil and a ruler to draw the rough triangular shape of the cheese.
Then, you could draw the holes and indentations into it also using your pencil, and then when you’re happy with how it looks you can finish by going over it with a pen.
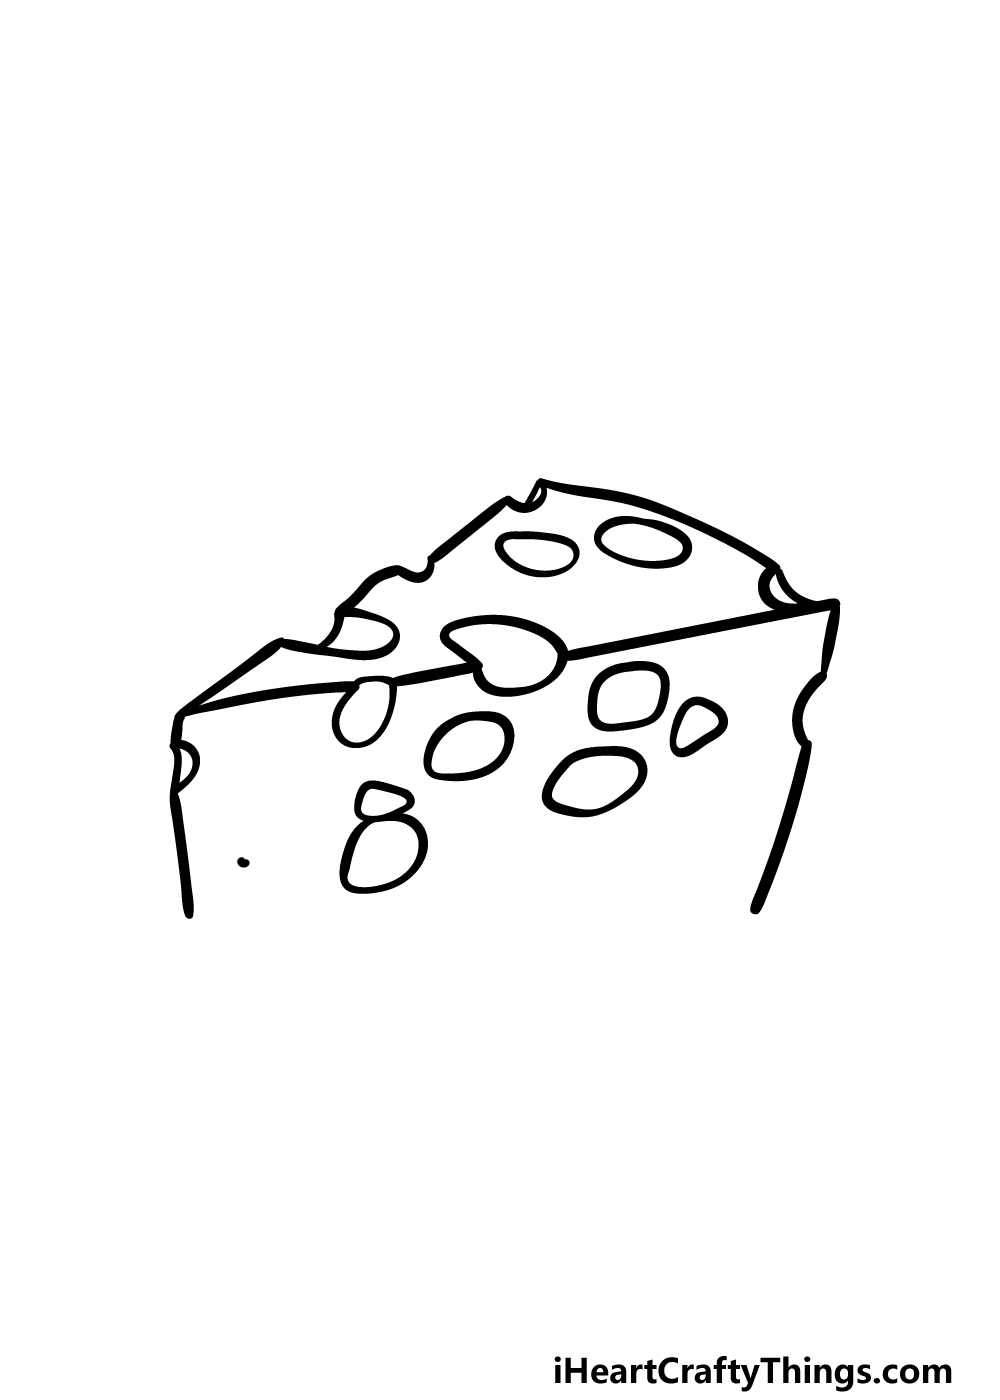
Step 2 – Next, draw the sides of the cheese
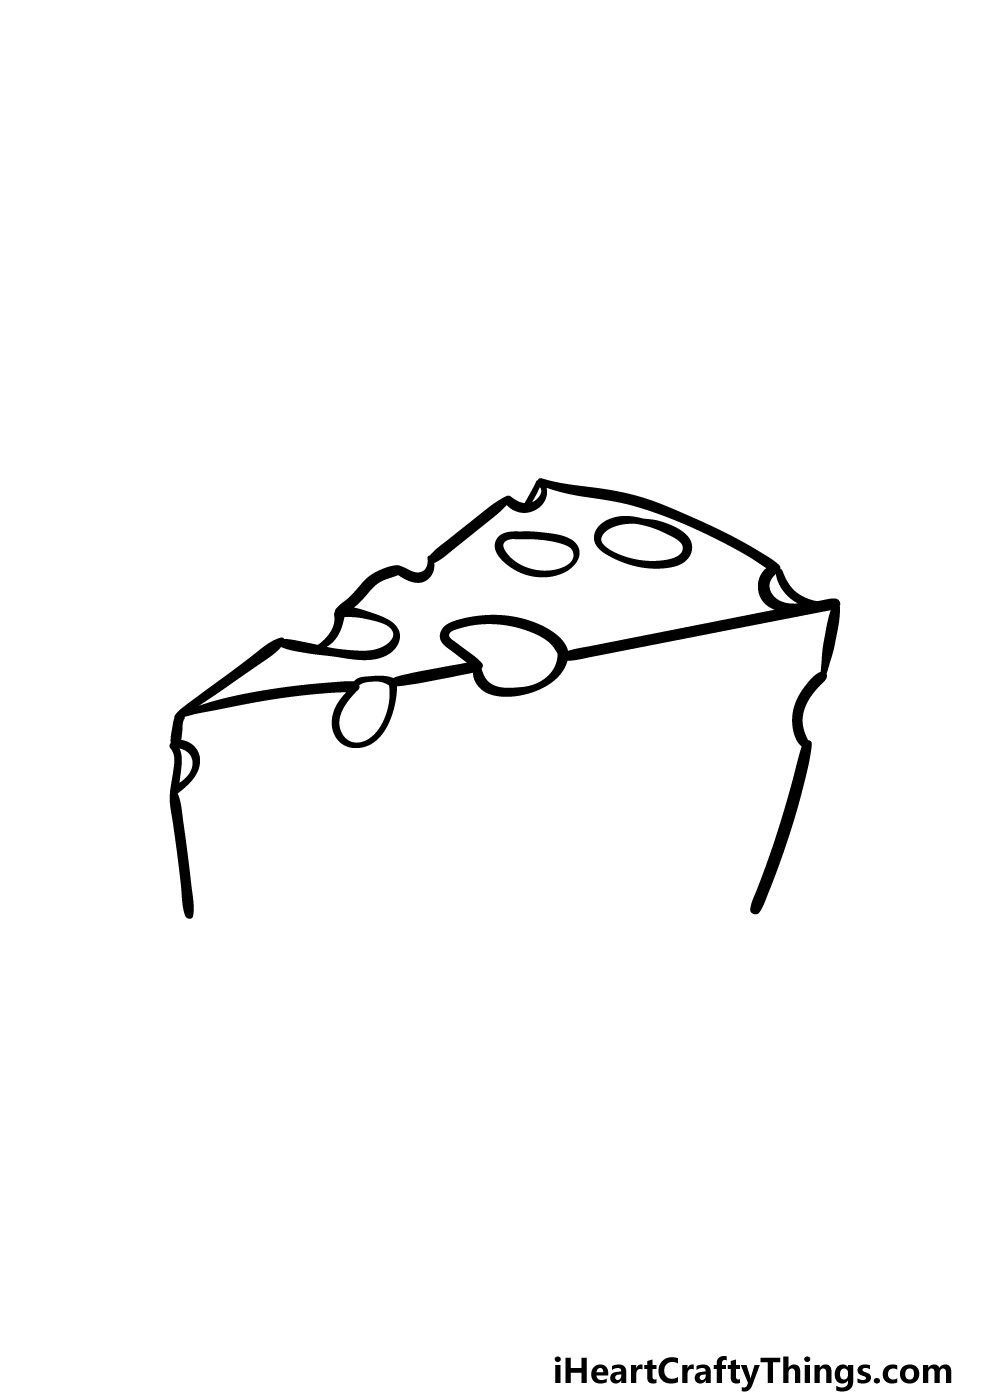
Now that you have the outline of the top of your cheese drawing done, we can start drawing the outlines for the other sides.
You can do this by drawing two vertical, slightly curved lines down from the far ends of the piece of cheese. These lines will also have some holes and indentations on them like the top of the cheese did.
Before moving on to step 3, you can also draw some more circular shapes for some more holes on top of the cheese. Then you’re ready to proceed to that next step!
Step 3 – Draw some more holes on the cheese
At the beginning of this guide on how to draw cheese, we mentioned that we would be drawing lots of holes in the cheese to make it look like a hunk of Swiss cheese.
In this third step, we will indeed continue to do that! This step will be quite a short and simple one, as all you need to do is draw some irregular circles onto the left-hand side interior side of the cheese.
Of course, if you’re choosing not to make this look like Swiss cheese for your own picture then you can ignore this and the next step!
Step 4 – Now, draw the final holes onto the cheese
Soon, we will be finishing off the outline and final touches of your cheese drawing.
Before we move on to that part, however, we will first add a few more holes onto the cheese to finish off the Swiss cheese effect.
To do this, simply add some more of those holes you have been drawing to the other side of the interior of the cheese.
Once you have drawn these holes, we can move on to those final details and elements that we mentioned earlier.
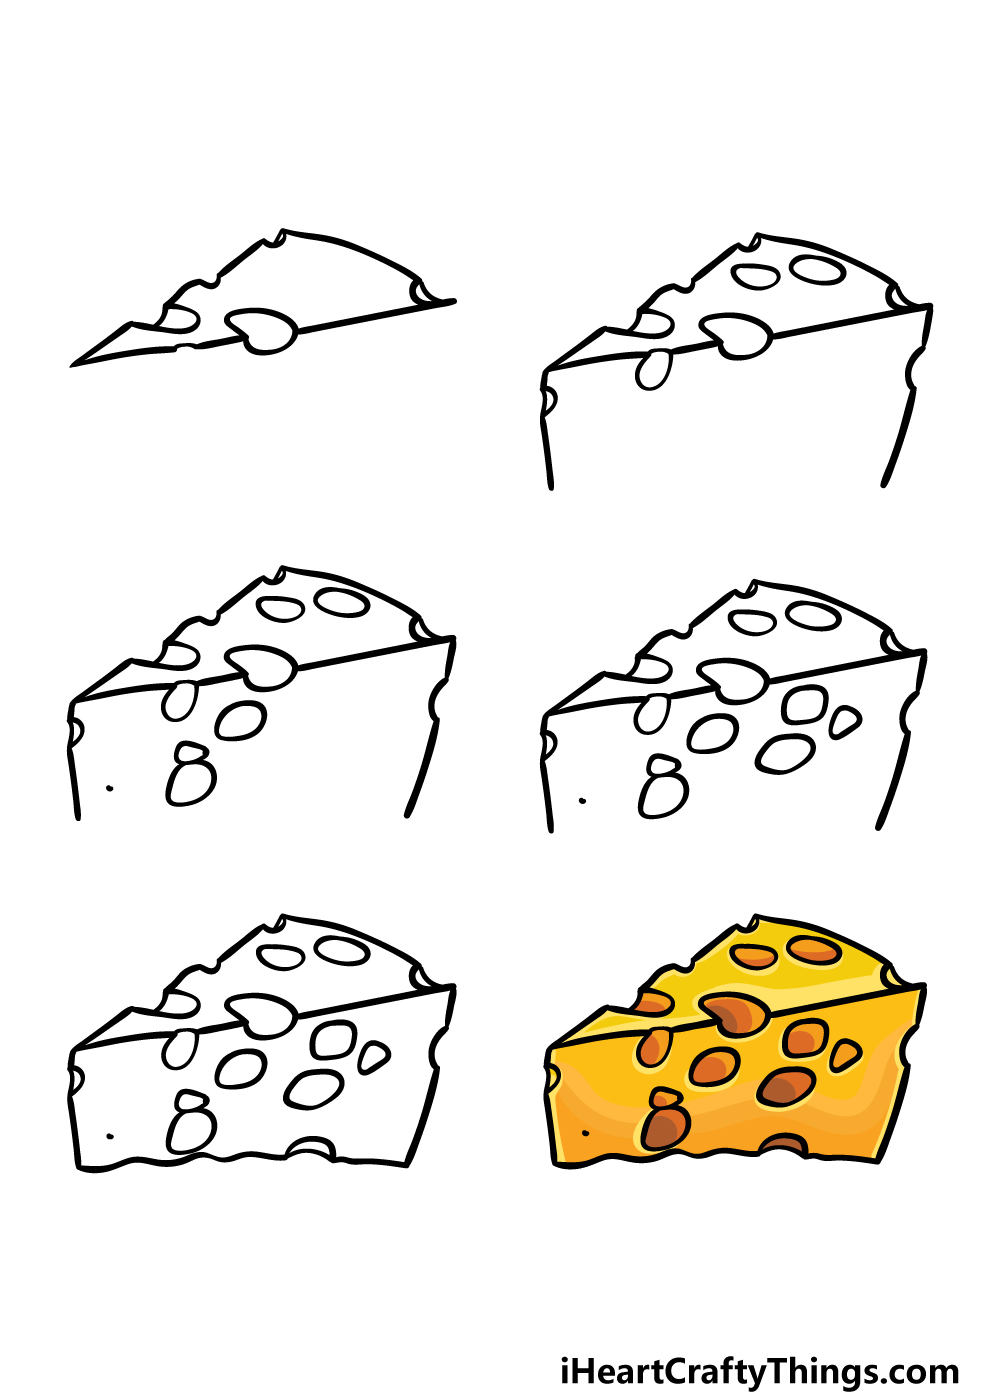
Step 5 – Finish off your cheese drawing
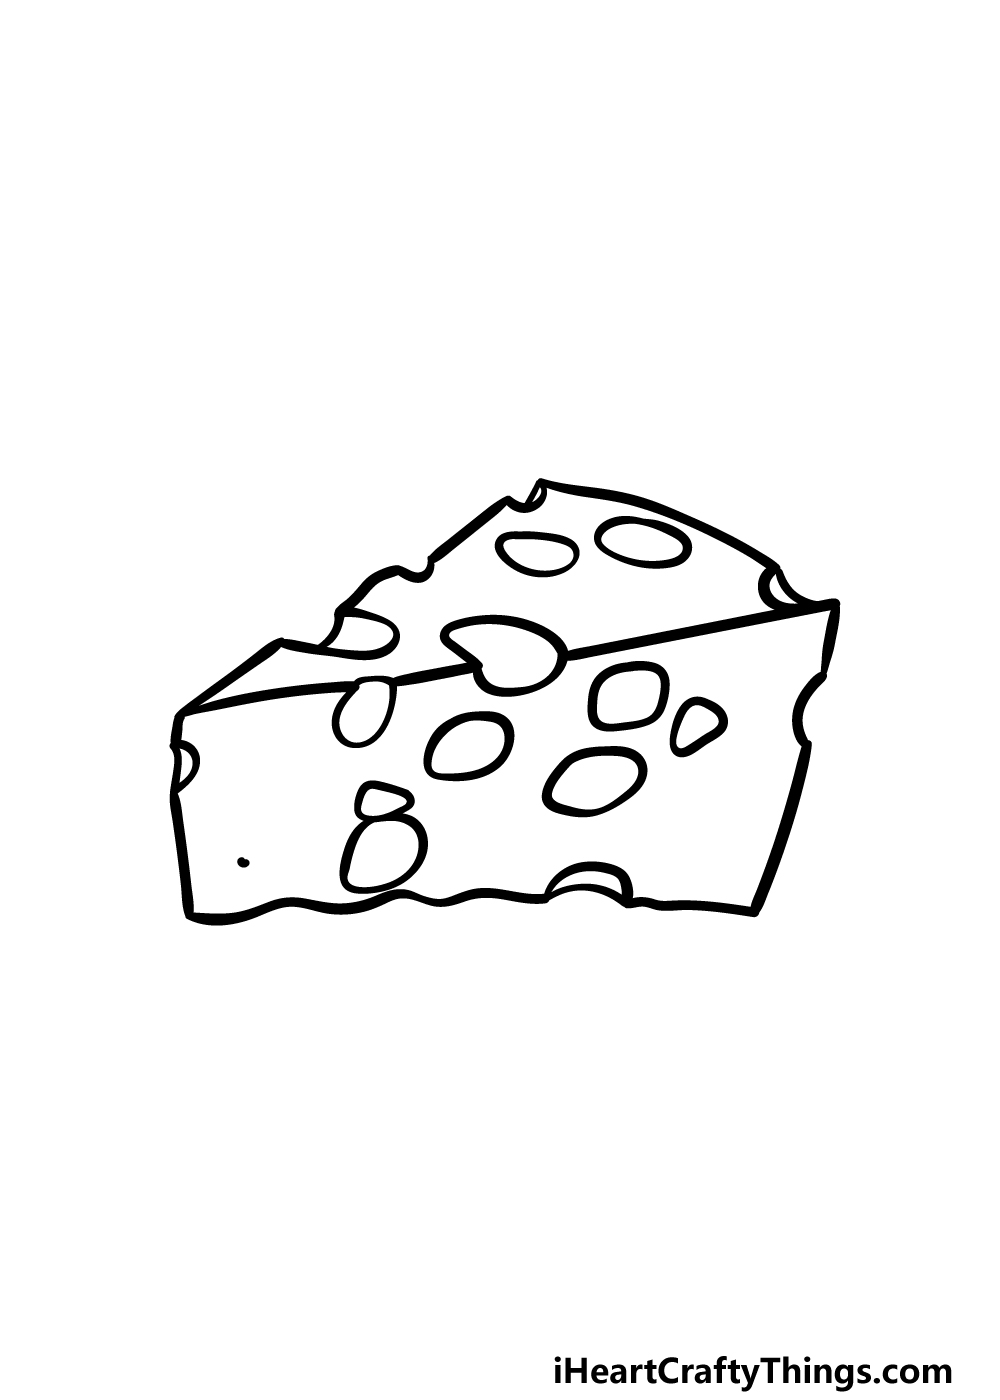
It’s almost time to color in your awesome picture, but first we will be finishing off the outline and final touches in this step of our guide on how to draw cheese.
The main thing that we will be doing in this step is drawing the base of the cheese, and you can do this by using a somewhat bumpy line.
Then, you can finish off by drawing some more holes and indentations into the base of the cheese and also add some more throughout the cheese interior.
That will finish off the final details of this picture, but you can also add some details of your own!
Cheese is often enjoyed with other fine food and beverages, so maybe you could draw a background to show what you would like to experience along with this cheese.
Step 6 – Finish off your cheese drawing with some color
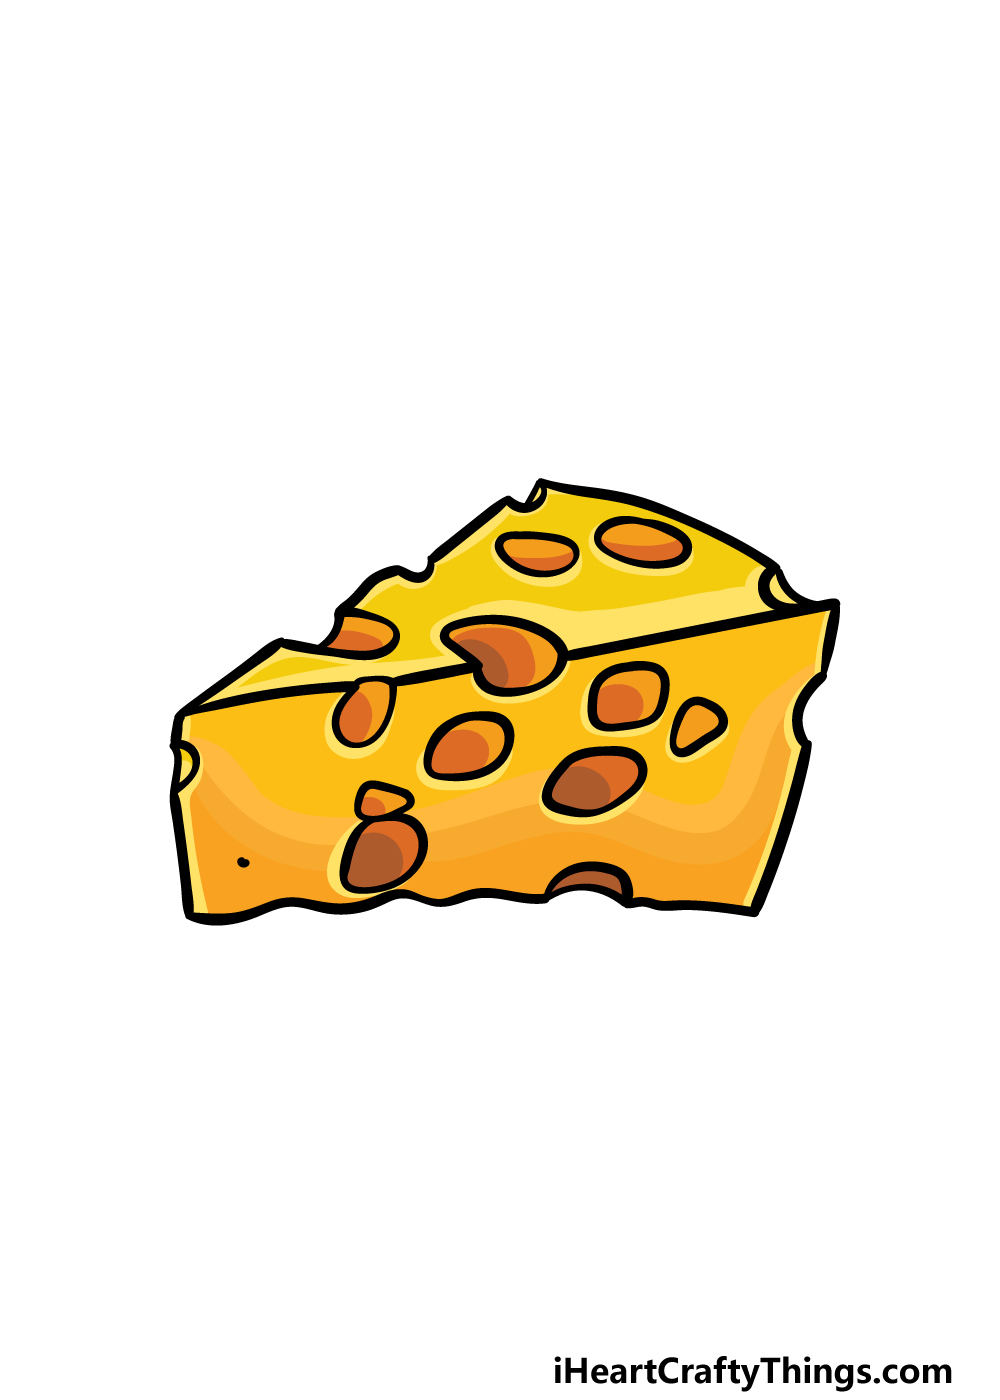
Now you have arrived at the final step of your cheese drawing, and in this one we will be finishing off by adding some amazing colors to your picture!
Cheese is often pictured as being bright yellow, and this is partly because this is how it appears in famous cartoons and media.
Cheese in real life can also be this color, however, and this is the color scheme that we went with in our reference image.
We used more than one shade of yellow when coloring in, as this helps to create a richer, more dynamic image.
Using darker shades of yellow also helps with shading on the sides and inside the holes of the cheese.
While this is a color scheme that you could go for as well, there are other options you could go for as well!
Cheese can come in many different colors and visual styles, so why not color this drawing to make it look like your favorite kind of cheese?
3 More tips to make your cheese drawing easy!
Grab your favorite cheesy snack as we make this easy to draw cheese even easier!
The chunk we created for this cheese drawing has lots of holes in it, which would suggest it is Swiss cheese.
This is a really classic look for cheese, but you may find it harder to draw with all these details.
You’re in luck, however, as many kinds of cheese do not have this many holes in them. In fact, most don’t, so you could portray a less complicated form of cheese.
Simply remove the holes, and you will have an ordinary slice of cheese. It won’t make it look any worse, as you will simply be representing a different form of this food.
If removing the holes didn’t make this cheese drawing easy enough, then you could also change the form of the cheese. Before it is cut into slices, cheese will often come in big wheels.
Drawing this big round wheel of cheese could prove a lot easier than drawing this triangular slice. If you wanted to try this but would like to show how the inside looks, you could remove a slice from the wheel.
That would basically be creating a polar opposite of the slice we made in the guide! That’s one example of how you can change the format of the cheese to make it easier on yourself.
What other ideas do you have for making it easier?
This last tip that we have for your cheese sketch is one that could prove extra tasty! One of the best ways to make a drawing easier is by using an example of the real thing to help you.
If you have a chunk of cheese in your fridge, then you could use it to help you as you draw this slice. Just make sure to ask for permission first, especially if you intend to nibble on it as you work!
You can also look up pictures of cheese, and this is especially useful if you want to create a specific look.
Your Cheese Drawing is Complete!
Cheese is always a tasty treat, and we hope that this guide on how to draw cheese was an equally enjoyable artistic treat for you!
We aimed to make sure you could focus on the fun of creating by showing you how easy this drawing could be, so hopefully we succeeded.
Now that you have completed this guide, we will look forward to seeing what extra fun touches you will add to finish it off.
We mentioned a few ideas for how you can personalize this picture, but it will be interesting to see what ideas you come up with as well!
On our website, we have dozens of guides like this one just waiting for you to enjoy them! We have more on the way as well, so definitely make sure you keep checking in.
We would be very interested to see how you finish off this cheese drawing, so please do show us by sharing your artwork on our Facebook and Pinterest pages.