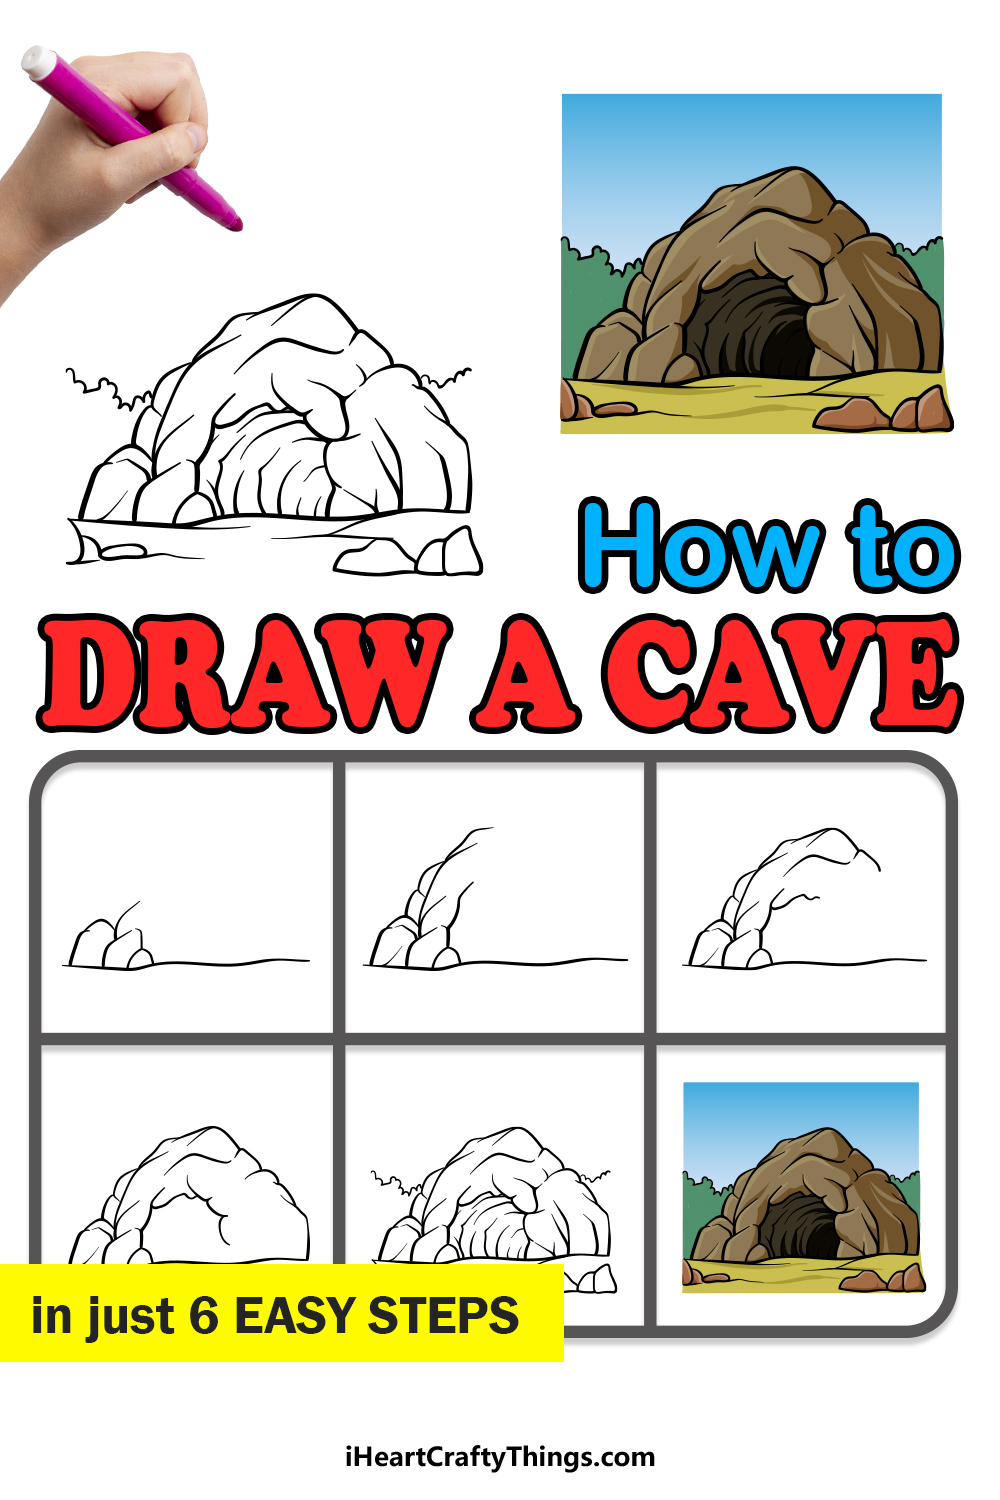
Explore this guide on how to draw a cave! It will be so fun and easy to create a mysterious cave that you can customize with your own ideas and additions.
Caves are inherently fascinating, as you can’t help but wonder what could be within. It could be a bear or maybe a mythological creature like a dragon.
Reassure could be contained within, or perhaps the entrance to a magical city. All of these possibilities are equally viable if you use your imagination, and you could go for whatever you please when you work on this design!
This guide will take you through the steps of creating a simple cave, but what you do after that will be up to you. You could add all sorts of additional ideas and details to show what you think is inside of this cave.
Watch And Learn How To Make Your Cave Drawing
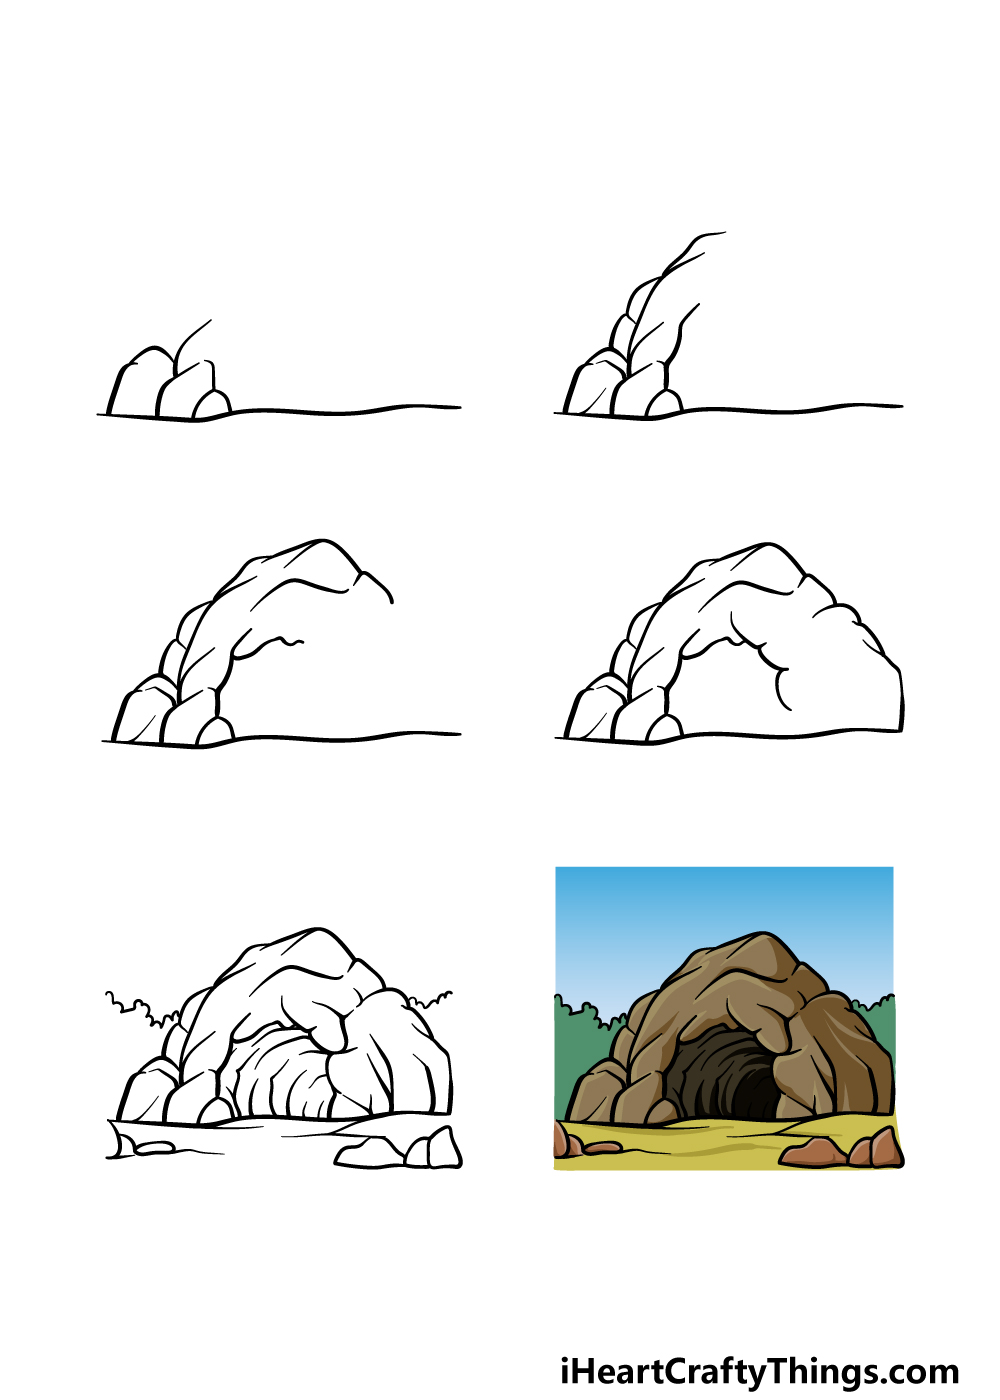
How to Draw A Cave – Let’s get Started!
Step 1
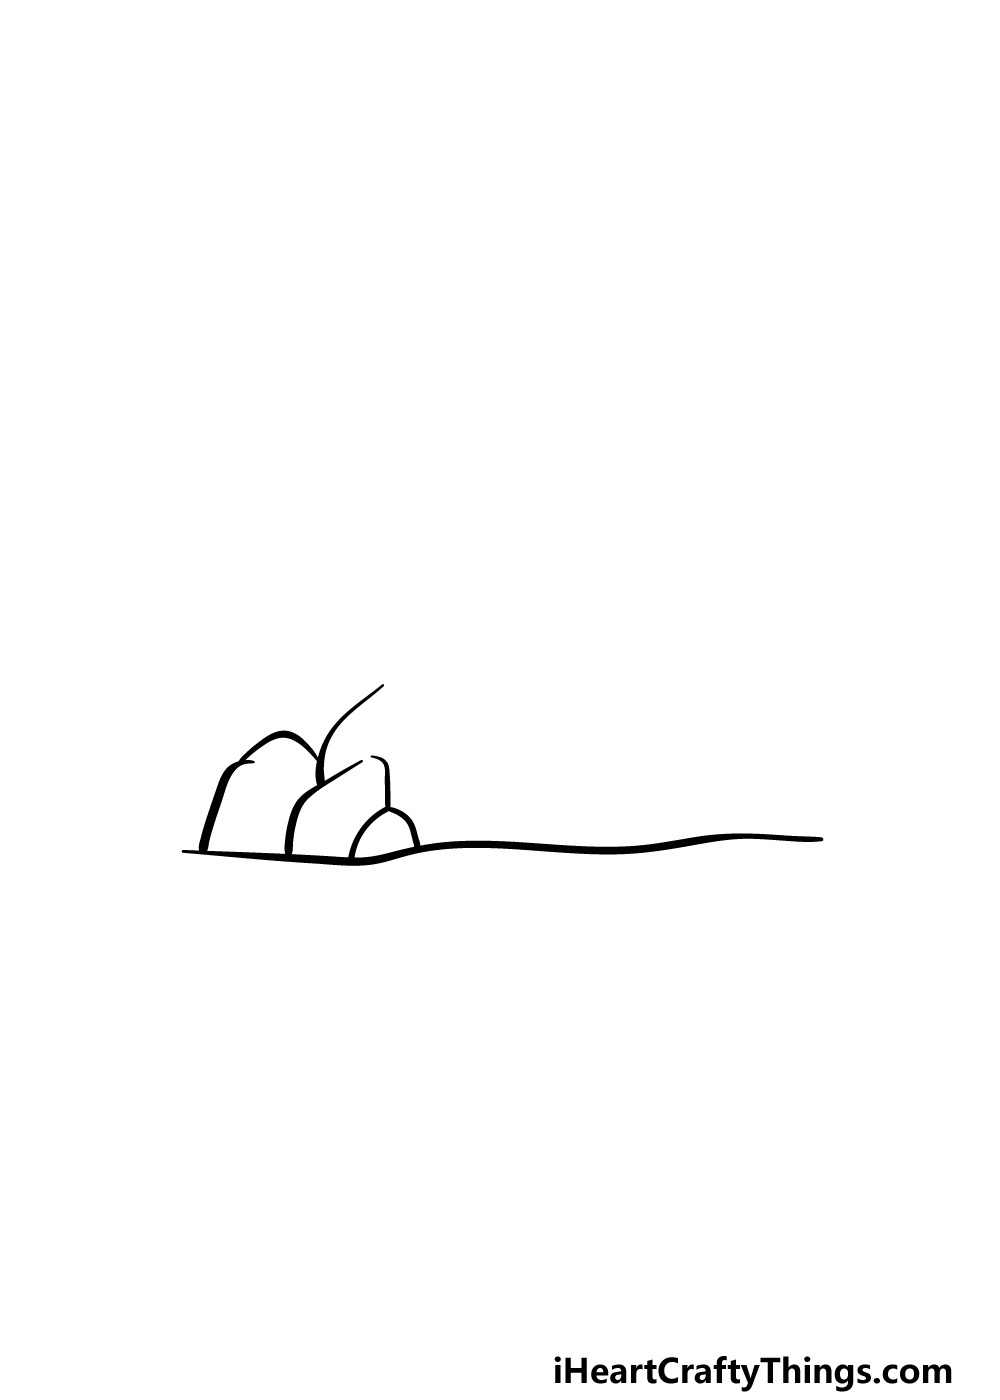
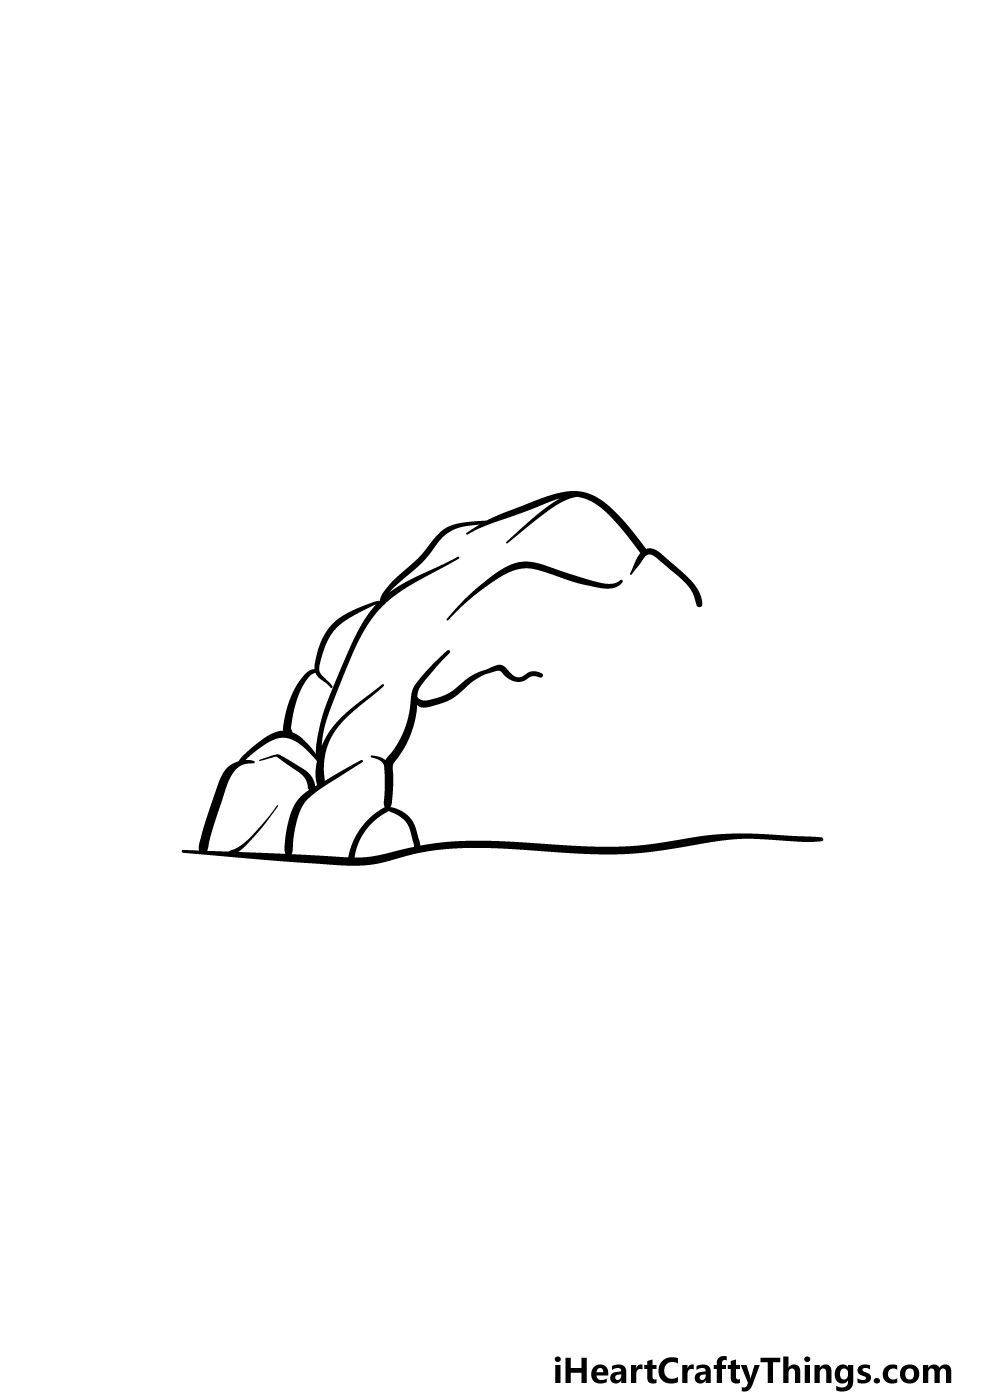
In this first part of our guide on how to draw a cave, we will be drawing some rocks and boulders that will make up a part of the side of the cave.
First, we will be drawing a base that the cave will be sitting on by creating a slightly wavy horizontal line.
Then, we shall be using some rounded lines to create the large boulder shapes piled on one another on the left-hand side of this line. Once you have it looking like our reference image then you’re ready to proceed to step 2!
Step 2 – Next, draw some more of the mouth of the cave
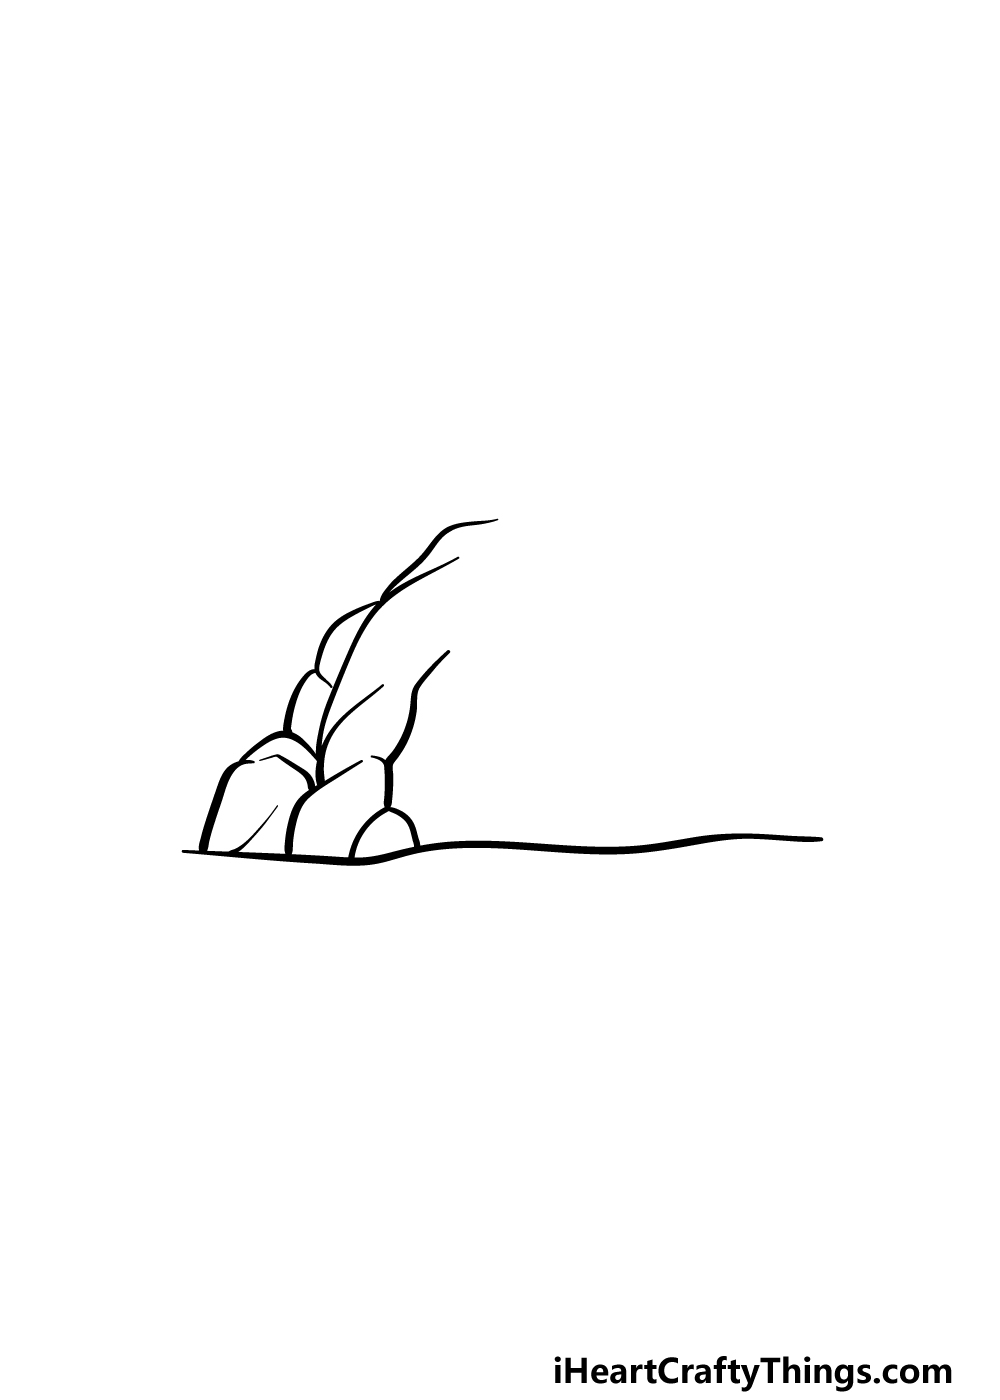
With these boulders at the base drawn, we can now start to draw the mouth of the cave itself.
To do this, we will be drawing some more wavy and bumpy lines up from the boulder shapes that you just drew in the first step.
Then, you can add some more rounded shapes onto the side of the mouth of the cave.
We will continue drawing the mouth in the next few steps, so let’s move on.
Step 3 – Now, draw the top of the cave
In this part of our guide on how to draw a cave, we will be drawing the top of the mouth of the cave.
We will do this in a similar fashion to how you started drawing the mouth of the cave in the last step, but there will be a few differences.
Mainly, while the width of the mouth on the left-hand side was quite thin, it will be quite a bit thicker on top. Otherwise, you will simply be using some more bumpy lines for the rocky mouth.
Step 4 – Next, draw the right-hand side of the cave

Your cave drawing is really taking shape now! We will continue to add on to the mouth of the cave in this fourth step.
We will continue the trend of the top of the cave in that this right-hand side will also be quite thick. You will again be using the same bumpy lines that you have been using all along for this part.
Then, once you have this side of the cave drawn, we can finish off the final details in the next part.
Step 5 – Now, you can finish off the final details of your cave drawing
In this fifth step of our guide on how to draw a cave, we will be finishing off the final details and elements.
You will also be able to add some details and additions of your own! Before we do that, however, let’s first finish off the details.
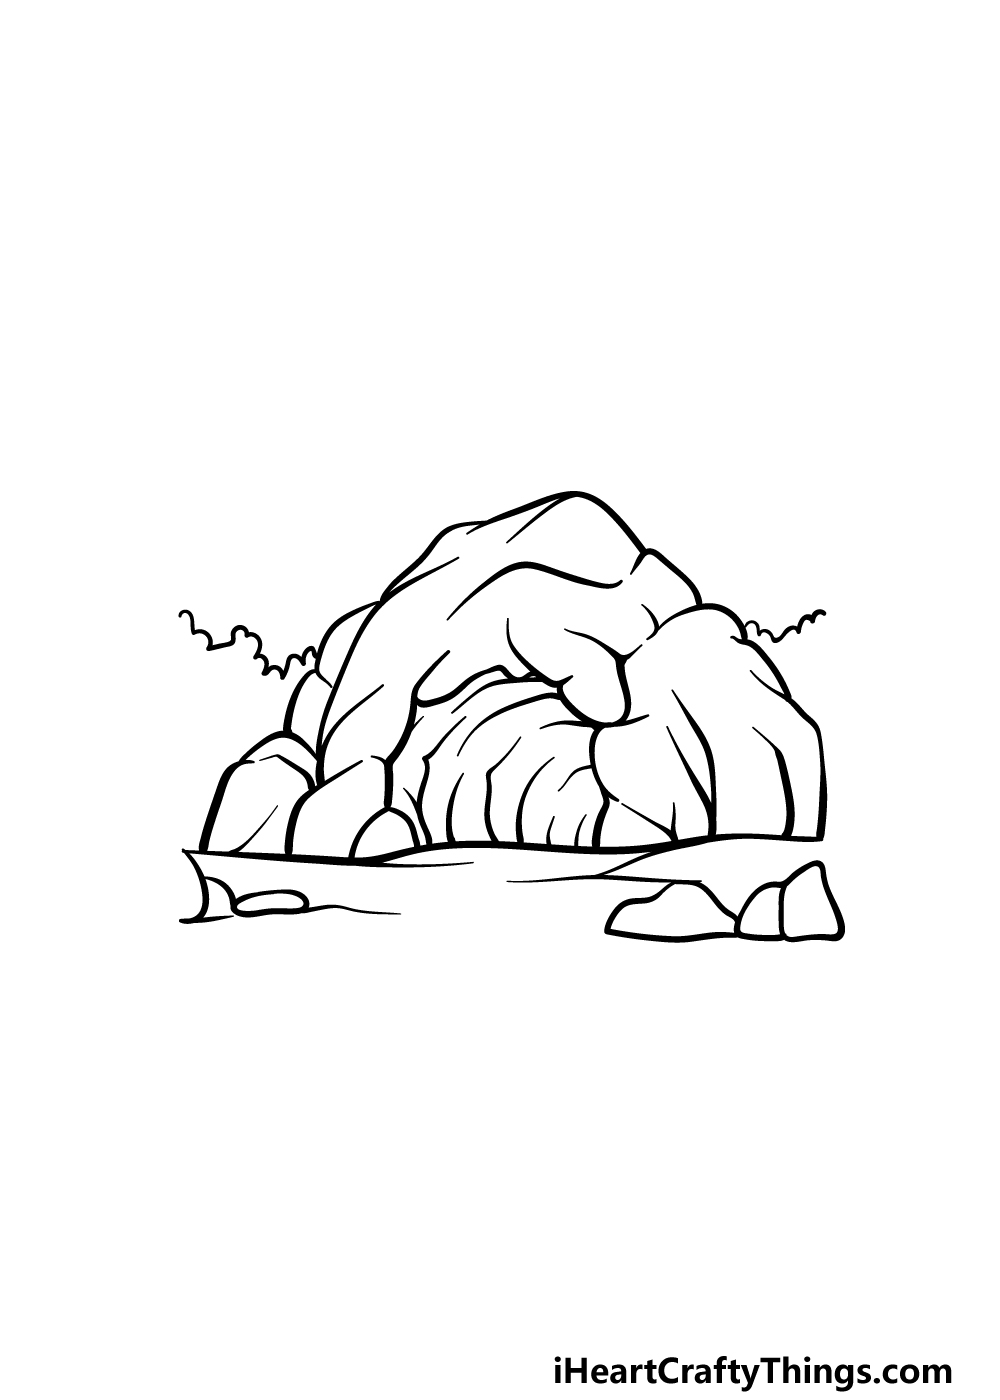
First, we will continue to make the outer mouth of the cave look nice and rocky by adding some lines throughout the interior of the cave outline.
Then, we will be drawing some more curved lines into the hole of the cave to suggest that it has some depth. Then, you can draw some horizontal, jagged lines near the top of the cave to look like treetops in the background.
Finally, we will finish off by drawing some lines and rocks into the ground in front of the cave. That will finish off the details in this guide, but you don’t have to stop there!
There are lots of cool things that you could add to the drawing to help personalize it. One of the fun ways you could go about this would be to show what you think could be contained within the cave.
It could be a bear or wild animal as we mentioned earlier, but you could also draw a fearsome troll or maybe some cavemen! What fun ideas can you think of to add that would really finish off this image?
Step 6 – Finish off your cave drawing with some color

Now you have reached the sixth and final step of your cave drawing, and this is the step where we finish off the drawing with some colors. This is a part where you can really get creative with it and see what you can come up with.
We showed you one way that you can go about it in our reference picture.
We used a nice wide color palette with blues for the skies, greens for the trees, browns for the cave and some dark yellows for the ground.
You can go for these shades too, but don’t be shy to change it up and use your favorite colors!
You could also experiment with some cool art mediums, and you have tons of options for colors and art tools you could use.
Be sure to have fun and get creative with it, and we can’t wait to see how you color in this picture!
Here’s how you can make your cave drawing even better…
Find out how you can make this cave drawing the best it can be with these tips!
Caves are always cool on their own, but it’s fun to imagine what could be within them as well. That brings us to the first tip we have for this cave sketch, and that is to show what is inside of it.
You could make this quite realistic and add something like a bear or some wolves. That’s one approach, but you could also try something more imaginative!
For example, maybe the cave could house a fearsome troll you could design. What else could be living within the cave?
Once you have decided whether to add a creature to your drawing of a cave, you could also add to the surrounding details.
We drew a few background details in the guide, but you could really take this even further.
If you were to draw this cave on a big piece of paper and put it near the middle, then you could add quite a landscape around it.
If you need some ideas or help with that, you can find many stunning landscape pictures online.
Focusing back on the cave sketch, you could also add some details to the cave itself. For example, it would be a nice addition to have a fire burning at the entrance.
That would make it look like someone is living inside of it! Or, maybe you could show more of the inside of the cave and add some cave paintings on the wall.
There are lots of cool details, extras and additions you can use to make this drawing even more interesting to behold.
Finally, we would also recommend trying out different colors, art tools and mediums for your cave drawing. We showed you one of the possible ways you could color this page in the guide, but that is just a suggestion.
When picking your art tools and mediums, remember that you can also mix up the various mediums to achieve some amazing colors.
Your Cave Drawing is Complete!
You have now successfully completed this guide on how to draw a cave!
We hope that this guide showed you that by breaking it down into steps that a drawing like this can be made much easier and even more fun.
Now you can show us your creativity by adding some extra details, elements and touches to the picture. You can also really make this image look amazing by experimenting with your favorite colors and art mediums.
Then, be sure to come and visit us at our website, as we have lots of cool guides for you to enjoy there. We upload new ones frequently, so don’t forget to check in often!
We would also love to see your finished cave drawing, so you can show it to us by sharing it on our Facebook and Pinterest pages.