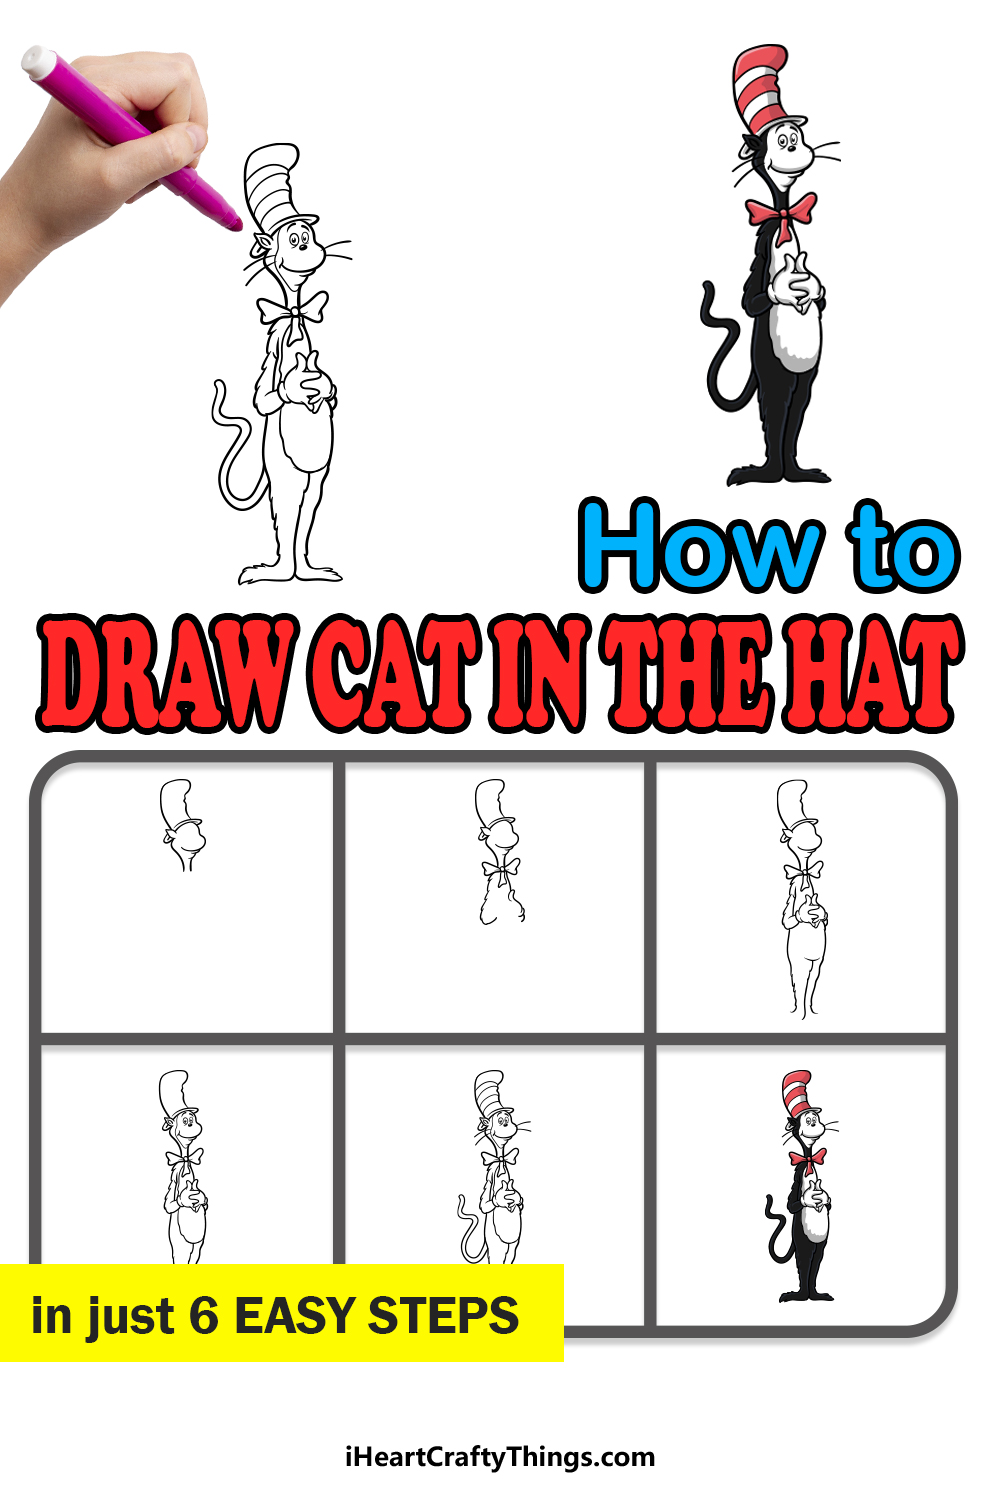
The Cat In The Hat is one of the most popular children’s characters of all time! Introduced to the world in the book by Dr. Seuss, this character has gone on to appear in films, TV Shows, toy merchandise and more!
This famous cat has fans all around the world, and his many fans often like to learn how to draw the Cat In The Hat.
It can be a bit tricky to learn, however, making a guide like this one very helpful!
This step-by-step guide on how to draw the Cat In The Hat in just 6 steps will show you how easy and fun it can be to draw this iconic character.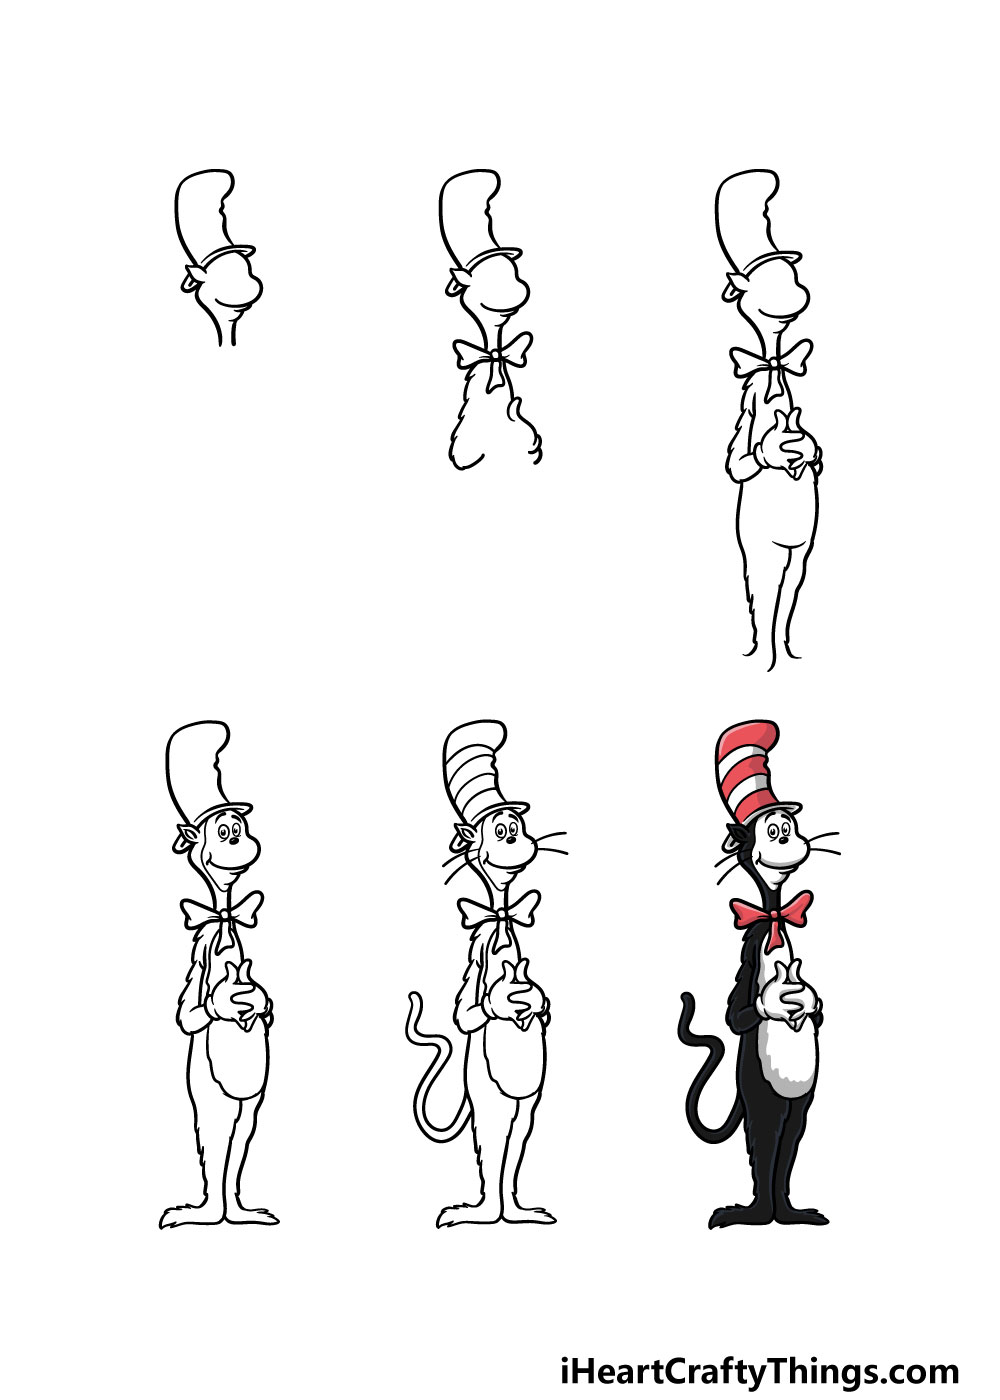
How to Draw The Cat In The Hat – Let’s Get Started!
Step 1
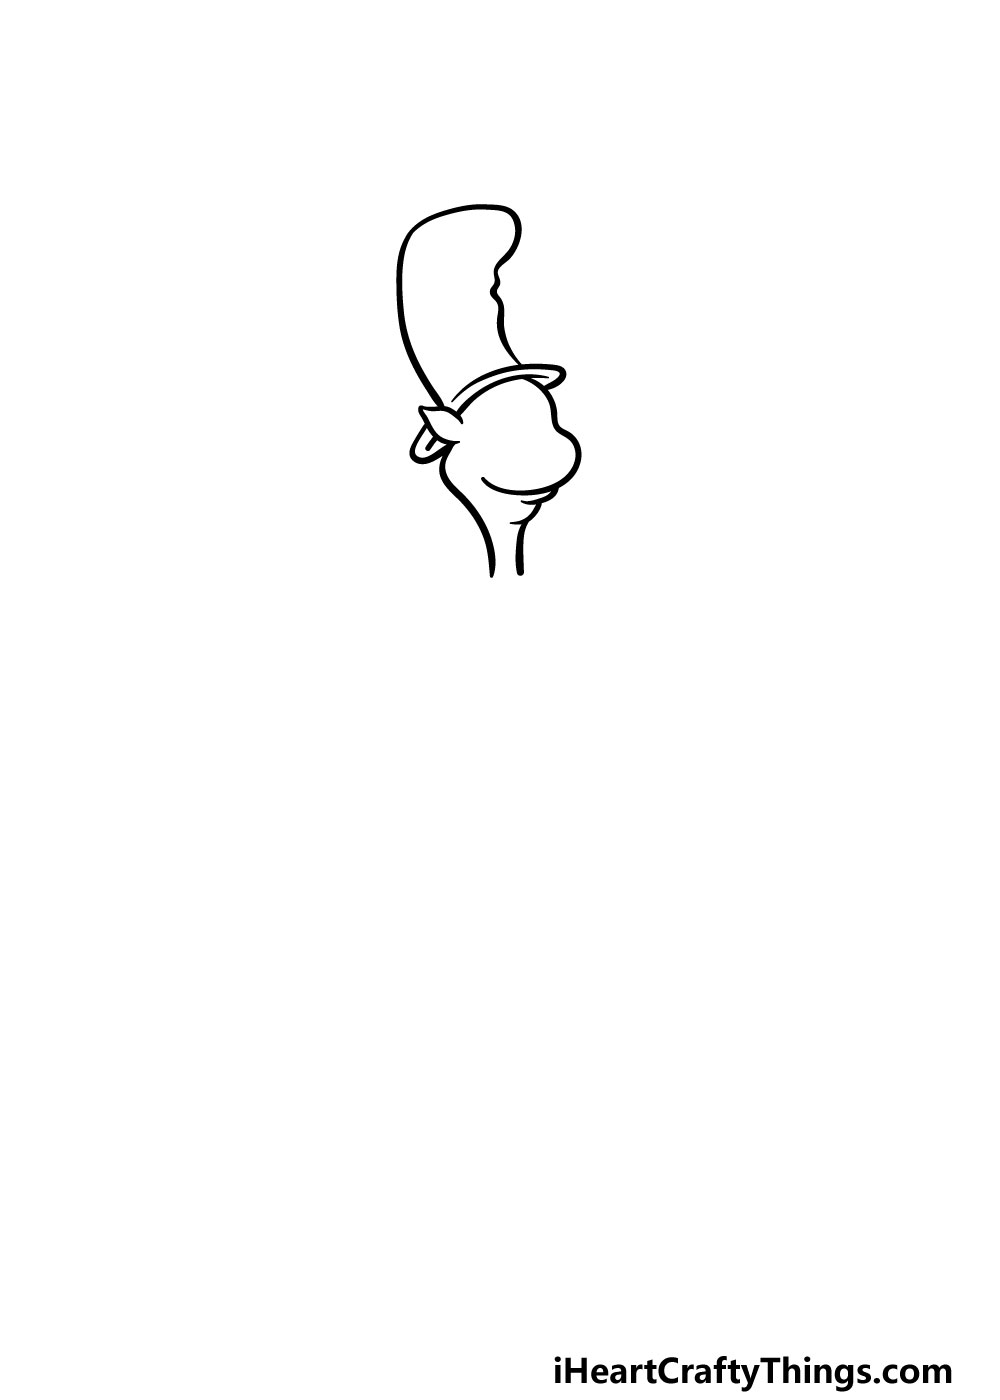
For this first step in our guide on how to draw the Cat In The Hat, we will be starting with the head and the famous hat itself!
For now, we will be focusing on the outlines of these two elements, but we will definitely add detail to them later.
We will be drawing these parts by using some curved and rounded lines mostly, and you can refer to the reference image to see how these should look!
Once you have drawn the head with the hat on top of it, we’re ready for step 2!
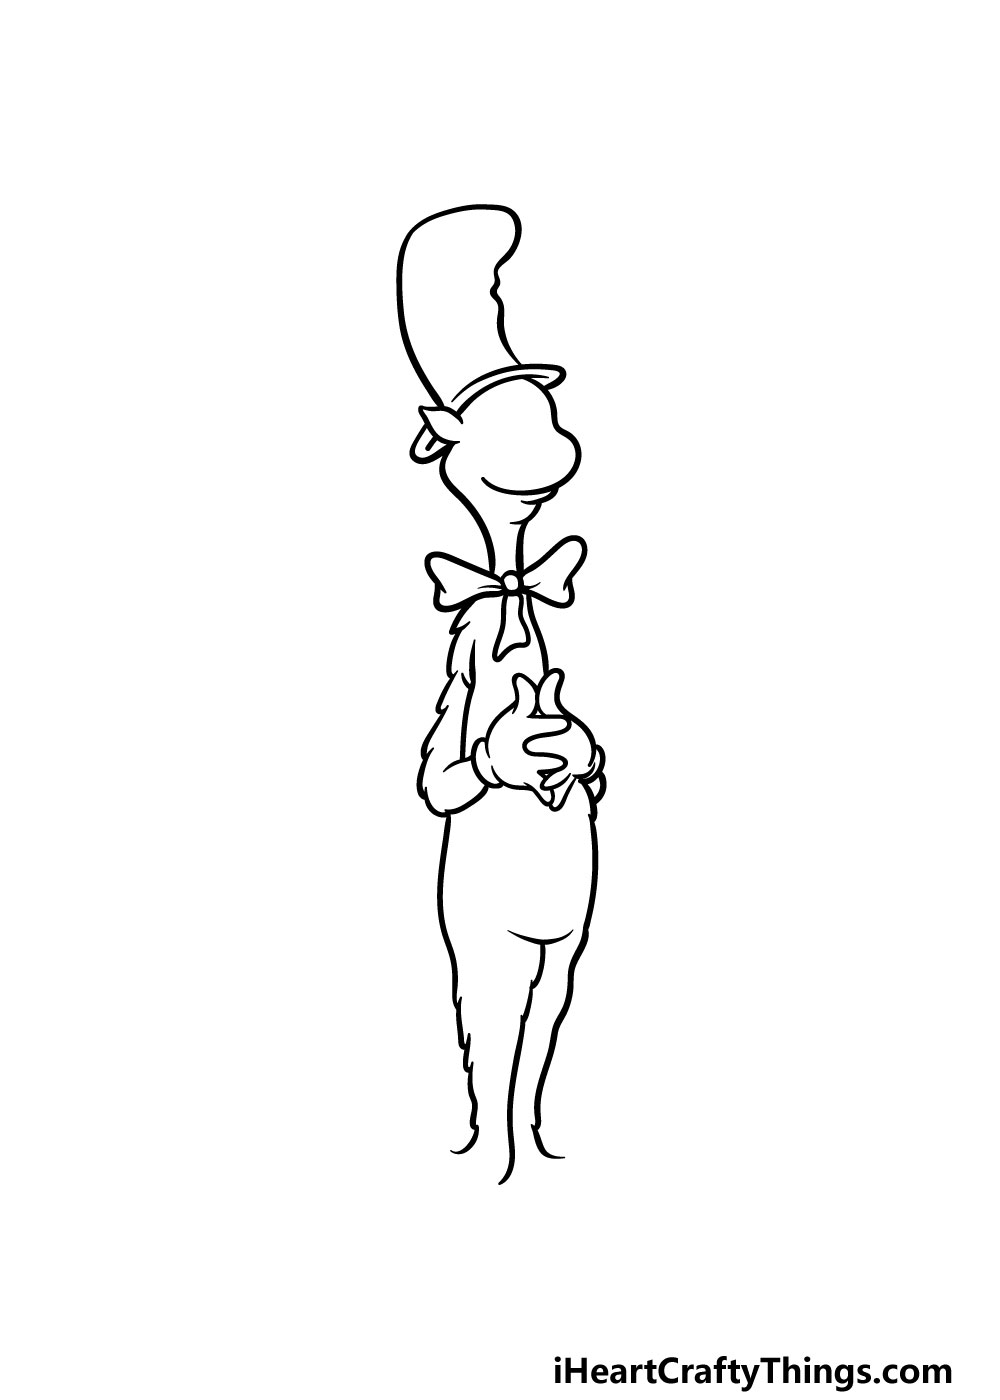
Step 2 – Start drawing his body in this step
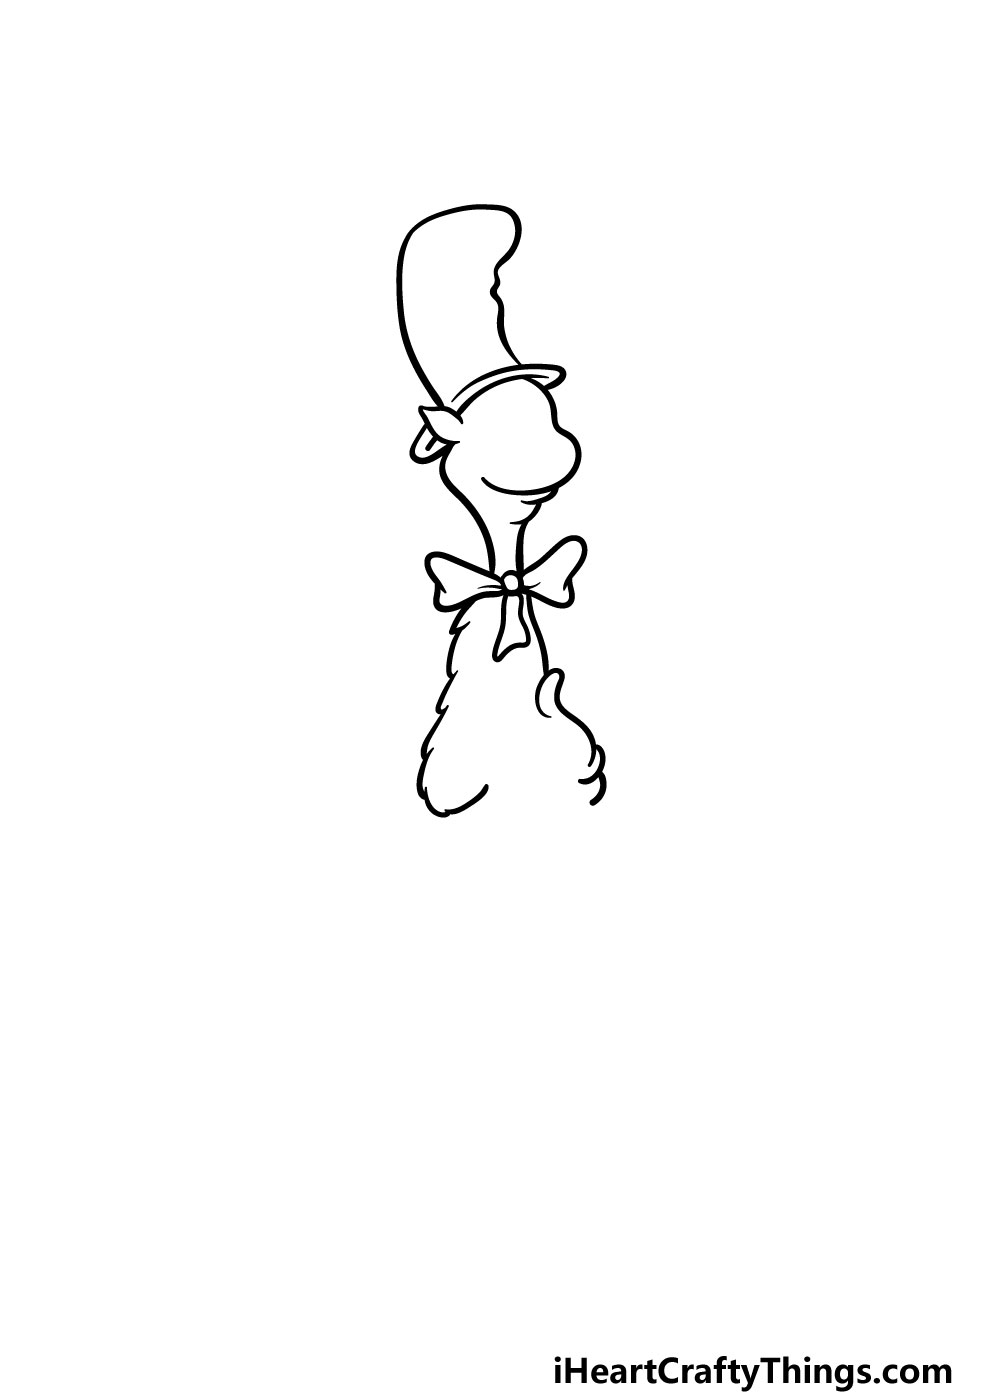
We will be moving further down and work on the start of the body in this step of your Cat In The Hat drawing. First, we will be drawing his large bowtie underneath his neck.
Then for his back, we will start to extend a jagged line coming down from the left-hand side of the tie.
This line will be jagged like this to give the appearance of furriness for the cat. Finally, we will use some smoother rounded lines for his chest and hand as they appear in the reference image.
Step 3 – Next, you can finish off his arms and start his legs
In this third step of our guide on how to draw the Cat In The Hat, we will be finishing off his arms and start the lower portion of his body.
Drawing hands, even cartoon ones, can be a bit tricky, so when you draw his gloved hands don’t be afraid to take it slowly and follow the reference image closely!
Then, once the arms are done we will start on his legs. These can be drawn using a combination of smoother round lines and jagged ones like the ones we used for his back earlier.
Step 4 – Draw some details for his face and feet
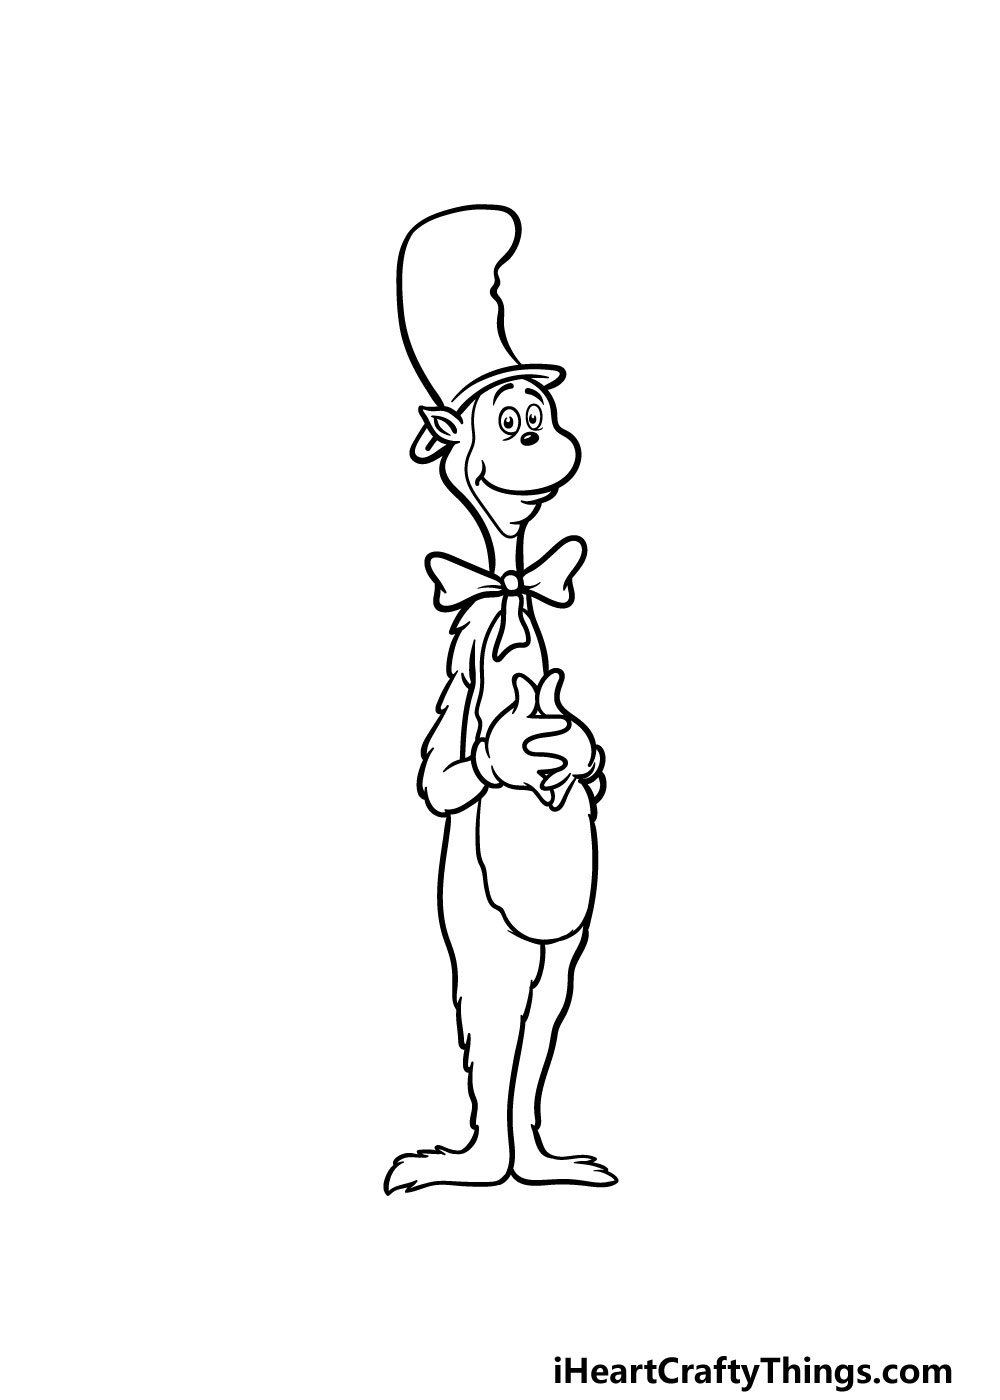
Earlier in this guide, we mentioned how we will be adding details to your Cat In The Hat drawing, and in this step we will start with that!
First, we will be drawing some eyes for him using some small ovals with dots in them. Then, his nose will be a small, black oval beneath the eyes.
You can then add a small line to the corner of his mouth for his smile. You can then finish off his face with a line encasing his facial features.
Finally, you can add another jagged, furry line for his belly, and then use similar lines for his feet. With those added, we just have a few more final details to add in the next step!
Step 5 – Now, you can add the final details to your Cat In The Hat drawing
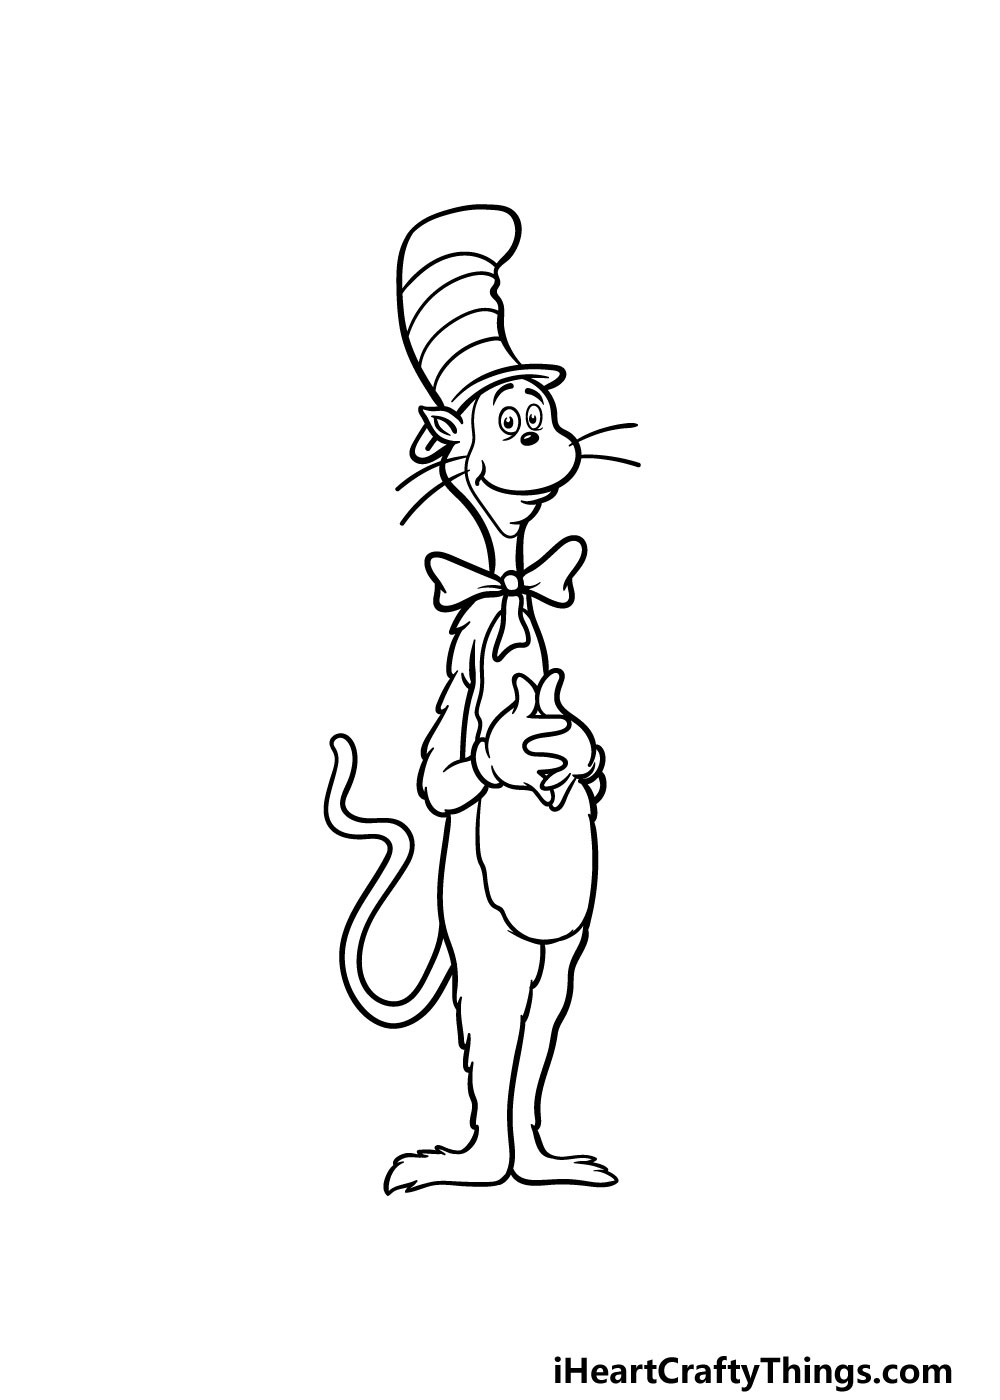
We will be adding some amazing colors to your picture soon, but first we have a few details to add in this step of our guide on how to draw the Cat In The Hat!
First, we will finish off the famous hat that he is wearing. This hat is striped, and you can add these stripes to it now. Then, you can draw three lines coming out from either side of his face for his whiskers.
Then, all we need to add is a curvy tail onto his back, and that will finish off all the final details! Before you move on to the final step, this is your chance to add any details of your own as well.
You could draw some more Dr. Seuss characters that you love beside him for one idea!
Or, perhaps you could draw a background to recreate your favorite scene from the book. How will you finish off this drawing before the final step?
Step 6 – Finish off your Cat In The Hat drawing with some color

You’ve worked very hard on this Cat In The Hat drawing, and now you get to relax with some coloring fun as you finish it off!
The Cat In The Hat is famous for wearing his red and white big hat along with his red bowtie, so if you would like to go for his classic colors then you can use our reference picture as a guide.
Even if you stick to his classic colors, there are lots of ways that you can bring even more of your favorite colors to this image! If you drew extra characters, objects or a background then those elements will give you an opportunity to add many more colors as well.
Then, once you have chosen your colors you can have even more fun choosing which awesome art mediums and tools you will use to fill in this picture!
Do this to take your Cat In The Hat drawing to the next level
Celebrate this iconic character with these tips for your Cat In The Hat sketch!
This cat may be the title character of the story, but he is joined by a few other characters. These include two children and a goldfish in a bowl.
It would be fun to add some of these characters to your drawing of the Cat In The Hat! If you want to try this, you can use the book or images online to help you as you draw.
What sorts of poses do you think you would use for these characters to create a really fun scene?
Speaking of poses, you could also create some fun new poses for the Cat In The Hat. this could be as simple as his arms being raised instead of clasped in front of him.
Or, you could create a sense of mayhem by having him running around causing mischief! What poses could you create for the Cat In The Hat in order to create some fun new scenarios for your artwork?
Next, you may wish to draw a background for your Cat In The Hat drawing. If you want to do this, the books will have many pages you could use as inspiration.
The Dr. Seuss style is fairly simple and effective, so it would be easy to add a fun background setting! Do you think that you would use a place from the books or maybe go for a background of your own design?
Finally, the Cat In The Hat is a story famous for many famous quotes. You could make your Cat In The Hat sketch look like a page from the books by adding one of these quotes!
There are lots to choose from, so you could pick your favorite and then see where you may put it on the page.
You could even use a similar font to the one often used in the books to make it look more authentic.
What are some lines or quotes you could use?
Your Cat In The Hat Drawing is Complete!
It was a really fun process recreating this beloved character in this guide on how to draw the Cat In The Hat! We hope that this guide made this drawing easy and enjoyable for you to take on.
We broke it down into smaller, easier steps for you to make sure you could just focus on the fun of drawing with no frustration!
Now you can show us what extra elements, fun colors and art mediums you can think of to really finish off this image.
We also have some amazing drawing guides on our website for you! Be sure to check in often to catch the new guides that we upload regularly.
It would be great to see your incredible Cat In The Hat drawing, so once it’s done please be sure to share it on our Facebook and Pinterest pages for us to see!