There are many natural phenomenons that inspire a lot of awe and humility in humanity!
Humans may think they rule the earth, but that can be put into perspective quickly when faced by something like a volcano erupting.
This devastating yet incredible natural occurrence can be destructive, but it is also a beautiful sight.
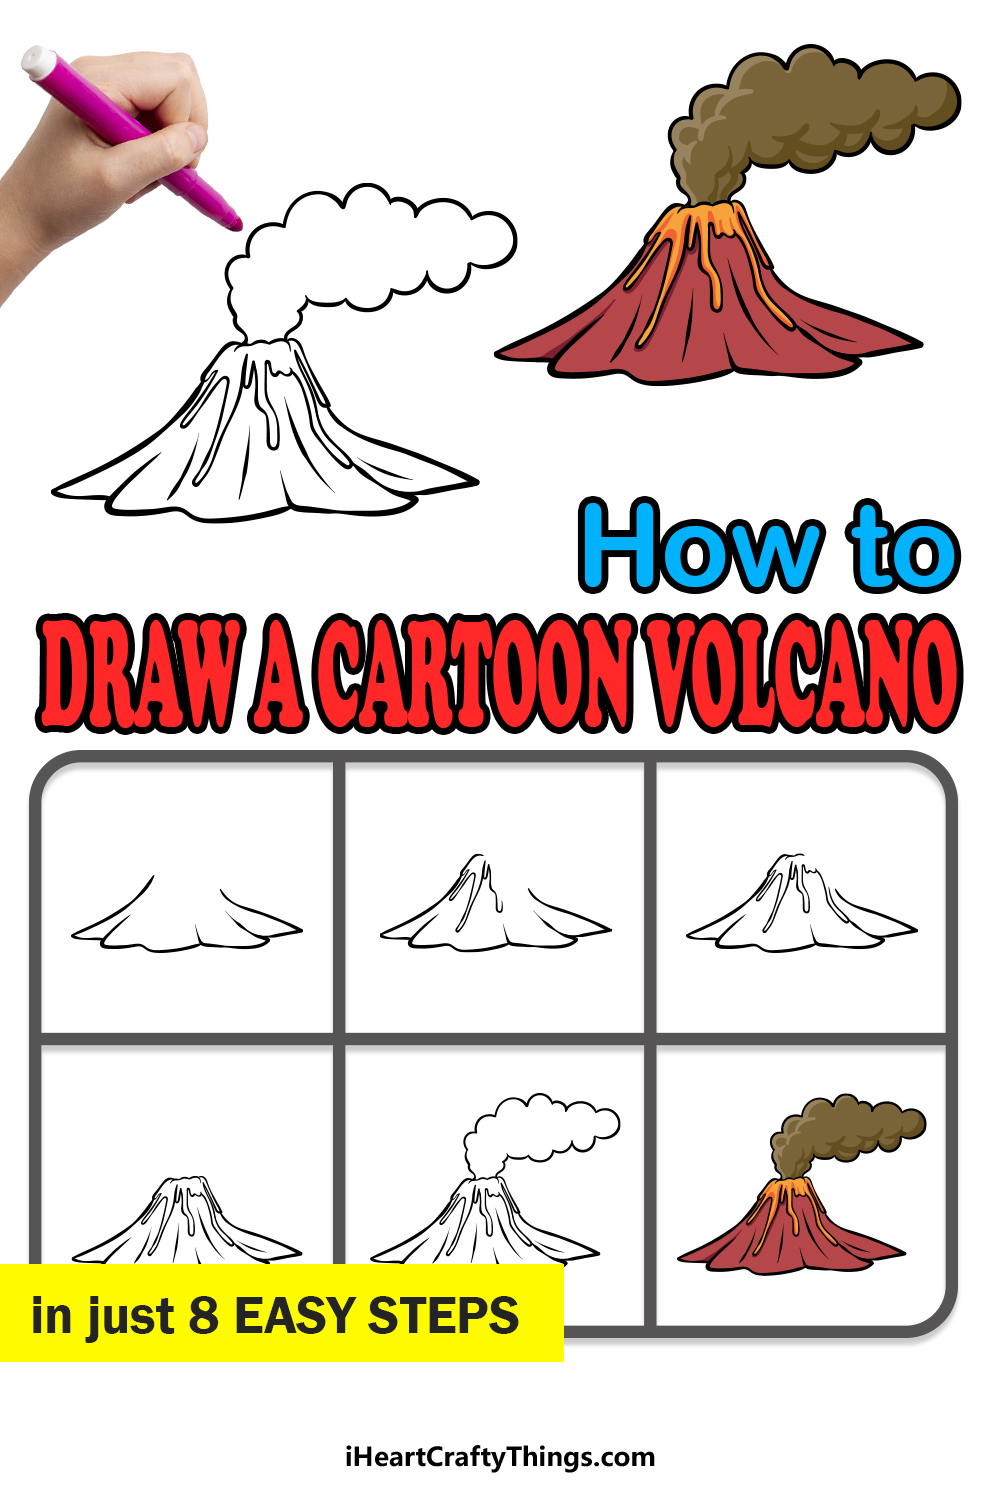
Because of this, volcanoes are represented in art often, and this guide on how to draw a cartoon volcano will help you to create your very own volcano art as well!
The 8 steps in this tutorial will show you just how fun and easy it can be.
So get ready to begin this incredible step-by-step guide on how to draw a cartoon volcano in just 8 fun and easy steps!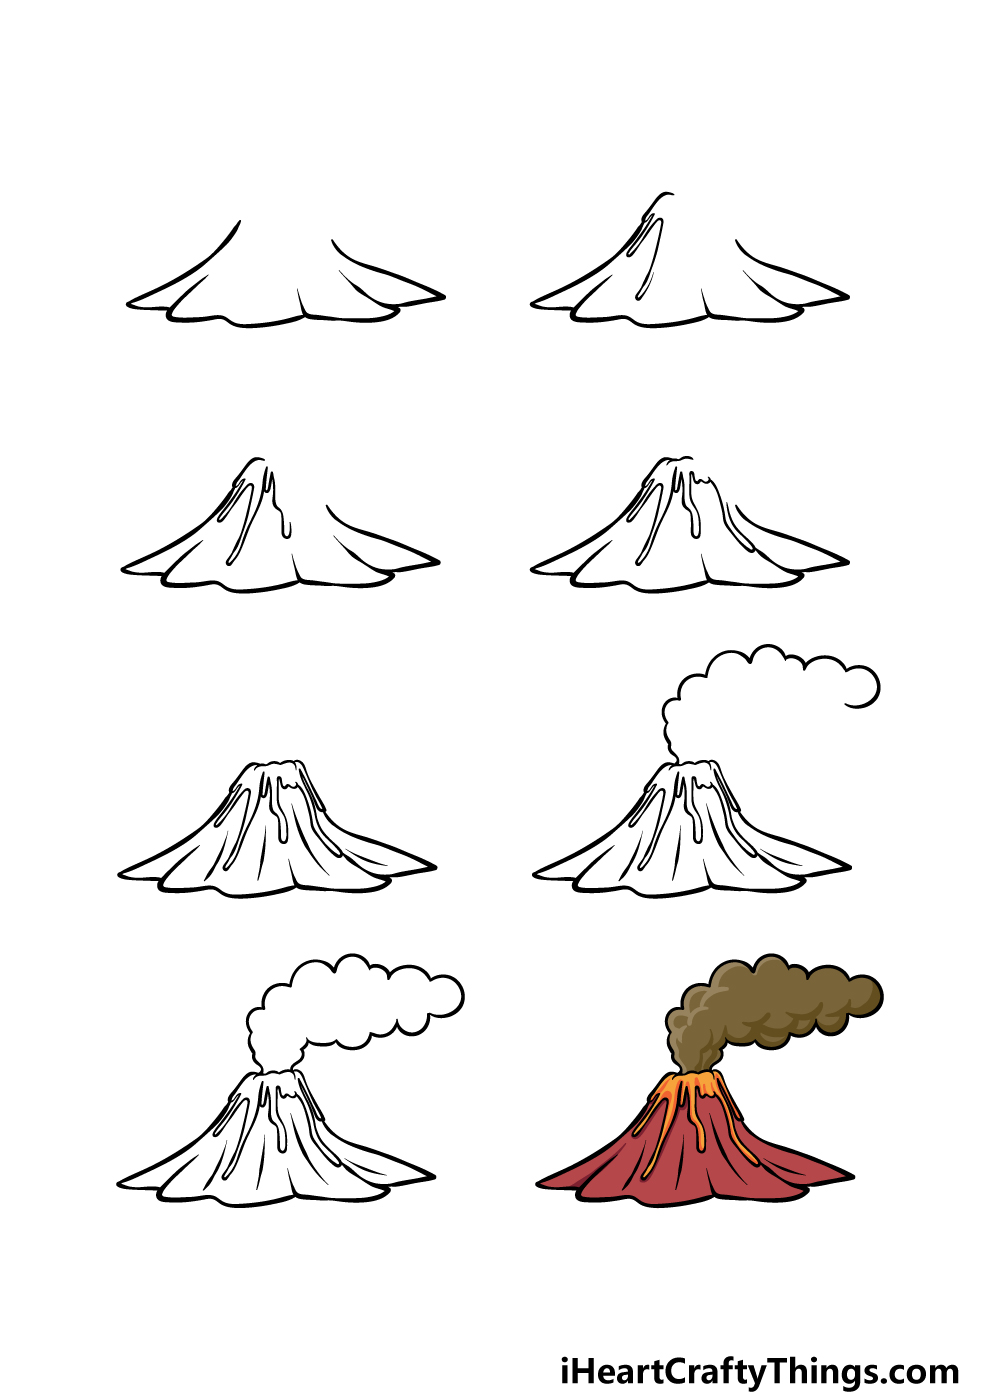
How to Draw A Cartoon Volcano – Let’s get Started!
Step 1
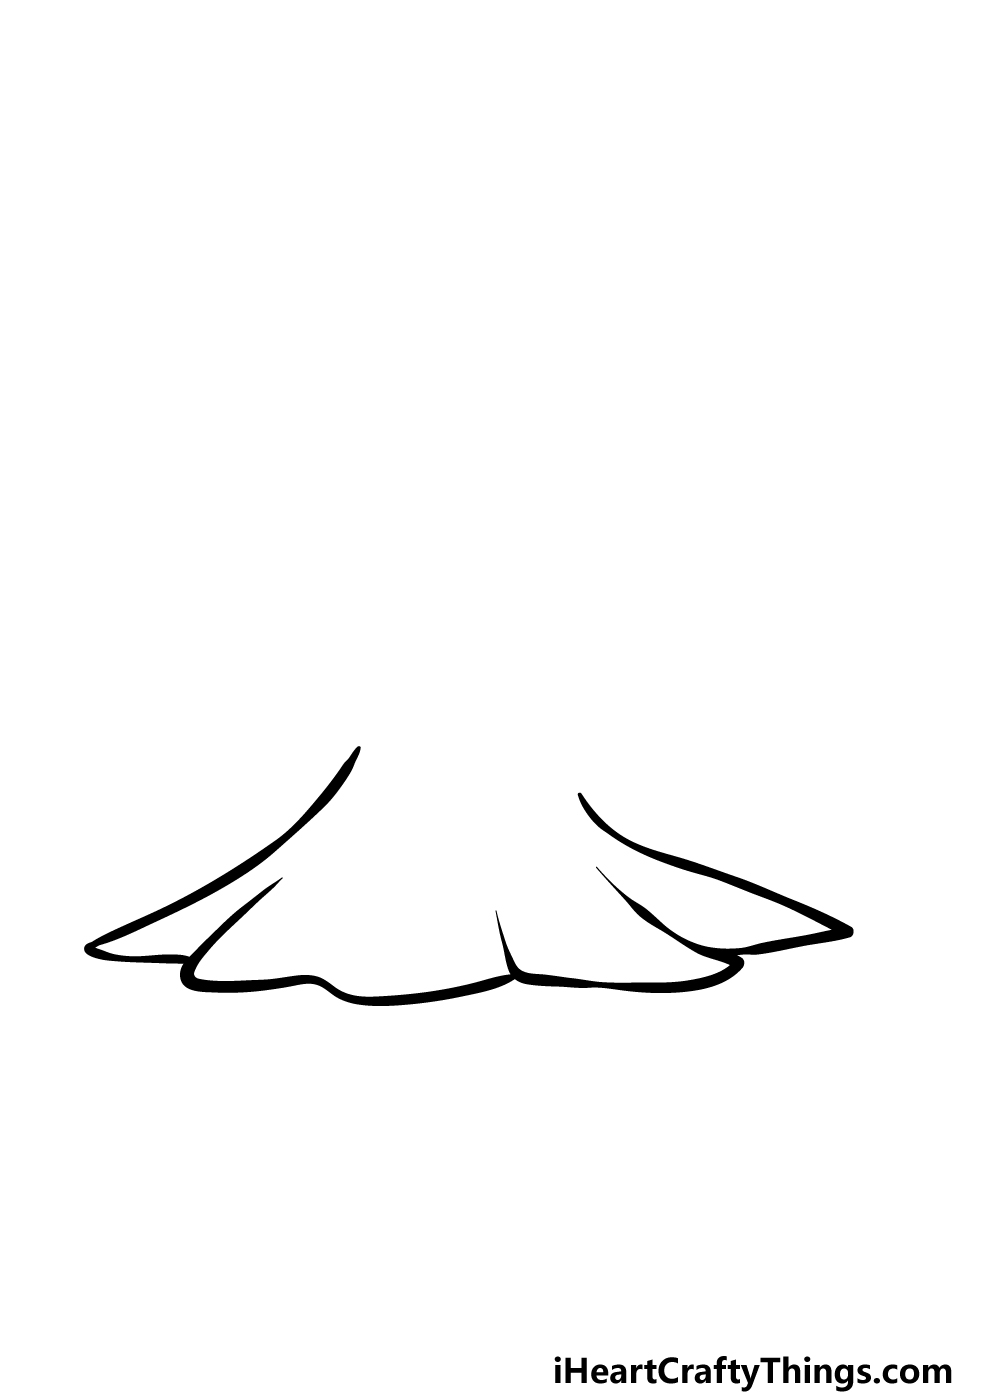
To begin this drawing, we will draw the volcano body itself. If you’ve ever seen a volcano or even a picture of one, you will be familiar with their distinctive shapes that extend up from the earth.
Even when not erupting, they are a sight to behold! To draw the body of this volcano, we will be using some curved lines that connect to one another.
The base of the volcano will be rather wide, and it will get slightly thinner as it moves up.
There will be a wide blank space on top, but we will fill that in very soon!
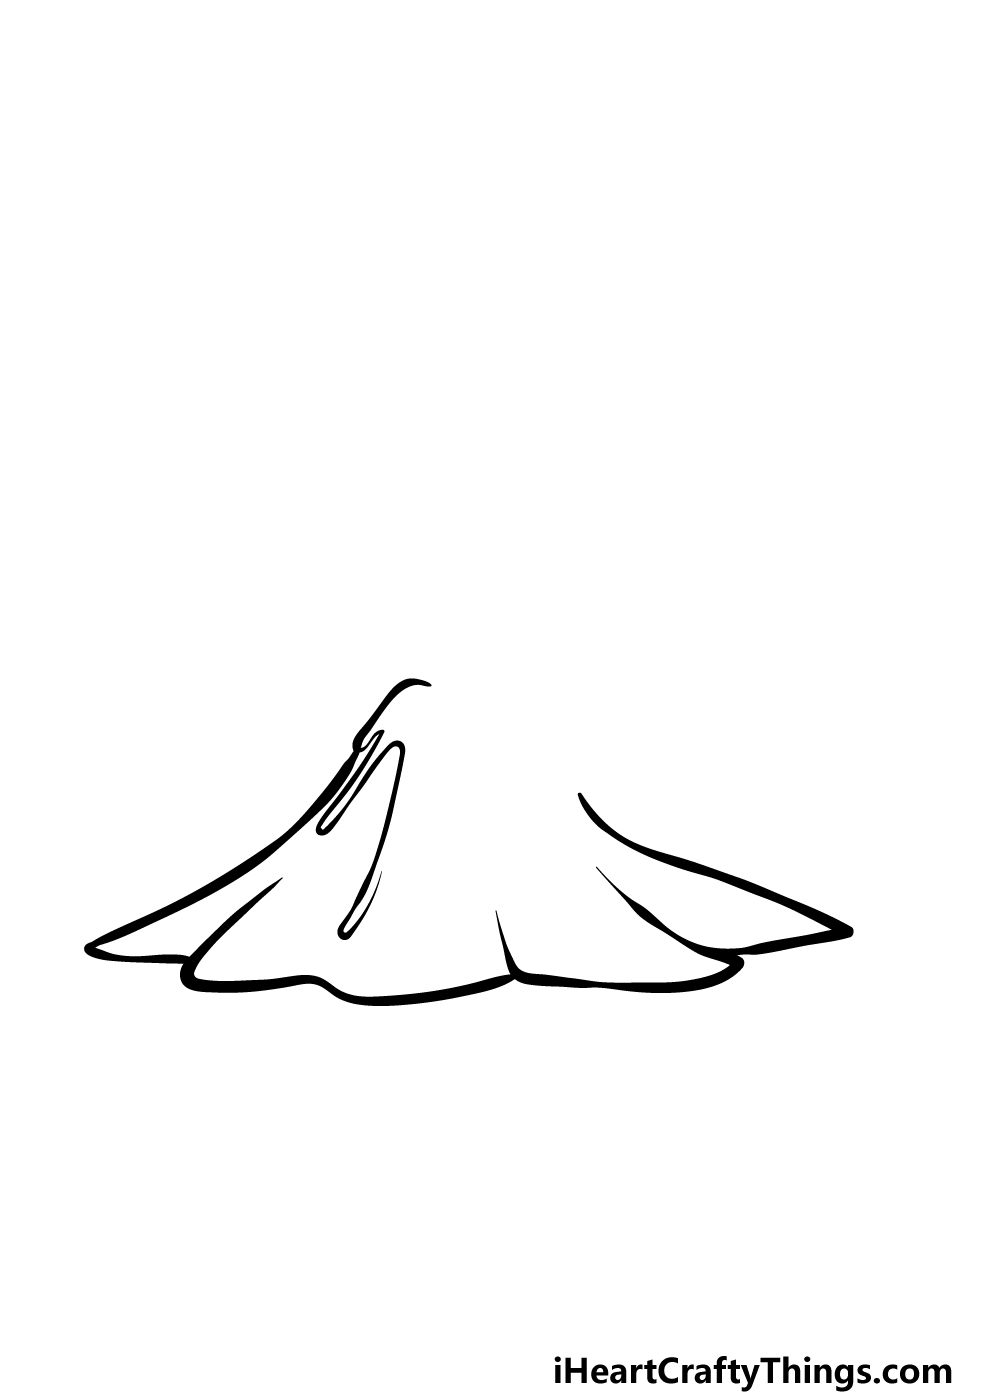
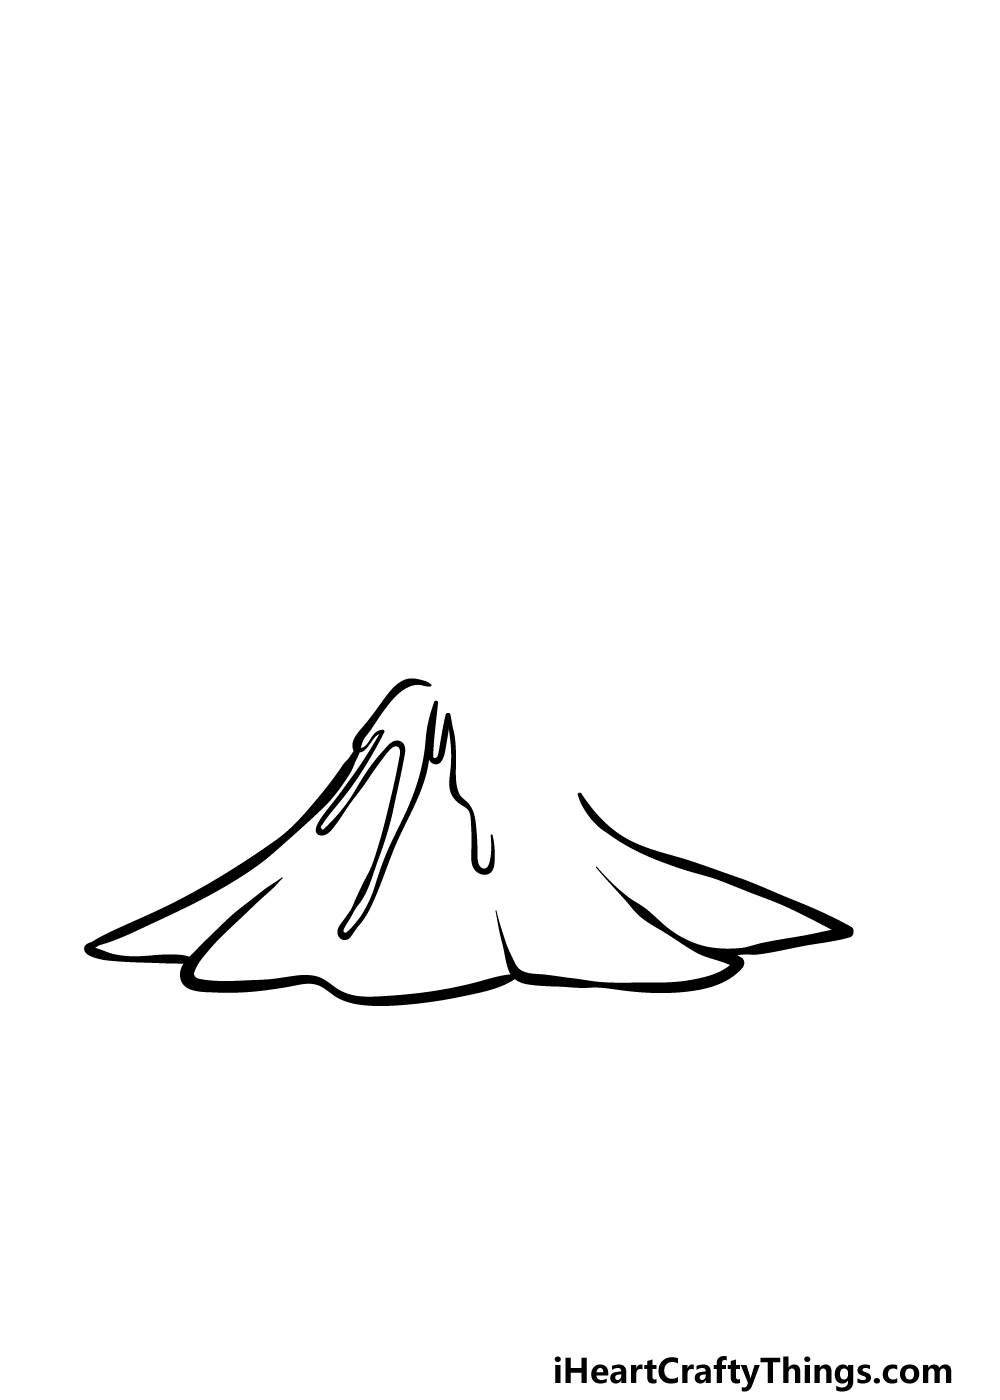
Step 2 – Next, start drawing the erupting lava
While dormant volcanoes also look incredible, they look even more breathtaking when they are erupting.
That is, as long as it is seen from a safe distance! We will begin drawing some of this erupting lava in this step of our guide on how to draw a cartoon volcano.
Lava takes on a thick liquid form as it flows from the volcano, and for that reason we will be drawing some thin shapes with rounded ends to show all the streams of the lava.
For now, we will only be drawing the lava flowing out of the left-hand side. We will keep adding to the lava stream as we proceed!
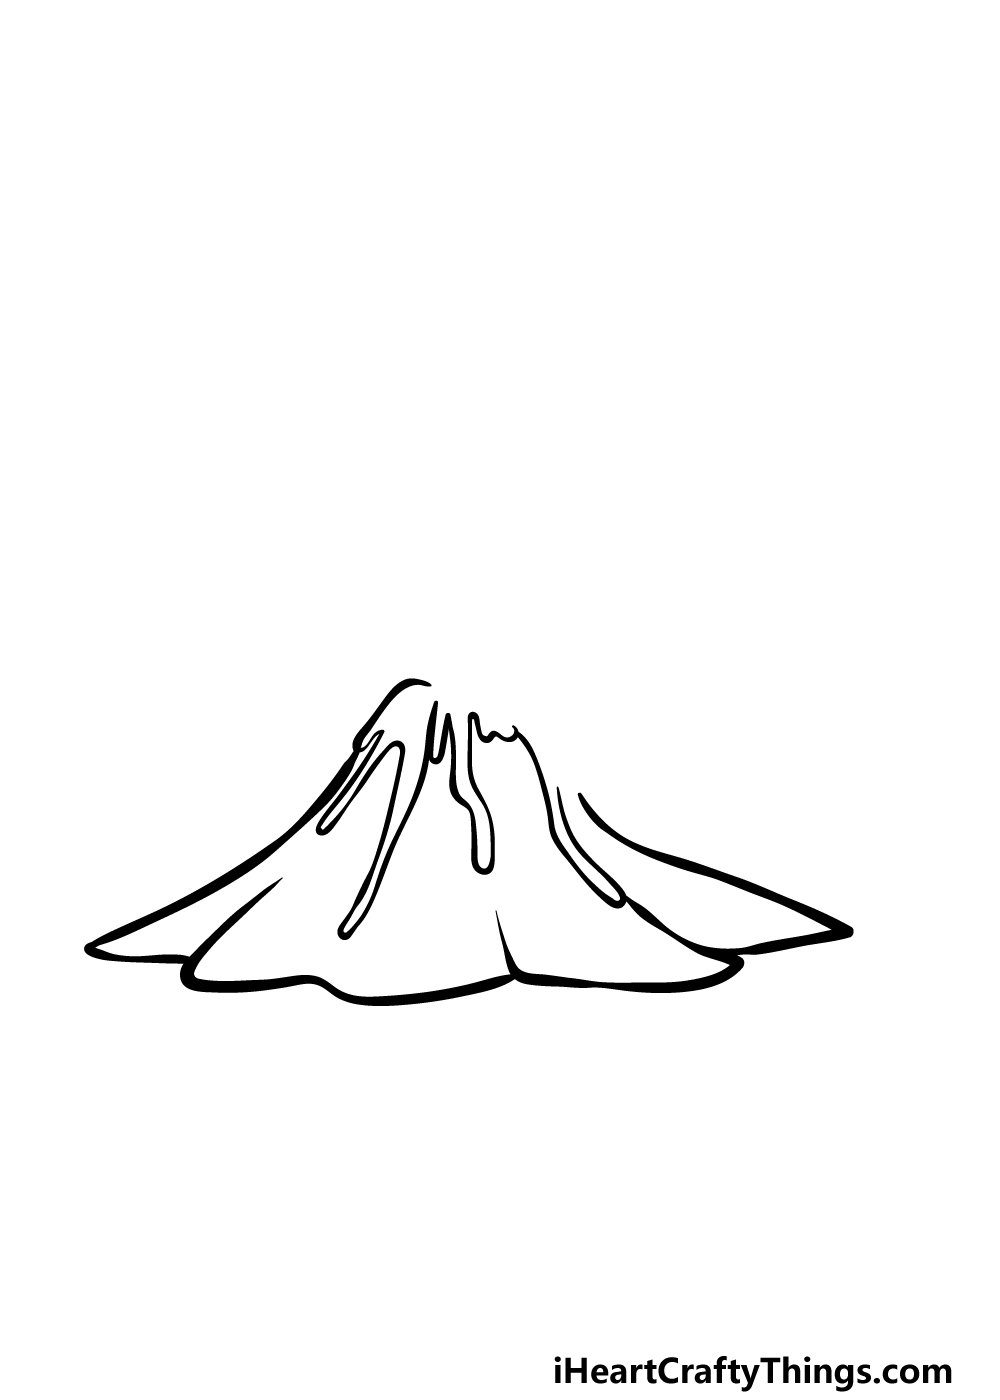
Step 3 – Now, draw some more of the lava
Continuing with this cartoon volcano drawing, we will keep adding some lava to the stream coming out of the volcano.
For this portion, we will be adding lava coming from the central portion of the volcano’s mouth.
To do this, we will again be drawing some curved, wavy lines coming out from the mouth of the volcano and down to around the halfway point.
You can copy the streams exactly as they appear in our reference image, but you can also change up the shape or volume of the streams as well!
Step 4 – Next, keep adding lava
We have a bit more lava to add before we get to the final details of this drawing! For this step, we will draw some more lava snaking down the volcano.
This time, the streams will go on the right-hand side of the volcano’s mouth. There will then just be one more section of lava to add, and we will take care of that in the next step!
Step 5 – Now, draw the final section of lava
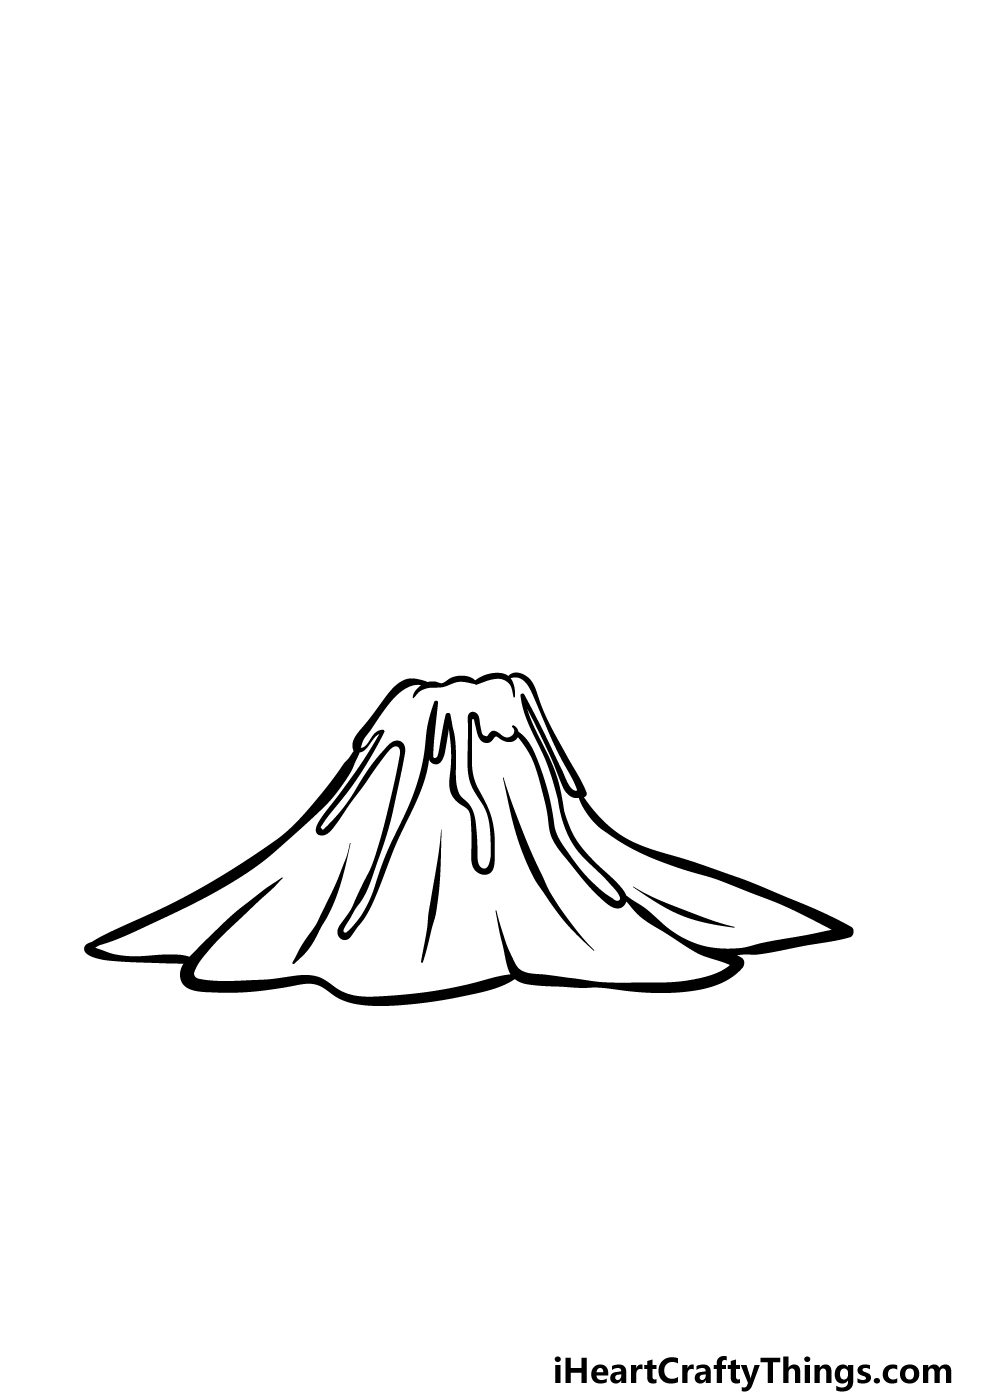
In this fifth part of our guide on how to draw a cartoon volcano, we will be drawing the final section of lava coming from the volcano, and we will also add some details to the body of the volcano itself.
First, add the final section of the flowing lava to the blank space that was left after the previous step.
Once this final section of flowing lava is added, we will then add some details to the body of the volcano.
These will simply comprise of some slightly curved lines moving down the body of the volcano as shown in the reference image. We will then finish off the final details in the next few steps!
Step 6 – Start drawing the smoke coming from the volcano
When a volcano is erupting, there will often be thick smoke billowing out from within, and we will draw this smoke in the next steps!
To draw the first half of this smoke, we will use a bumpy line that extends from the left side of the volcano mouth.
It will then curve to the right, and the sizes of the bumps will vary depending on your preference.
We will then finish it off along with any final details in the next step!
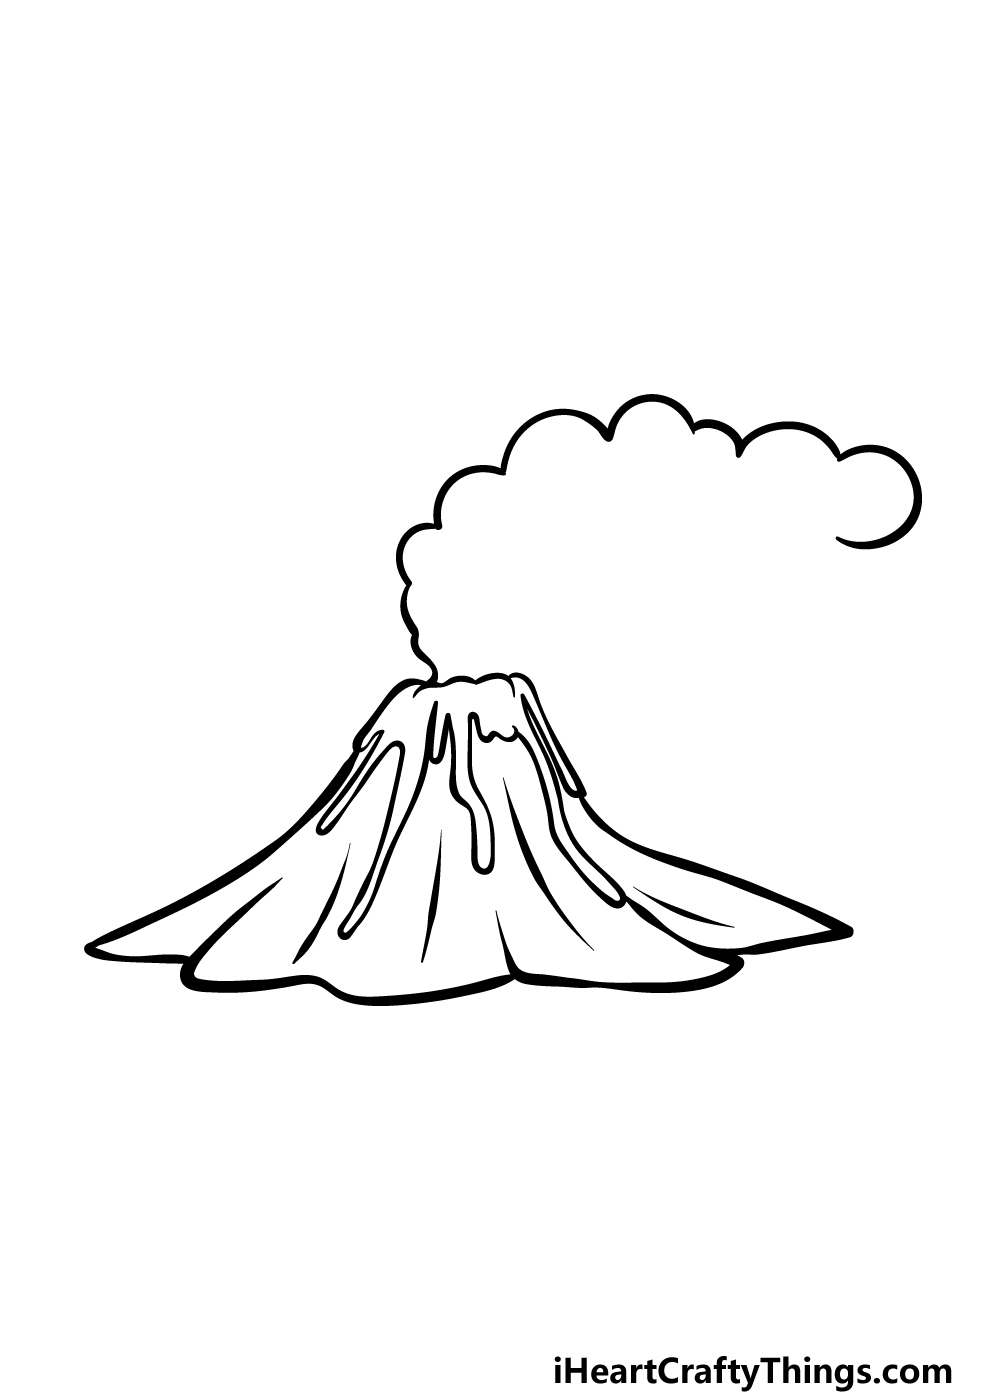
Step 7 – Next, draw the final touches of this cartoon volcano
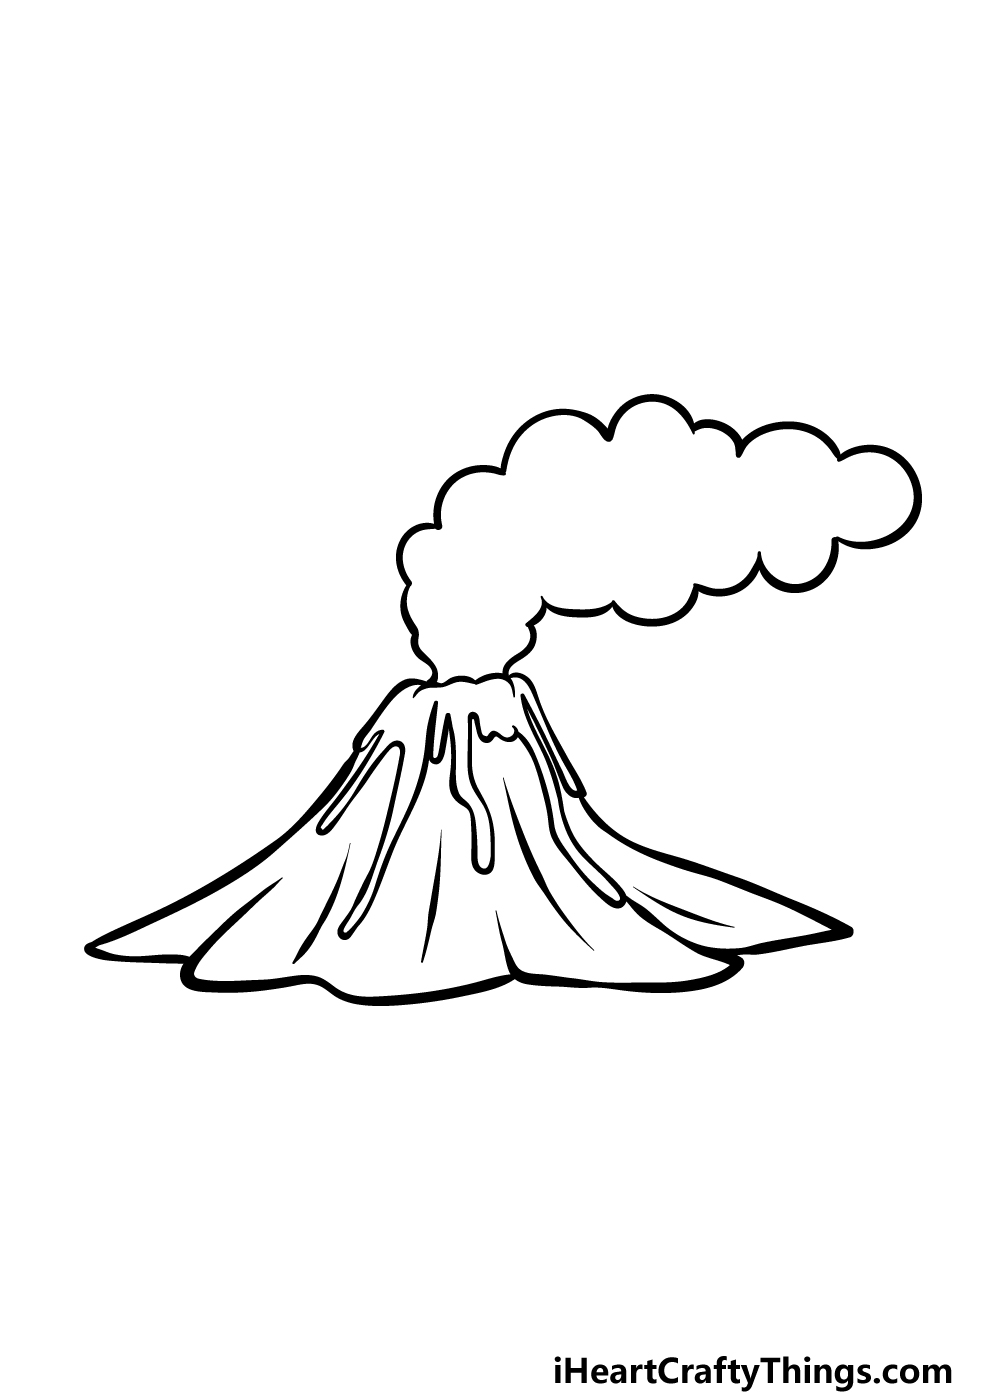
Now, we will finish off the final outlines of this cartoon volcano drawing by finishing off the smoke that you started in the previous step.
This will again be drawn using some curved, bumpy lines to finish off the shape of the smoke. This is another step where you could alter the shape or position a bit if you like!
Before moving on to the final step, will you add any background details or other additions to really finish it off?
Step 8 – Now finish it off with some color
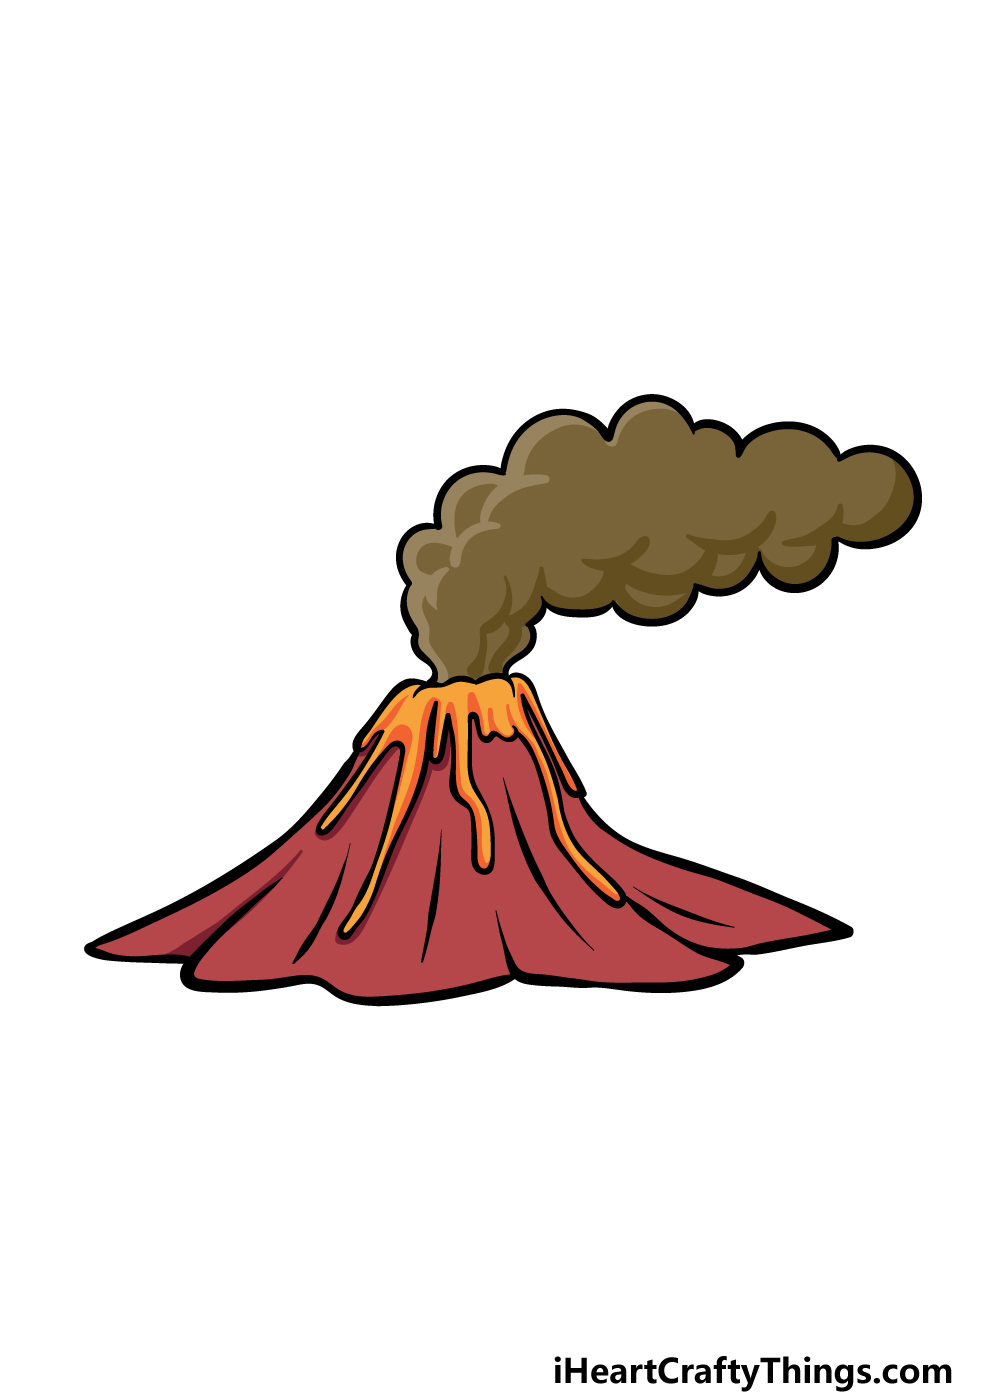
We will properly complete this drawing of yours by adding some color to it in this final step! We show you one way you can color this cartoon volcano in our reference image.
We used a reddish-brown for the volcano body, bright oranges for the lava and then shades of brown for the smoke coming out.
Will you go for similar colors, or do you think you may take a different approach?
4 More Ways To Make Your Cartoon Volcano Drawing Unique
We have 4 more ideas for you that will make your cartoon volcano sketch look even better!
For our version of this drawing of a cartoon volcano, we made the smoke coming from the volcano look quite solid. This is one way of representing it, but there are a few other methods.
One would be to not draw the outlines of the smoke and rather use your coloring mediums to create clouds of smoke. Paint would be an excellent choice for this method!
What are some other art tools and mediums that you could use?
Similarly, there are other ways that you could show the lava in this image. Once again, we drew it with a solid outline in our example, but this outline could be left out.
This is another detail that could be done with paint. For this part, we would suggest using a thick layer of paint at the mouth of the cartoon volcano and then let it drip down a bit.
This would give the lava more of a flowing feel to it.
Once you have the hang of this cartoon volcano drawing, you could make the volcano look even larger and more intimidating. The shape of the volcano could also be made to look different as well.
You could get some inspiration for how to make your cartoon volcano look by looking up images of real volcanoes online.
These will show you how varied volcanoes can look in real life and can then be adapted for your drawing.
Finally, you could give this cartoon volcano sketch more of a sense of place by adding a background to it. This would be a way to show the area that is unlucky enough to have an active volcano near it.
It could be a completely natural environment, or you could create a sense of drama and peril by having some human structures near the cartoon volcano.
Once again, you could get some help from real volcanoes to aid you as you draw your setting.
Your Cartoon Volcano Drawing is Complete!
That does it for the 8 steps of this guide on how to draw a cartoon volcano! We hope that all of these steps made it fun and simple for you to replicate this awesome picture.
It will be great to also see how you go about adding your own details and ideas to this image!
Then, when you would like a new drawing challenge to take on, you can check out our website for even more awesome drawing guides to enjoy.
We also have other art goodies that we add to all the time, so keep checking in for more fun!
We would be interested to see how this cartoon volcano drawing turned out, so please share it on our Facebook and Pinterest pages when it’s done.