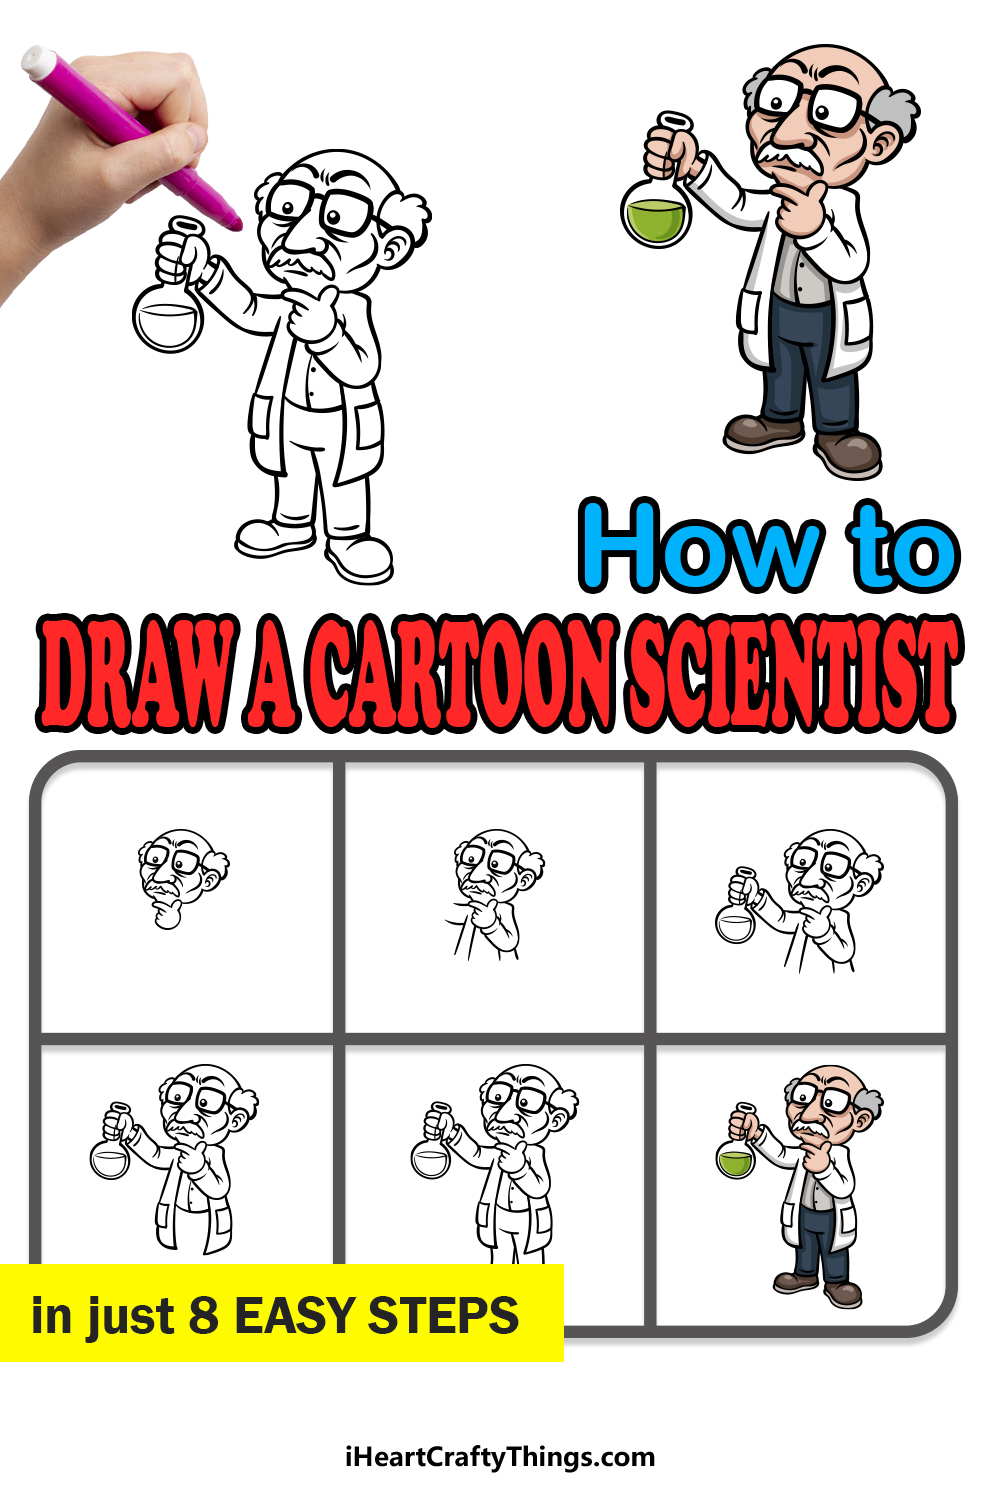
Science is a really important field, as all kinds of advancements in aspects such as medicine and technology are made possible through scientific study.
These advancements would be impossible without smart scientists, and we will be learning how to draw one of these smart people in this guide on how to draw a cartoon scientist!
This guide will be showing you not only how easy it can be to recreate the design we have prepared for you but also just how easy it can be when you know what to do!
You will also be able to do some artistic experiments of your own as you add your own fun details and ideas.
With that, we can begin this step-by-step guide on how to draw a cartoon scientist in just 6 fun and easy steps!
How to Draw A Cartoon Scientist – Let’s get Started!
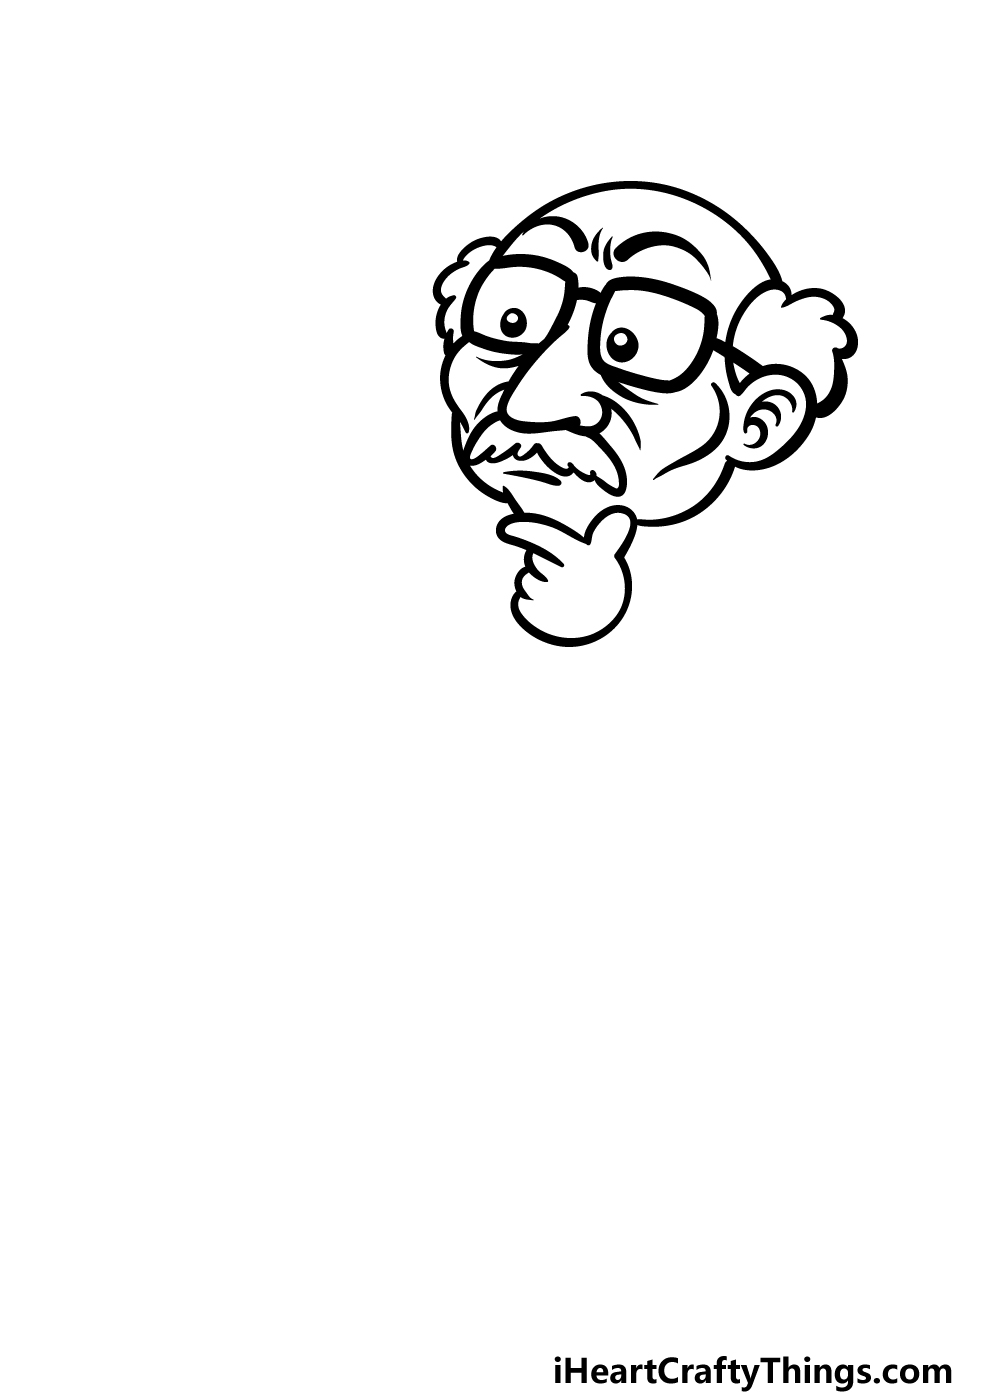
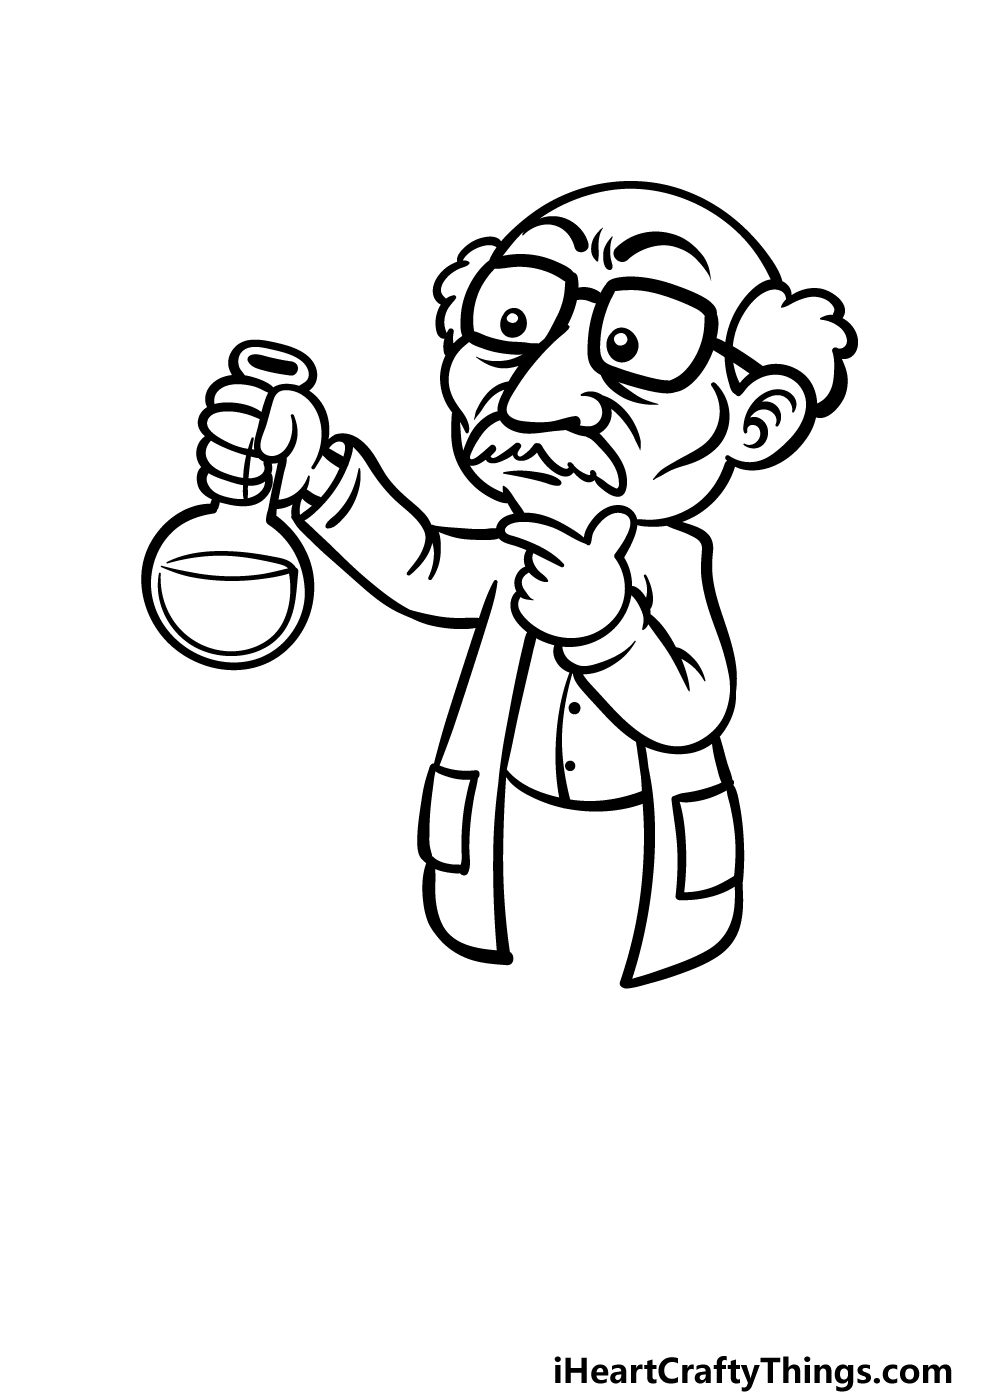
Step 1

This drawing shall begin with the top of the scientist’s head and face. To begin this, we will first draw two rounded square shapes for his glasses.
Then, add a small black circle with a white dot in each one for his eyes behind his glasses.
Next, we will draw his nose beneath his glasses, and this can be drawn using some slightly rounded lines.
He has a rather serious expression on his face, and we can begin drawing this by adding some thick curved eyebrows above his glasses.
Finally, draw the top of his head using a curved line and then add some tufts of hair above his ears.
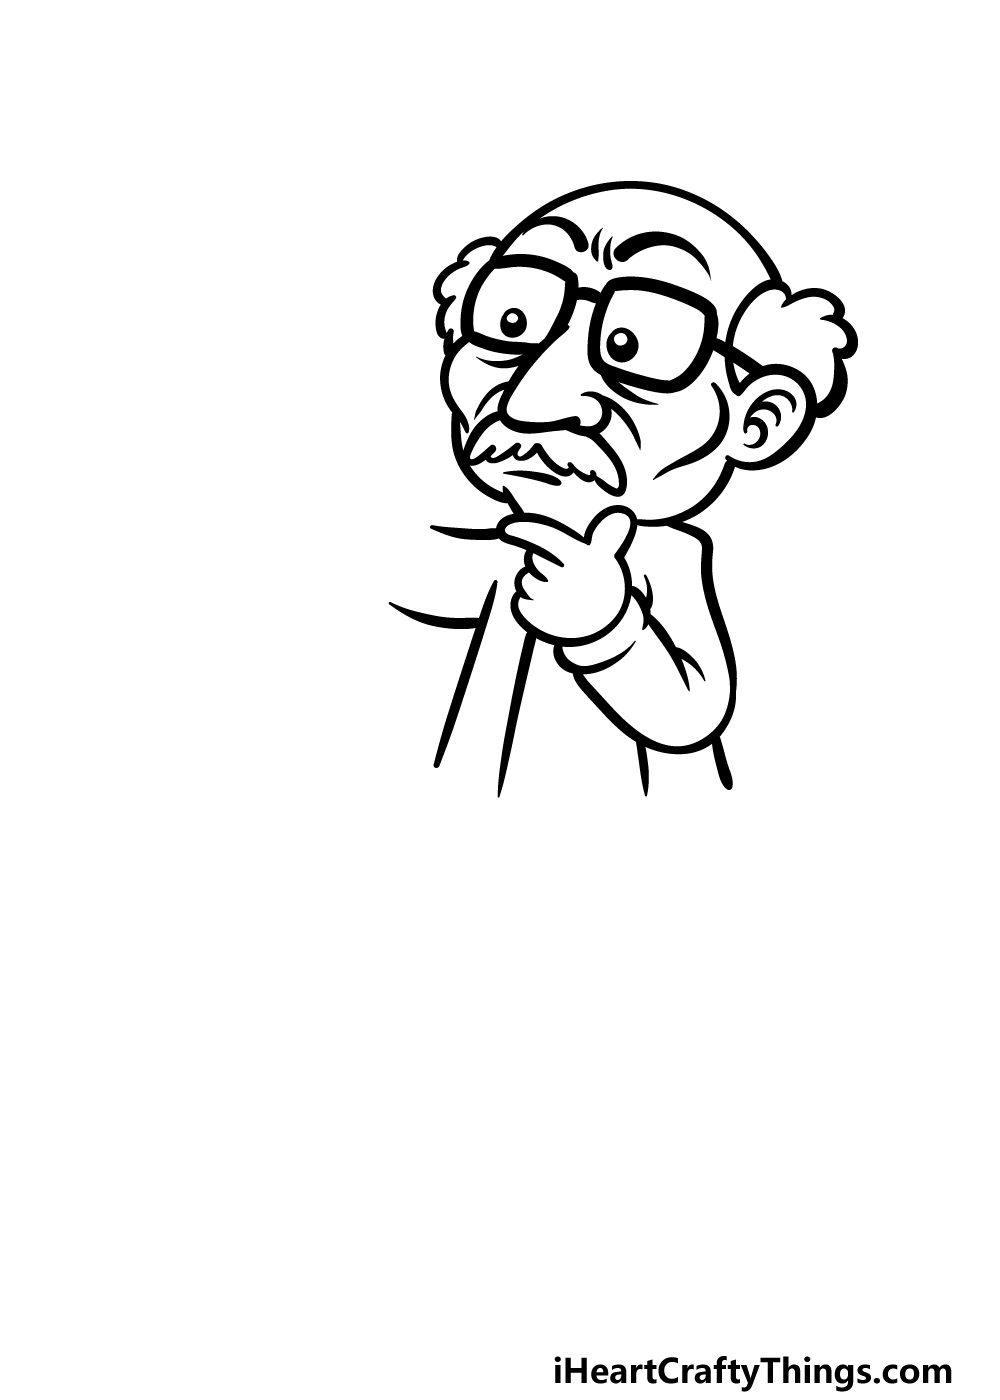
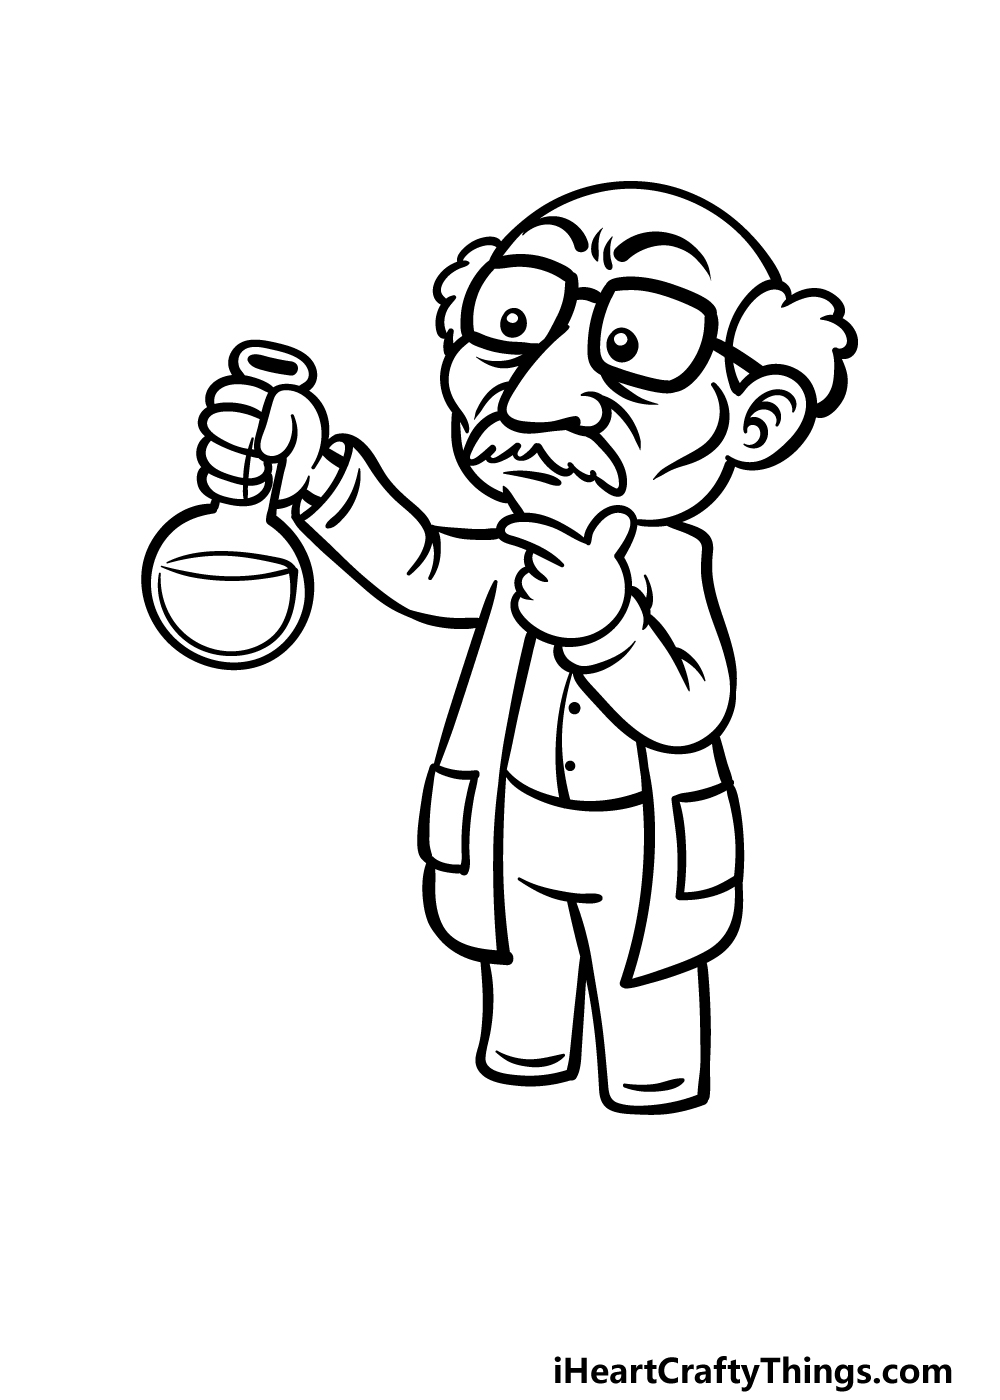
Step 2 – Next, draw the rest of his face
We will finish off the face design in this second step of our guide on how to draw a cartoon scientist.
First, begin by adding a bushy mustache under his nose. We will also add some curved wrinkle lines coming off of his nostrils.
You can then add some rounded lines for his cheekbones and also give him his ear on the right. Finally, finish off this step by drawing his jaw and add his hand beneath his face.
That’s all for this step, and we can then move on to the next steps!
Step 3 – Now, draw his arms and chest
This third part of your cartoon scientist drawing will see you adding the start of his arms and chest.
First, we will use some rounded lines for his shoulder on the right that turns into his bent arm that connects to his hand that you drew in the previous step.
Then, you can start drawing his arm on the left using some more curved lines. They will be short for now, as we will finish this arm later.
Lastly, use some straighter lines for the outline of the chest of his coat. Then, we can move on to step 4.
Step 4 – Next, draw the beaker he is holding
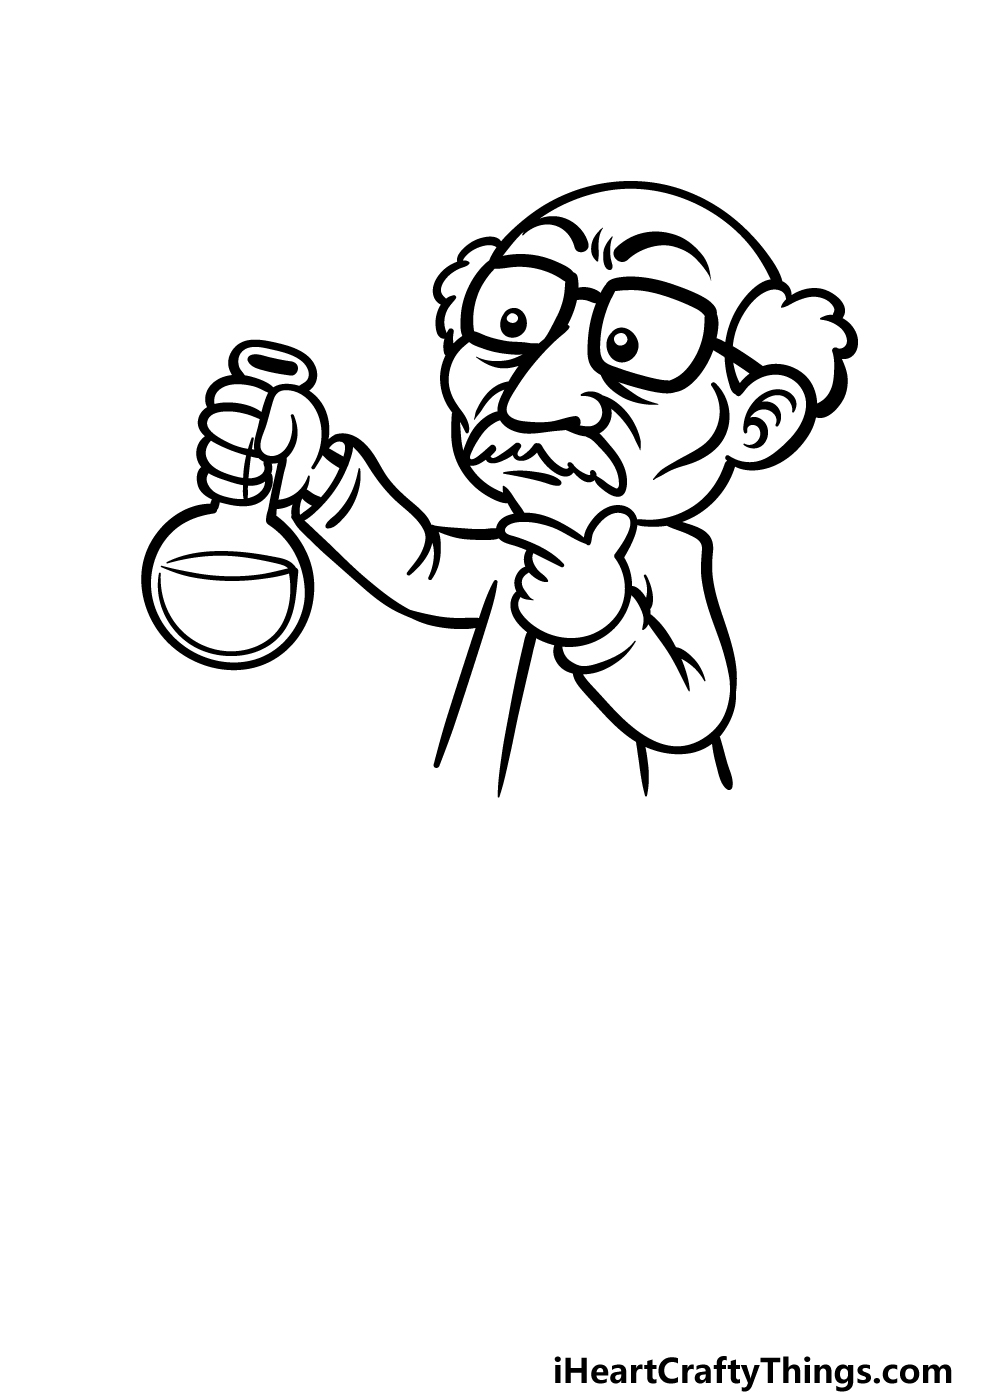
The scientist we’re working on is gazing intently at a beaker filled with some kind of chemical. We will be drawing these aspects in this step.
First, extend the arm on the left that you started in the previous step and finish off the sleeve.
His wrist will poke out of this sleeve, and his rounded fingers will be holding the long portion of the beaker.
Draw a round shape at the base of the beaker, and then add some curved lines for the chemicals within it.
Step 5 – Now, draw the rest of his coat
We will finish drawing his lab coat in this step of our guide on how to draw a cartoon scientist.
Keep extending the straight lines for the first halves of his coat to do this, and you will see that they end in pointy tips. He also has some rounded square pockets on the sides of his coat.
Finally for this step, use a curved line for the bottom of his shirt and then add the divide down the middle along with two dots for buttons.
Step 6 – Next, draw his pants
Your cartoon scientist drawing is really coming together now! We are moving to the final details in these next few steps, and in this one we will be drawing his pants.
These will be drawn using some more slightly curved lines that also have some line details near the ends of his pants.
Once his pants are drawn, you will be ready for the final details in the next step!
Step 7 – Next, draw the final touches of this cartoon scientist
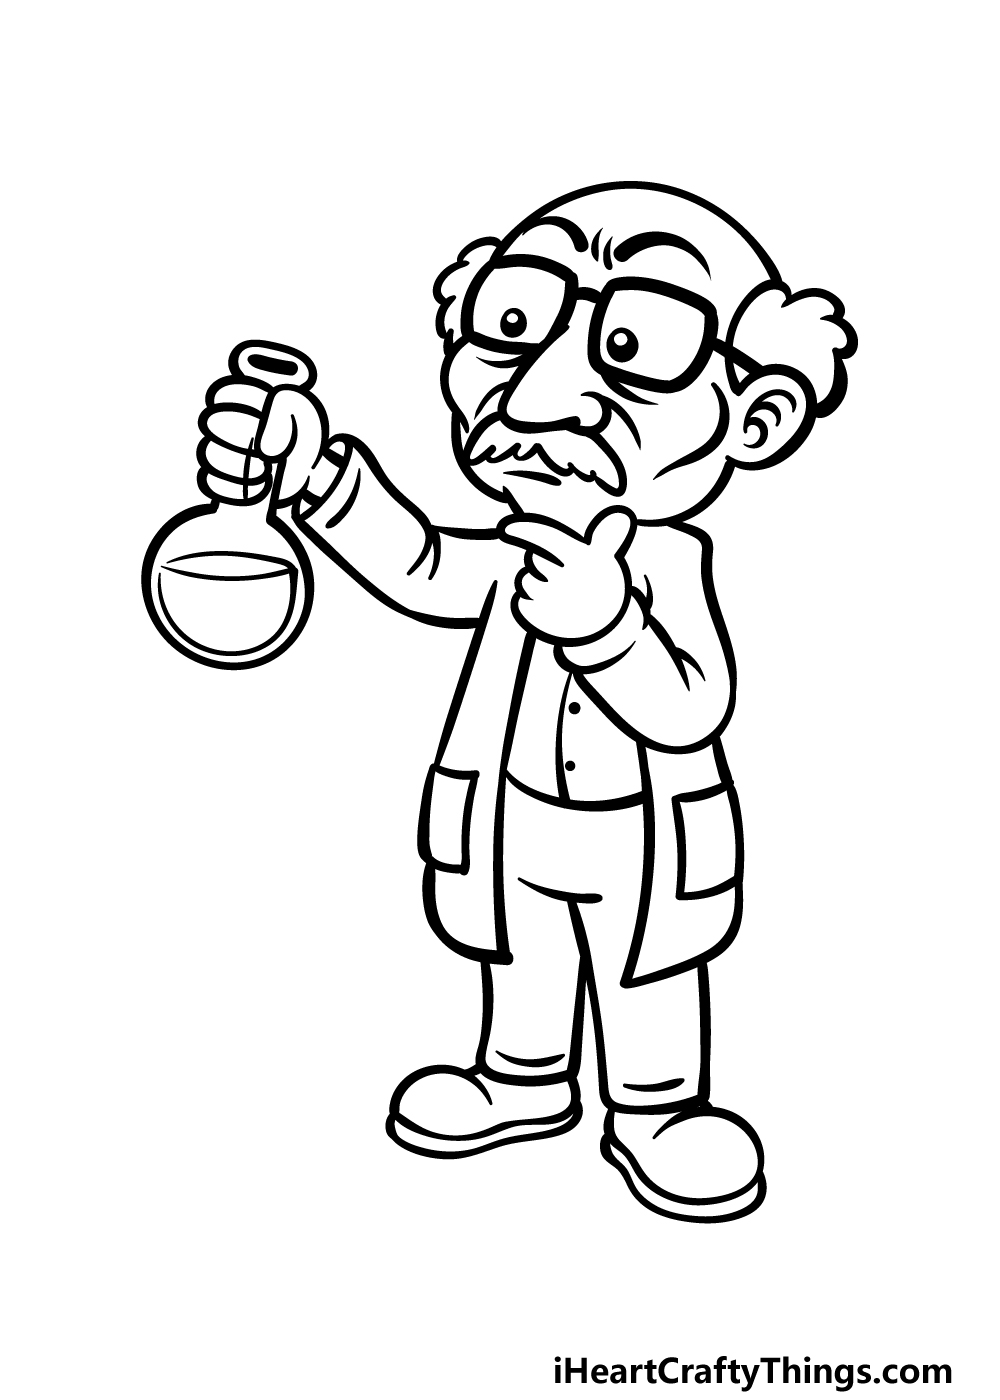
This step is where we will finish off your cartoon scientist drawing before coloring him in the final step.
The last touch is to draw his shoes, and these will be rounded on top with some flat soles beneath.
Once his shoes are drawn, you can also add some extra details of your own! Will you draw a background that maybe shows some of his science equipment? What ideas come to mind for you?
Step 8 – Now finish it off with some color
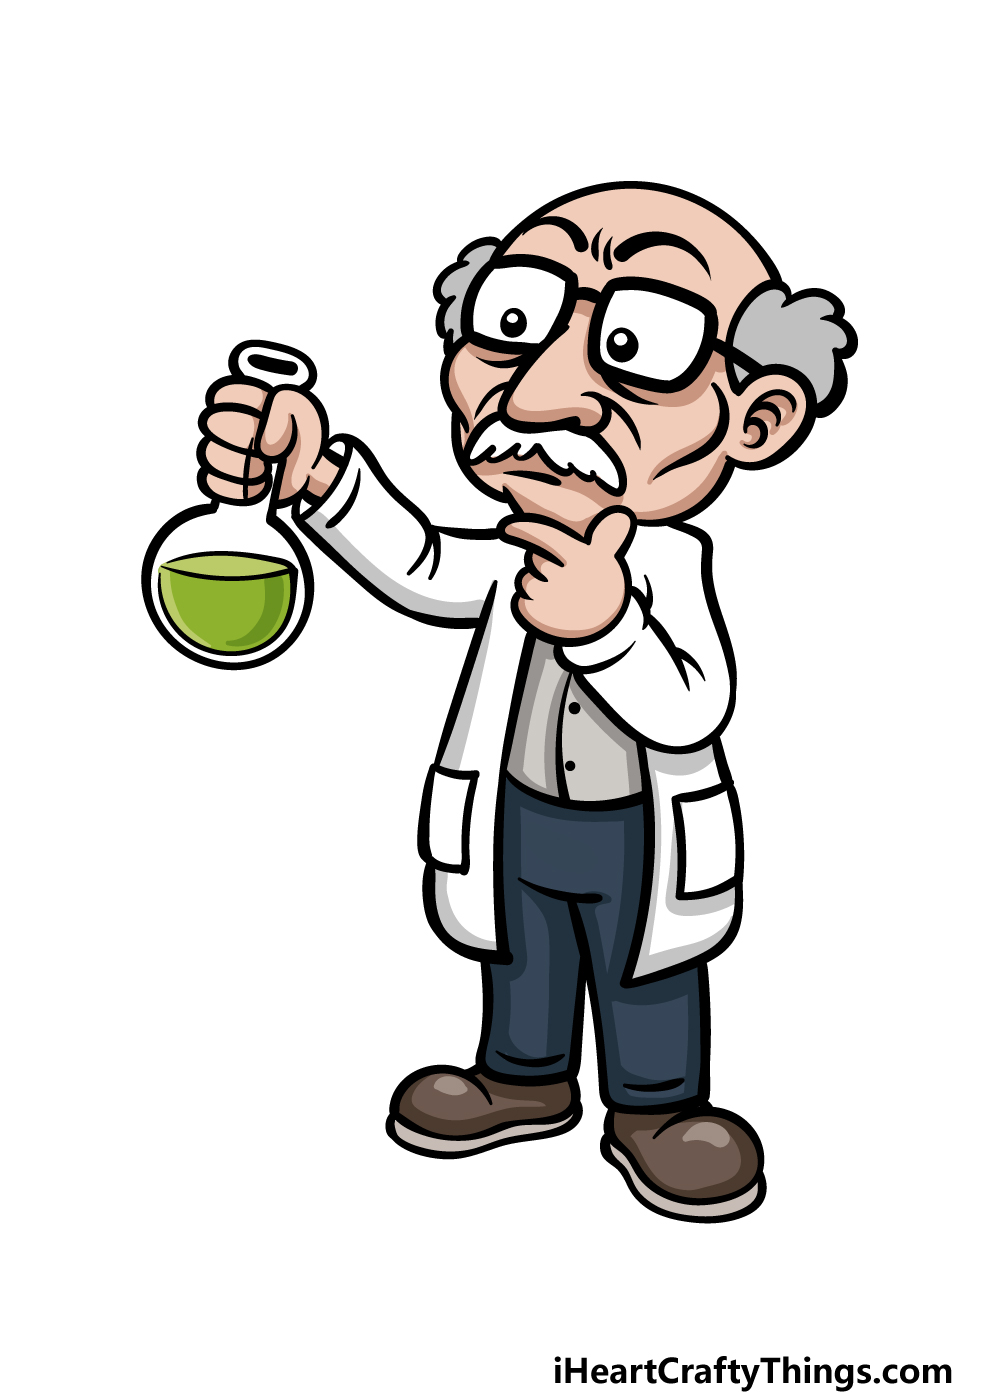
For the final step of this guide on how to draw a cartoon scientist, we will finish it off with some color.
We showed you our interpretation of the colors in our example images, and you could go for similar ones if you like this approach.
Much like with science, art is all about experimenting! That means you can play around with colors and fun art mediums to get the kinds of colors you want for this image. How will you finish it off?
Do this to take your cartoon scientist drawing to the next level
Making this cartoon scientist sketch even better won’t be rocket science with these tips!
This drawing of a cartoon scientist is holding a beaker containing some concoction of curious chemicals. Often, these kinds of mixtures will emit smoke and even sparks.
These would be great details to add to your artwork! You could have smoke coming from the mouth of the beaker or add any other number of shapes, substances and effects.
The more volatile you can make the beaker look, the better! What kind of reaction do you think could be happening in this beaker?
Scientists will use all kinds of equipment in their scientific endeavors. You could add some of this equipment around this cartoon scientist to add to his laboratory workspace.
These details could include things like computer screens or maybe other beakers and scientific instruments. If you need some inspiration, then you could look up some pictures of laboratories online.
You could add scientific tools that are based on real ones, or you could create your own crazy science contraptions!
Building on from the previous tip, you could also draw a background for your cartoon scientist drawing. The obvious setting would be a laboratory, but even so there would be lots of room for creativity.
It could be a normal lab environment, or you could make it look the kind of lab you would expect to see Dr Frankenstein in. What sort of background would you like to create?
Scientists rarely work alone, so it could be fun to add some more characters to this cartoon scientist sketch. You could start by following through the guide again.
Then, you could change certain pose details and give the character a unique face. You could distinguish this second character by making them a female scientist, for example.
You could also give him a wacky assistant to aid him in his endeavors. This assistant could look really weird if you’re going for a mad scientist vibe.
What kinds of crazy characters would you like to add here?
Your Cartoon Scientist Drawing is Complete!
You have successfully finished all 8 steps of this guide on how to draw a cartoon scientist! That means that you have finished with an incredible drawing of this smart scientist.
Now it’s up to you to finish it off with your own details, additions, ideas and color choices! We can’t wait to see how you finish this one off.
Then, you can head to our website when you’re ready for some more fun drawing guides and art activities to enjoy. We look forward to seeing you there for some more drawing fun!
We always love to see how your drawings turn out, so please share the finished artwork on our Facebook and Pinterest pages for us to see.