They say money makes the world go round, and whether that’s true or not it’s definitely true that money is hugely important to pretty much every nation on the planet.
Different countries have different kinds of currencies, and often these currencies will feature the likenesses of people important to the country’s history.
The United States is no different, as each note features a different likeness on it. Learning how to draw a dollar bill is a great way to honor this rich legacy.
There are lots of details to draw, however, so that makes a tutorial like this very useful!
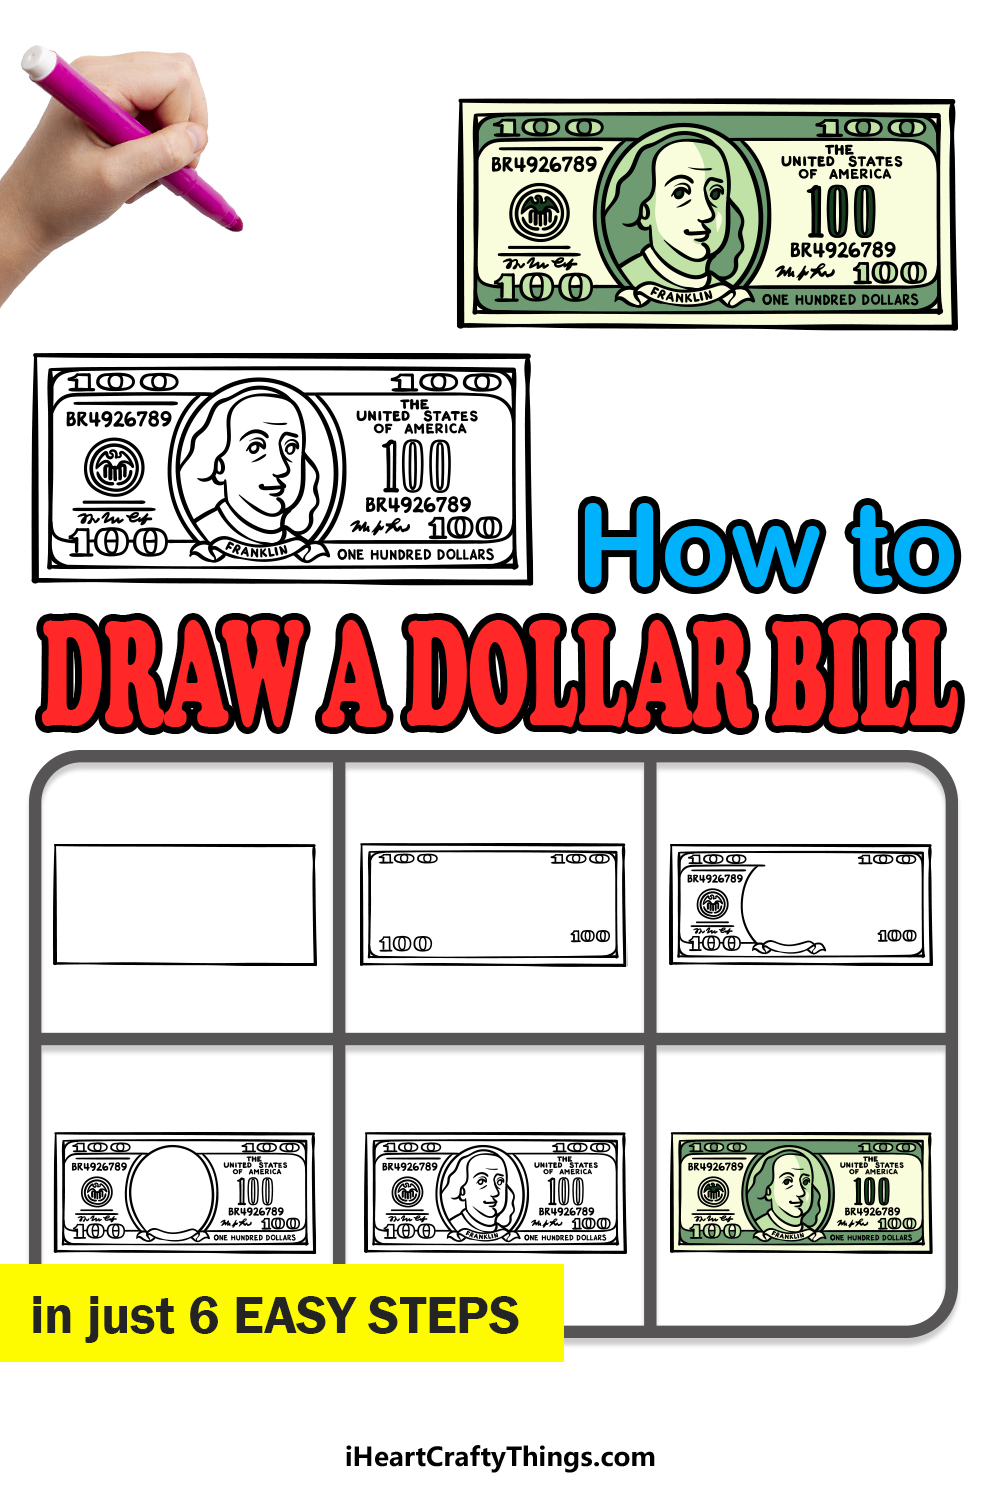
Our step-by-step guide on how to draw a dollar bill will show you exactly how it can be done with no frustration.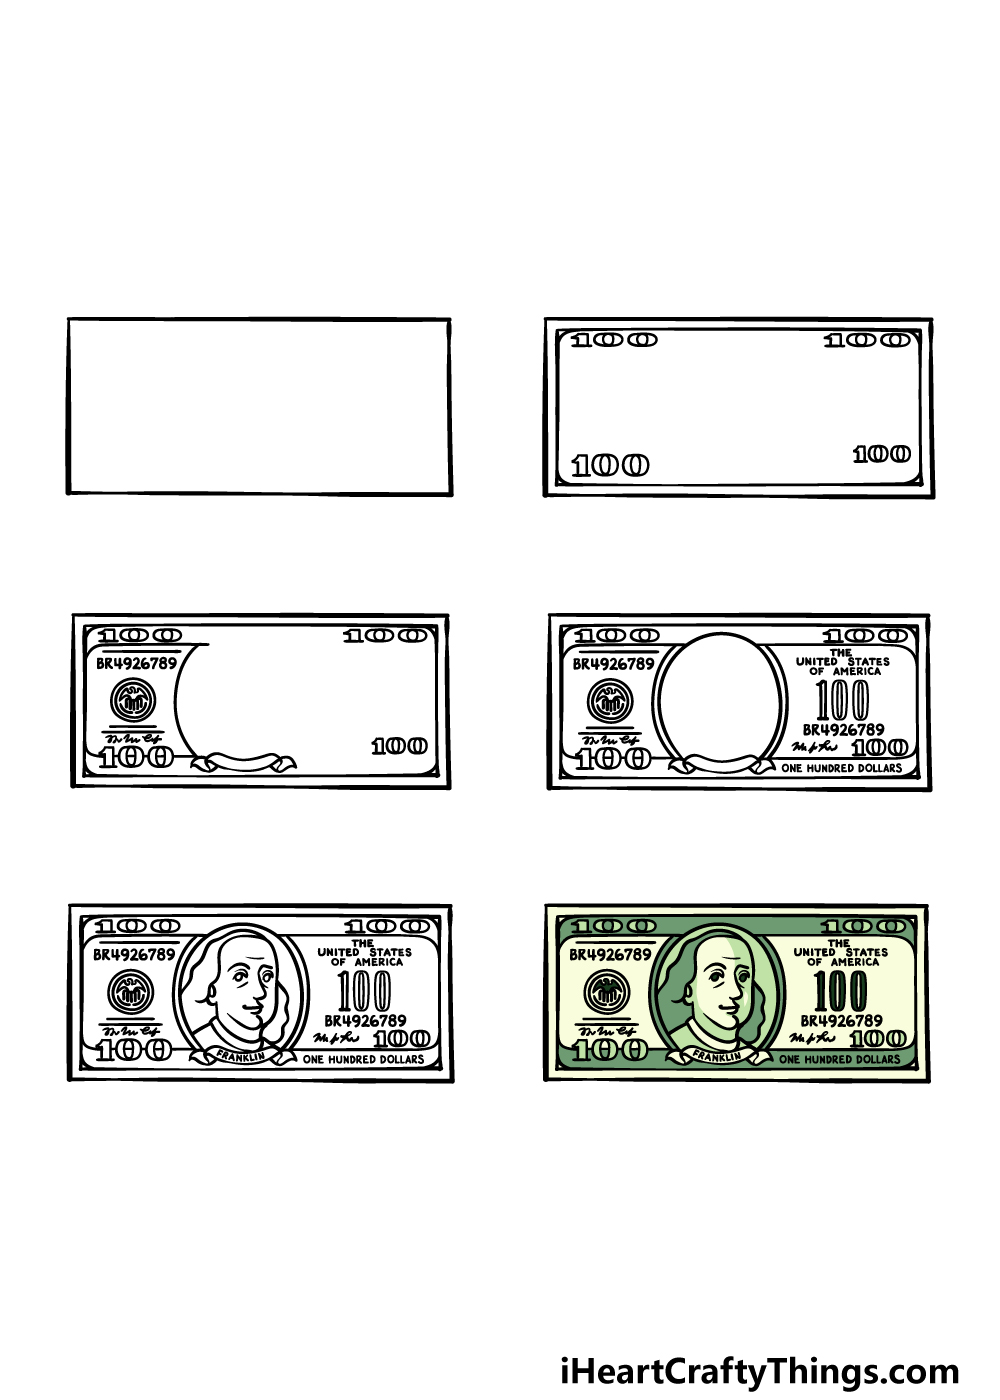
How to Draw A Dollar Bill – Let’s Get Started!
Step 1
In this guide on how to draw a dollar bill, we will specifically be drawing the 100 dollar bill.
This note features founding father Benjamin Franklin, but you could take what you learn to draw any other dollar bill variants you may want to as well.
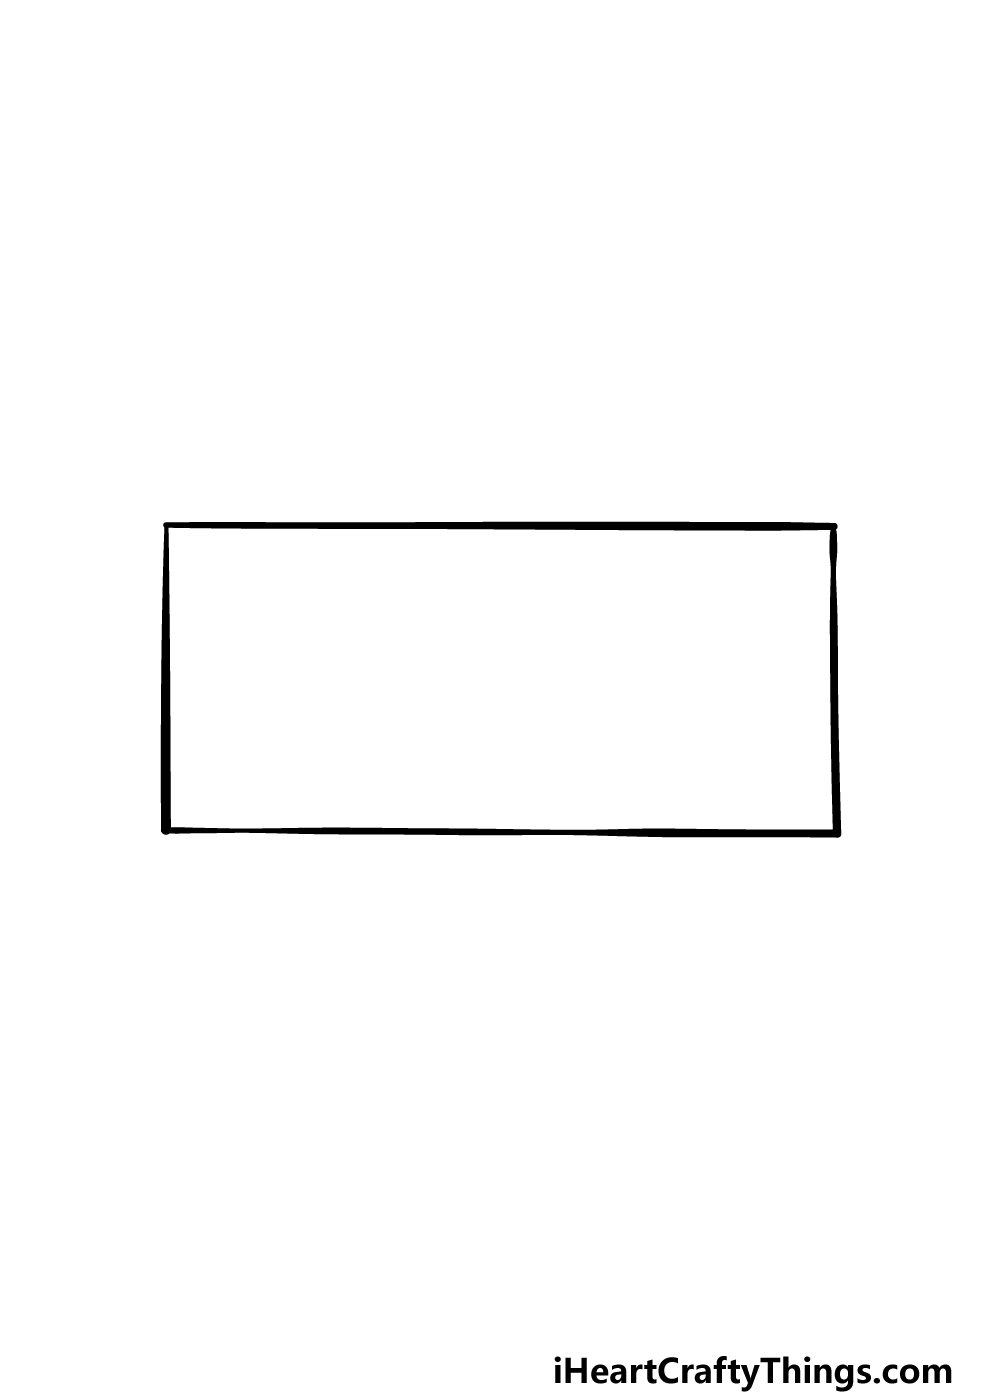
For this first step of the guide, you may want to use a ruler, as we will be aiming for completely straight edges.
With your ruler ready, we will be drawing a perfect rectangular shape that is horizontal on the page.
This will be the outline of the dollar bill, and as we move on to the next steps we will start adding more of the inner details.
Step 2 – Now, draw the first inner details of the dollar bill
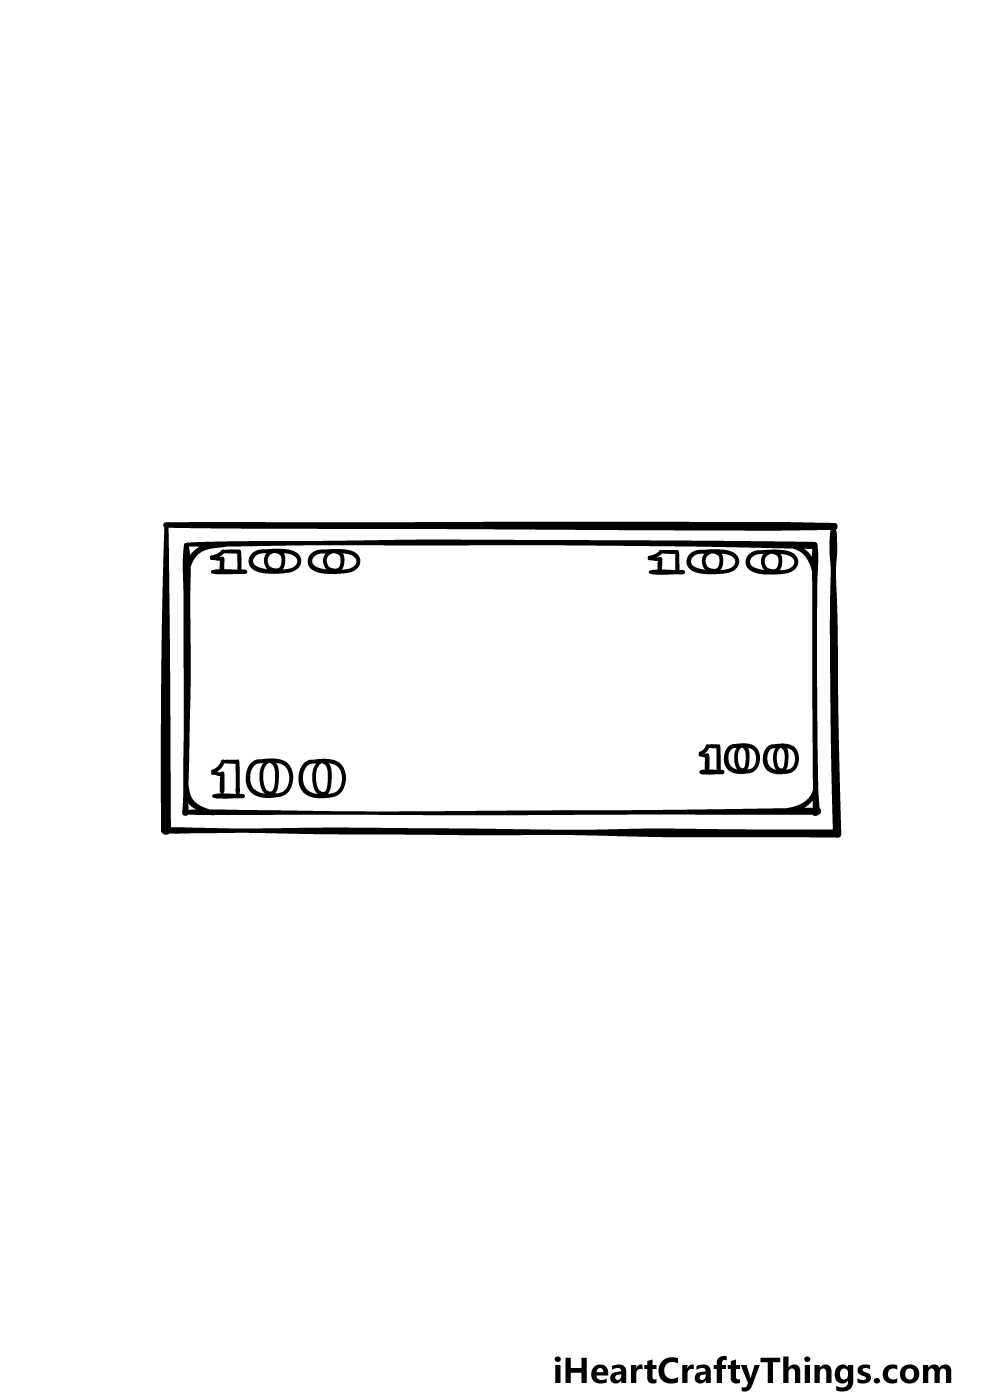
You’ve drawn the outline, and in this next step you will want to keep that ruler handy as we will be drawing the inner border of your dollar bill drawing.
To do this, carefully draw another slightly smaller rectangle closely within the inner parameter of the outer outline. It should be pretty close to that outline, but shouldn’t touch it.
Once that is drawn, add a small curved line to each inner corner of the smaller rectangle. Then you will be adding a 100 to each corner of the inner rectangle.
These will be relatively large, and there is a very specific font that they use. As you draw each one, try your best to closely copy them as they appear in the reference image. Then it’s on to step 3!
Step 3 – Next, draw some more details inside of the bill
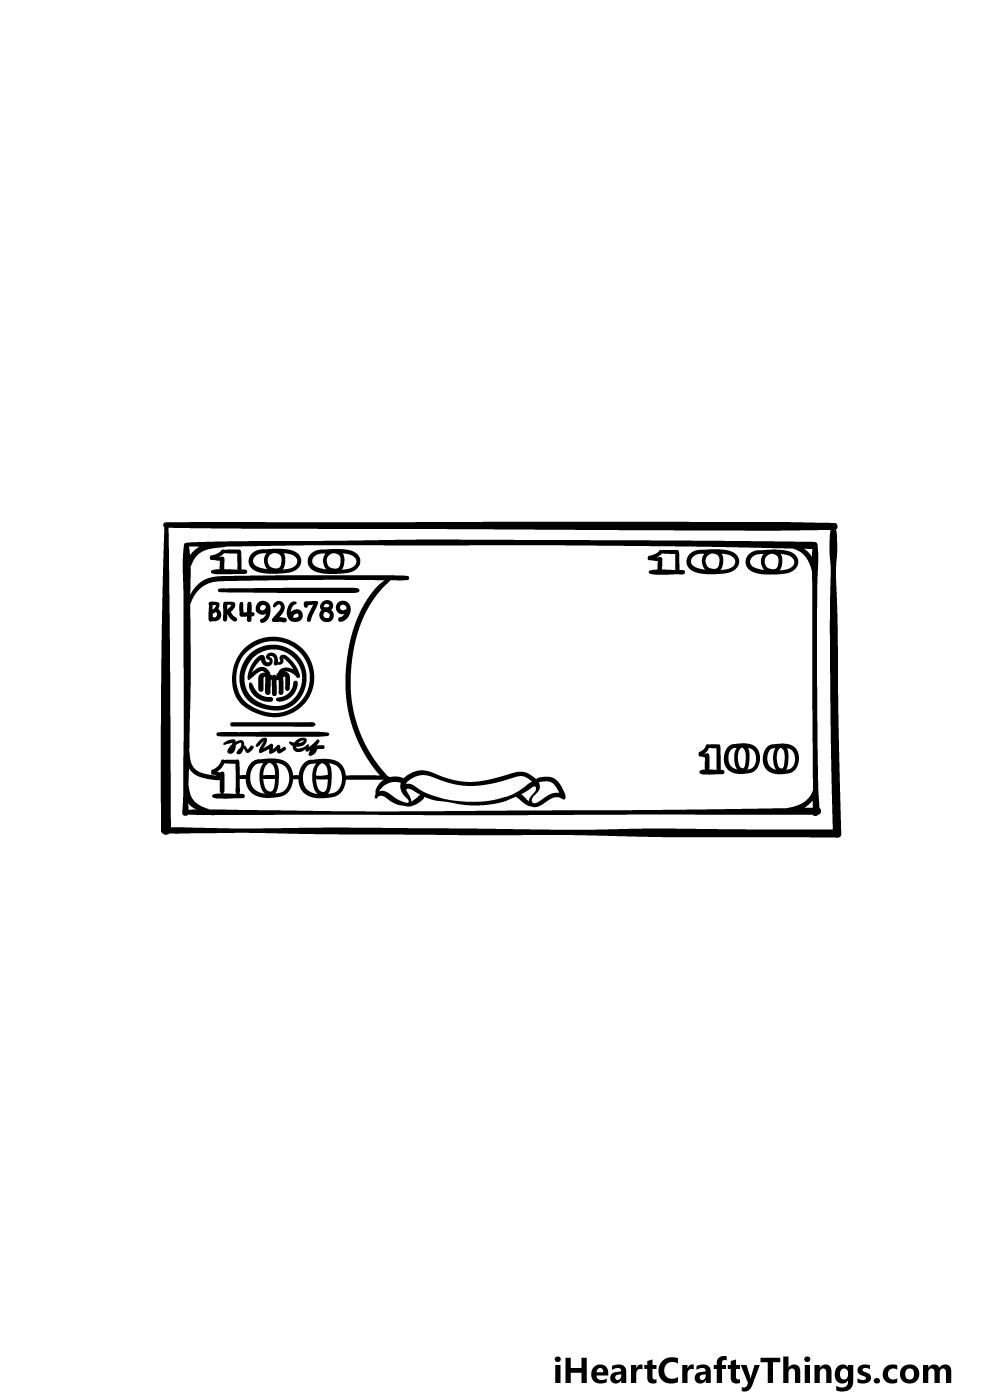
Paper currency will always have various symbols, serial numbers and other authentication printed on them to ensure that they’re not counterfeit.
We will start drawing some of these details in this third step of our guide on how to draw a dollar bill.
First, draw a rounded shape on the left-hand side of the bill with a flowing parchment shape beneath. Then, there will be a serial code there, so try to draw one in with your neatest handwriting.
Finally, draw the round emblem beneath that, and then add the signature below. For a fun detail, why not use your own signature there?
Step 4 – Draw some more of the inner details
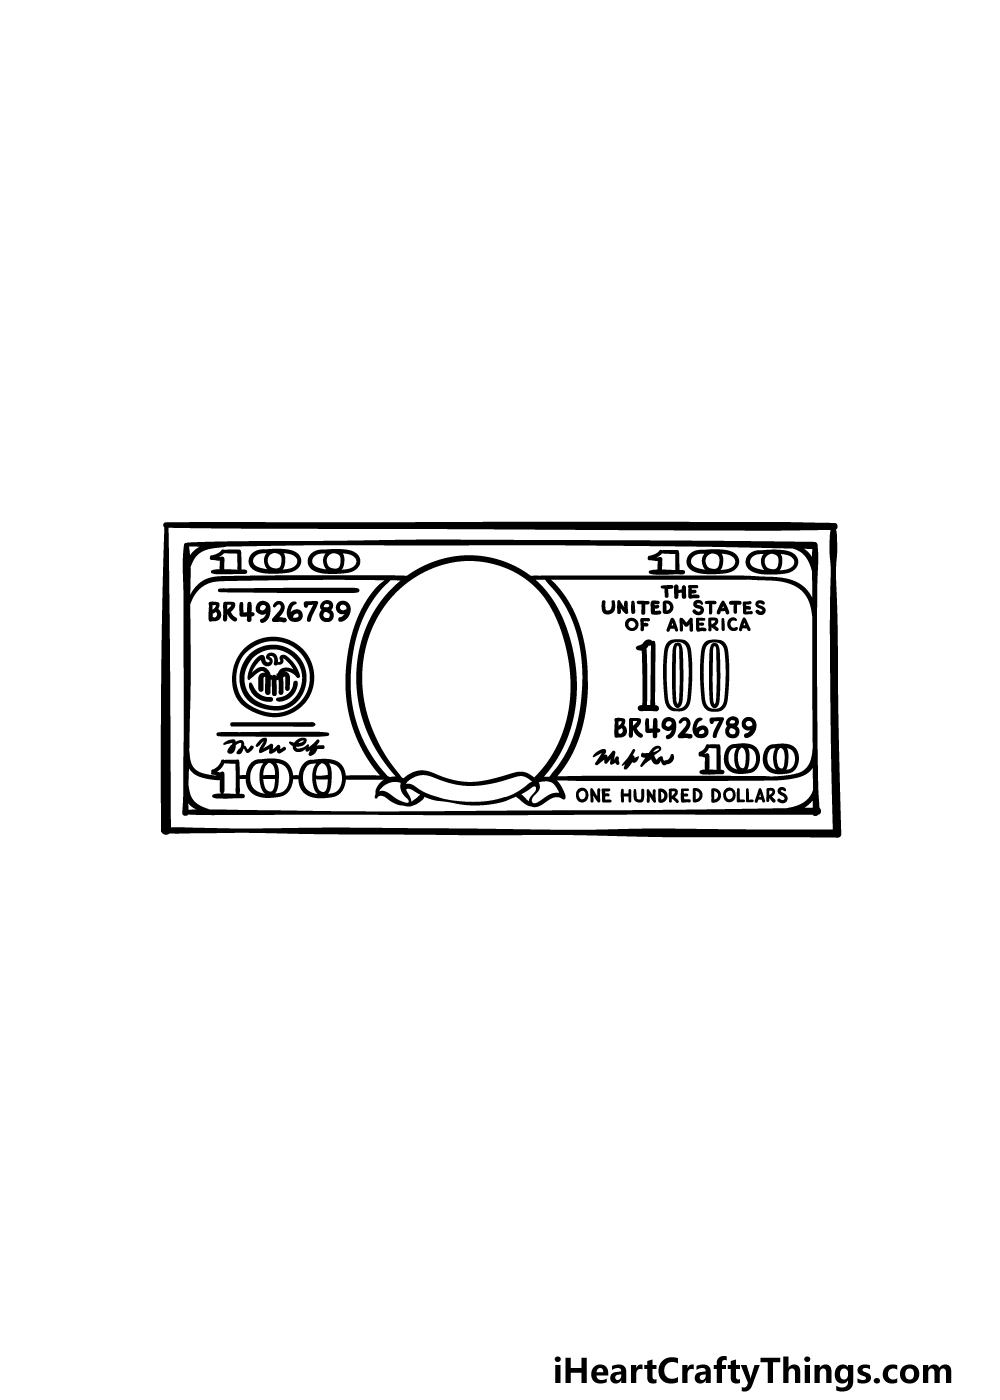
Continuing with the details of your dollar bill drawing, you can now draw an oval shape to the center of the dollar bill.
Then, there will be another rounded shape on the right-hand side of this. There will then be some more text inside of this shape.
First, write THE UNITED STATES OF AMERICA as displayed in the image. There will then be another 100 beneath that with another signature below.
Finally, draw in ONE HUNDRED DOLLARS in the lower border of the bill. Once these are drawn, we are ready for the final details in the next step!
Step 5 – Add Benjamin Franklin to your dollar bill drawing
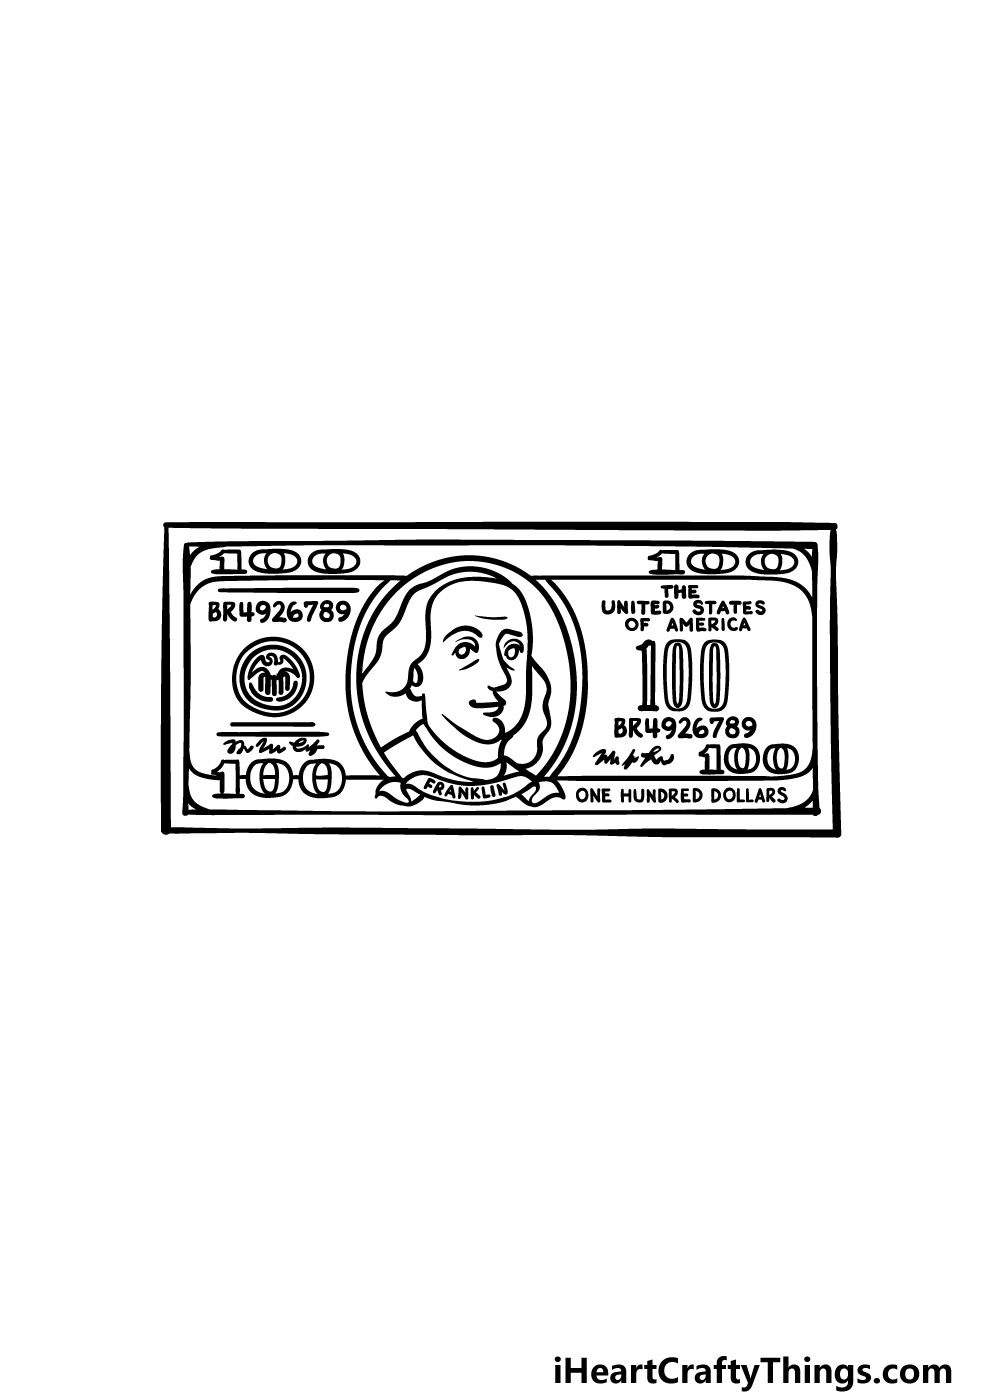
Something is missing on this bill, and we will make sure to fix that in this fifth step of our guide on how to draw a dollar bill.
The missing element is the face of founding father Benjamin Franklin, so we shall draw that now.
Using the reference image to help you, draw his distinctive smiling face into the oval in the center. You can then write Franklin onto the parchment beneath his face.
With these elements drawn, you’re ready to move on. You could also add some details of your own, however!
It could be fun to draw a background, and if you do perhaps you could draw more dollar bill variants to go with it. How will you finish off this picture?
Step 6 – Finish off your dollar bill drawing with color

Now you’re ready to finish off your dollar bill drawing with some color!
Some currencies around the world boast some vibrant colors, but money in the United States has a more muted color scheme, usually in shades of green.
For this dollar bill drawing, we used various alterations of light and dark greens to color it in. this helps to give it a nice, realistic look.
You can try to copy the colors as we have them if you would like this more realistic look for your own one.
When coloring this image, we would recommend using some watercolor paints for a softer look to the image.
There are many other mediums you could use, so what do you think you’ll pick for this image?
3 More tips to make your dollar bill drawing easy!
Make this easy to draw dollar bill look like a million bucks with these fun tips!
For our example of this dollar bill drawing, we made it quite detailed and realistic. This makes it look great, but you may also want to create a simpler design to make it easier to draw.
This would be especially helpful if you’re planning on drawing multiple dollar bills for this drawing.
You could do this by removing some of the smaller writing details and lines.
This could be taken even further if you want to make it look even simpler! For example, you could remove most of the details and then replace them with the classic dollar sign.
What are some other ways you could simplify the design?
If you want to keep the detailed design but are struggling to draw certain details, you could add elements to cover up these problem areas. For example, maybe you could have this dollar bill on a table with a wallet and some coins.
If you find coins easier to draw, then they could be lying over the parts that you find hardest to draw. Not only would it make it easier, but it would also make the drawing even more interesting to look at.
This is one example of how adding details can actually make this dollar bill sketch so much easier to do!
Finally, we would recommend using a real bill to reference as you create your drawing of a dollar bill. If you don’t have one of your own, you could borrow one from a parent.
Just be sure to ask for permission first! If you live in a country that does not use the US dollar, you could still do this trick by looking up pictures of real dollar bills online.
If you wanted to try this, you could also use the trick to draw the extra elements we mentioned in the previous step.
Using the real thing along with the guide we provided will help to make things so much easier!
Your Dollar Bill Drawing is Complete!
You have finished this guide on how to draw a dollar bill, and even though your drawing is so great it won’t count as counterfeit money, so don’t worry!
Even though you may be very familiar with this dollar bill design, there are still loads of details that may go forgotten when drawing it.
We hope that this guide helped to make it much easier for you to do!
When you’re finished with this drawing, there are loads of ways that you can go about putting your own spin on it. We mentioned a few ideas, but what can you think of to add to the picture?
You can then head on over to our website for more awesome drawing guides to enjoy! We upload new ones often, so keep checking in to make sure you never miss out.
When your dollar bill drawing is complete, be sure to share your artwork on our Facebook and Pinterest pages for us to see!