The human body is made up of many different parts, and each one has its role to play.
Every single facet of the human body is really incredible, and each one of these aspects are controlled in some way by the brain.
The brain is one of the most important organs in the body, and it will be helping you out even as you work on learning how to draw a cartoon brain!
The brain can be complex to draw, but that’s why we will be showing you how it can be done during this guide.
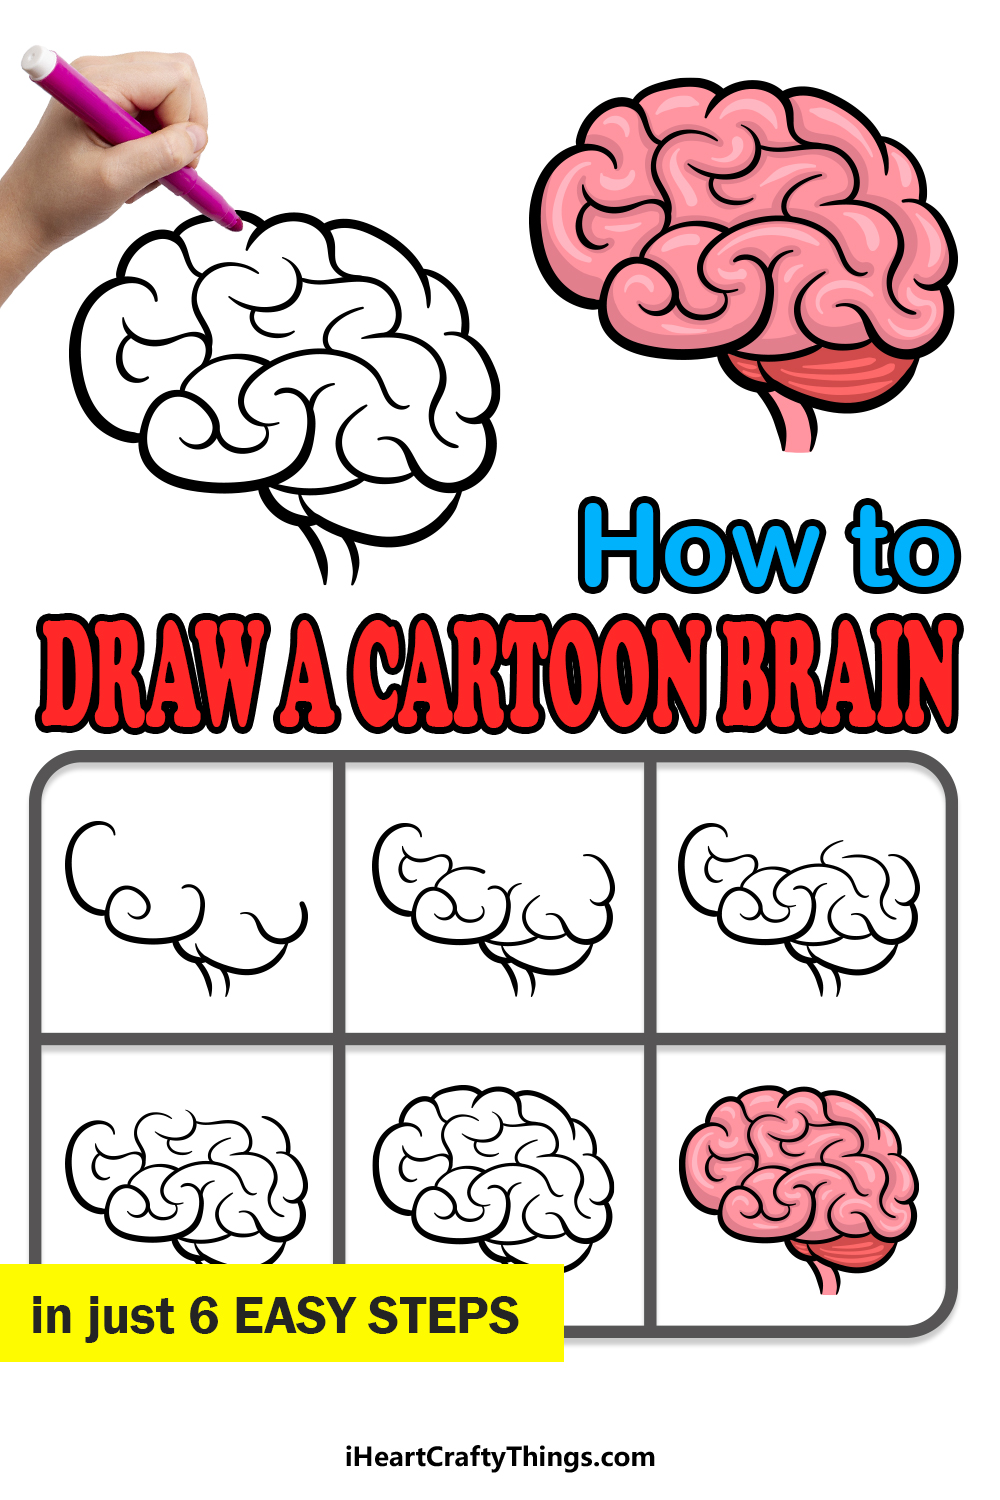
By the end of our step-by-step guide on how to draw a cartoon brain in just 6 easy steps, you will know everything there is to know about how to draw a fun brain design!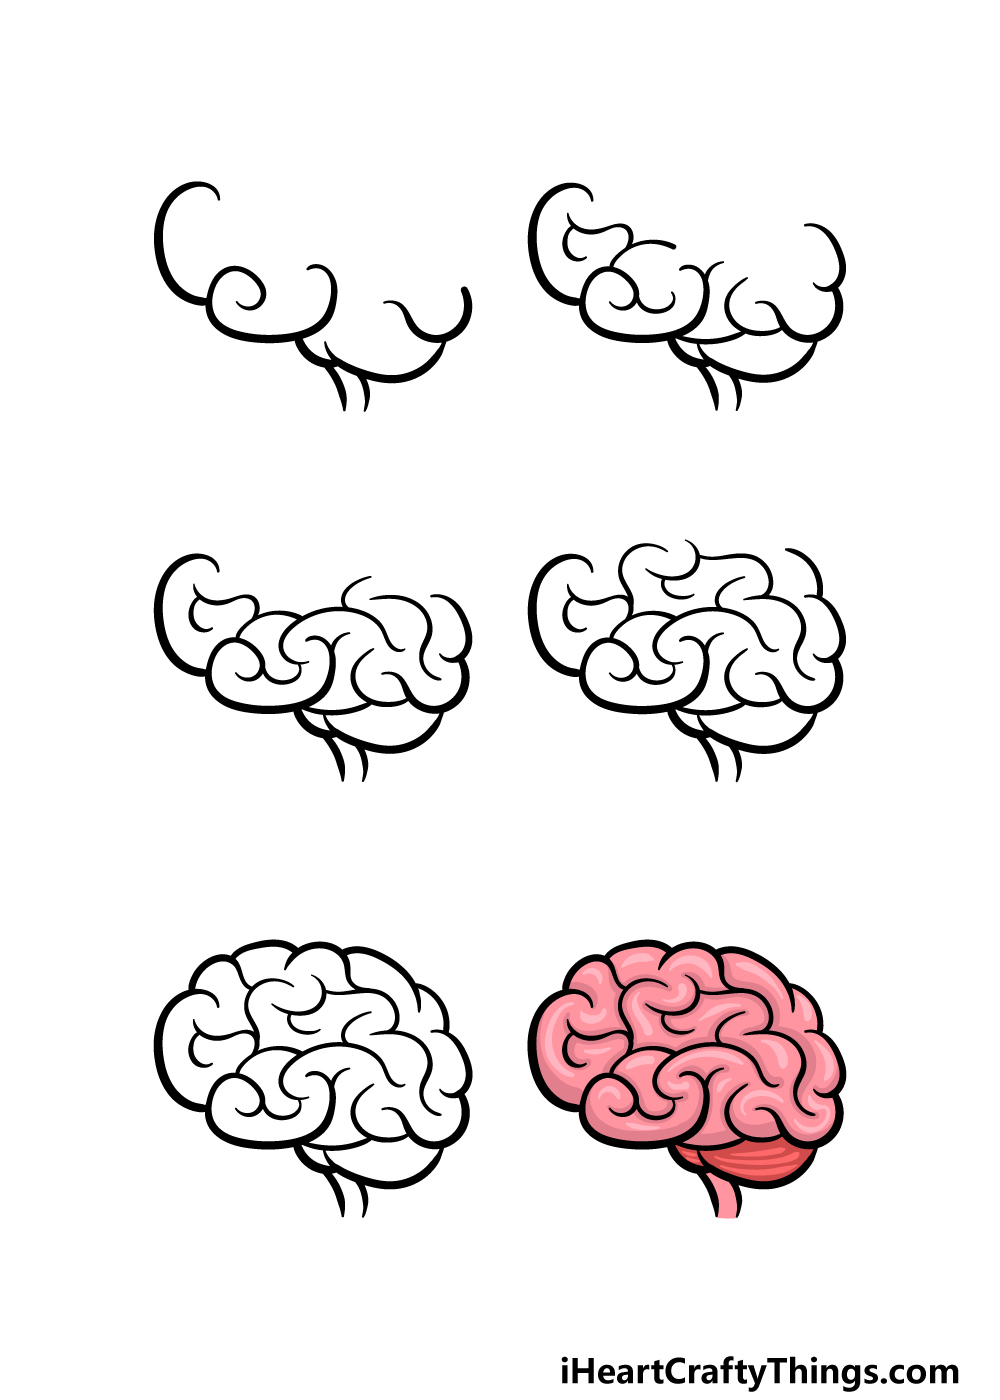
How to Draw A Cartoon Brain – Let’s Get Started!
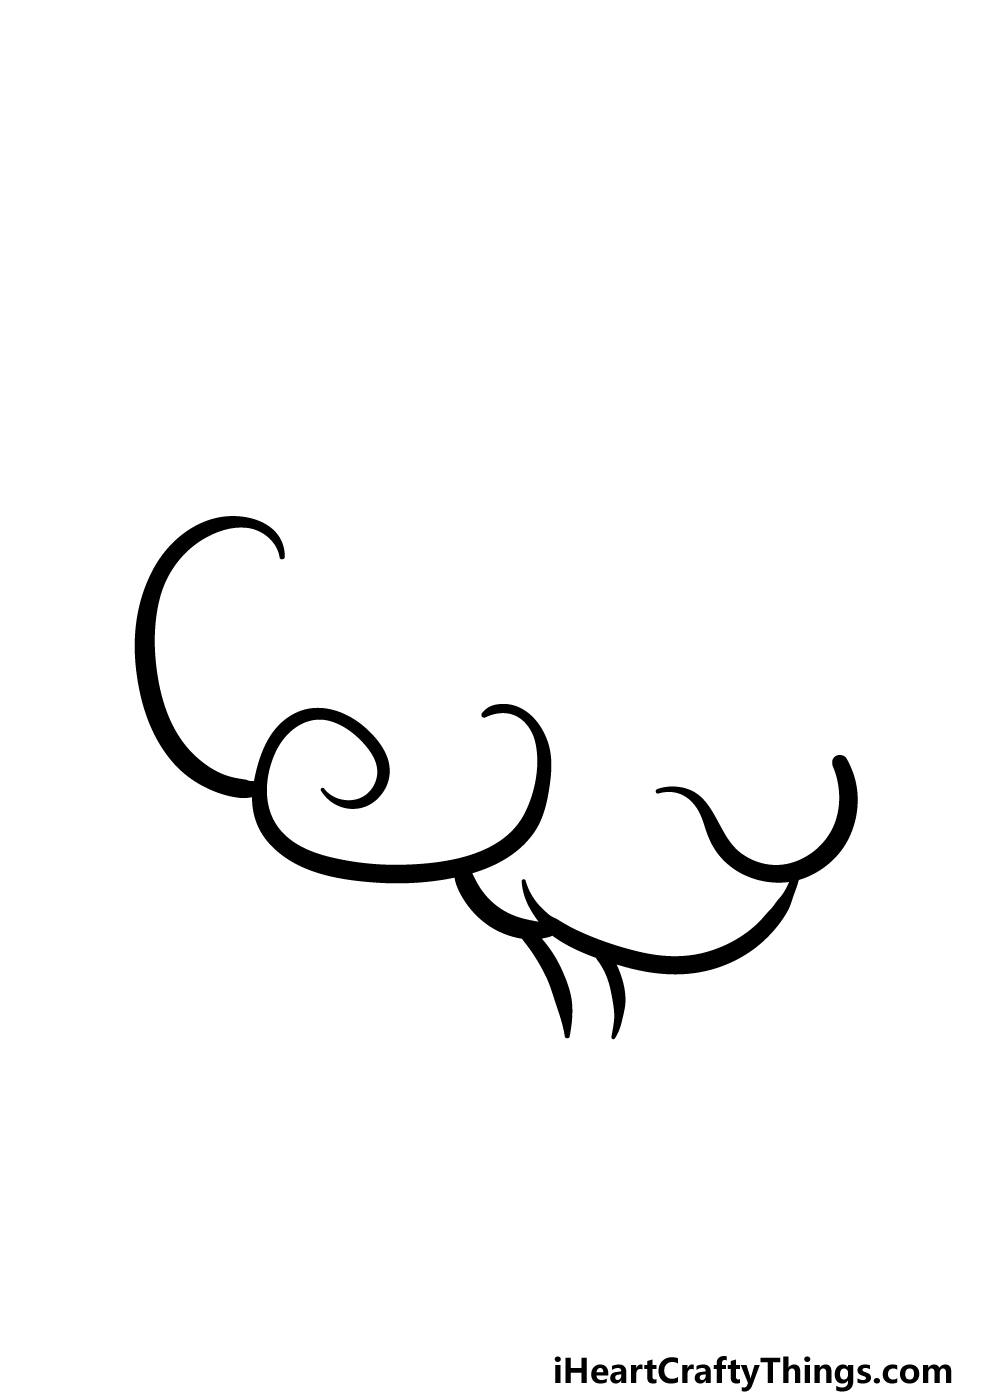
Step 1
Our brains are not only complex in the functions they provide, but also in their basic structure.
This can make them difficult to draw even in a simplified form, but in this guide on how to draw a cartoon brain we shall break it down to make sure that it is easy and fun for you to master!
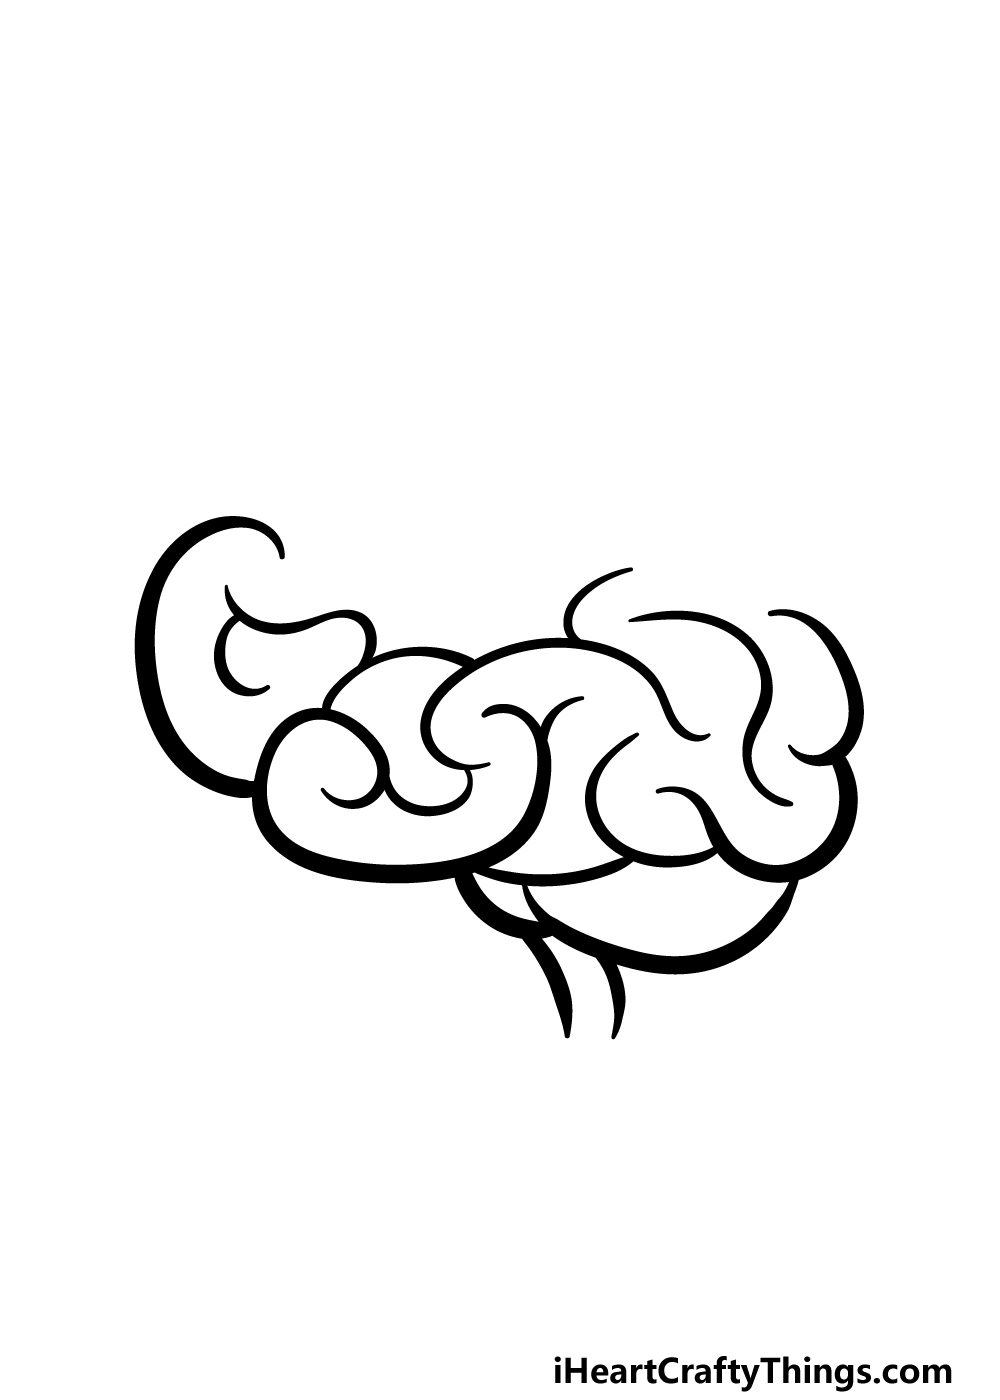
For this first step, we will concentrate on the lower portion of the brain.
First, we will draw some large curved lines that connect to one another.
The size and placement of these lines will vary, so this is one where you will probably want to replicate the lines as they appear in our reference image.
Finally, once you have drawn this portion of the brain, extend two curved lines down from the base for the stem, and then we can proceed.
Step 2 – Now, add some extra details for the section you just drew
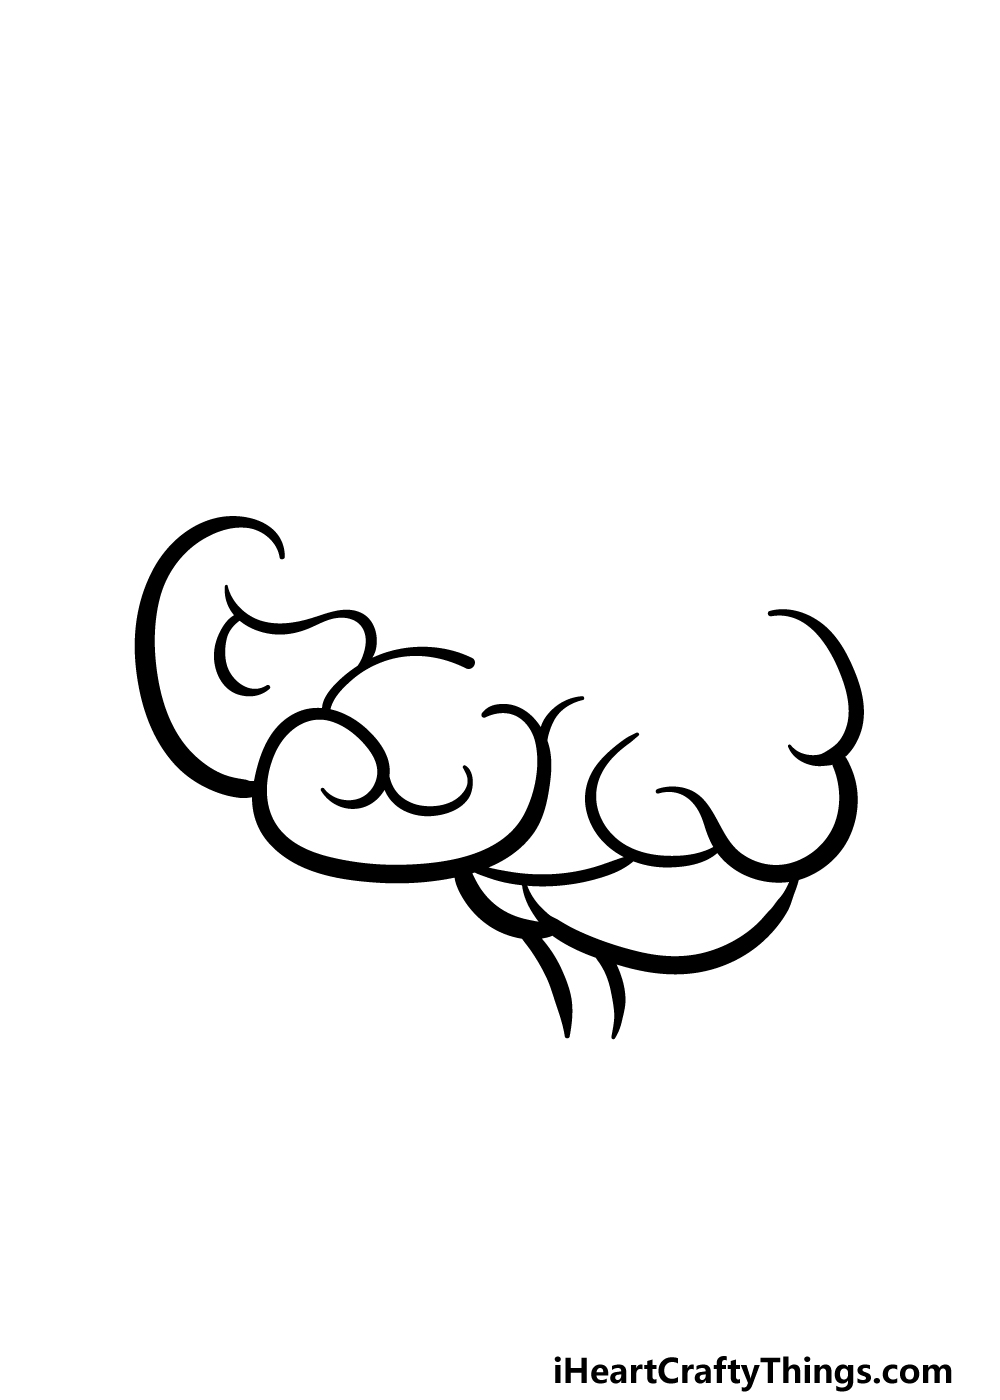
Now that you have the structure for the lower half of the brain drawn, we can start adding some details before adding more sections.
To do this, we will be adding smaller curved and rounded lines throughout the section that you began in the first step.
Brains are made up of lots of folding, twisty portions, and adding these lines will help to portray that texture.
Once you have added these details, we can move on to step 3 of the guide.
Step 3 – Next, draw some more curved line details
For the third part of your cartoon brain drawing, we will be adding some more curved lines to the interior of the brain.
These ones will go near the center of the brain, and we will be making them a bit larger than the previous ones you drew in step 2.
The position that we are adding these in will also build up the main body of the brain, as you can observe in our reference image.
With these latest details added, we can then add some more to the top of the brain in the next few steps of the guide.
Step 4 – Now, add some more to the top of the brain
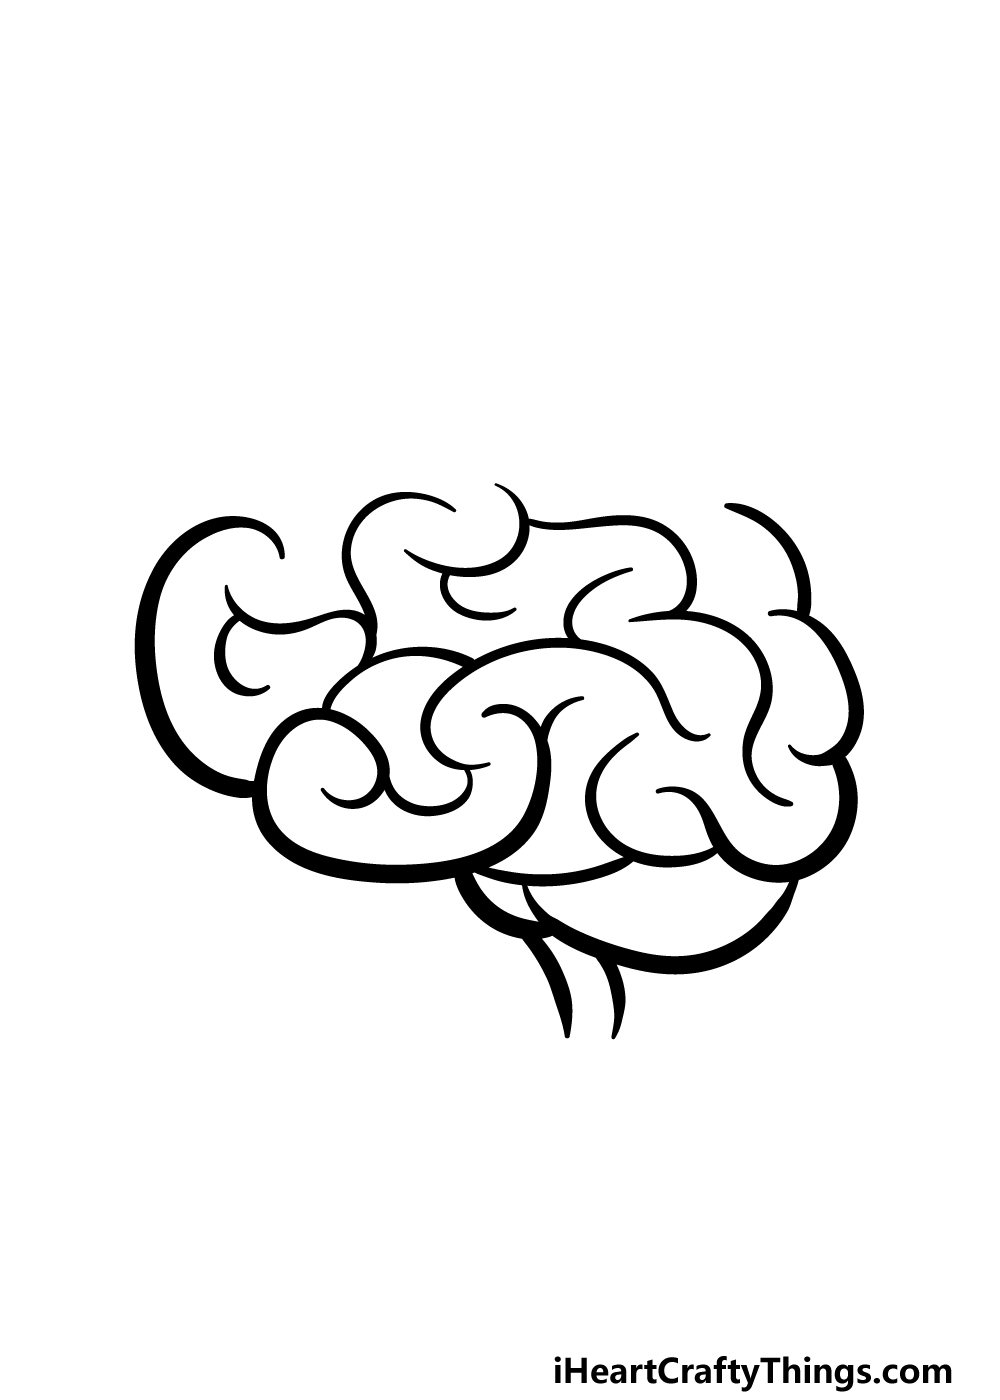
Before we finish off the brain and color it in, we will be adding just one more section. You know what to do here!
All that you need to do is keep adding some more of those curved, rounded lines you’ve been working on.
The positioning of these lines doesn’t need to be identical to ours in order to look good, but you should try to get their placement and size to be at least similar to our example.
Once you have added this section of the brain, we can draw the final details and any other fun additions in the next step of the guide.
Step 5 – Add the final details to your cartoon brain drawing
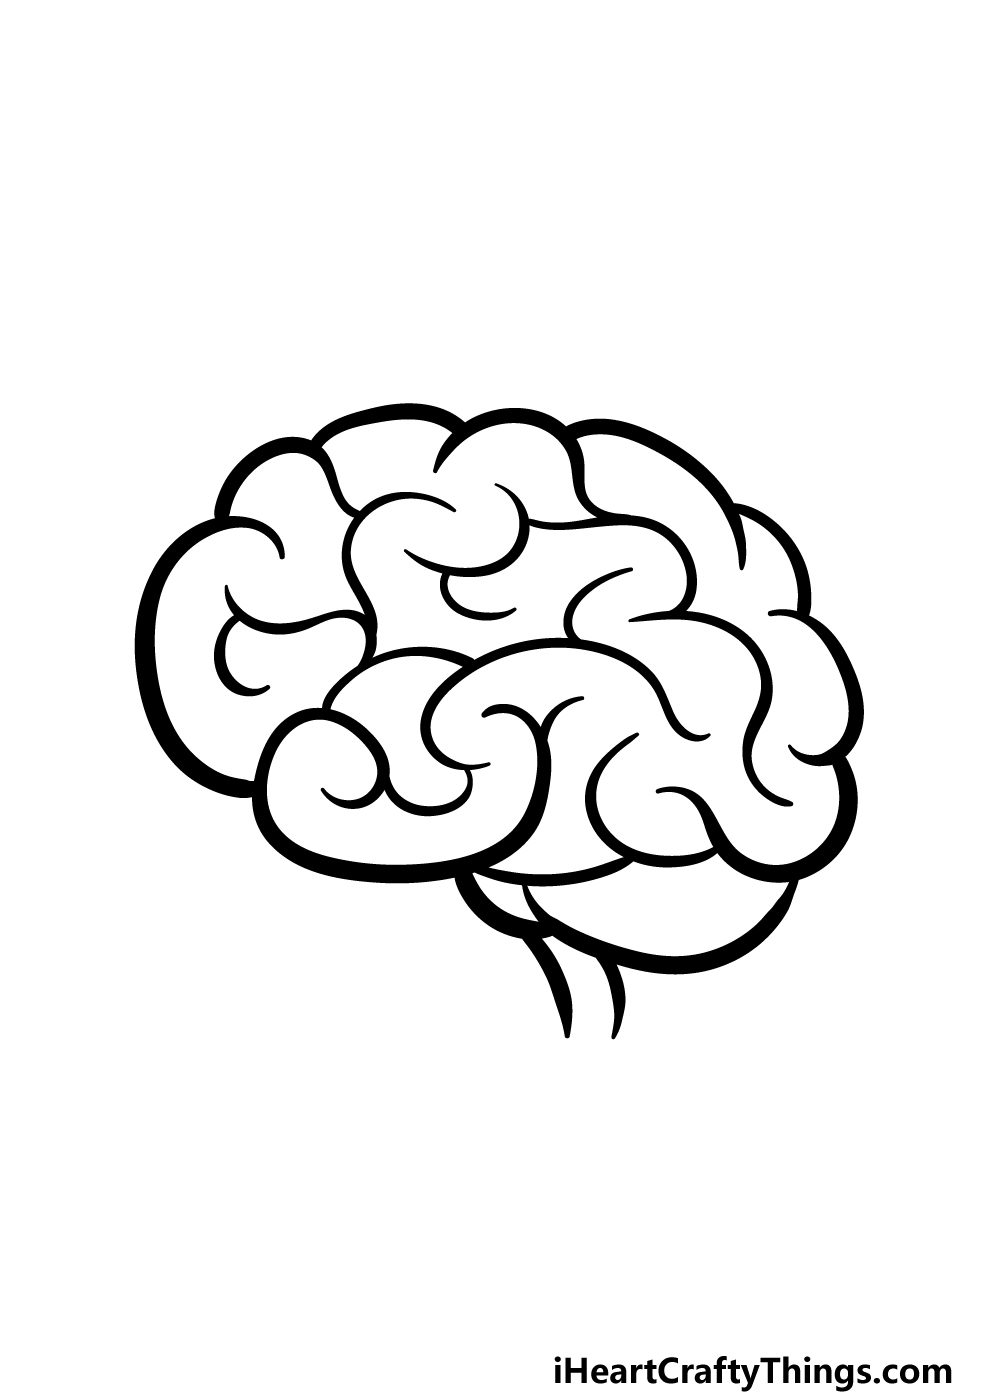
Now it’s time to finish off this awesome drawing of yours! In this step, we shall focus on finishing the outline as well as adding any extra details that you think would look cool with it.
First, let’s finish that outline. By adding just a few more curved lines to the top of the brain. This will finish off the outline and complete the main body of the brain.
Once that is complete, the rest is up to you! There are many ways that you could go about finishing off this brain.
You could draw a background that incorporates different body parts drawn in the same style, or you could get really creative!
One idea would be to have it in a jar with some aliens or a spooky mad scientist studying it. These are just a few ideas, but what else can you think of?
Step 6 – Finish off your cartoon brain drawing with color

You’re ready to finish off this cartoon brain drawing with some color! We took a simple, yet effective, approach with our example image.
We used shades of light pinks for the main portion of the brain, and then we used darker shades for the lower portion.
You could go for similar colors of your own choosing, or you could go with a similar scheme to what we went with.
The choice is up to you, and any approach you take will look great! You can also play around with different art tools and mediums to really spice things up.
What will you pick to finish off this amazing drawing? We can’t wait to see how it turns out!
Bonus: Get Creative With The Colors You Use
In this guide, we learned how to draw a cartoon brain, which is the organ that is responsible for ideas to begin with! For that reason, we wanted to cover some bonus ideas you can use to color your picture.
We covered a few of the mediums you could use in the previous step, but there are so many ways to think outside the box. You may think you’re limited to art tools made for coloring, but there is so much more you could do!
You can look around your house and see what could be used to make your drawing even more special. For example, let’s say you wanted to add some eyes to this drawing of a brain.
You could draw and color the eyes, but why not stick something on instead? You could take two ping pong balls and glue them to the brain and then use a marker to draw some dots on them.
This would be an easy way to make your drawing even more fun and creative, and it would give your drawing a 3D look. You could also use something like pink clay to stick to the image.
This could also help to give your drawing some depth and make it more of a multi-media drawing. These are some simple ideas, but you could use many things around the house.
Of course, make sure that whoever the objects belong to approves of you using them in your artwork first! Doing this can turn your already unique drawing into something unlike any other.
Now it’s up to you, so what are some fun objects and materials you could use to make your cartoon brain drawing even more unique and cool?
5 Tips To Make Your Cartoon Brain Drawing Even Better!
Check out some smart tips for making this cartoon brain sketch look even better!
A great way to make this carton brain drawing even better would be to show how it looks inside of the skull. You can find many different diagrams and representations of how this would look online.
Using these references, you can show a cross-section that would show how the brain looks along with all the parts that surround it. This would be a great way to make this drawing more realistic.
Once you have the hang of drawing this brain, you can change it up a bit to create your own unique version. For example, you could draw the brain at a different angle to how we showed it here.
If you were to go with this suggestion, you may again want to find some pictures online to help you with how it should look.
Another way to take this drawing of a cartoon brain to the next level would be by making it look like a medical diagram. If you add a few more details, you could make it even more realistic.
Then, using a reference, you could then label all of the different parts of the brain. Maybe you could also write what each part is responsible for!
We went for a light pink color for this cartoon brain drawing, but you could also use some other colors if you would prefer.
You could go for some more muted, realistic shades, but you could also stay with the pink theme and use different shades of that color.
What kinds of colors do you think you will choose for this brain?
We’ve covered how to make this drawing more realistic, but you could also make it less so! One way would be to turn the brain into a fun cartoon character.
You could do this by drawing a simple face onto the brain and maybe some limbs. Then, if you add a background you can really finish off this cartoon scene!
What kind of background would you create?
Your Cartoon Brain Drawing is Complete!
That brings you to the end of this guide on how to draw a cartoon brain in 6 steps!
Brains can be a complex organ to draw, so we hope that by following all of the steps that you found it to be fun and easy to do.
Then, once you have finished up the drawing, remember to add your own touches and ideas to finish it off!
We spoke about how you could draw a background or some extra elements, and you could also change up the colors and mediums that you use.
How do you plan to make this cartoon brain look even better?
If you had fun with this guide, remember to check out our website for access to many more! We have tons of awesome guides to enjoy and we plan to bring out many more, so stay tuned.
Please also consider sharing your finished cartoon brain drawing on our Facebook and Pinterest pages for us to enjoy!
Here Is A Cute Cartoon Brain Drawing To Inspire You!
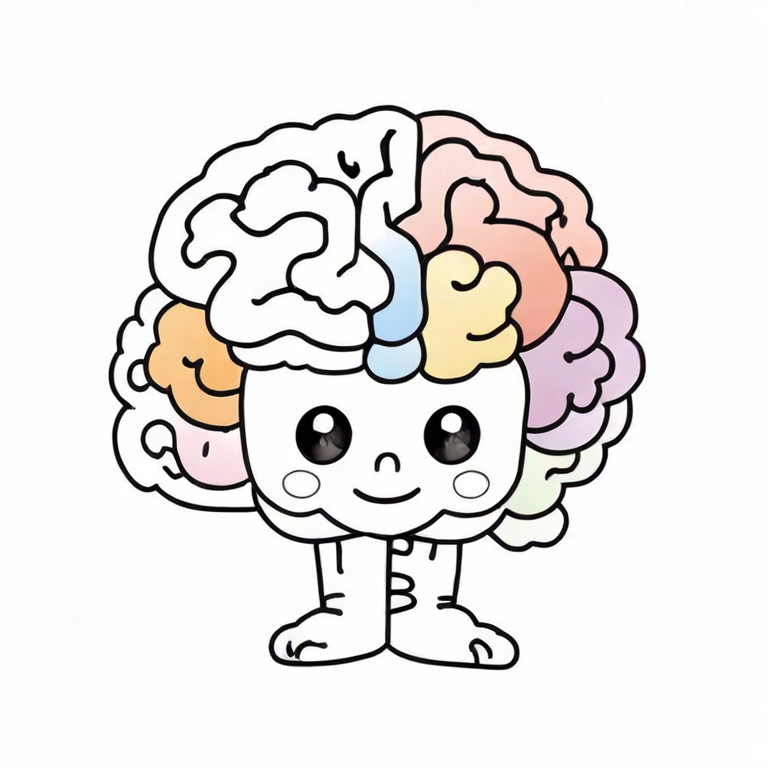
Even when drawing this brain, you don’t need to worry and overthink it! Our artist Amanda has created this cute cartoon brain drawing for kids to show you how you can draw your own version.
This character is adorable, but it still manages to show you a bit what a real brain would look like. The face on the character helps to give it some extra personality, though.
Amanda also added some colors on the various sections of the brain, but kept it to just a few sections.
This was done to show you some possible ways of coloring the brain, but leaves it open for your own creativity.
When you color your own cute cartoon brain sketch, you can use all sorts of colors and techniques for the various details and sections of the brain.