There are few better ways to spend a sunny day outside than relaxing and having fun on a beach. One of the best accessories to bring with you to any beach is a beach ball.
With one of these ready to go, you can have loads of fun kicking and throwing it around, and it becomes something that everyone can enjoy.
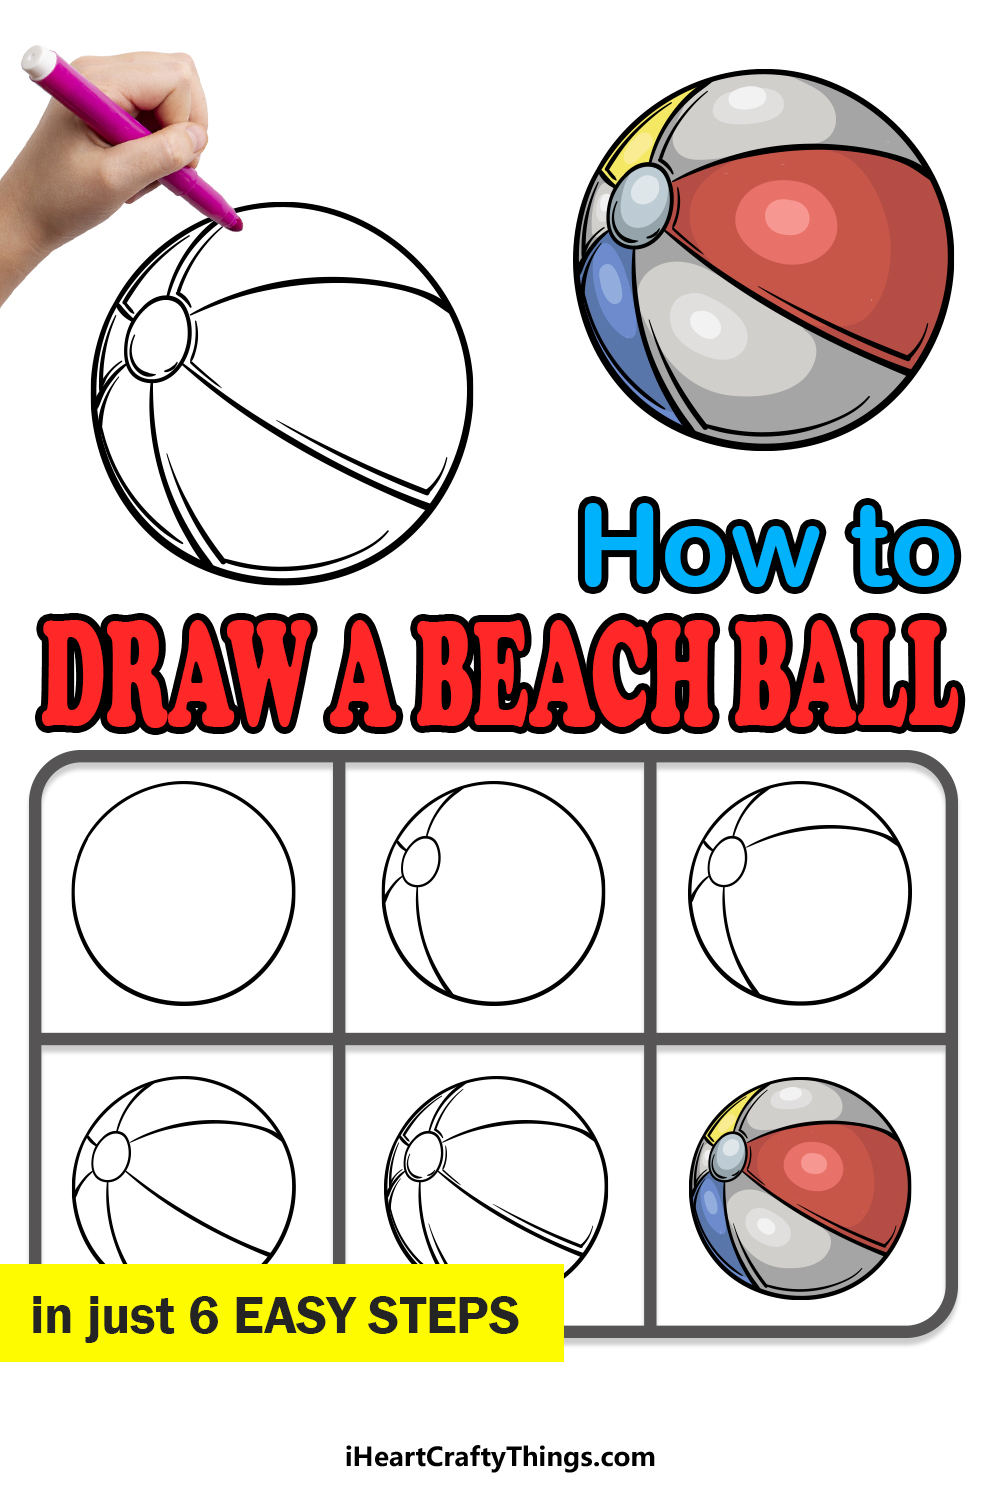
If you learn how to draw a beach ball, then you can create this fun wherever you are!
This is the tutorial to be on if you would like to know how you can do just that!
So sit back, relax and create some beach fun as you work on this step-by-step guide on how to draw a beach ball in just 6 steps.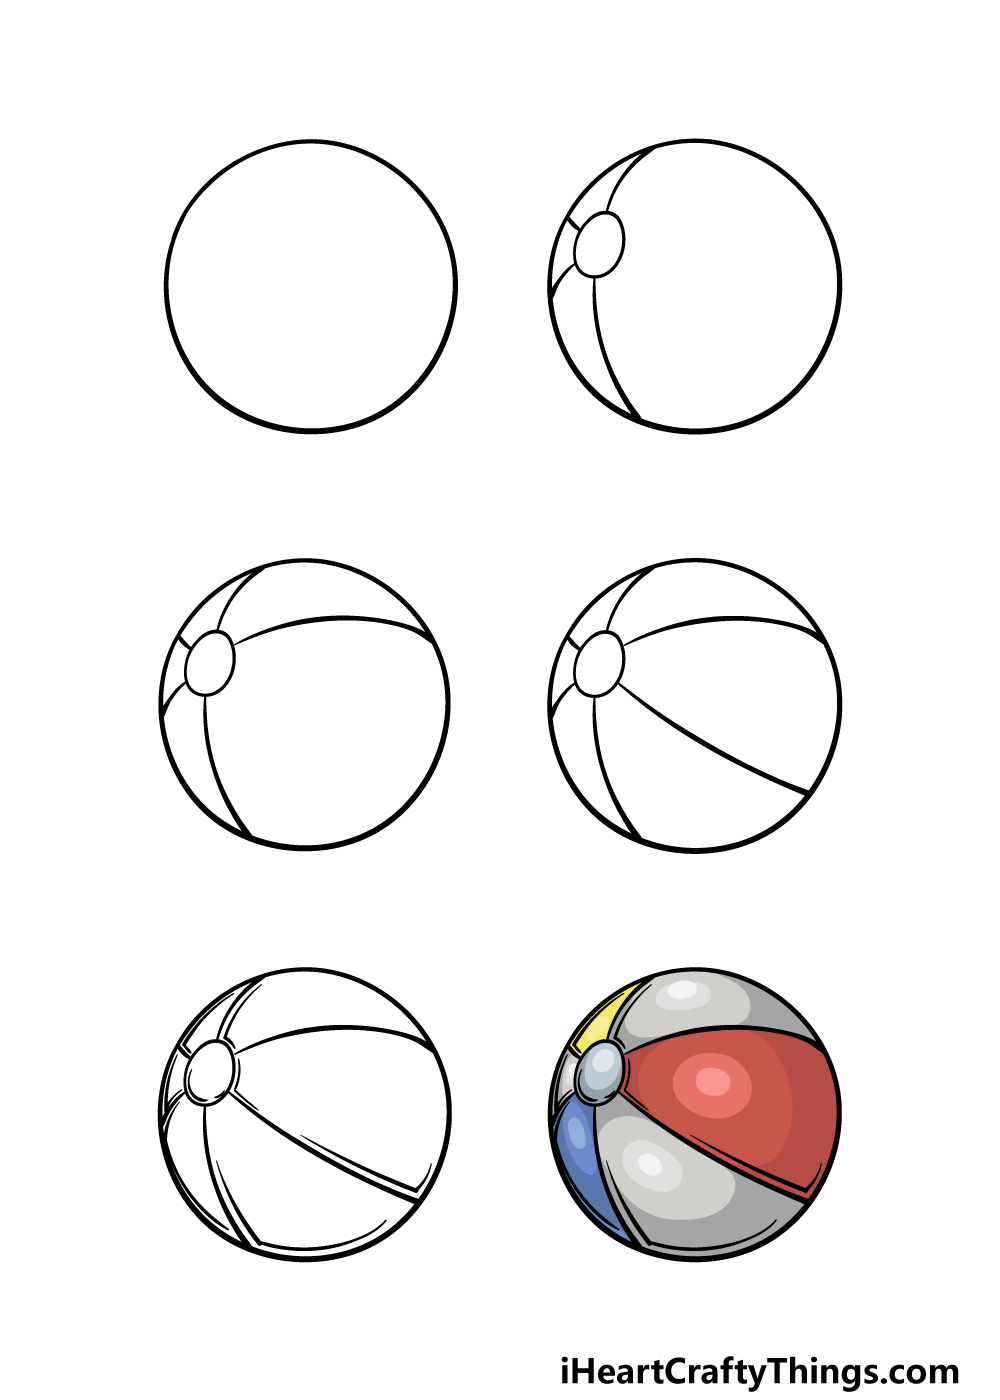
How to Draw A Beach Ball – Let’s Get Started
Step 1
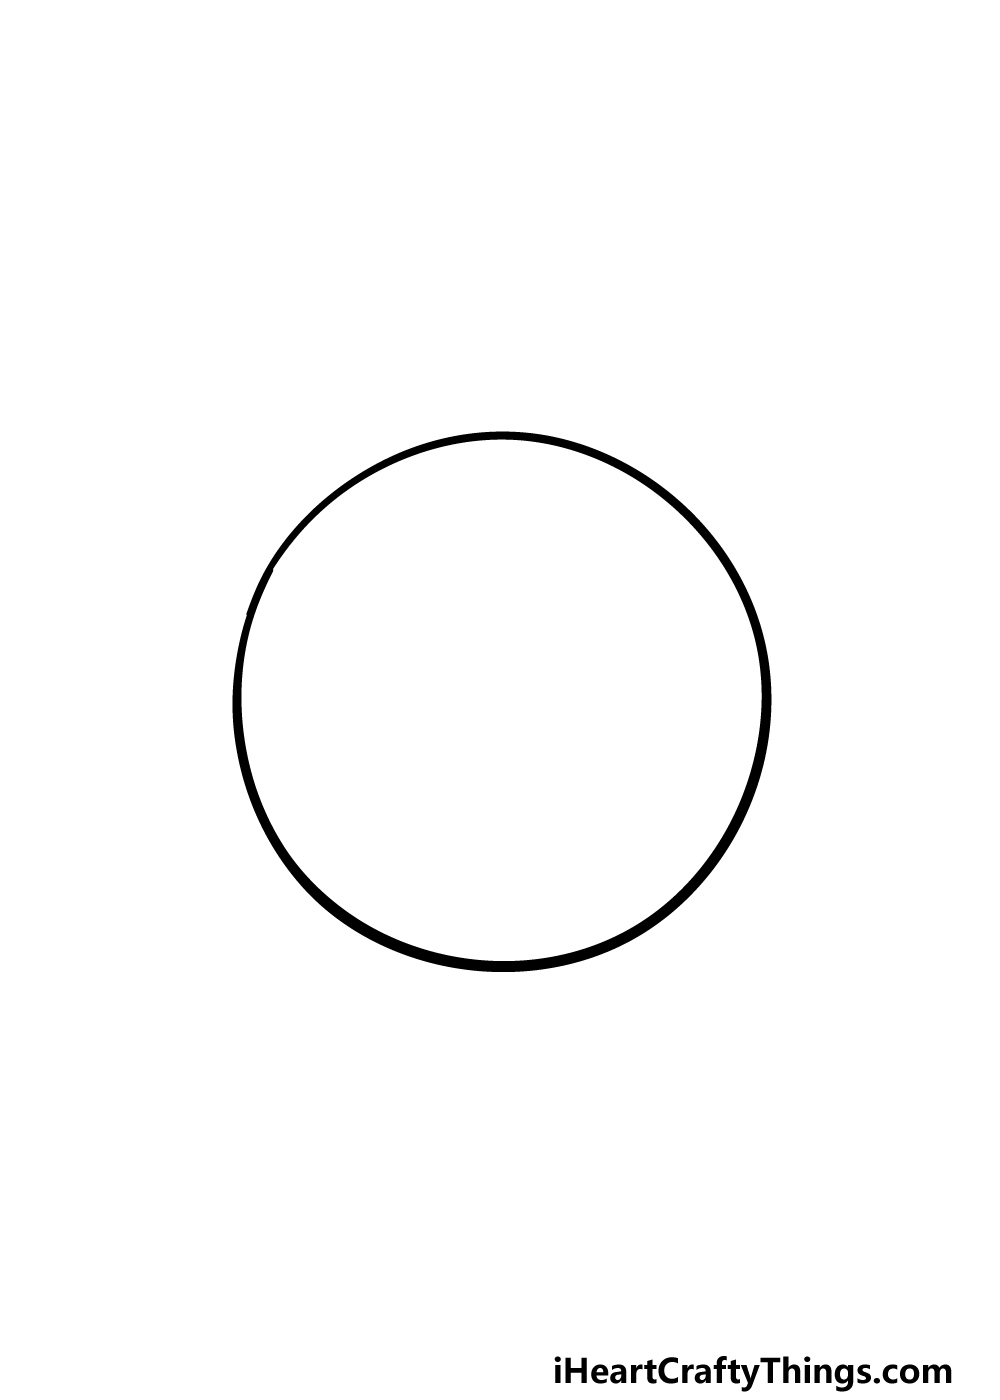
To begin this guide on how to draw a beach ball, we shall start with the outline for the ball. As you may imagine, this means that we will be drawing a circular shape.
This doesn’t have to be a perfect circle, but if you would like to create a perfect one then you could use a tool such as a drawing compass to easily draw on.
Otherwise, try your best to slowly draw the closest thing you can to a perfect circle.
Beach balls are usually slightly irregular in their shape, so that’s why it doesn’t really matter if it doesn’t end up being a perfect circle.
However you end up drawing it, once this circle is complete you will then be ready to proceed to the second step of the guide!
Step 2 – Next, draw the first details for the beach ball
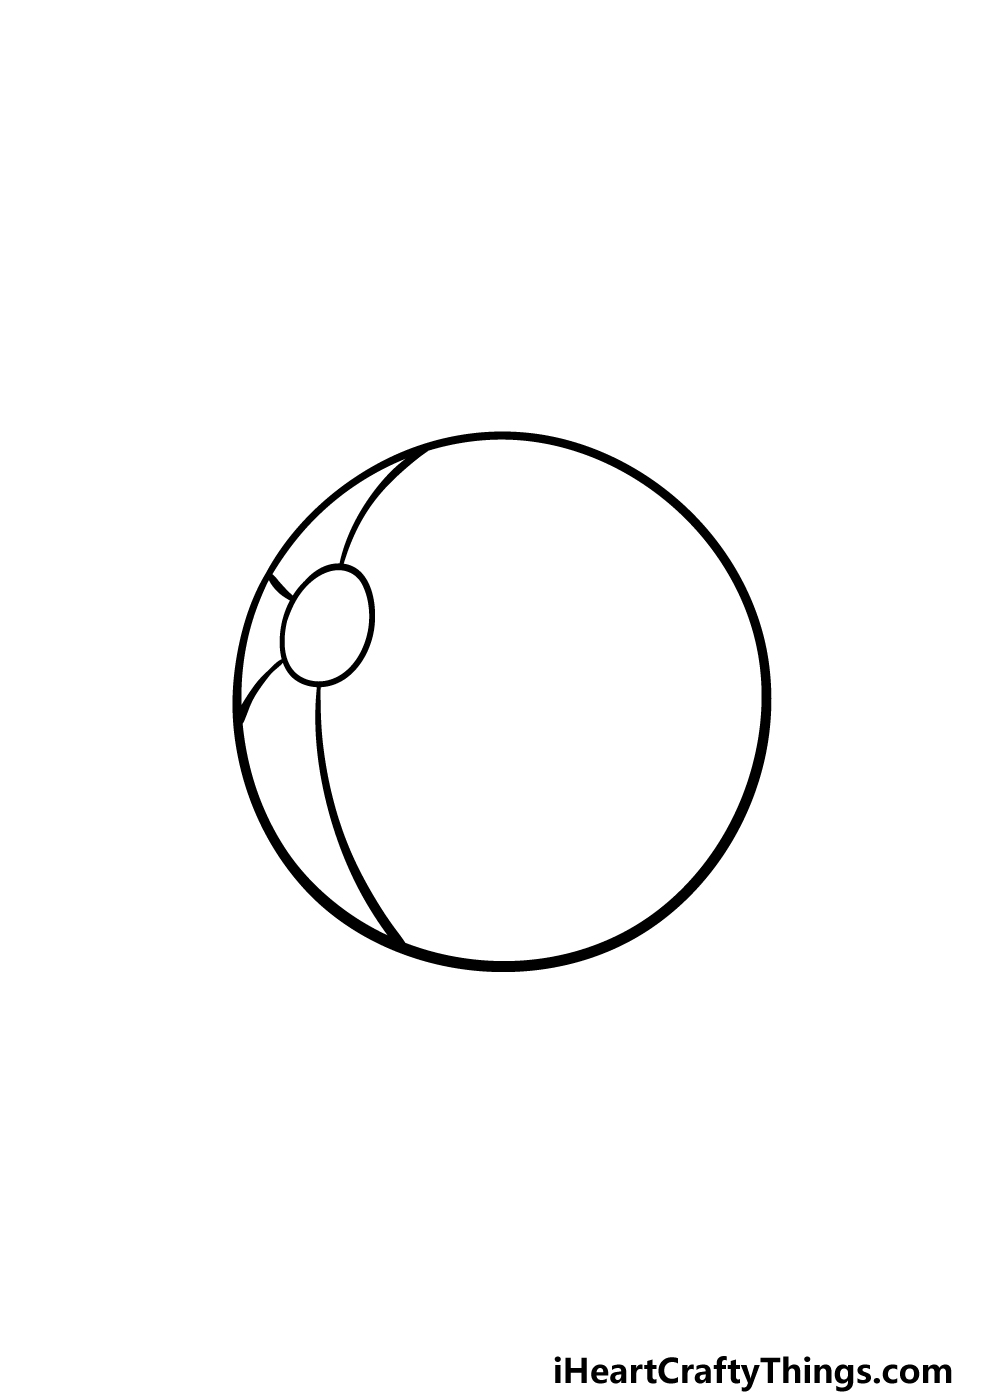
A beach ball is almost always decorated by having various segments on it. We shall start drawing these details in this second part of your beach ball drawing.
For now, we shall focus on the detailing on the left-hand side of the ball. To do this, simply draw a circle on the upper left-hand side of the ball.
Then, draw a series of curved lines coming off of this circle. For now, we shall be drawing four of these curved lines.
One will come out from the bottom of the circle, another will extend up and then the other two will go towards the left.
Then it will be on to step 3!
Step 3 – Now, draw another line for the detailing
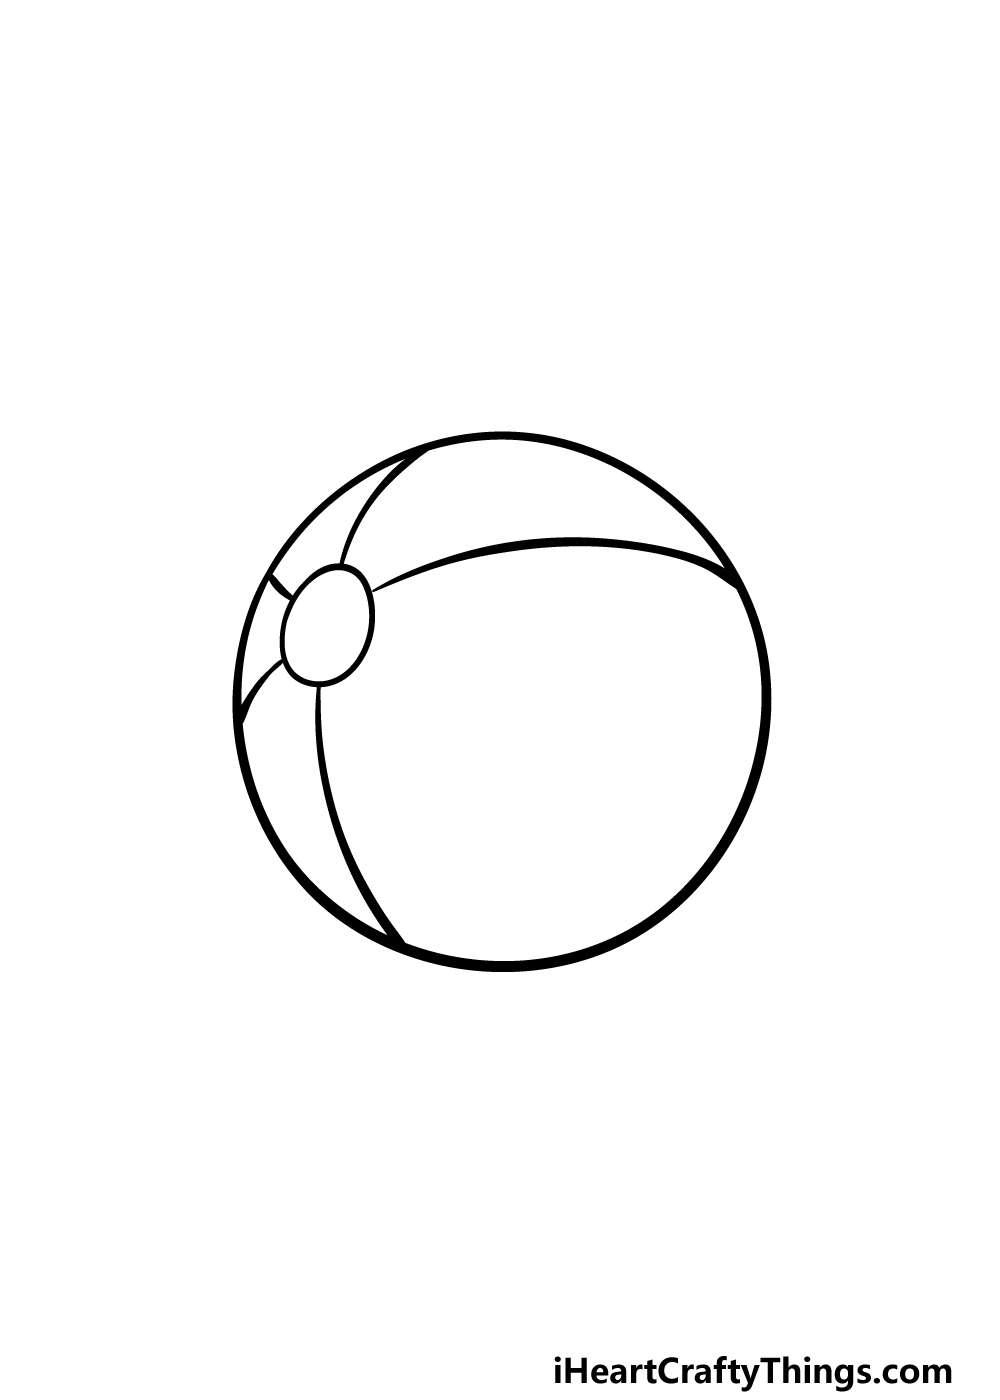
We will keep things simple in this third step of our guide on how to draw a beach ball. We will be adding just a bit more to the line detailing on the ball that you started in the previous step.
All you need to do is draw another curved line extending from the top of the small circle and extend it all the way to the right-hand side of the beach ball.
Try to follow the curvature of the lines that we used in our reference image if you can! Then we can keep adding to the detailing in the next part.
Step 4 – Next, draw the final line of the detailing
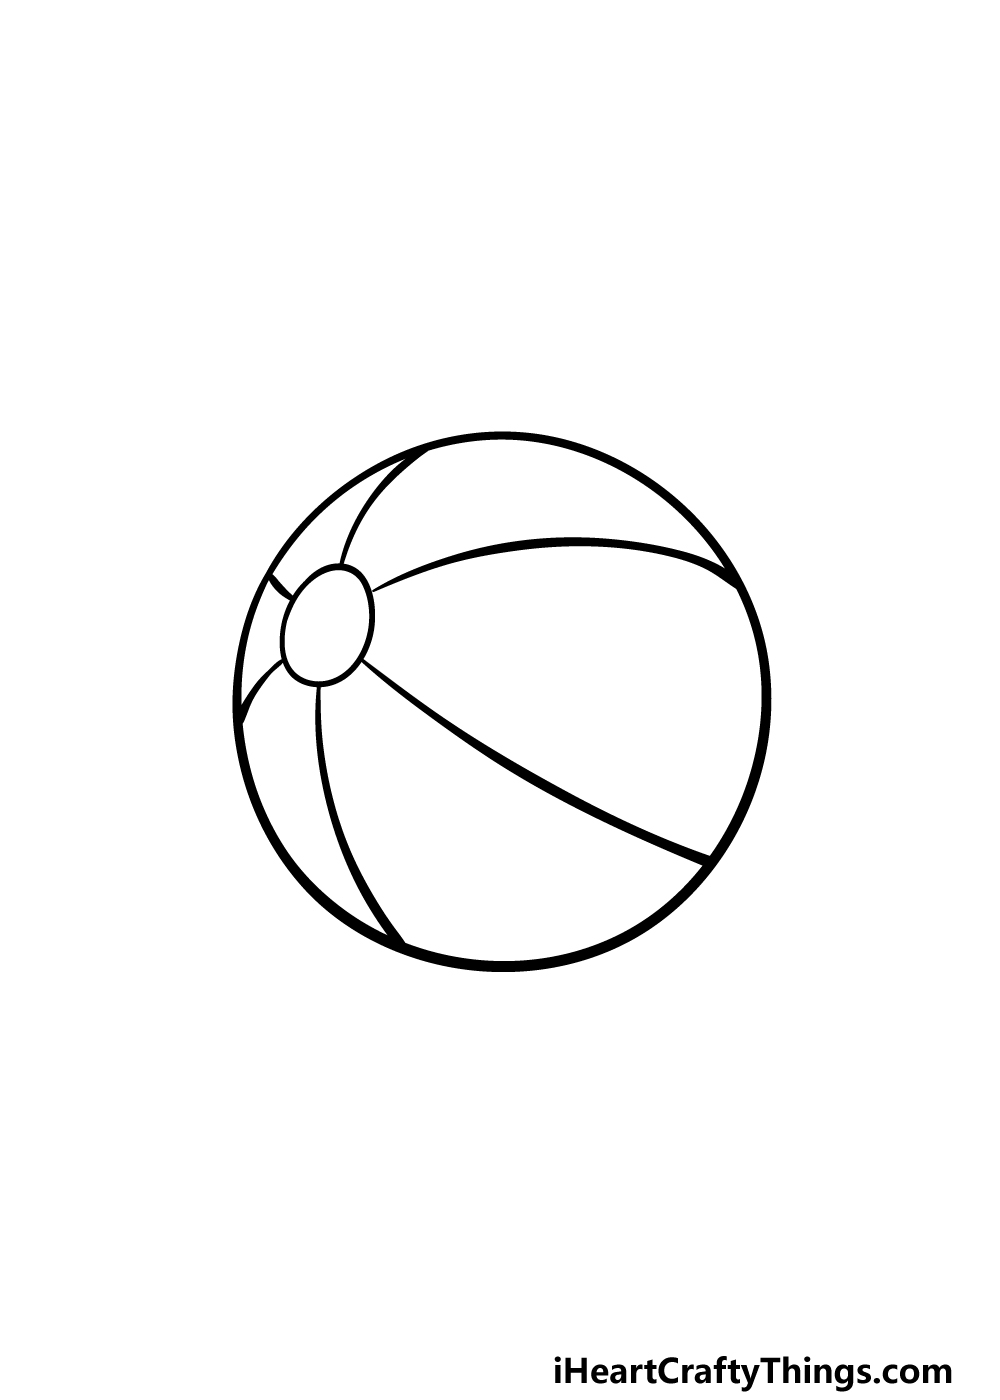
This fourth part of your beach ball drawing will see you adding the final line detail for the ball. To complete the segments of the beach ball, simply draw one more of those long, curved lines.
This will fill in the last space left in the ball and will complete the detailing nicely.
Once you have finished drawing all of the segments of the beach ball, we will then be ready to add the final details and touches in the fifth step, so let’s move on to that!
Step 5 – Add the final details to your beach ball drawing
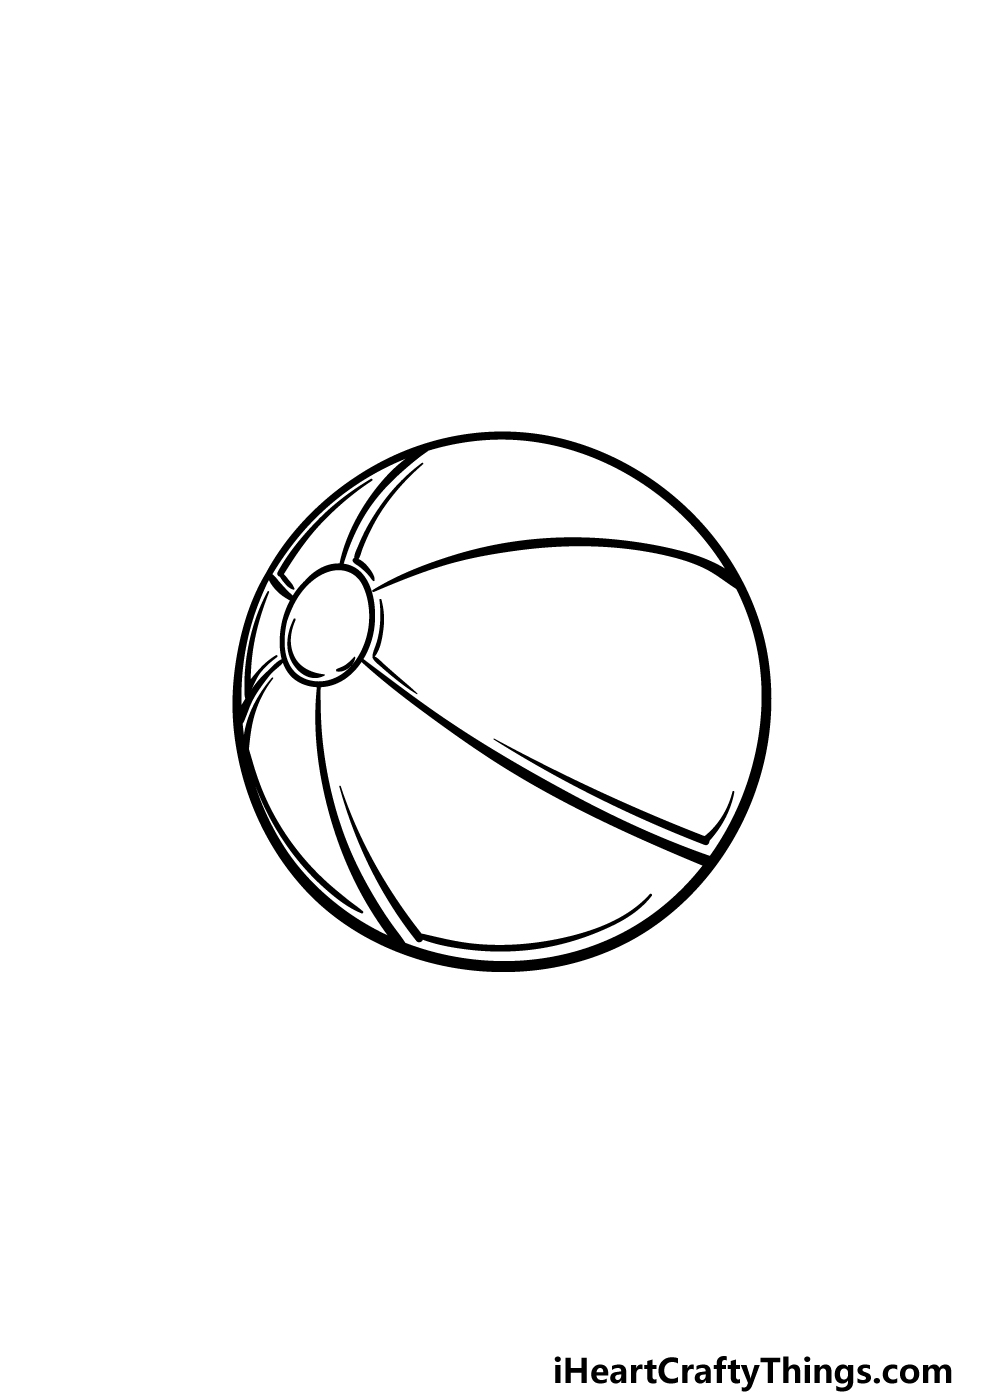
Before you color your creation in, we first have a few final details to add in this step of our guide on how to draw a beach ball.
These details will seem pretty minor, but they will make a big difference! Simply draw some lines running parallel to the segment lines that you have been drawing so far.
These lines will angle sharply when they reach the inner edge of the beach ball outline as well. Once these are drawn, you can then add some more details of your own!
One idea to do would be to draw a background.
The obvious choice would be to draw an awesome beach setting, and this would be a great chance for you to show what other toys and objects you would enjoy with this beach ball on the beach!
Step 6 – Finish off your beach ball drawing with color
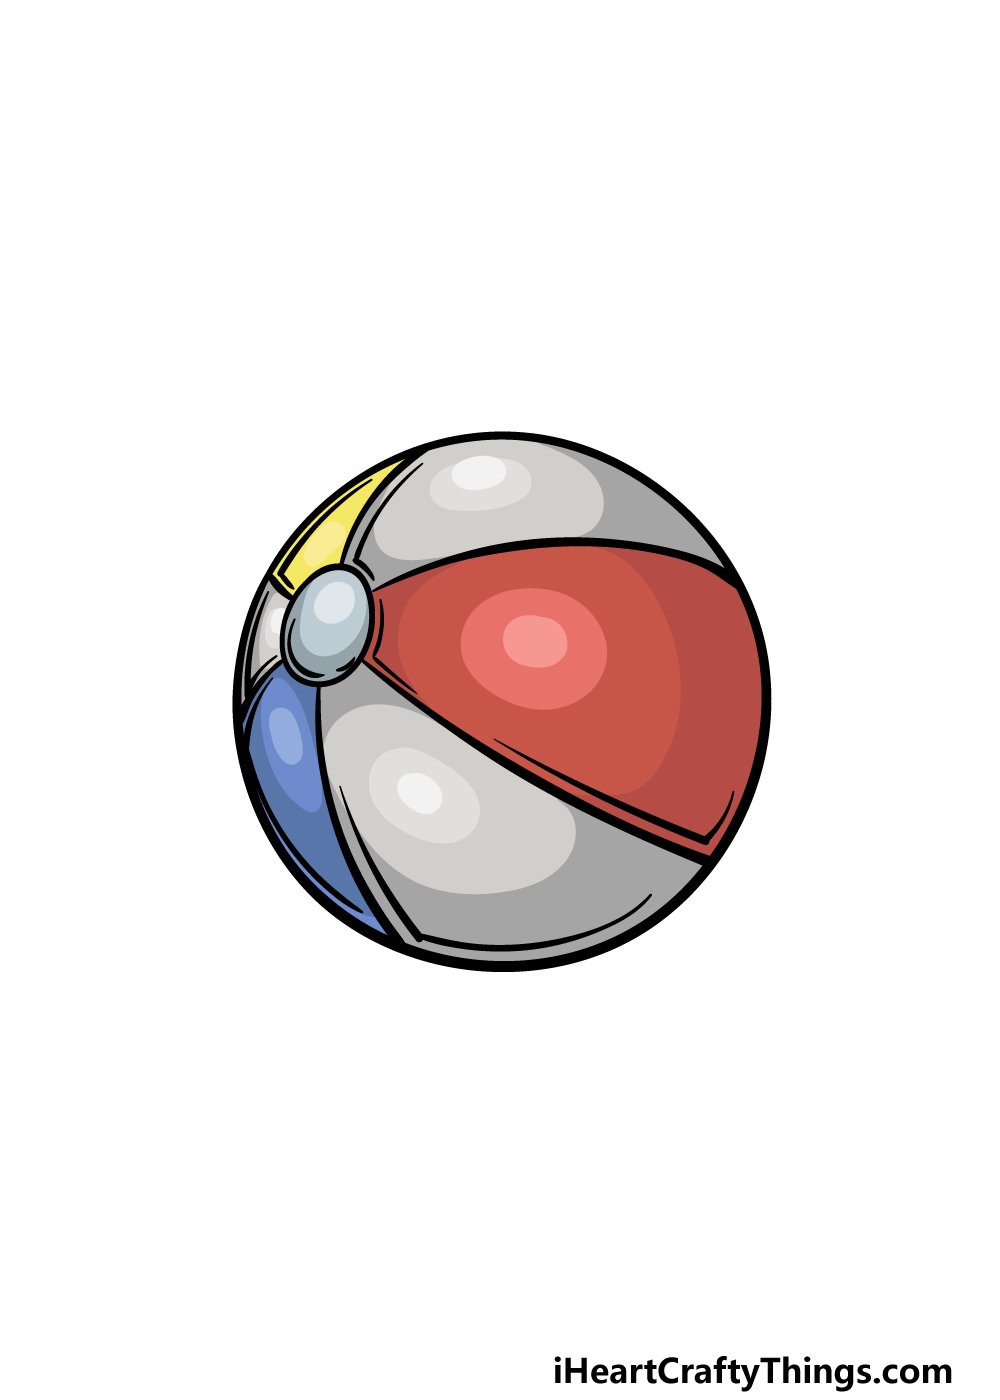
Beach balls will usually have some bright and interesting colors decorating them, and that’s why we shall add some colors to your beach ball drawing in this final step!
In our reference image, we used some red, yellow and blue for some sections of the ball while using some greys and whites for the segments in between.
You could go for some similar colors for your own drawing, but this would also be a great chance to incorporate some of your own favorite colors.
This is your chance to let your creativity flow, so have fun with it and see what happens!
4 More Ways To Make Your Beach Ball Drawing Unique
Create a fun trip to the beach from your own home with these tips for your beach ball sketch!
For this drawing of a beach ball that we created, we went with a fairly standard beach ball design. Now that you have completed the guide, you could make it more unique in a few ways.
One way would be to add some logos or other markings onto the beach ball. These could be real ones or your own designs.
Adding these would help to make the ball look more distinct and unique!
Next, you could draw a background for the beach ball setting. The first background you may think of would be a beach location.
Doing this would allow you to draw the ocean, beach umbrellas and other objects you may encounter during a day at the beach. This is not the only setting you could draw, however.
For example, maybe you could go for a backyard setting with a pool that the beach ball could be at. What other backgrounds can you think of for this image?
Whether you add a background or not, you could also add some human characters to the beach ball drawing. These characters could be drawn in any style and pose that you like.
They could even be based on people that you know for an extra personal touch! It could be a lot of fun to draw an intense beach ball game going on in this picture to make it even more action-packed.
A beach ball can come in many different colors and designs. Changing the colors or design would be a great way to put your own spin on this particular beach ball.
We showed you one set of colors you could use, but now you can show us what colors you think this beach ball should have.
Not only can you choose the colors, but you could also have some fun with the different art tools and mediums that you choose. What colors would you pick for this beach ball sketch?
Your Beach Ball Drawing is Complete!
That concludes our step-by-step guide on how to draw a beach ball in 6 steps!
Objects such as this may seem simple, but when you sit down to draw them they can often prove a bit trickier than expected. Hopefully with the help of the steps in this guide you found it to be fun and easy to take on!
Then, when you have finished all of the steps you can then finish off with your own details, elements and ideas.
We mentioned just a few ideas you could use to personalize your picture, but this is your chance to show off your creativity! What ideas do you have for some extra details, colors and art mediums that you could use?
When you’re finished with this guide, you can find many more drawing guides on our website to enjoy. We upload new ones often, so keep checking in to never miss out!
We would love to enjoy some beach fun by admiring your beach ball drawing, so please go ahead and share it on our Facebook and Pinterest pages.