Flowers can instantly bring a bit of beauty and elegance to any room or garden that they are found in.
Introducing a beautiful flower is one of the best ways to create a happier, more peaceful feeling for your surroundings!
There are so many flowers to choose from, and everyone has their favorite. The calla lily is one of the most popular flower types in the world, and they are known for their simple, pretty elegance.
Learning how to draw a calla lily is a great way to recreate the beauty of this amazing flower.
If you love the calla lily and would like to show your appreciation by creating some art featuring it, then look no further than this tutorial!
Our step-by-step guide on how to draw a calla lily will show you how fun and rewarding it can be.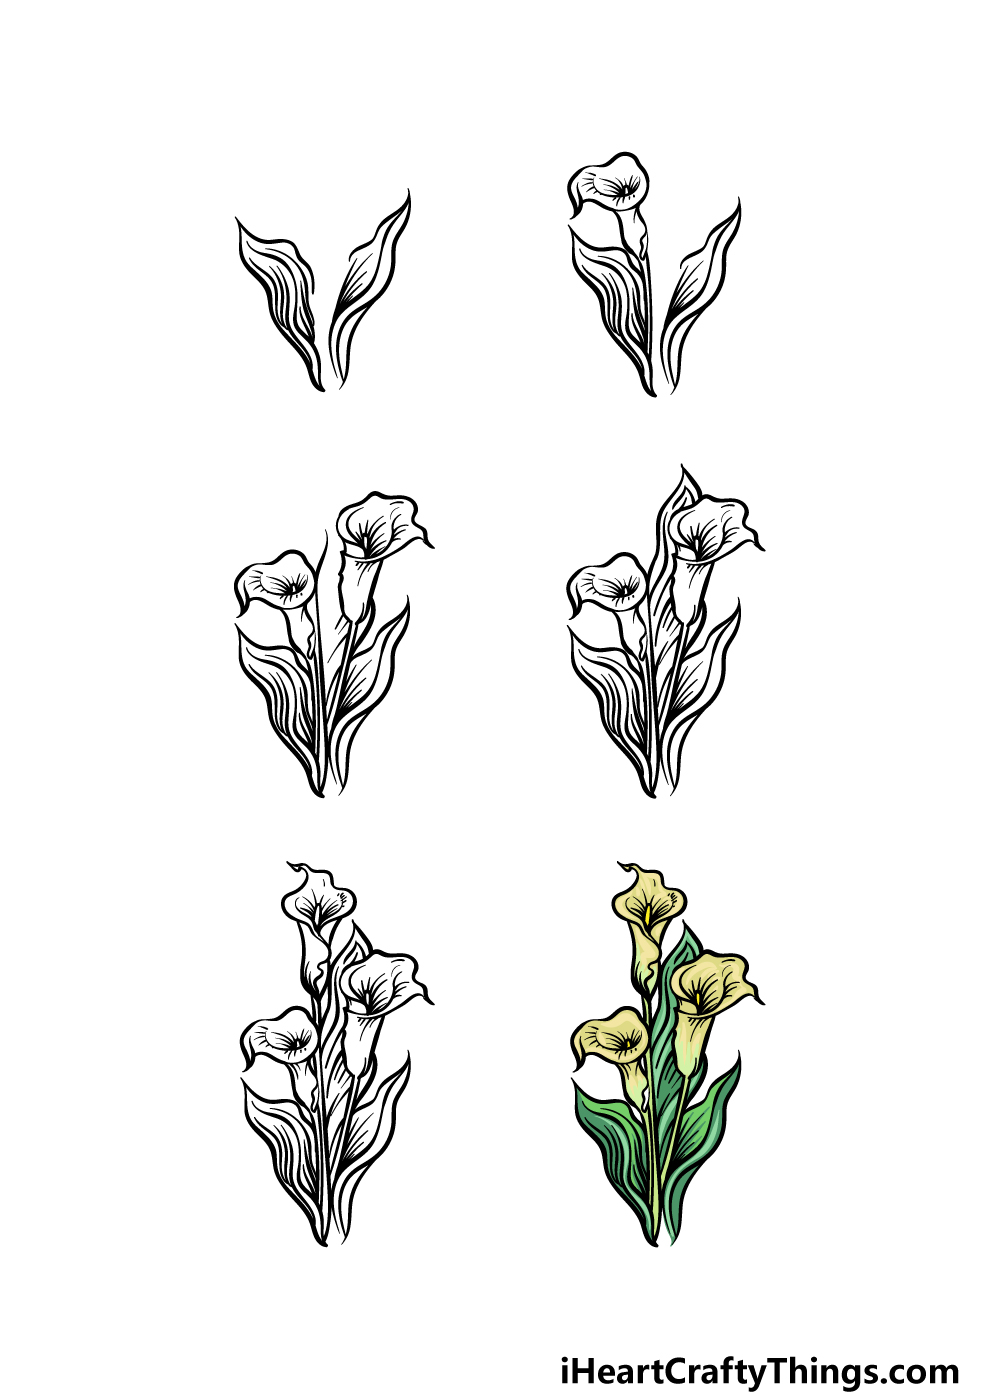
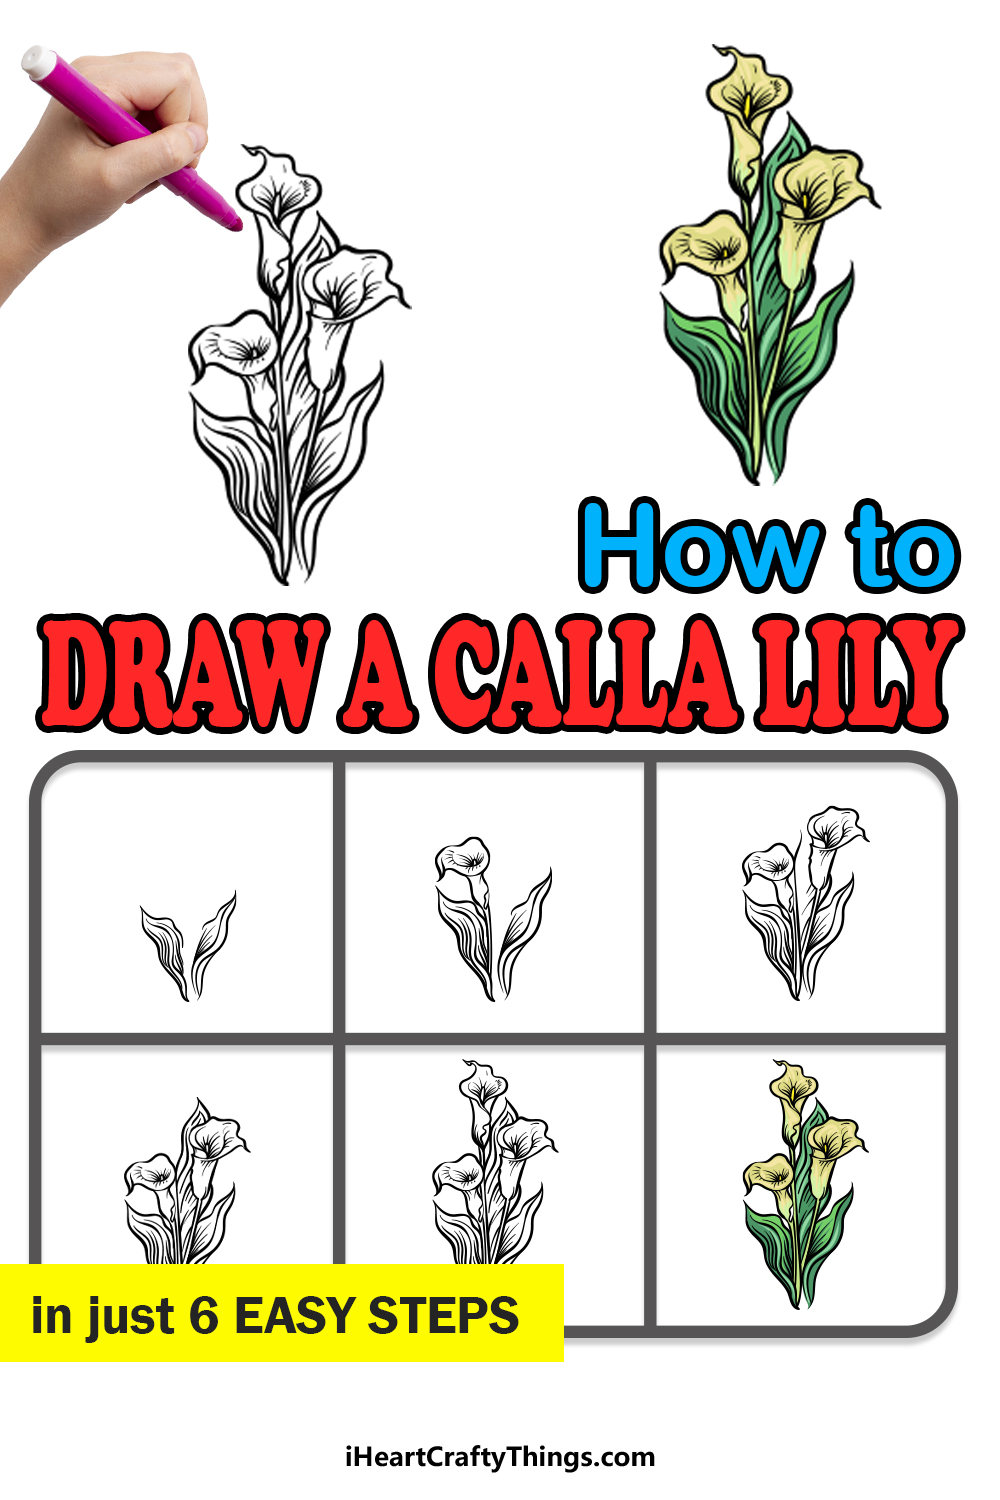
How to Draw A Calla Lily – Let’s Get Started!
Step 1

For this first step of our guide on how to draw a calla lily, we will start with the leaves that surround the flower.
For now, we will be drawing two large leaves on either side of the flower. As shown in the reference image, they will be drawn with some rounded lines that have pointy tips at the ends of them.
These leaves will be fairly highly detailed as well. To do this, we shall add lots of curved, wavy lines to the interior of the leaves.
This will help to give them more texture and dimension. Then it will be on to step 2!
Step 2 – Now, draw the first flower for the calla lily

You have the leaves for your calla lily drawing, and now you can add the first actual lily to the ensemble.
To start this first flower, first draw two slightly curved lines running closely parallel to one another for the stem of the flower.
Then, you can finally draw the flower itself. Each flower will have two sections. The first will be the thin, rounded bottom half of the flower, whereas the top will flow outward with the rounded rim of the flower.
There will then be s few smaller details to add inside the flower, and then it’ll be time for step 3.
Step 3 – Next, draw another flower and leaf
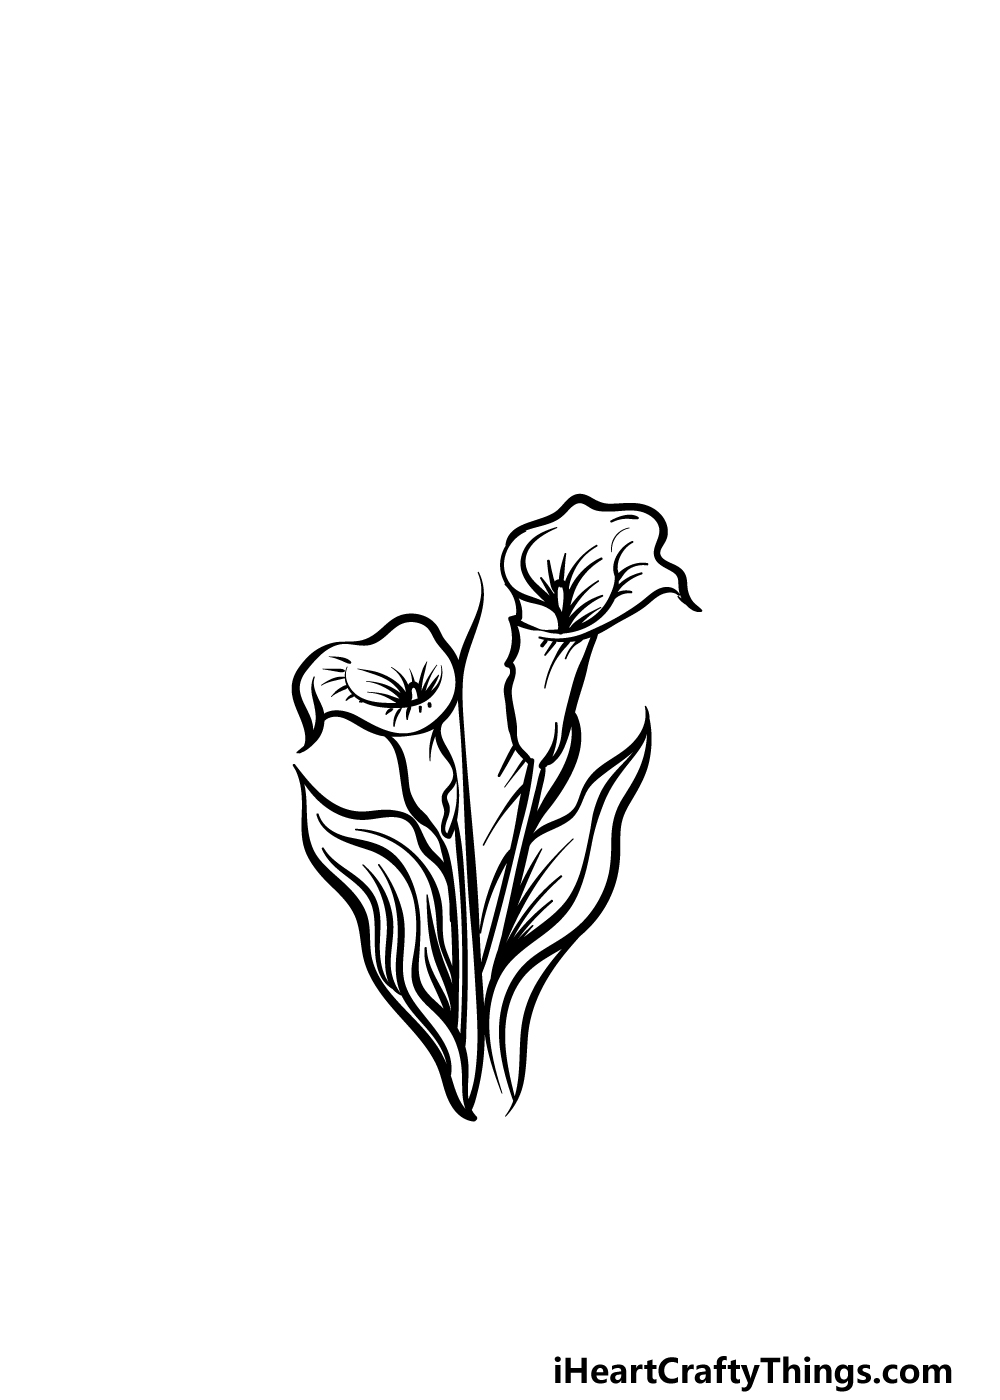
Continuing on with this guide on how to draw a calla lily, we shall be adding not only another flower but also another leaf to the picture.
For the second flower, you can follow pretty much the same steps that you followed in the second step of the guide. This one will be taller, and some of the details will be a bit different as it is not at the same angle.
Once you have drawn this second flower, we will then be adding another leaf. This one will also look like the other leaves that you drew, but we will see a bit less of it due to its positioning.
We also won’t draw the tip of it for now, but we will add that soon!
Step 4 – Now, finish off the leaf that you just started
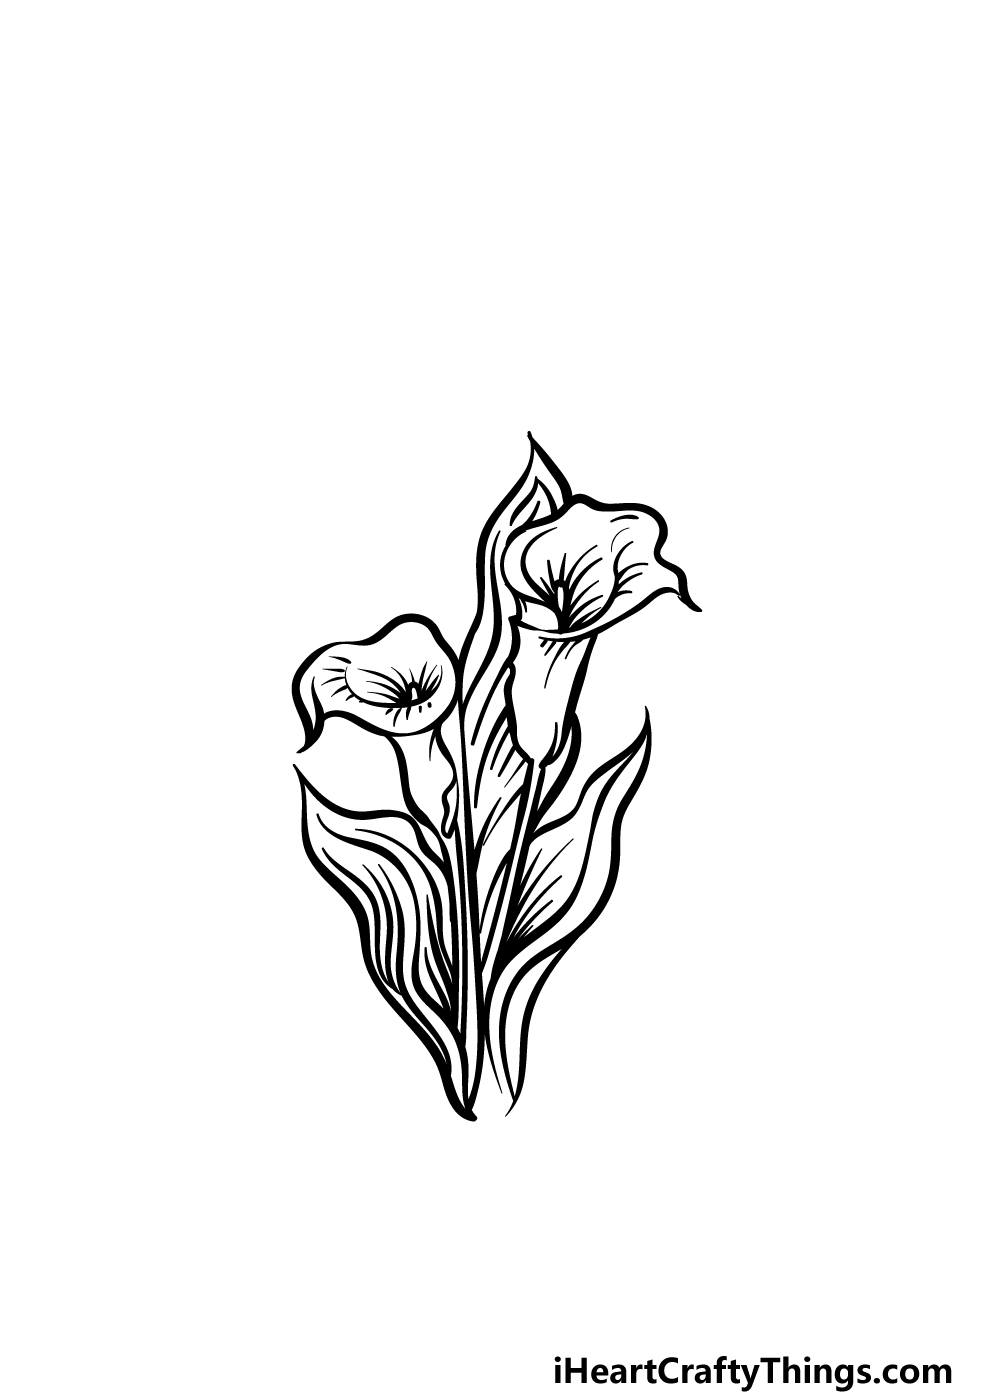
This step of your calla lily drawing will see you finishing off that leaf that you just started drawing before we move on to the final details in the next step.
To do this, simply draw the rest of the leaf in the same way that you drew the others earlier. That means using some curved lines for the sides and then finishing it off with a pointy tip on top.
Then we can move on to those final details in the next part!
Step 5 – Add the final flower to the drawing
For this fifth step of our guide on how to draw a calla lily, we shall finish it off by adding another flower for the picture.
This one will be the tallest of the lot so far. It will also have a small, wavy and pointy part sticking straight up the top of it, as shown in our reference image. Don’t forget to add the little interior details as well!
Once you have drawn this flower, you will be ready for the final step of the guide. You should also feel free to add some more details of your own as well.
You could draw a background, and this could be a great way to incorporate more lilies or maybe even some more flowers that you may love.
What can you think of to add to this amazing picture of yours?
Step 6 – Finish off your calla lily drawing with some color

Now you’re ready to properly finish off your calla lily drawing by adding some amazing colors to it.
This flower is known for its subtle, elegant colors, and that is what we went for in our example image.
We used some lovely soft greens and yellows to color it in, and you could go for a similar color scheme if you would like to make the image more muted and realistic.
You could just as easily use some nice bright colors if you prefer! It’s up to you, and this is your chance to show off how creative you can be.
Be sure to also change up the tones and art mediums that you use to finish it off. How will you color your wonderful artwork in?
Here’s how you can make your calla lily drawing even better…
Make this pretty calla lily sketch look even better with these tips!
For this calla lily drawing, we kept the focus purely on the flowers themselves. This includes 3 lilies, but you could add some more if you wanted to!
Now that you have learned how to draw a calla lily, you could make a bunch as big as you like. This would be a great chance to create the ultimate bunch of calla lilies!
How many would you like to add to this image?
If you want a beautiful bunch of flowers, you can also add different kinds of flowers instead. This would be a great way to make this drawing of a calla lily even more spectacular!
It would depend on which flowers are your favorites, but you could add any species you like.
Whether it’s roses, daisies or sunflowers, anything you choose will bring something incredible to the picture.
There are so many amazing flowers to choose from, so which ones do you think you will use for this picture?
In this calla lily sketch, we colored the flowers in a lovely soft yellow. A calla lily can come in a wide range of colors though, so you have many to choose from!
Some calla lilies can be purple, orange or even black! If you can’t decide which colors to choose, then maybe you could have a bunch of lilies and use a unique color for each one.
How do you think you will color this calla lily?
The final suggestion we would have for this calla lily drawing would be to add a background. You can find a calla lily in all manner of places, so you could create any kind of background you like!
It could be a themed background such as a wedding or a festival. Or, you may wish to show them growing in a pleasant garden.
It could also be as simple as in a pot on a windowsill. What are some other backgrounds you could use for this picture?
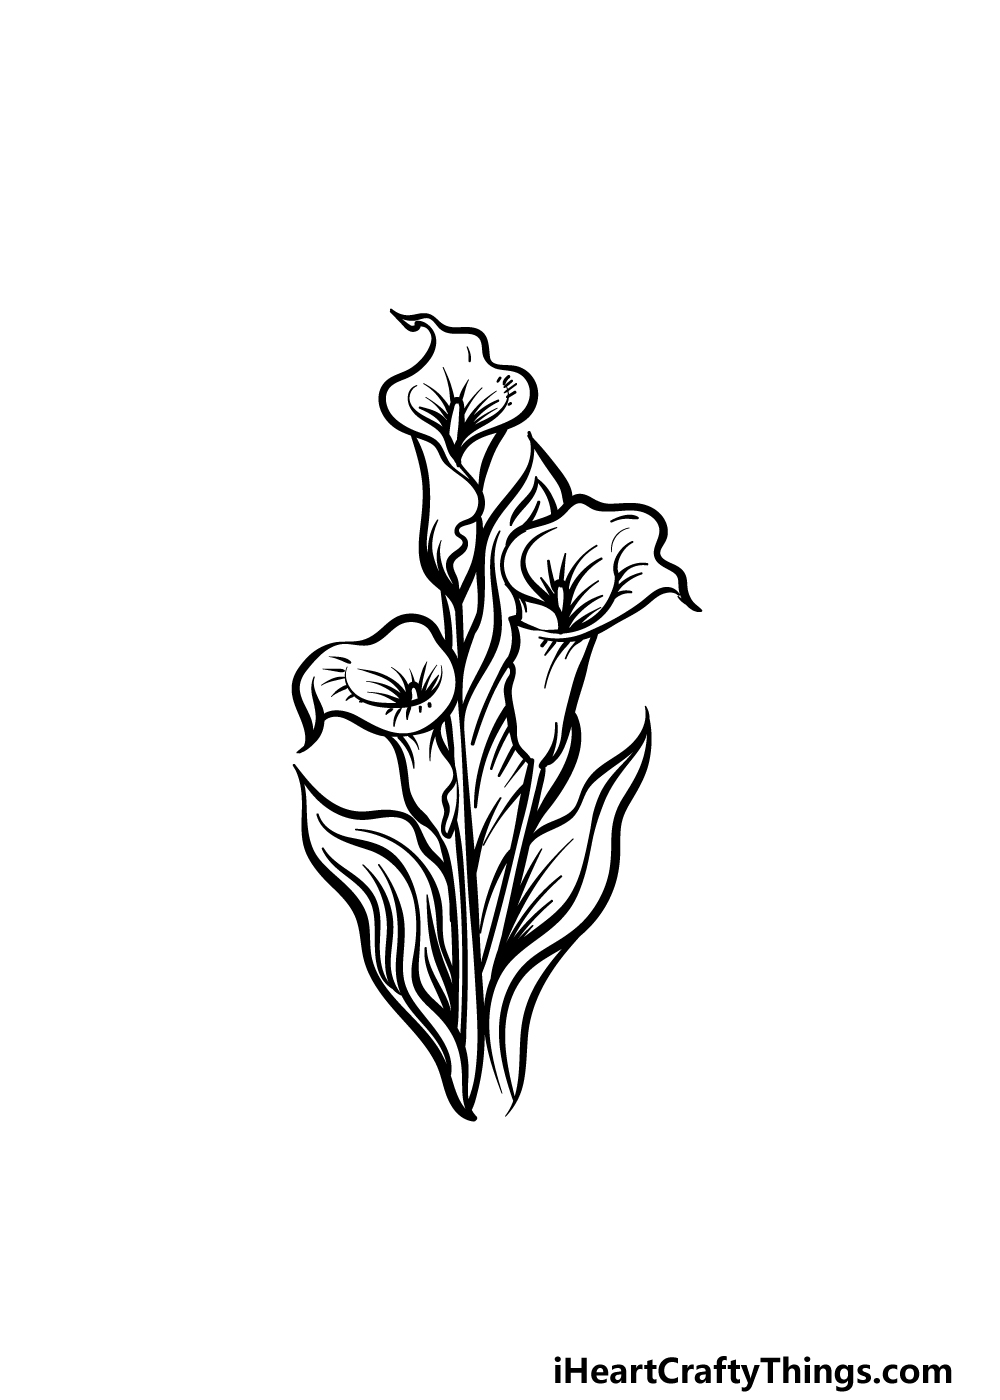
Your Calla Lily Drawing is Complete!
That takes care of all 6 steps in this guide on how to draw a calla lily! We wanted this guide to be as fun and easy for you to work on as possible, so we hope that we achieved this goal for you.
Drawings are always made much easier to do when you have some simple steps to follow, so if you follow these steps then you will get the hang of it in no time!
Don’t forget that you can also add your own details, backgrounds and color choices to further make this image your own. We can’t wait to see what you come up with!
We have a huge collection of drawing guides for you to enjoy on our website, so make sure that you check in often to catch each new one we bring out!
Please also remember to share your finished calla lily drawing on our Facebook and Pinterest pages for us to see and admire!