The letter Z is the twenty-sixth and final letter of the alphabet. Not only does it have to be the last letter, but it is also statistically the least used letter in the English language.
That doesn’t mean that we should ignore it, however! It still appears in a lot of words, and you can make some pretty cool designs with it too.
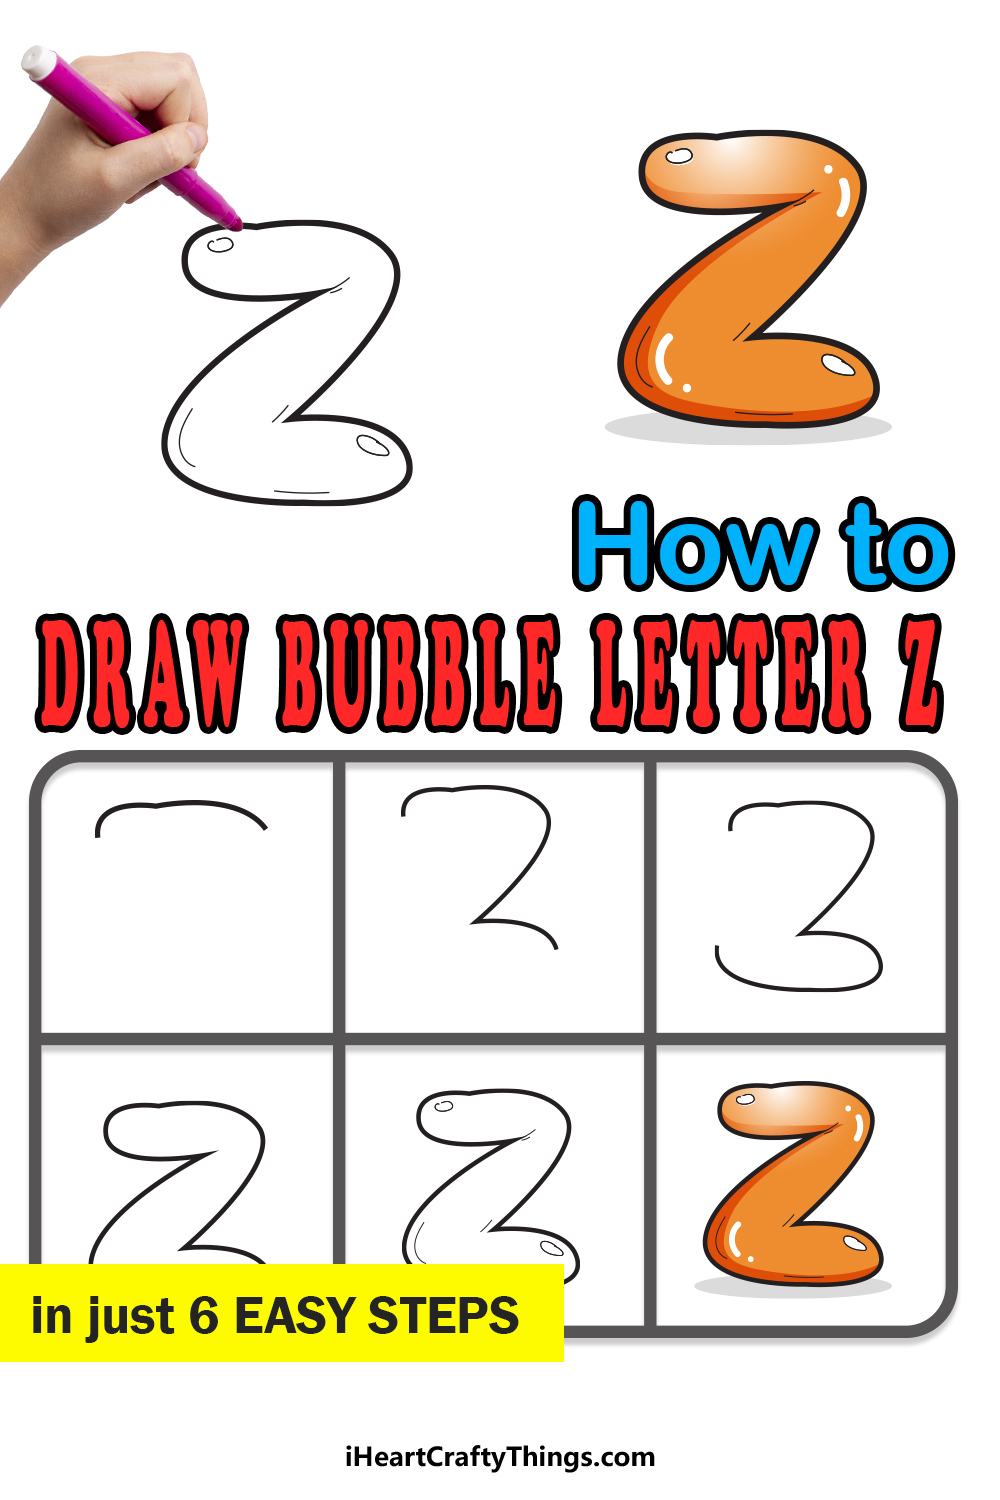
You probably know how to easily write a letter Z, but that’s not what we will cover in this guide. Instead, we will be learning how to draw a bubble letter Z.
We will accomplish this not just with how we draw it, but also with the details and colors we use. All this and more will be covered in the 6 easy steps of this guide.
Without further ado, let’s begin with step one of six which will show you how to make a really cool interpretation of this letter.
Let’s Get Started
STEP 1:
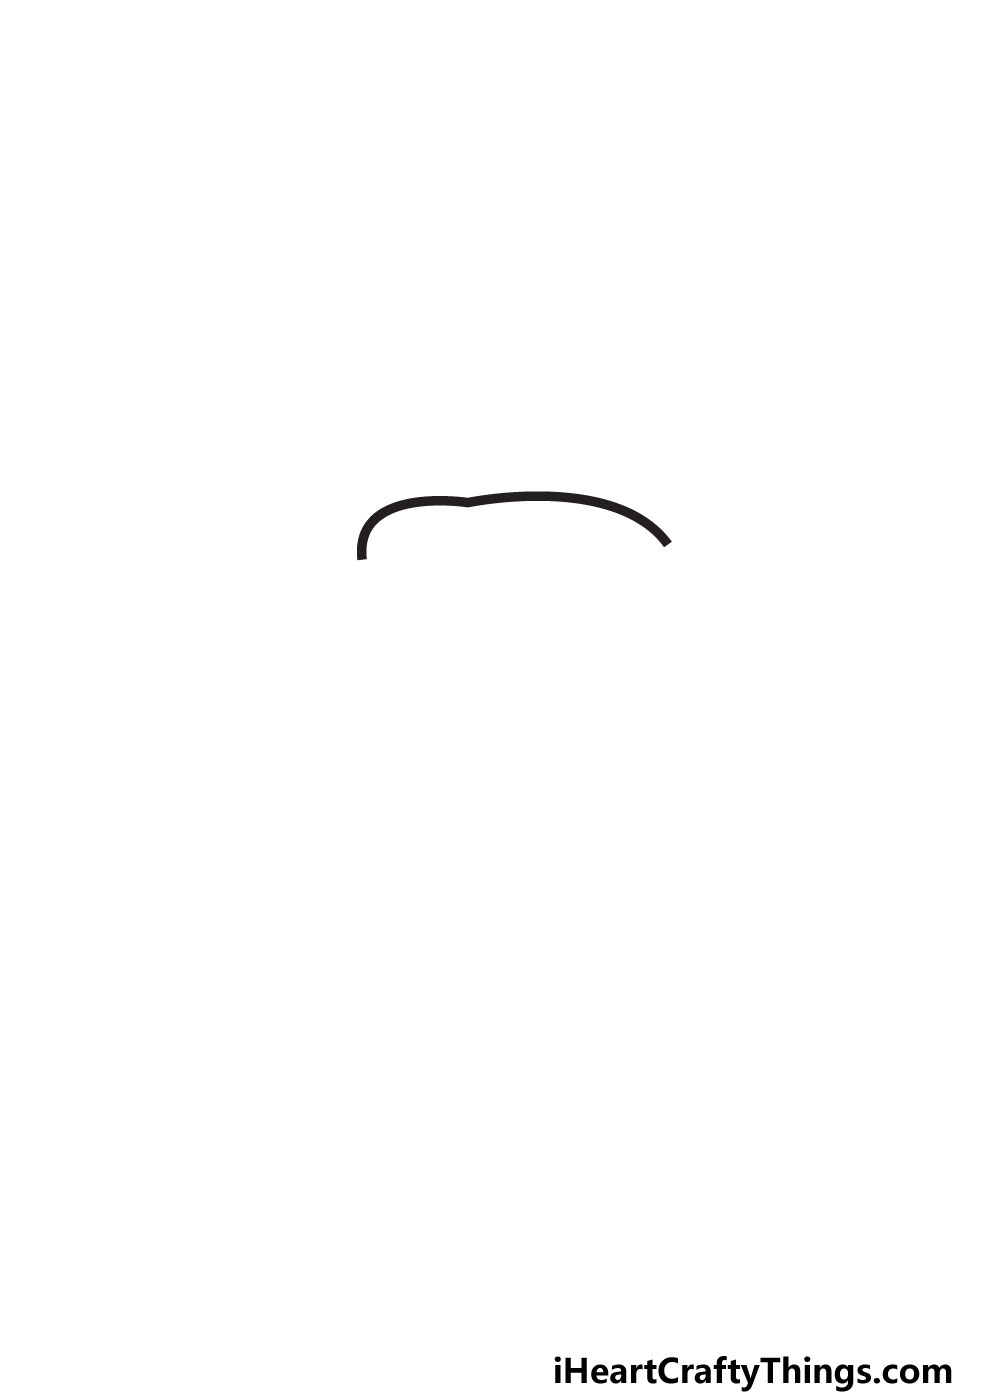
When picturing this letter we will be drawing, try to think of a long balloon. Then, think of it folded twice to make the shape we will be drawing.
When writing the letter Z, it’s a pretty straightforward process of three zigzagging letters. However, in this bubble form it becomes a bit more complicated.
We would suggest taking a pencil and writing out a big Z as you normally would when writing it. This will make building a bubble version around it much easier.
Then, we will draw the top of the letter. You might be surprised to see that we don’t use a simple curved line for this part.
Instead, there is a bit of a dip in the line, which will help to make it look like a bubble or a balloon. As we will see shortly, this first line will be the very top of the letter.
Once you have drawn this line just like we did, we can move on to step 2 where we will add more to it.
STEP 2:
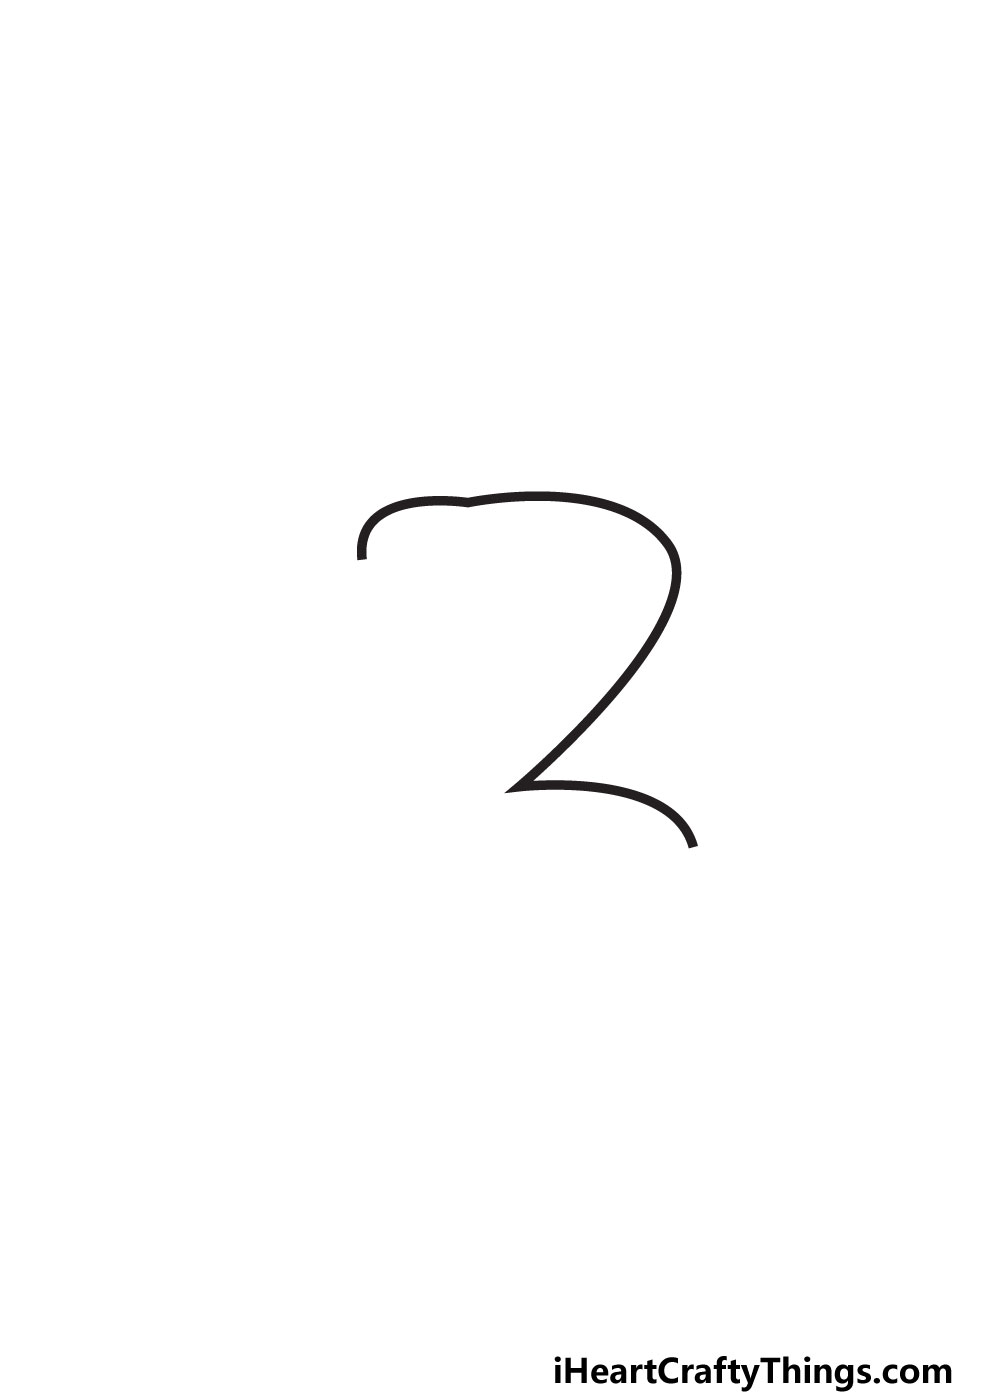
If you wrote out the letter Z before starting, you will be glad you did now, as this is where it starts to get tricky.
Even though it might be a bit trickier, there’s no need to worry as you merely need to follow our reference image.
This second part of the letter will begin where the previous one ended. The line will continue and curl down and to the left.
It will end at a pointy bit, and then it will sharply curve to the right. This is definitely a bit harder than the first step was, but just try to replicate it exactly as it appears in our example.
Take your time with it and draw as slowly as you need to, it’s not a race! When you’re ready, we will continue to step 3.
STEP 3:
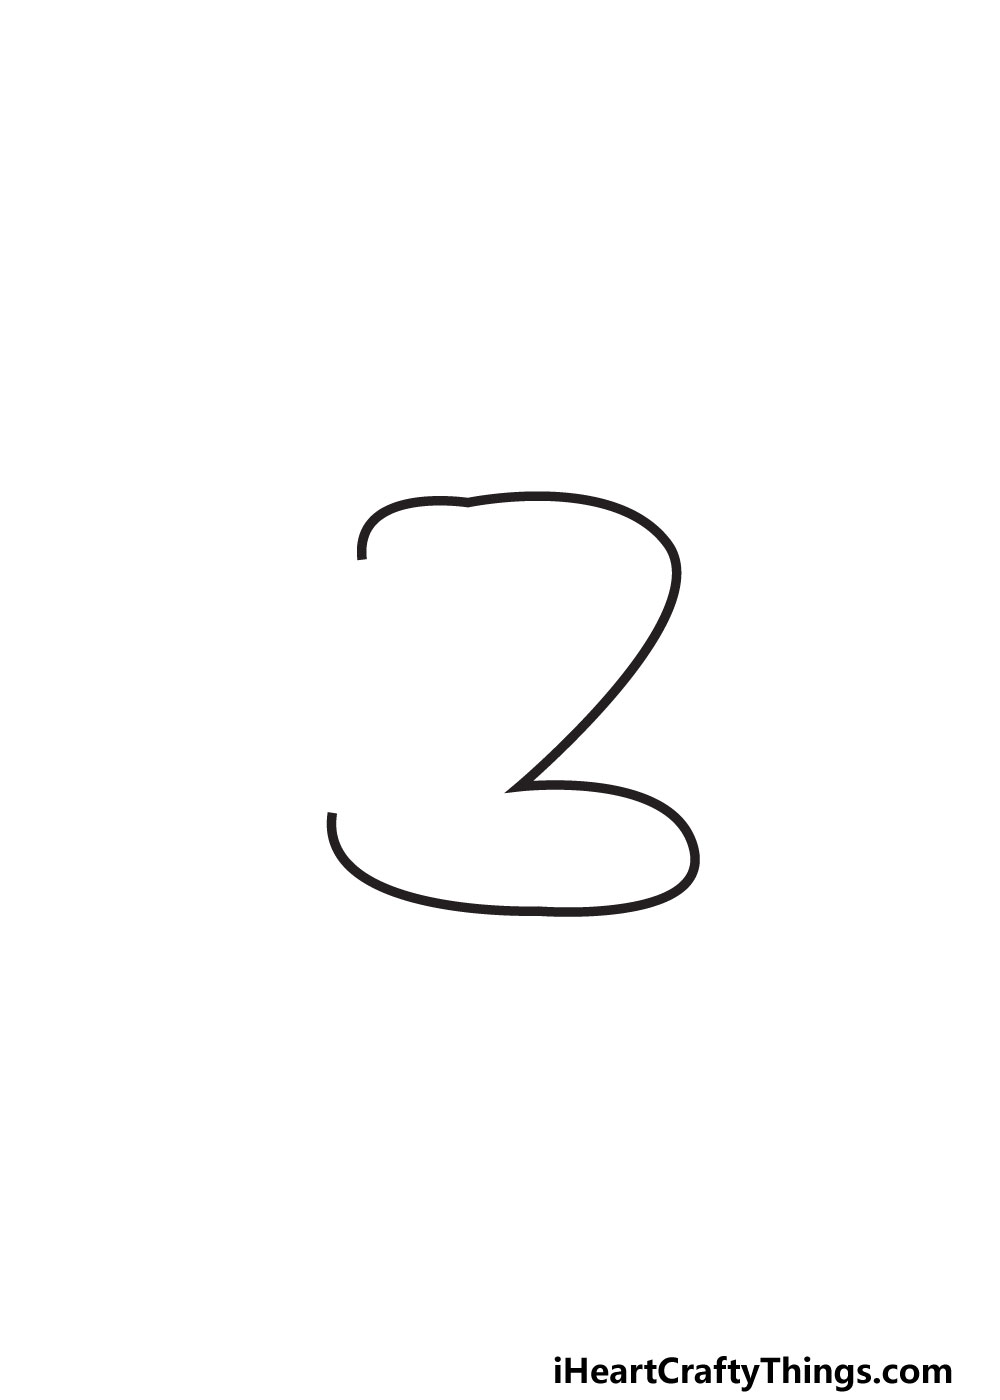
The third step of your bubble letter Z will be easier than the previous one. In this step, we will be drawing the base of the letter.
So there will be no fancy zigzagging needed, at least not for step 3! Once again, this new line will begin where the line from the previous step ended.
Simply draw a nice curved, horizontal line to form the base of the letter Z. there will be a fairly large empty space left on the left side of the letter now.
In the next step, we will be drawing quite a bit more to finish off the outline of the letter, so make sure you’re ready before moving on!
STEP 4:
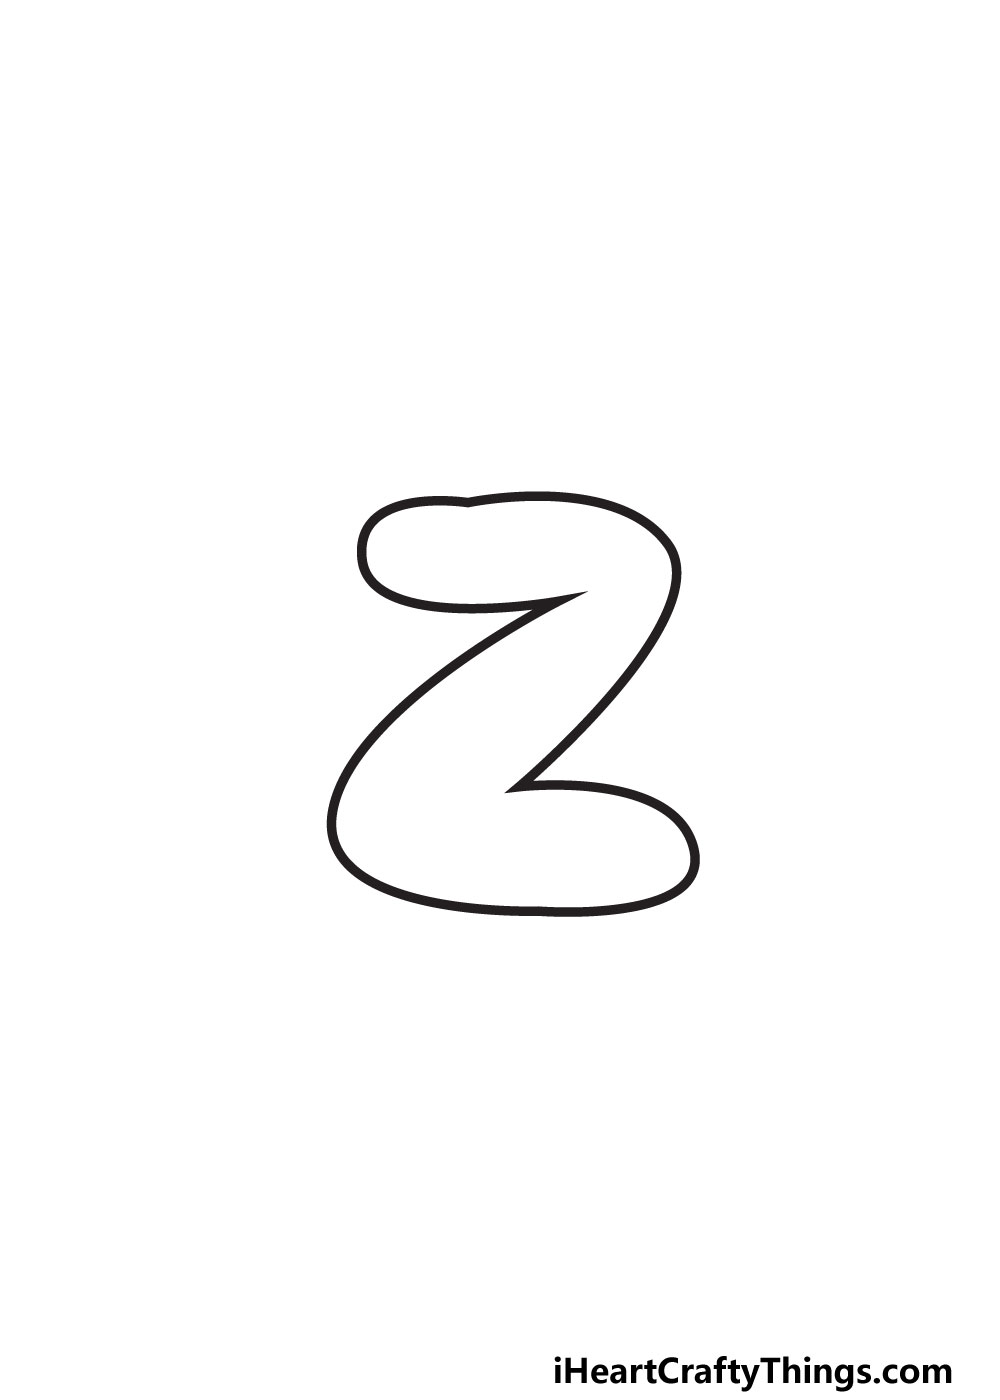
In the previous step, we mentioned that we will be finishing off the outline of the letter in this step. And that is exactly what we will be doing!
This is another involved step like step 2, but once again you merely need to follow the guide and take it slowly as you draw.
We will begin this final section where the base line ended earlier. Draw a curved line angling up in a slope. Once again, this will end in a pointy tip.
There will be just one more curved line needed now, and it will fill in the final gap. With that, your outline for this letter is complete!
The hardest parts are over now, and step 5 will be about adding some final touches. Before you do that, be sure to erase your pencil guides if you used them.
They were only there for the outline, and we will be focusing on the interior next. Let’s head on to that step and see how we can make this look more like a bubble.
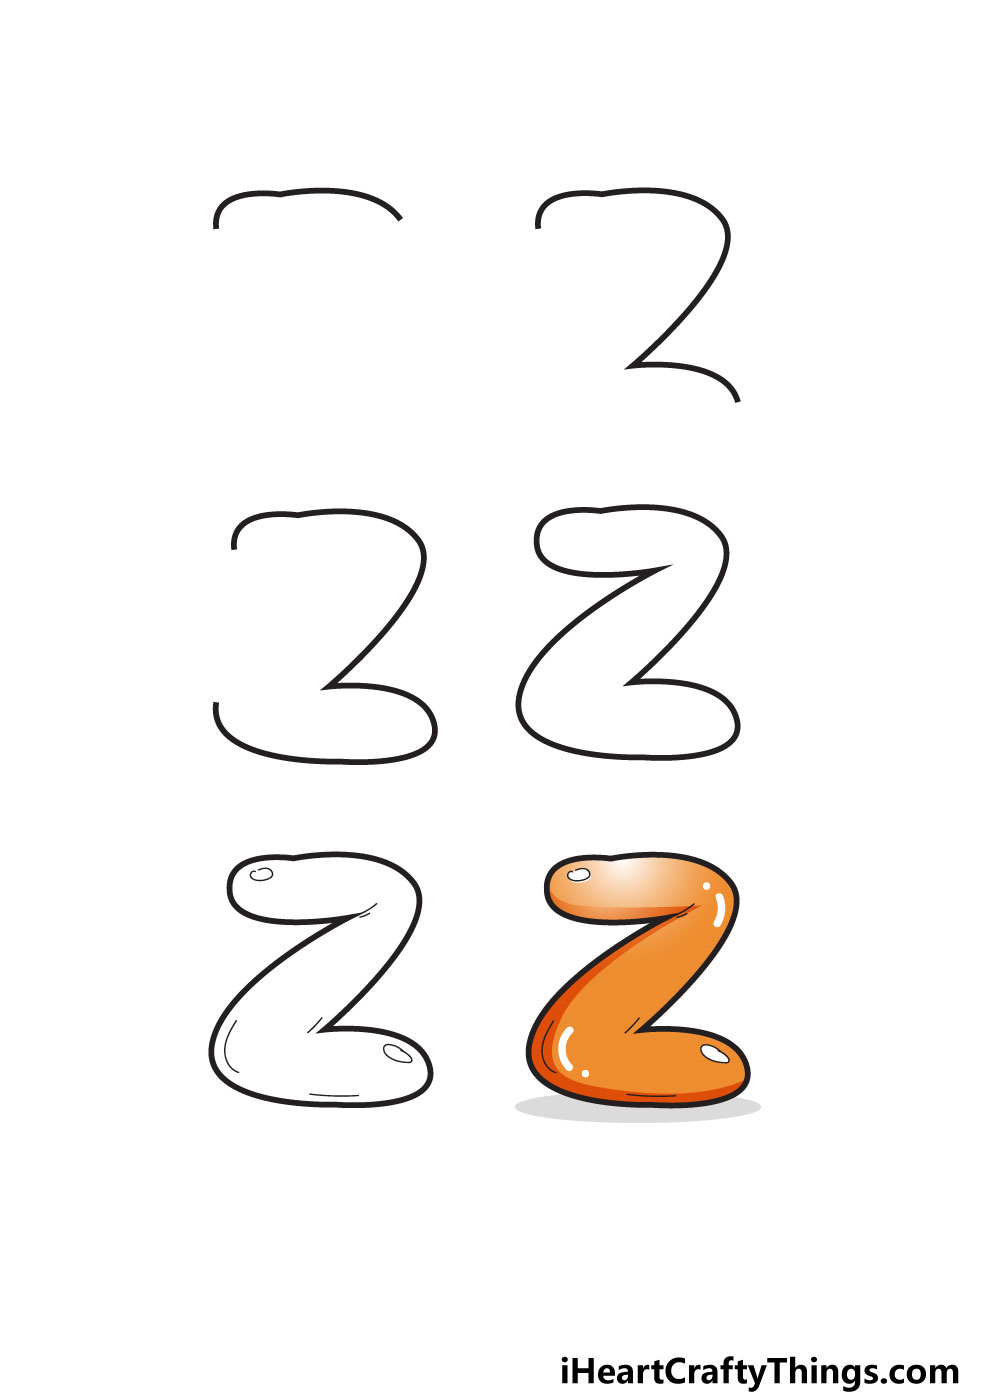
STEP 5:

Earlier in the guide, we suggested imagining this letter as a long balloon folded over. If you imagine a balloon again, you will know that they tend to reflect light.
This is the first little trick we will use to make this letter look more like a bubble letter. To do this, we will add two small ovals to the letter.
These will make it look like light is reflecting on the letter. Then, we will make it look like this is a bubble or a balloon by making it look like it is inflated.
This part will be done by drawing some thin lines along the interior outline of the letter. You will see in our reference image that we kept these lines quite restrained.
They will also show where the stuff the letter is ‘made’ of would bunch over when bent. These tricks are simple, but you can see how they make the letter look more alive!
The final way we will make it look more 3D will be in the sixth and final step. Before we proceed there, you can add any other fun details or alternative looks you like for the letter.
STEP 6:
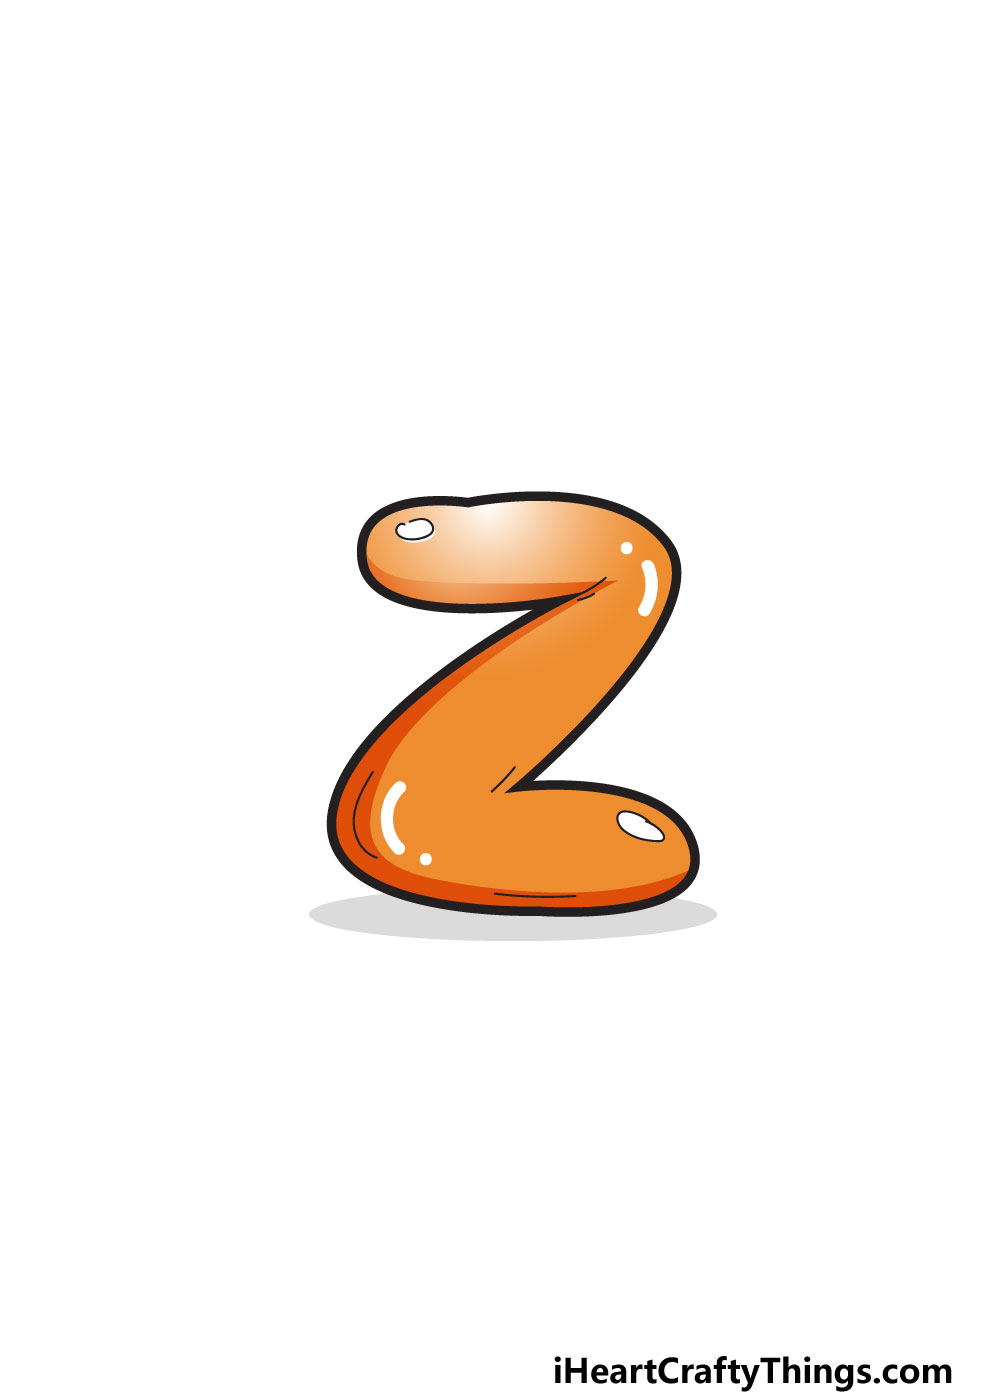
Who doesn’t like to have some fun coloring in a picture? There were some twists and turns in drawing this image, so some relaxed coloring fun will be a great way to relax.
In our reference image, we showed you the color scheme we would choose for the picture. We decided to go for a warm orange color scheme.
You can use the same color scheme if you like the color orange! Otherwise, you can choose any other color you like.
Even if you use a completely different color choice, try to look at how we colored in the letter. You will see we didn’t use just one flat color.
Instead, we varied how light and dark the shades of orange are. The colors are lighter closer to where the spots of reflected light are on the bubble.
This gradient of light and dark colors can really help to make your drawing look less flat and more like and object with depth.
You can achieve this effect no matter which color you choose! Of course, you don’t have to stick to just one color.
You could fill the letter with as many colors as you like! So now our question is which colors do you think would best suit this drawing?
My Final Tips To Make Your Bubble Letter Z Drawing Even Better!
Drawing is all about being creative, and that means letting your imagination run wild! We will give you a few tips on ways you can make your bubble letter Z even more creative.
When it comes to bubble letters, we always like to think of words that start with the letter. We don’t have as many options with Z as other letters, but there are still a fair few!
Some words would be zebra, zoo or zipper. There are many more you could use, but let’s stick with zebra for now.
This would make a great theme for the drawing! Here are two ways you could incorporate zebra.
One would be to color the letter with black and white zebra stripes. Or you could write out the rest of the word zebra and then draw a cartoon zebra beside it.
These are some fun and simple ideas, but you see how you can turn the design into something else by using a theme.
Another way to create a theme is by using a name that starts with the letter. There are names like Zoe or Zack that come to mind.
Can you think of anyone that has a name starting with Z? If you can, then why not try writing their name in all bubble letters?
If you know them personally, then you could gift them your artwork for a fun surprise!
What are some other cool ideas you could use for this drawing?