W is the twenty-third letter of the alphabet, and it’s a fairly common one. Strangely, it sees the combinations of a few different letters.
We pronounce it double u, and it looks like two letter Vs stuck together. That can make things confusing, but it’s a fairly easy letter to learn how to write.
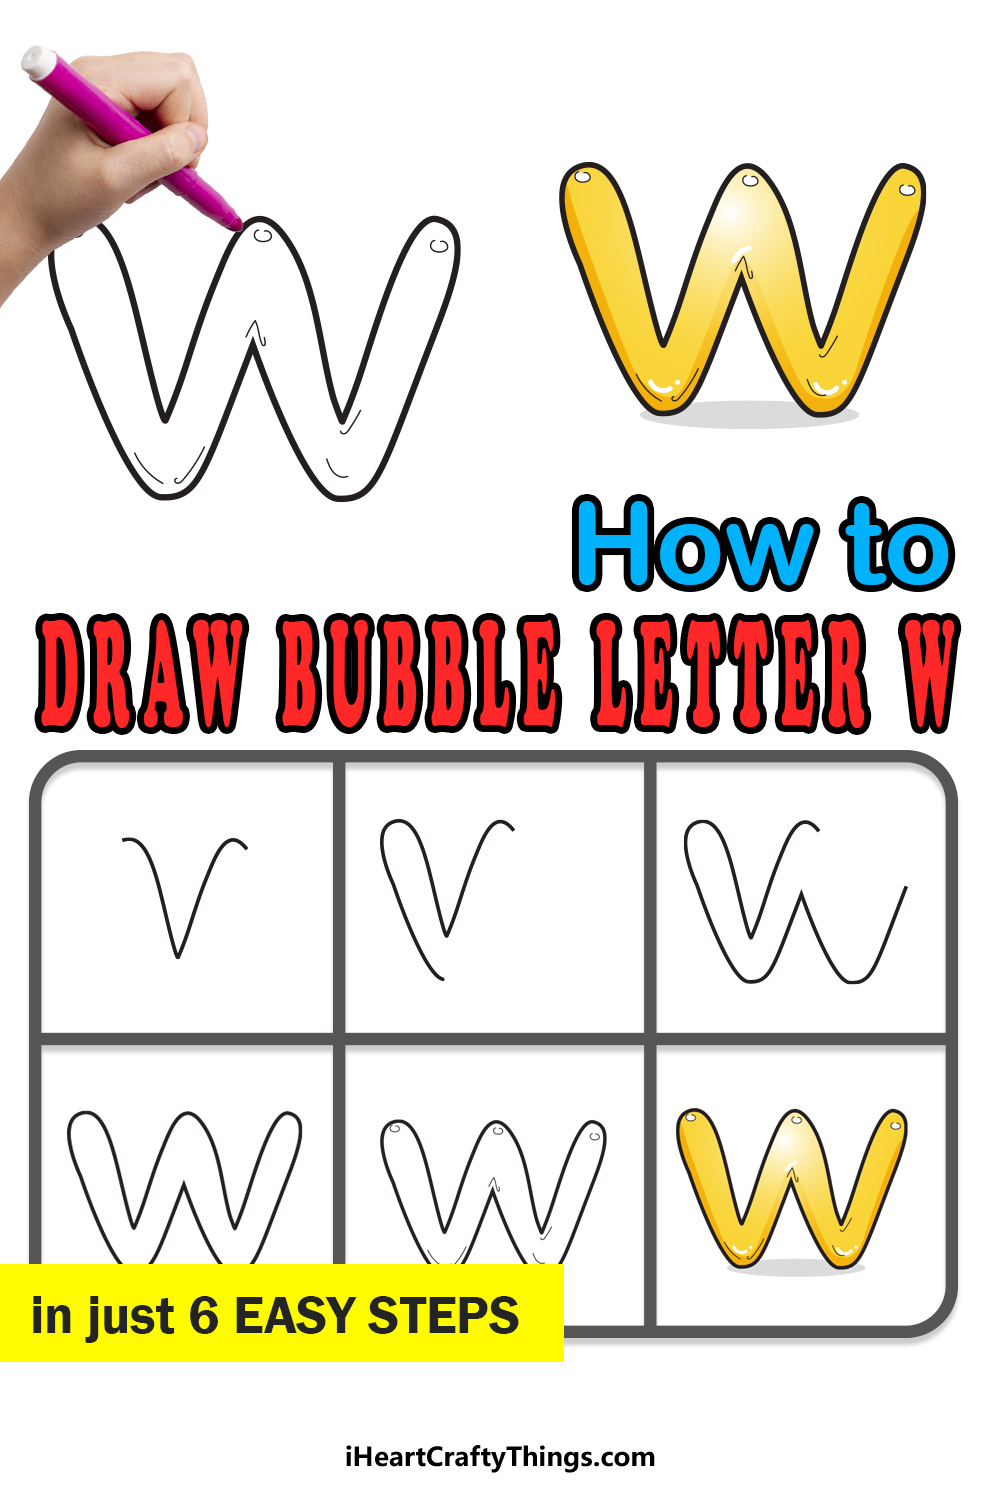
While it’s easy to write, it can actually be quite tricky when drawing it in other styles. In this guide, we will be covering how you can draw a bubble letter W.
It may be a bit tricky, but we have 6 fun and easy steps that will guide you through the process and show you how easy it can be.
Not only that, but we will look at a few ways you can color in your creation along with some other fun ideas to try out.
Let’s create a winning picture by checking out how you can draw this bubble letter!
Let’s Get Started
STEP 1:
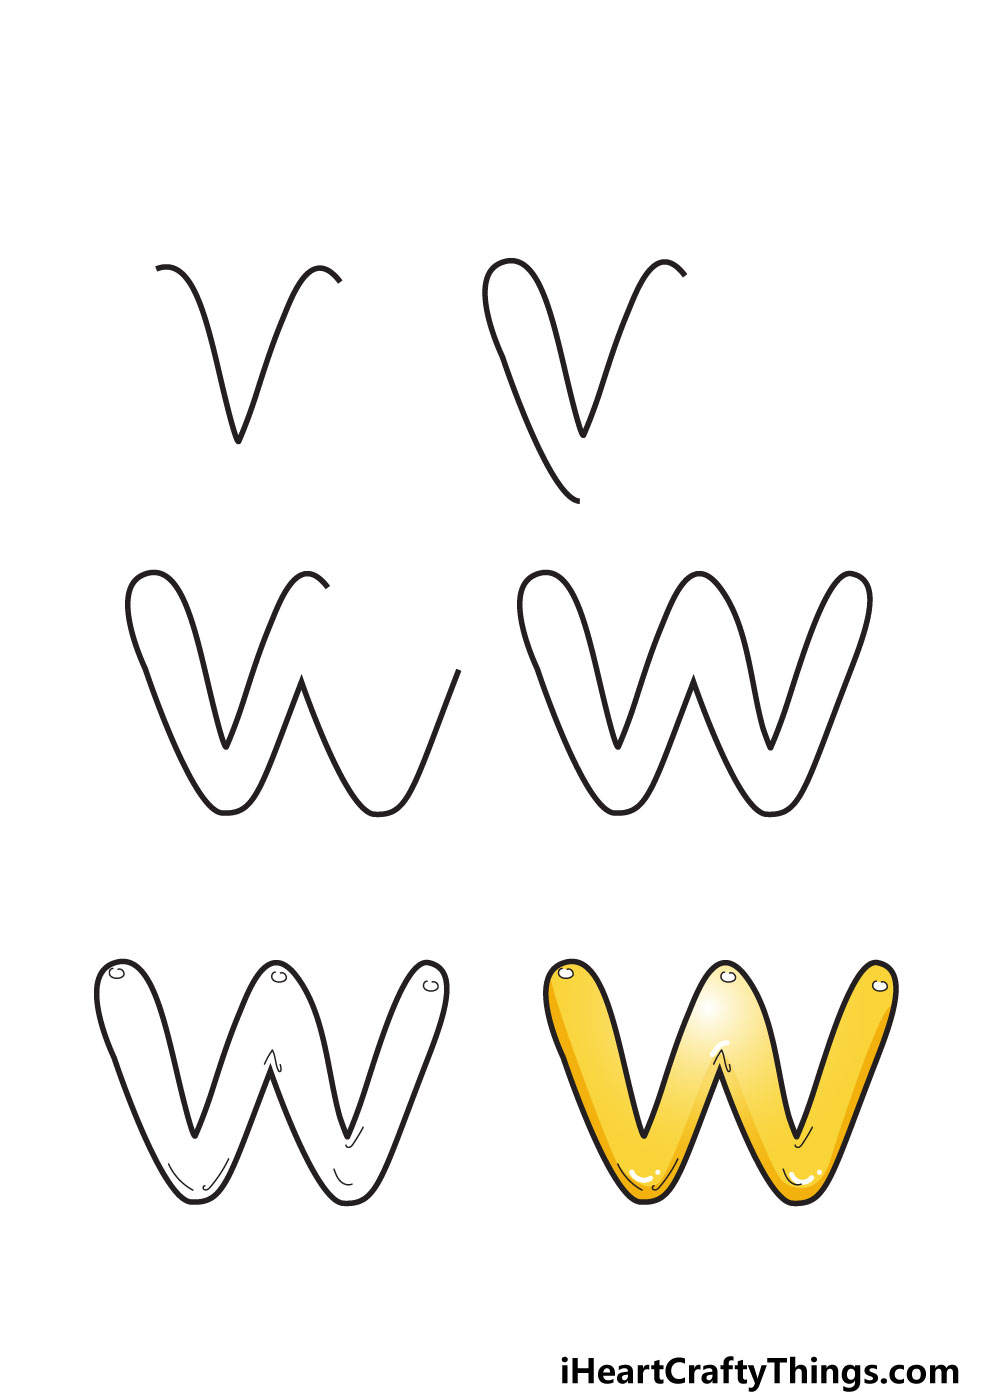
Whenever we are learning how to draw any bubble letter, we always like to map it out first with a pencil. This can be a good idea when the letter is simple, but it’s even more recommended when it’s a complex design.
That’s why we would definitely recommend that you do that with this letter. You can draw out a large W in pencil, and for now it can be designed how you would normally write it.
As we follow through the guide, we will build the bubble version around it. Whether you draw this guide or not, we can draw the first lines of your letter.
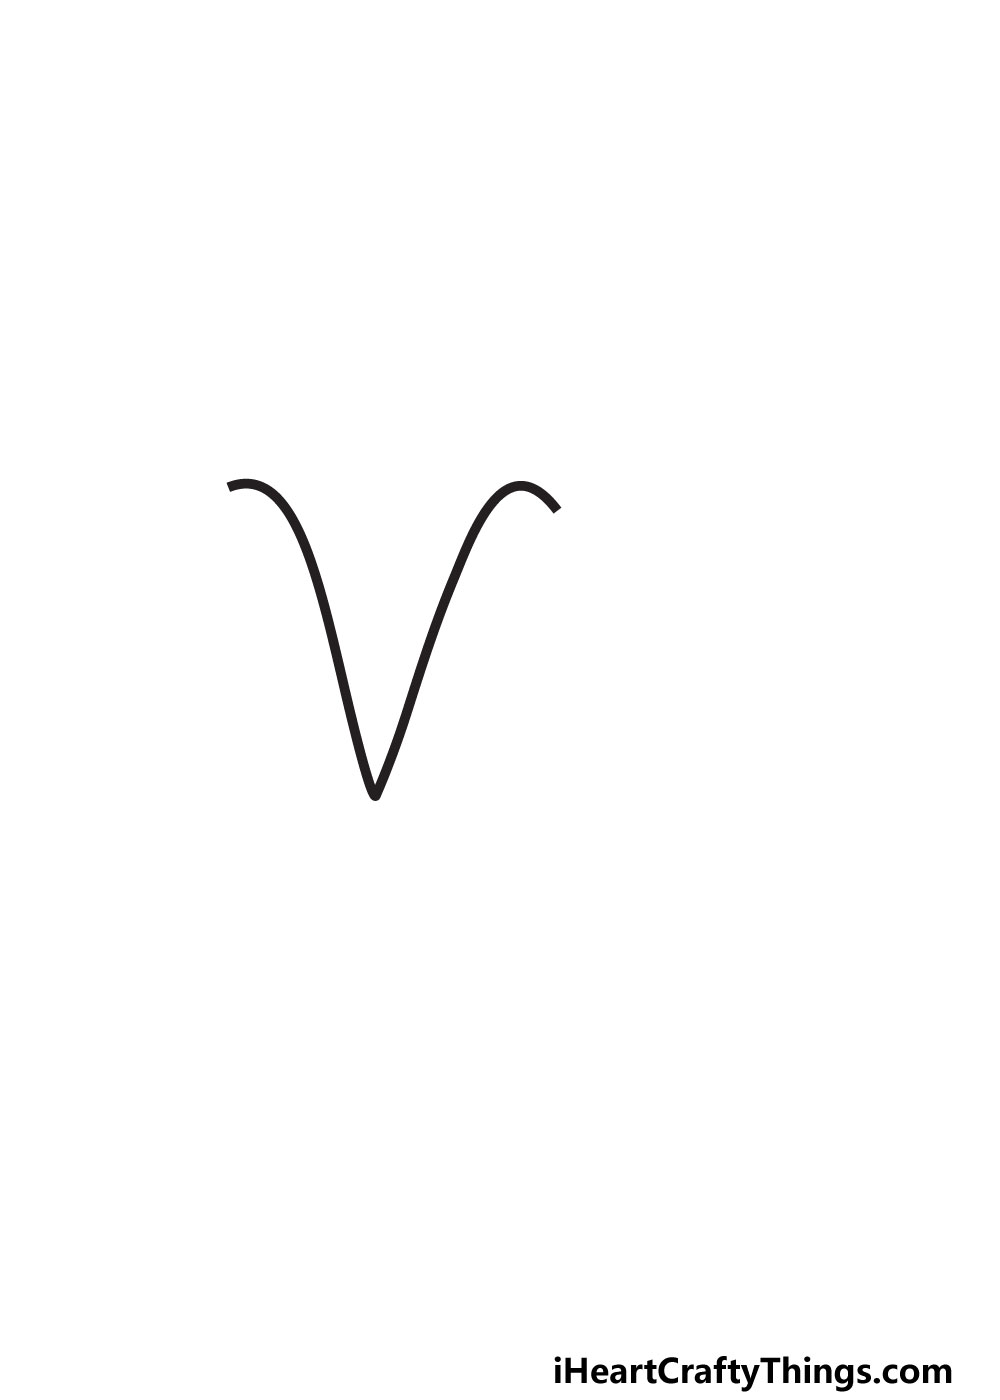
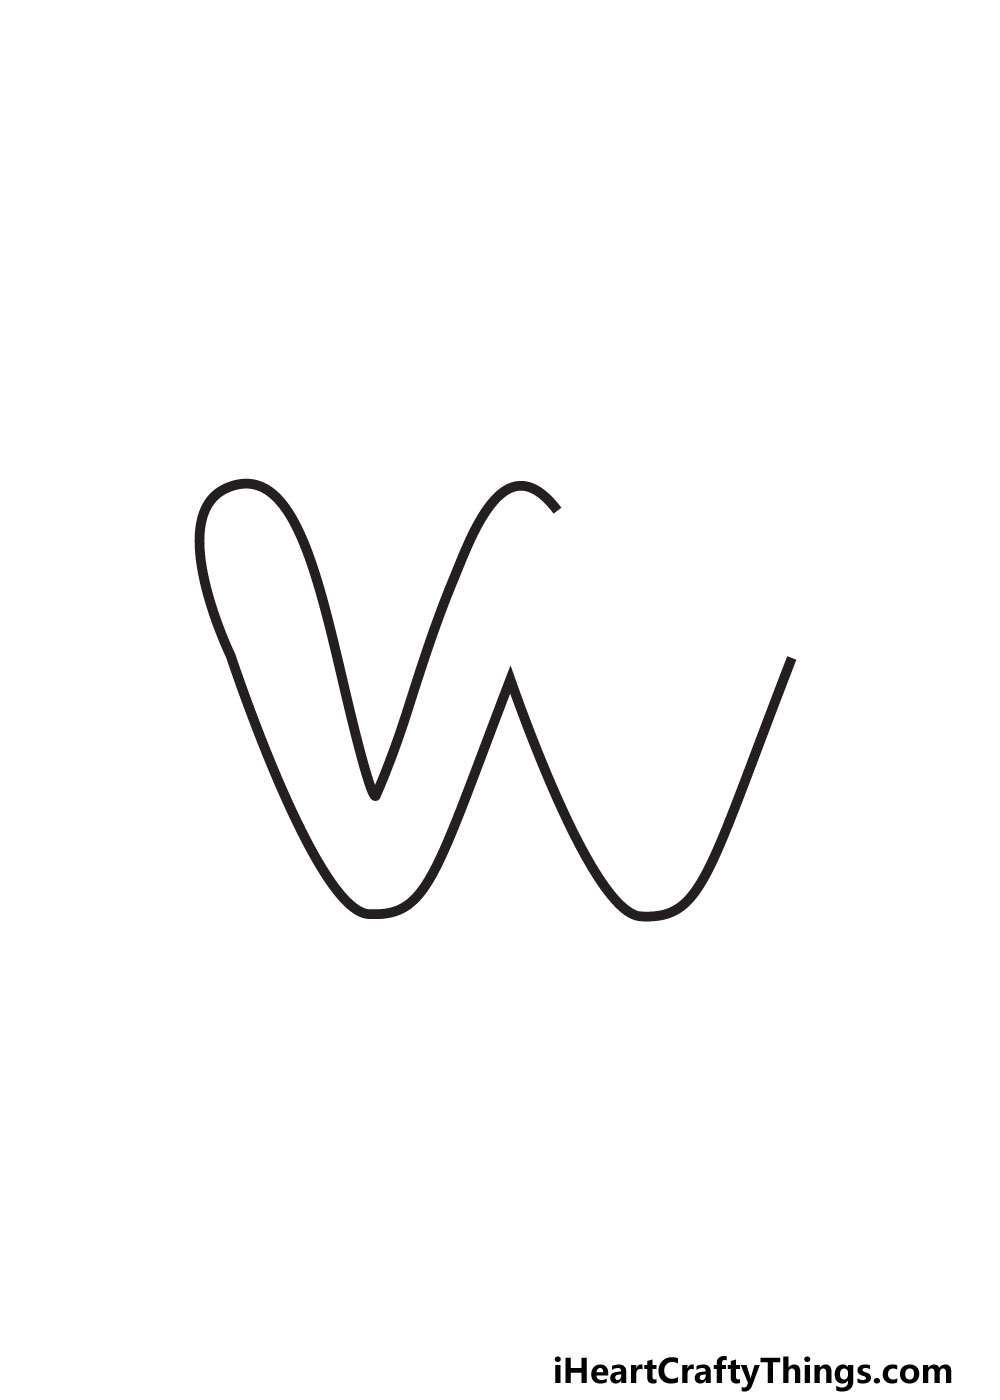
Earlier, we spoke about how this letter looks like two letter Vs, and we will draw the V on the left first. To do this, we will be drawing a bit of a V shape with curls at the top.
The reference image will show you how this should look, so try to replicate that as close as you can. Then, we can continue to the next step where we will add to the design.
STEP 2:
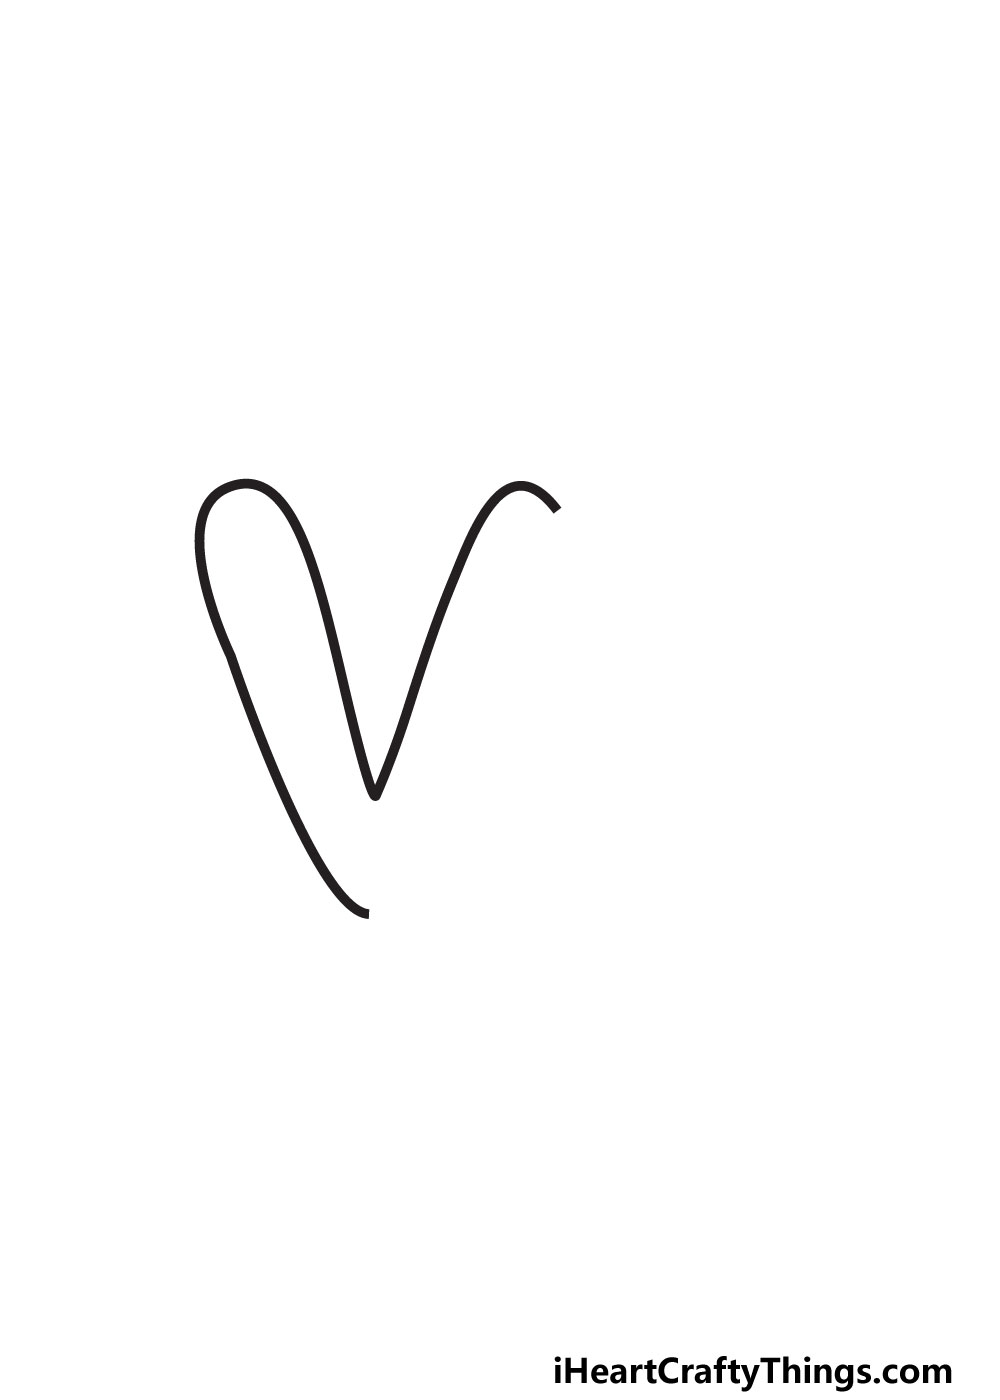
Next, we will be drawing the left hand side of the V shape that we started in the previous step. This next line may look easy, but it can be trickier than you think!
When drawing a longer line, it can be easy to let your hand move in a wavy way accidentally, and this can be even more likely if you rush it.
When you extend the line we started in the previous step, try to take it slow as it curves slightly down. At the base, it will curve very slightly to the right.
Now, we can start to see one half of the W take shape, but we still have a ways to go! When you’re happy with how this step looks, we can move on to the next one.
STEP 3:
In this third step of the guide, we will not only finish off most of the V on the left side of your bubble letter W but also start the one on the right.
Where the line ended in the previous step, we will create a gradual slope moving up. At around the mid-point of the letter, this will angle sharply down again.
This will head down until you hit the base of the letter, and then it will curve up again. Now we can see the beginning of the second V forming, so we’re getting close to having a complete outline.
In fact, we will be finishing off the outline in the very next step, so let’s go ahead and do that as soon as you’re ready!
STEP 4:
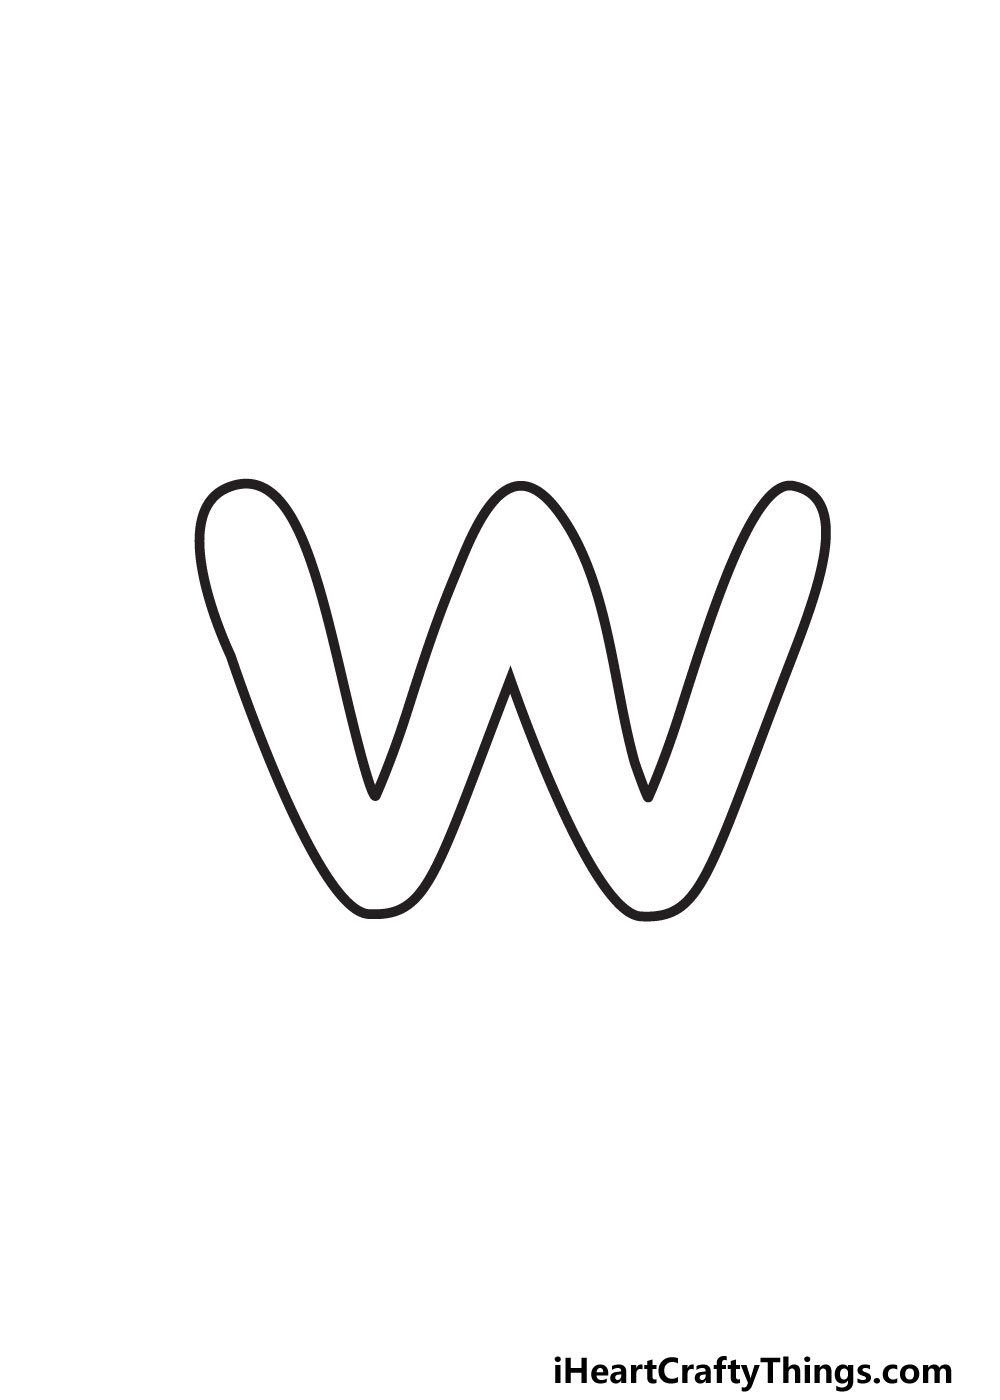
As we mentioned in the previous step, this one will be where we finish off the outline of the W. This will be done by drawing the rest of the second V we began in the previous step.
The line on the far right of the letter will rise up a bit more before it has a small curve. Then, it will head down toward the mid-point once again.
Finally, it will slope up from that mid point until it reaches the other line. With that, your outline for the letter will be done!
When you break down a drawing into smaller steps like this, it can make some of the points where the lines joined not as smooth as they can be, so you can neaten up any of these points before moving on.
Also, now would be a good time to erase any pencil lines you drew as a guide for your drawing.
They were mainly there for the outline, and so we won’t need them anymore.
The next step of the guide will be about adding some interior details to the drawing, so let’s go ahead and do that.
STEP 5:
Your W drawing is already looking really good, but something seems to be missing still. Right now, it looks a bit flat on the page.
We definitely want it to look more like a bubble or a balloon, and luckily we have a few ways to do that. The first ones will be done in this step, and we will finish off the effect in the next.
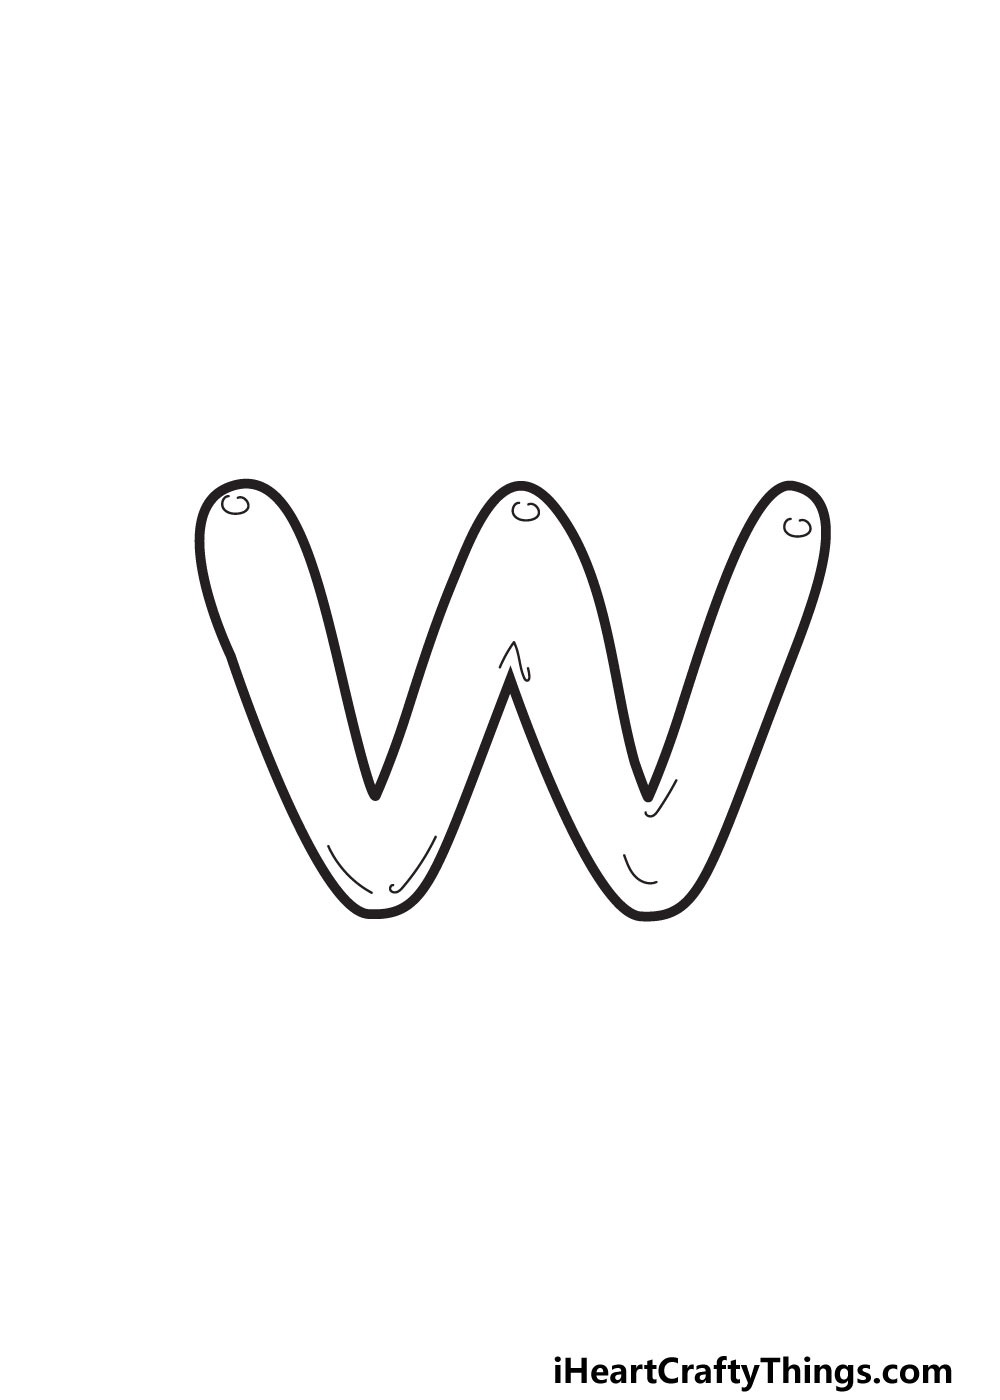
For now, let’s start by drawing some reflective spots on the letter. These can be drawn with some simple small circular shapes on the top tips of the W.
These little shapes will make it look like a light is shining down and reflecting on the letter. Then, we will add some small thin lines inside the outline.
They will go quite near the outline, and these will make it look like the letter is filled with air. As you can see, these details are simple yet effective!
This is how we chose to draw these details, but you can change them up a bit if you want it to look a bit different.
You could also add some additional details of your own! These could be some fun patterns or other unique details on the letter.
Once you have added any details you want, we will then add some colors in the final step.
STEP 6:
Earlier, we mentioned that there are a few ways to make your drawing look less flat on the page. In step 5, we started this with some details, and now we will do it with color.
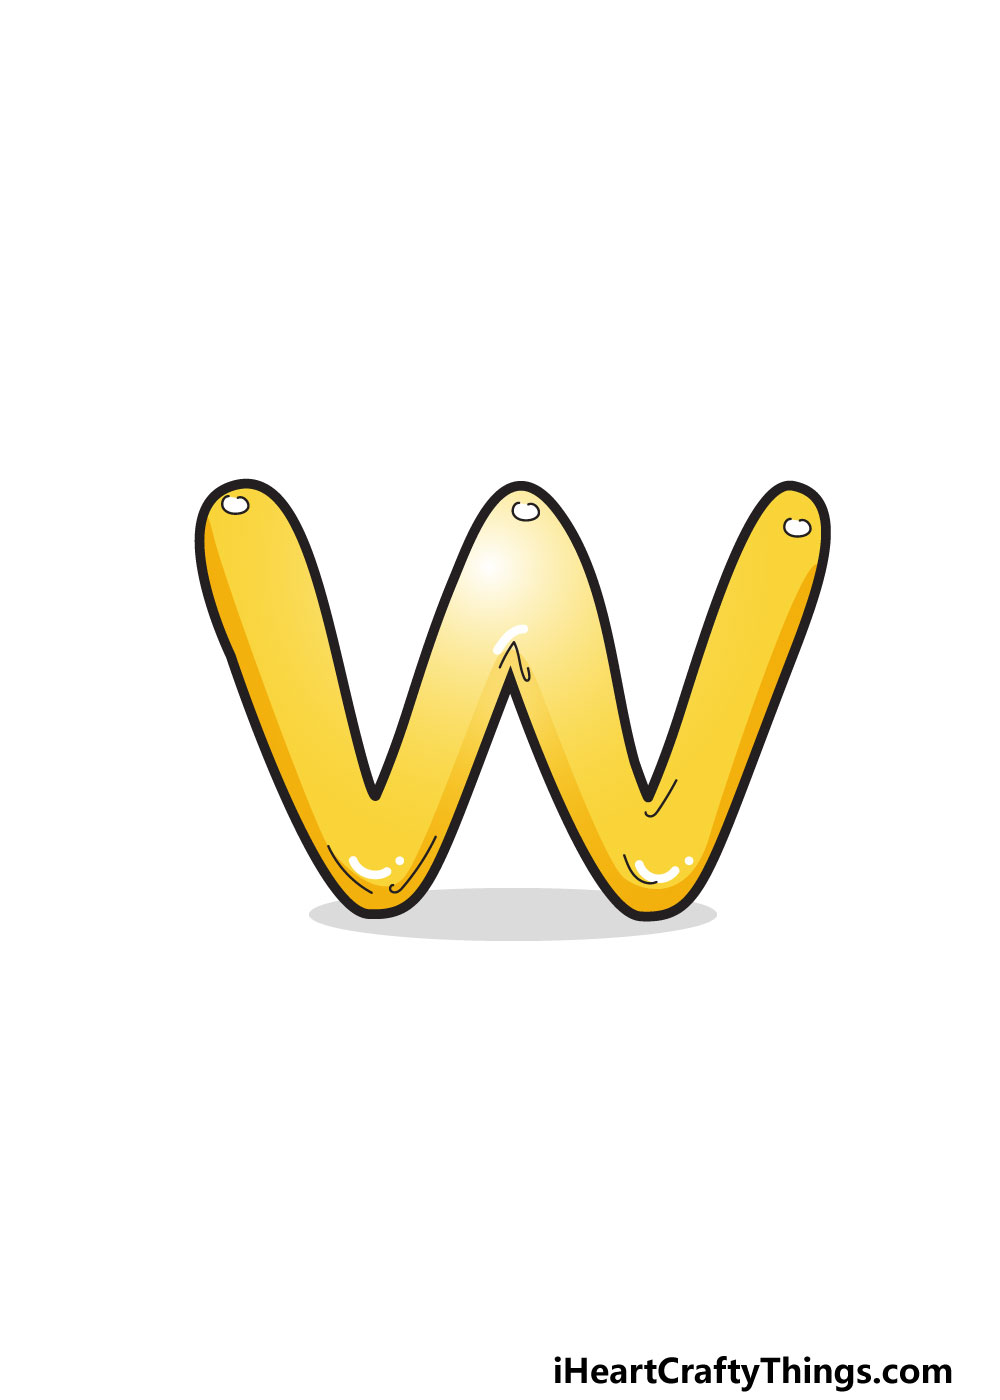
We chose a yellow color scheme for our example, but this would work no matter what color you choose. The trick is to use both light and dark shades of your chosen color.
The darker shades will fade into lighter ones, as shown in our reference. The colors will be the lightest where the reflections are.
Even if you choose a different color scheme from ours, try to replicate how we applied the colors in our example. These colors will make it look even more like a 3D object.
Certain art mediums will make this easier, such as acrylic paint. Of course, if you’re not as concerned with the 3D look you could make the colors more solid.
Or, you could include lots of different colors instead of sticking to just one color scheme! There are so many different ways to bring color to your drawing, so what will you choose?
My Final Tips To Make Your Bubble Letter W Drawing Even More Special!
This bubble letter W we created in this guide had some tricky moments, but you did an amazing job on it!
We also had some fun with colors, but there are more ways to have a great time working on this letter.
When creating art with letters, it’s always tempting to incorporate words into the design. So, we can start by thinking of some words that begin with W.
Some examples that come to mind would be walrus, watermelon or whale. If you think about it, the two Vs of the letter W look a bit like walrus tusks!
So, you could incorporate this by making a cartoon walrus face with the W that you drew. Or, you could make it look like the letter is made out of watermelon.
These are a few suggestions, but there are so many creative ways you can play with this letter. You could also spell out names that start with W in this style.
There are names like Walter, Wendy or Wayne that you could write out. This would be especially great if you know someone who has a name starting with W!
Can you think of other fun ideas that you could try out with this drawing?