Q is a letter that we don’t use all that often in the English language. In fact, it is one of the least used letters according to how often it appears in words in the dictionary.
It is a bit of an unusual-looking letter, and its lower and uppercase versions differ quite drastically from one another. Learning to write the letter Q is not too difficult, but what about drawing it?
Drawing it in a fun bubble style can be quite tricky because of the line that pierces it, but it’s easier if you know what to do.
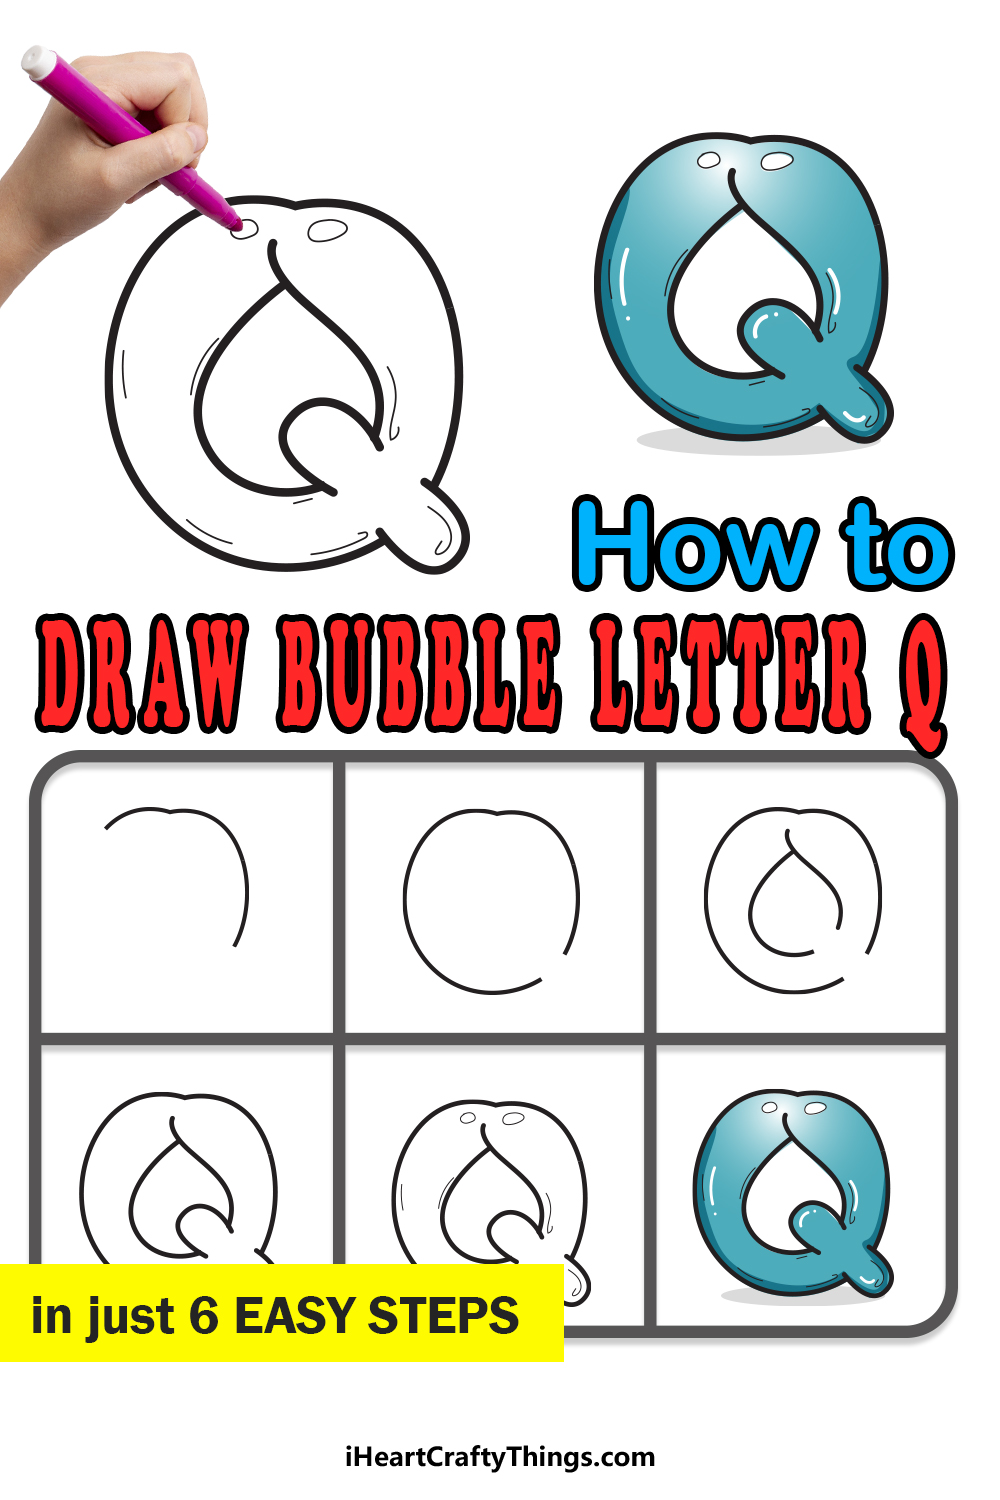
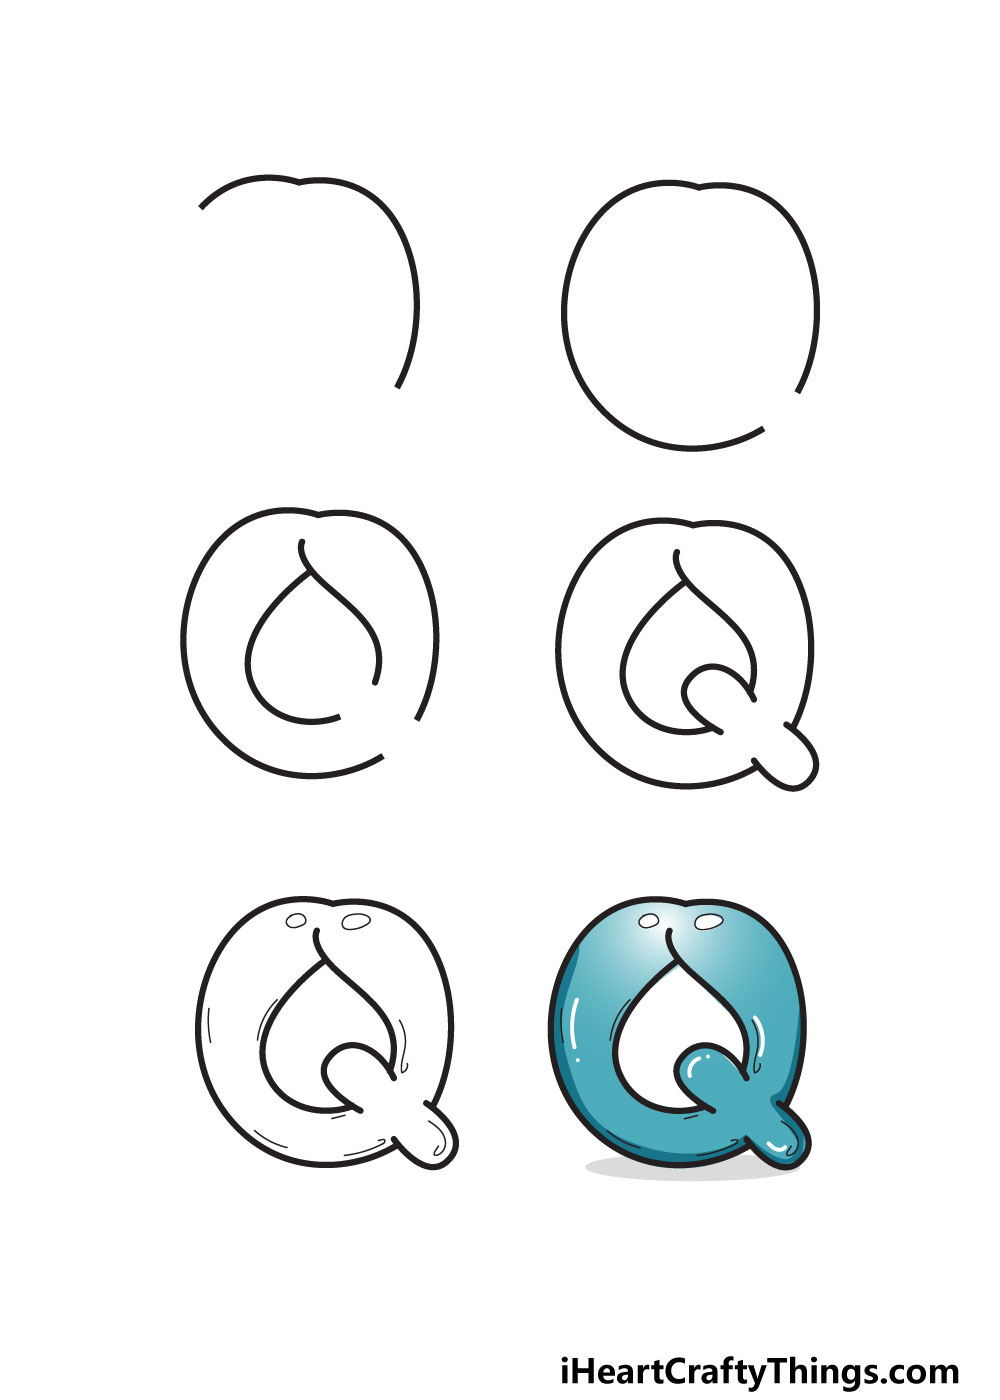
In this guide, we will take you through 6 steps that will show you how to draw a bubble letter Q. We will also cover some ideas for coloring and adding to the design to really make it your own!
Let’s Get Started
STEP 1:
When we learn how to draw bubble letters in general, we always recommend drawing out the letter in pencil before beginning.
We would especially recommend it for this letter, as it can get quite tricky to draw. Simply take a light pencil and draw a letter Q the same way you would write it normally.
Remember to keep in mind how large you would like the final letter to be and account for that. Also, try not to draw the pencil guide too dark, as that will make it difficult to erase later.
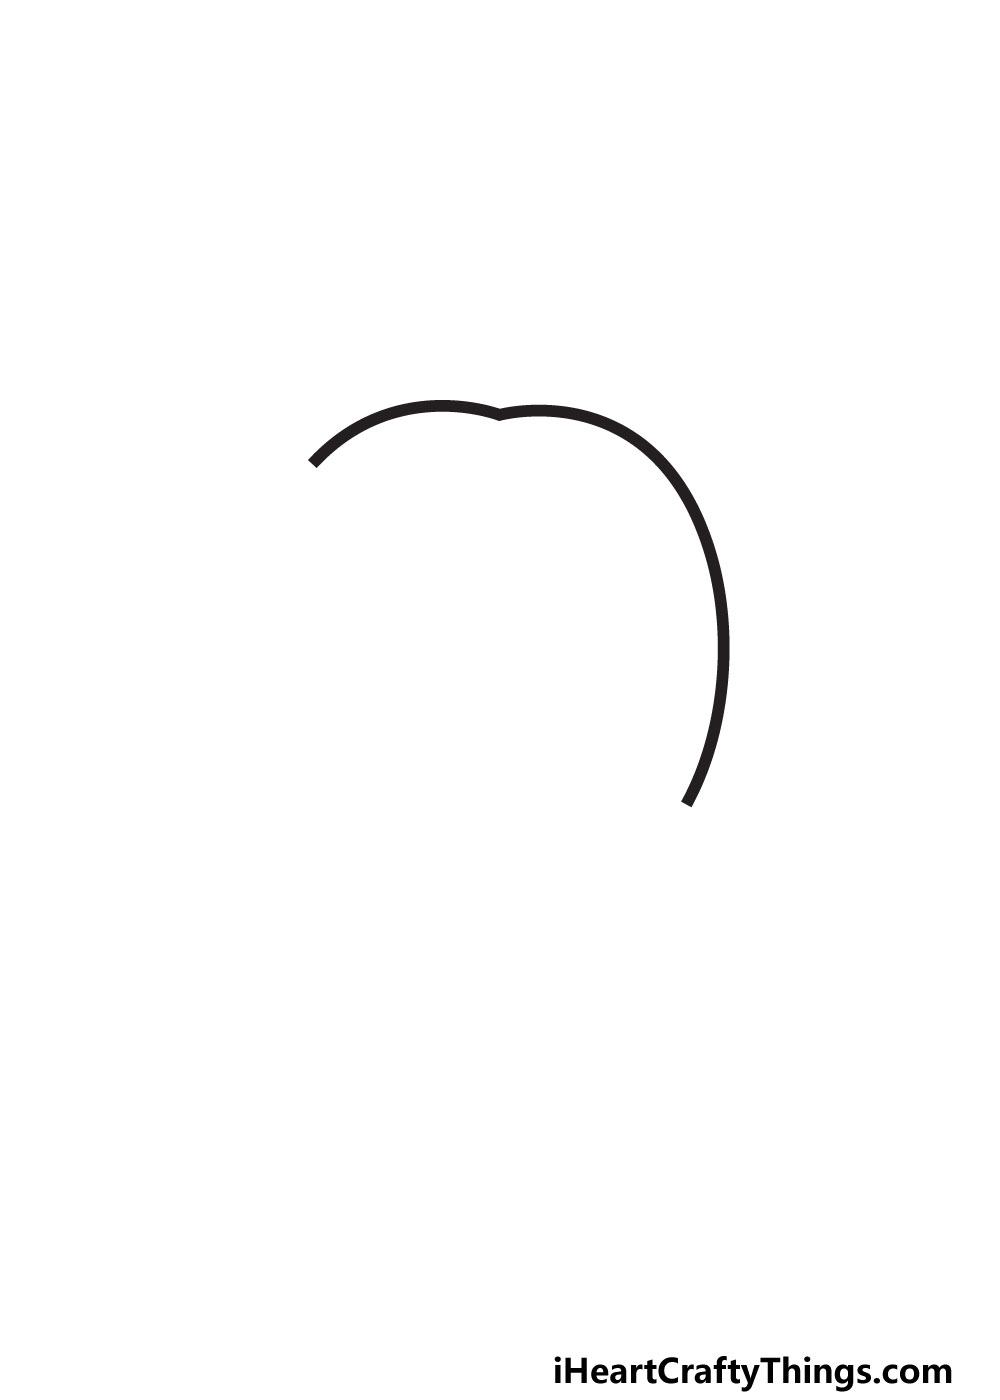
With that being said, we will now draw the top and right side of the letter. If you look at a regular Q, it has a perfectly rounded top.
For this design, we want it to look like a bubble, so we will add a small dip at the top of the Q. You can draw it using a smaller curved line connected to a larger one.
Try to angle these lines so that they match the ones in our example and you’ll be good to go!
STEP 2:
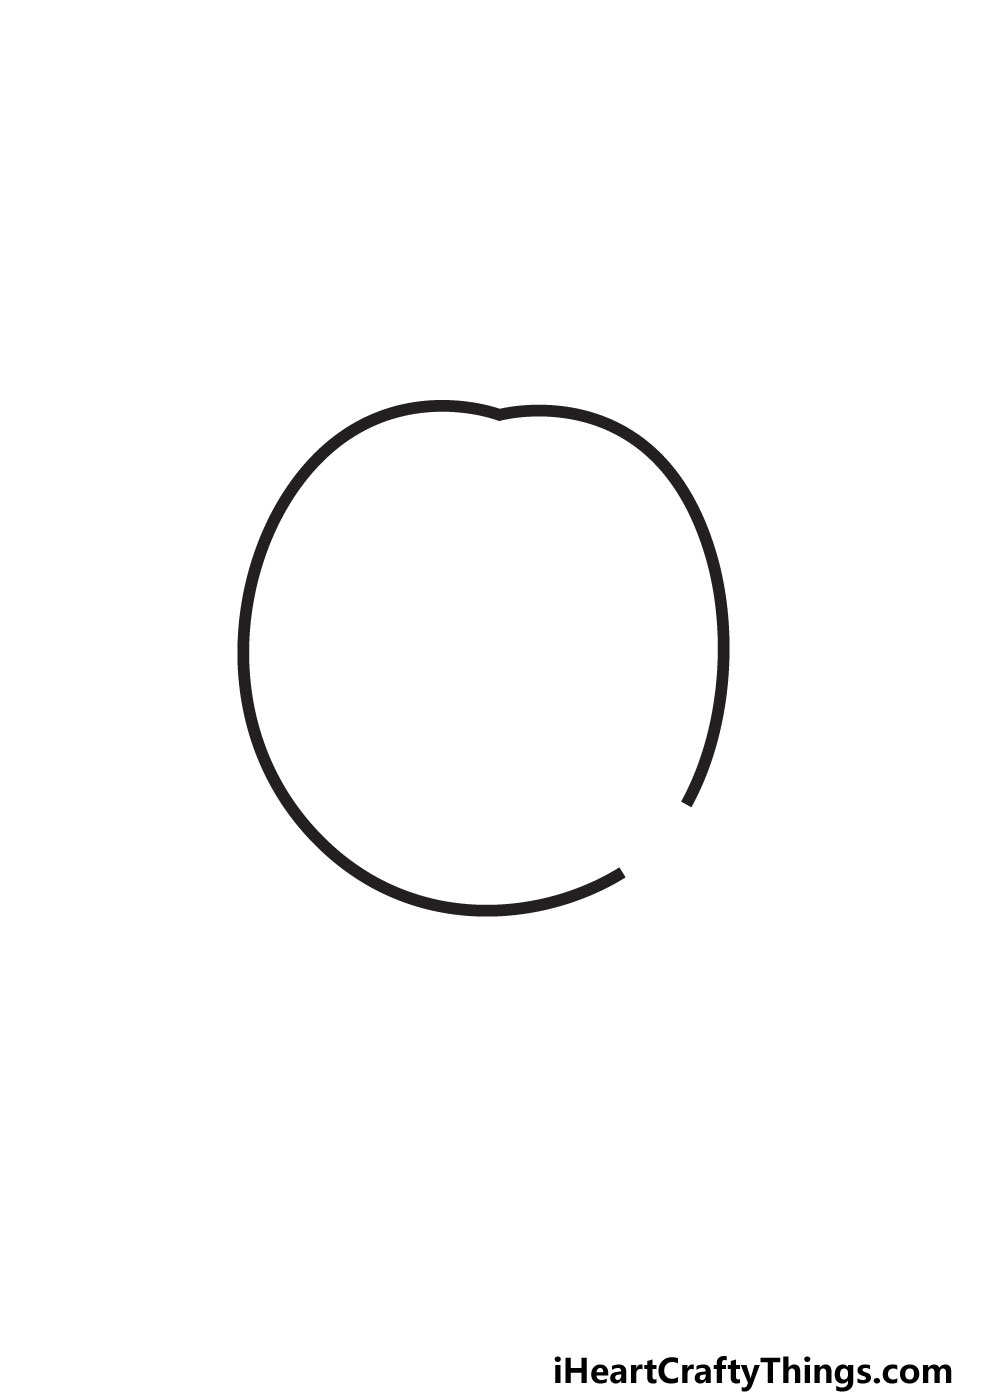
Next, we will be adding to the outline on the left side of the letter. This will be done by extending the other lines from the previous step in a curving motion.
So, simply keep drawing down from where the smaller curved line ended earlier, down and around until it angles up again.
You’ll notice that there is a small gap left at the bottom right of the letter, and it’s important that you include that gap as it appears in our reference image.
Once you have the outlines drawn, we will start drawing some of the interior details of the letter in the next step of the guide.
STEP 3:

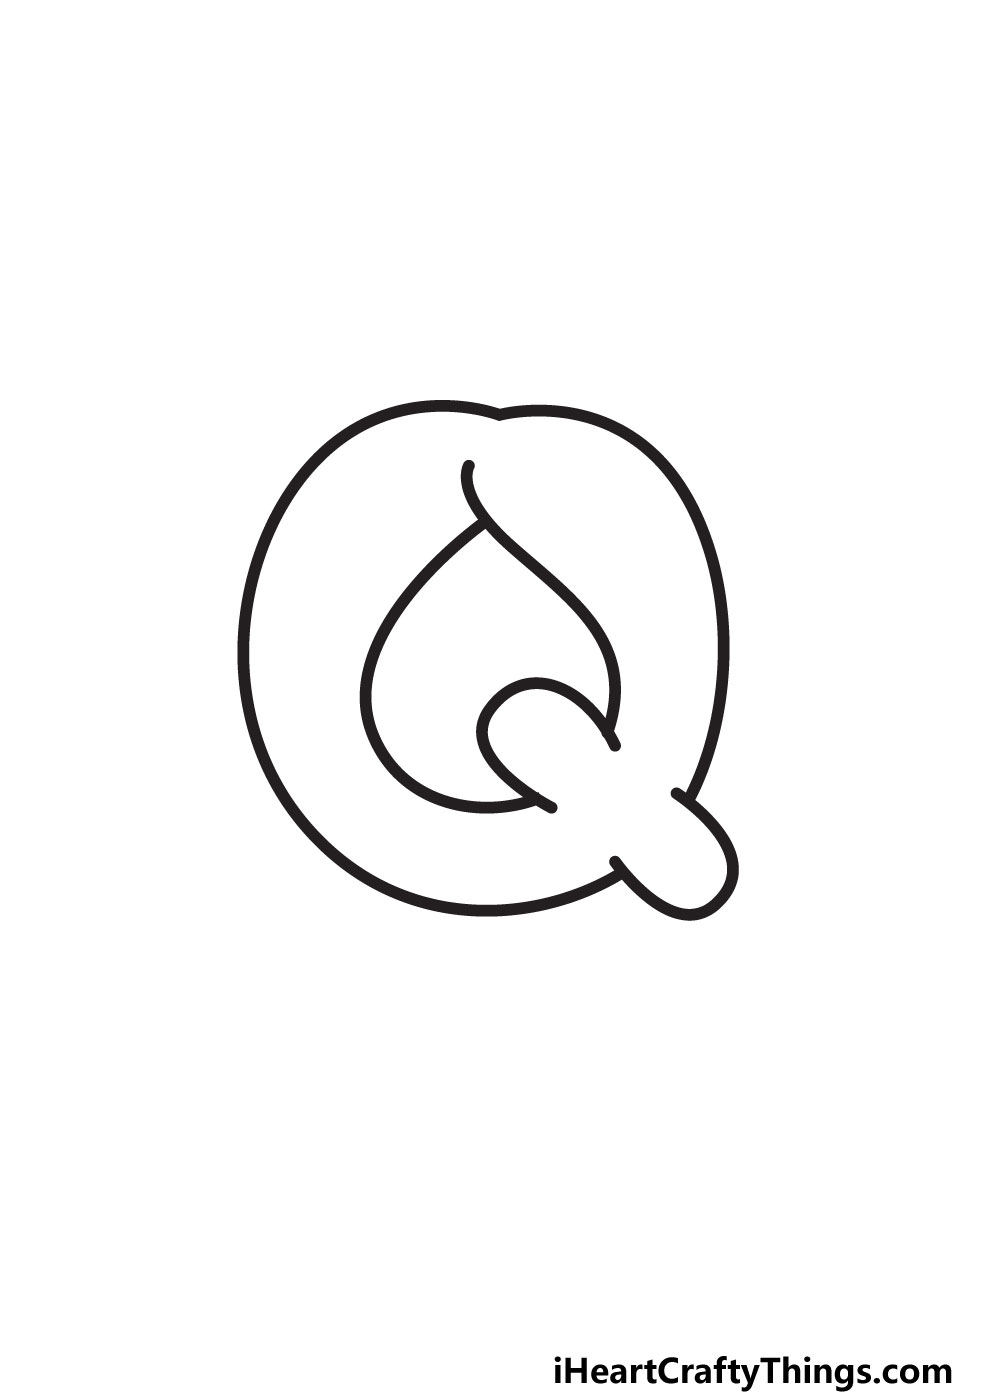
Now that we have most of the outline for your bubble letter Q except for the small gap, we will be adding the hole at the center of the Q.
Unlike a written Q, the hole at the center is not circular, as you will see in the reference image.
Instead, the hole will be shaped a bit like an onion and made up of two small curved lines.
The line on the right is a bit wavier while the one on the left is a bit smoother, and they will overlap a bit.
Once again, it’s important to leave a gap that is the same width as the one we left previously. You will see why it’s designed like this in the next step, as we will fill these gaps in one go.
STEP 4:
In this fourth step, we will be filling the two gaps by drawing the ‘tail’ of the Q. This will finish off the outline of the letter so we can add some fun details.
To add this tail, we will be drawing two horseshoe-shaped lines that are mirroring each other. The reference image will show you how these should be positioned.
You will notice that the beginning and end of each of these lines will overlap into the outline, making it look like it’s poking right through.
When this tail is drawn, you have completed the outline and there should be no more gaps left. Now you’re ready for the fifth step, but first we should erase any guides.
If you took our suggestion of drawing a pencil Q to make things easier, then you can erase them as we won’t be needing them anymore.
If you drew the final outlines with a pen, give it a few minutes to make sure the ink is dry, or you may smudge it when you erase the pencil.
When you’re ready to proceed, we will then add some fun smaller details in the fifth step!
STEP 5:
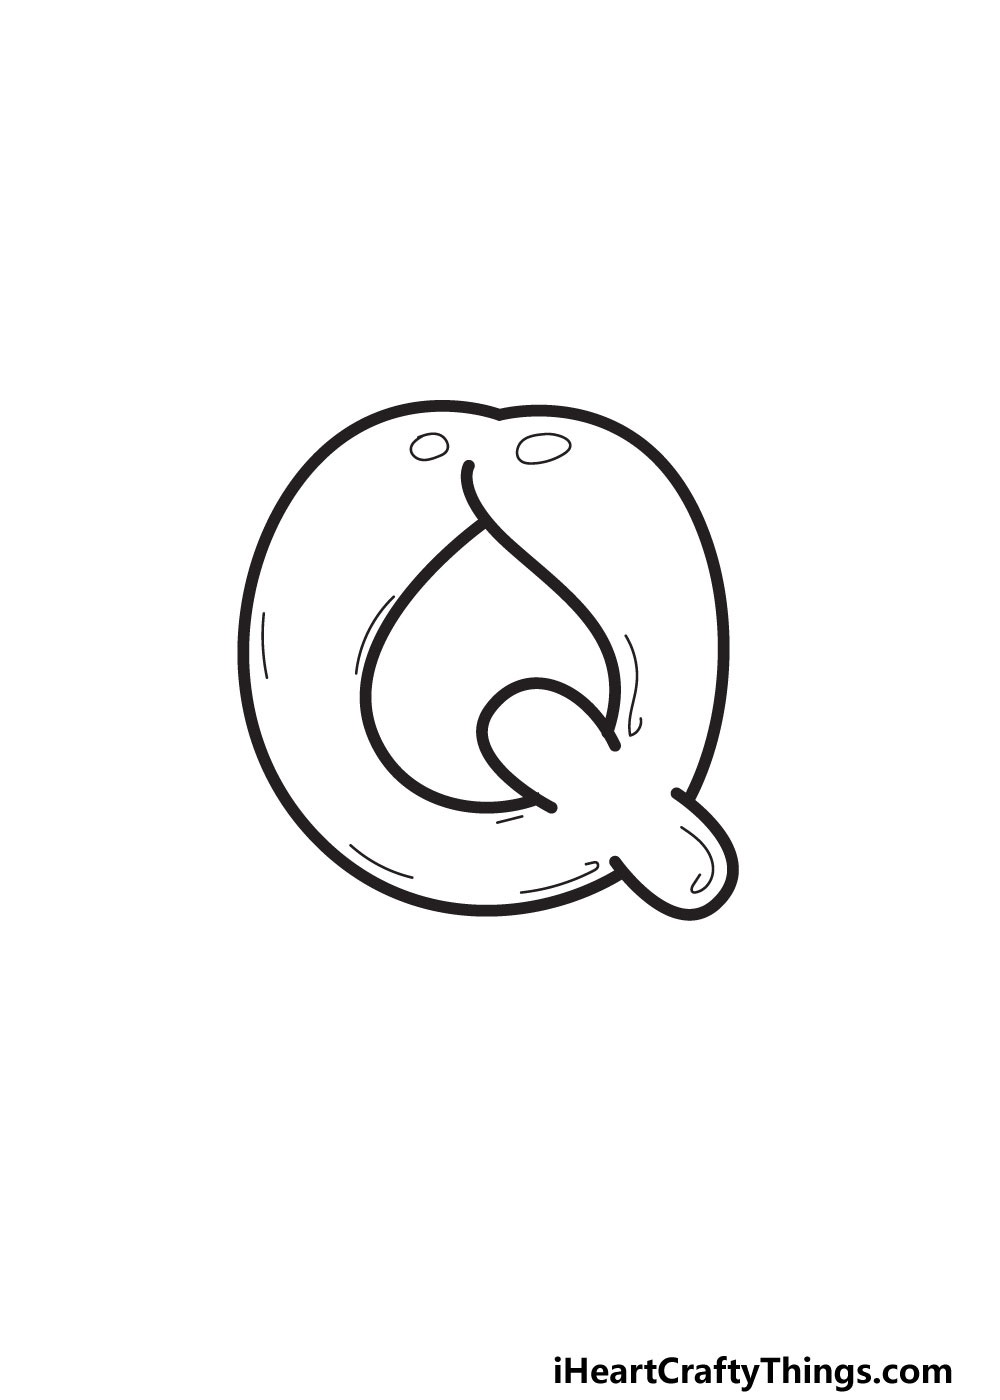
The fifth step we have for you will deal with making the letter look less like a letter drawn on a page and more like a bubble with some volume.
If you look at a bubble or a balloon, they will usually reflect light. We will simulate the look of light reflecting by drawing a simple set of oval shapes.
If there is a light source in this image, we have placed it above the letter. For that reason, we added two oval shapes on the upper sides of the letter, as shown in the reference.
You could draw these oval shapes elsewhere on the image if you want to have the light source coming from a different direction.
Once you have decided on where to place these light reflections, we can then add some texture lines.
We drew some thin curved lines along the inner edges of the letter in order to make it look like it is an inflated balloon or bubble.
These details can also be moved around or changed if you want to personalize the drawing a bit more.
Before you move on to the final step, you can add some extra details, patterns or anything else you like! Then, we will be ready to add some colors in the final step.
STEP 6:
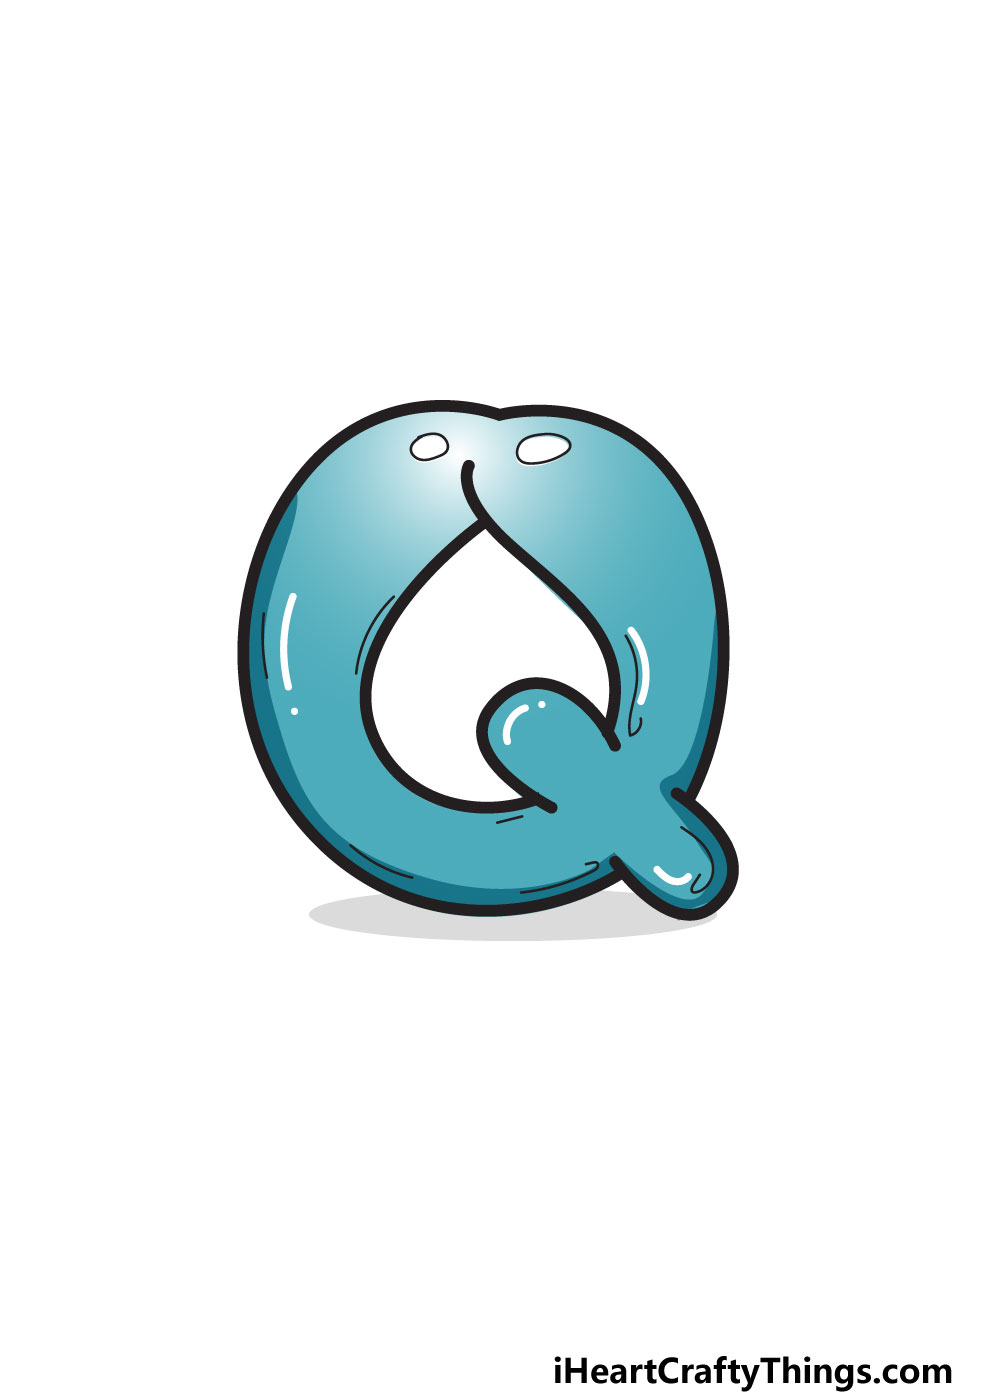
This final step of the guide will be all about adding some color to your bubble letter Q. There are so many colors to choose from, and you could use any colors you like!
In our example image, we went for a lovely turquoise-blue color scheme to give the letter a nice cold look. Even though we stuck to mostly turquoise, we varied the shades.
The colors are slightly darker the further you get away from the light reflections, so that’s worth keeping in mind if you chose to move them elsewhere on the image.
Even though we chose turquoise, you could go with any colors you love! Or, you could use lots of different colors to make it an explosion of color.
If you want the colors to have different textures and ways of interacting with each other, you can mix the mediums you use.
For example, you could color the base of the letter with some paint and then use colored pens to add smaller details.
Then you could finish off with a sprinkling of glitter! These are just a few of the ways you could bring color to this drawing, but be sure to experiment and have fun with it!
My Final Tips To Make Your Bubble Letter Q Drawing Even More Unique!
You finished drawing this Q and added some color, but we’re not done with it yet! This design is perfect for getting creative with, and you can really have fun with it.
You could start by picking a theme that starts with the letter Q. For example, there are words like queen, quiet or quack.
If you chose the word queen, you could give the image a royal feeling by using gold glitter and maybe adding a crown or a royal robe.
You could show this theme with just the letter or you could write out the rest of the word in a similar style. This is just one way you could make this drawing more unique!
Another would be to incorporate it into a name that starts with or contains Q. Q isn’t a common letter to start names with, but there are a few.
For example, there are names like Quinten or Quinn that you could use. If you happen to know someone with a Q name then you’re good to go!
You could even surprise them with their name written out in a fun bubble style. Drawing a background or adding other little pictures around the letter can also be a fun way to put a new spin on this image.
We’ve given you a few to get started with, but can you think of any other ideas that could make this picture more unique to you?