The letter P is the sixteenth letter in the alphabet. It is a relatively uncommon letter, but one that most people find pretty easy to learn to write.
It retains its shape whether it’s upper or lower case, but the lowercase version goes lower on the line, making it even easier to learn.
Writing this letter normally is not particularly difficult, but what about when you start turning it into more creative forms and shapes?
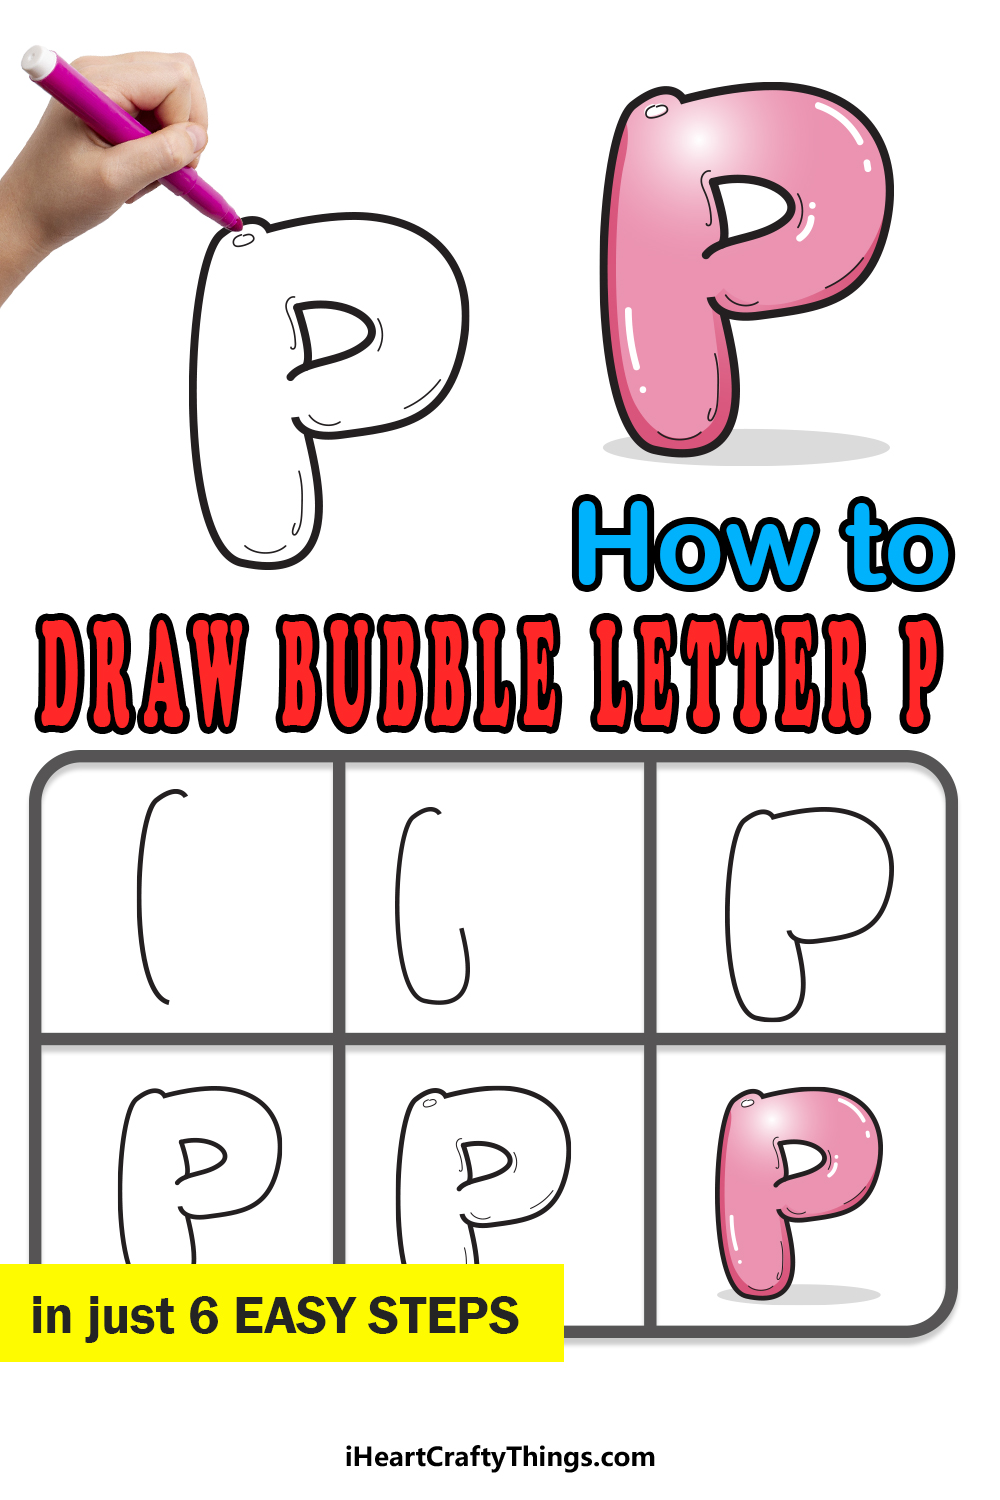
In this guide, we will be covering how you can learn how to draw a bubble letter P in just 6 fun and easy steps. Not only that, but we will also look at some fun ideas to make it even more unique afterward!
Get your favorite drawing tools and coloring mediums ready to go, as we are about the begin the first step to drawing a great version of this letter.
Let’s Get Started
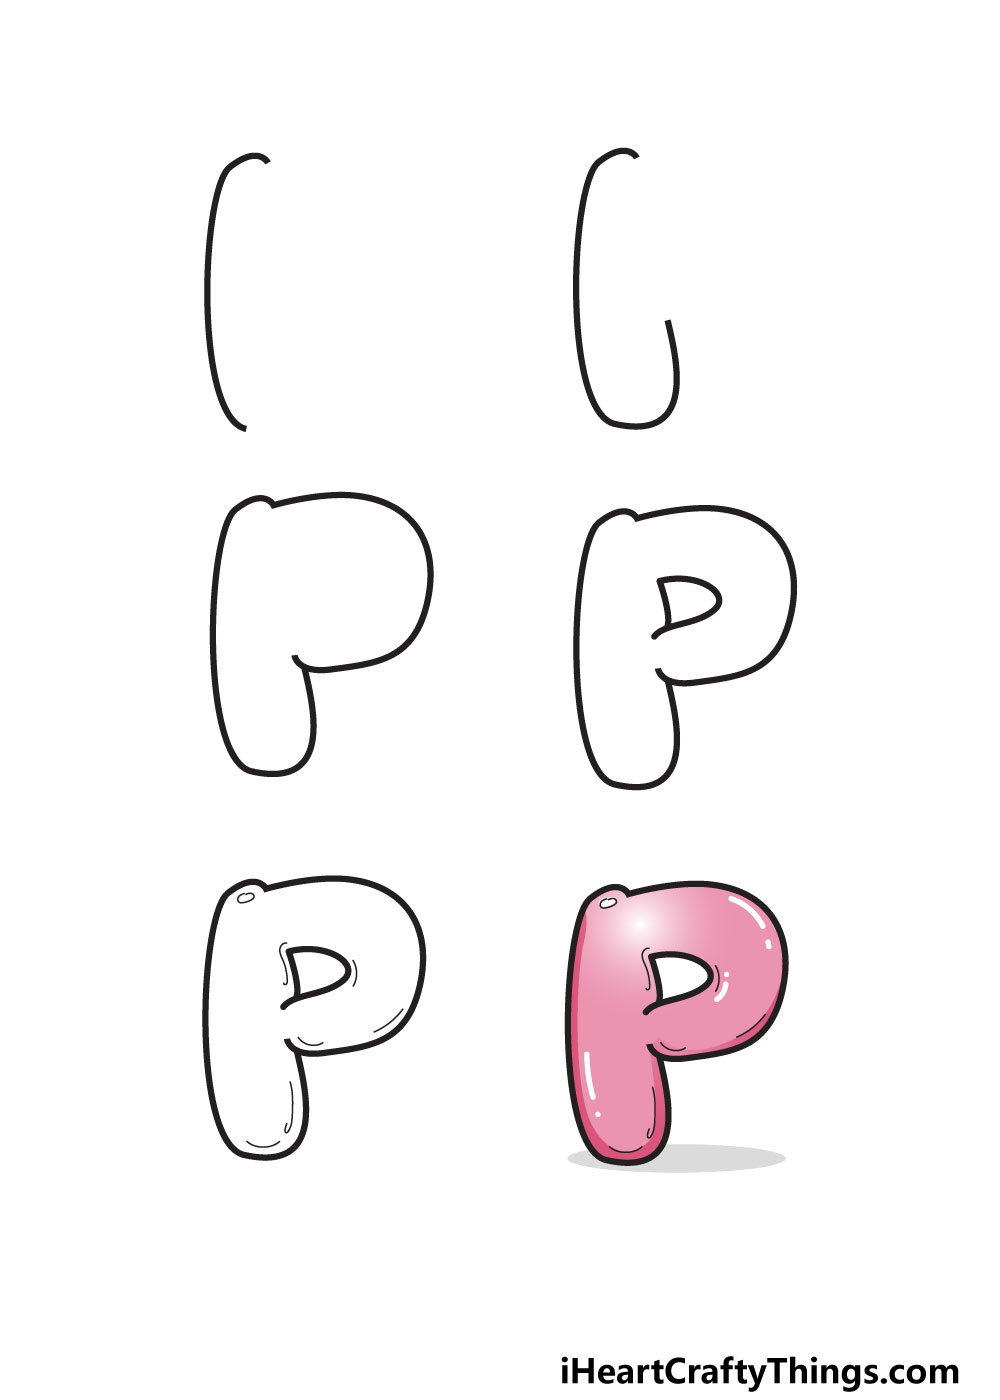
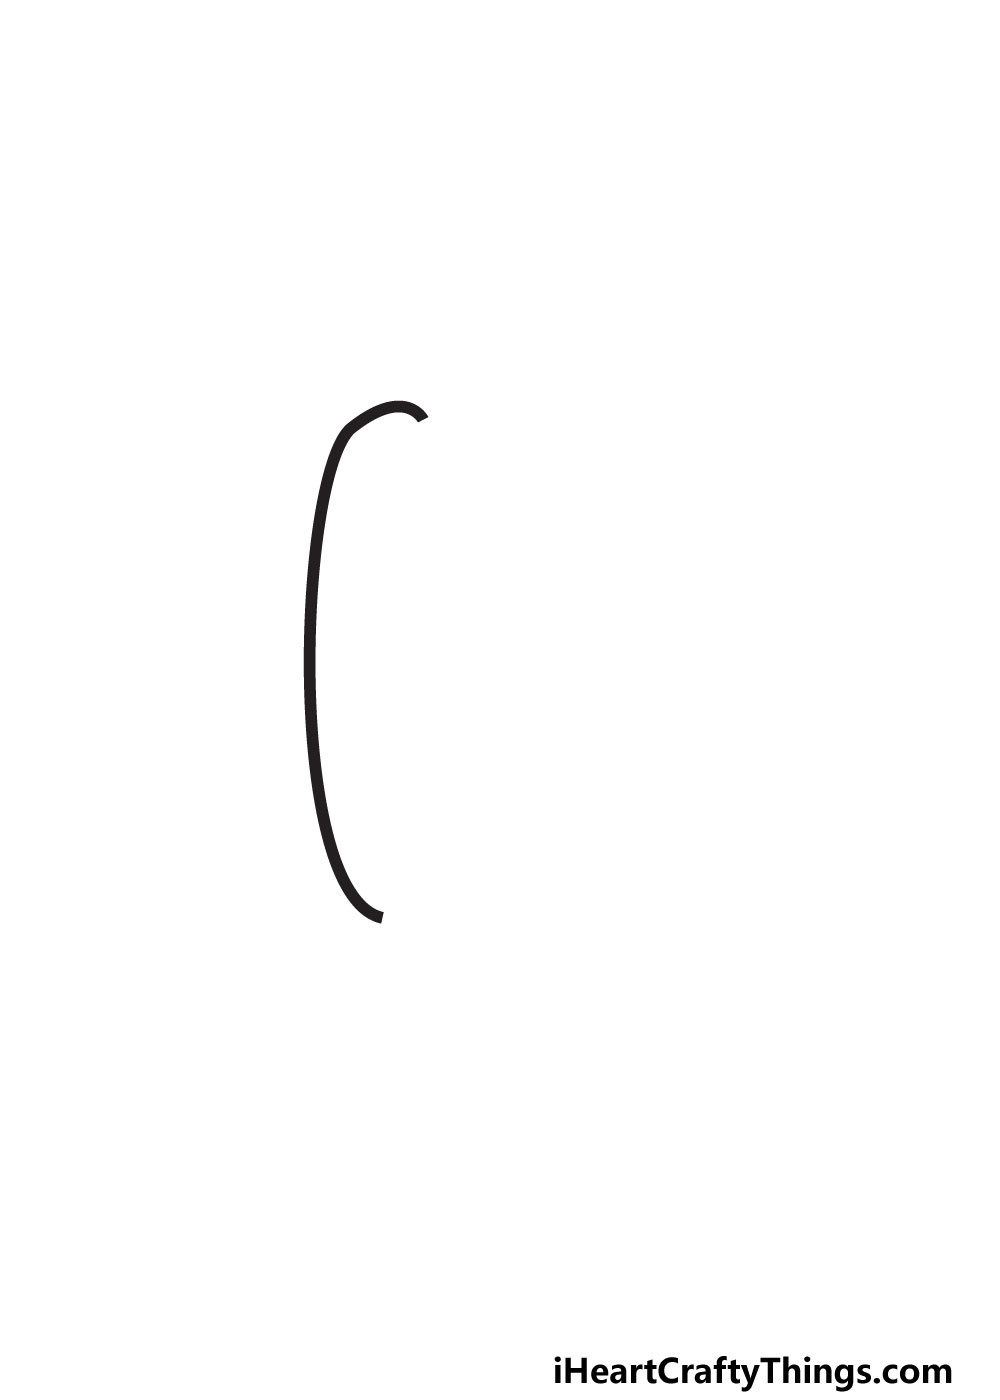
STEP 1:
Whenever drawing these kinds of bubble letters, we often like to use a pencil to plan it out first. No one will ever see this planning and it can make the shape more accurate.
All you would need to do is draw out a P using your preferred writing style. This would also be a great way to plan out how big it will be on the page.
You can try to draw it without this guide, but it can be a great way to make it easier. It’s up to you, but either way we are ready to start!
The letter P has a column-like spine on the left-hand side. This is what we will start with, and we will begin with a curved vertical line.
The reference image we provided will show you how it should curve to prepare for the next lines. When you’re happy with how it looks, we can proceed to step 2 of the guide!
STEP 2:
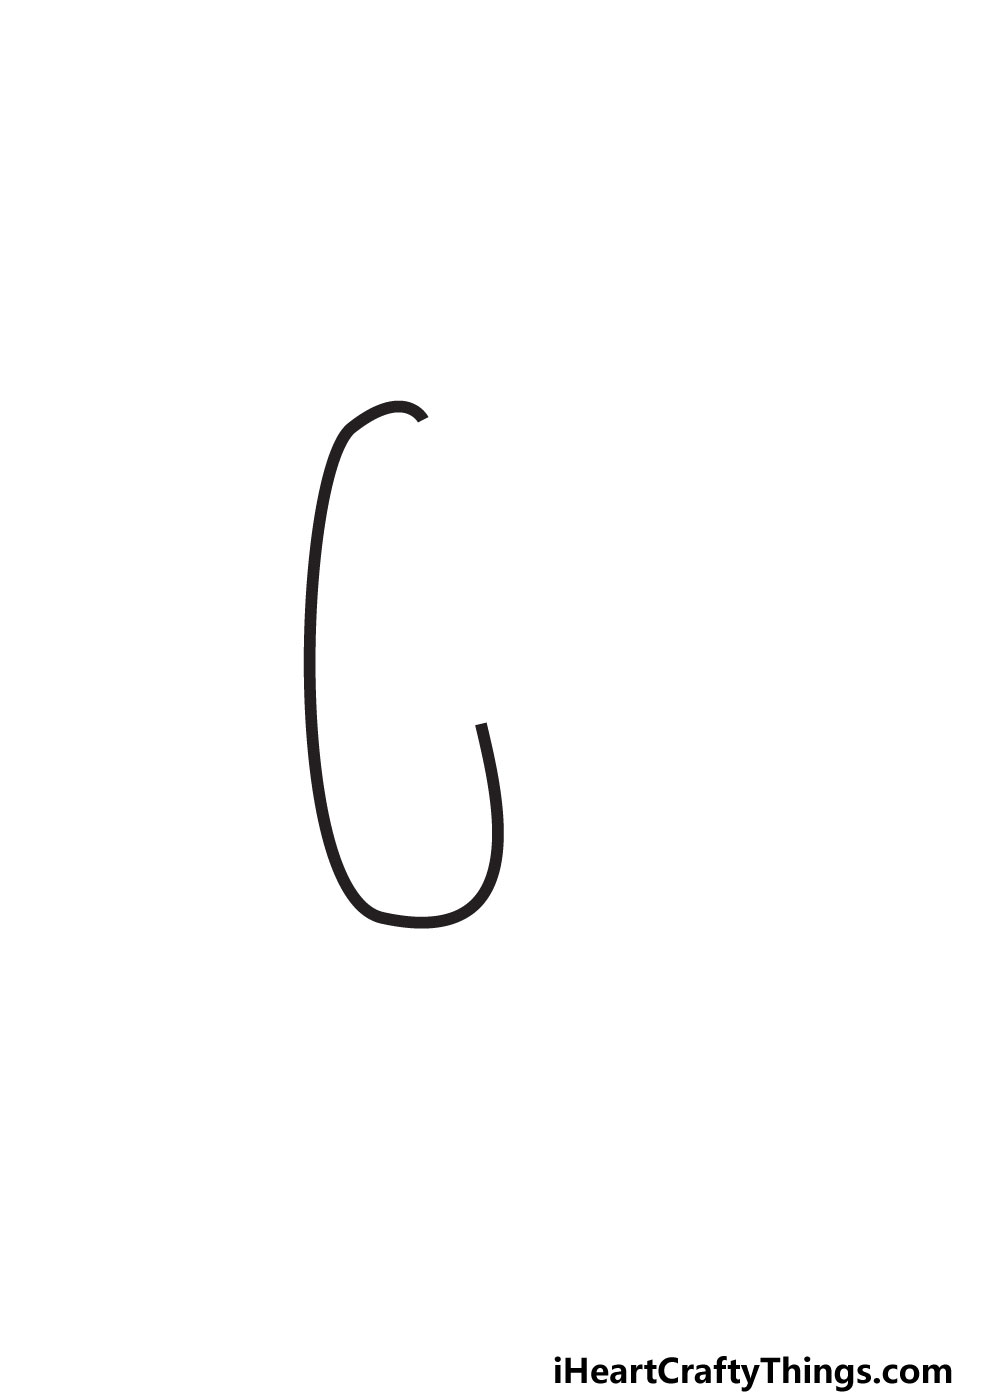
Step 2 will be very simple, and we will be adding to the line that you drew in the prior step. In that step, we drew the side of the column on the left of the letter.
In this second step, we will be drawing the base of this column. Continuing from where the previous line ended, curve it inward and then up.
The reference image shows you how this should look, and you can draw it slowly to make sure it’s smooth. If you can combine the lines from steps 1 and 2 into a single stroke then that will help to make it smoother.
When this portion of the column is done, we will then take on step 3 of the guide where we will finish off the outer outline of the letter.
STEP 3:
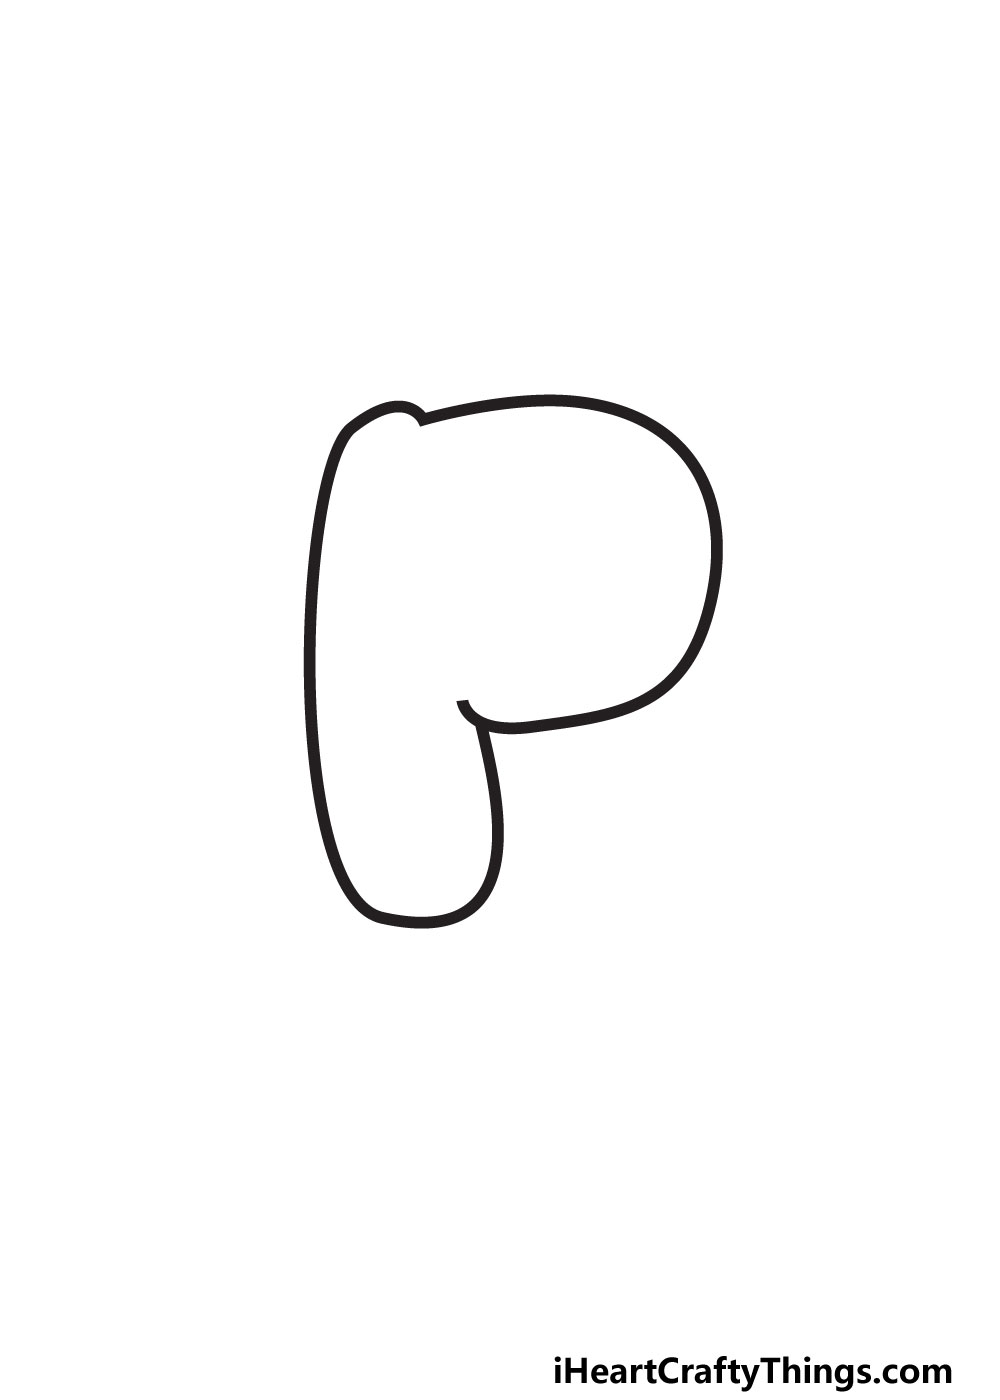
There is a large gap on the right-hand side of the bubble letter P now, and we will fill it in this step. As you can see in the reference image, this will be done with a single curved line.
This is one of the longer lines in this design, so it can be a bit difficult if you rush it. You can choose to start from the upper or lower end of the gap that was left.
When you have decided where to start, try to keep your hand as steady as possible as you add the rounded line we show in the reference image.
Try to make it as rounded as possible to give it that bubble-like effect. When it’s drawn, you’re done with the outer outline!
If you drew a pencil guide to help you, it would be a good idea to erase it now, as you won’t be needing it and it will make drawing the inner details trickier.
STEP 4:
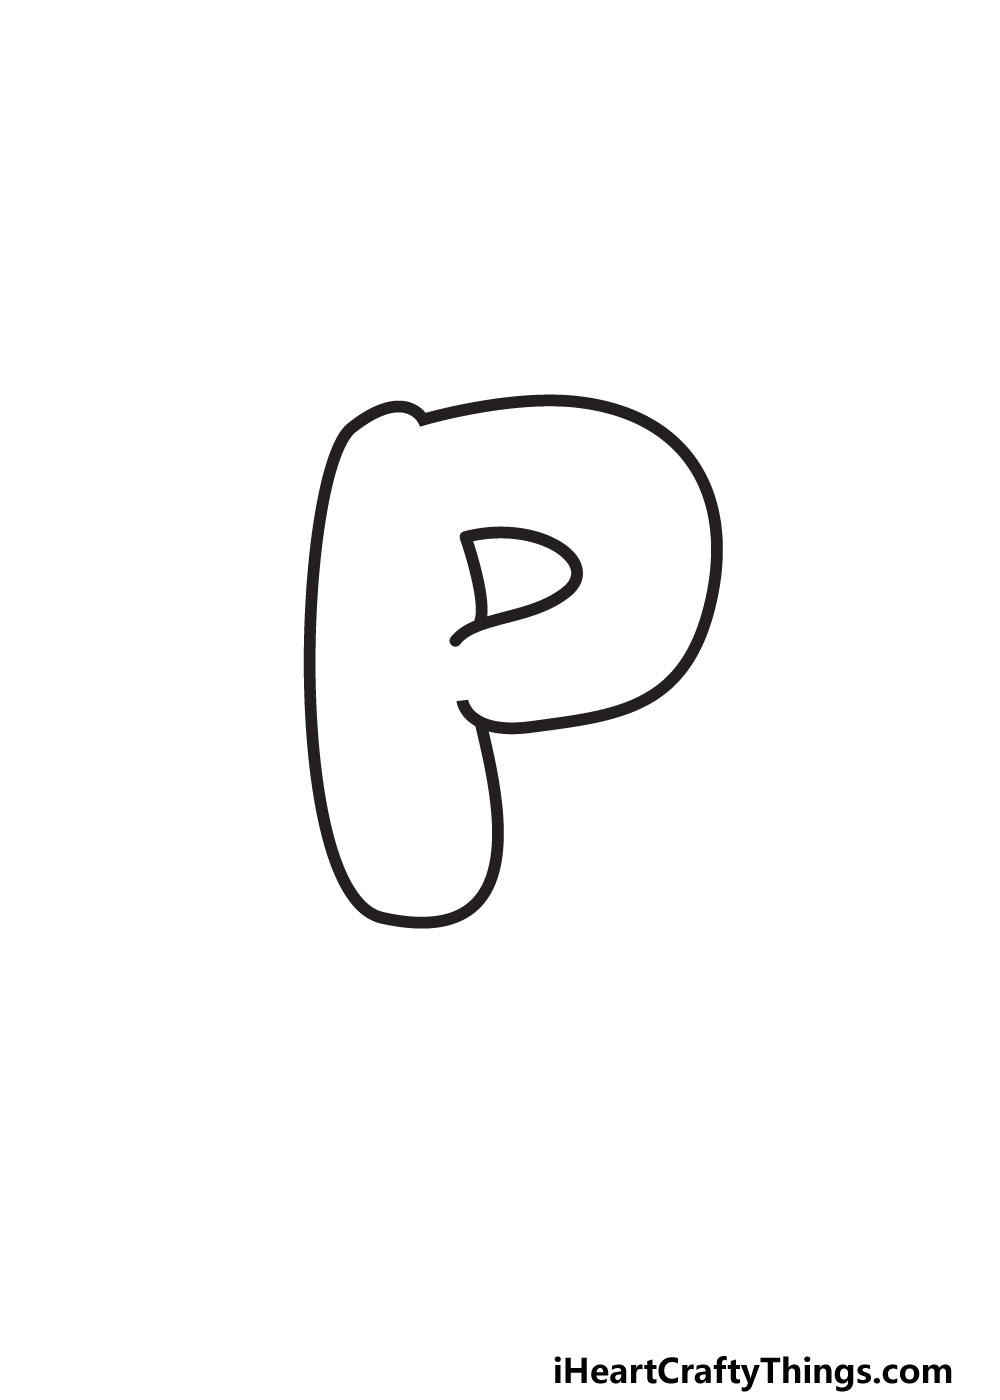
Now that the outline of the letter P is drawn, we will draw the inner outline. In a regular letter P, this inner part is usually more of a circular shape, but we will take a different approach.
We are aiming to make this P look like it’s made out of a bubble, so we will shape the hole at the center to fit this look better.
Instead of a rounded shape, it will be shaped more like the letter D. The reference image shows off how this should look.
You will also see in the reference that the line at the bottom left of the letter overlaps a bit. This will be to make it look like the balloon material it would be made of is bunching in on itself.
When you have drawn this inner portion of the letter, we will be ready for some final touches in the next step.
STEP 5:
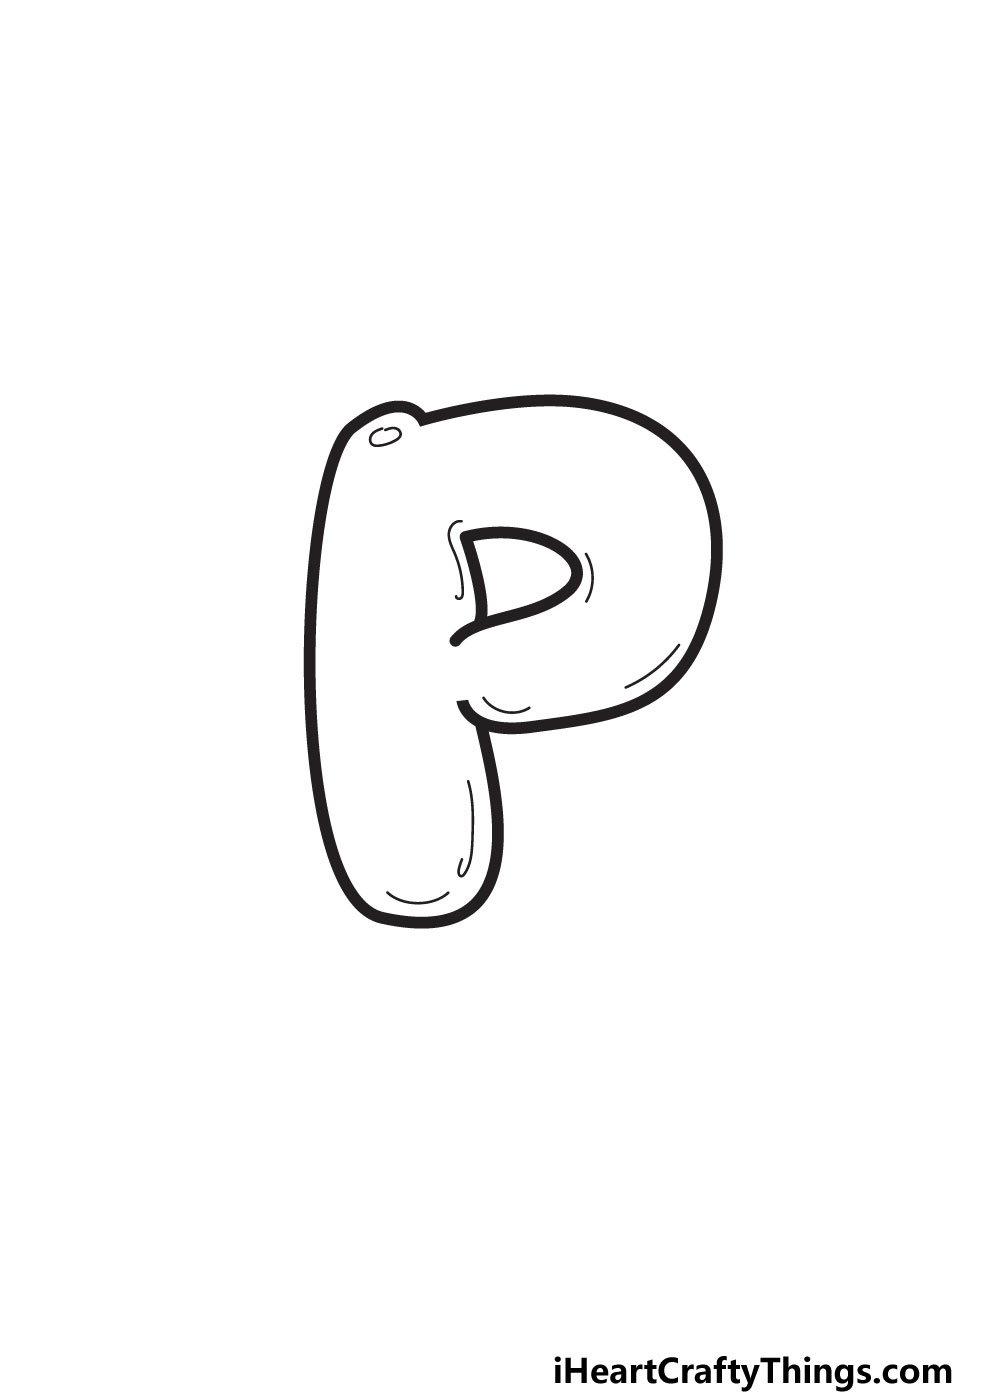
This part of our guide will take the outline you have completed even further by adding some interior details. The letter is already starting to look like a bubble but these details will help make it look even more like one.
First, we will add a small detail that will nevertheless make this look even more like a balloon. This will come in the form of a small oval.
We chose to place this on the upper left side of the letter but you could place it anywhere else on the letter you like.
This little oval will make it look like there is light reflecting on the surface of the letter, which makes it look a bit less flat on the page.
Next, we will add some lines along the inner outlines of the letter P. These will help to make the letter look even less flat and more like it’s a rounded object with depth.
You can replicate how we did in our reference image, but you could also put these lines in different spots.
Before you move on, be sure to add any other details you may like! These could go inside the outlines such as patterns or little shapes inside the larger one.
Or you could draw a background and maybe add other letters beside it! Whatever you decide to do, we can move on to the final step when you’re done.
STEP 6:
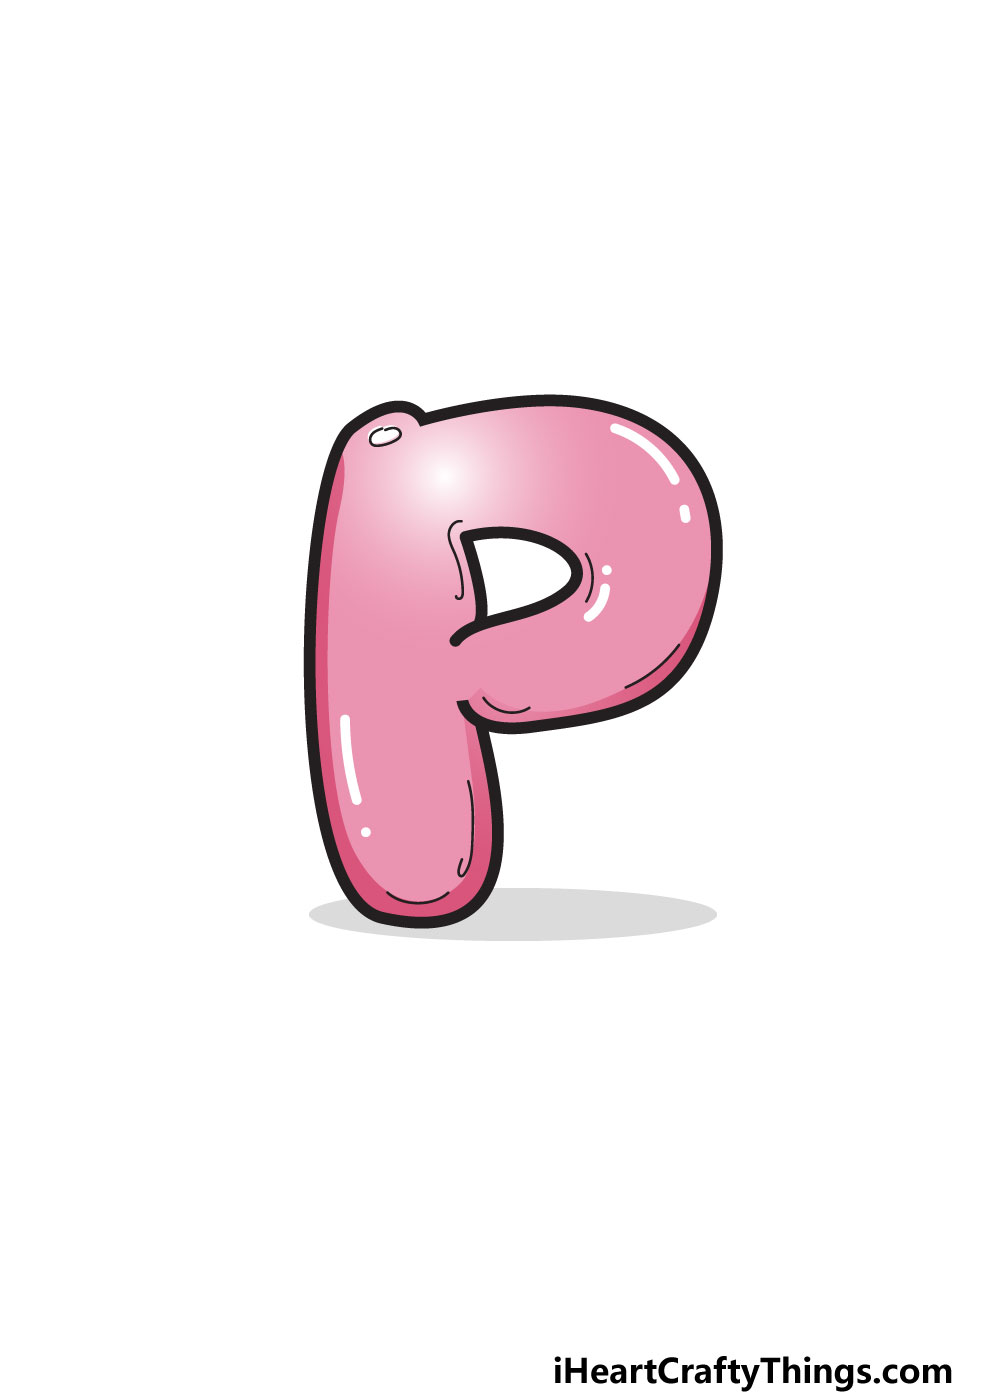
Now it’s time to finish off your drawing with some color! This is a step that has a lot of room for you to play around and be creative.
For now, we will stick to the color scheme that we chose for our example. We chose the color pink, seeing as it starts with P!
The colors are darker lower on the letter and they get lighter closer to the spot of light that we drew earlier. Varying the shades can help make it look like this letter is made of a bubble or a balloon.
Pink would be a great color for this letter, but you can use any colors you like! You could even stick with the P theme and use purple instead, but any colors you like would look amazing.
You could also find ways to use more than one color for the drawing, perhaps by adding a pattern inside the letter.
Another way to get some great color variation would be by using some fun art tools and mediums along with some crafts.
With that, your drawing is complete! Before we finish off, we will now look at some ideas for how you can make this drawing even better.
My Final Tips To Make Your Bubble Letter P Drawing Even More Unique!
The bubble letter P you drew along with us looks great, but there are ways that you can keep being creative with it.
We’ve already spoken a bit about how you can use colors and art mediums to make it look more unique, but there are other ways to do this.
One way would be to draw a full word in this style, and words that start with P would be a good place to start. Some word ideas would be pie, parrot or maybe plane.
For example, we will use the word parrot, mostly because many parrots are colorful and this would give an excuse to add lots of color to your artwork!
You could make the letter actually look like a parrot by adding a beak and some eyes to it, or you could draw a cartoon parrot sitting on top of it.
These are just two ideas, but they show how you can incorporate words as a theme into your image. Or, you could write out a name that starts with P.
Names like Paul or Pamela would be a few examples, so you can try to think of people you know whose names start with P and make them a card!
What are some other ideas you have for making this image more unique?