


The letter N is the 14th letter of the alphabet, and it’s one where the lowercase and uppercase versions are very different from one another.
This can make learning how to write these letters a bit tricky for those just learning how to write the alphabet. However, it’s one of the easier letters to Write when you get the hang of it.
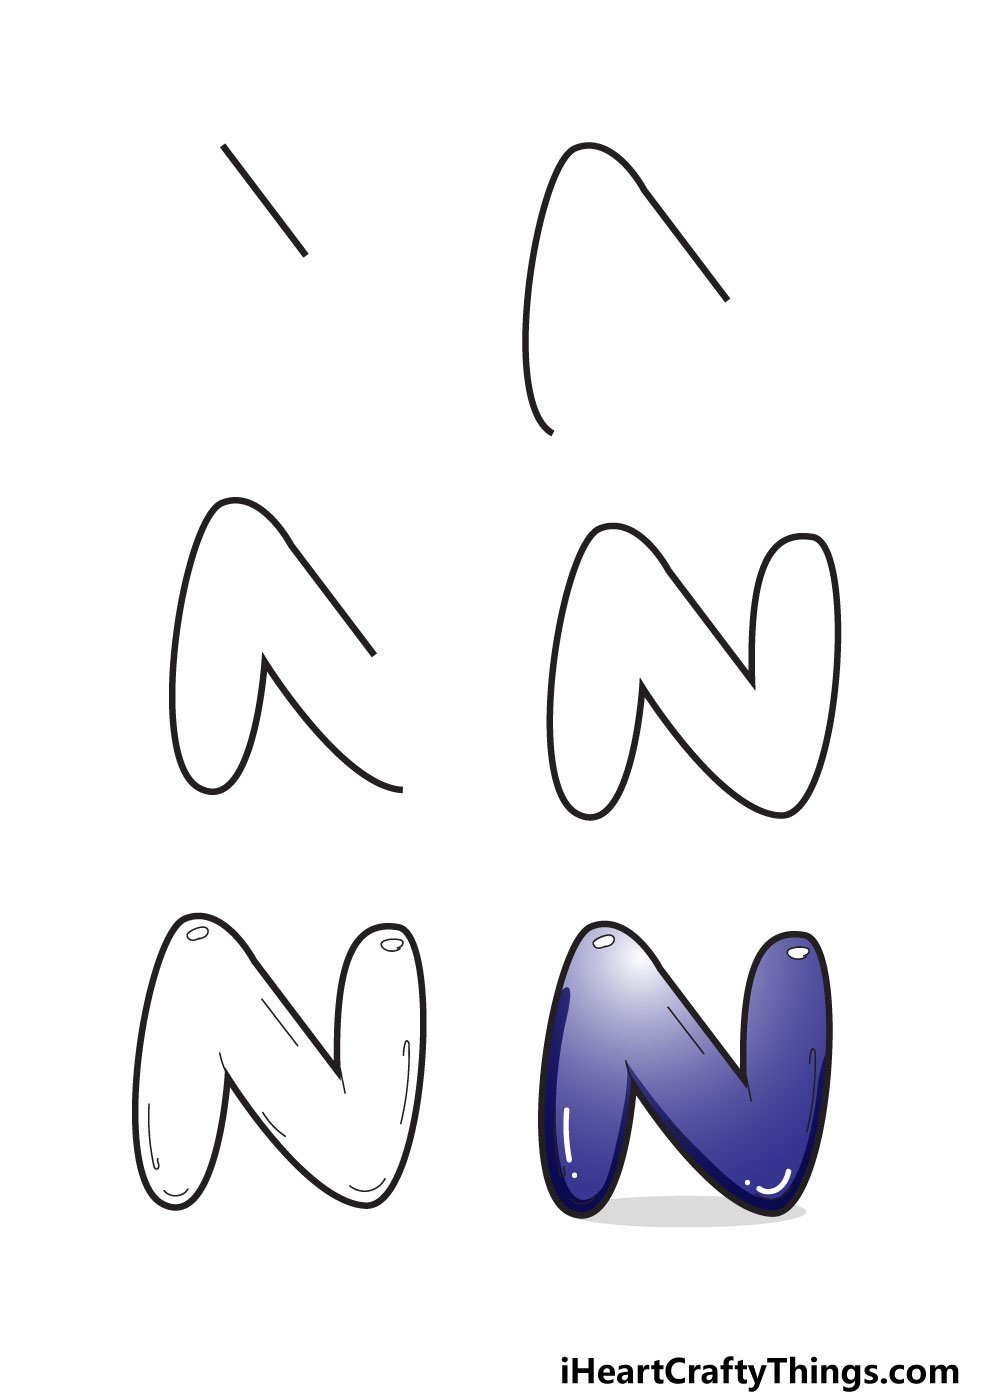
While it may not be that difficult to write a capital N, it can get trickier when you want to try and learn how to draw a bubble letter N.
Learning how to draw a bubble letter allows you to make all kinds of fun designs, and we will cover how you can easily do it in just 6 steps!
With all that said, let’s begin with the first step of the guide, after which we will give some bonus extra ideas for you to try.
Let’s Get Started
STEP 1:
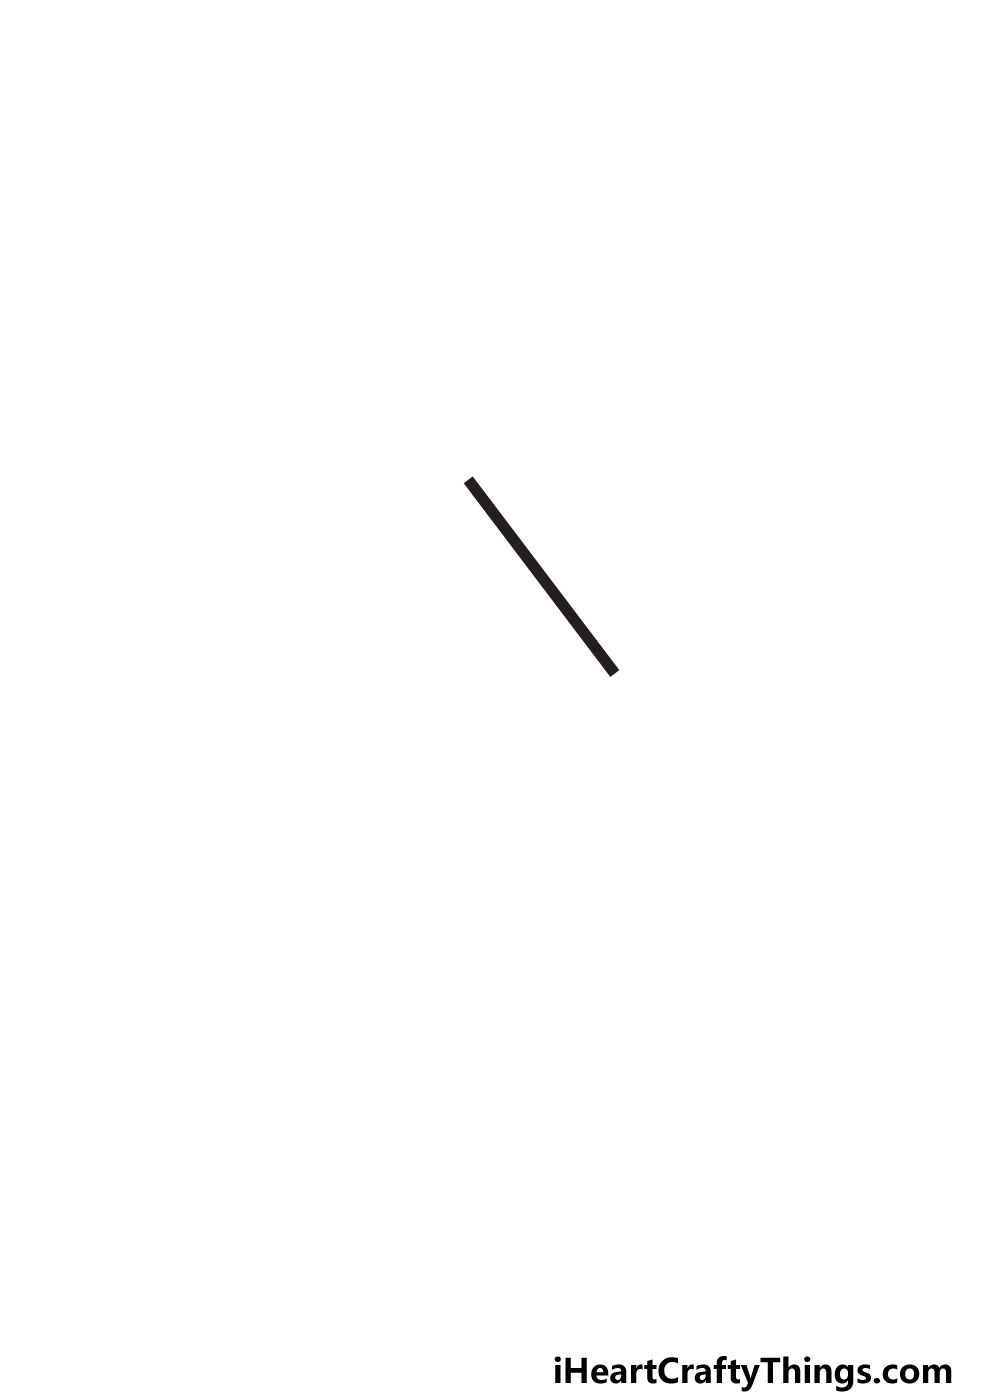
Before you begin this bubble letter, you can first make things easier for yourself by drawing it as a regular N first. This could be done roughly with a pencil.
If you choose to do that, then you should use a light pencil or press gently on the page, so that the pencil lines will be easy to erase later on.
Whether or not you decide to draw a regular N, we can start with the first line. You could use any drawing tool you like, but we recommend something with a thick tip.
All you will need to do is draw a straight, diagonal line. The reference image will show you the angle this should be at.
Most of the lines in this drawing will not be perfectly straight as we want to make it look like the letter is made out of a bubble.
This line will be an exception, however. We would still recommend drawing it freehand instead of using a ruler, but try to make it as straight as you can.
Once that is done, we can move on to the next step where we will add to what you started.
STEP 2:
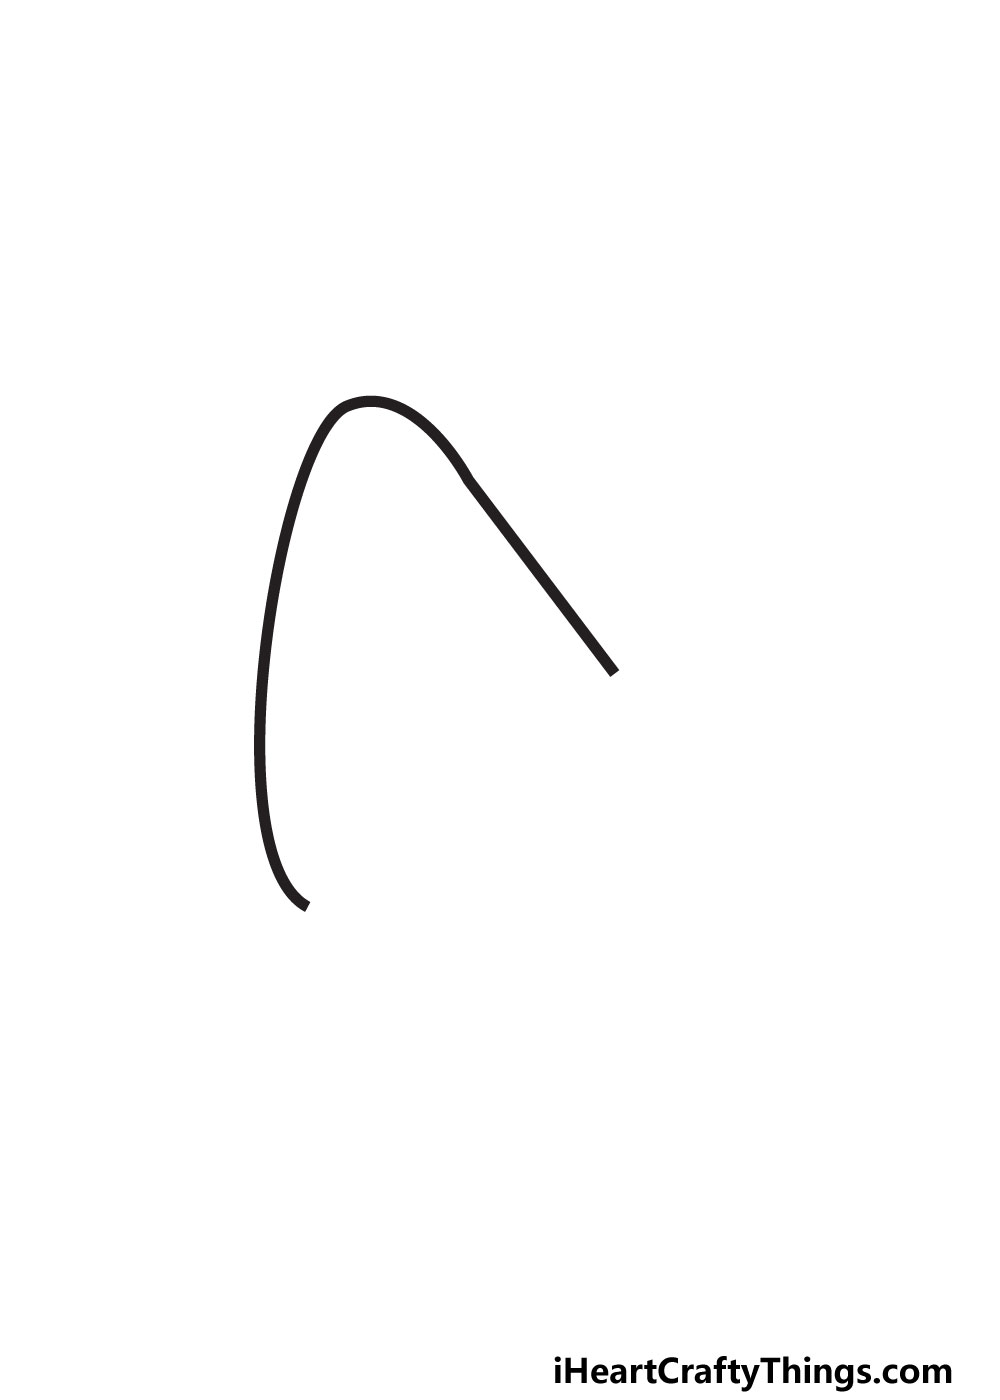
Next, we will be extending the first line you drew for the next section of this N. As you can see in our example, this line will be drawn from the top of where the previous one ended.
The top of this first line will arch up and then down, almost like the dip of a rollercoaster. Then, it will slope down quite sharply, but there will still be a slight curve to it.
At the base of the new line, it will curve inwards slightly as we begin to draw the base of the N. This line can be tricky to get right, so try to take it nice and slowly.
Also, follow the reference image carefully, as it will aid you in getting the angle and curve just right. Then, it’s on to step 3 where we will continue the design!
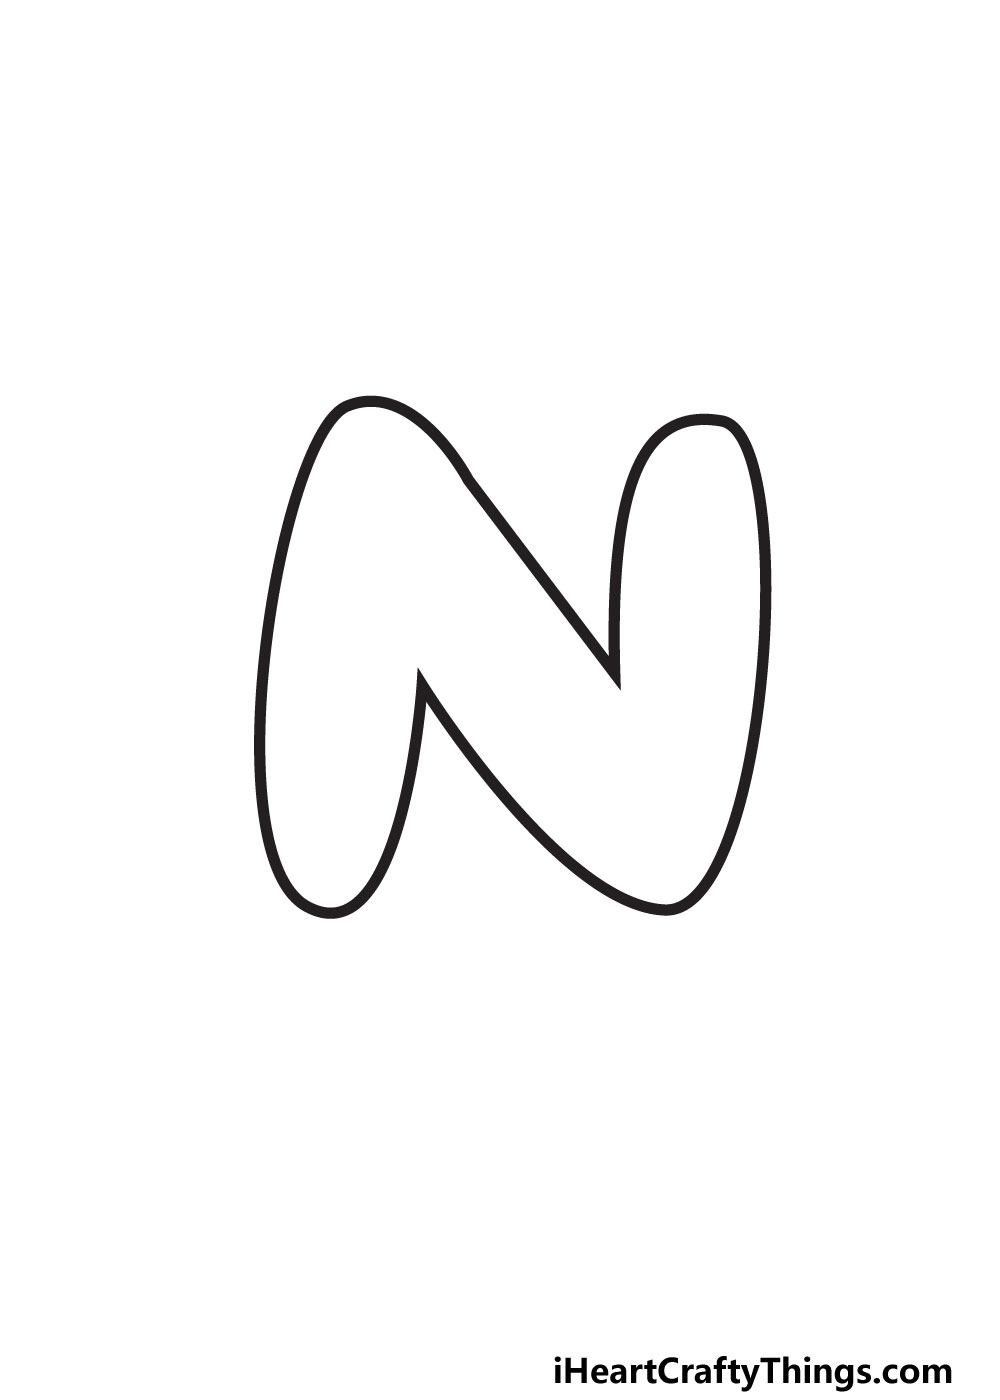
STEP 3:

The third step of your bubble letter N will be focused on the underside of the letter. This part can be a bit fiddly, so let’s take it slow.
Steps like this will show you why it can be so helpful to draw a regular N first, as it makes it so much easier to visualize the final product!
First, we will begin right where the line ended previously. It will curve and arch upwards, as shown in the example picture.
This line will stop around the midpoint of the letter, where it will end at a sharp point. Finally, you will need to draw another line sloping down from that sharp point.
With that, you are ready to finish off the final details of the outline in the next step of the guide, so when you’re ready we can move on to that part.
STEP 4:
As we mentioned in the previous step, this one will see you finishing off the outline for the letter before we add some final touches in the next step of the guide.
To do this, we will be drawing the pillar-like section on the right-hand side of the letter. Right now, there is a gap on the right side that we will be filling in.
That means you have the choice of whether to start this next section from the upper or lower line.
However you do it, we will be drawing a long, curved shape that begins and ends where the lines ended earlier.
As you will note in the reference image, it will be the same height as the pillar on the left. With that, you’re all done with the outline!
Before we move on to some final touches, first make sure to erase any pencil lines you used as a guide. If you drew the final lines with ink, make sure it’s completely dry before erasing anything.
STEP 5:

You’ve completed the most difficult parts of this letter, and now we can take it easy and have some fun with some final details.
These details will look simple, but they will make a huge difference to the drawing. The main goal of these details is to make it look like this letter is made of a bubble.
We will start this process by making it look like the bubble letter is reflecting light. To do this, simply draw too small ovals on the letter.
In our example, we placed these on the top portions of the letter, but you could place them anywhere you like.
Next, we want the letter to have a bit of depth and volume to the letter, and we will achieve this by drawing various slightly curved lines on the letter.
These will help to make it look like the letter has been inflated.
We show you where we chose to place these lines, but you could draw them elsewhere if you want to personalize them. Once these are drawn, you can add your own details!
These could be some shapes, patterns or other small details that will make your letter N more unique. When you’re ready, we will then move to the final step and color in your picture.
STEP 6:

Now you’re ready for the final step of this guide, and this one is where you will add some color to your bubble letter N.
This is a step where you can really have fun and get creative, so we encourage you to experiment and see what happens!
For now, we will use our example as a baseline for how you can color it in. we used a darker blue color scheme, but we also used some color variation.
By making the colors lighter in some areas than others, you can make it look like light is shining on the letter. You can see in our example how we accomplished this.
We think this color scheme looks great, but you don’t have to stick to it. You could go for any other colors you like, and you may even want to incorporate many different colors!
When you have decided on how you would like to color it in, you can also have some fun playing with art tools and mediums.
There are so many ways to have fun when finishing off this drawing, so let your creativity run wild and see what you can create!
My Final Tips To Make Your Bubble Letter N Drawing Even More Special!
You have completed all six steps of this guide, but the fun doesn’t have to end here! Now you can make your drawing even more fun and creative with some extra ideas.
We will give you a few to start with so that you can start customizing your image. First, we think it would be fun to add some elements of words that start with N.
For example, there are words like noodle, night, nose or nurse. For now, we will use night as a specific example.
You could write the rest of the word night after the N, and then you could color the background dark blue or black with some twinkling stars.
If you went with an idea like this, you could even use some glitter for the stars! This is just one way you could take this drawing in a fun new direction, but there are many more.
You could draw backgrounds, add other letters or even use this design to write out someone’s name for a card. We hope these ideas will spark your imagination!
What will you do to finish off this drawing now that you have completed the guide?
