When visiting Egypt, there is a seemingly infinite amount of ancient wonders to behold.
The ancient Egyptians were almost unparalleled by the artistic and architectural wonders that they produced, and many of these creations are famous around the world.
The great Sphinx that sits near the pyramids of Giza is one of these, and this giant statue captivates millions around the world.
For that reason, it has also been featured in many artistic portrayals, and by learning how to draw the Sphinx you can create your own artworks featuring it!
If you would like to portray this ancient wonder yourself, then this will be the tutorial for you.
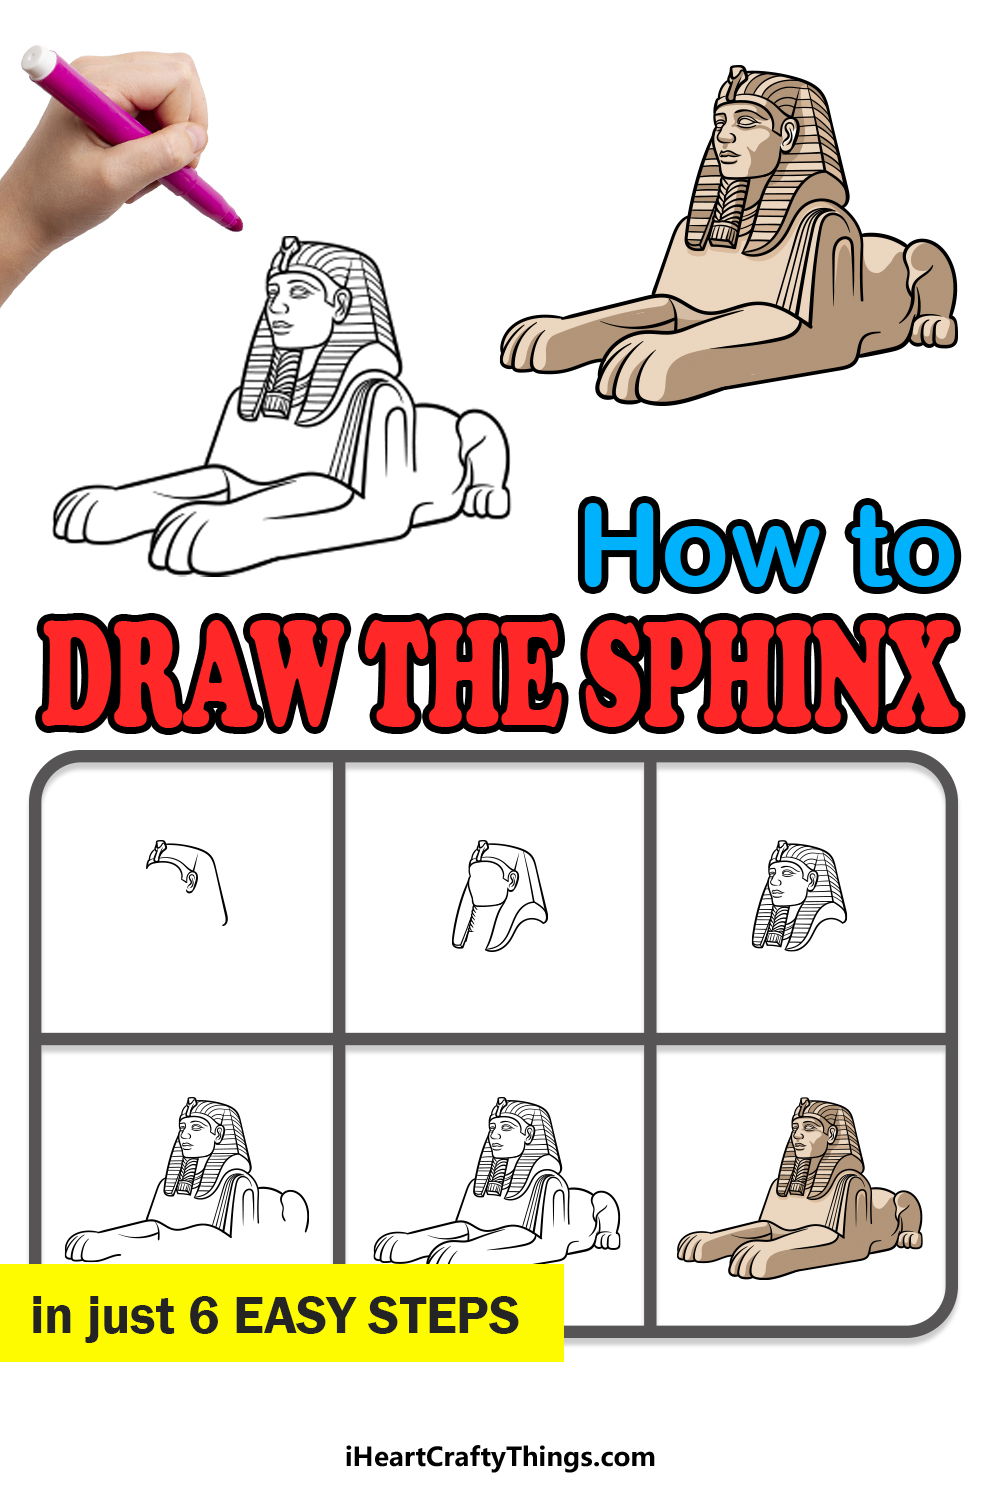
Our step-by-step guide on how to draw the Sphinx in just 6 easy steps will show you just how you can do that.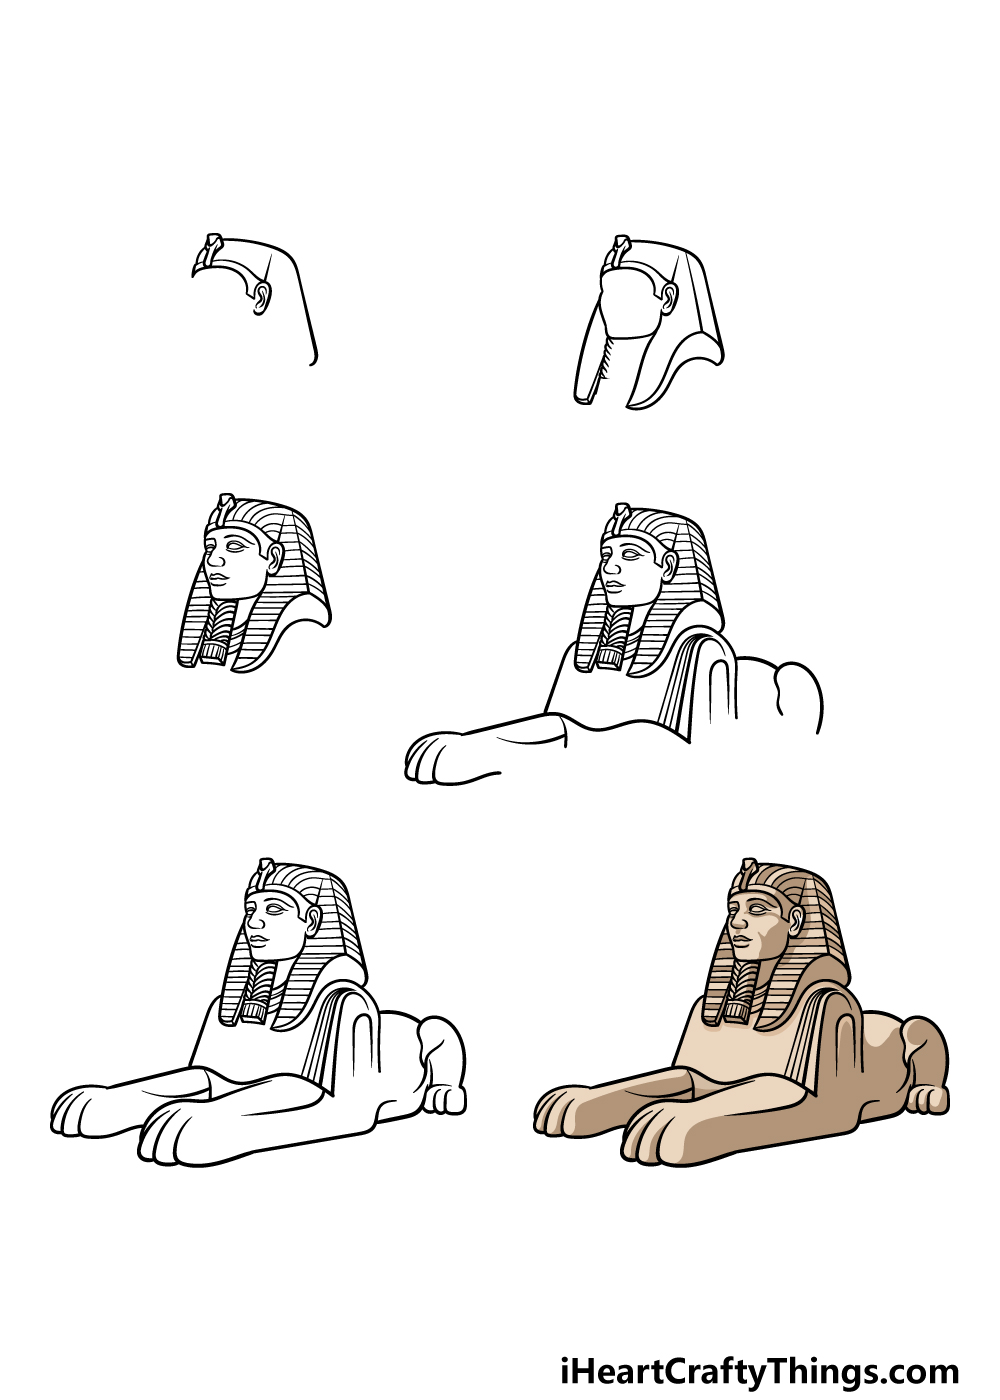
How to Draw The Sphinx – Let’s Get Started!
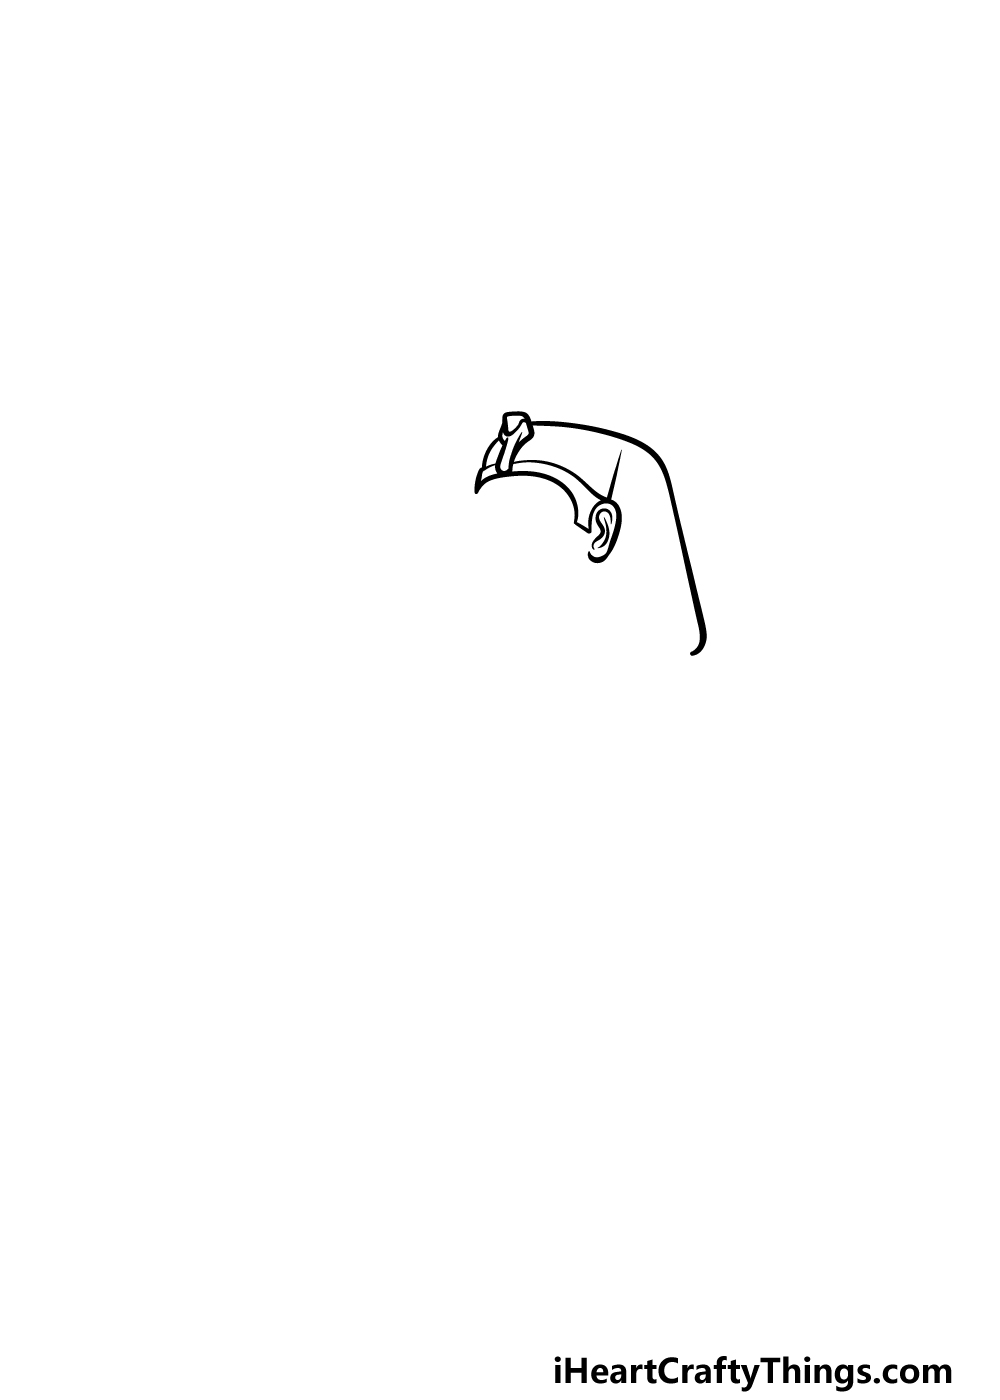
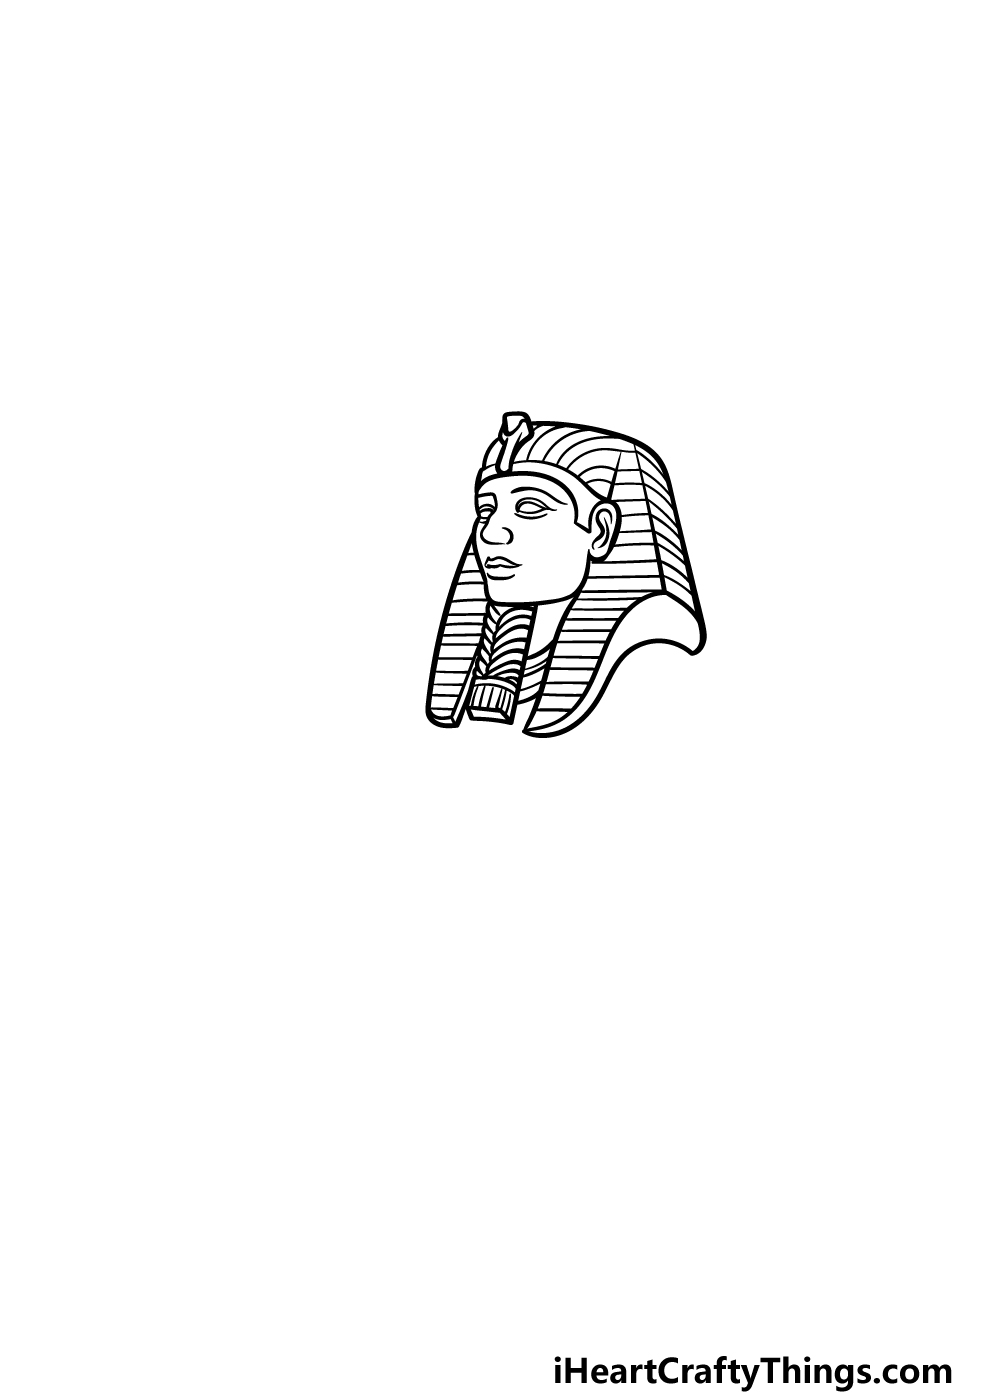
Step 1
The Sphinx looks very different today than it would have when it was created, and this is due to thousands upon thousands of years of degradation and sandstorms.
Even though it still looks really good today despite this, we will be drawing a portrayal of an estimate of what it may have looked like in its glory days.
With that in mind, we can begin this guide on how to draw the Sphinx.
We will start by drawing the distinctive Egyptian headrest that sits upon the head. This will have a small shape at the center of it that looks a bit like the head of a cobra.
This will have a curved rim beneath it that will go over the top of the head. Next, draw the ear of the Sphinx below this, and then you can use a curved line for the top of the headdress.
Once this is drawn, we can move on to the second step.
Step 2 – Now, draw the face outline and more of the headdress
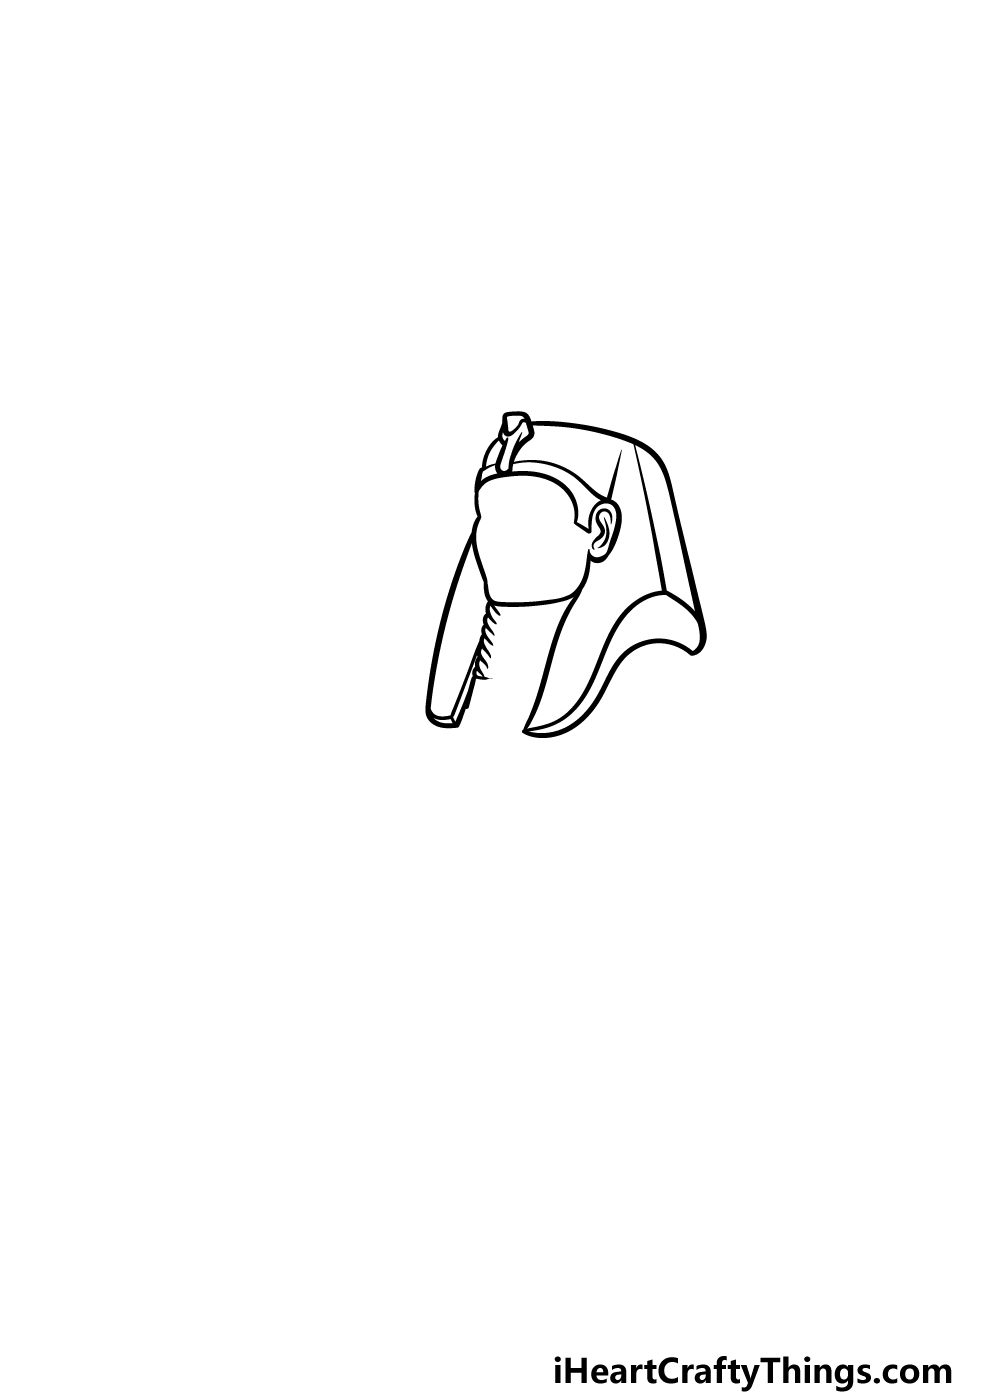
This second part of your Sphinx drawing will see you adding more to the facial outline and the headdress.
First, use some curved lines to draw the face outline beneath the rim of the headdress and connecting below the ear.
Once the face outline is drawn, we will be drawing the two sections of the headdress that are dropping down over the shoulders.
You can also draw the back edges of the headdress in this step. This has a really specific shape to it, so try your best to replicate it as it appears in our reference image.
Finish off by drawing some small curved lines beneath the chin for the long, thin beard there.
Step 3 – Draw some details for the sections you’ve drawn so far
Before we start adding more elements to this picture, we will add some details to the sections you’ve already been drawing in this guide on how to draw the Sphinx so far.
We shall start with the face, and right away you’ll notice something unusual if you’ve ever seen the Sphinx in the modern-day.
If you see the Sphinx at this moment, you will see that it is missing its nose, a feature it has become quite famous for.
It wasn’t always like this, however, and you can draw a proper nose for the Sphinx in this image.
Then, draw some rounded shapes for the blank eyes and then draw a neutral mouth. You can then finish off this step by adding lots of line details to the headdress and the beard.
Step 4 – Next, draw the start of the body
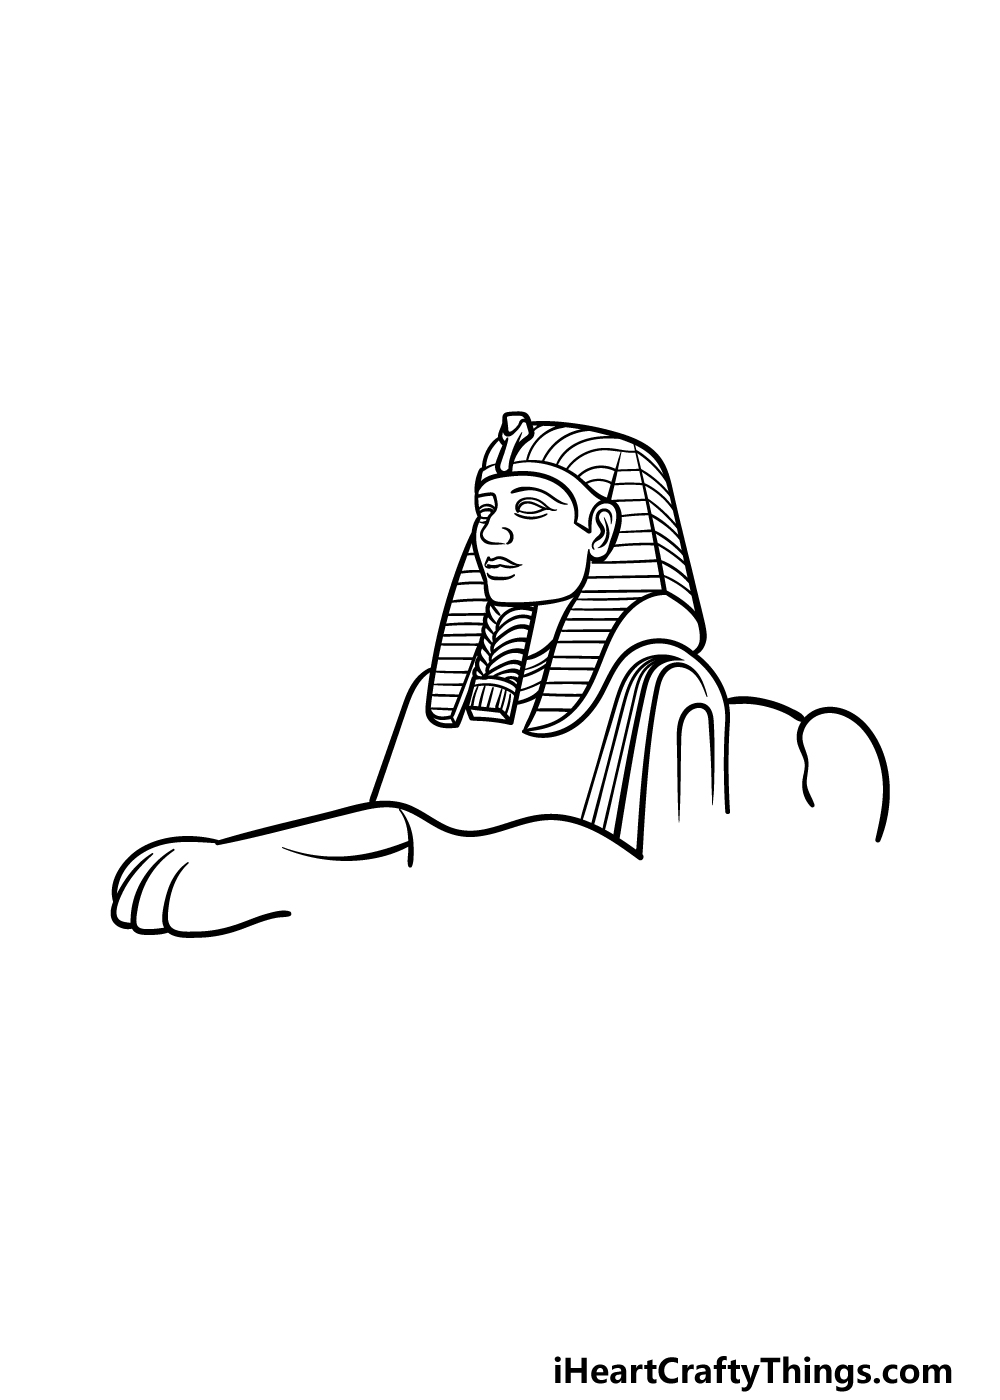
The body of this statue is made to look like a resting lion, so we shall start drawing it in this part of your Sphinx drawing.
Use some curved lines for the front shoulder of the Sphinx, and then extend some more curved lines back from the head for the start of the back and back legs.
Then, draw the start of the front legs that lie on the ground and extend quite far before the Sphinx. Once these lines have been drawn, we can then finish off this outline in the next step of the guide.
Step 5 – Add the final details to your Sphinx drawing
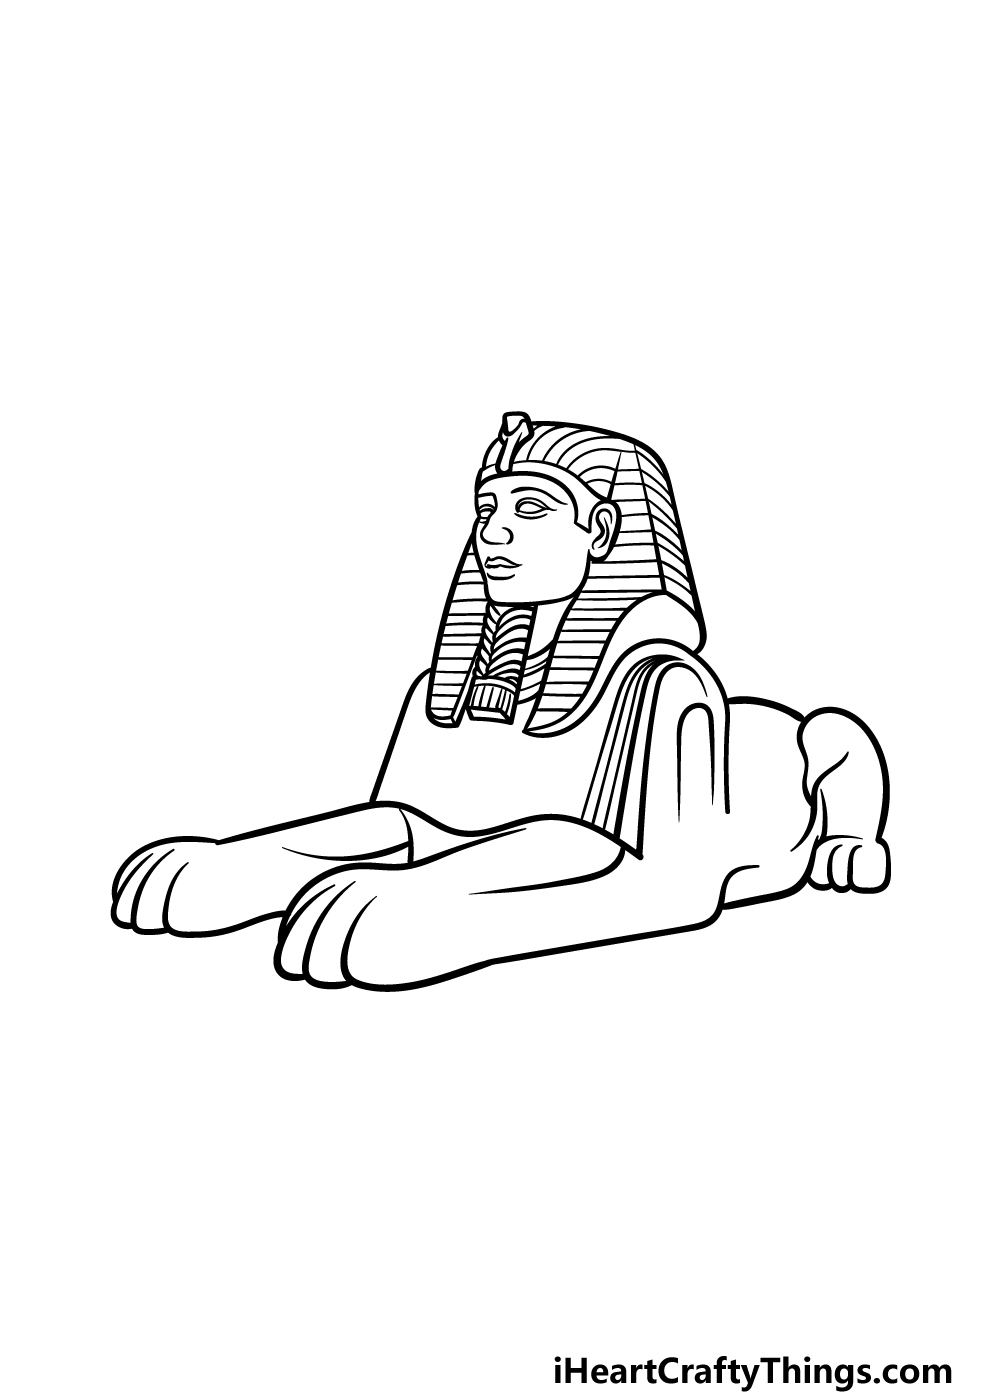
This fifth step of our guide on how to draw the Sphinx will see you finishing off all of the outlines to get you ready for some coloring fun.
You can finish off the base of the other front leg along with the base of the rest of the body in this step. Then, be sure to add any other final details you may have missed out on!
Once this is done, you could also add some extra touches like a background. You could draw the desert and even the pyramids in the background for one idea, but how do you plan to finish this off?
Step 6 – Finish off your Sphinx drawing with color
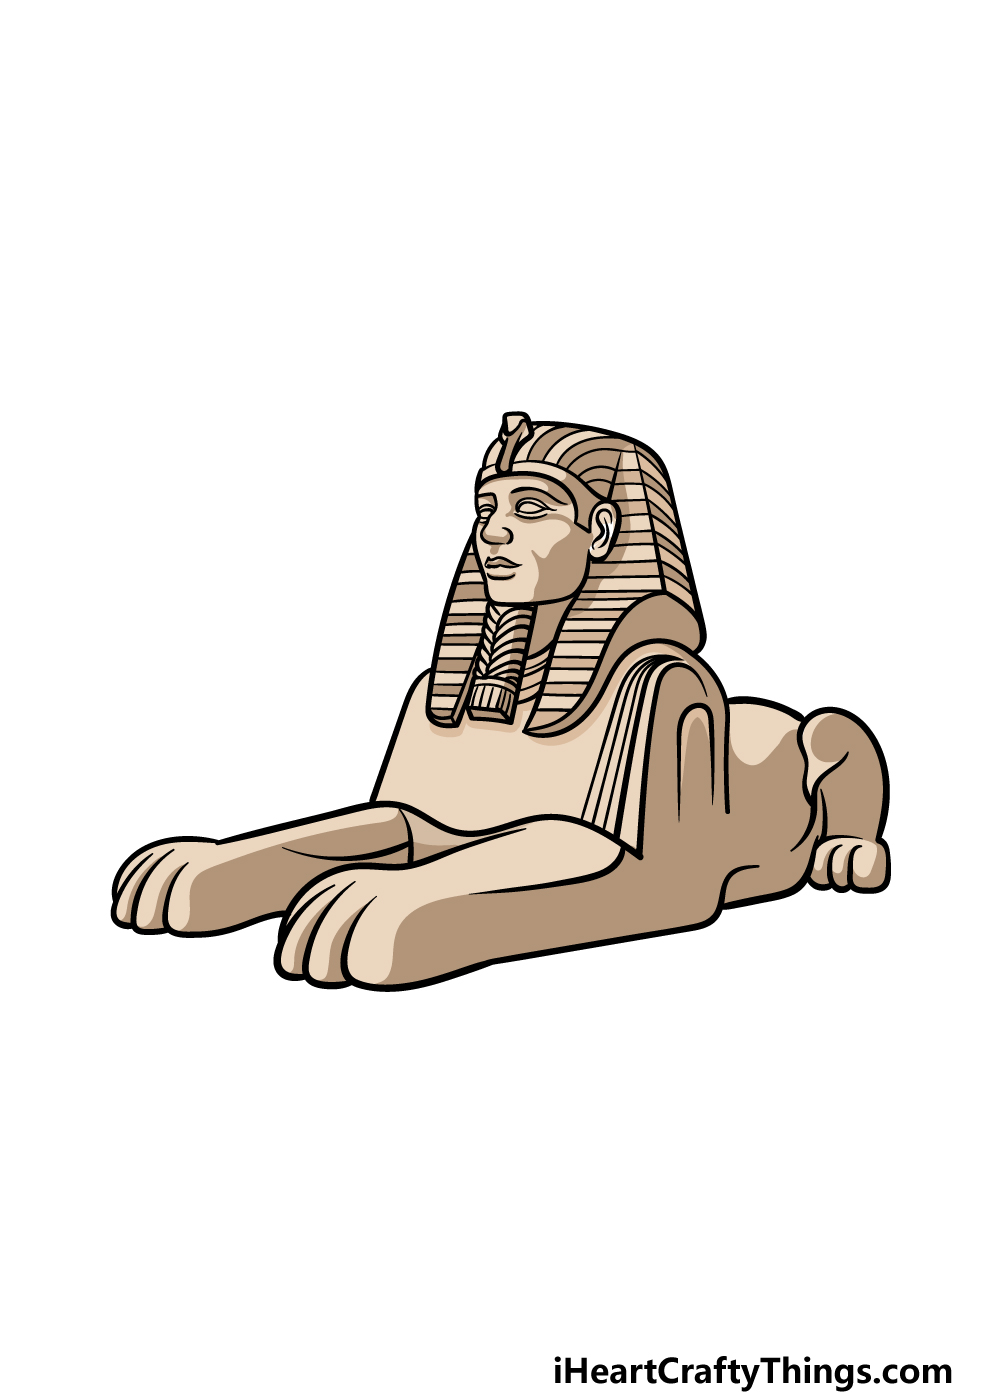
In real life, the Sphinx is made of limestone, and we are showing that off with the colors that we used in our reference image for this Sphinx drawing.
That means that we used a combination of light beige and brown colors for the entirety of the Sphinx, and this helps to give it that stony look.
You could use some similar colors if you would like to replicate this realistic look, but you should also feel free to incorporate any other colors you like.
This is a great way to imagine how you think this statue may have been painted before the paint was eroded from decades of dust storms.
5 Tips To Make Your Sphinx Drawing Even Better!
Travel back in time as we make this Sphinx sketch even better!
The drawing of the Sphinx that we created in this guide focuses on just this landmark, but there are a few others surrounding it. For example, you could draw the pyramids that are nearby.
You could even show the city of Cairo in the background to show off how close the Sphinx actually is to the city. What are some other landmarks you could add to finish off the setting?
The Sphinx is a major tourist attraction, and thousands of people travel to see it each year. For that reason, you could add some people to the drawing.
They would likely be quite small in the image, so they wouldn’t need a lot of detail. You could also draw some camels and other details such as that to make it even more interesting!
This Sphinx drawing we created shows it back in its glory days, and it even has its nose! In the present day, it is looking a bit more disheveled and is missing its nose.
You could draw a version that looks more like its present day counterpart to show the contrast between the two. If you need some help, then you could look up some photos of the real Sphinx.
There are so many interesting facts and statistics about the Sphinx, and these could be added to the drawing as well! You could start by looking up some of these facts.
These could include details such as the age of the structure and how it was built. Then, write these around the Sphinx to add an educational aspect to your artwork.
Finally, it would also be cool to create a montage of different structures around the world to go with your Sphinx sketch.
These could include structures that are also ancient, or they could be newer ones.
The colosseum would be a great one to add if you want another ancient structure, whereas the Eiffel Tower would be perfect for a more modern landmark.
Your Sphinx Drawing is Complete!
You have completed all six steps of this guide on how to draw the Sphinx!
The real Sphinx would have taken years and backbreaking work to create, but we hope this guide was quick, easy and fun for you to take on.
When you have finished the drawing, you can also add your own ideas to personalize it even further. We gave a few ideas for how you can do this, but what will you choose for your image?
Don’t forget to head to our website when you’re ready for more drawing fun! We have tons of guides for you to enjoy there, and more are on the way soon.
You can also show off how this awesome Sphinx drawing turned out by sharing it on our Facebook and Pinterest pages.