The Toy Story film series is one of the most loved franchises ever created. There are four films in the main series as well as countless TV shows, video games, books and other merchandise centered on these characters.
One of the main characters is the cowboy toy, Woody. Fans love this character due to his sarcastic yet honorable nature, and his journey of learning to be less jealous and rely on his friends has captivated audiences.
Learning how to draw Woody is a great way to honor this classic character!
If you love this character then there will be a lot to love in this tutorial.
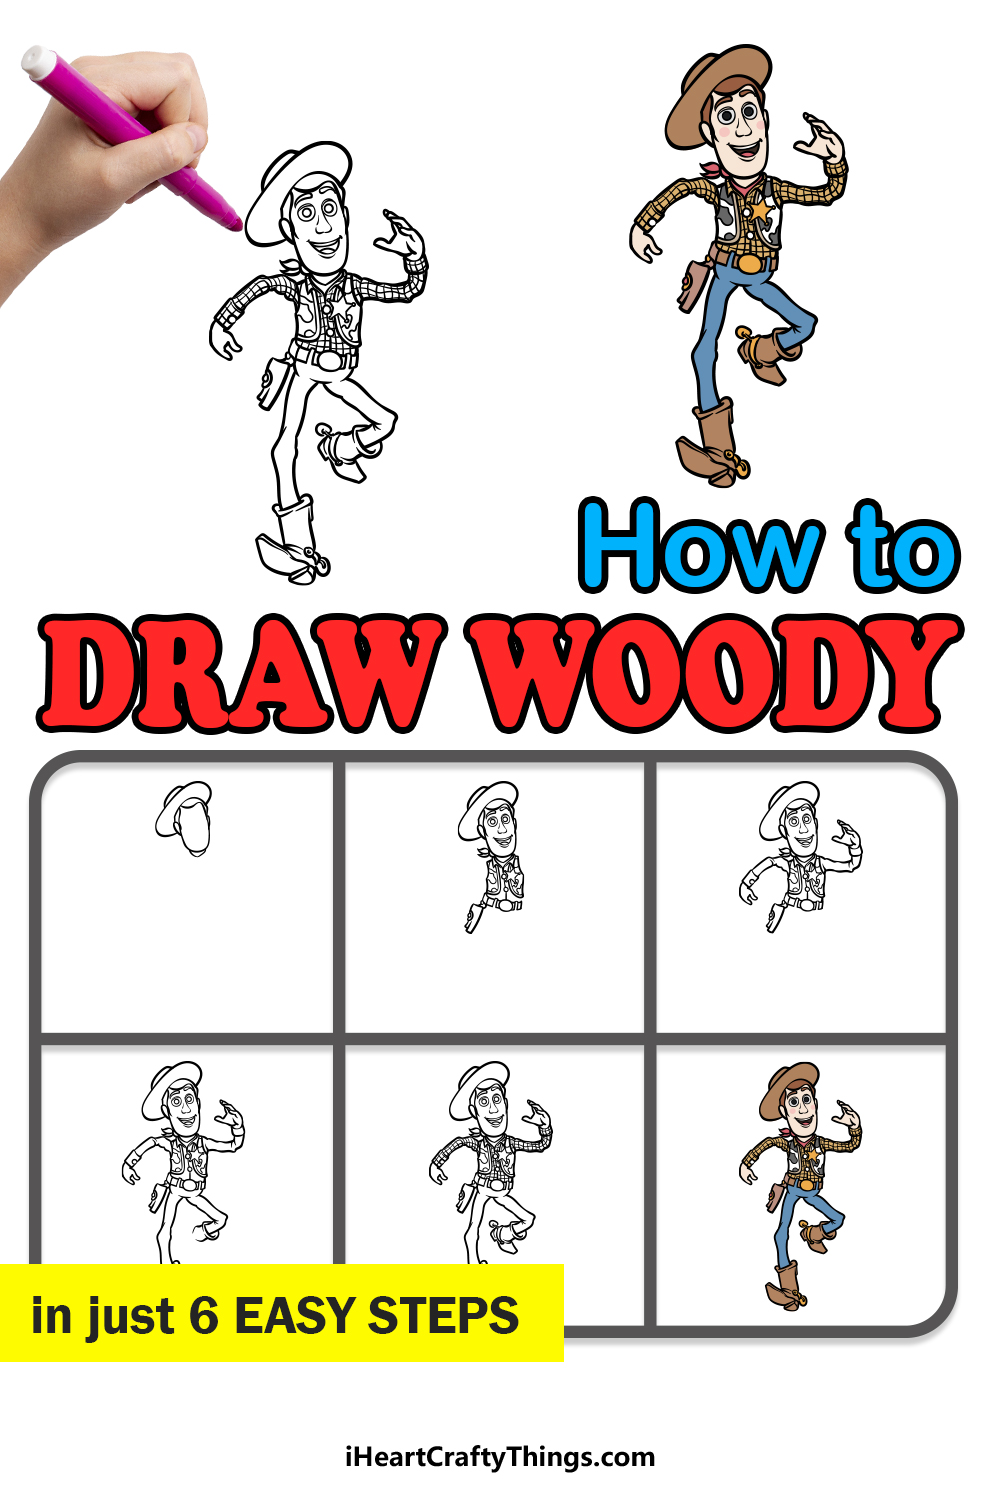
Our step-by-step guide on how to draw Woody in just 6 steps will show you how to easily recreate this famous cowboy toy.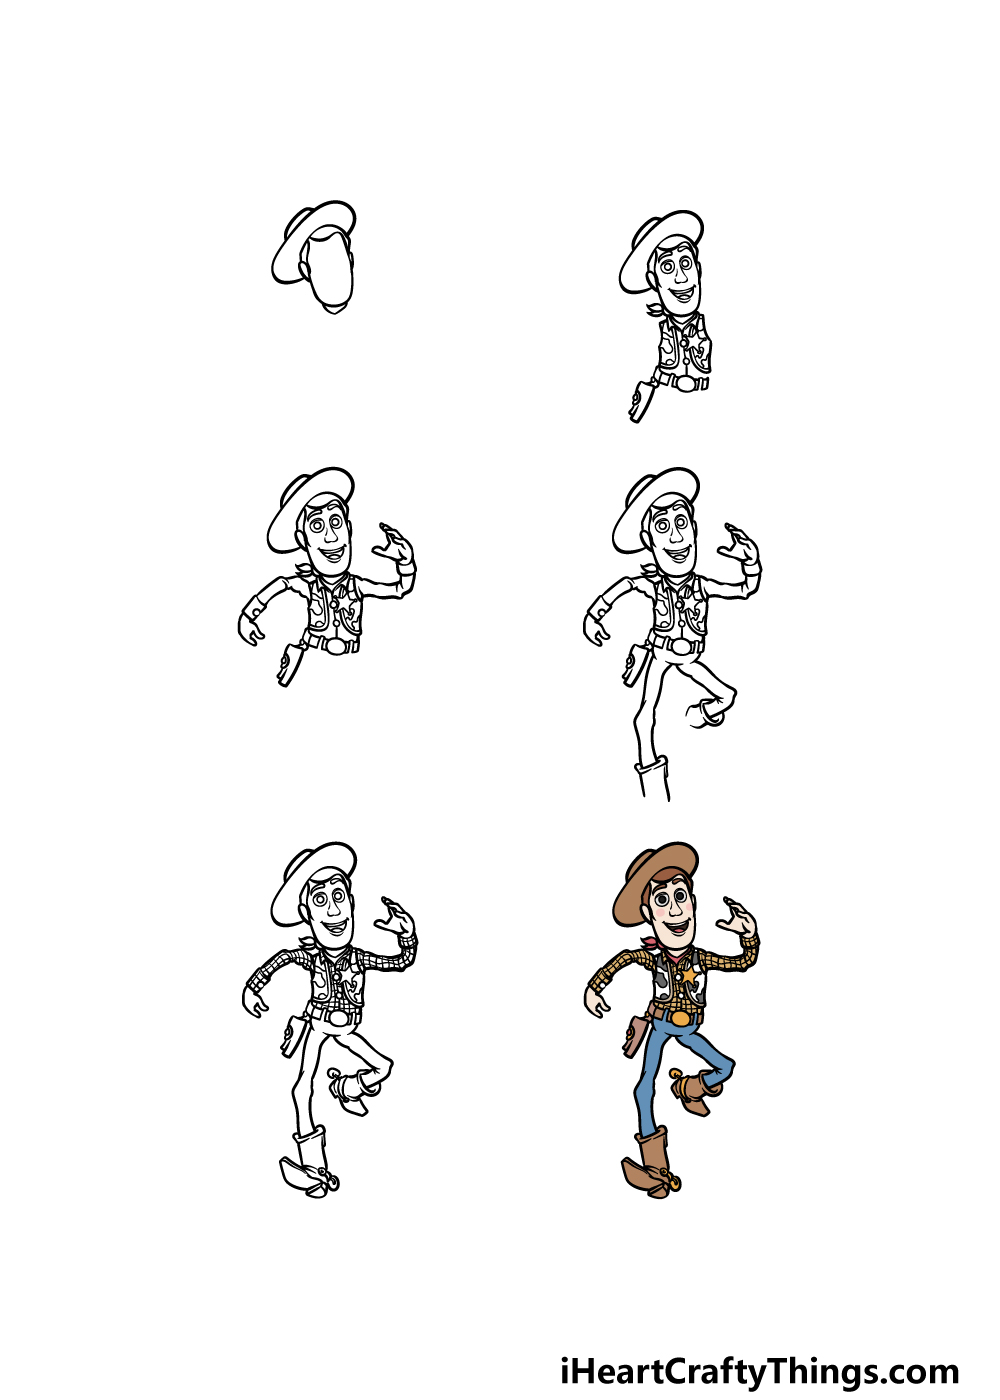
How to Draw Woody – Let’s Get Started!
Step 1
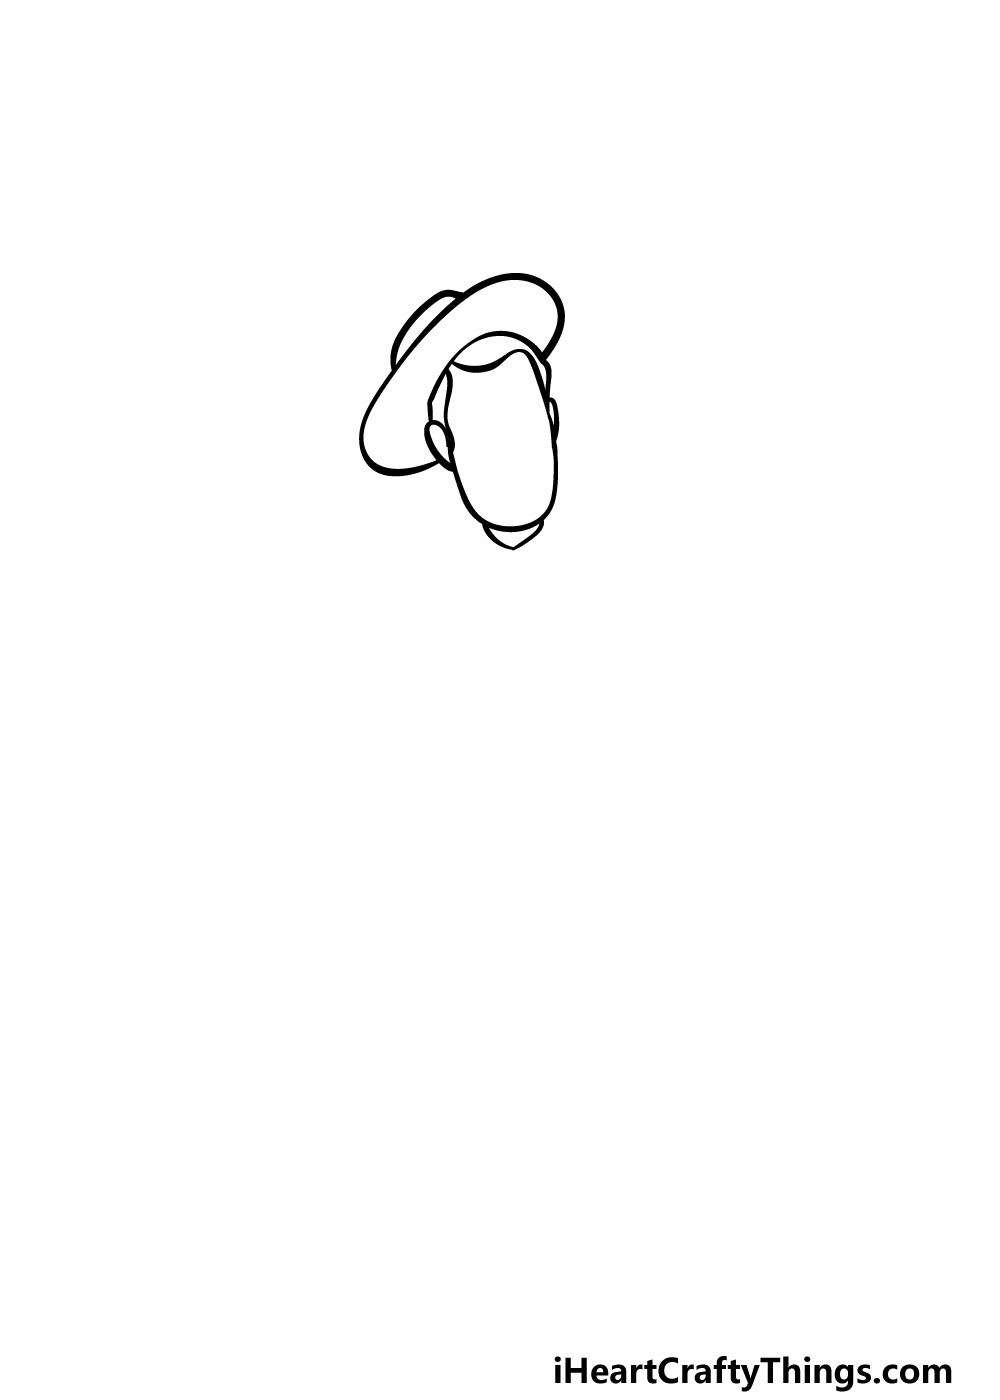
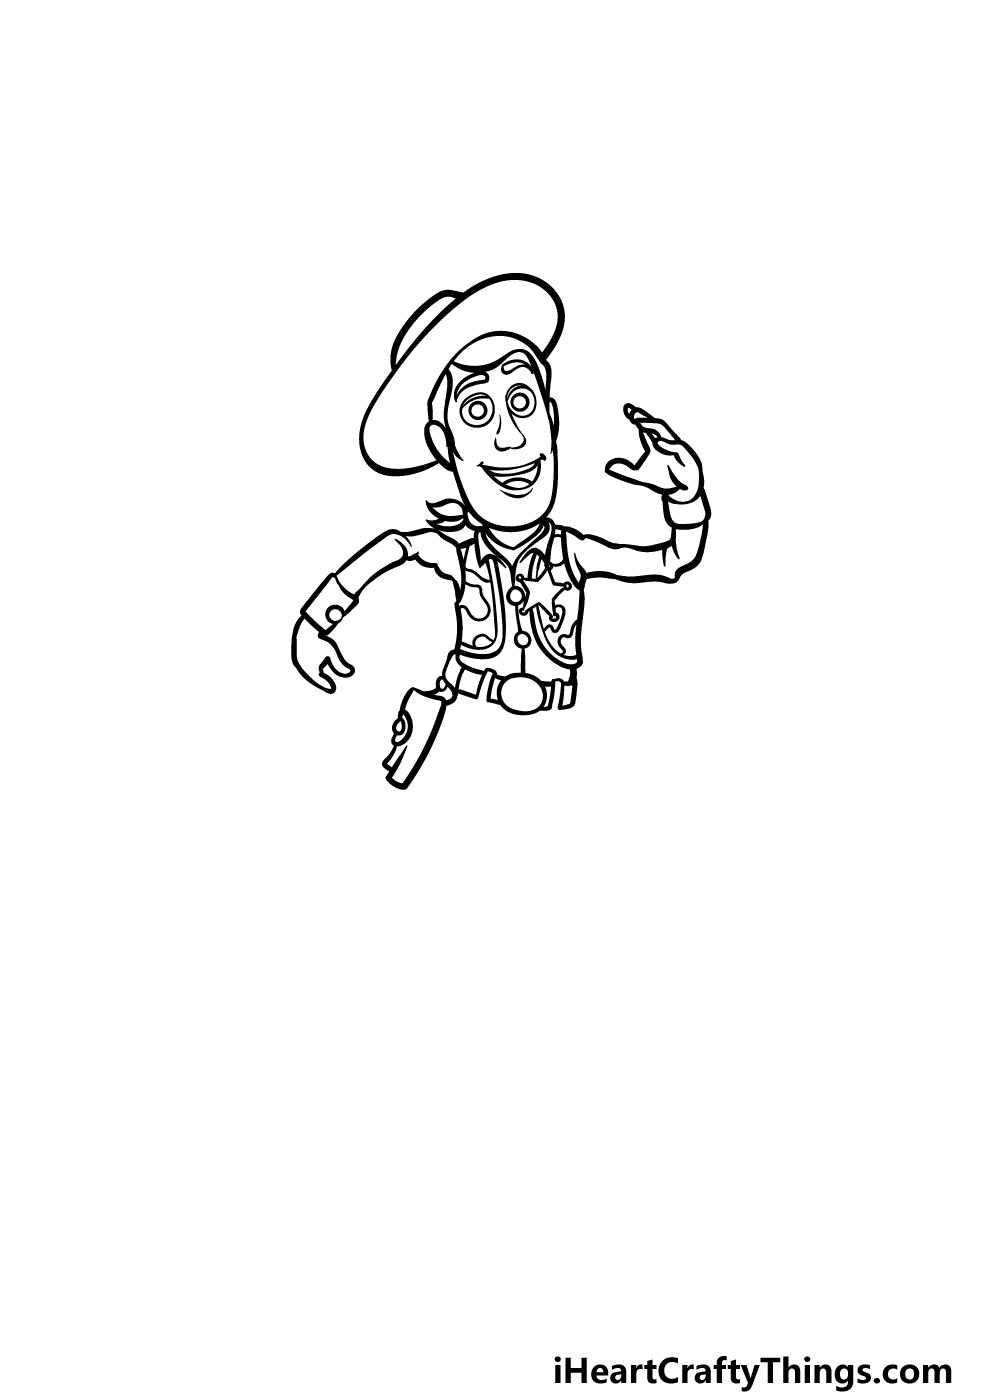
This first step of our guide on how to draw Woody will see you beginning the drawing by drawing his head.
Woody’s head is quite thin and long, so you can start by drawing a rounded line to create this shape as it appears in the reference image.
Then, draw a smaller curved line for the base of his neck beneath it.
Then, draw his ears on the side along with some curvy lines for his hair on the sides. Woody is almost always seen with his famous cowboy hat, so we shall also start drawing that.
Draw a rounded line over the top of his head, and then add another one over it for the top of the hat. Once you have drawn all of these aspects, you’ll be ready for step 2.
Step 2 – Draw his facial features and his chest
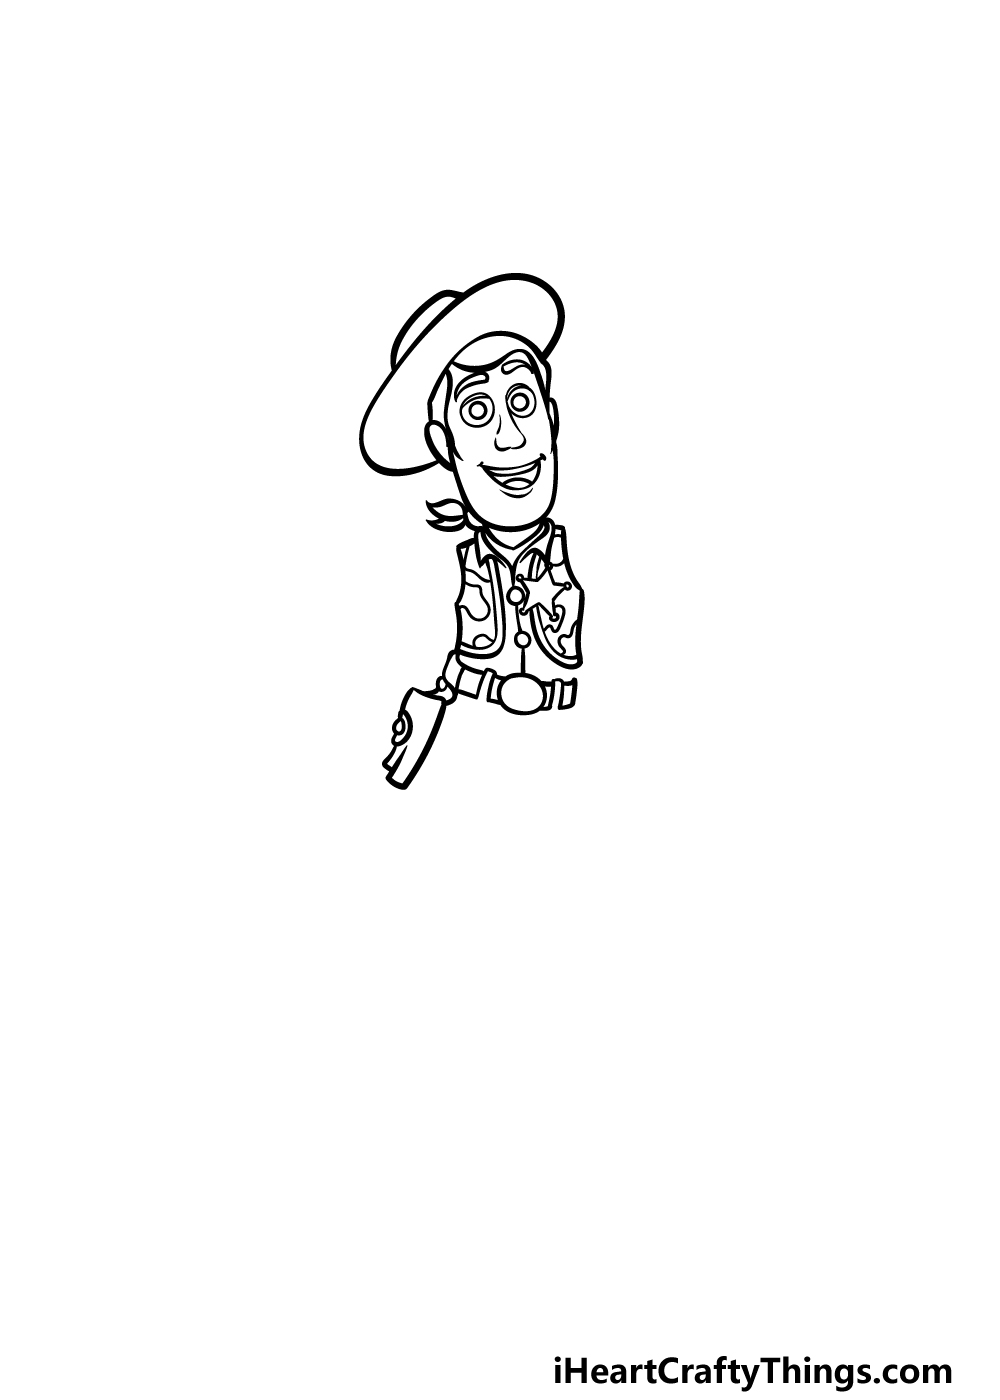
To continue this Woody drawing of yours, we will next be drawing his features as well as his chest. For the facial features, we shall start with his eyes.
His eyes are round in shape with some large circular pupils within them. His eyelids will also be slightly lowered for his facial expression.
Then, you can draw his eyebrows using some simple shapes, and then draw his nose and smiling mouth beneath.
Then, we will be drawing his chest. Woody wears a vest with cowskin patterns on it, and this has his star-shaped sheriff’s badge over it.
Then, draw the buttons of his shirt between the vest, add his scarf and then draw his belt. Finish off by drawing the gun holster on the left side of his waist and then it’s time for step 3.
Step 3 – Now, draw his arms
In this guide on how to draw Woody, we will be portraying him in a dynamic running pose. To start this off, we will begin by drawing his arms.
His arms are made of stuffed fabric, so they will be swinging wildly around as he runs. Use some curved lines to portray his arms, with the one on the left angled down.
The one on the right will be raised a bit, and we’ll get a better look at the hand on that arm. Be sure to also draw the rounded rectangle sections of his sleeves on his wrist!
That’s all there is to it for now, so you can now move on.
Step 4 – Next, draw the starts of his legs
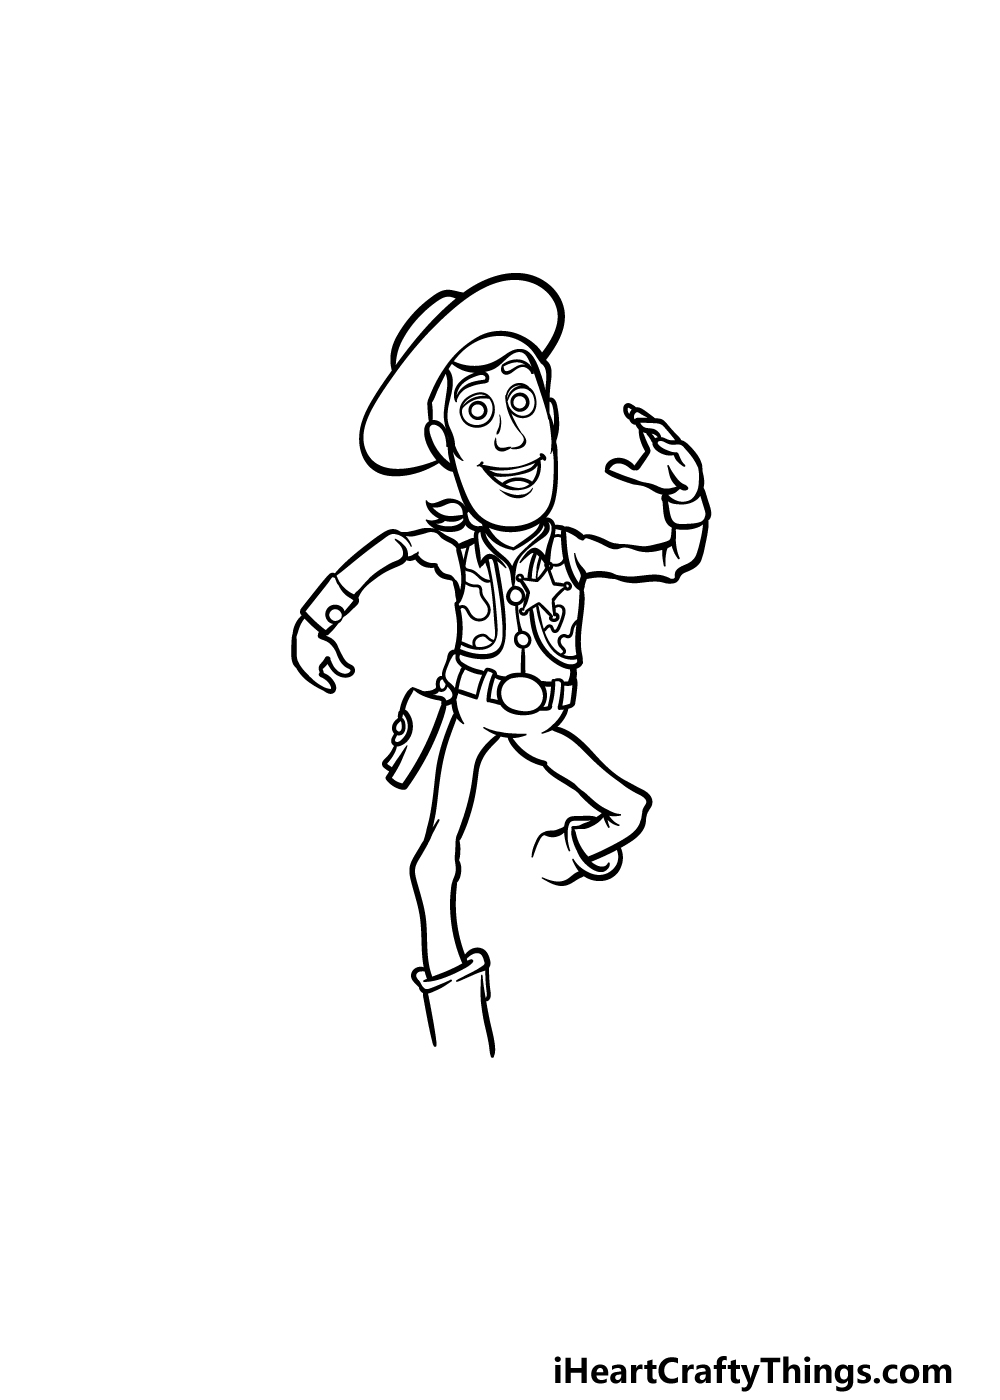
Much like his arms, Woody’s legs are made out of floppy stuffed fabric. As we draw them, they will be similarly flailing like the arms were.
The leg on the left side will be straighter and extended further forward than the other one. That other leg will be a bit more bent, and this will help to show that he is mid-stride.
You can also start drawing the top rims and first sections of his boots under his legs. We will leave the bottom of the boots undrawn for now, but you will finish them off along with final details in the next step.
Step 5 – Add the final details to your Woody drawing
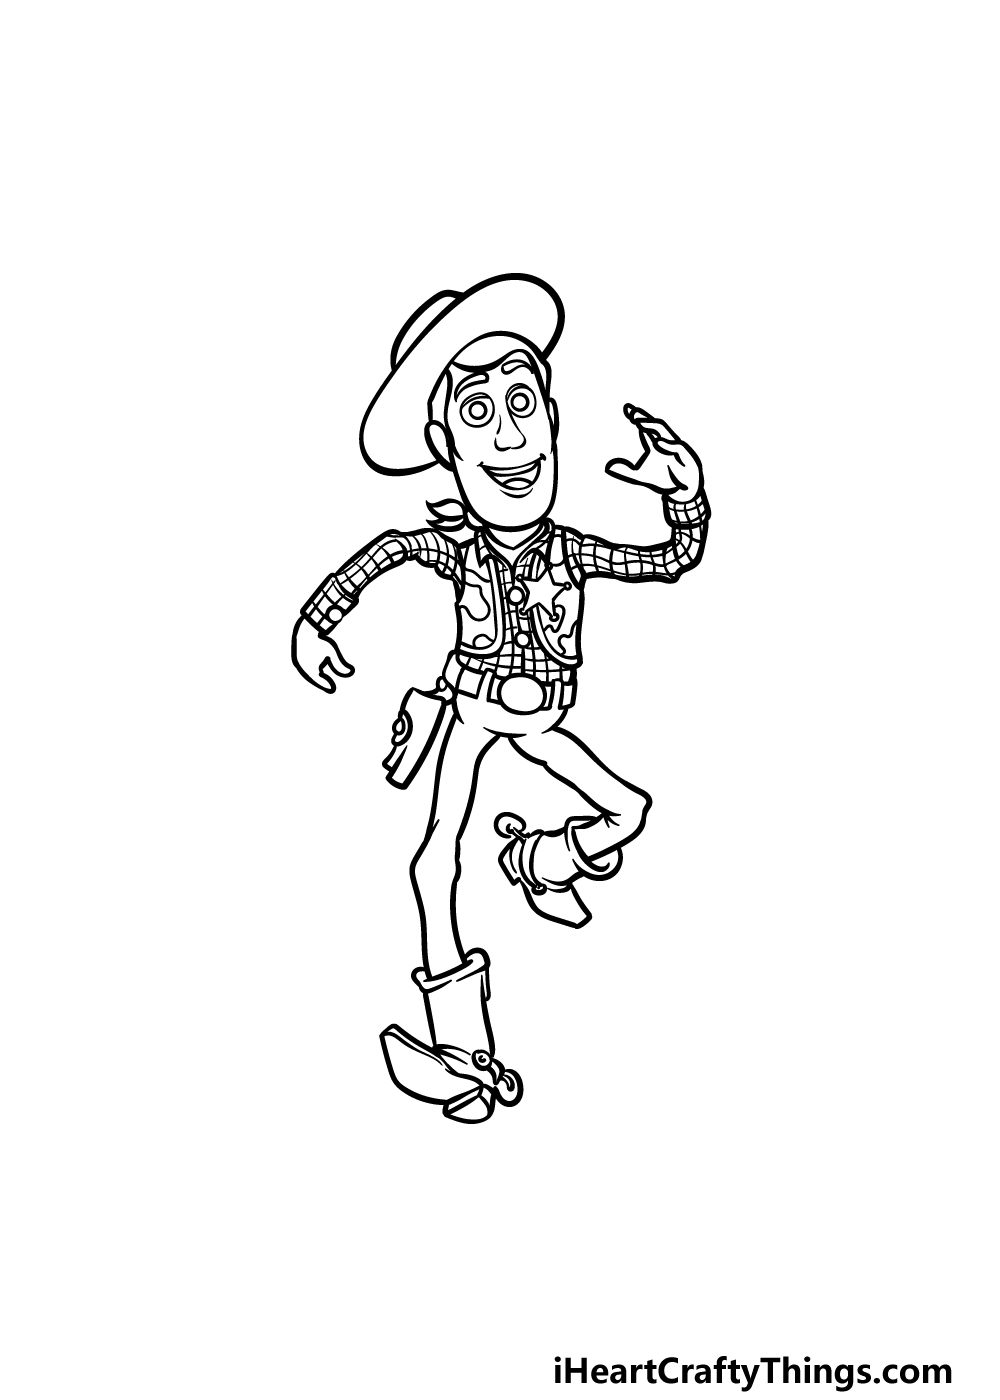
This step of our guide on how to draw Woody will be all about finishing off the final elements and details. To start, we will draw the bottom of his boots.
For the boot on the left, we will see a bit of the base of the shoe, whereas for the other one we will only see the top.
You can finish off the boots by drawing the stirrups attached to the backs of them. Then, you can finish the drawing by adding the checkered pattern to his shirt.
Once that is drawn, you can also add some ideas of your own! Perhaps you could draw a background to show off your favorite scene from the film or maybe even add some more characters from the films.
Step 6 – Finish off your Woody drawing with color
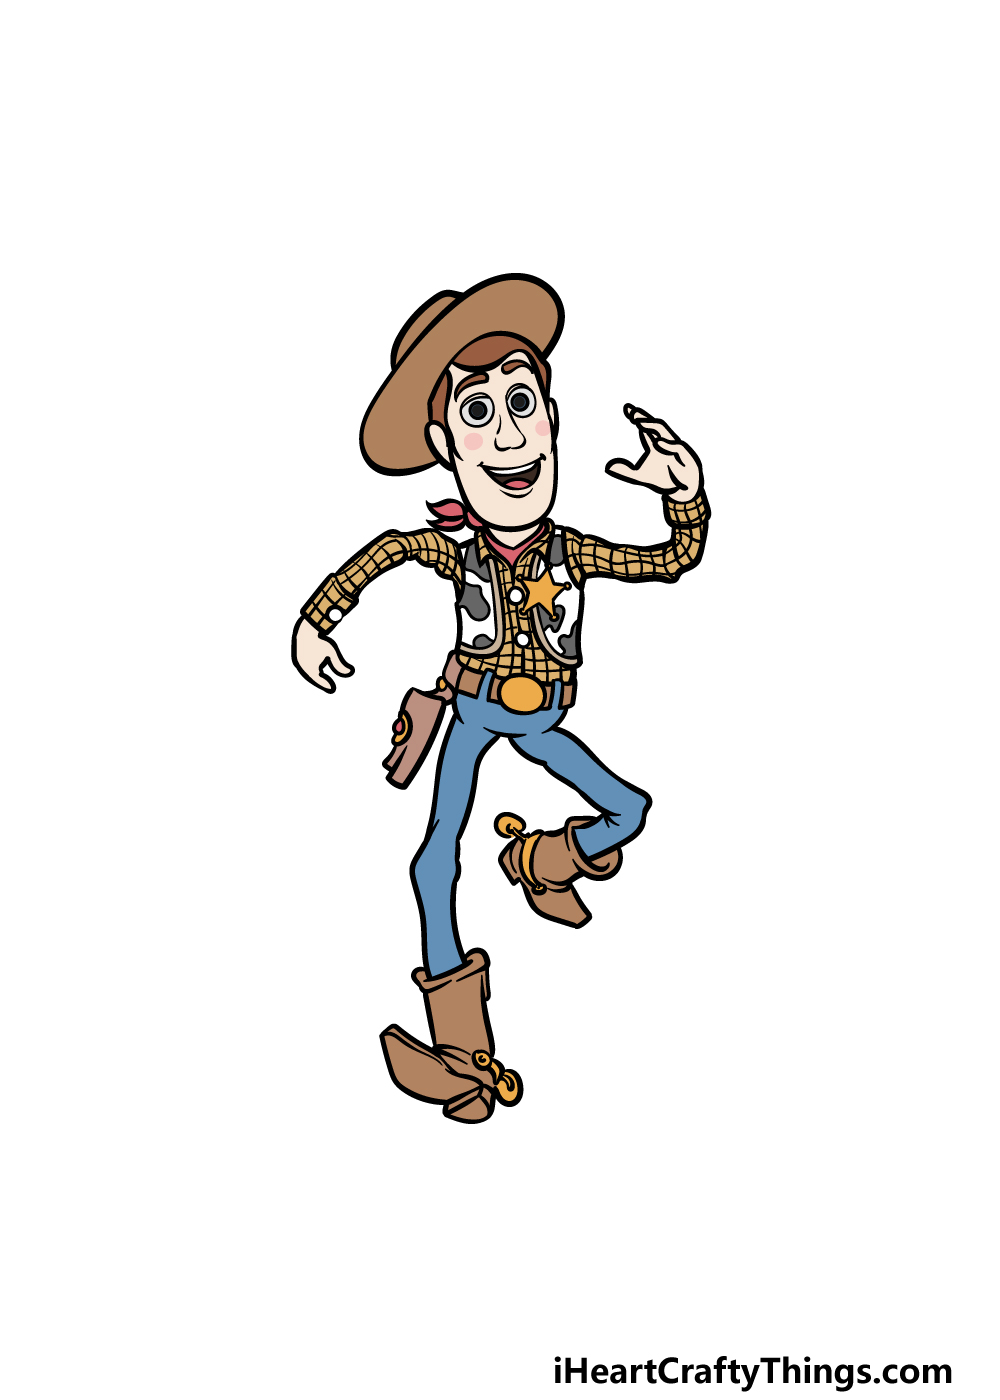
You’re ready to finish off this Woody drawing with some colors! In our reference image, we went with the typical colors he is seen in throughout the films, so you can copy our example to keep him looking accurate.
Some of the colors include some brown for his hat and boots, yellow for his shirt and blue for his pants.
Will you portray his typical color scheme or will you maybe create your own Woody variation by changing up the colors?
Even if you stick to his regular colors, you can still have some color variation by experimenting with the art tools and mediums you choose.
5 Tips To Make Your Woody Drawing Even Better!
You’ll want to have some fun playing around with these tips for your Woody sketch!
In this drawing of Woody, we see him running and smiling, ready for adventure. This is a great pose, but in the films Woody is almost always joined by others in his adventures.
The first choice for this would be his best friend Buzz Lightyear. There are so many other characters such as Bo Peep, Mr. Potato Head or Rex to name a small selection.
What are some other characters you could add?
There are loads of friends to add, but the Toy Story series also has many villains that could be added. They could be chasing after Woody to create a tense scene.
Some famous examples would be Emperor Zurg, the Prospector or Lotso the bear, maybe you could even design a brand new villain to be in the image!
The Toy Story series is all about imagination, and you could also take this opportunity to use your own imagination. You could do this by creating some new toy characters.
One way you could do this would be by using some of your own toys that could join Woody in his adventures. Or, you could design your very own dream toy!
The pose used in this Woody drawing is really cool, but you could also look into changing the pose he’s in.
For example, you could have him in a simpler standing pose if you don’t want such an action-packed image.
You could use the film itself or some pictures online to help you create this new pose that you have in mind.
Finally, you would have many famous settings from the films to use as a background for this Woody sketch. There are some iconic locations such as Andy’s bedroom or Al’s Toy Barn.
You could begin by choosing your favorite scenes from the movies and then try to recreate the settings of these scenes.
What are some classic moments you would like to recreate for your drawing?
Your Woody Drawing is Complete!
This is one of the most well-known and well-loved characters in animation history, and we hope you had a great time recreating him in this guide on how to draw Woody!
There were a lot of details in this drawing, so we hope that by working through the steps you were able to overcome any of the challenges presented to you.
Now you can finish it off by adding your own ideas, elements and details! What will you do to finish off your drawing?
Our website is full of many incredible drawing guides to enjoy. These cover a wide range of subjects, so be sure to head over and check out our ever-growing selection!
You’ll want to check in often to make sure you never miss out.
You can also show off how your Woody drawing came out by sharing it on our Facebook and Pinterest pages. We can’t wait to see how great your incredible picture looks!