It would be tricky to find a type of food that is more versatile and varied than a sandwich.
On a basic level, a sandwich is usually comprised of two pieces of bread with some kind of filling between, but there are infinite possibilities to what that can comprise.
You don’t even necessarily need to use bread, as some people will even create a sandwich using crackers or something like lettuce.
It can be great to devise the perfect sandwich, and learning how to draw a sandwich is a great way to visualize that.
If you would like to know how to create your own perfect sandwich, then you’re in the right place!
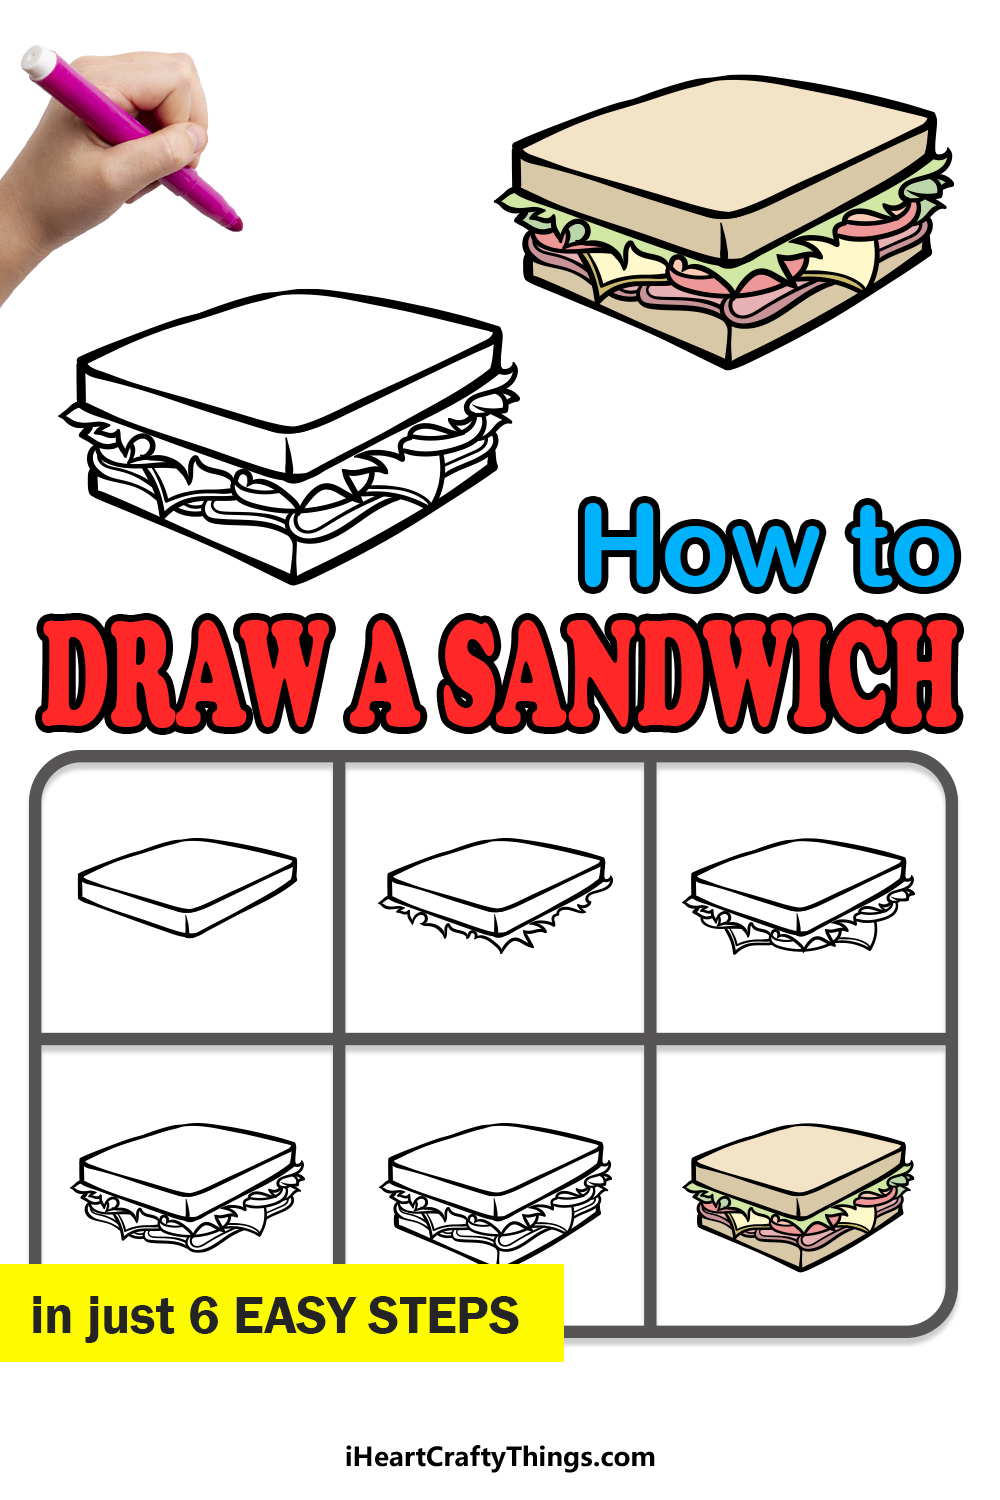
Our step-by-step guide on how to draw a sandwich in just 6 easy steps will show you how easy and fun it can be.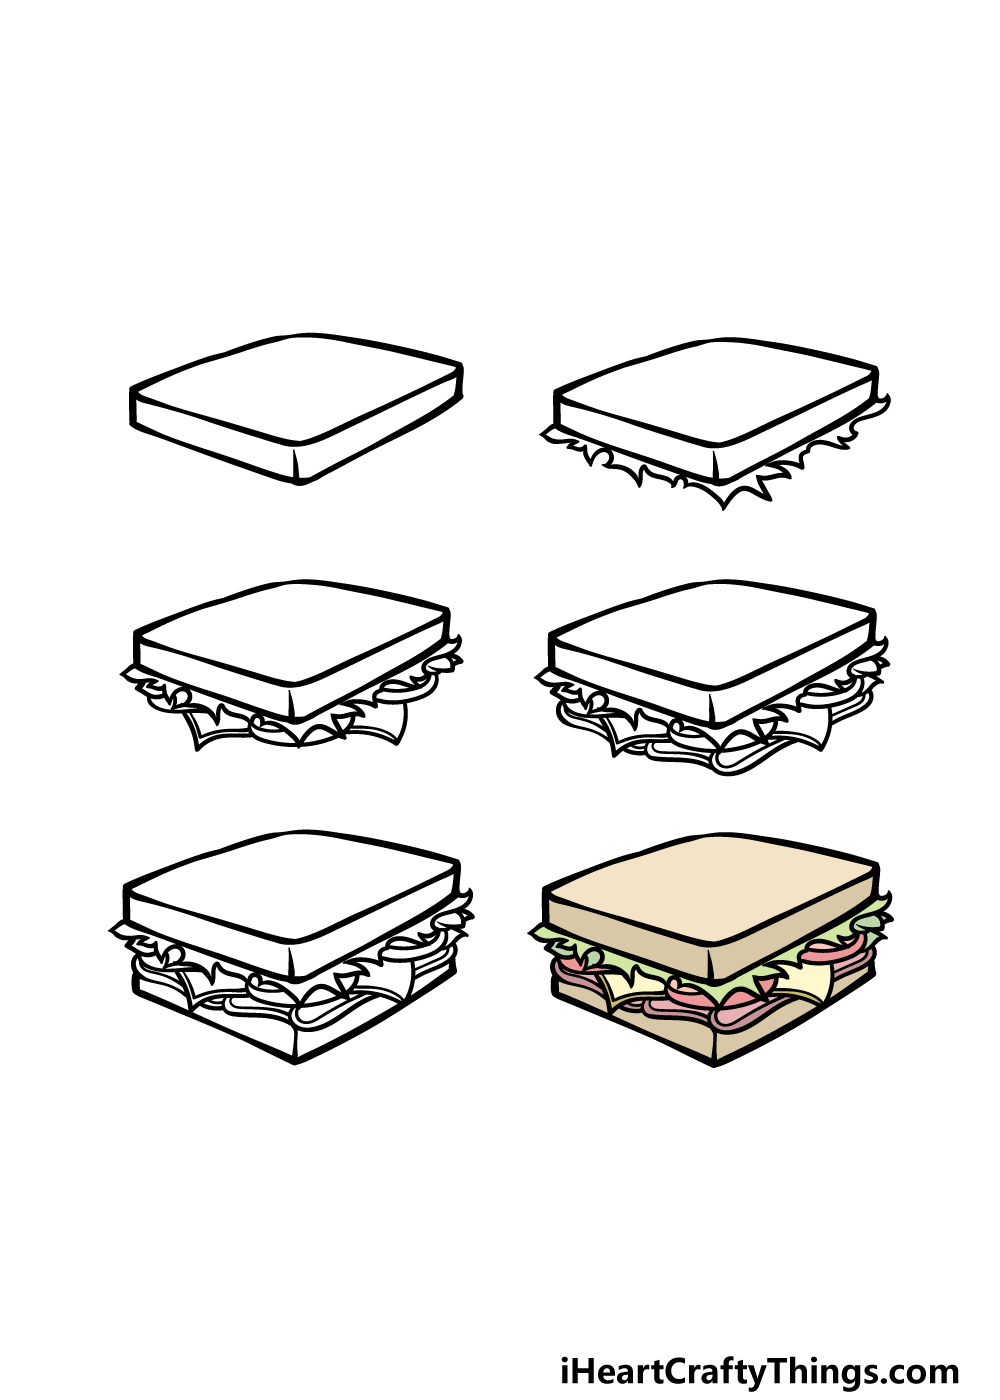
How to Draw A Sandwich – Let’s Get Started!
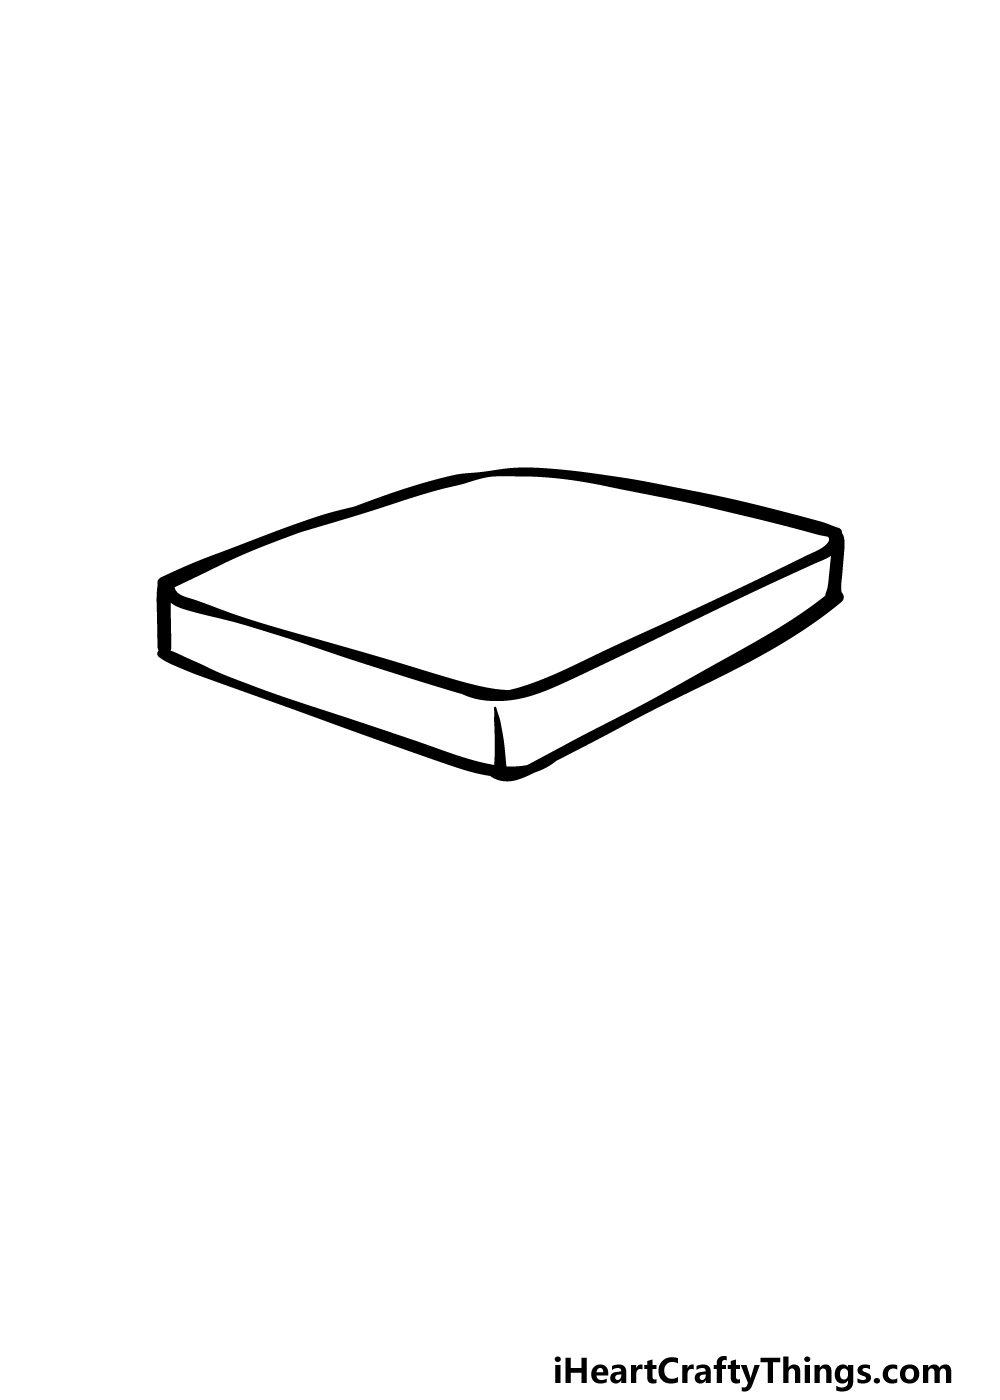
Step 1
We will be portraying a pretty standard example of this food as we work through this guide on how to draw a sandwich.
That means that there will be some filling between two normal slices of bread, but you will also have a chance to customize some of these elements later on!
For now, we will begin with the top slice of bread. Start by drawing a rectangular shape at an angle.
Then, we will try to give this piece of bread more depth by drawing some lines down from it to create the thin side of the bread.
This part can be surprisingly tricky to get right, so try your best to replicate the lines as they appear in the reference image. When you have this first slice of bread drawn, we can move on to step 2!
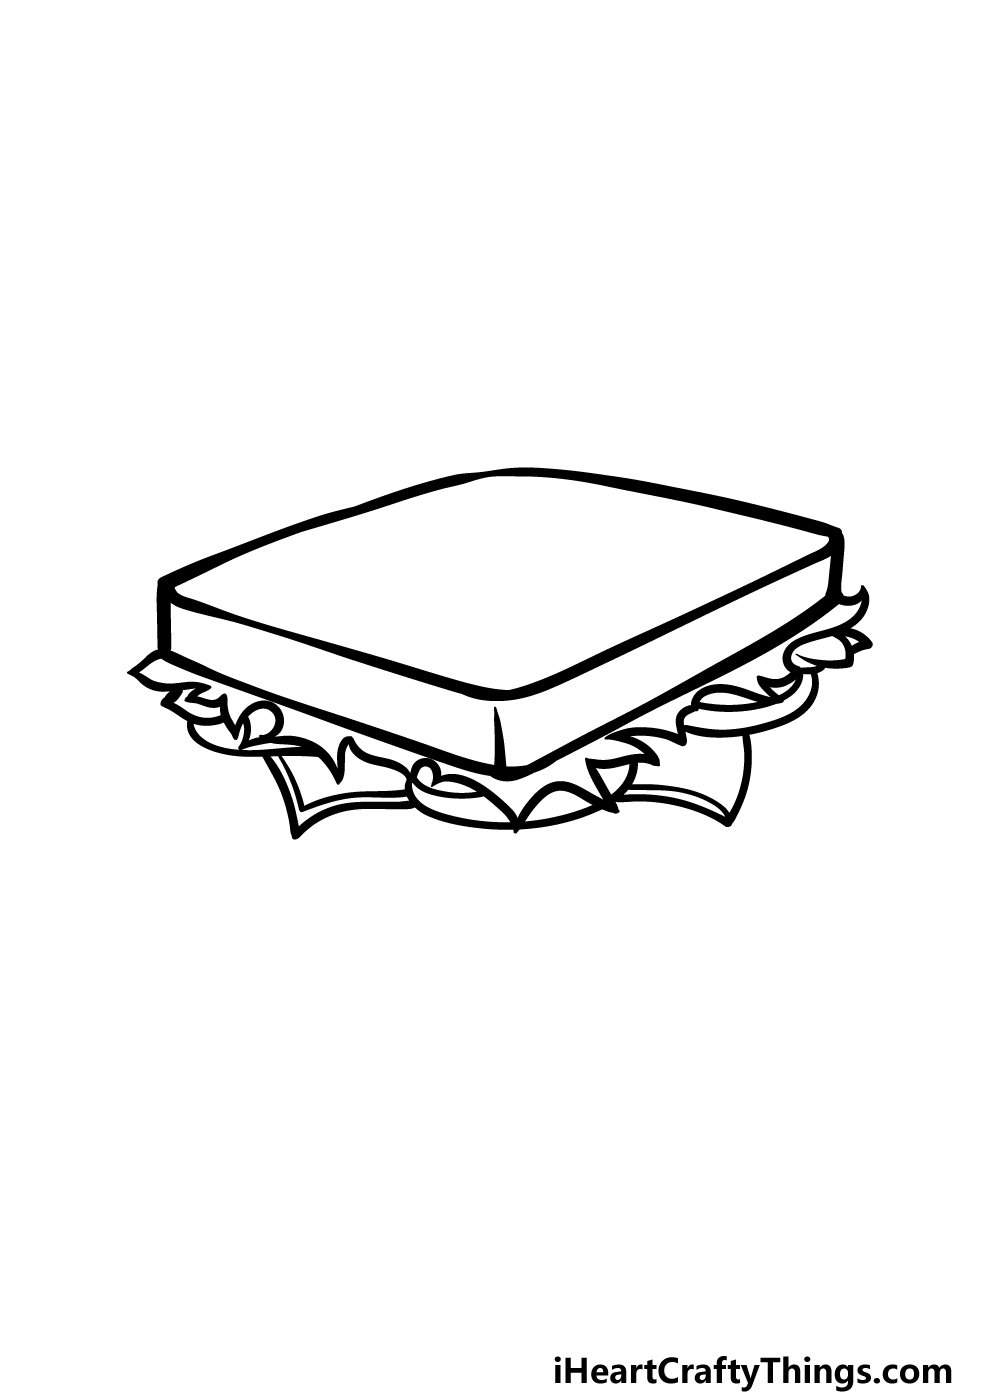
Step 2 – Draw the lettuce for the sandwich

Lettuce is a common feature of many sandwiches, so in this second step we shall be adding some to your sandwich drawing.
To do this, we will be using some curved lines with sharp points in them all along the bottom perimeter of the bread.
This will help to make it look like there are pieces of left lettuce contained within the sandwich.
That’s all there is to it for this step, and then it will be on to adding some more fillings in the third step of the guide.
Step 3 – Now, draw more of the filling for the sandwich
There are many other fillings that you will tend to find in many sandwiches, and we shall be adding some in this third step of our guide on how to draw a sandwich.
The fillings that we shall be adding in this part will be some slices of tomato along with some cheese.
For the tomato slices, simply draw some rounded lines poking out the side of the sandwich and then draw another curved line on the inner perimeter of the tomato outline.
For the cheese, draw some lines coming out to form some pointy tips poking out, and then add some line details to them.
The reference image will show you how you can place these elements, but feel free to move them around if you wish!
Step 4 – Next, draw some meat on the sandwich
Meat is also very common on sandwiches, and we shall add some to your sandwich drawing in this next part.
The meat that we are adding looks like shaved beef or ham, and the thin slices will be folded into the sandwich.
Use some rounded, curvy lines beneath the previous fillings to create the shapes of the folded meat slices.
If you would prefer a vegetarian sandwich, then you could add some more vegetables instead of this meat!
Regardless of what you choose, when you’re ready we can then move on to the final details in the next step.
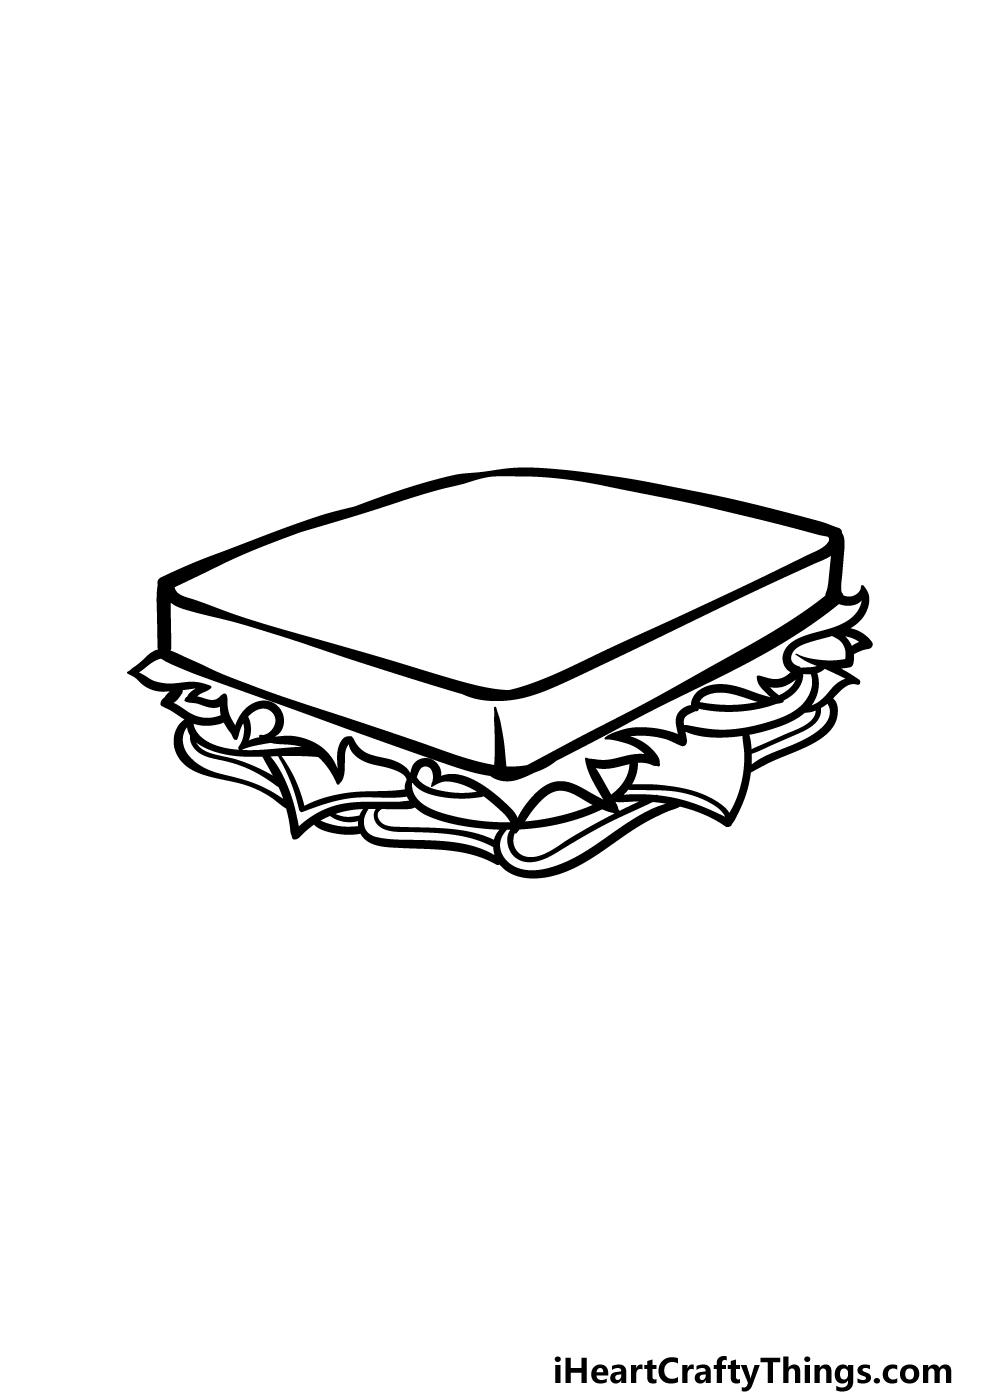
Step 5 – Add the final details to your sandwich drawing
This step of our guide on how to draw a sandwich will be all about adding some final details to finish it off.
This part will also give you the chance to customize your picture, but first let’s finish off the final element.
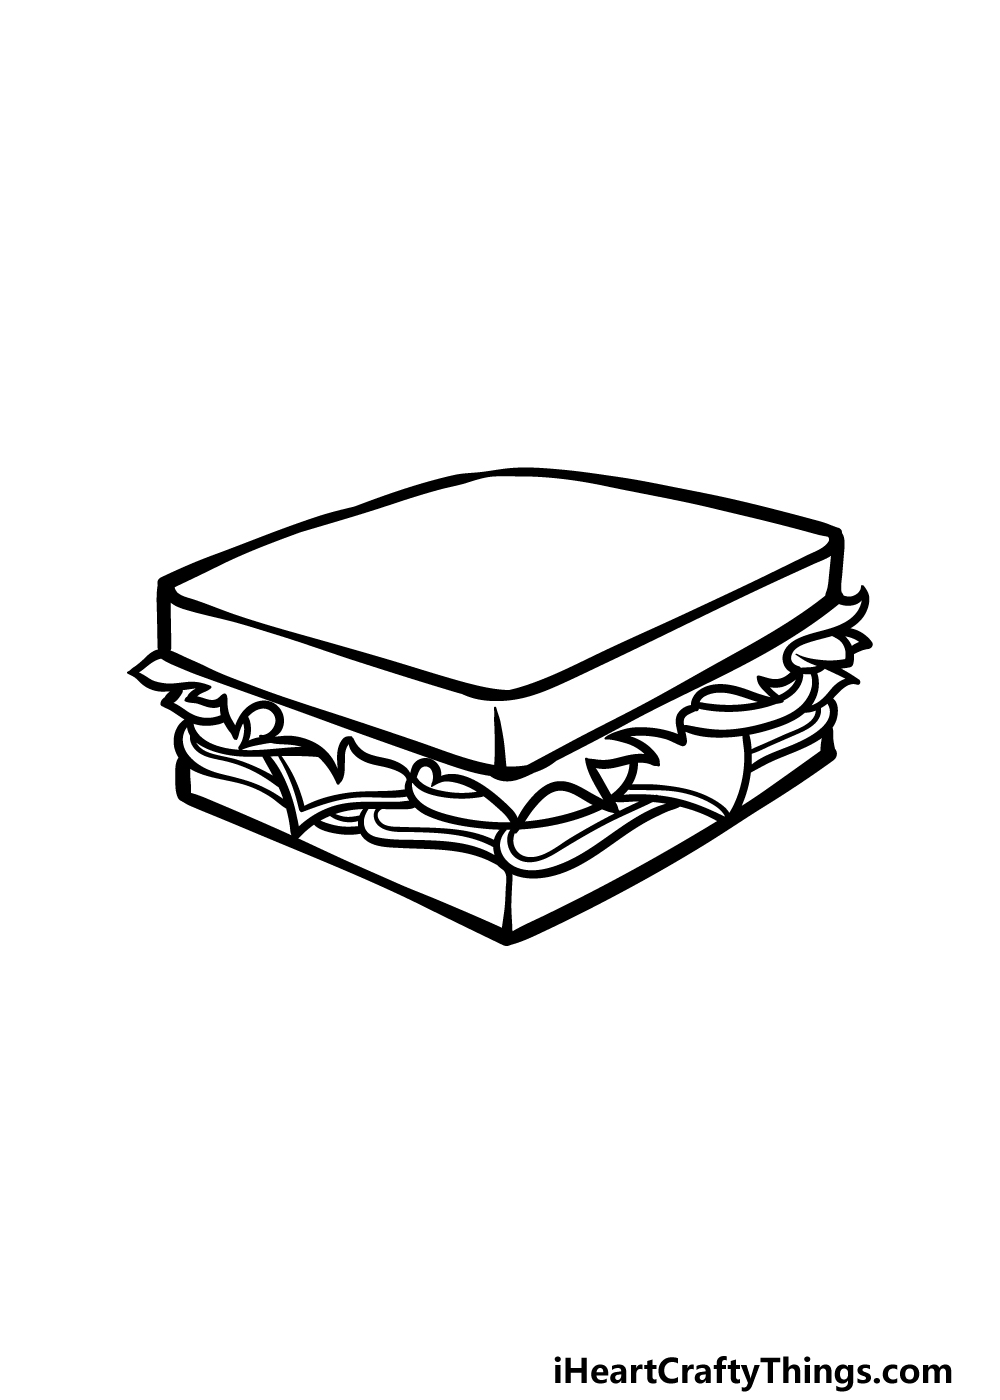
The final thing to add sill be the bottom piece of bread, and this one will be drawn exactly as you drew the top slice.
Once you have drawn this second slice, you’ll be ready for the final step! Before you proceed, feel free to change and add any elements that you like.
You could draw a background to show what food or beverages you would enjoy with this sandwich, or you could create a unique one.
Maybe you could design a new sandwich that stands tall from all the fillings inside of it! What would your perfect sandwich look like?
Step 6 – Finish off your sandwich drawing with color
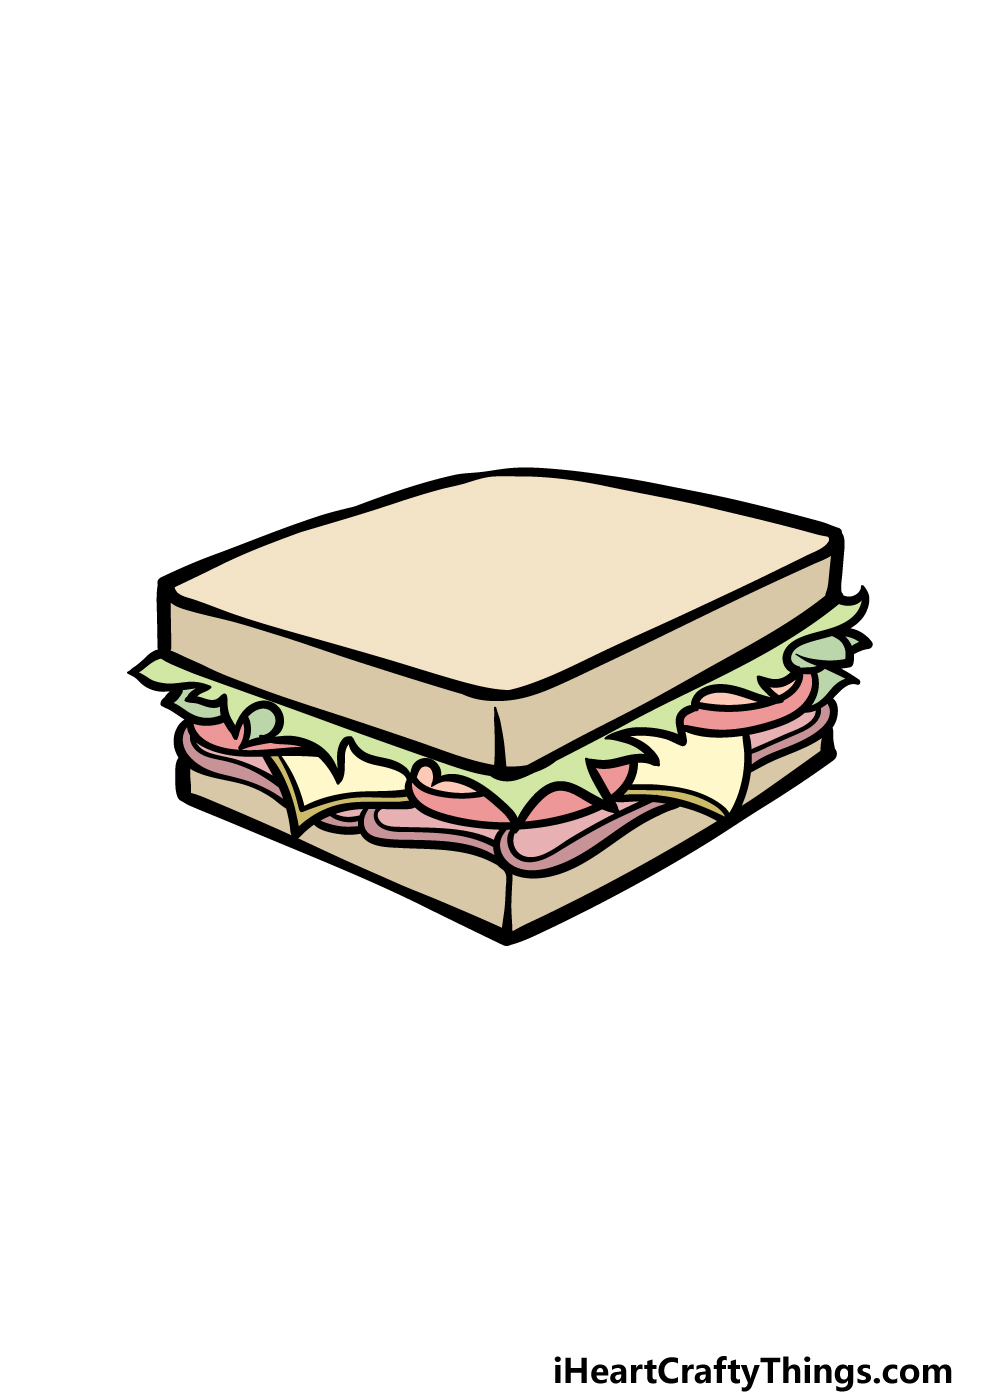
In this final step of your sandwich drawing, we will finish it off with some color. In our reference image, we kept all the colors pretty realistic.
We used a light brown for the bread, and then we used green for the lettuce, red for the tomatoes and dark pink for the meat.
You could replicate the colors we used in our image for a more realistic look, but you could also use any unique colors you may like!
When you have decided which colors you will use, the next thing is to decide which art mediums would work best to bring them to life. How will you finish off this tasty sandwich?
5 Tips To Make Your Sandwich Drawing Even Better!
These 5 tips have all the ingredients you need to create a wonderful sandwich sketch!
While the fillings of a sandwich can be really varied, the same can be true of the bread! We will focus on the fillings later, but first let’s look at the bread.
For this sandwich drawing, you could use regular white or brown bread, as shown in our example.
Or, you could use health bread that has seeds and other additions.
This is all up to your preference, and it could be as simple as adding a thicker crust to the bread!
Now, we shall focus on the filling of this drawing of a sandwich. We showed you some of the fillings you could include in our guide image.
This is another step where you can show off what your ideal sandwich would be. You could add any of your favorite foods, even if they’re unconventional!
Enjoying a sandwich is great, but it can be even better when enjoyed with other food and beverages. These could include a can of soda, a glass of juice or maybe even a milkshake!
In terms of food, you could add food such as potato chips or maybe some fries. These are a few ideas, but what else could you add to enjoy with this sandwich?
Once you have chosen the additions you would like to add to your sandwich drawing, you can then draw more background details!
For instance, you could have a character about to dig into the sandwich. If you want to go with this suggestion, you could use yourself or a friend as a model.
What kind of style would you draw this character in?
Finally, you can experiment with the colors you use to make your drawing look incredible! If you did different layers of filling for the sandwich, it would be fun to go for a different color scheme for each one.
To take it even further, you can also use a different art medium for each layer to make them stand out even more!
Your Sandwich Drawing is Complete!
We hope that working on this guide on how to draw a sandwich was a fun and rewarding experience for you!
We aimed to make sure that this drawing would be not only fun and easy for you to do, but that it would also leave a lot of room for your own creativity.
What other additions, ideas, color choices and other elements can you think of to personalize this picture even further?
We have a huge selection of drawing guides for you to enjoy on our website, so be sure to check in there for more drawing fun! We have many more on the way, so be sure to check in frequently.
When your sandwich drawing is all done, we hope that you will share your creation on our Facebook and Pinterest pages for us to take a look at!