The letter K is one of the more difficult letters to write when you’re first starting out. Luckily, the uppercase and lowercase versions of this letter are quite similar, so that makes it easier.
It may not be the most common letter in the alphabet, but it’s one we still use fairly frequently.
One benefit of it being a more complex letter is that you can make it look quite cool in designs. That is exactly what we are aiming to do in this guide!
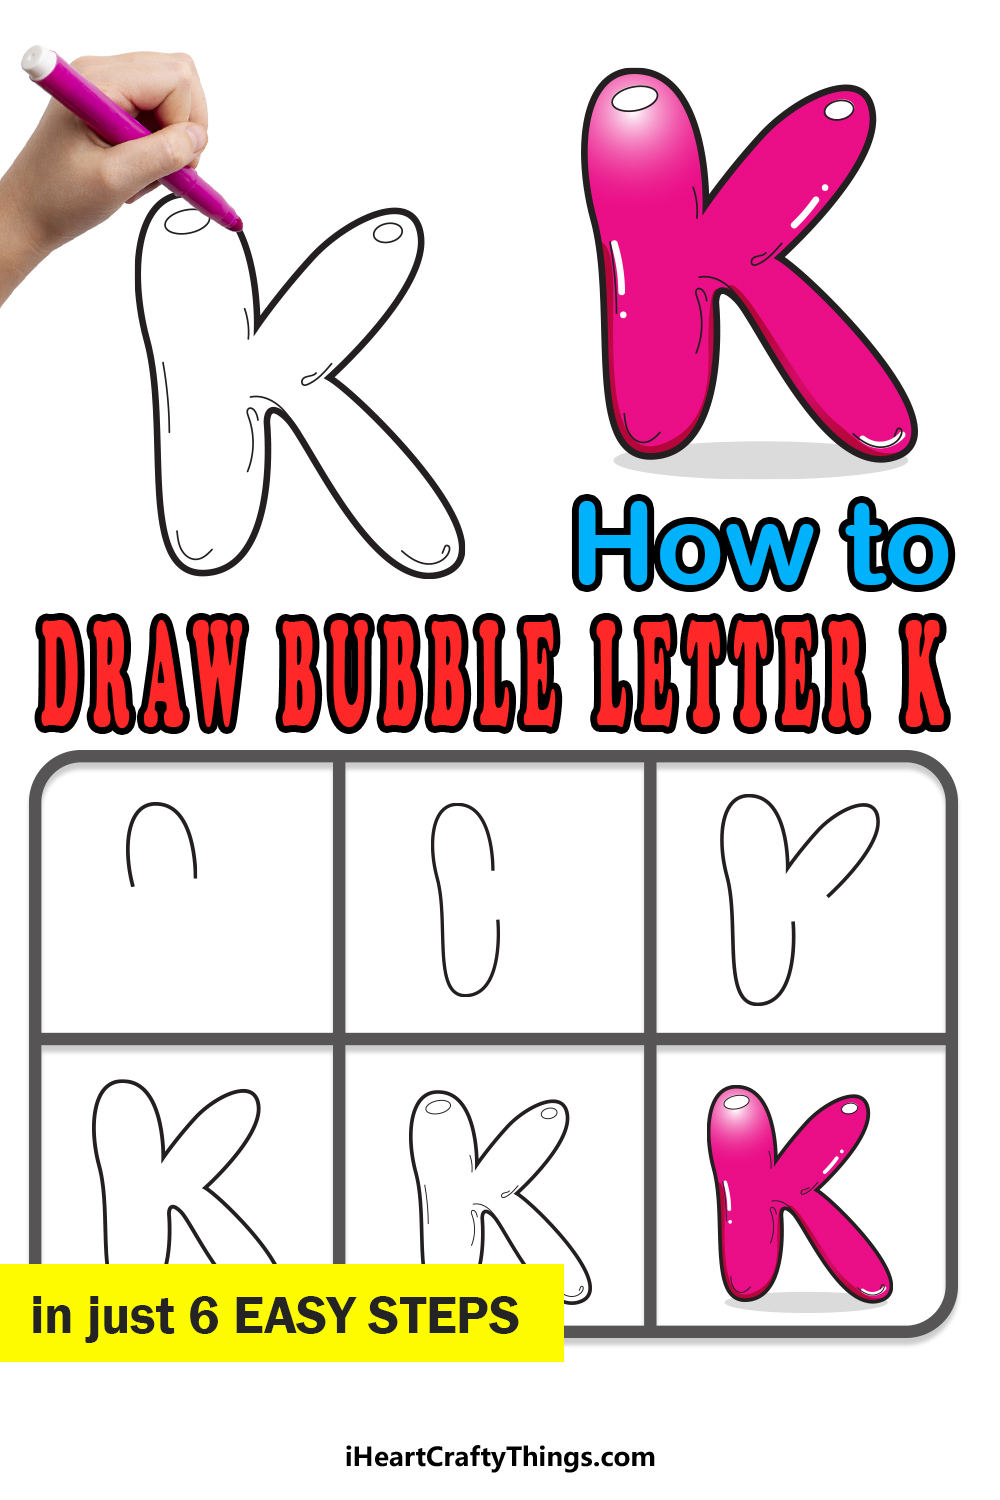
Throughout this guide, we will be going over 6 steps on how to draw a bubble letter K. We will show you how to draw it and then give you some ideas for coloring it in.
As a bonus, we will also cover some fun ideas on how to take it to the next level! So get your drawing and coloring tools and prepare for fun as we begin the guide.
Let’s Get Started
STEP 1:
As we mentioned before, the letter K can be a bit tricky to write at the best of times. There are three lines that have to interact with each other at specific angles, and that can take some getting used to.
When learning how to draw any bubble letter, we will often suggest that you write the letter out in pencil first. That is something we especially recommend for this one.
You can do this by lightly drawing a large version of the letter K as you would normally write it. Then, we can design the bubble letter K around it.
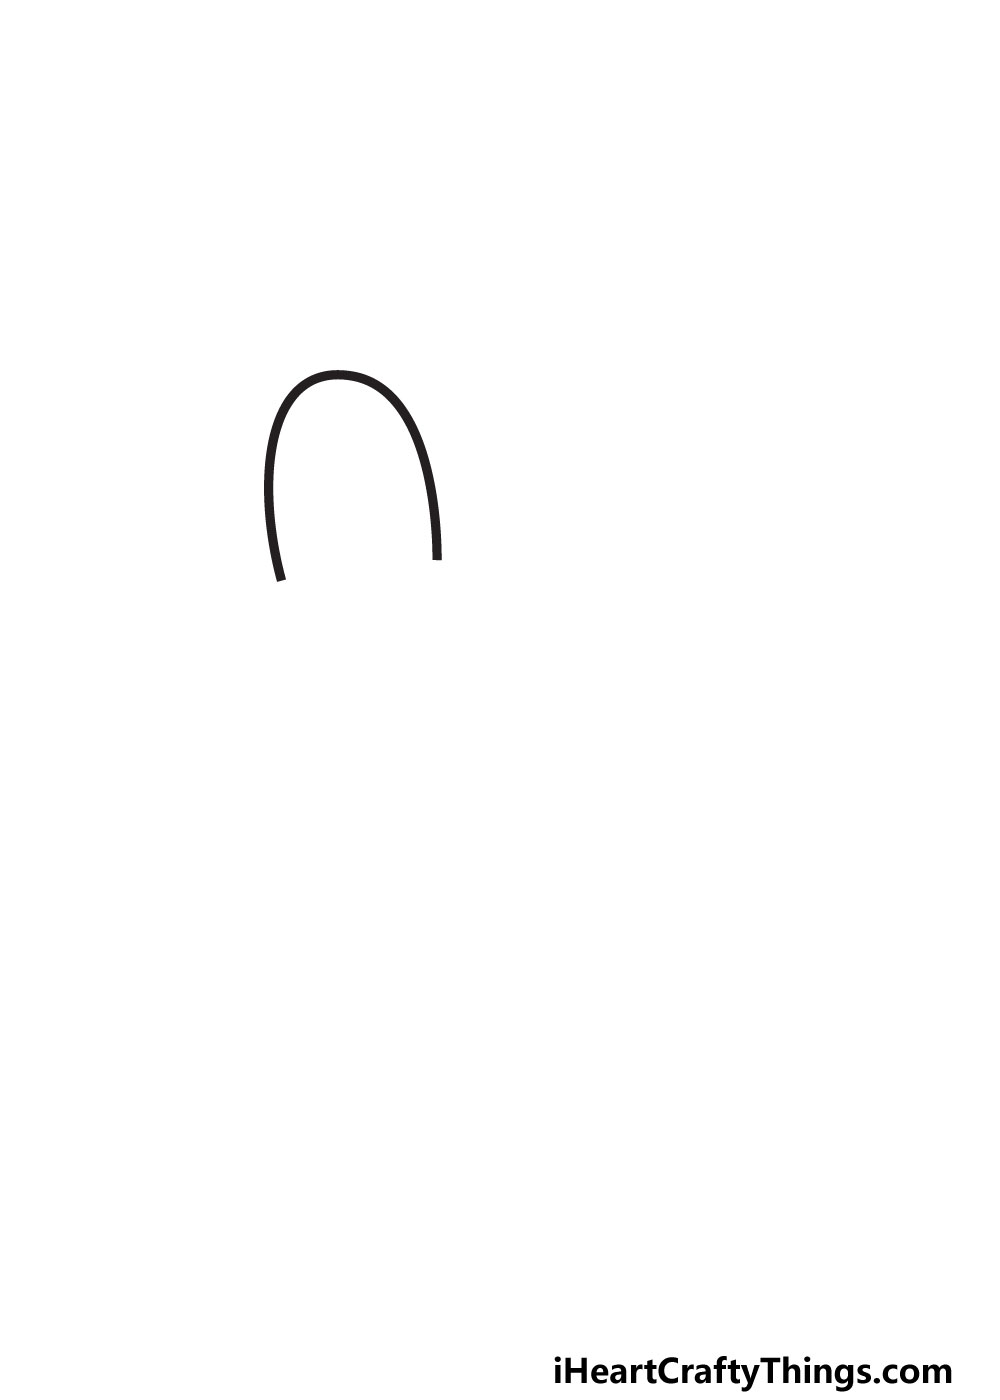
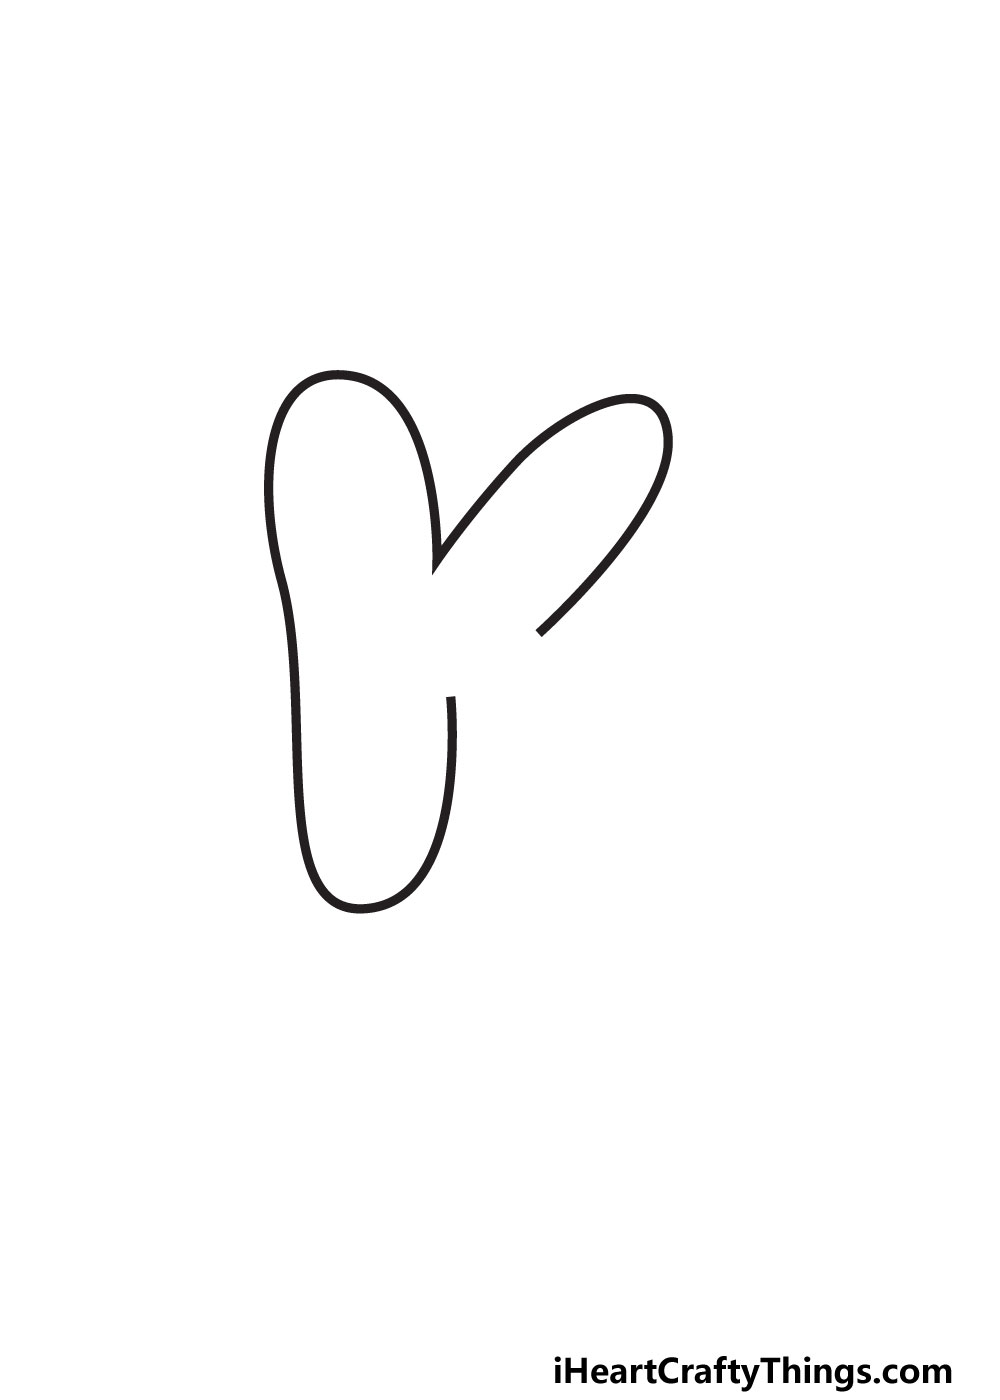
As for the first step, we will keep things nice and simple. For now, we will be drawing the top portion of the pointy part of the letter at the top left.
Simply draw a curved, rounded line so that it looks as it does in our reference image. Once that is done, we can move to step 2.
STEP 2:
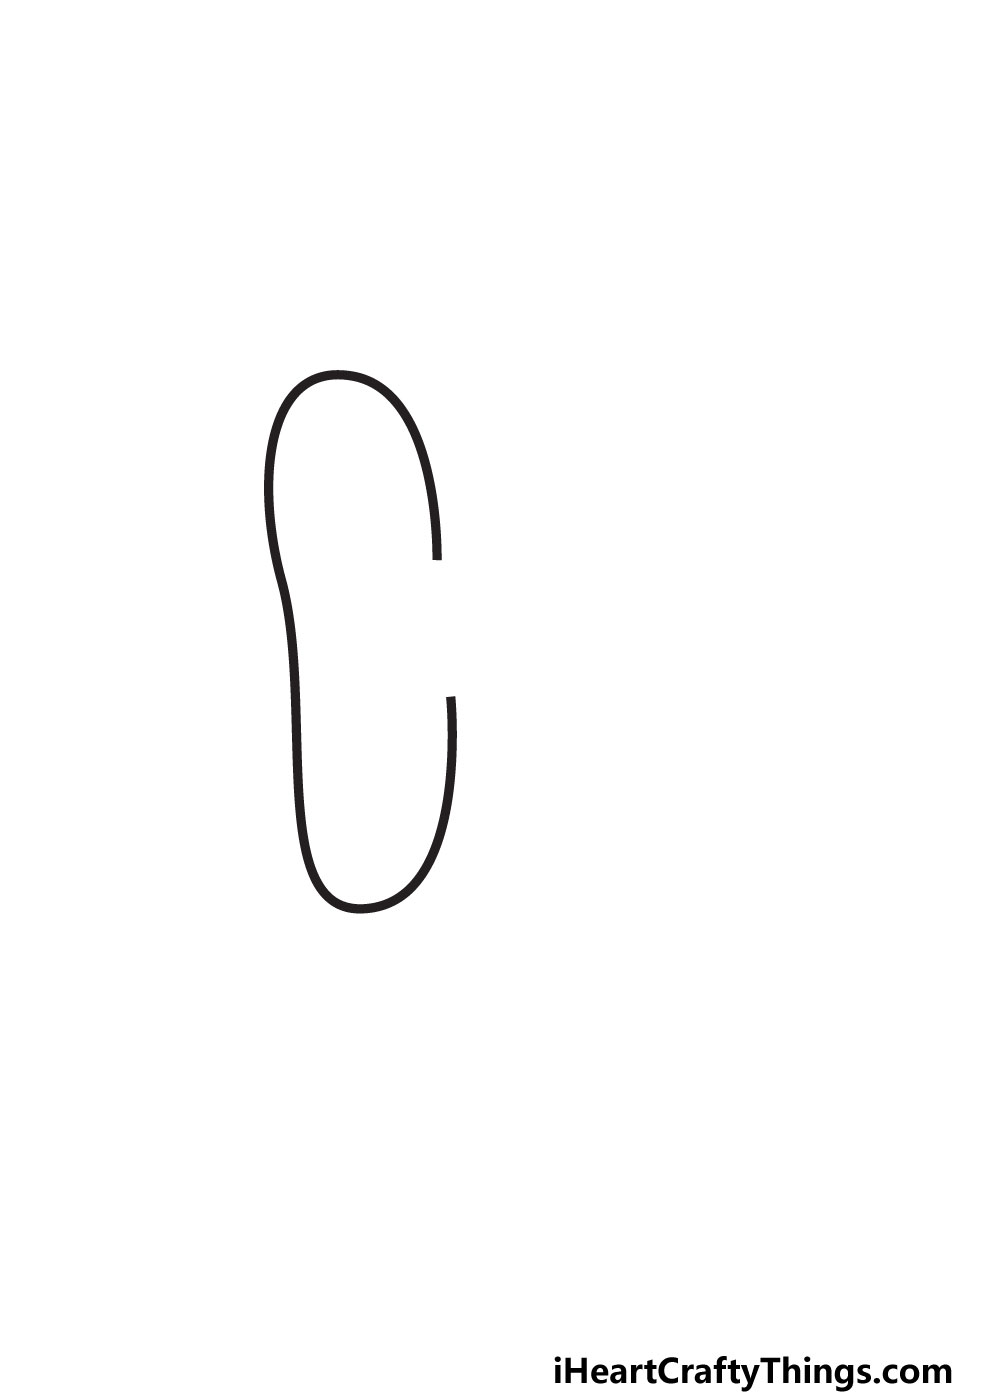
Next, we will finish off the left portion of the letter K. To do this, we will be extending the line that you drew in the first step.
Start by drawing down from the left-hand side of the curved line from step 1. It will be a vertical line to start with, but it should have a slight waviness to it.
At the base, it will go around and head up again, as shown in our reference image. At the end of it, you should have a tall, thin oval shape.
There will be a gap on the right-hand side, which you can see in our example. This will be filled in soon enough in the next steps.
For now, we will proceed to step 3 as soon as you’re ready and happy with how it’s looking so far.
STEP 3:
If you look at the letter K, you will see that there are two branches poking off the vertical line on the left-hand side.
In step 3, we will be adding the top branch of your bubble letter K drawing. The top of this branch will start directly from where the gap that we left in the shape starts.
To add this branch, we will be using another line that curves in on itself to form a thin oval shape.
As you can see in the reference image, this shape will be roughly the same height as the top of the shape on the left side of the K.
There will still be a gap left beneath this branch, but we will fill in that space when we finish off the outline in the next step of the guide.
STEP 4:
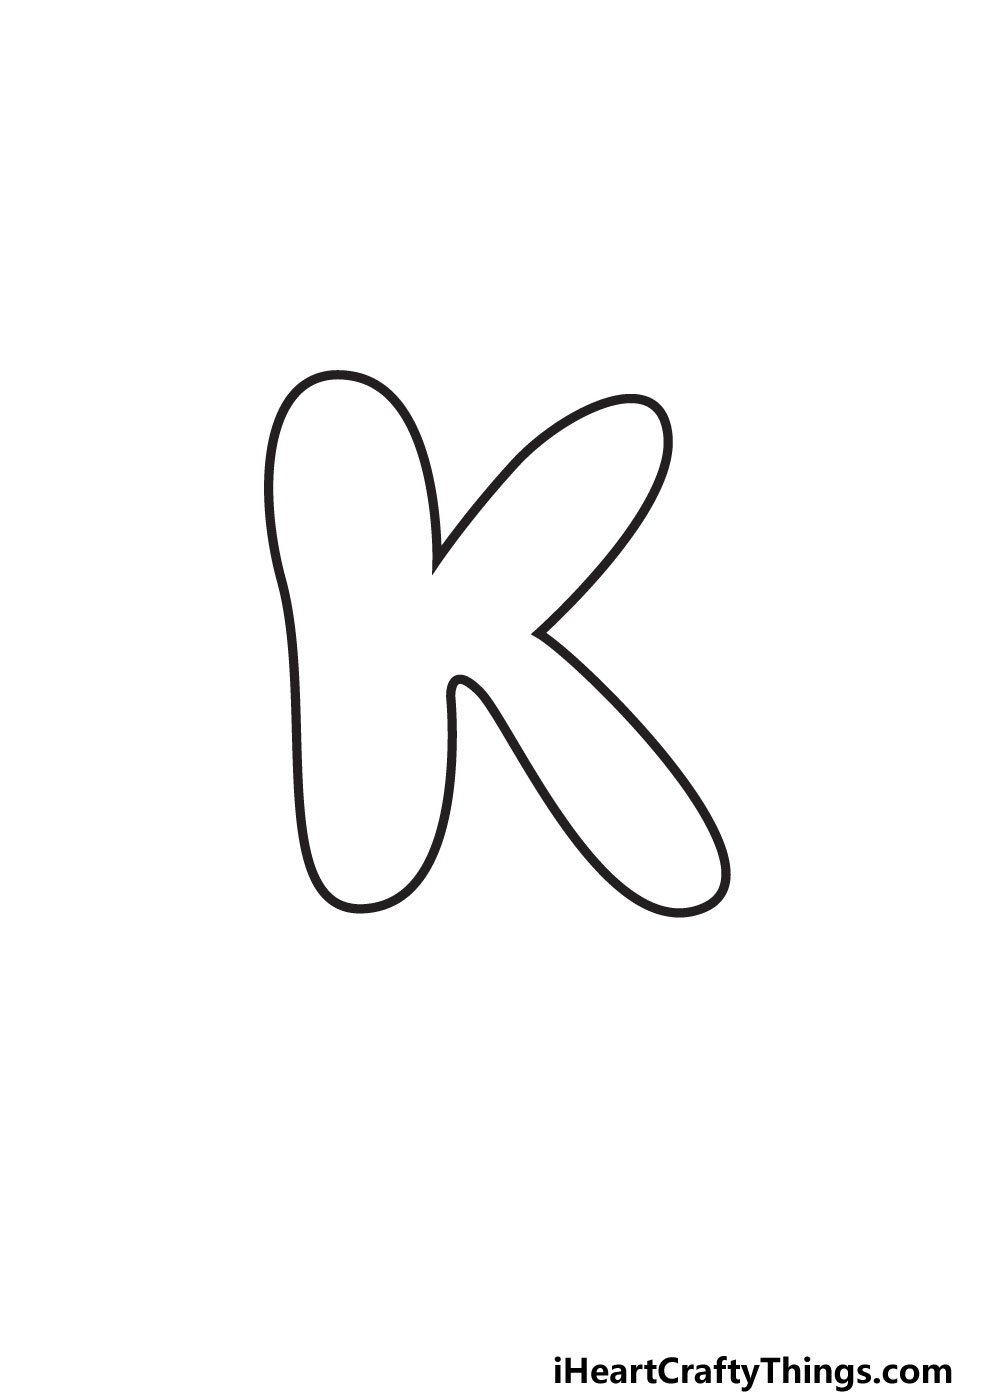
Now you’re ready to finish off the outline of this letter by adding the final branch of the design.
You’ve already done it a few times in this guide, so this last one should be easy for you!
Once again, we will be making a long, rounded shape that extends from the gap we left earlier. This time, it will be angled downward, as you see in the image.
Now the gap is filled and you have the complete shape of the letter K. It may have looked complicated at the start, but now you see how easy it can be when you break it down!
You’re ready to move on to some final details, but be sure to take the time to make sure it’s all exactly as you want it to be.
Earlier we recommended using a pencil to map out the letter first, and now would be the time to erase those lines before proceeding.
If you have a nice pen or a marker that you can use for the final outlines, you can do so now to make it look as good as it can be.
Whenever you’re ready, we can add some final touches to really finish it all off nicely!
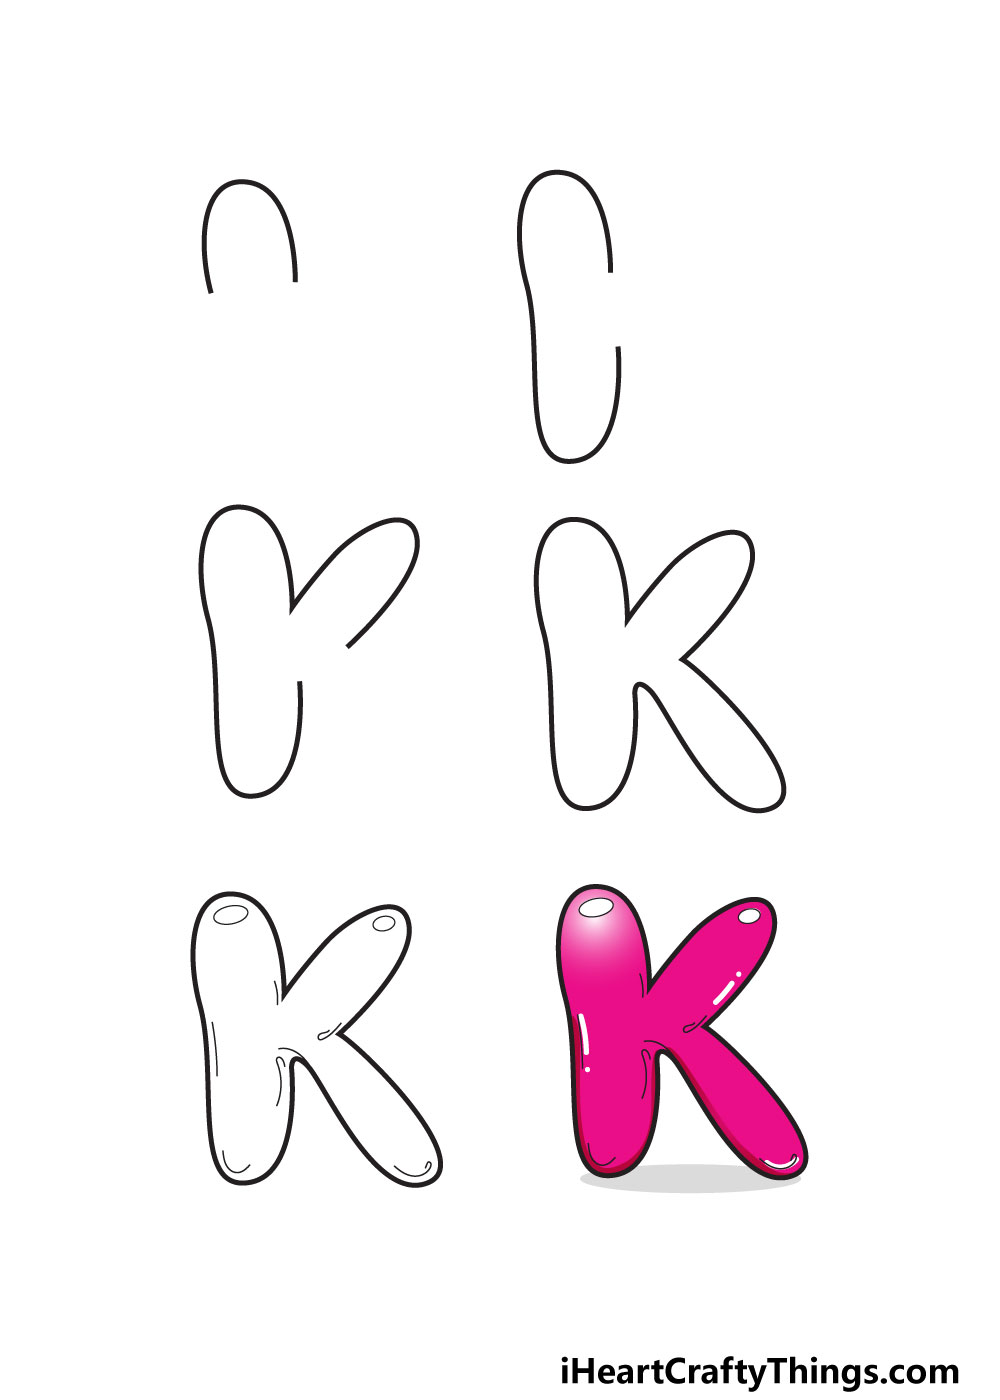
STEP 5:
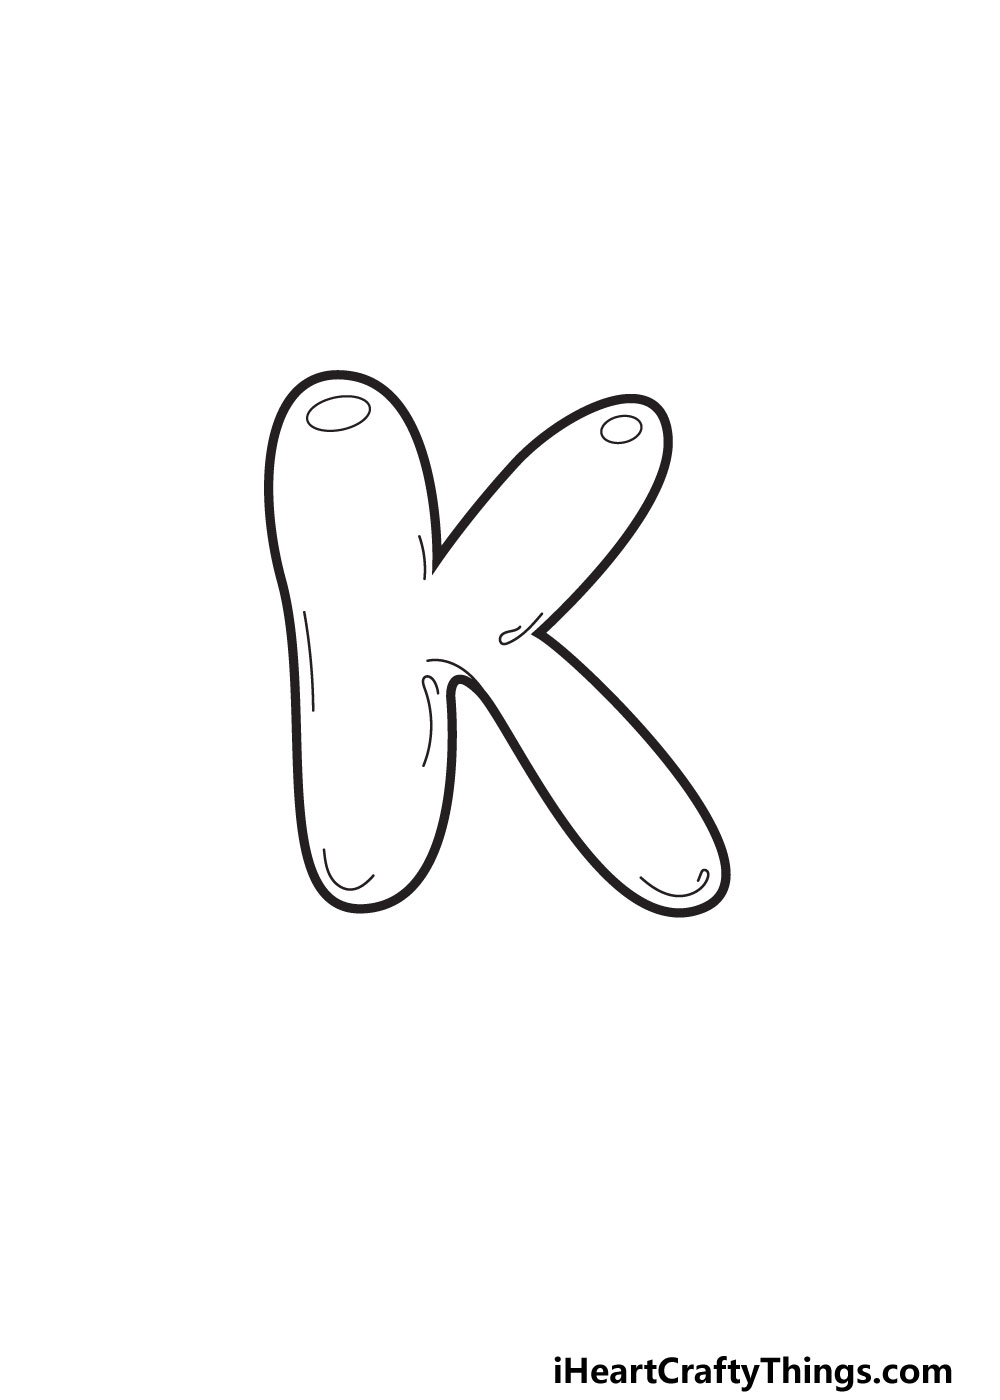
You’ve completed the trickiest parts of this design, and now it’s time to draw some extra inner details. The design already looks great, but these will help make it look even better!
The main goal of these extra details is to complete the idea that this is a bubble letter. They will make the letter look like it is actually a bubble or a balloon that is reflective.
First, we will draw some round shapes on the upper points of the letter. These will be there to show off where light is reflecting off the surface of the letter.
When those have been added, we can then add some lines inside the design along the inner edges of the K.
These should be added sparingly, but a few lines will make it look more like a bubble that has some volume. You can replicate how it looks in our design, but don’t be afraid to try other ideas!
You could draw some patterns or create some texture with other line details for a few other approaches you can take.
How do you think you will finish off this design with some fun extra details?
STEP 6:
This is the final step of the guide, and now it’s time to have some fun with your favorite art supplies!
That means it’s time to add some color to your drawing, and this is something you can really get creative with.
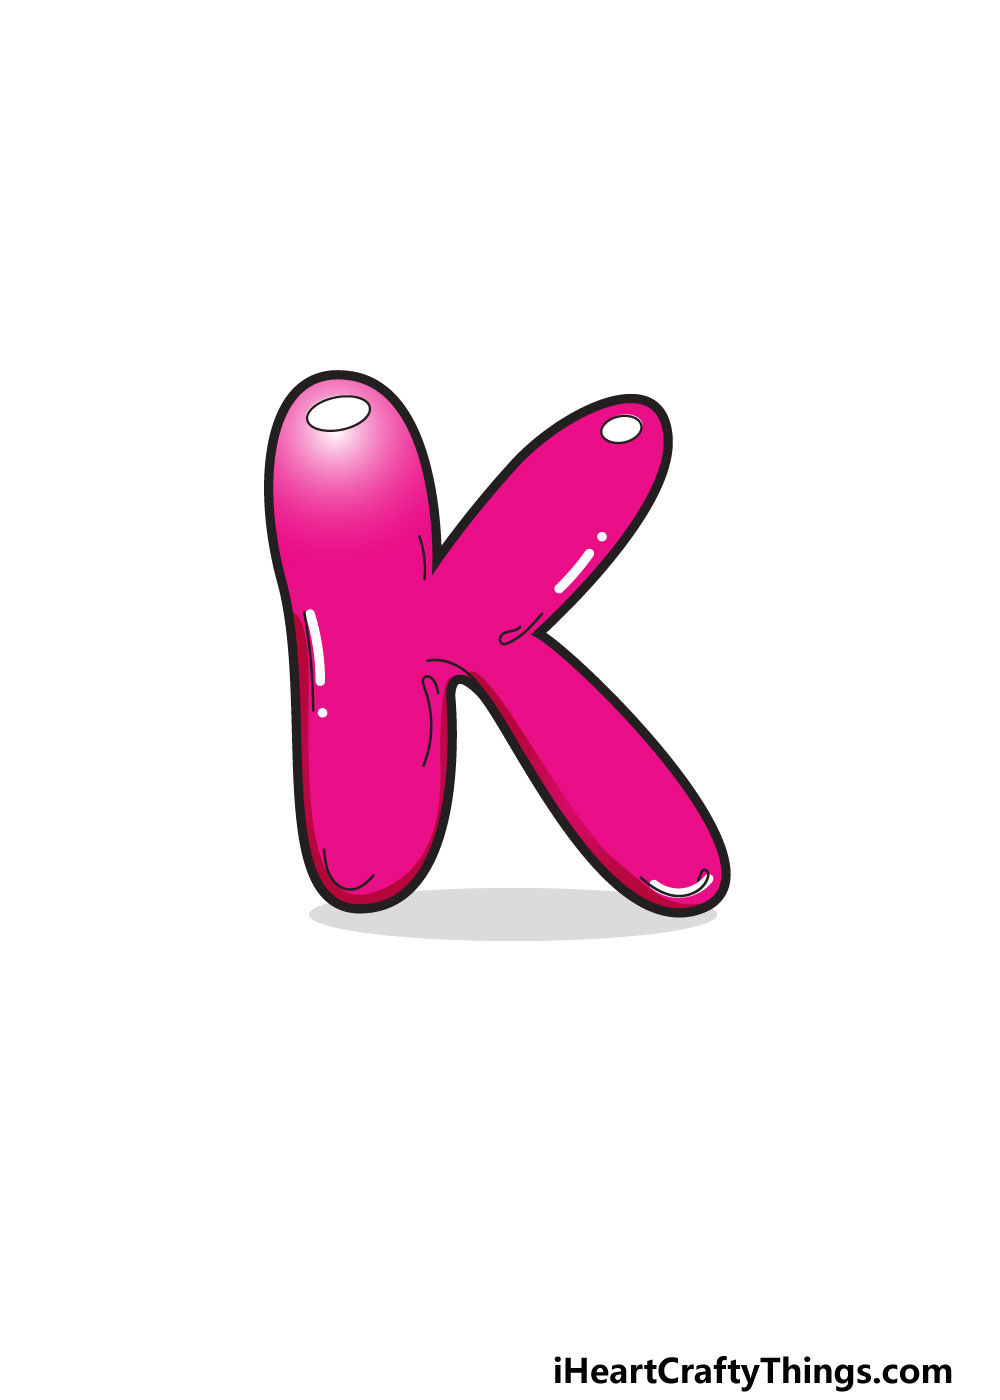
There are no wrong ways to color in this design, but we’ve given you somewhere to start with an example.
For our design, we chose a pink color scheme to make this picture really pop off the page. The idea is to make it look like a bubble, and you can use your colors to do that.
The pink color is pretty dark and solid throughout most of the image, but it gets lighter around the reflective oval details that we drew.
That helps to give the balloon a more realistic texture and suggests light shining on it. You could go for the same colors we did, but you could also use any other colors!
When bringing color to this design, you can also try to mix and match different art tools and techniques. It’s up to you now, so let your creativity flow and see what happens!
My Final Tips To Make Your Bubble Letter K Drawing Even More Special!
Before we finish off this guide completely, we want to give you a few more ideas to try that can make your picture look even better.
There are so many possibilities even for a simple design like this, so there is plenty more fun to be had!
First, try to think of some words that begin with K. We can think of words like kite, koala, kiwi or ketchup.
Once you have a word that you can use, you can then incorporate it into the design. For example, you could write out the rest of the word ‘koala’ after the bubble letter K you drew.
Then, you could have a cute cartoon koala clinging to the big K. That would be a really fun way to create a theme for the image!
You could do similar ideas with any other K words you can think of. You could also use it to create a cool version of someone’s name.
If you know someone who has a name like Karen or Kevin, then you could write out their name with the K design we worked on as a start.
You could make a pretty cool birthday card by writing out someone’s name in this bubble style! We hope that these ideas get your imagination going.
Be sure to have fun with it and be as creative as you can! We can’t wait to see what you come up with.