The letter J is the tenth letter in the alphabet, and it also happens to be one of the simpler letters to learn how to write.
Whether it’s the capital or lowercase version of the letter, you’re essentially creating a curved line that looks a bit like a fish hook.
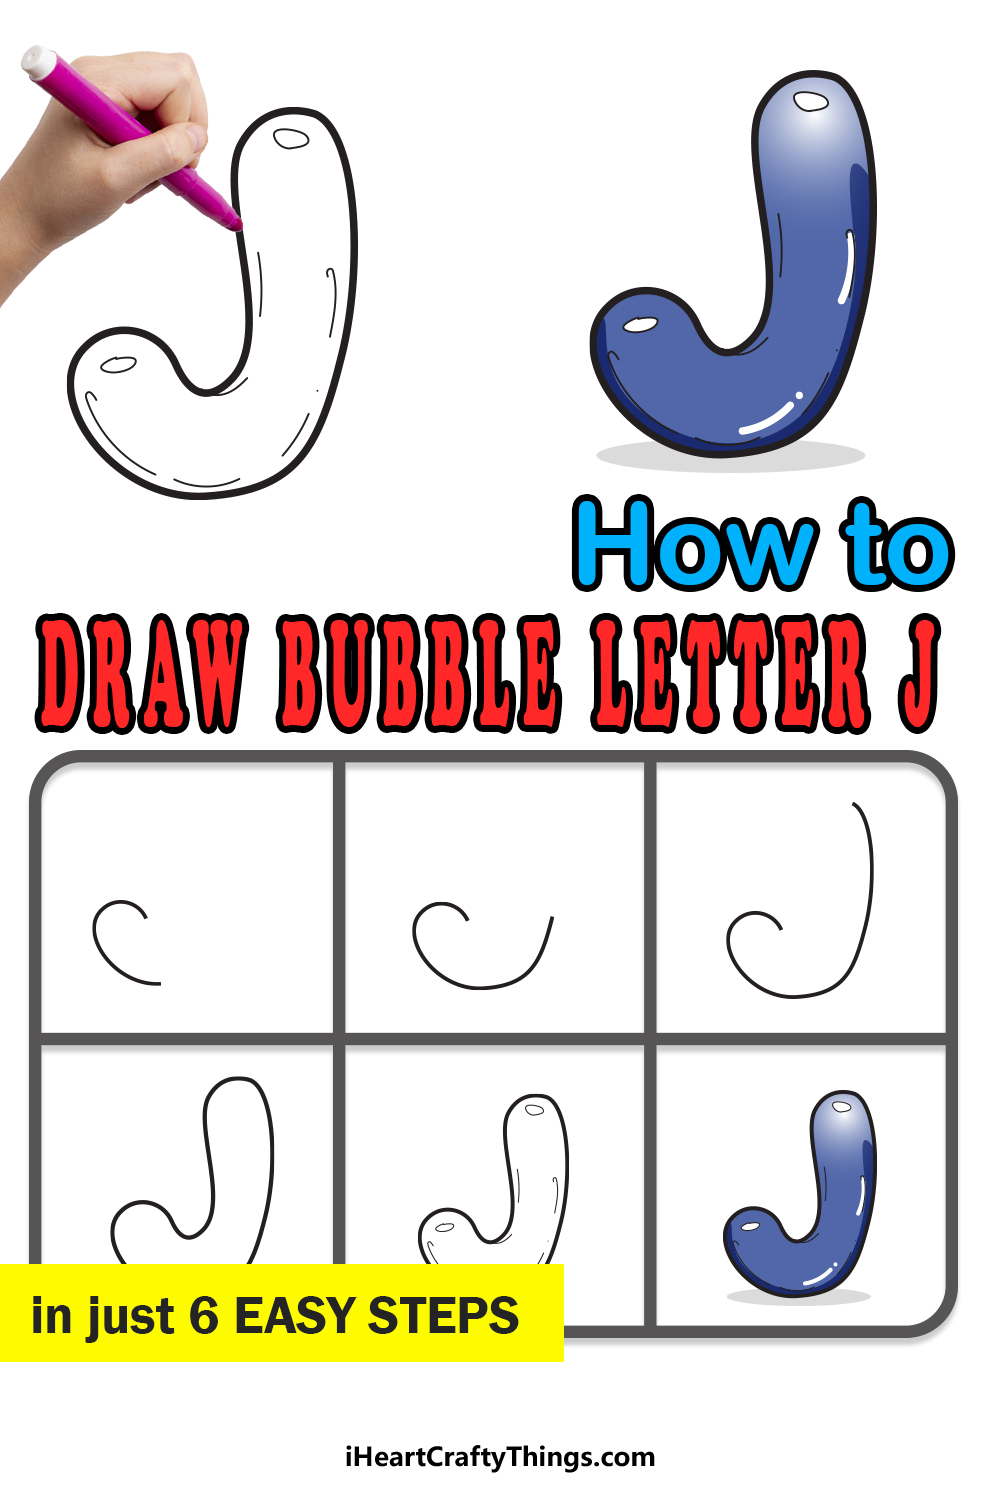
Writing the letter is pretty easy to learn, but we’re not here to create a regular version of this letter! Instead, we will be showing you how to create a bubble letter J.
We will do this by guiding you through 6 fun and easy steps that will show you how to draw it and add some details to make it look even better.
Not only that, but there will also be a section at the end exploring some fun ideas that you can try to make it even more unique.
Let’s not delay any longer as we dive right into the first step!
Let’s Get Started
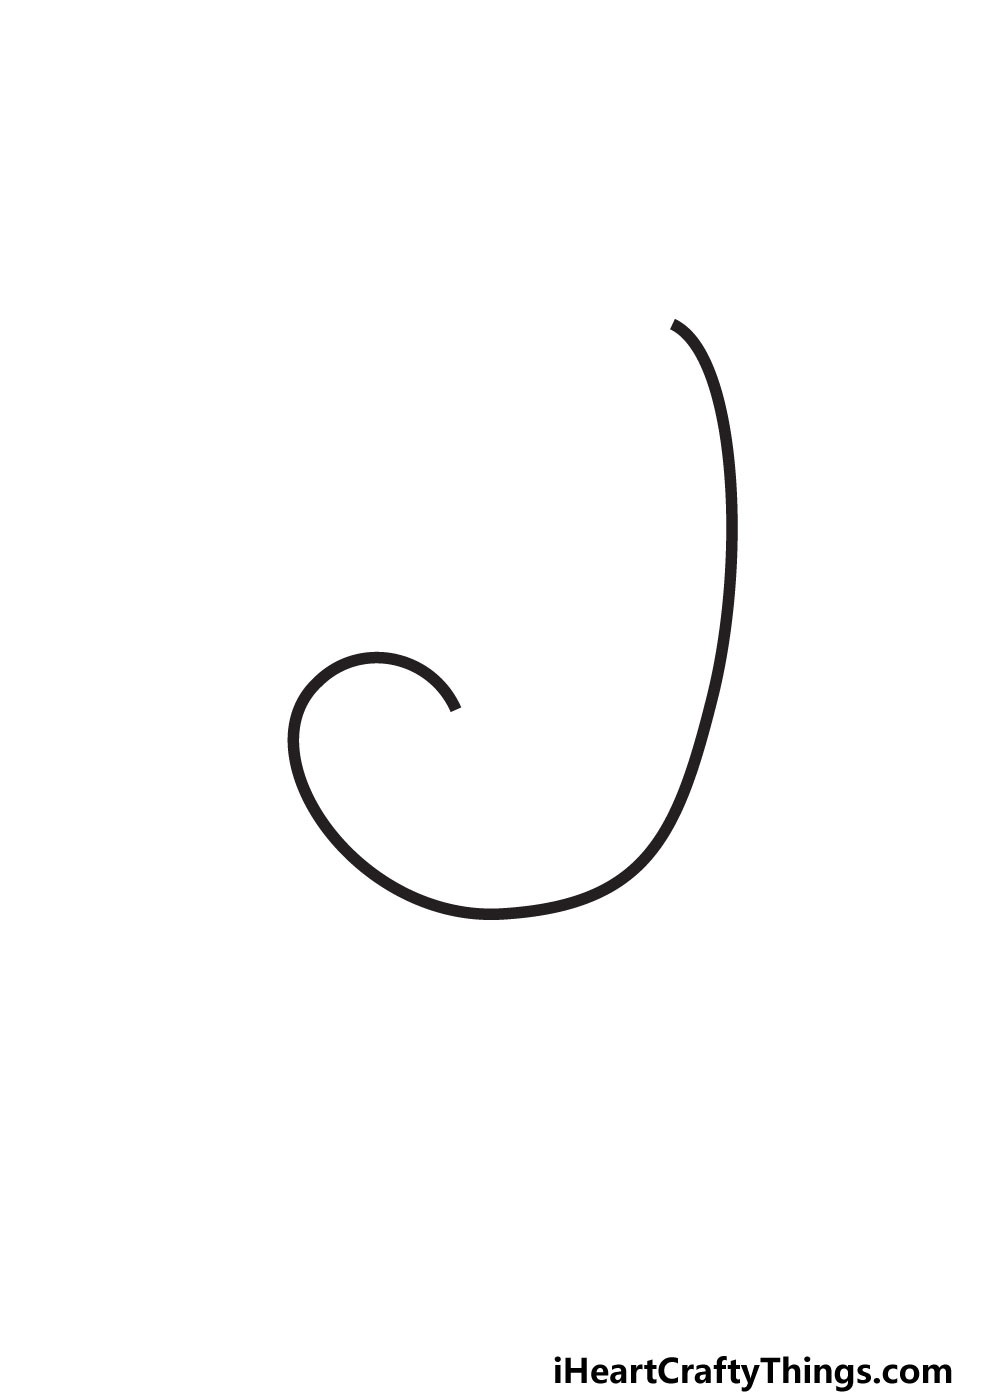
STEP 1:
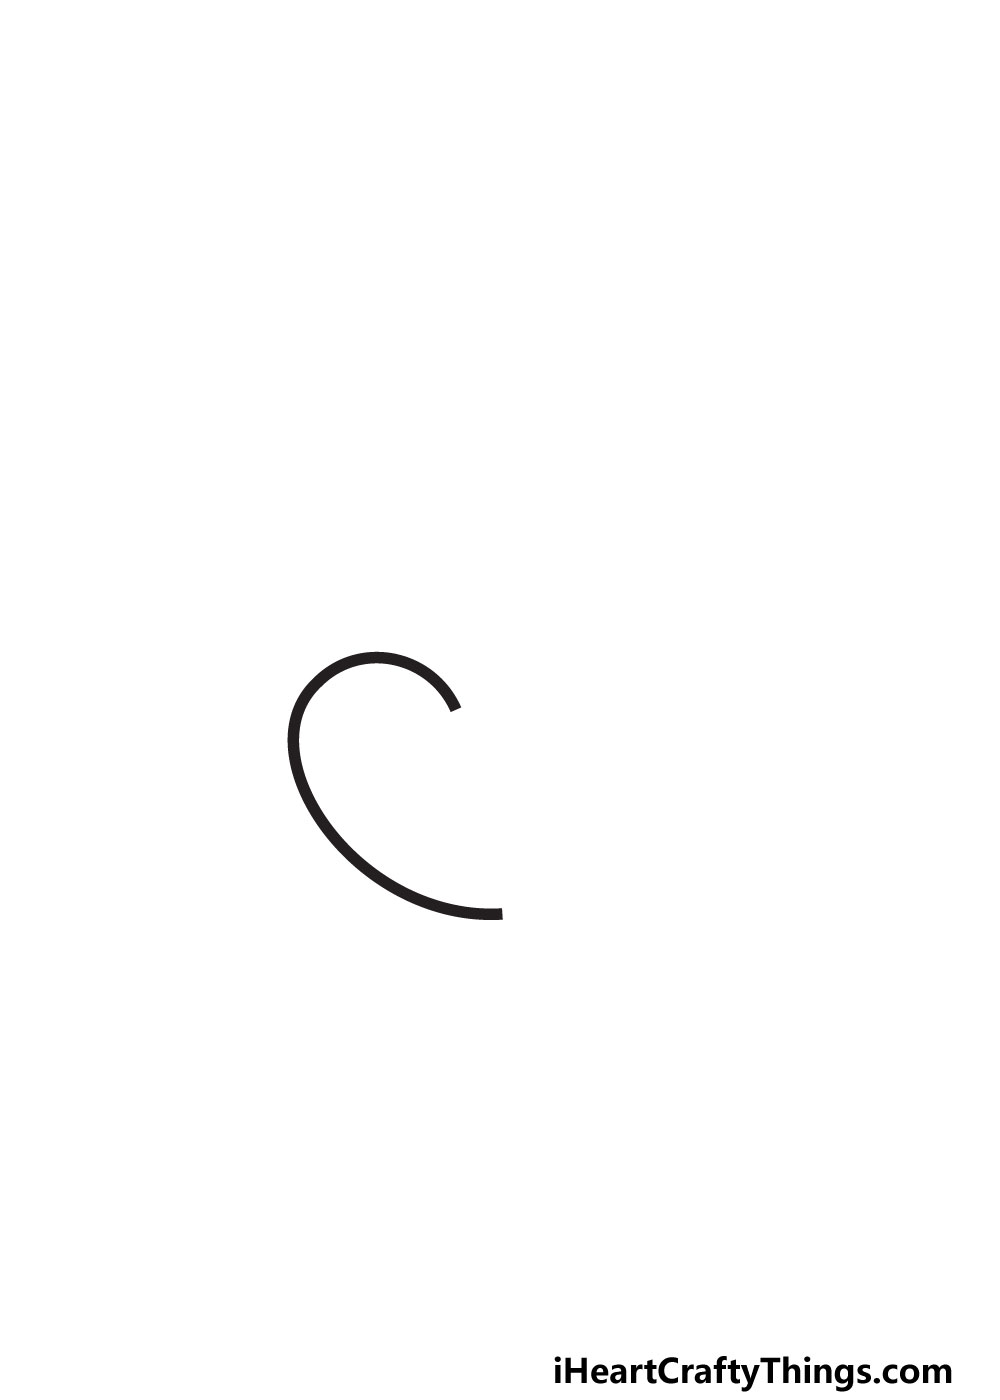
As we mentioned in the introduction, the letter J is a simple curved shape that looks a bit like a fishhook. Sometimes a capital J may have a line at the top, but we won’t have that in this design.
With that in mind, we will draw the first part of this letter now. Before we start drawing any lines, we would recommend planning it out with a pencil first.
You can do this by drawing a large, regular J shape that you will then build the bubble version around.
You don’t need to do that, but it can certainly help! For this step, we will be drawing a curved, rounded line for the bottom left part of the letter.
Once you have drawn that section of the letter so that it matches our reference image, we can move on to step 2.
STEP 2:
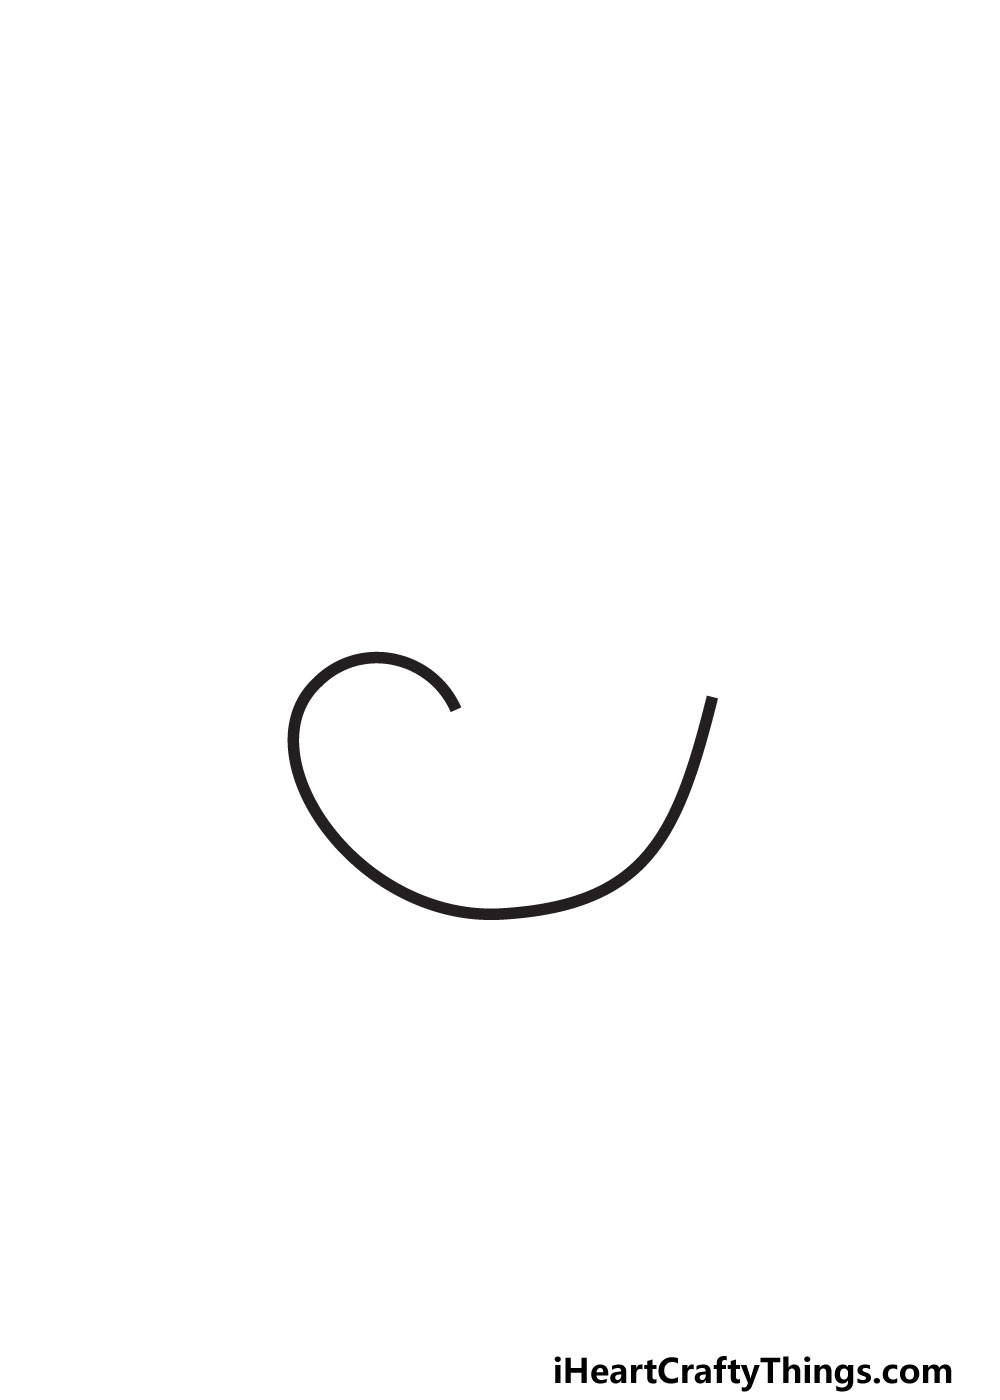
We will be keeping things very simple in this second step of the guide. In this part, we will be extending the line that you started in the previous step.
We drew the little ‘tail’ section of the J in the prior step, and in this one we will be drawing the base of the letter.
Simply keep the line going where it ended in the prior step and maintain the curve. As you can see in the reference image, this line will then start to curve up.
We will be creating the main pillar of the J where that line ends, but that will come in the next steps. For now, just try and get the drawing to match our example as best you can.
Then we can move on to step 3 where we will continue to build this letter.
STEP 3:
In this third step of the guide, we will start to draw the central pillar of the bubble letter J. This will be done by adding a very slightly curved vertical line.
As you can see in the reference image we provided, this line will extend up from where the line in step 2 ended.
When drawing this line, you ideally want to have it be straight but not too straight. We don’t want lines that are too straight, as we want the letter to look like it’s made of a bubble.
Once you have drawn this side of the pillar, there will be quite a big empty spot on the left. The next step will see you finishing off the outline completely before we add some interior details.
STEP 4:
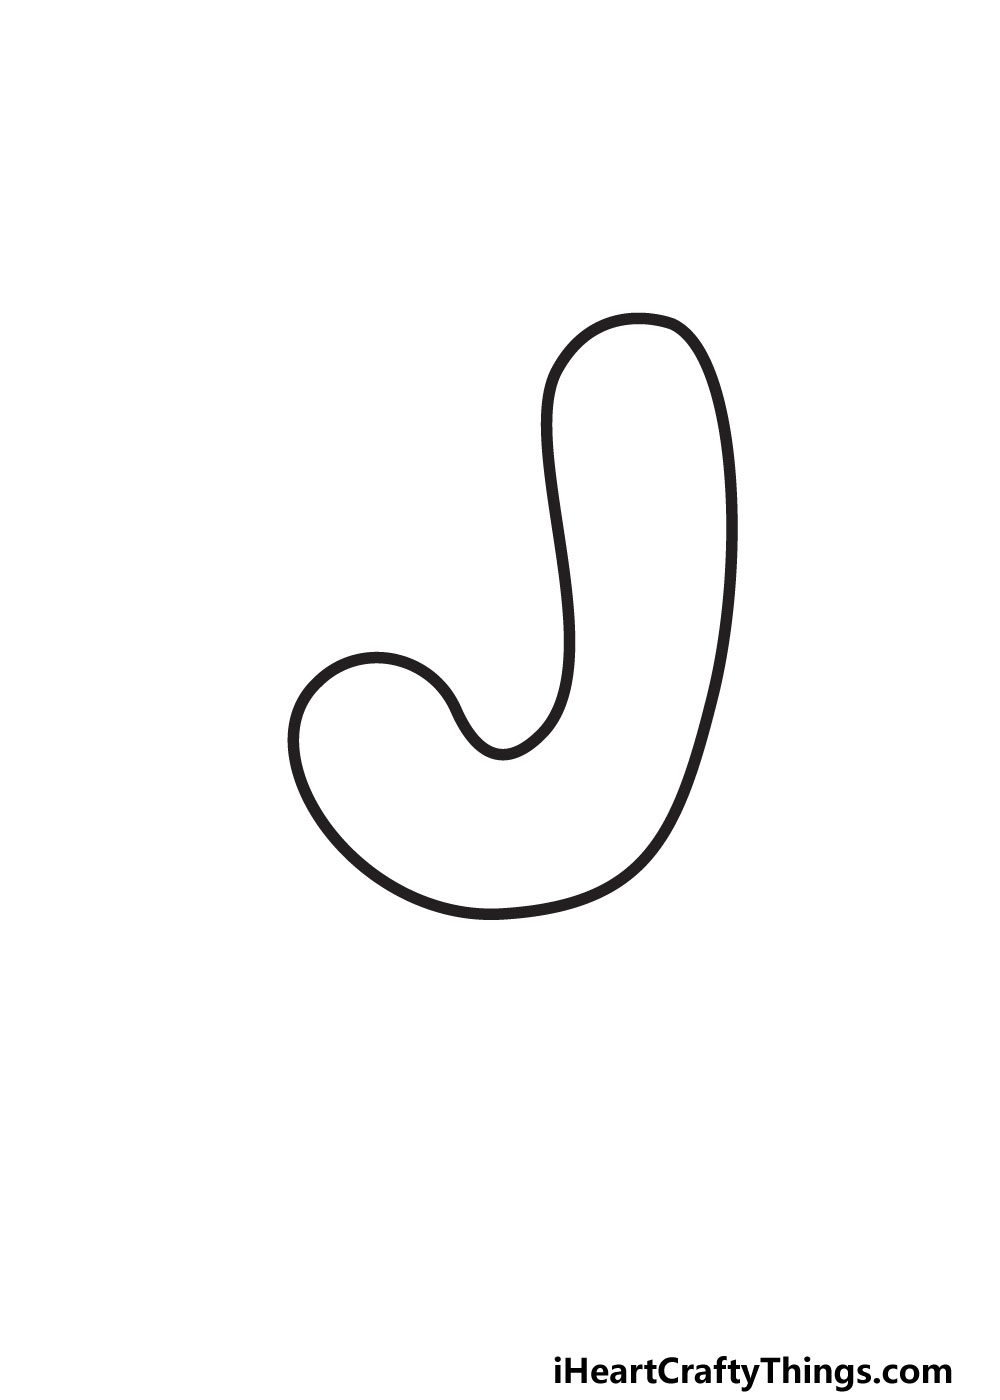
As we mentioned in step 3, this fourth step of the guide will be about finishing up the outline of this letter J.
To do this, we will be using a curved, wavy line to fill in the gap on the left side of the letter. It will start where the line in the previous step ended at the top of the J.
It will slope down and then sharply curve up to finish off the tail of the J. once that line has been drawn, the outline for the letter is complete!
You will now be ready to draw some inner details, but make sure you’re ready before moving on to the fifth step.
One way you can do this is by erasing any pencil lines you used to prepare the drawing. At the start, we mentioned how you could draw a regular letter J with a pencil.
If you did that, then now would be a great time to erase it. Then, it will be time for step 5 where we will add some cool inner details to the letter!
STEP 5:
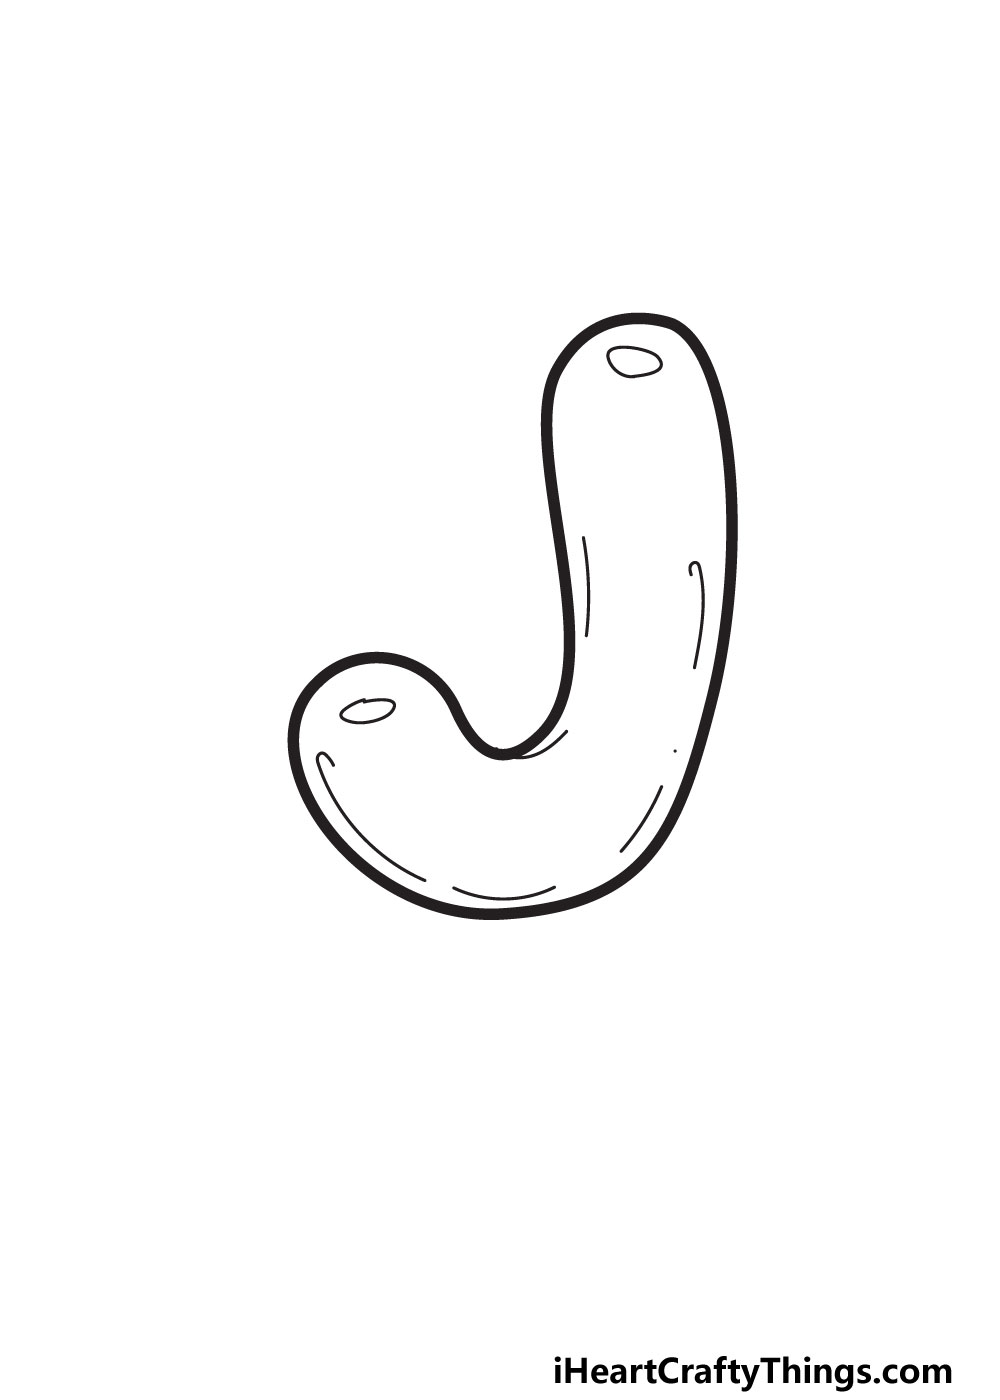
The main goal of this guide was to take the letter J and make it look like it is made of a bubble or a balloon. We will help to finish off this effect with some simple details now.
First, we will make the letter look reflective by drawing some simple oval shapes on the letter. As you can see in the reference image, we will be using two of these oval shapes.
There will be one at the top of the J and then one at the end of the tail on the left side of the letter. You could also add a few more of these reflective spots if you like!
Then, we will create the illusion that the J is made of a bubble or of a balloon by adding some texture lines to the letter.
These will go inside the outline and help to make it look more like an object than a flat letter.
This is another detail that would allow you to add some more of these lines if you wish to make the effect even stronger.
Once these lines are drawn, you’re ready to add some color in the sixth step! You don’t have to move on just yet, however.
Before you color your picture, you could also add some fun extra details. For example, you could draw a background for the picture.
This could be a simple pattern background or you could draw an actual setting. We will look at some ideas you can try after the next step, but you can think of some ideas in the meantime.
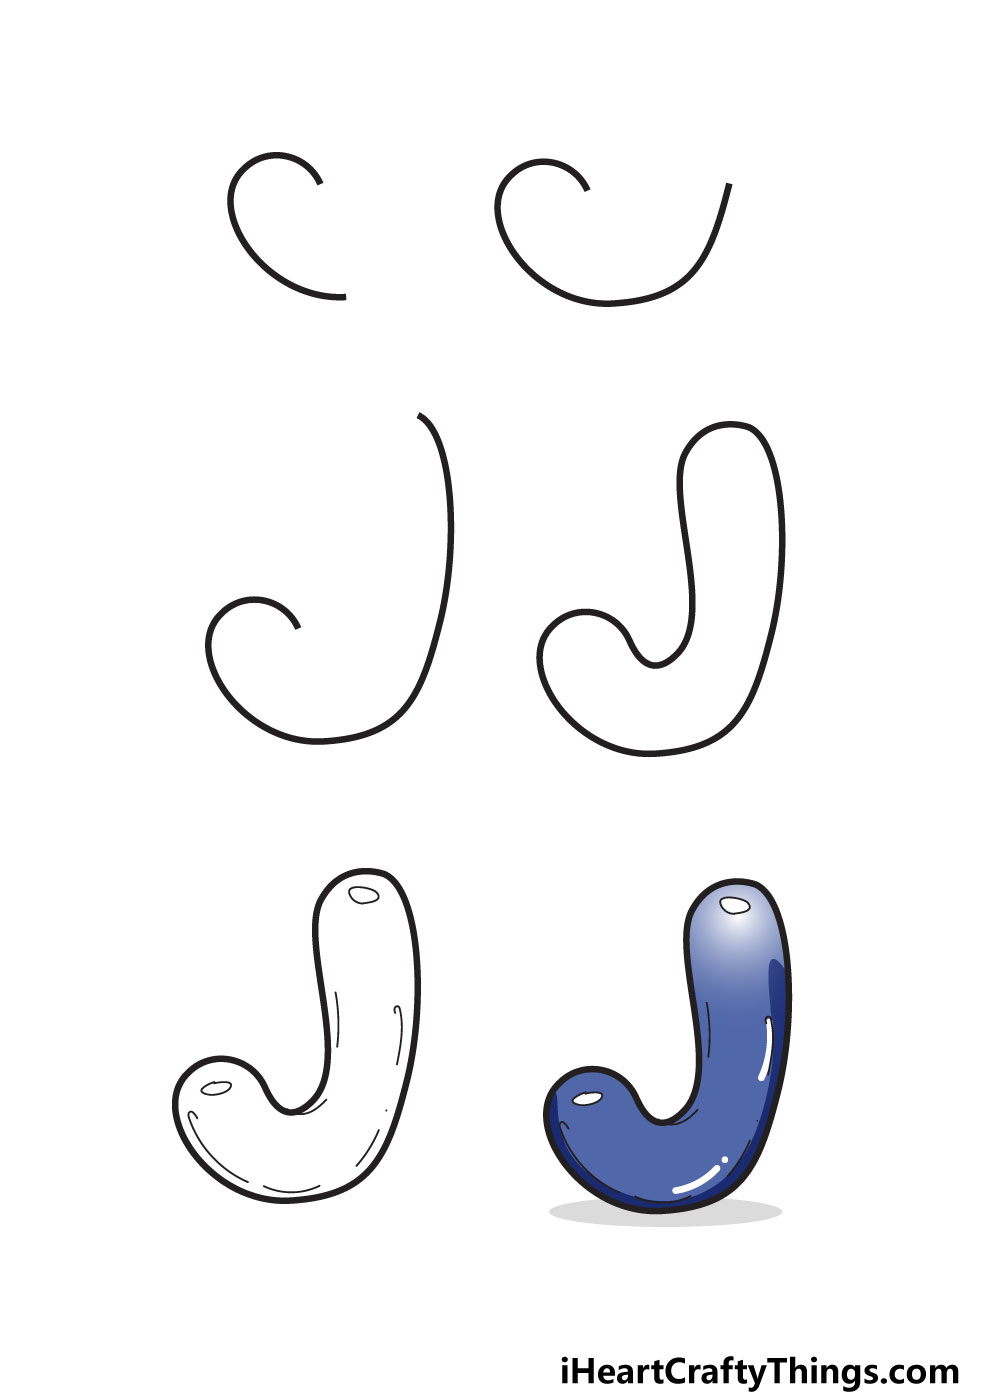
STEP 6:
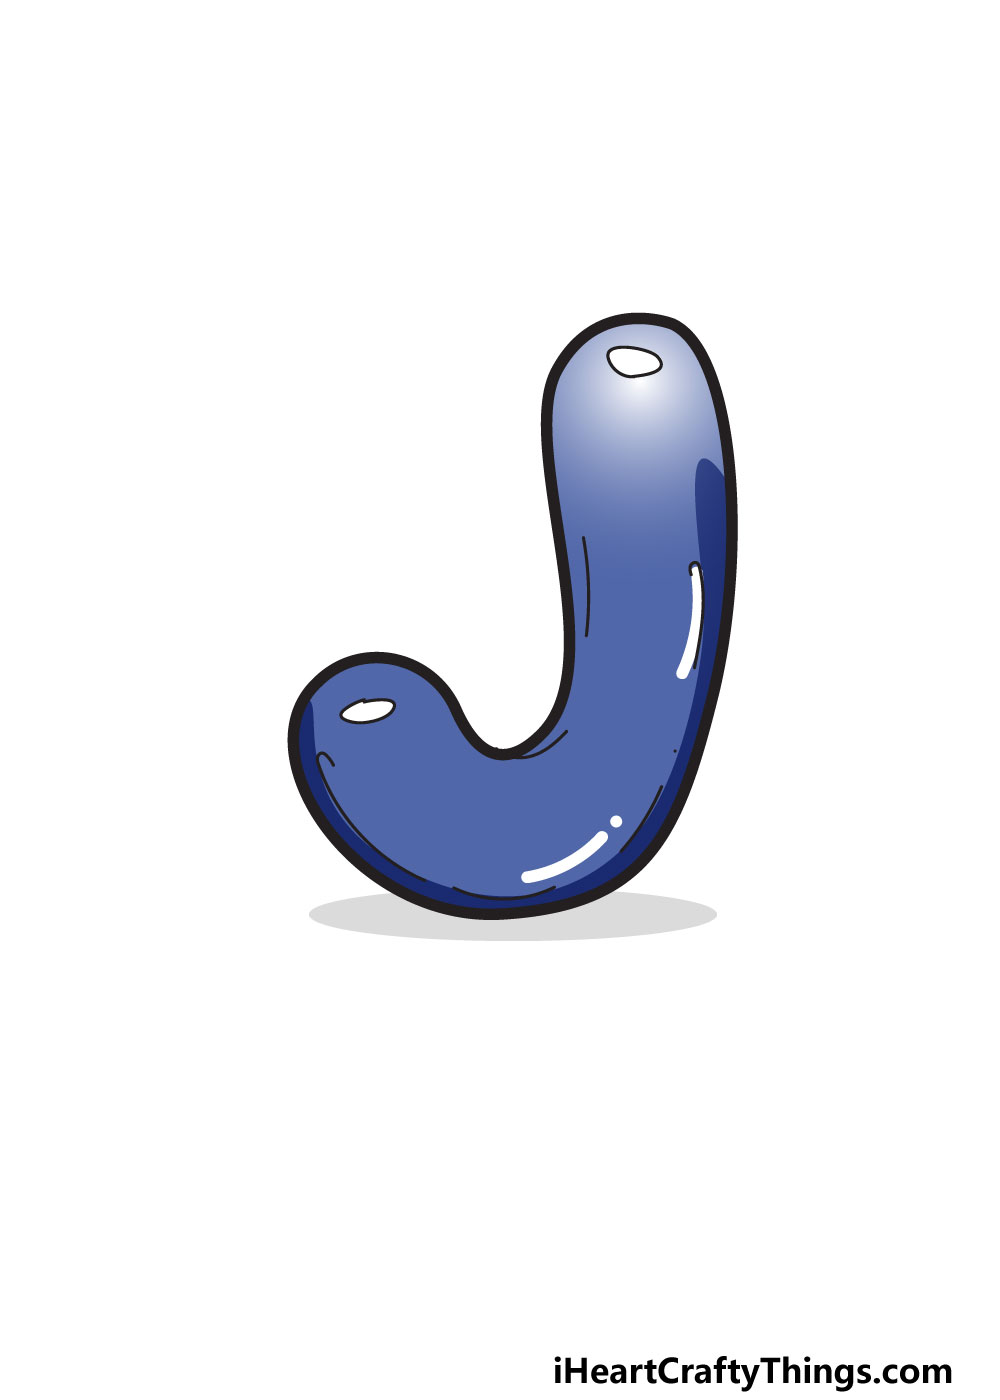
It’s always fun to relax with some coloring fun, and that’s what we will be doing for this final step. This is your chance to show off your color creativity!
In our example picture, we show you one of many different color possibilities you have for your drawing.
We chose a dark blue color scheme as the main theme of this image. Even though dark blue is the main color, we used some lighter shades as well.
Mixing in light and dark shades can help to make the reflective portions more visible and just makes the image look less flat.
You could go for the same colors we did, but you can also use any other colors you love! It doesn’t have to be just one color either.
There are some fun ways that you could incorporate many different colors as well, so you should really use your creativity and explore options with your favorite art tools.
With that, your drawing is complete! Before we finish completely, we will give you a few ideas on how to make it even better.
My Final Tips To Make Your Bubble Letter J Drawing Even More Special!
You did an amazing job on this drawing, but there are more ways that you can have fun. Drawing is all about letting your creativity take over, and there are many ways to do that.
There are many words that start with the letter J, and these could be incorporated into the image. A few words that come to mind for us would be jelly, jam, jet or jump.
You can probably think of many more, and then you can create a picture that relates to the word!
For example, we will use the word jet. You already have the J, now you can write the rest of the word any way you like.
Then, you could draw some clouds around the word to make it look like it’s high in the sky. The effect could be finished off with a picture of a jet!
Or you could write out the word jello and make it look like that is what the word is made of.
These are just a few ideas, but there are so many ways you can get creative! Don’t be afraid to think outside the box as you bring your own spin to this drawing.
We can’t wait to see what you come up with!