There are many classic fairytales and stories that have been delighting kids around the world for generations.
Of all these tales, some stick out as being more famous than the others, and the story of Rapunzel is one of the most well-known.
This story has featured in many books and reimaginings and has seen some film adaptations from studios such as Disney.
With so many fans around the world, many people would like to learn how to draw Rapunzel themselves.
This guide will show you how to do just that!
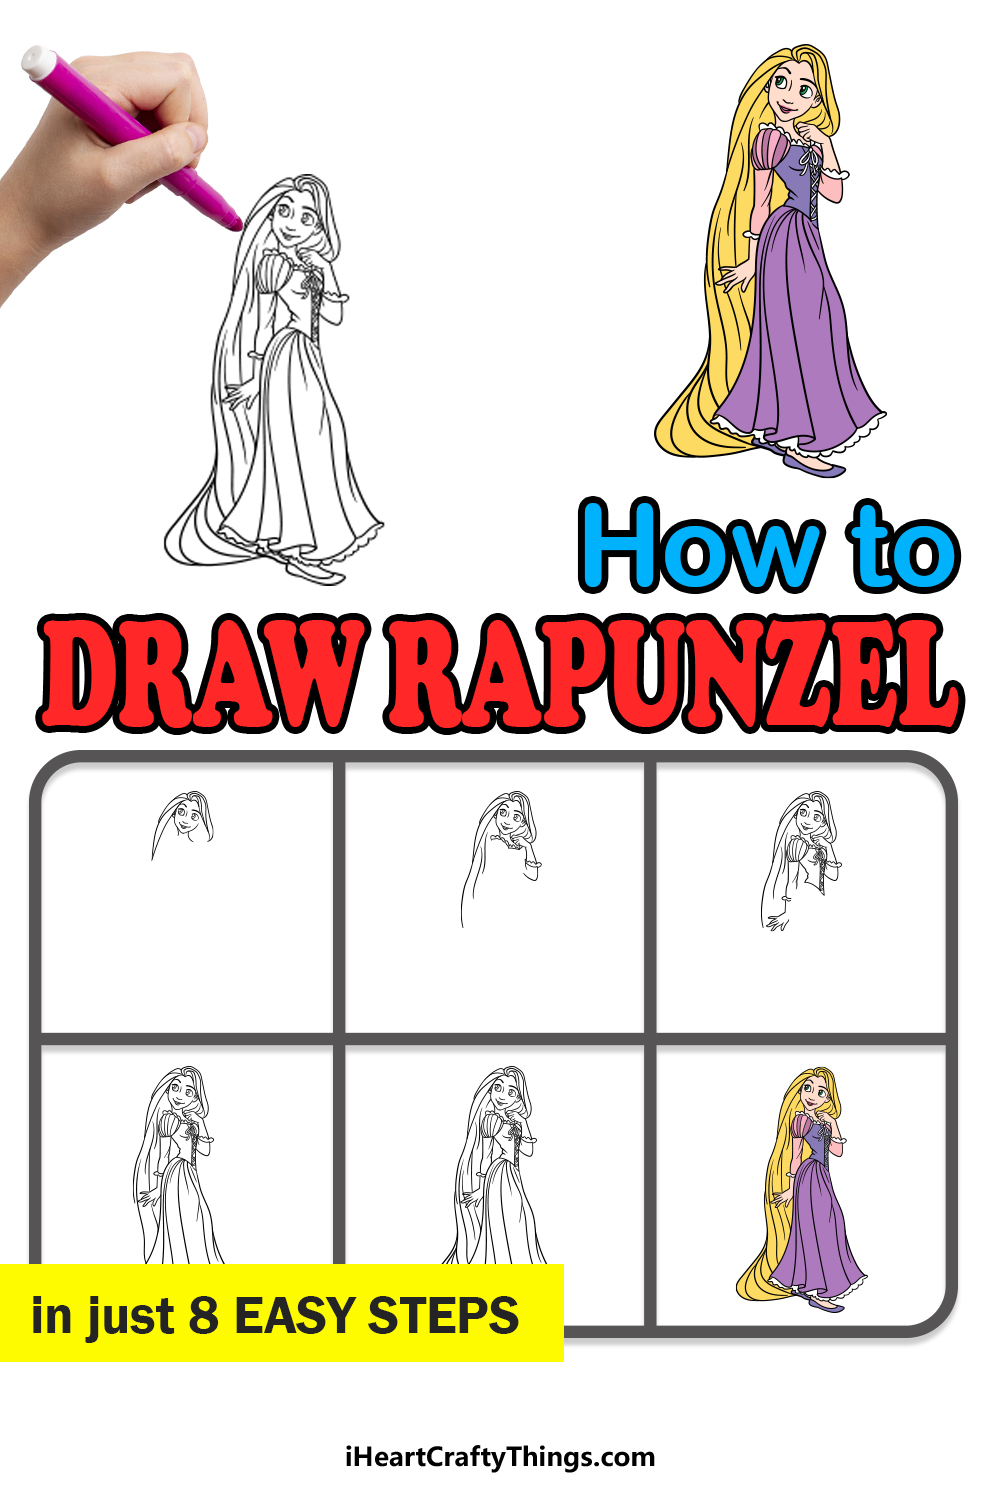
We hope you have a fun time working on this step-by-step guide on how to draw Rapunzel!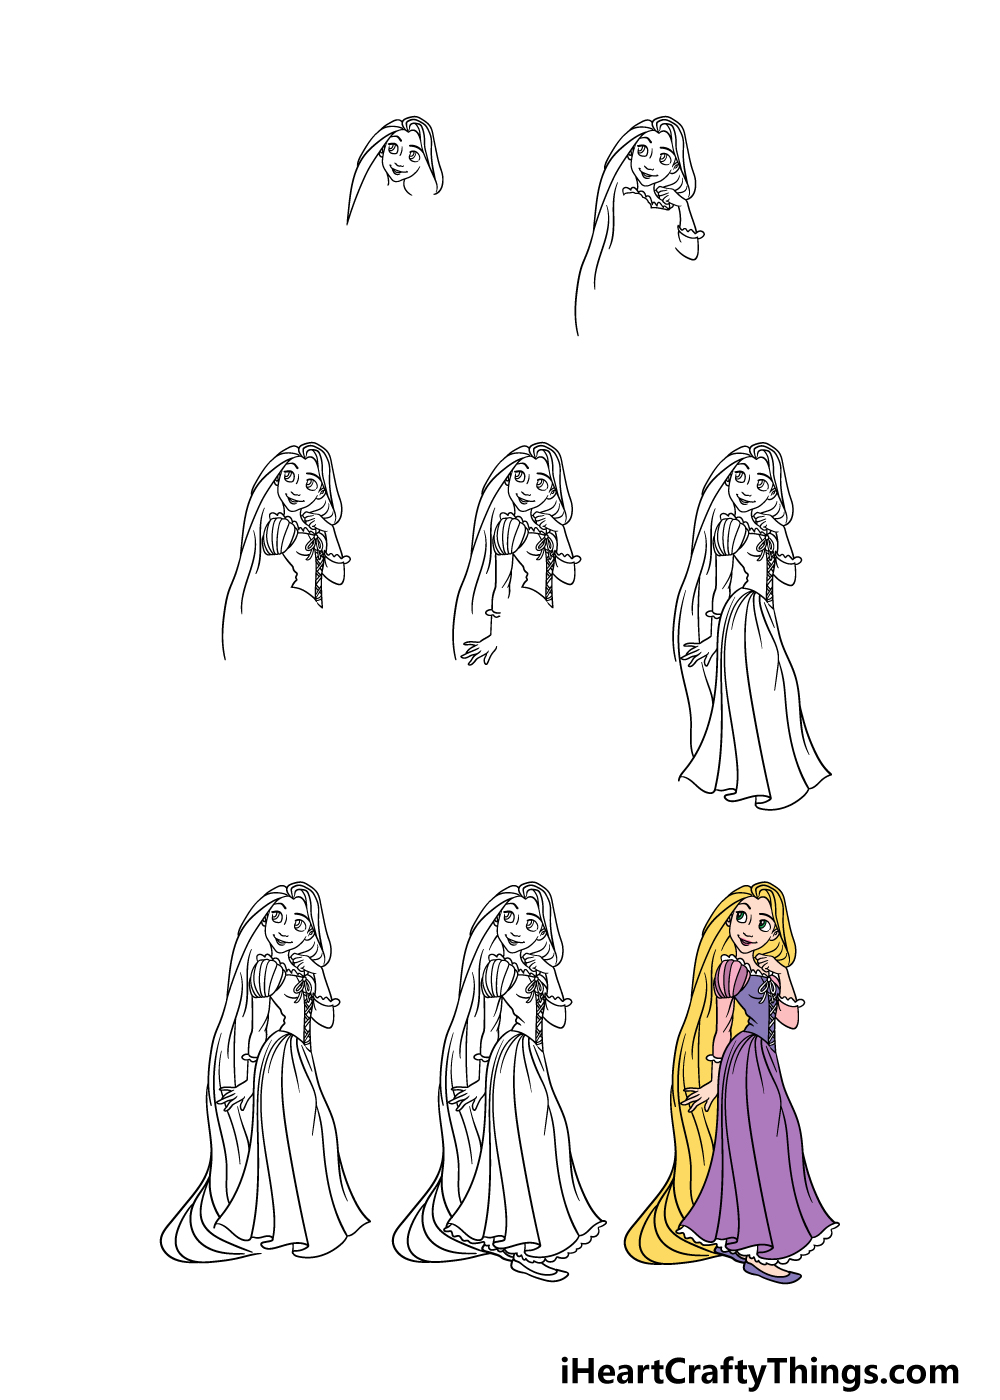
How to Draw Rapunzel – Let’s get Started!
Step 1
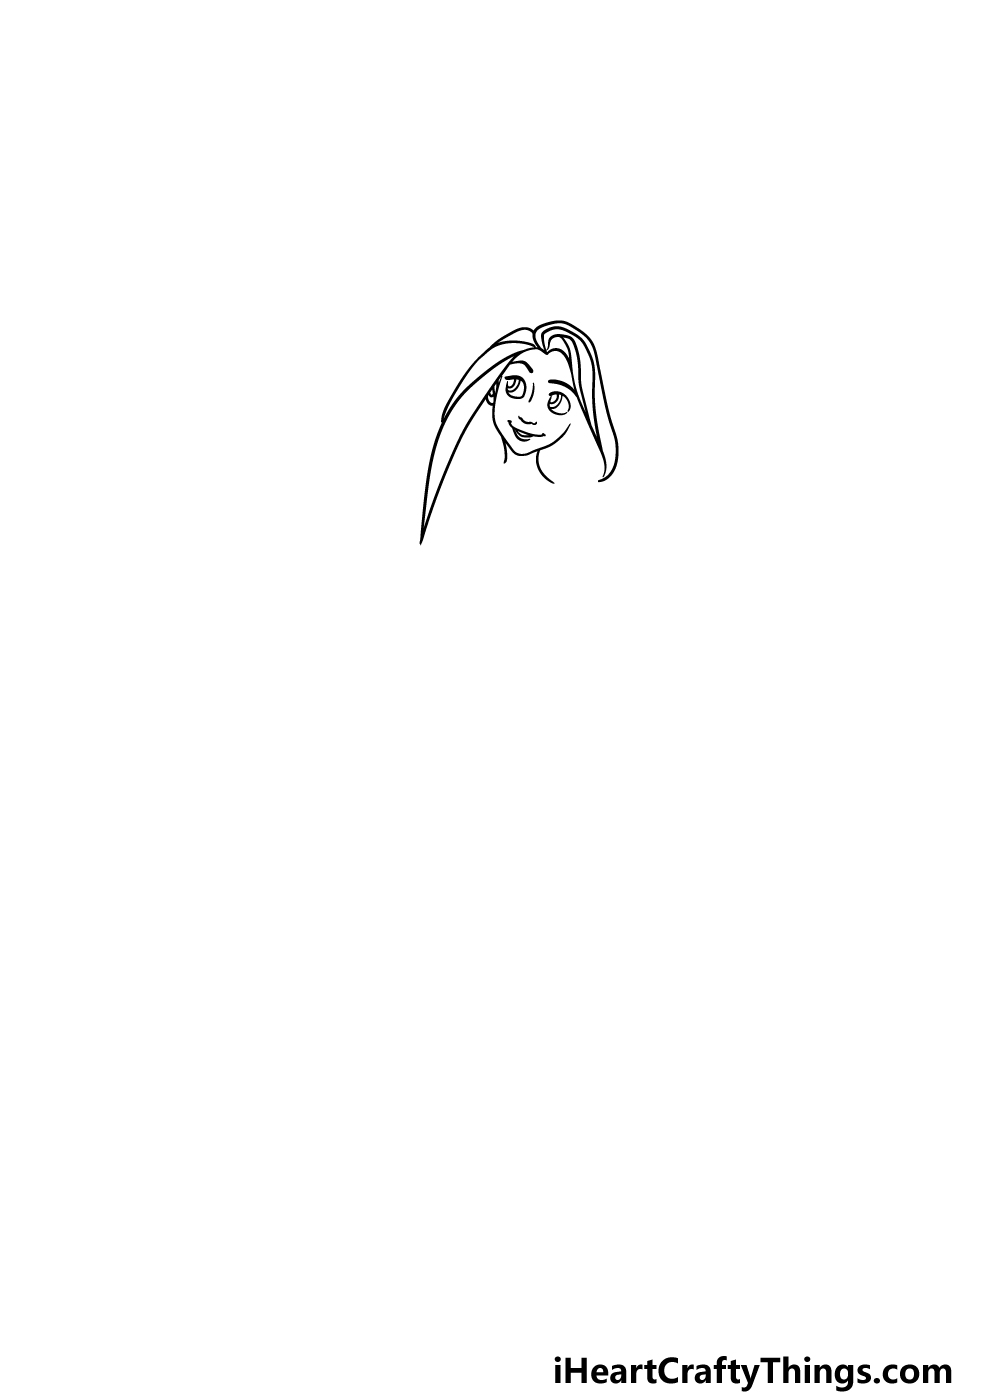
In this first step of our guide on how to draw Rapunzel, we will be starting with her head and hair.
This will be quite a detailed drawing, so it could be recommended to use a pencil first and also to follow the reference image very closely.
Her eyes are big and round with some large pupils inside of them. Then, her face will be a bit rounded with simple thin lines for her mouth and nose.
Then we will start to draw her thick hair, which will be in several sections. Once you’re happy with how it looks in relation to our reference image then you’re ready to move on!
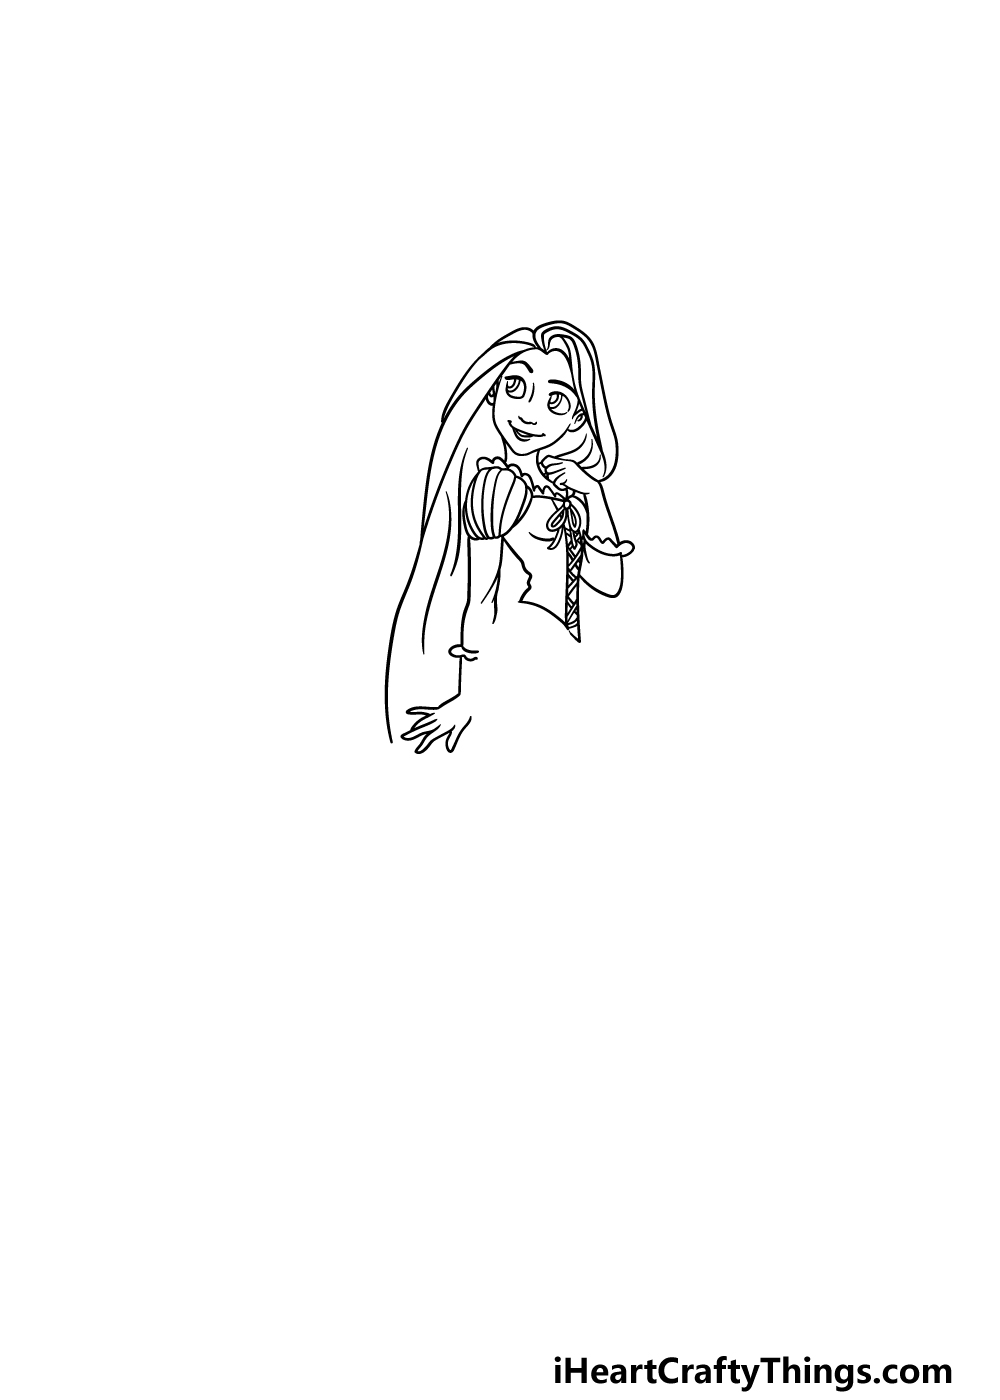
Step 2 – Now, draw her first arm and continue her hair
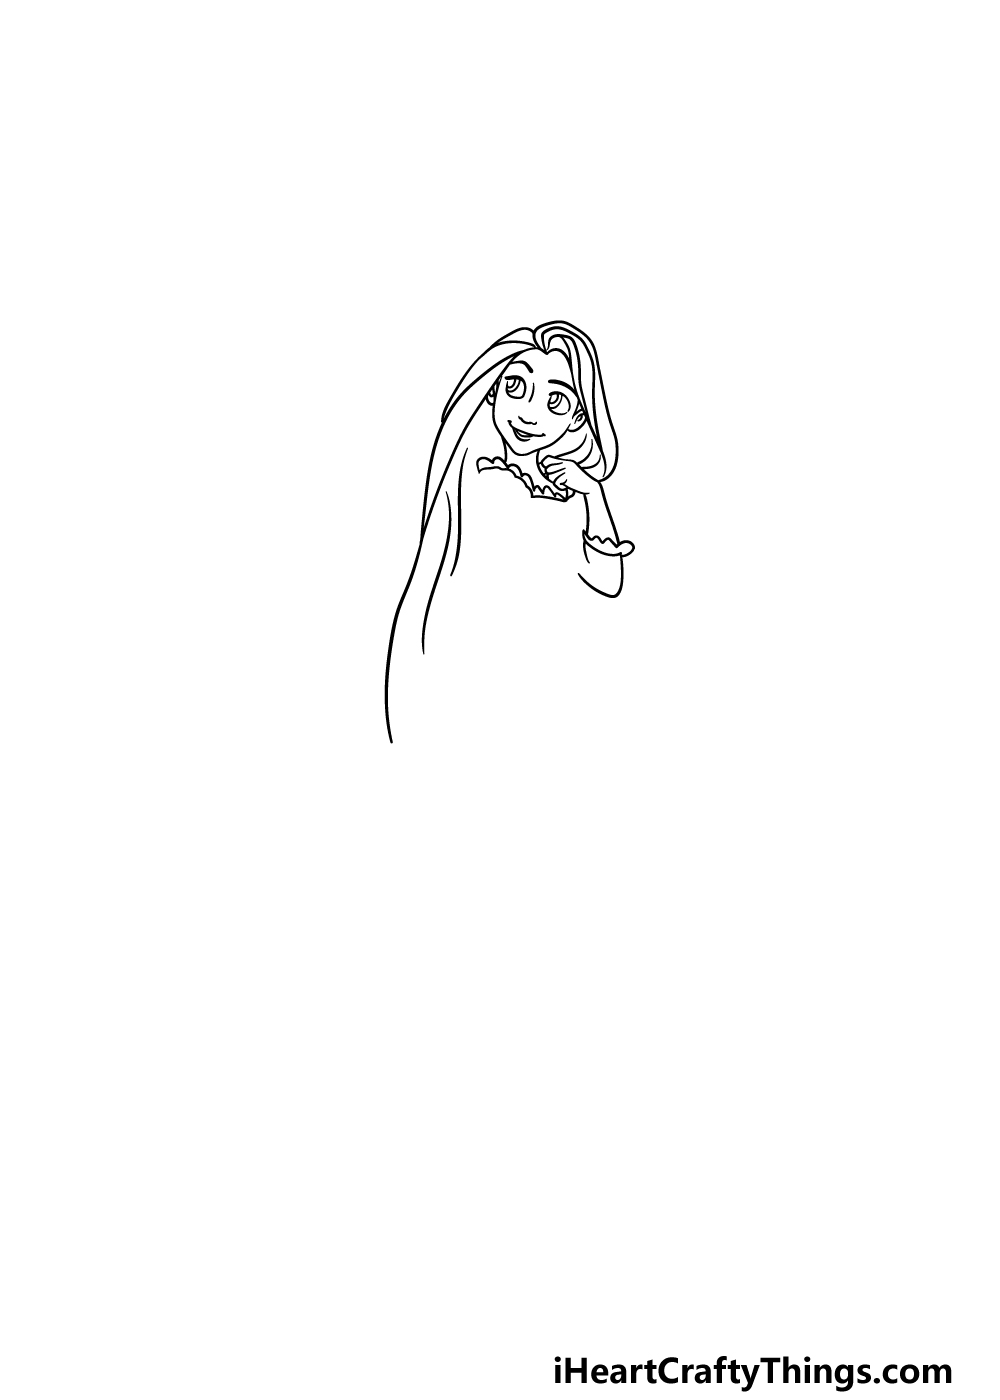
We will be drawing the second arm as well as extending the hair in this second part of your Rapunzel drawing. Her arm will be bent at the elbow so that her forearm is poking up with her hand below her face.
Then, you can draw some small, bumpy lines for the collar of her dress. Finally, use some more slightly curved lines going down to continue her long hair.
Step 3 – Next, draw some more detail for her dress

There will be a lot of details in the next few steps of this guide on how to draw Rapunzel, so be sure to take it slowly and have fun with it! We will be using some curved lines for the shoulder of her dress to start with.
Then, you can draw her chest and waist with some intricate detailing going down the center for the string she fastened her dress with.
It may look a little complicated, but if you refer to the example image you’ll have no problems!
Step 4 – Now draw the other arm
You’re making great progress on this Rapunzel drawing! For this step, we will be focusing on her other arm.
Using some slightly curved lines going down, you can draw her other arm poking straight down from the shoulder of her dress that you drew previously. With that arm drawn you’re ready for step 5!
Step 5 – Draw her flowy dress next
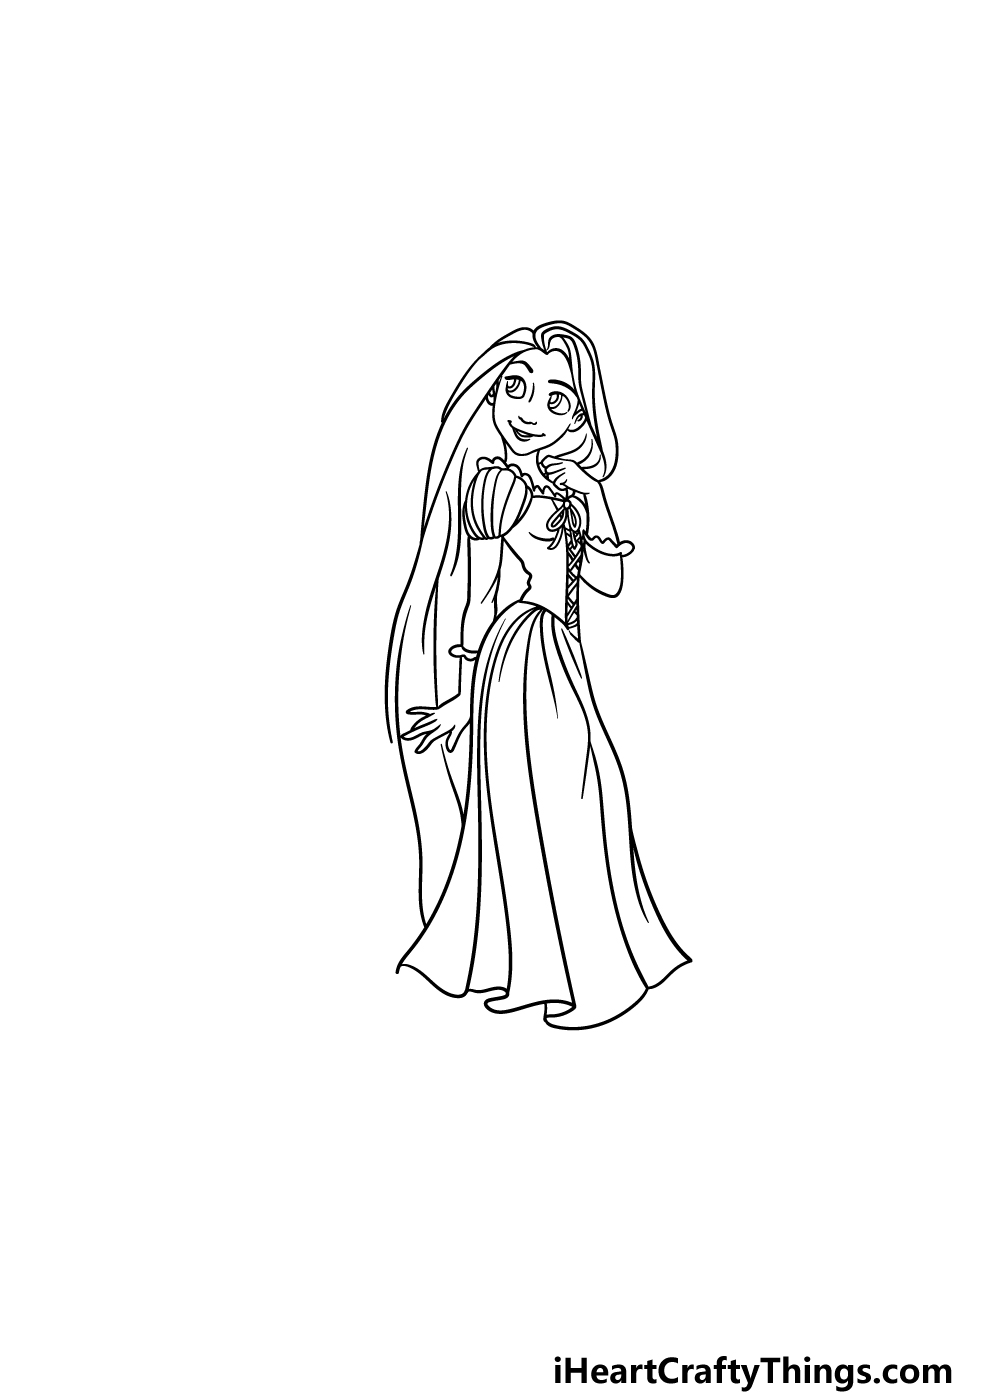
It’s time to draw the rest of the dress in this fifth step of our guide on how to draw Rapunzel.
The dress will be drawn with lots of curved lines of varied lengths coming down and connecting to one another. This will help to portray the flow of the fabric and will give it a more dynamic look.
Then, once you have finished the dress we just have a few final details to add in the next steps before you color in your drawing.
Step 6 – Next, finish drawing Rapunzel’s hair
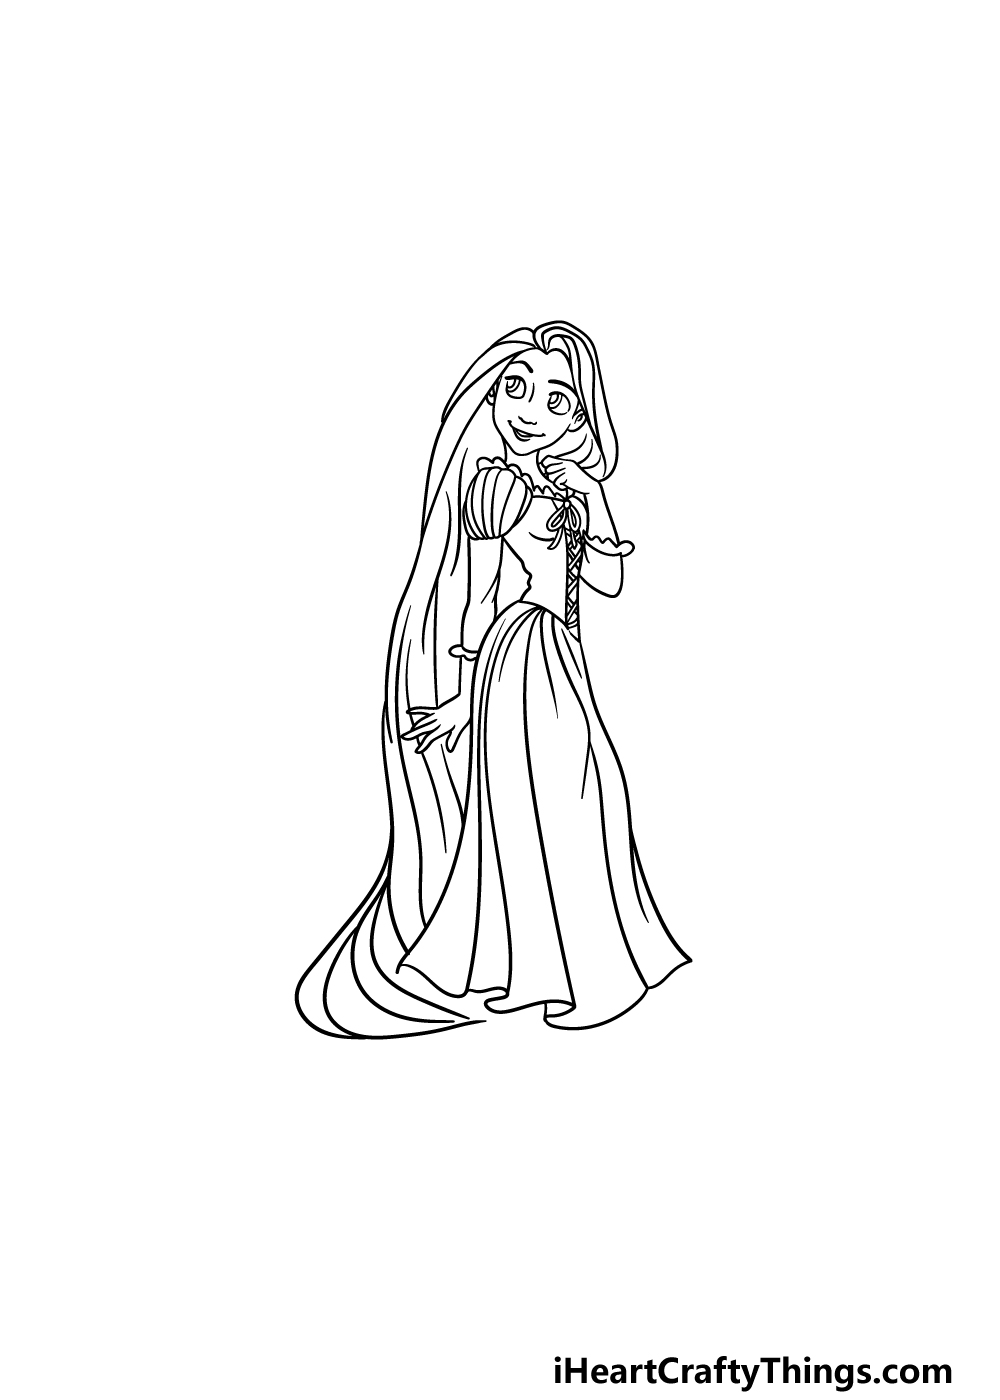
One of the most famous attributes of this character is her long hair, and we will finish that off in this step of your Rapunzel drawing.
To do this, we will use some sharply curved lines coming down from the hair and towards her feet. It’s as simple as that, and you’re ready for step 7 now!
Step 7 – Now, add some final details
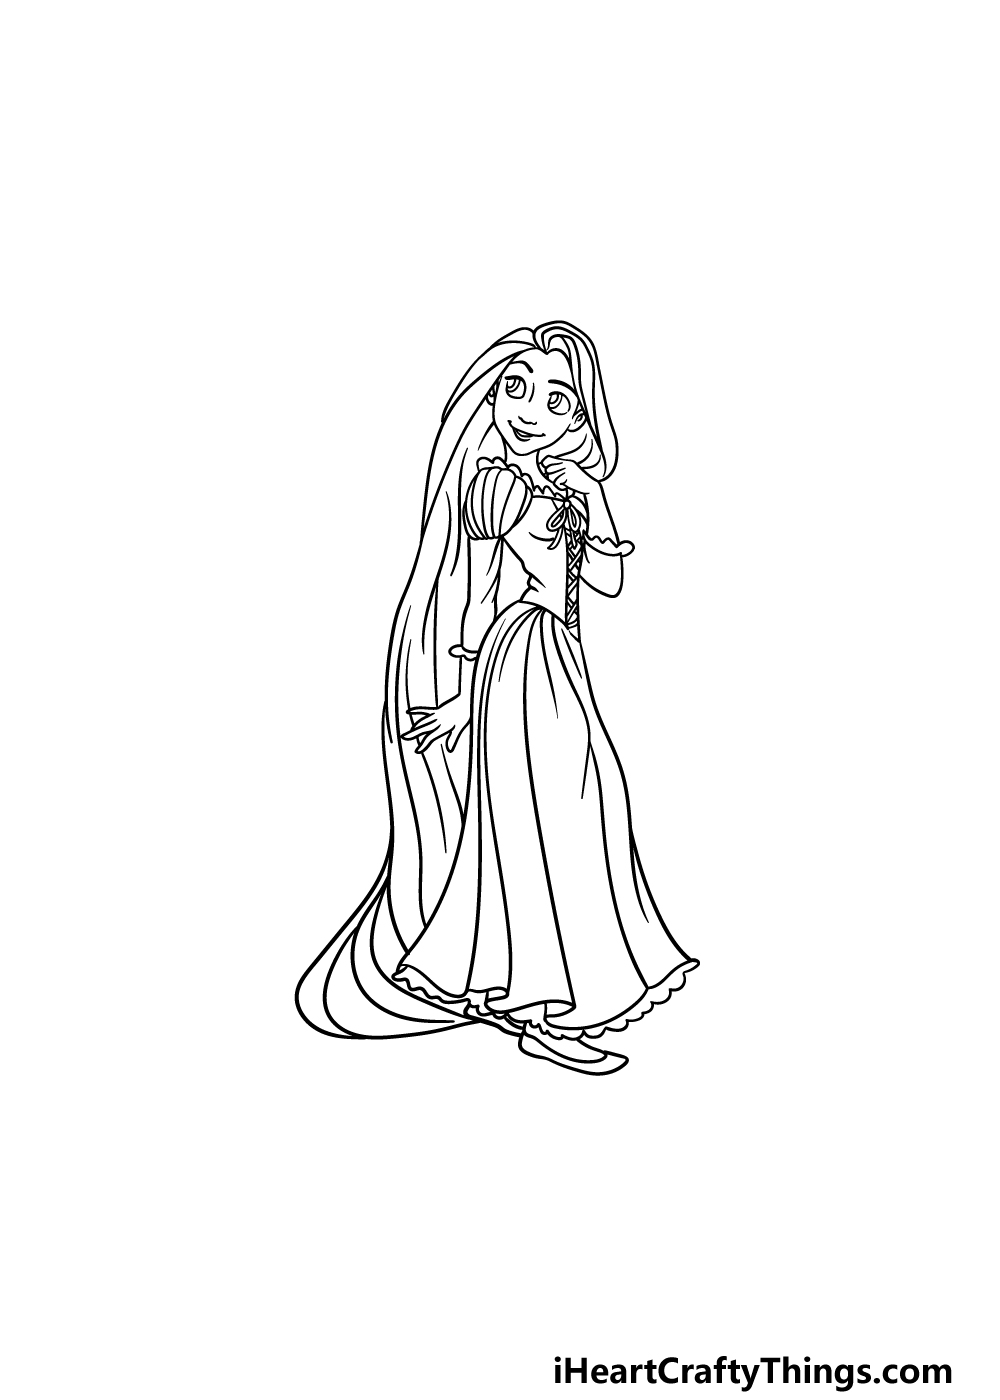
It’s almost time to color in this picture, but we have a few final aspects to draw in this step of our guide on how to draw Rapunzel.
First, you can use some more bumpy lines at the very base of her dress to finish off the hem. Then, you can draw her feet beneath the base of the dress to finish her off.
That will do it for our details, but you can also add some of your own if you wish!
Perhaps you could draw a background to show your favorite scene from the movie. You could also lookup more characters you like from the story and draw them beside Rapunzel.
How will you finish off this drawing before the final step?
Step 8 – Finish off your Rapunzel drawing with some color
That brings you to the final step of your Rapunzel drawing. In this part, you can have some fun adding some incredible colors to your picture!
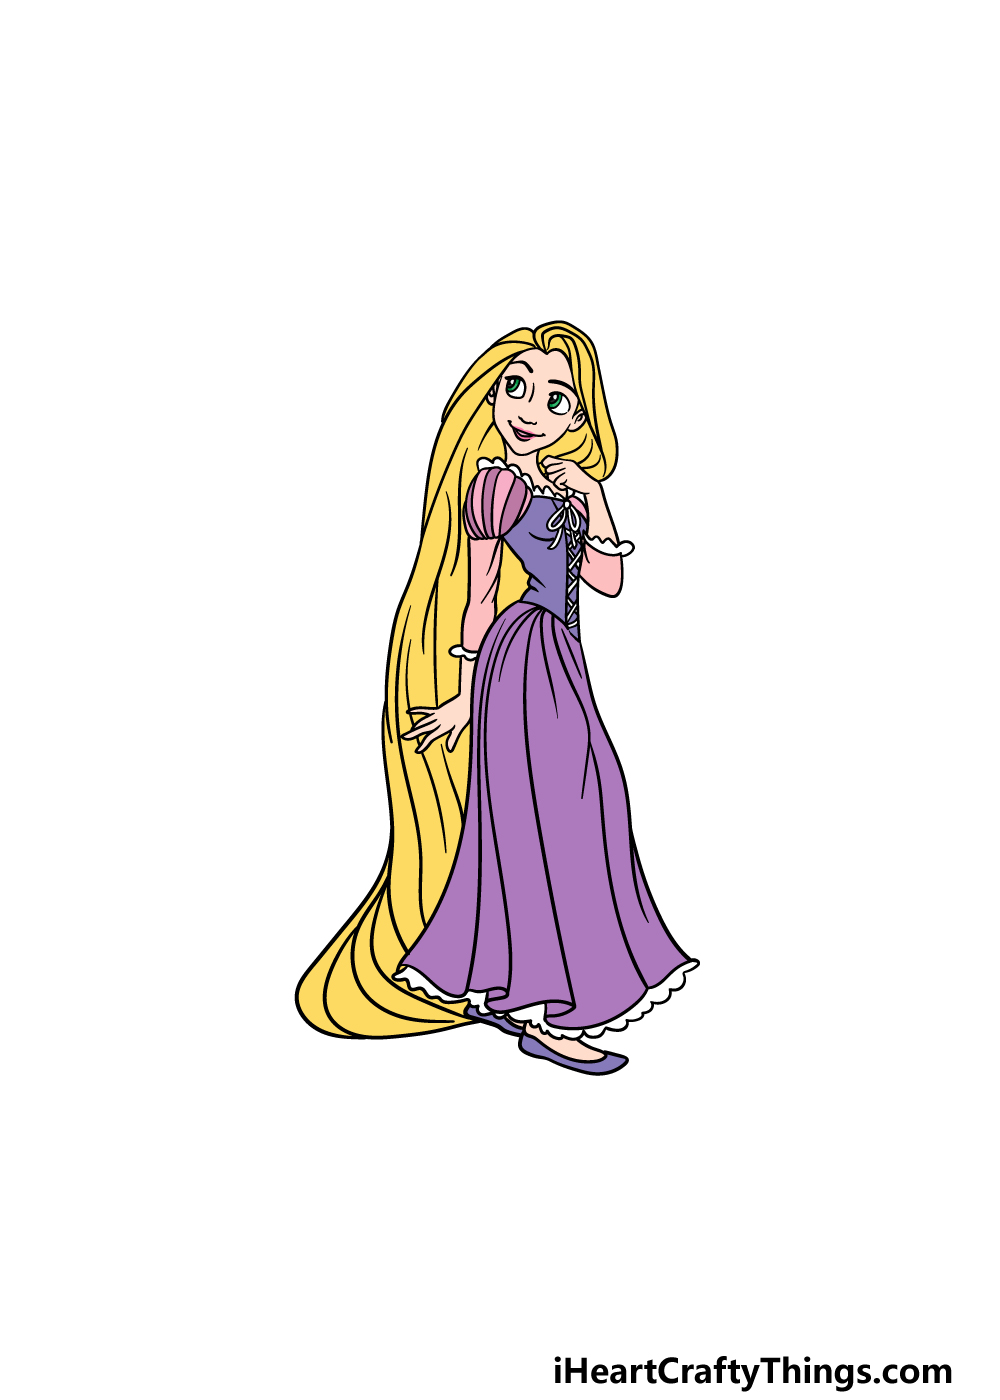
We showed you in our example how she looked in the movie, and for this we used some nice yellows for her blonde hair with a pink color scheme for her dress.
You could use this image as a reference point for your own colors, but you could also change up the color scheme to your favorite colors if you prefer!
If you would like to have the colors be nice and bright then you could use mediums like colored pens and acrylic paint for a few examples.
Alternatively, you could use some watercolors or colored pencils for a more muted look to the image. What colors and mediums will you use to finish off this picture?
5 Tips To Make Your Rapunzel Drawing Even Better!
Celebrate this iconic character as we make your Rapunzel sketch look even better!
This drawing of Rapunzel shows her in a simple, pretty pink and purple dress. This is a great look for her, but you could also give her a brand new look!
It could be as simple as keeping the design of her dress but changing up the colors to the ones that you prefer. Or, you could give her a whole new dress and other accessories.
In the movie, Rapunzel is joined by other characters that fans have also grown to love. These could also be added to the picture for some extra fun!
One of the most obvious would be the lovable Flynn Rider from the film. He would be a great addition, but you could add any other characters that you love from the movie.
When adding additional characters, you don’t need to stick to just characters from this movie. It would also be fun to add characters from other Disney films to your Rapunzel drawing!
For starters, you could show what it would look like if she were to meet some other Disney princesses you love. That would be such a fun way to imagine some awesome Disney crossovers!
Who would you like to meet Rapunzel?
When you have sorted out all of the characters that you want for this drawing, you could then draw a background.
This would be a great way for you to represent some of your favorite scenes from the movie.
Simply freeze the movie at a scene you like, and then use it as a reference while you draw. Or, you could pick some other pretty settings for Rapunzel to be a part of!
Perhaps the most famous aspect of Rapunzel’s character would have to be her hair. This could be drawn with your pens, pencils and other art tools.
You could also use some other fun arts and crafts to represent it! Perhaps you could use some yellow ribbon or strands of fake hair.
What other art supplies could you use?
Your Rapunzel Drawing is Complete!
You have added your final colors and details, and that means you have successfully completed this guide on how to draw Rapunzel!
There were a lot of details to do in this image, so you should be proud of doing such a great job. When taking on a new image, it always helps to break it down into smaller, more manageable steps.
Now you can take it even further with your own details and colors, so we can’t wait to see what you do!
When you are ready for more drawing fun, be sure to visit our website for more amazing guides. We upload new ones frequently, so we hope to see you often!
Once your Rapunzel drawing is finished and colored, please remember to share it on our Facebook and Pinterest pages for us to enjoy!