Whether you’re looking at the lowercase or capital version of the letter I, it’s one of the easiest letters to learn how to write.
Learning how to write it normally may be a breeze, but trying to make it a bit more fun by learning how to draw a bubble letter I can be a bit more of a challenge.
The letter I is quite common in our everyday lives, so it’s well worth learning how to make it more fun. Once you know how to do that, you can make all sorts of cool designs!
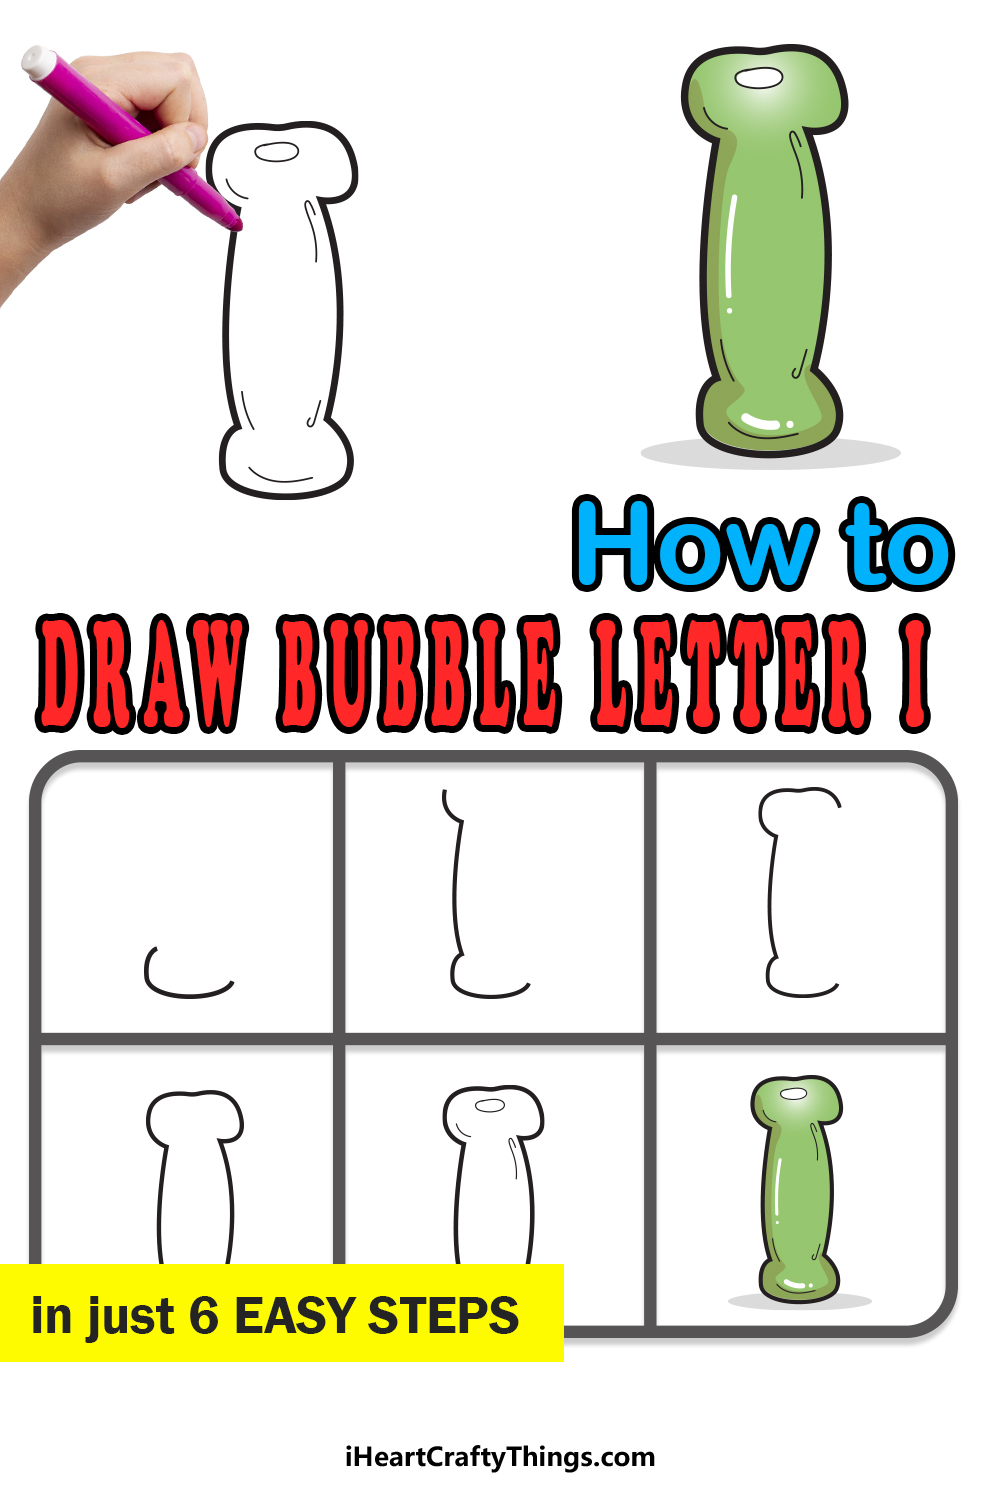
In this guide, we will take you through 6 steps on how to make a fun bubble version of this letter. After that, we will show you some fun ideas that you can use to inspire you.
Now, let’s begin with the first step of the guide to get you started!
Let’s Get Started
STEP 1:

Depending on the font and style, the letter I can come in a few variations. In the previous sentence, you will see that it is a simple straight vertical line.
Sometimes, there can be two smaller lines at the top and bottom of the letter, and that’s the design we will be using for this bubble letter.
We shall begin by drawing the start of the lower small line we just mentioned. To draw this line, we will be using a simple curved line.
The reference image will show you how this line should look. When written, the letter I is very straight, but we will be avoiding any perfectly straight lines here.
This will be so that the I looks like it’s inflated with air inside. Once you have drawn this base curved line, we can move on to step 2 of the guide.
STEP 2:
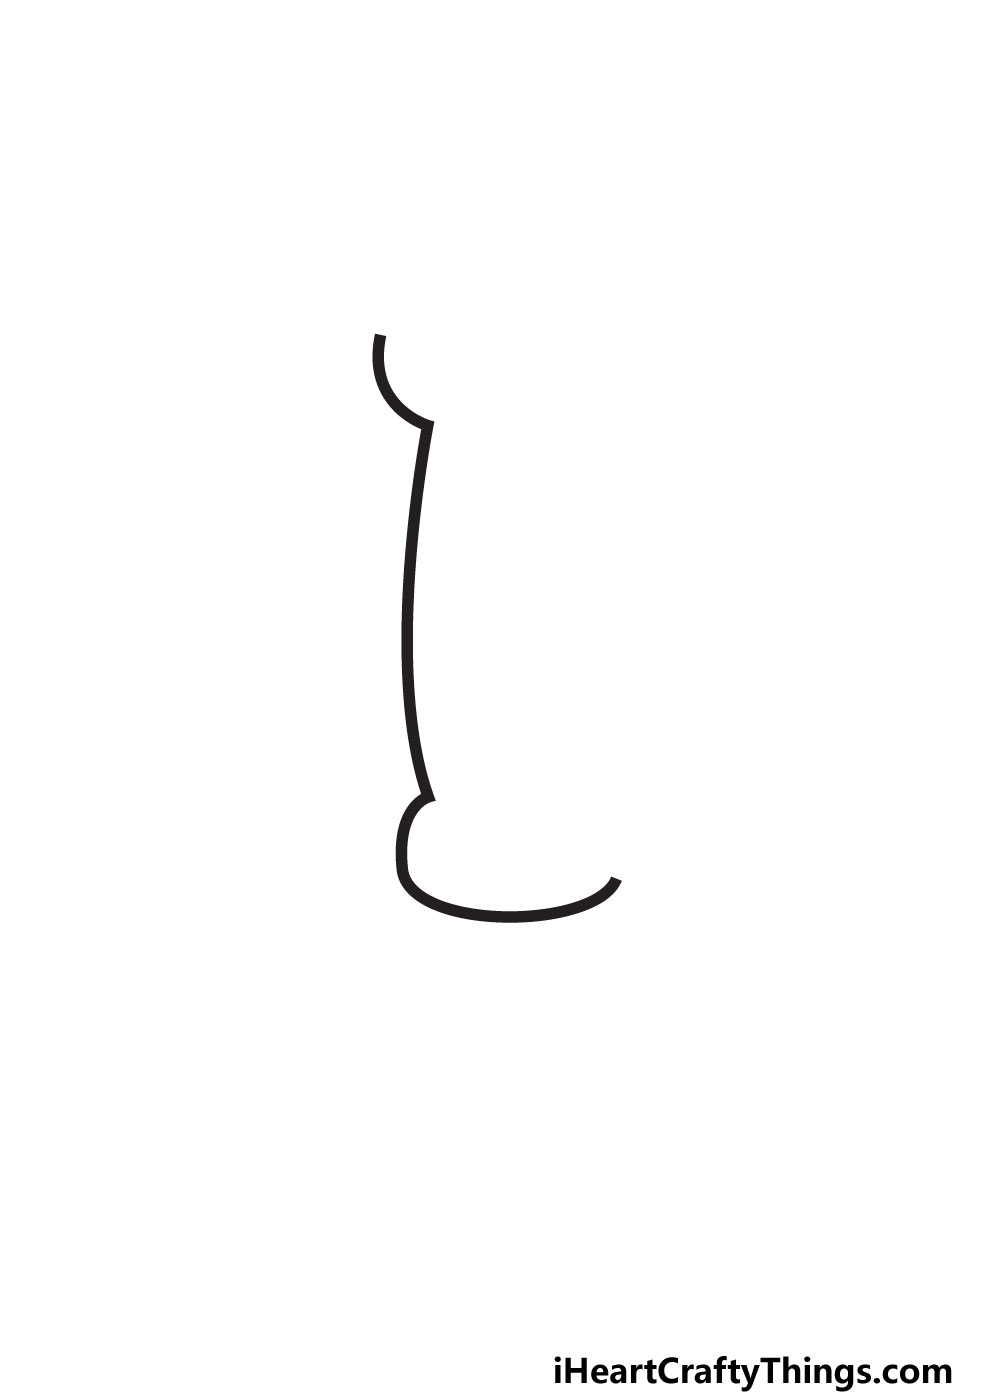
For the second step of this guide, we will be drawing the beginning of the vertical pillar of the letter I. This will extend up from the base you just drew.
Once again, we will make it slightly curved as straight lines will prevent it from looking inflated. Once you reach the top of the pillar, we will add another small, curved line.
This will be the beginning of the smaller line at the top of the letter, so keep that in mind. If you want to keep the size of the letter consistent, you can plan it out.
A good way of doing this would be to use a light pencil to draw a straight line up. This will help you choose the length of the I that you can reference as you add the final lines.
Next, we will draw the top portion of the letter, so when you’re ready let’s move to that step.
STEP 3:
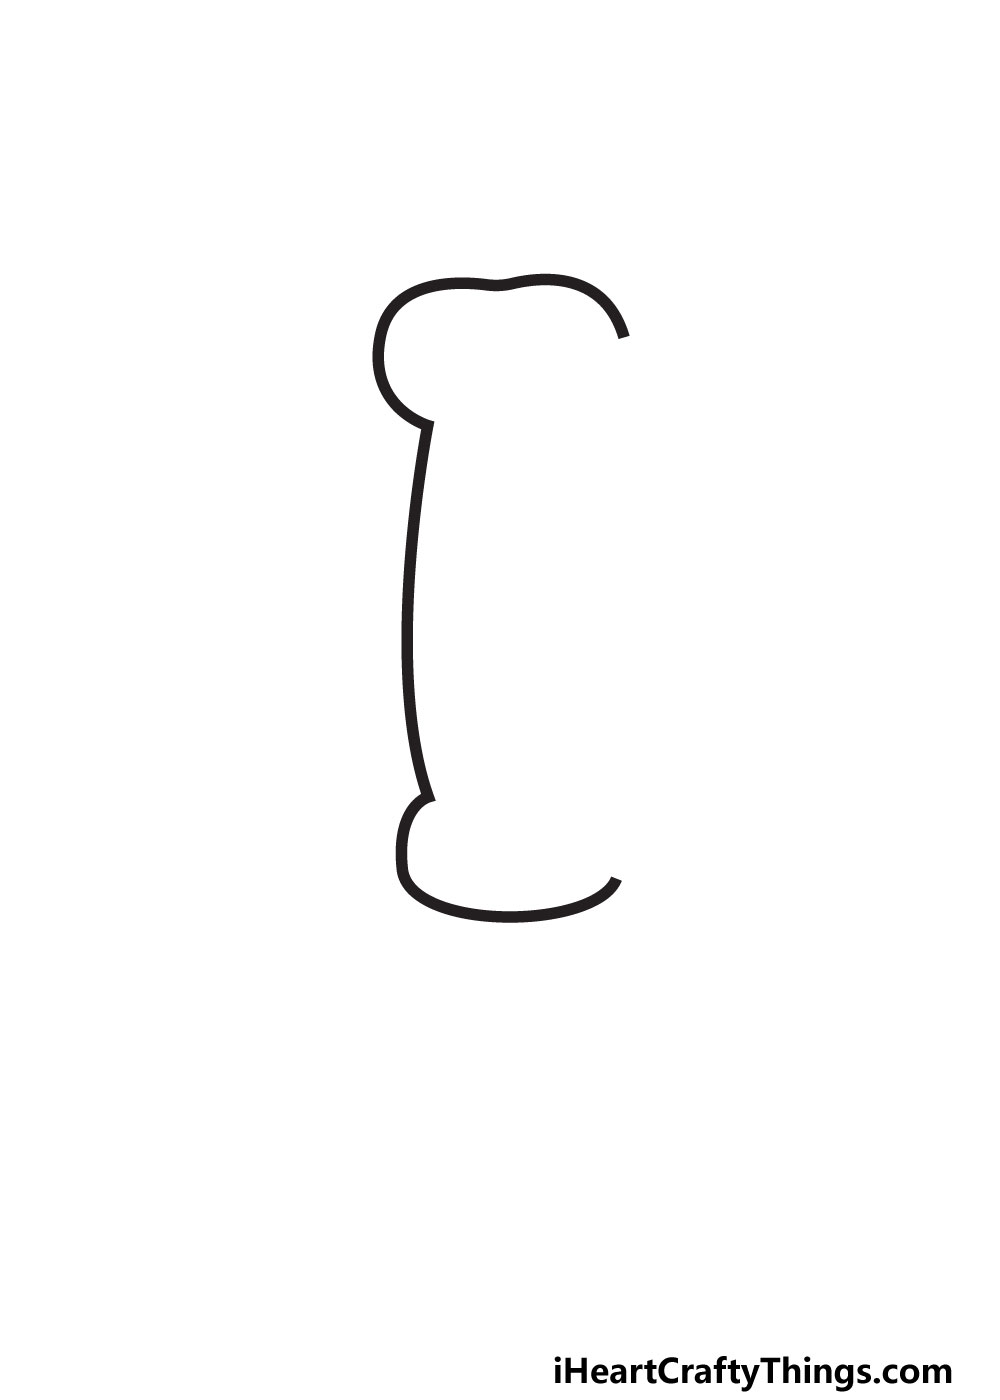
Now, it’s time to add the top of the letter I. Once again, we will be extending from where the previous line ended in the previous step.
You would think that the top of the letter I would be identical to the one on the bottom, but we will actually make it look a bit different.
Instead of a smooth curved line, we will instead have a very mild dip in the center. This will again serve the purpose of making this I look like it has been inflated.
There is a big gap on the right-hand side of the I, but we will fill that in the next step as we finish off the outline completely.
Once the outline is complete, we will then be free to add some final touches, so let’s move on.
STEP 4:

As we mentioned earlier, this step will see you finishing off the outline of your bubble letter I. First, draw a small, curved line to finish off the top bit of the I.
Once that is done, we will draw the right-hand side of the pillar. This will be a mirror image of the one on the left and will have a similar slight curve to it.
When that part of the pillar is drawn, there will just be one tiny space left. That can be filled with another small, curved line.
Once that last small line has been drawn, you’re ready for some final details! Before you move on, be sure to check that everything is ready for those final touches.
If you took our suggestion of drawing an I in pencil to prepare, then you can erase that as we won’t be needing that. You can also go over the outlines with your pen or a dark pencil.
When the outline looks exactly as you want it to, we can start adding some interior details in the next section.
STEP 5:
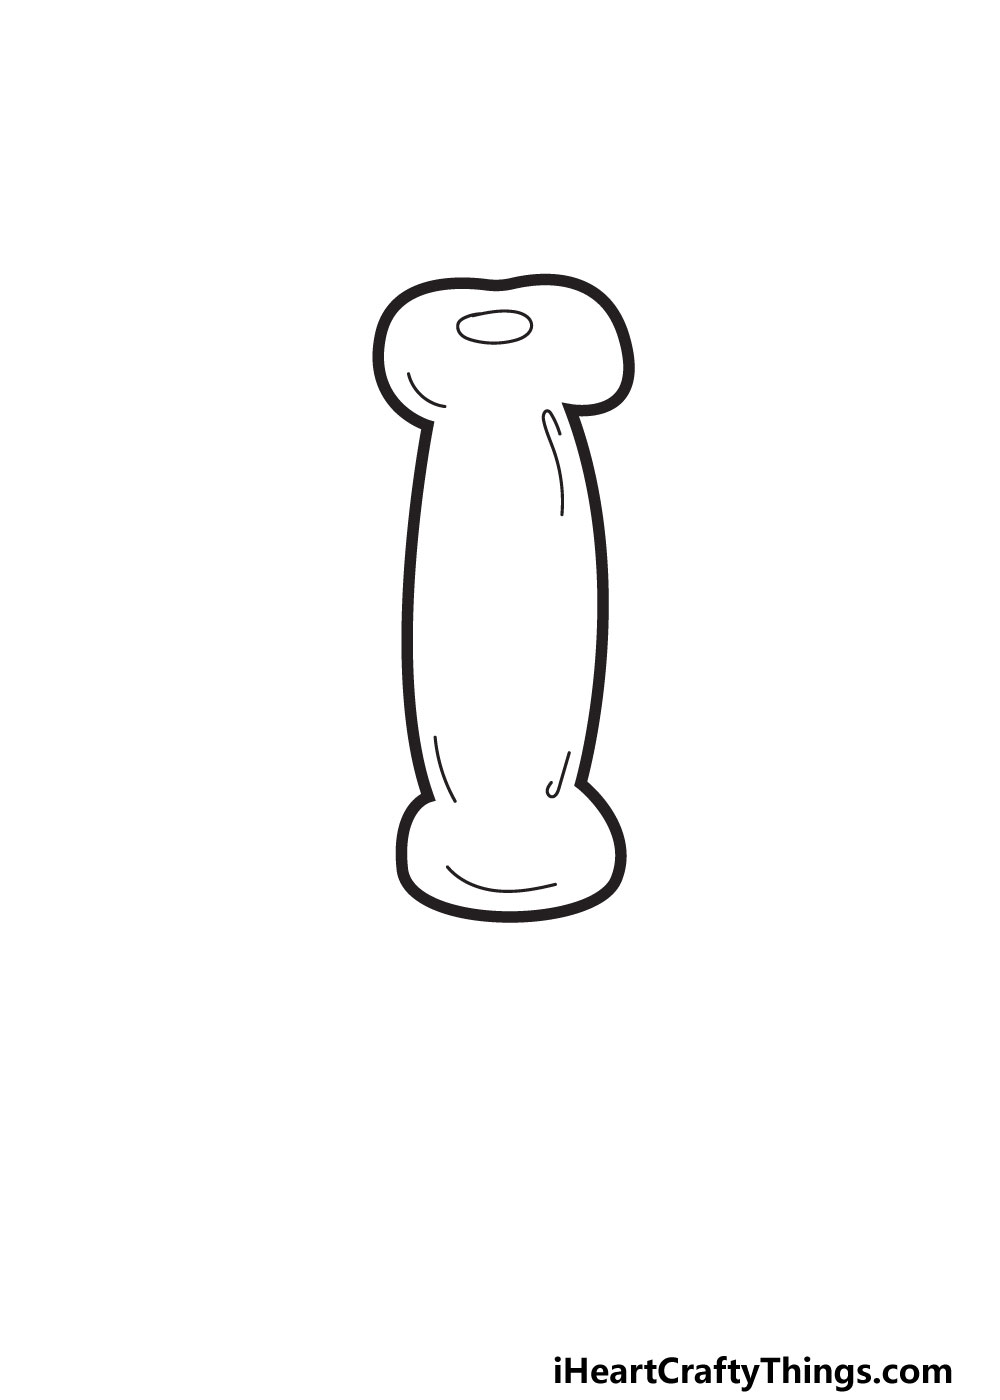
The outline for this letter may be done, but we’re not finished with it yet! This part will be all about making the letter look like it is a bubble.
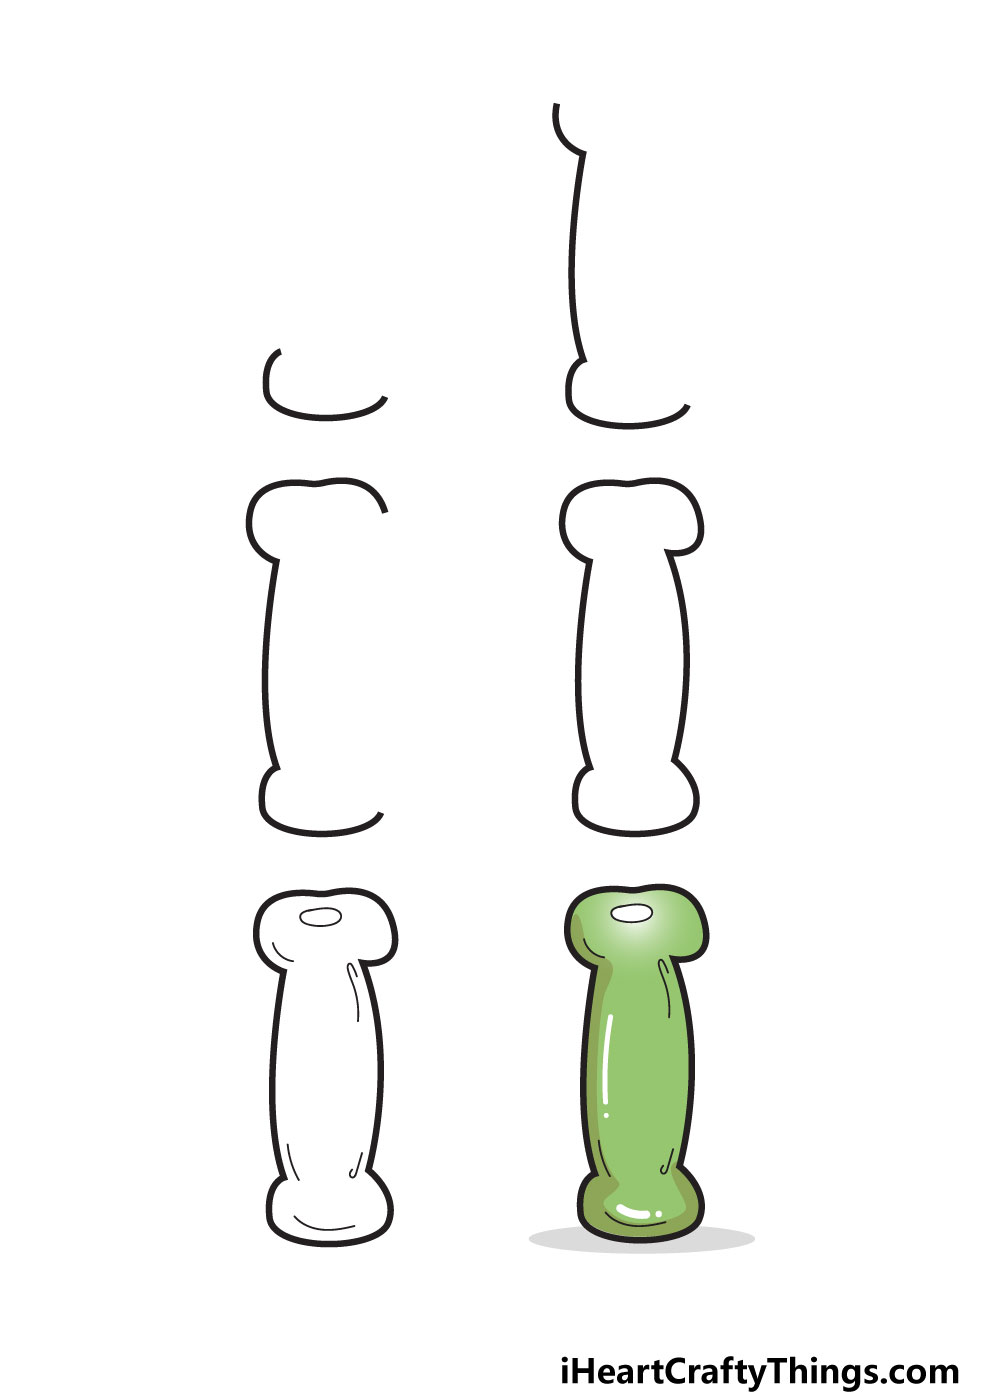
For that, we will be adding shapes to show light reflecting on the letter and lines to give the letter some volume. Let’s start with the reflective shape.
As you can see in the reference image, this will be drawn as a simple oval shape. We chose to place it near the top of the I, but that is just one of many places you could put it.
Finally, we added some simple, slightly curved lines inside the I to suggest that it has some volume. Once these details are in place, you are free to add some extra touches of your own!
There are many ways you can make this letter drawing more unique to you. For example, you could draw a background or draw some little pictures around it.
If you want to keep the focus on the letter, you could decorate it with a pattern or some shapes. After the next step, we will also look at some ideas you can try out.
For now, let’s add some color to this drawing in the final step.
STEP 6:
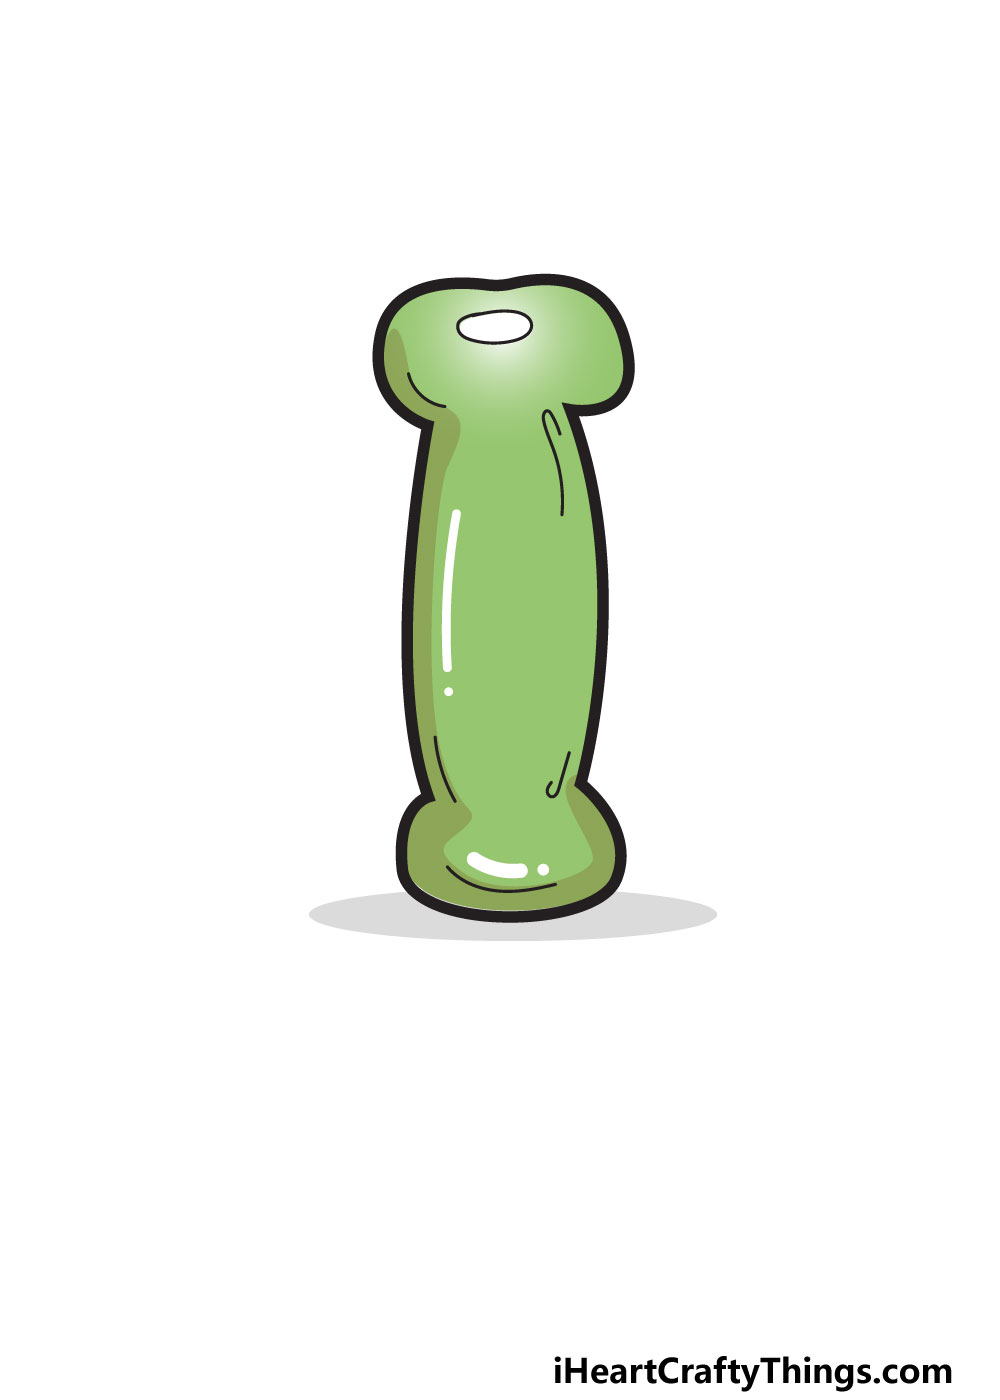
The great thing about coloring in your bubble letter is that there is no wrong way to do it. In our example, we chose to go for a green color scheme.
When coloring in something that is supposed to look like a balloon, you ideally don’t want to stick to just one shade.
In our example, we made a gradient of light and dark shades to simulate the look of light shining on the bubble. You could create a similar effect no matter which color you choose.
You can choose any color you love to fill in the bubble letter, or you could use several different colors!
If you drew some patterns or shapes inside the bubble letter, then you could work in all sorts of colors.
Choosing the colors you use is just a part of the fun, however. It can also be a lot of fun to mix and match different art tools and mediums.
For example, you could use acrylic paints for some portions of the letter and then colored pens and markers for smaller details.
That is just one possible combination, but you can really experiment and show us what you can do! What colors and art mediums will you use?
My Final Tips To Make Your Bubble Letter I Drawing Even More Special!
Your letter I is drawn and you have added your colors, but the fun can still continue! Before we close off this guide, we will look at a few ways that you can make your drawing even more special.
One idea for adding some more personality to the drawing would be to think of words that begin with the letter I.
Some that come to mind would be ink, igloo, iceblock or insect. Once you have chosen a word, you can use it as a theme for the drawing.
For example, let’s go with insect. You could use this bubble letter I as the start of the word and then write the rest of the word.
Then, you could draw all sorts of fun little insects on and around the letter! This is just one of the countless ideas you could go for, but you may be surprised how creative you can get.
If you don’t want to pick a theme for the image, you can still make the letter look really cool in other ways. One way would be to use crafts that may seem unusual.
You could cover the I with some fake fur, glitter or stickers as a few ideas on how to make it look really cool.
We have given you some ideas, but now you can show us how you want to make this even better than it already is!