The letter H is the eighth letter of the alphabet, and it’s a rather commonly used letter as well. The lowercase and capital versions of the letter are quite different, but neither are that difficult to learn how to write.
You probably know how to write both forms, but you can make this letter even more fun by turning it into a bubble letter H!
This can be much trickier than just learning to write the letter, but that’s what this guide is here to help with.
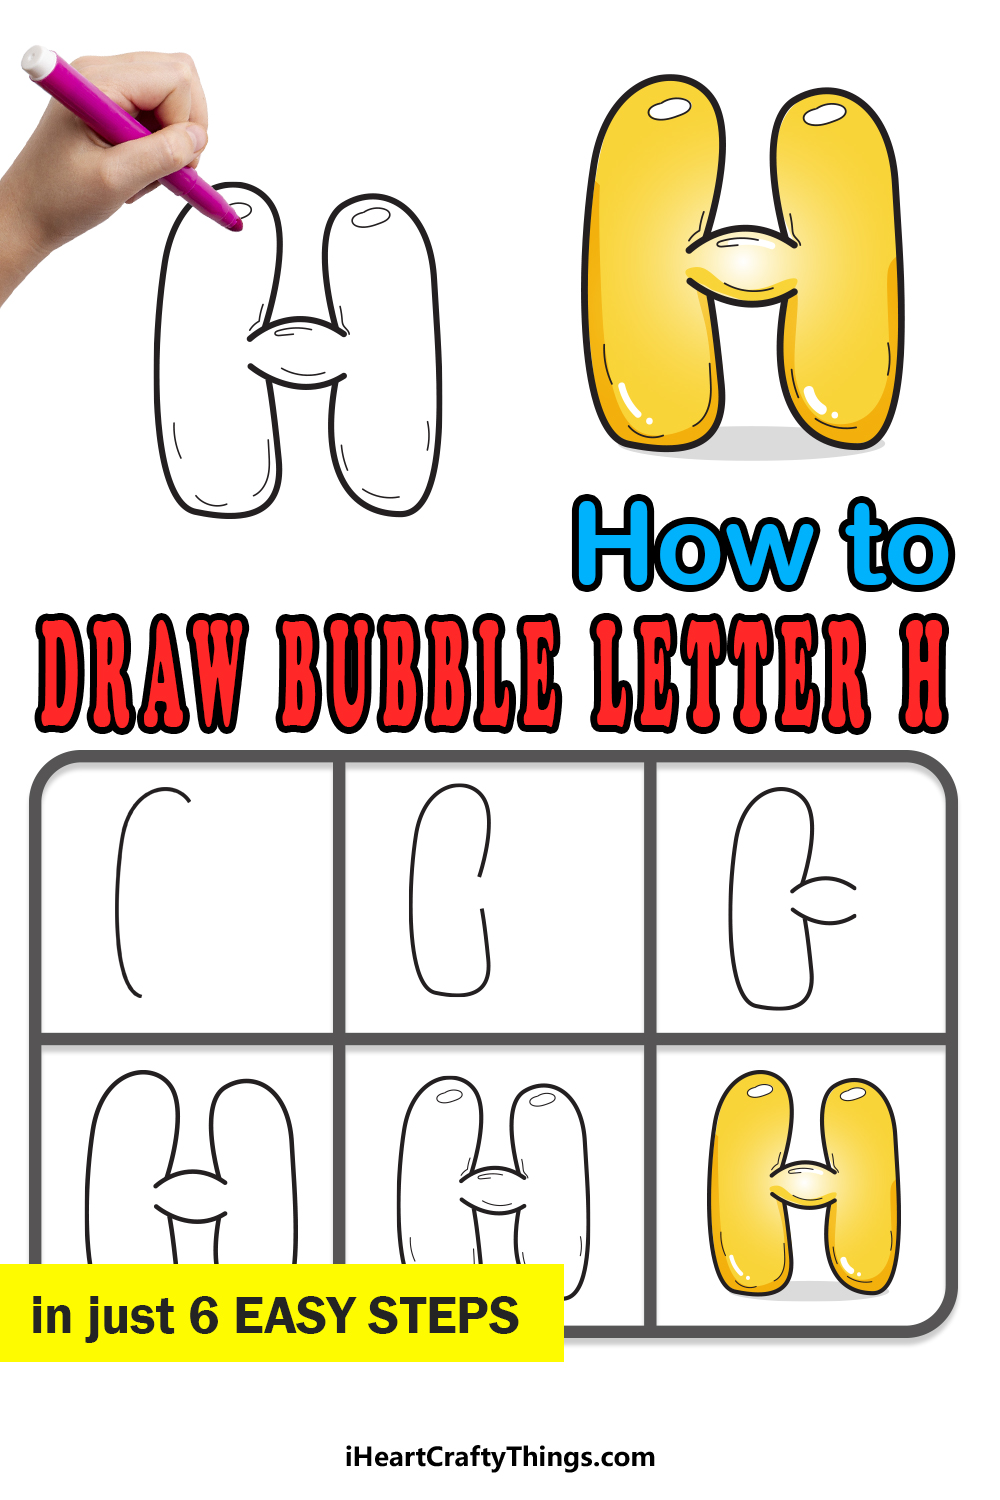
After these 6 fun and easy steps, you will be able to draw a bubble version of this letter with ease. We will also cover some fun ways you can personalize your letter once it’s done.
After this guide, you will have everything you need to create some happy H artwork! Now, let us begin by starting the first step of this guide.
Let’s Get Started
STEP 1:
In text, the letter H is quite simple, as it is made up of three connected lines. If you use your imagination, it looks a bit like someone doing a handstand.
Because it’s so simple to write, we would suggest doing that to prepare yourself. To do this, we would recommend finding the lightest pencil you can.
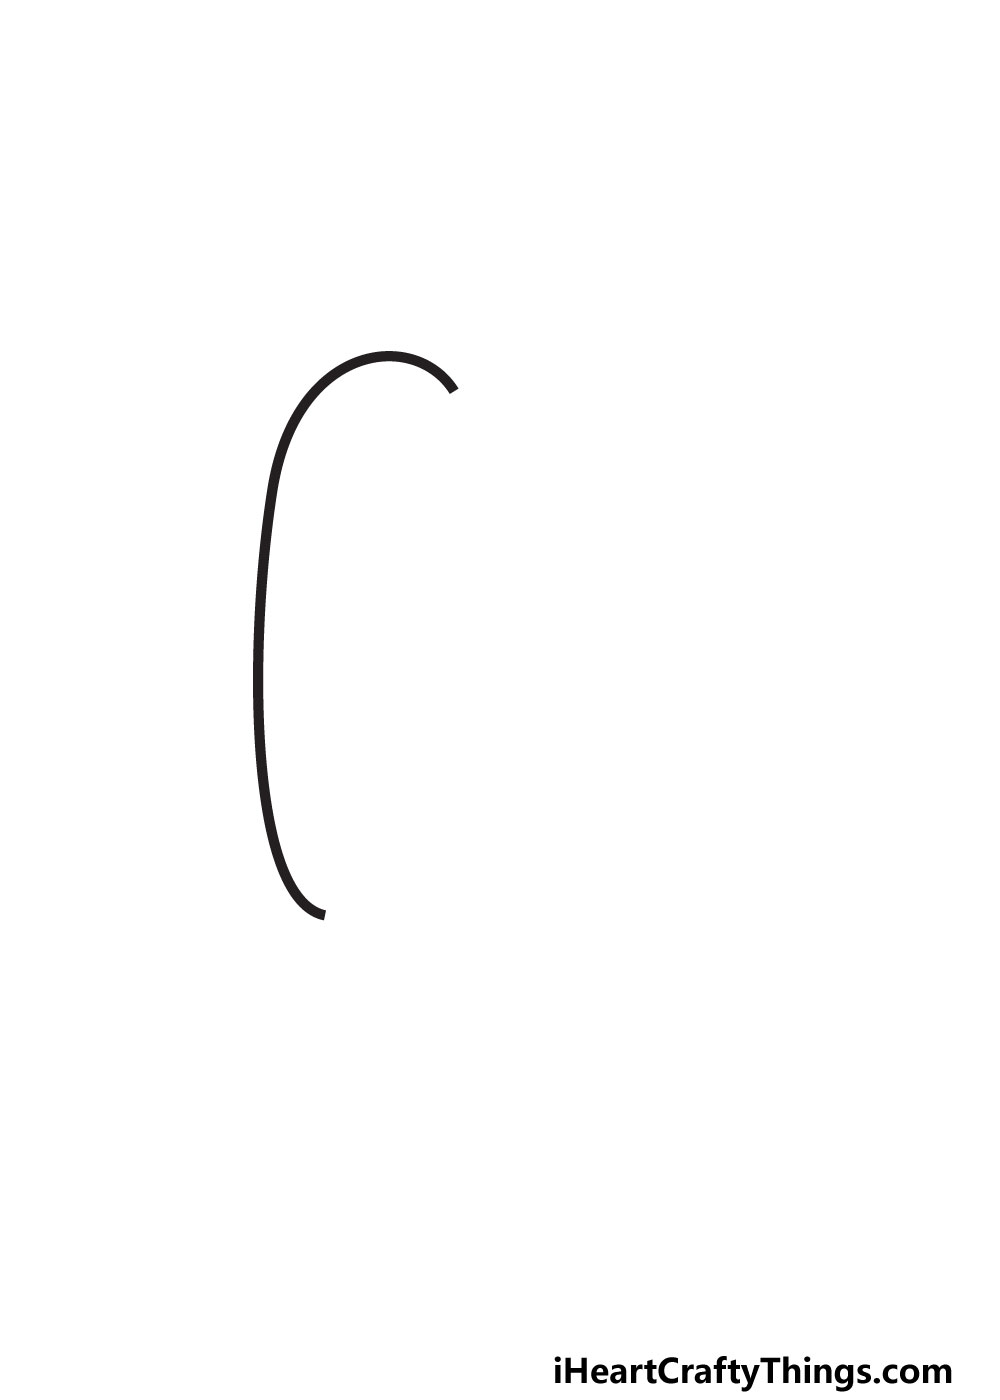
Write out the letter H in a large size, and then you can use that as the skeleton of your drawing. Then, we will begin the bubble version with a curved line.
This curved line will form the top left-hand ‘arm’ of the letter. The reference image will show you how it looks and how it curves down.
Once it matches our example, we can move on to step 2.
STEP 2:
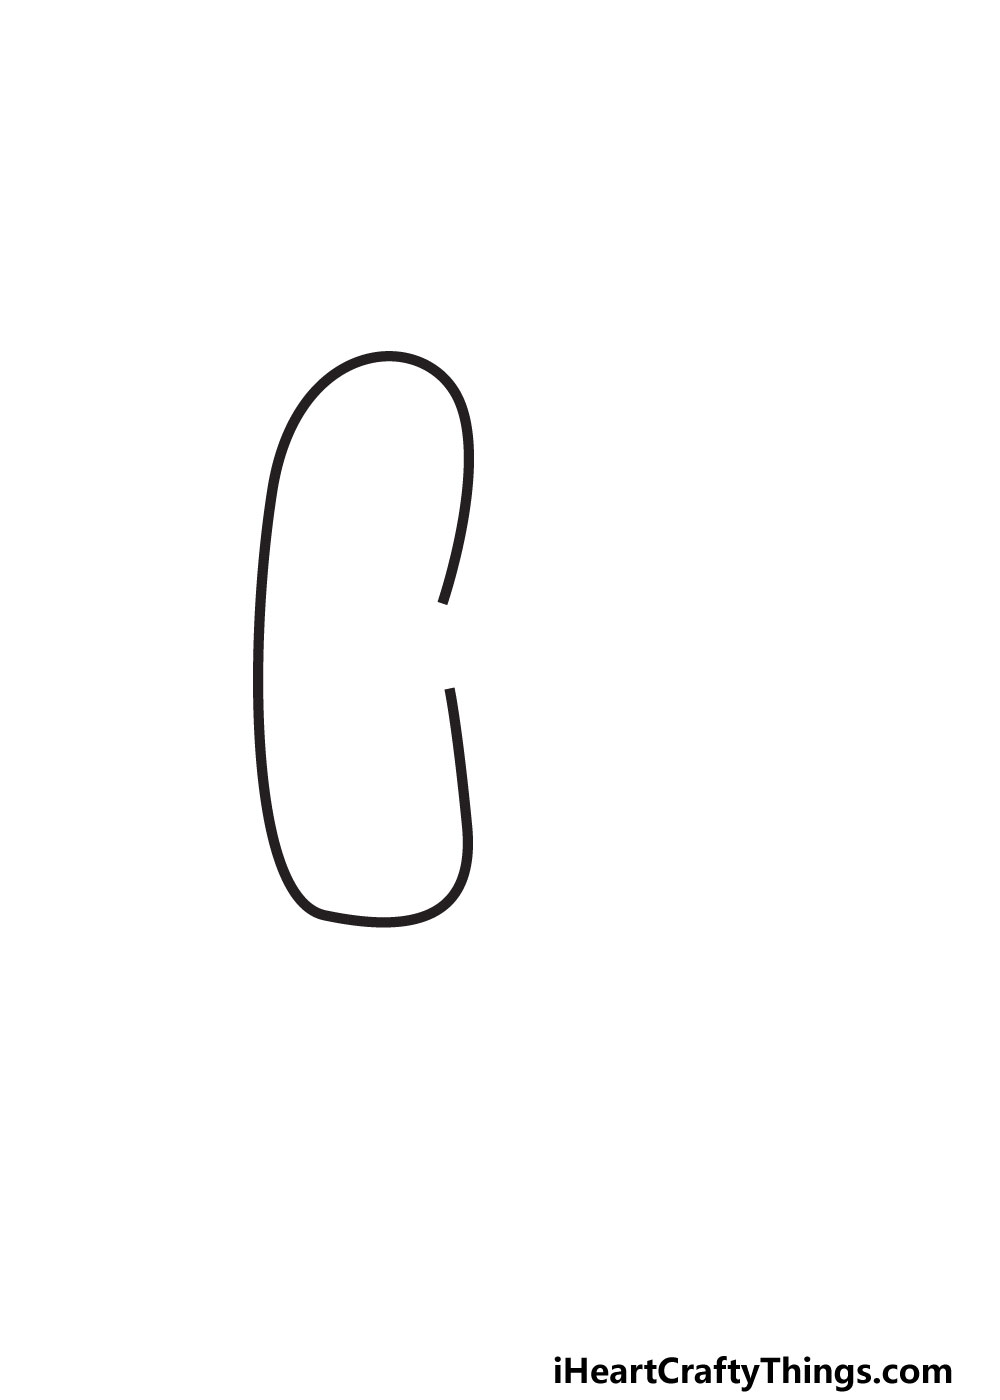
Next, we will finish off the entire left side of the letter H we are drawing. This will be done by extending the curved line you began in step 1.
The top of the line will curve and extend downward while the bottom will extend up. This will result in a shape that looks a bit like a sausage.
As you will see in the reference image, there will be a small gap on the right side of the shape. This is where the little bridge of the letter will go in the next step.
For now, you have the left side of the H complete. If you drew the letter H out in pencil then you can definitely see where this is going.
Try to make the shape curved like ours in the reference image. We’re trying to avoid any perfectly straight lines, as we want to make it look like a bubble.
Once you have completed this half of the letter, you will be ready for step 3.
STEP 3:
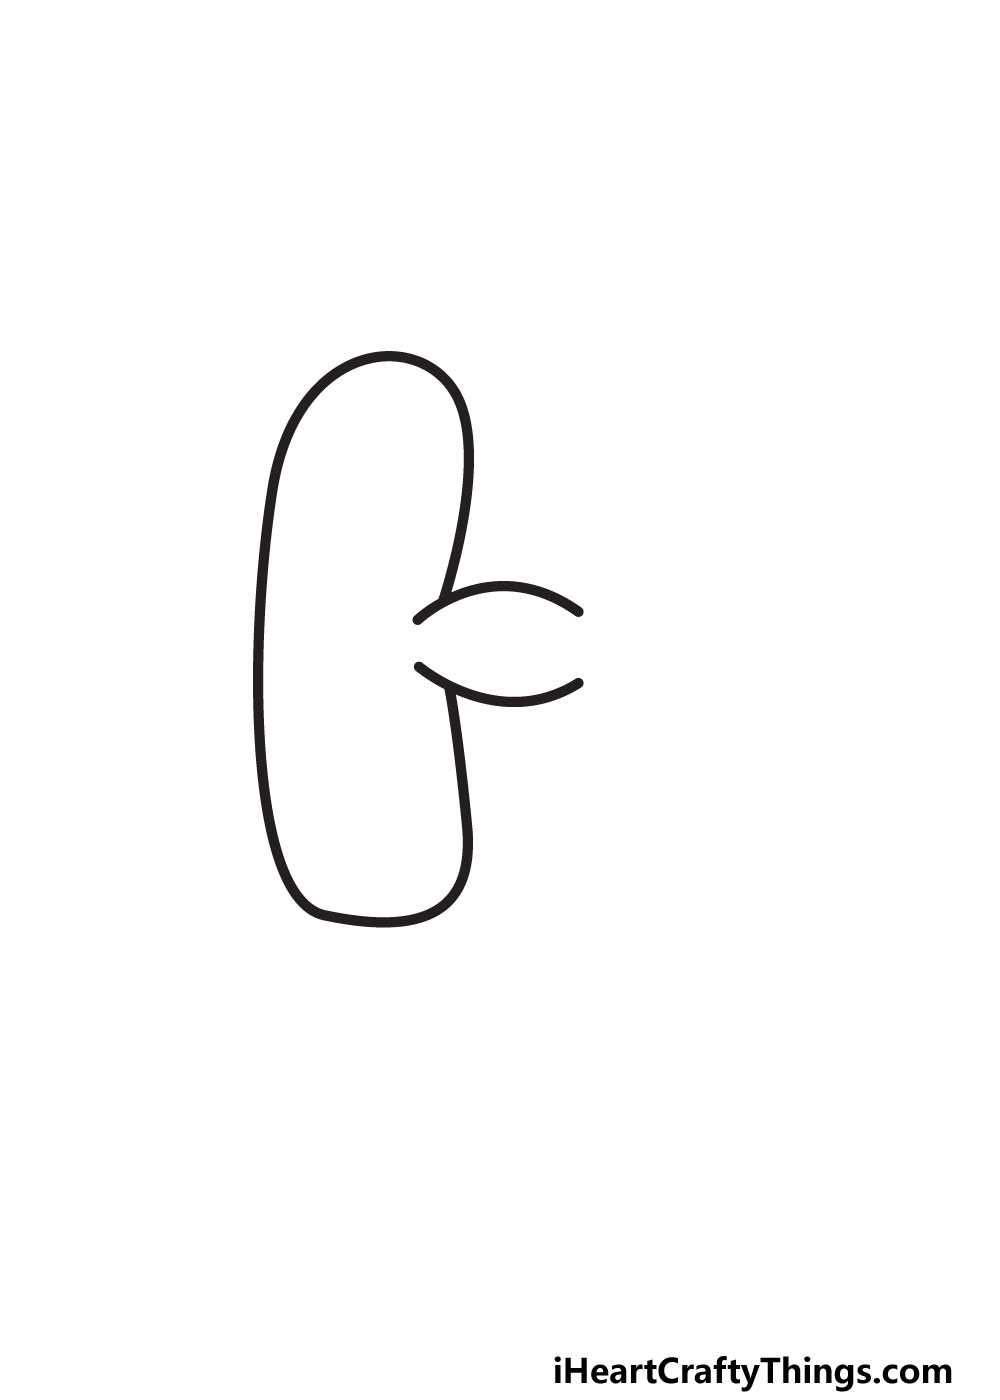
This third step of your bubble letter H drawing will see you adding the little bridge between the two halves of the letter.
When you look at a regular letter H, the bridge is perfectly straight. As we mentioned in the previous step, we want to avoid any straight lines.
For that reason, we will be drawing the bridge using two rounded lines instead. These two lines will fill the gap in the shape we spent the first two steps drawing.
You will also note that these lines extend a bit inside the shape we created. This may look a bit strange now, but you will see how it makes this shape look like a bubble later.
Next, we will finish off the outline by drawing the right-hand side of the H in the next step.
STEP 4:

In the first two steps of this guide, you worked on creating the left side of the letter H. In this step, we will be doing what you did in those steps but all at once.
Essentially, you can repeat what you did in those steps just in reverse. If you feel confident in drawing the right side of the H, you can go ahead and add it as it appears in our example.
If you need a bit more help, then simply follow the first two steps again. You can even mirror the images so that they will show you how the steps should be done in reverse.
However you end up doing it, you will now have a complete outline for this letter H! If you drew a regular H with your pencil, you won’t be needing it anymore after this step.
Carefully erase any pencil lines you drew and make sure all the final lines for the outline are drawn in your medium of choice.
Now that the structure of the H is done, we can focus on making it look like a balloon in the fifth step.
STEP 5:
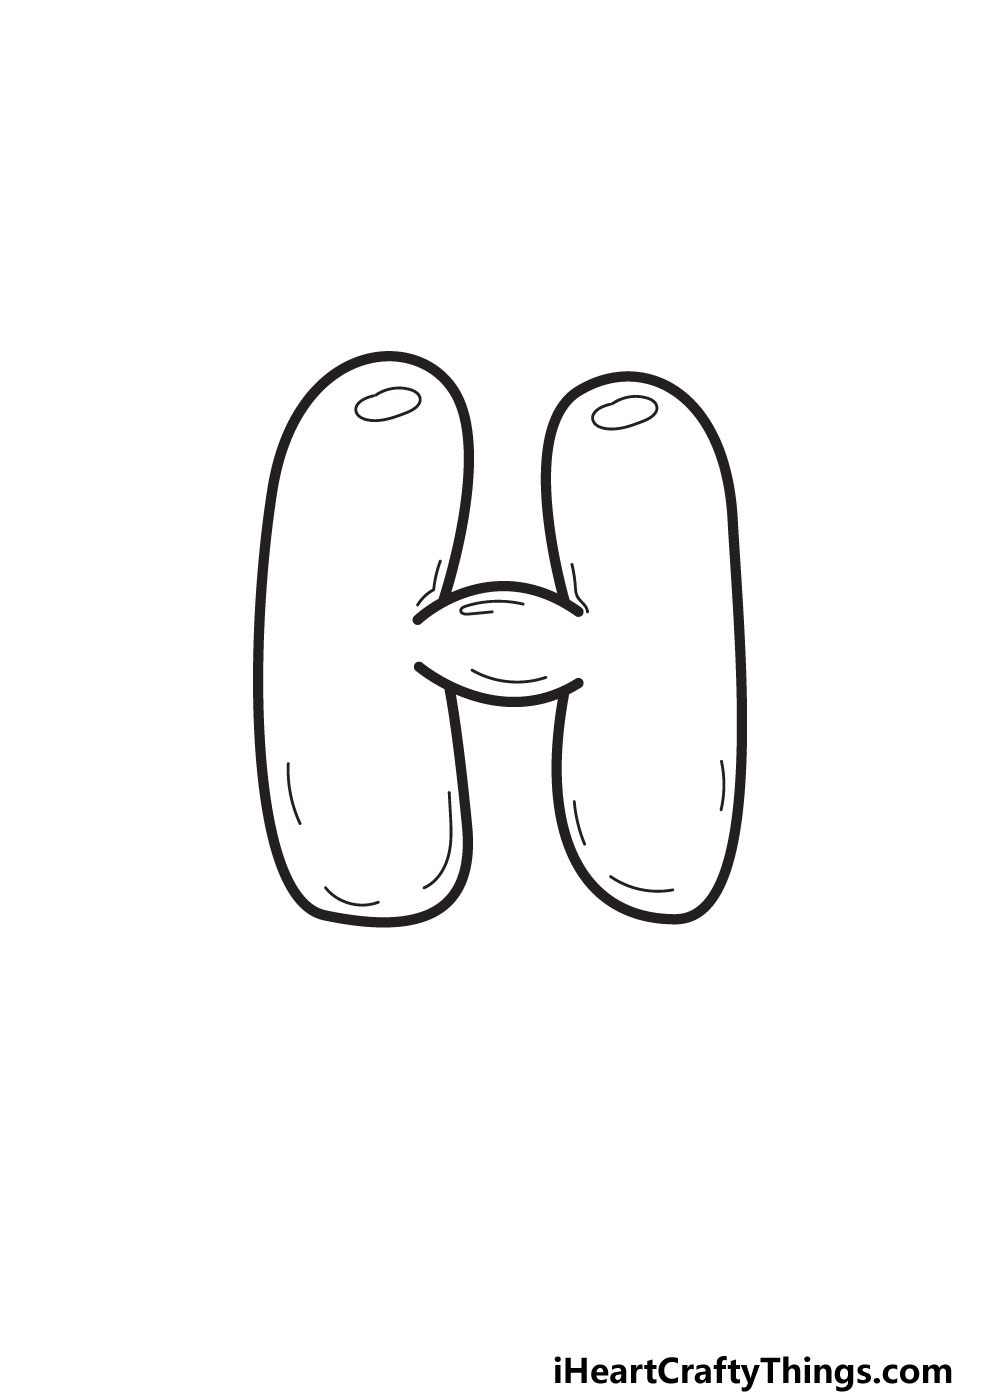
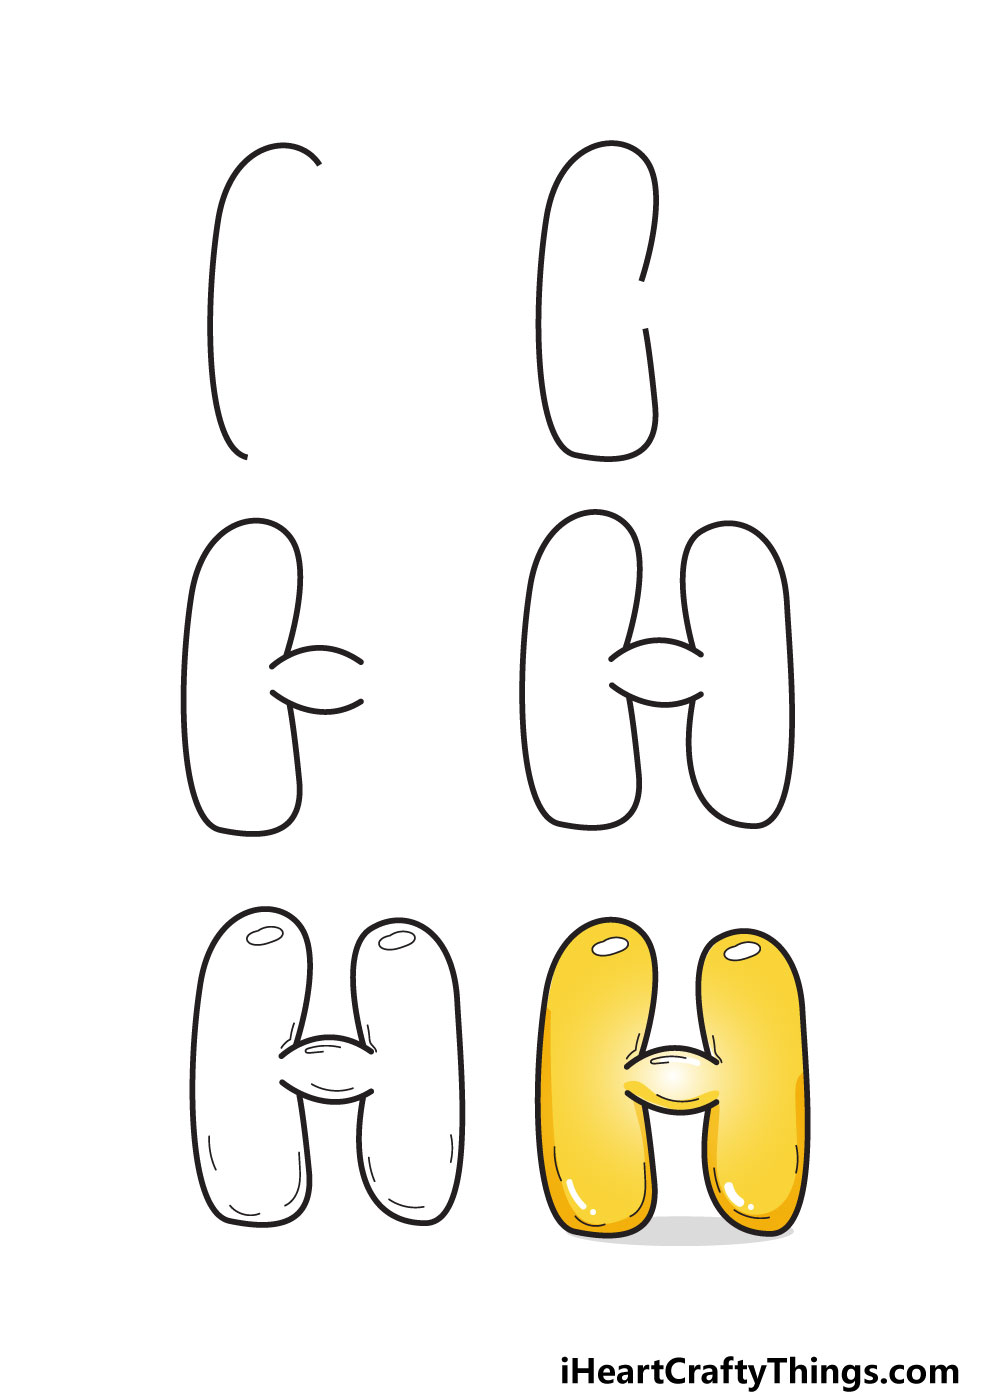
Now you are ready to create the illusion of this H being made out of a bubble or a balloon! The way we will be doing this will be simple yet effective.
First, we will draw two horizontal oval shapes. These will be placed at the top of each arm of the letter H.
They don’t need to be perfect ovals, so don’t worry too much about keeping your hand steady. The idea is that they will look like light is reflecting on the surface of the letter.
Once that is done, we will add some lines to make it look like the H is made out of a bubble or a latex balloon.
The way we will do this will be by drawing some lines along the inner lines of the outline. This will make it look like the material the H is made of has some air pushing out from inside of it.
You could add a few more of these lines if you want to give the H a bit more volume. Then you’re ready to add some color!
Before you do, feel free to add some fun extra details or touches. For instance, you could draw a more distinct reflection on the surface of the bubble.
STEP 6:
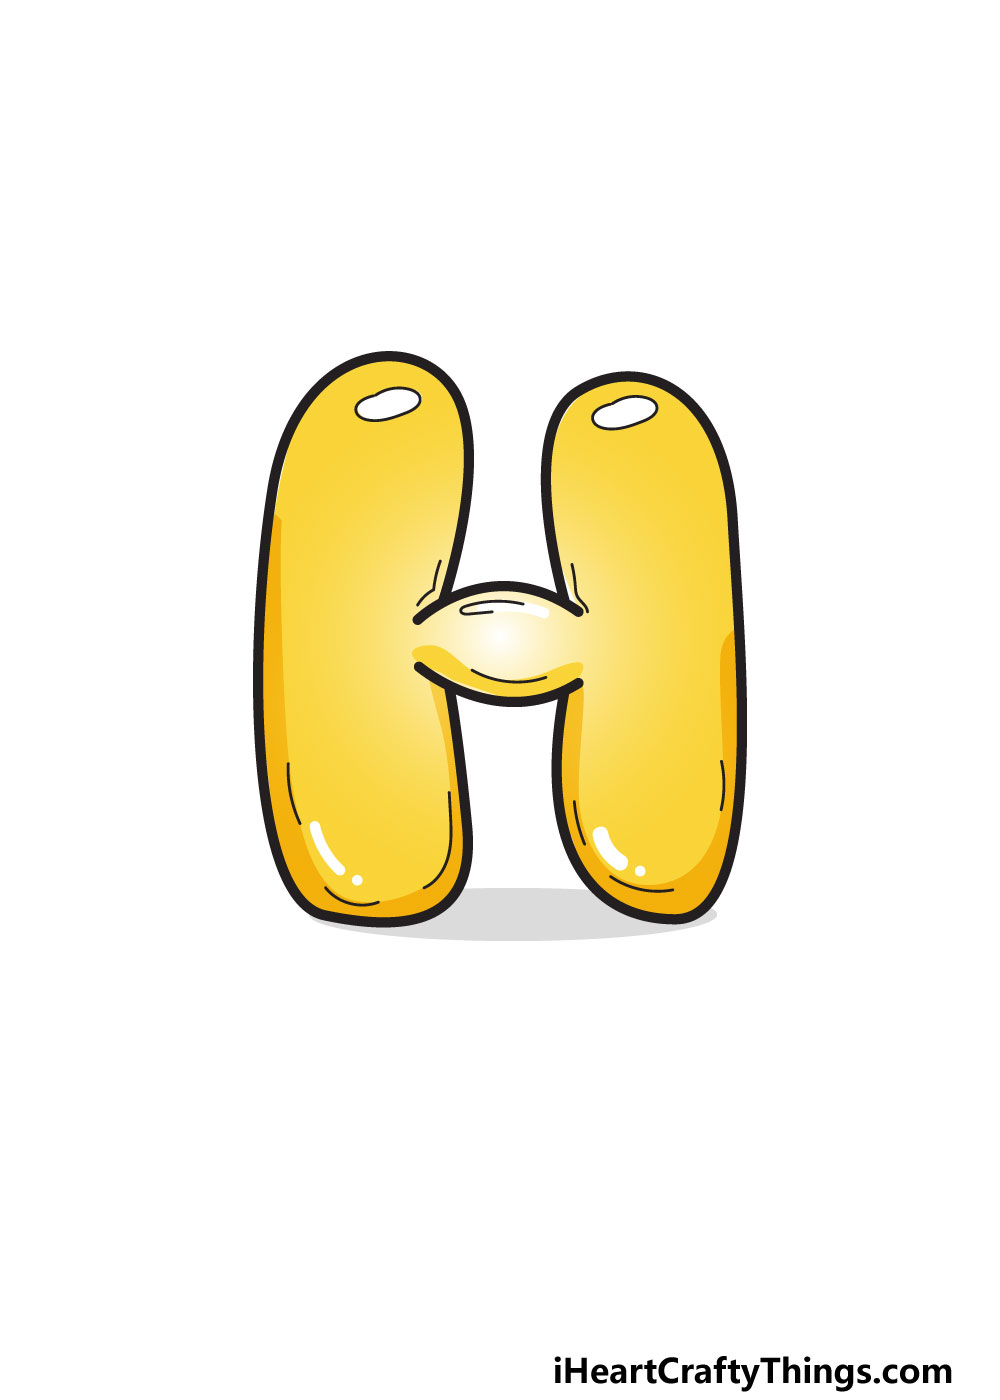
It’s time to get your favorite coloring tools out, as we will be bringing this drawing to life with some color! In our example, we chose a yellow color scheme for this H.
If you like the way this yellow scheme looks, then you can try to replicate it with your coloring tools. We made some areas lighter to further create the look of light reflecting.
This is a good technique to make it look like this H is made from a balloon. There are so many other colors you could go for instead, though!
It would be a perfect opportunity for you to show off what your favorite color is by using it for this H. You don’t need to stick to just one color, though!
You could make this H an explosion of color by adding as many different colors as you can to the design.
Using patterns and shapes can also provide the perfect opportunity for even more color variation. The only question now is which color or colors will you choose to make this letter look even better?
My Final Tips To Make Your Bubble Letter H Drawing Even More Unique!
You have completed all of the steps in this guide and done an amazing job with it! We showed you how you can finish off the drawing with colors, but it doesn’t have to stop there.
There are so many other ways you can finish off this drawing, and we will give you a few ideas now. One idea is to pick a word starting with H.
A few words that could come to mind would be hat, hamburger, hill or hog. That is just a small selection of words, but you can probably think of many more!
For now, we will use hat as an example. Once you have drawn out the H, you could draw the rest of the word in any style you like.
One way to take it further would be to draw some details to actually turn the letter H into a hat that a cartoon character is wearing!
That’s a really simple idea, but there are so many possibilities. If you know someone with a name starting with H then you could draw their name.
For example, a name like Harry could be turned into a fun bubble word. Doing that would be the perfect cover for a birthday card!
Now you’ve seen just a few ways you can make your artwork more special, but what are some other cool ideas you have for this artwork?