When it comes to learning how to write the 26 letters of the alphabet, some are easier than others. The letter F is one of the trickier ones to learn, but it’s worth it as many words use this letter.
It is a letter that looks fairly similar whether it’s in its capital or lowercase forms, so that can make learning it a bit easier.
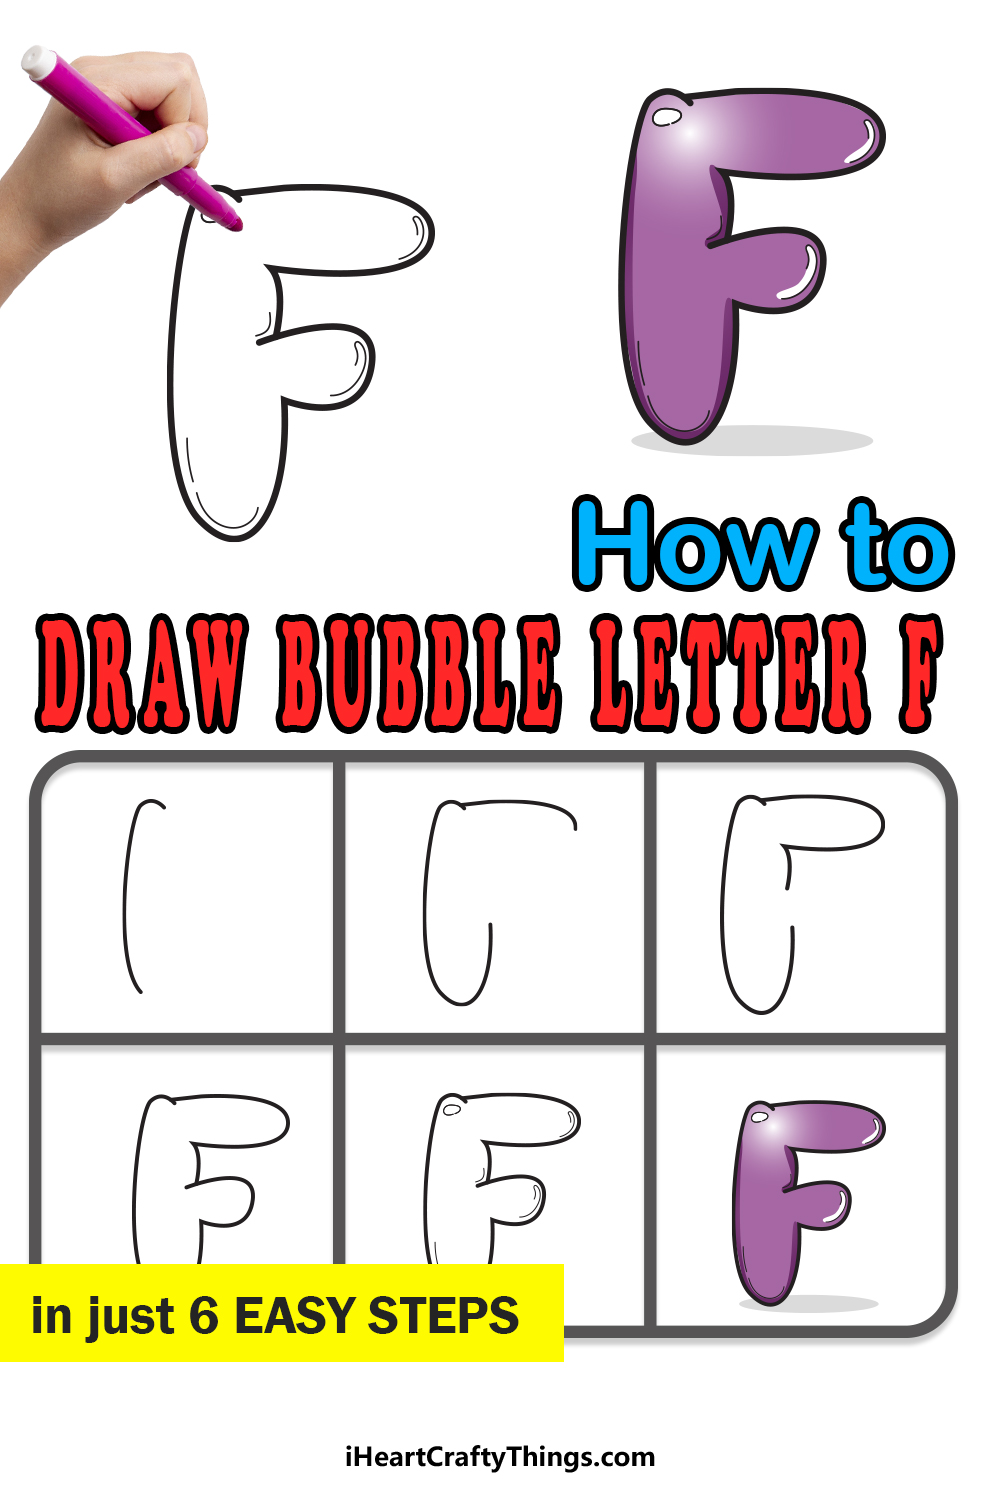
You may know how to write the letter F, but do you know how to draw a bubble letter F? That is what we are here to learn, as we will show you how to do it in just 6 easy steps.
So get ready for a fun, fantastic and fabulous time as we take you through everything you need to know! We will also go over a few ways that you can make your drawing even more fun.
Let’s Get Started
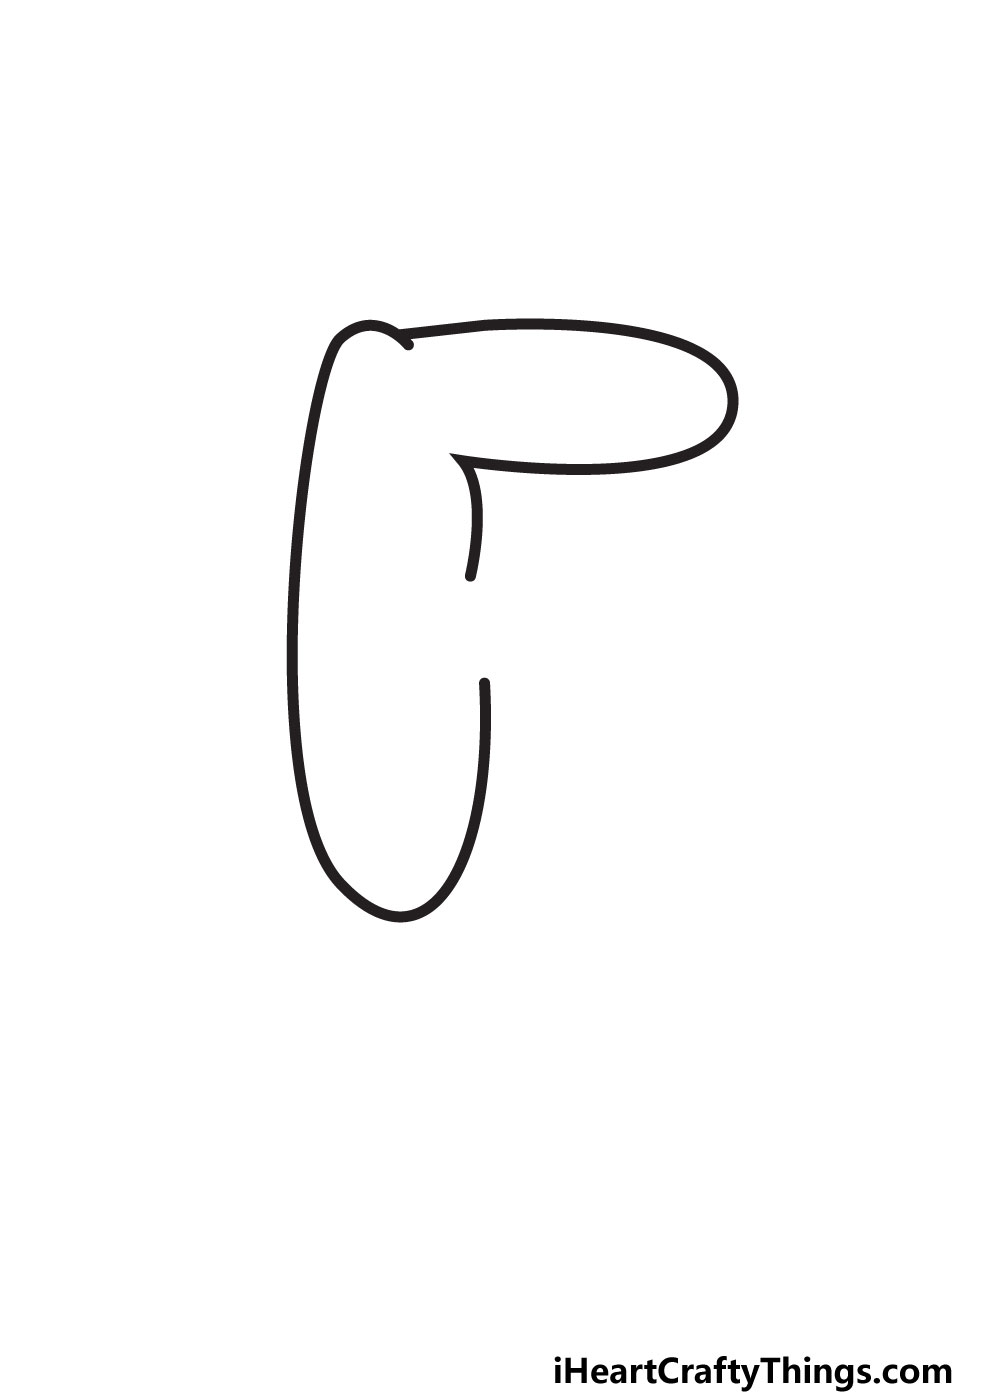
STEP 1:
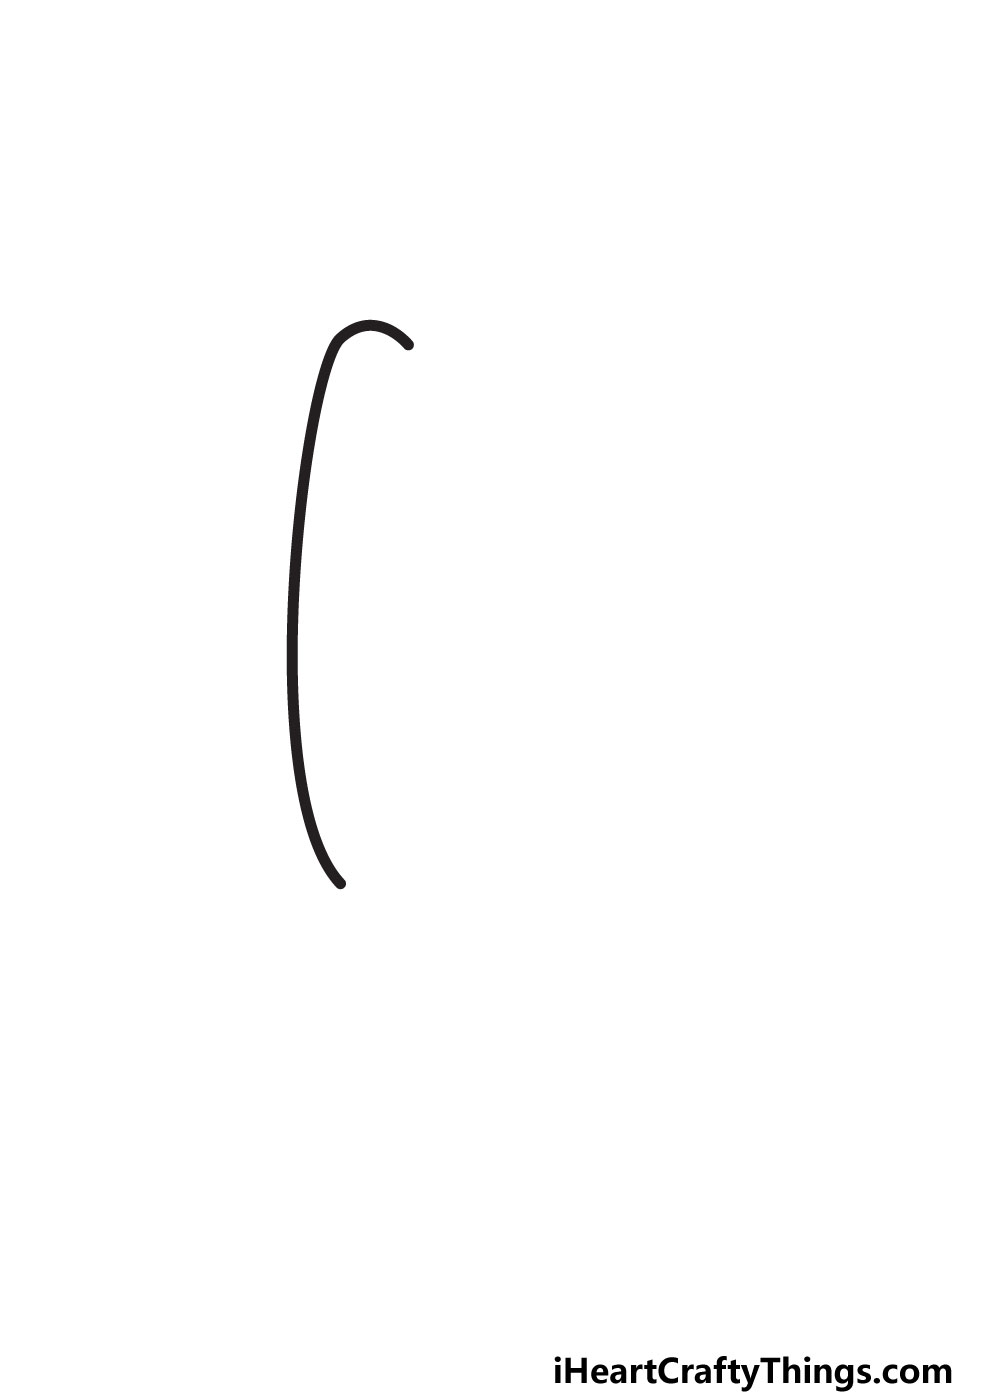
The letter F may seem relatively complicated, but we will make it easier by breaking it down into smaller parts. We will begin with the left-hand side of the letter.
To begin this part, we will simply be drawing a vertical line. As you can see in our reference image, it has a slight curve to it.
This curve will be to make it look more bubble-like when it is done. The top of the line will curve fairly sharply to the right.
The line will be a part of what could be considered the spine of the letter, and the branches we will be drawing later will be separate to the spine.
It may sound complicated now, but you will soon see how it all fits together. With that in mind, let’s proceed to the second step of the guide.
STEP 2:
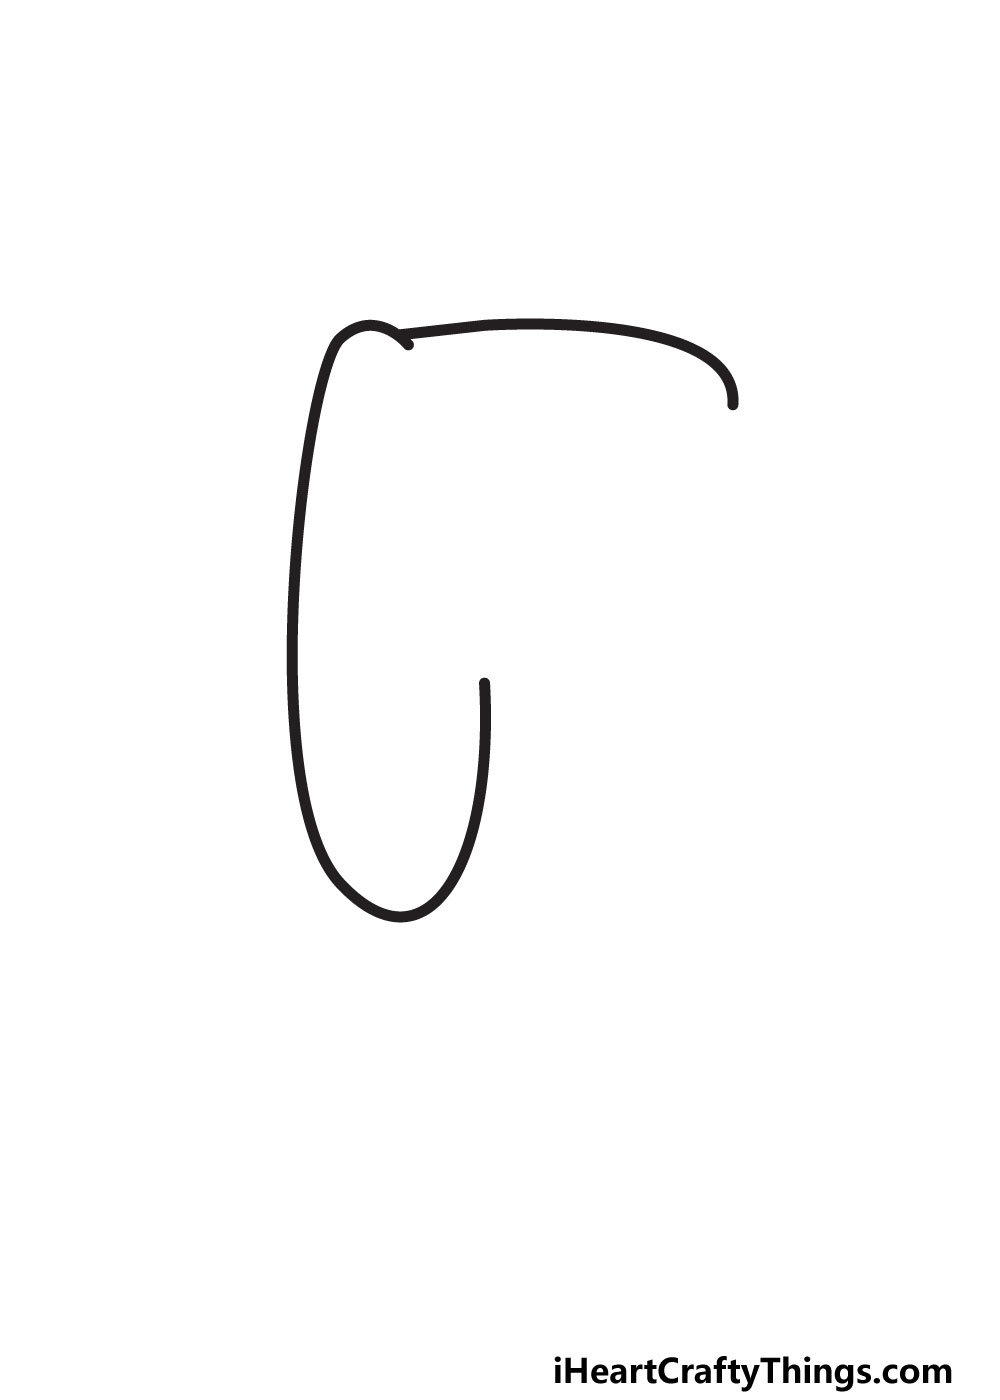
In this second step, we will be adding two additional lines to your drawing. One of these will be a new one, whereas the second will be an extension of a line you began previously.
Let’s draw the new line first, and it will go at the top end of the letter. It will begin slightly above where the line from step 1 ended at the top.
As you can see in the reference image, it will be horizontal with another slight curve. This will function as the top branch of the letter.
The second line of this step will extend from the bottom of the line from step 1. It will curve slightly to the right and then sharply upward.
Later, you will see this section will become the leg of the letter. With these two lines done, we can move to step 3.
STEP 3:
Now, we will finish off the top branch of your bubble letter F. To do this, we will be extending the line we drew in the last step at the top of the F.
Gently curve this line down and back towards the spine of the F. Ideally, this arm should look a bit like a chubby finger pointing out.
Once this branch is drawn, we will be adding one more slightly curved vertical line beneath it. This line will function as the space between the top branch and the second one.
As you can see in the reference image, there will be an empty space between this arm and where the leg of the letter ended in step 2.
Filling in that space will be the final task to finish off the outline of this letter, and luckily that will be an easy task!
We shall take care of that final branch in the next step before we move on to some final touches.
STEP 4:
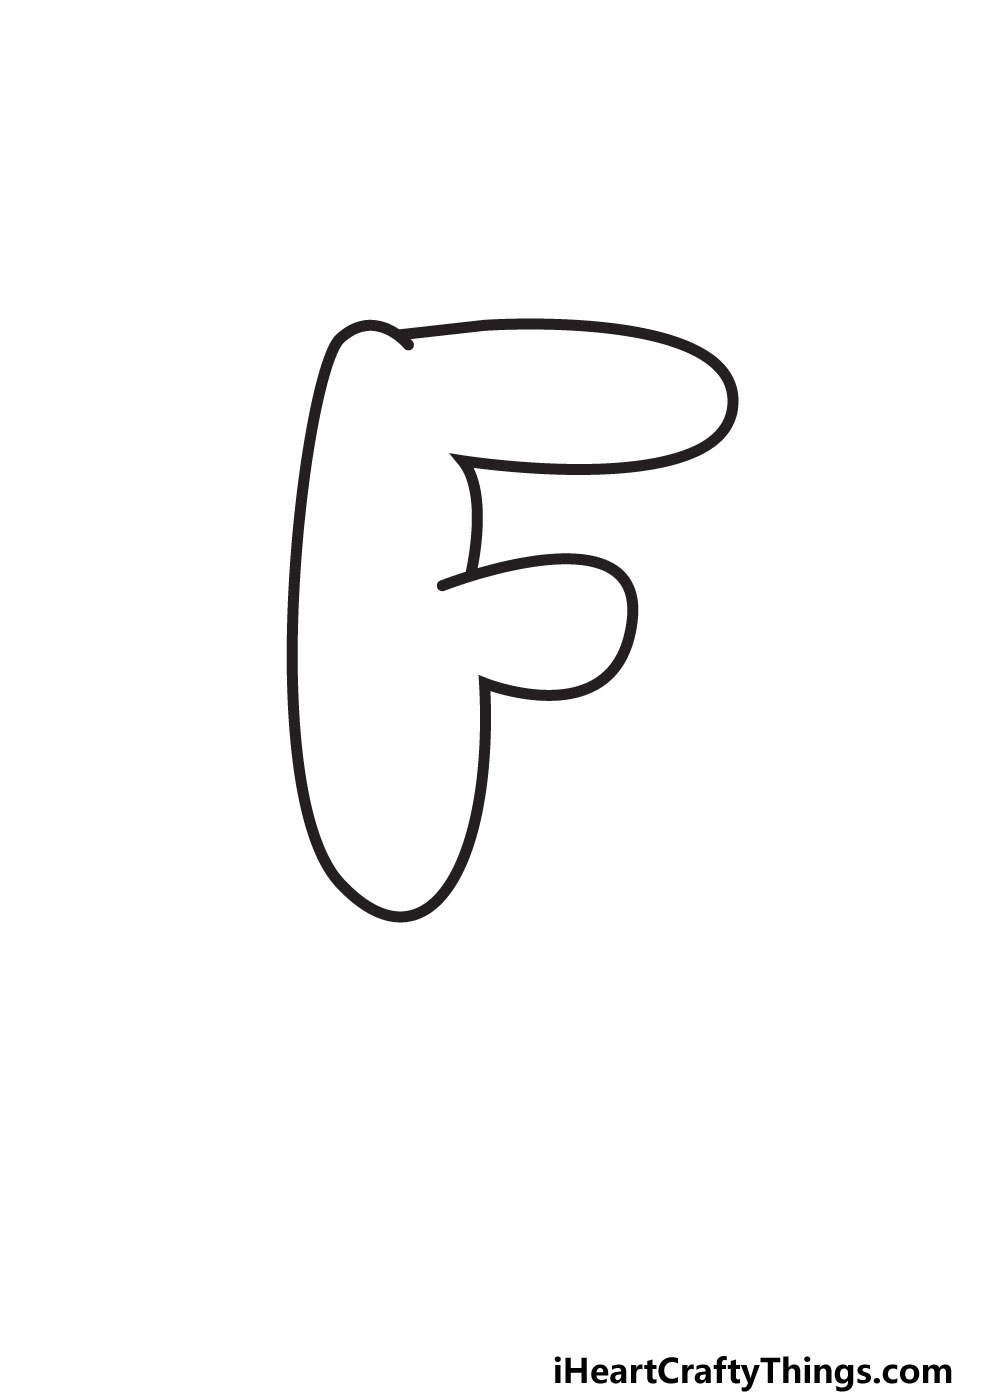
In this fourth step of the guide, we will be adding the second and final branch of the letter. This will also finish off the outline of your letter F.
To add the final branch, we will be filling in the space that we left previously. Simply draw a rounded curved line to fill that space.
The top of this branch will overlap with the line above it, as shown in our reference image. Alternatively, the bottom of the branch will connect directly to the line that makes up the leg.
With that branch added, you are ready to add some fun final touches to your letter! Before that, you can do any cleanup you need to make sure the outline is neat.
If you used a pencil to plan out your drawing, you should probably erase it now. Then you can use a pen or a dark pencil to make sure all the final lines are nice and dark.
When it’s all looking as you want it, we can proceed to step 5.
STEP 5:
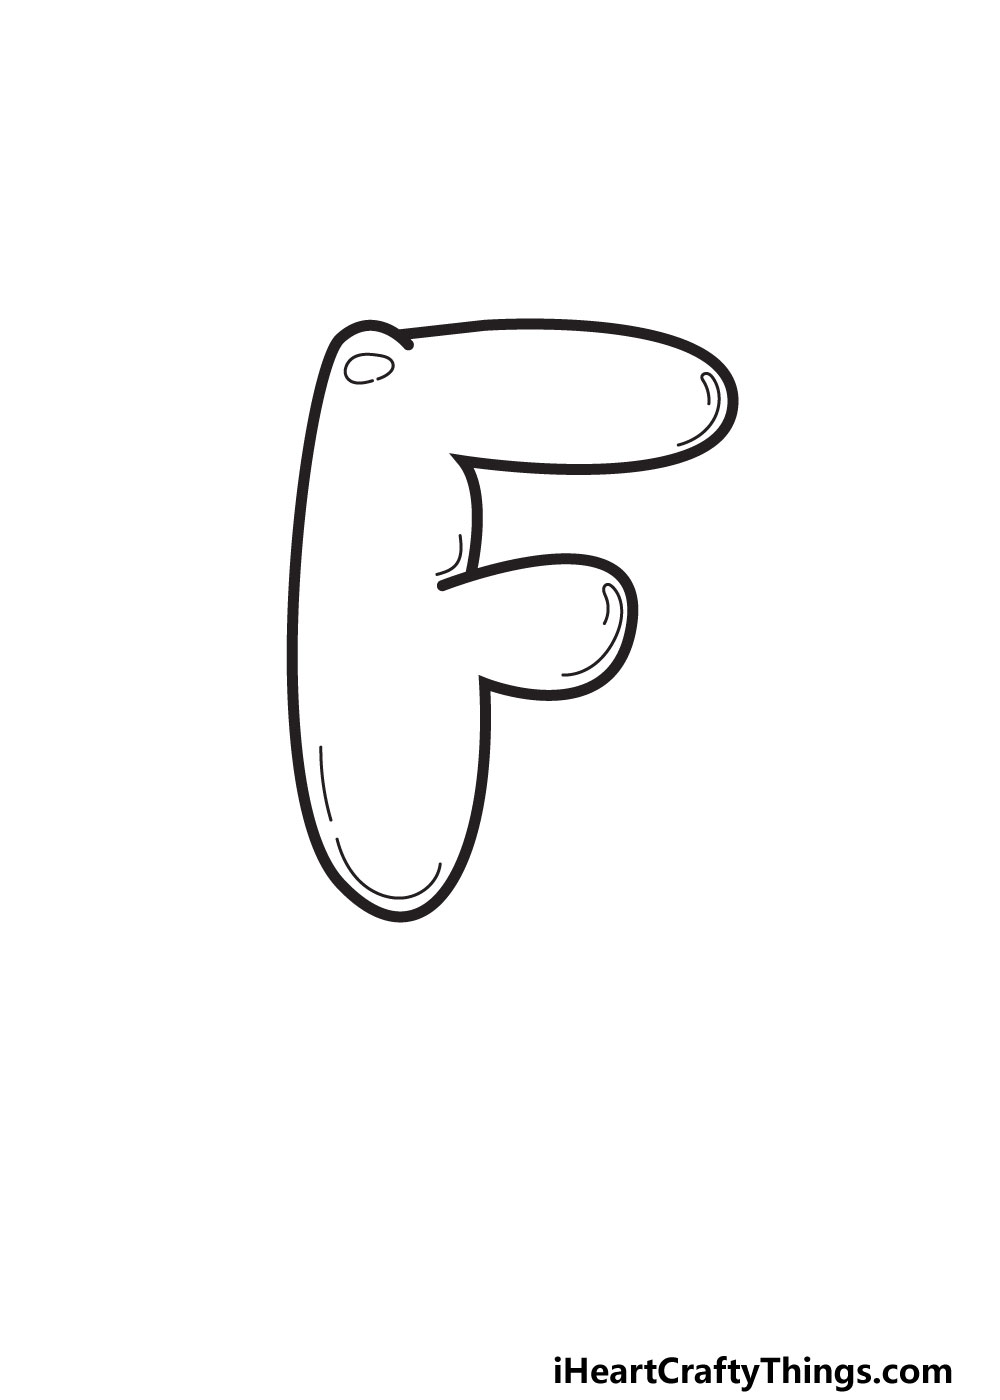
In step 5 of this guide, we will focus on making this letter F look like a bubble. This will be done using some very simple lines and shapes.
What we’re basically aiming for here is to make the letter look like it has some volume and that it is reflecting light like a bubble or a balloon would.
We shall first focus on adding the volume of the bubble, and this will be done using some lines on the interior outline of the letter.
As shown in our reference image, these lines are primarily on the right-hand side of the image. This is what we chose, but you can change it up if you like!
Adding some of these details to the left side would give it even more volume. However you decide to go about it, we can then add some reflective spots.
In our reference image, we kept it simple with a single oval shape. This went near the top of the image to make it look like there is a light source above it.
You could add a few more reflective spots if you want to, but there are a few things to keep in mind.
Mostly, try to keep all reflective shapes on the same side of the letter. This will make it look like there is one source of light shining on it.
Then you can add any extra details and fun touches you like before we move to the final step of the guide!
STEP 6:
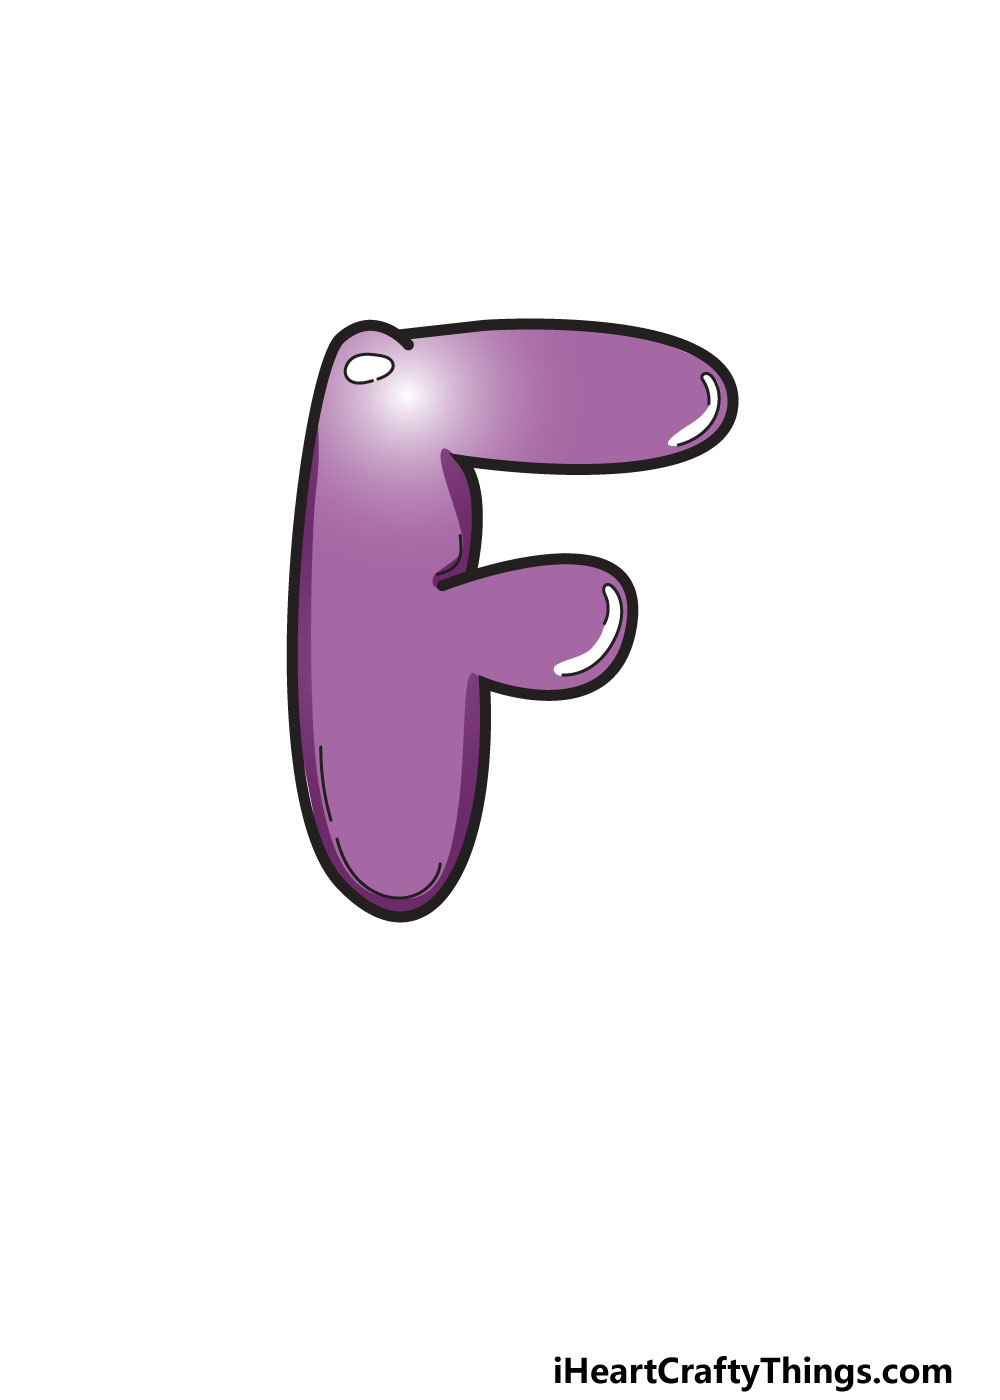
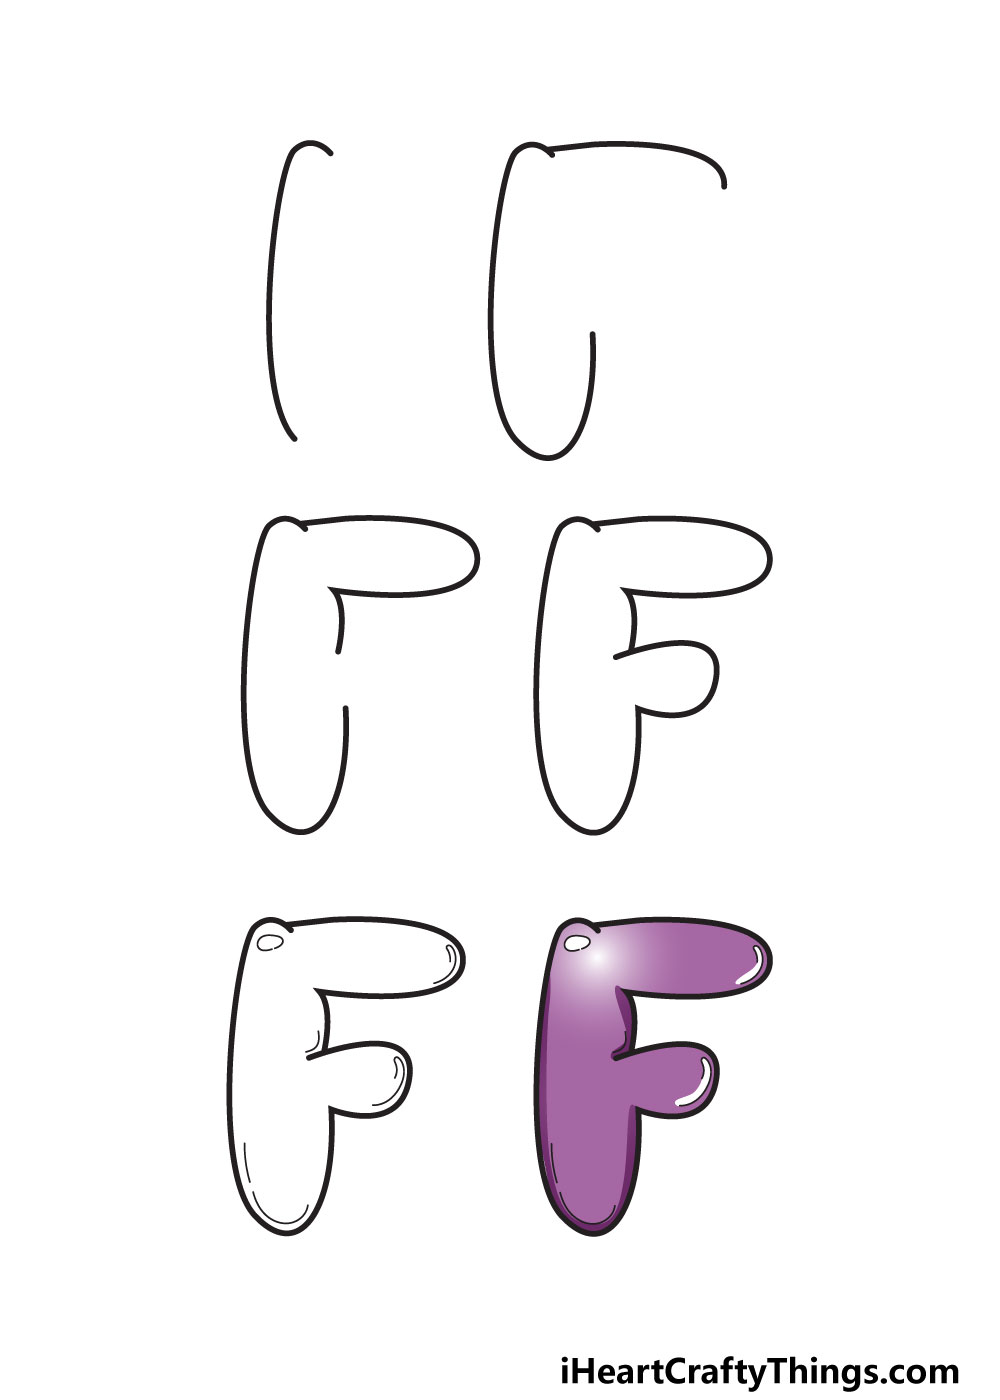
Now that your drawing is done, it’s time to have some fun with colors. Of all the 6 steps in this guide, this is the one where we encourage you to use your own creativity the most!
In our image, we showed you one of many interpretations you could take for color. We went with a deep purple color scheme to give the letter a nice warm feeling.
You’ll notice we varied the shades throughout the letter to give the letter some more depth. You can use a similar technique no matter which color or colors you decide to go with!
It would also be fun to play around with color combinations or patterns. For instance, you could have colored polka dots or stripes on the F.
That would allow you to incorporate all sorts of different colors to really make the drawing pop!
It’s all up to you, so you should definitely go for all your favorite colors and art mediums to finish off your artwork.
My Final Tips To Make Your Bubble Letter F Drawing Even More Unique!
You did a great job on this bubble letter F, but we’re not done with having fun with it yet! In our guide, we showed you a simple yet pretty way to finish it off with colors.
There are so many other ways that you could go about finishing off the letter, so this is where you can really show off your creativity.
One idea we always like when it comes to letters is incorporating words that begin with the letter.
For example, you may think of the word ‘fish.’ You could start by writing the other three letters of this word after the F you drew.
Then, you could draw a background that makes it look like the word is underwater. To finish off the theme, you could then draw some cute fish swimming around the word.
Of course, that is just one of many words you can use to create a theme for the artwork. You could draw the rest of the letters of the word in a similar bubble style, too.
It can also be fun to use this letter you have designed in a name so that you could give it as a card or a gift to a friend or family member.
What other ways could you personalize this drawing you have created?