The various books, shows, films and other forms of media that fall under the Dragonball series are full of many brave heroes and good characters.
While these are the characters we root for, sometimes it’s the villains who will become popular with fans despite their evil deeds.
The powerful Broly would be an example of one of these characters. When transformed, this is a character that proves to be a formidable opponent for even the strongest heroes
As hard as it is to defeat him, it can also prove equally difficult to learn how to draw Broly!
This is the right guide to be on if you would like to learn how it is done, however.
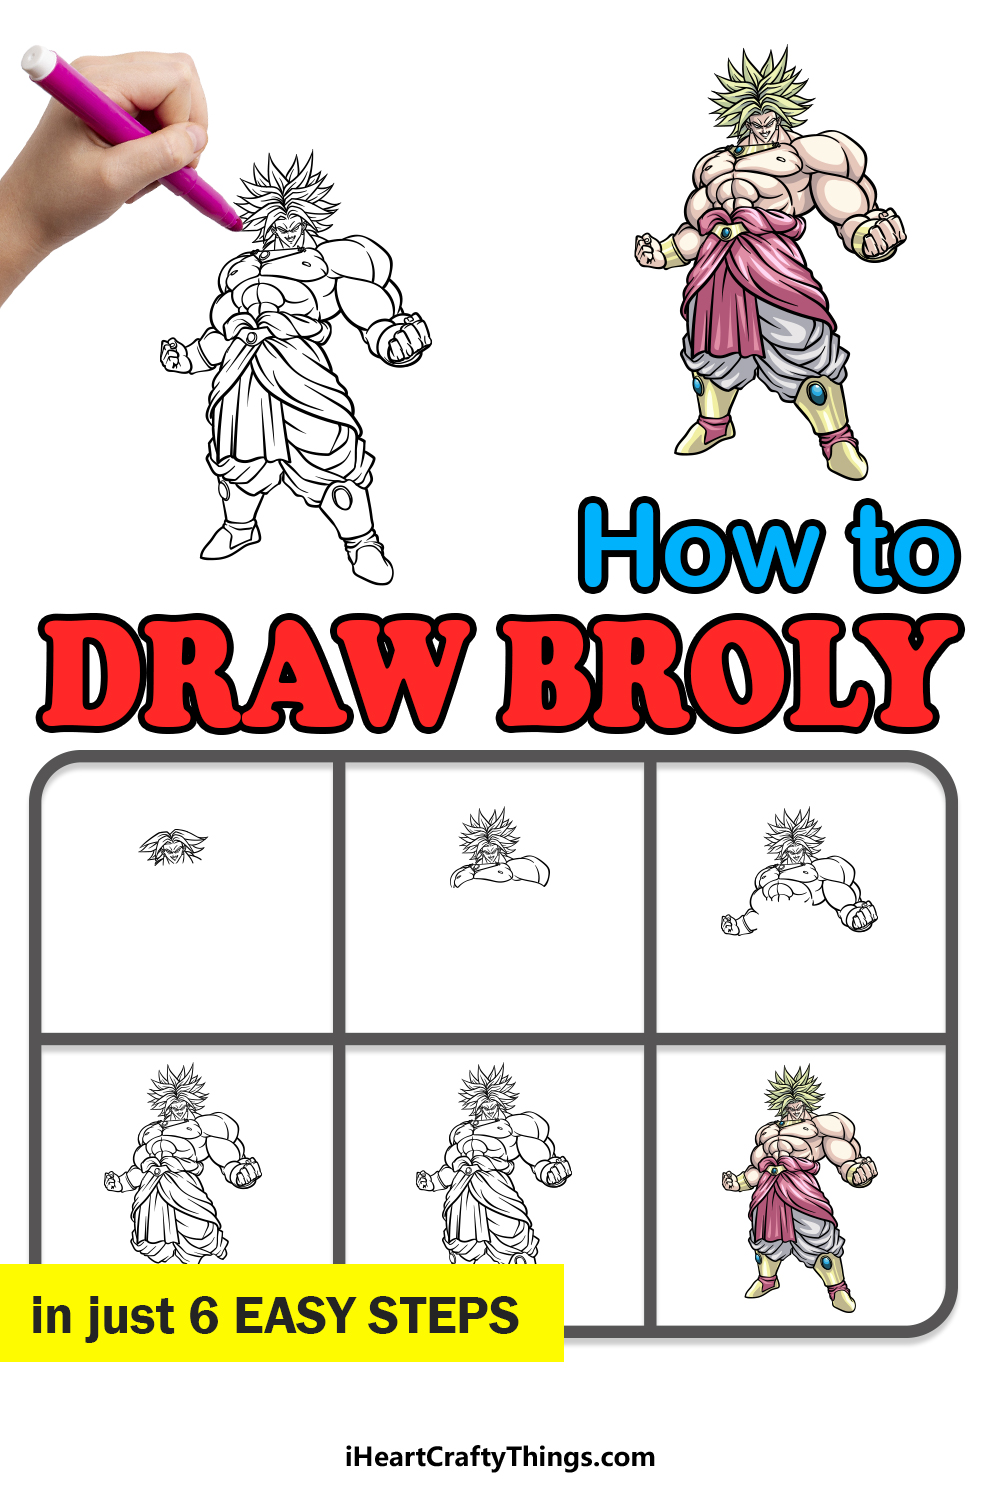
We hope that you have a great time recreating this villainous character in our step-by-step guide on how to draw Broly in just 6 easy steps!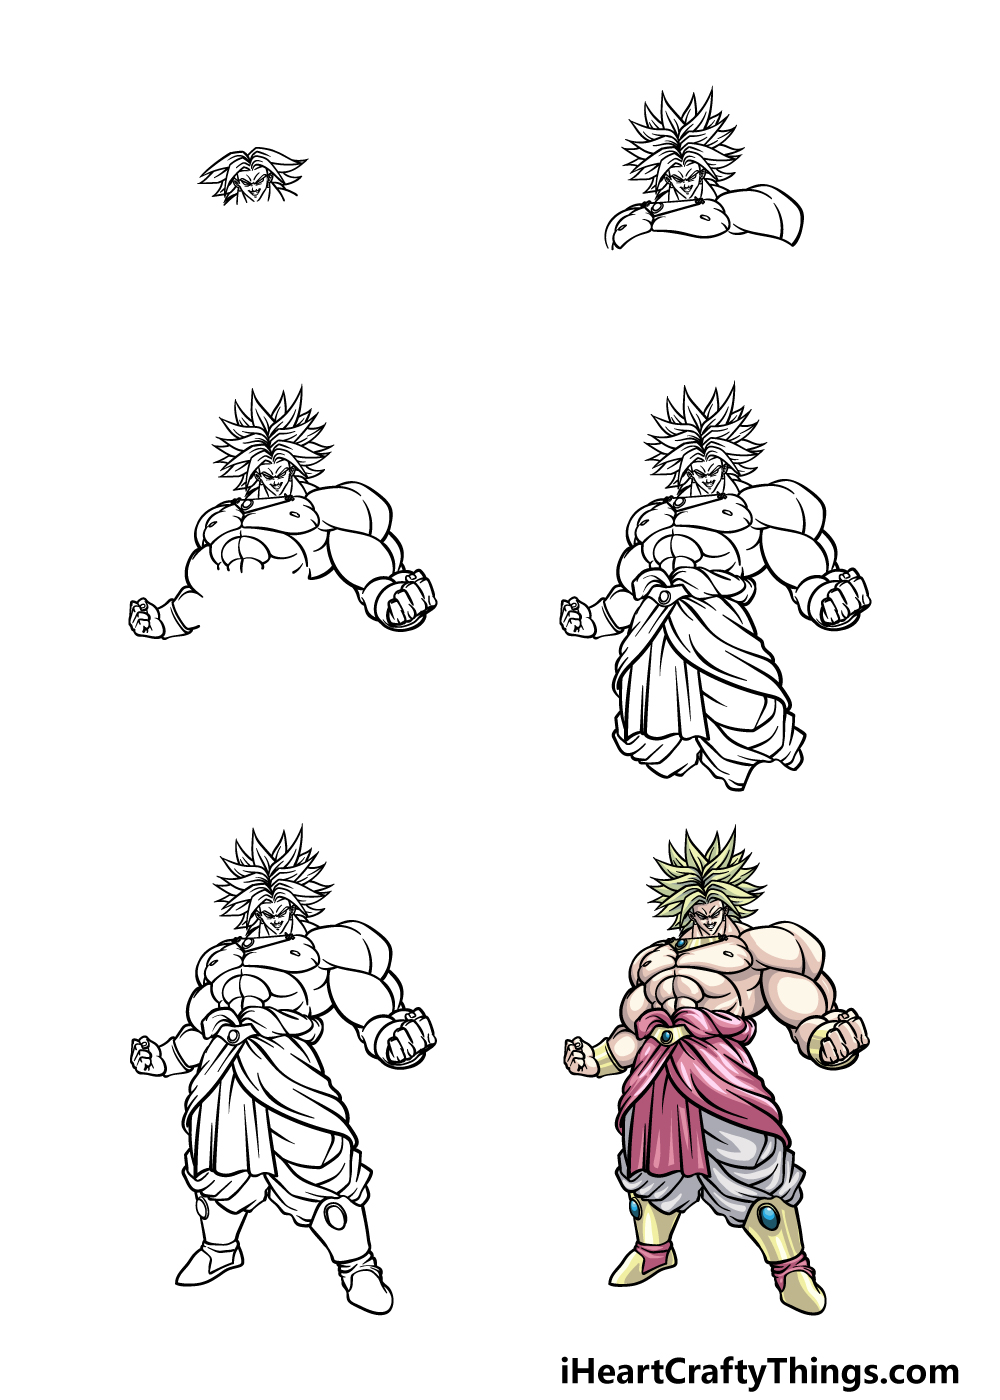
How to Draw Broly – Let’s Get Started!
Step 1
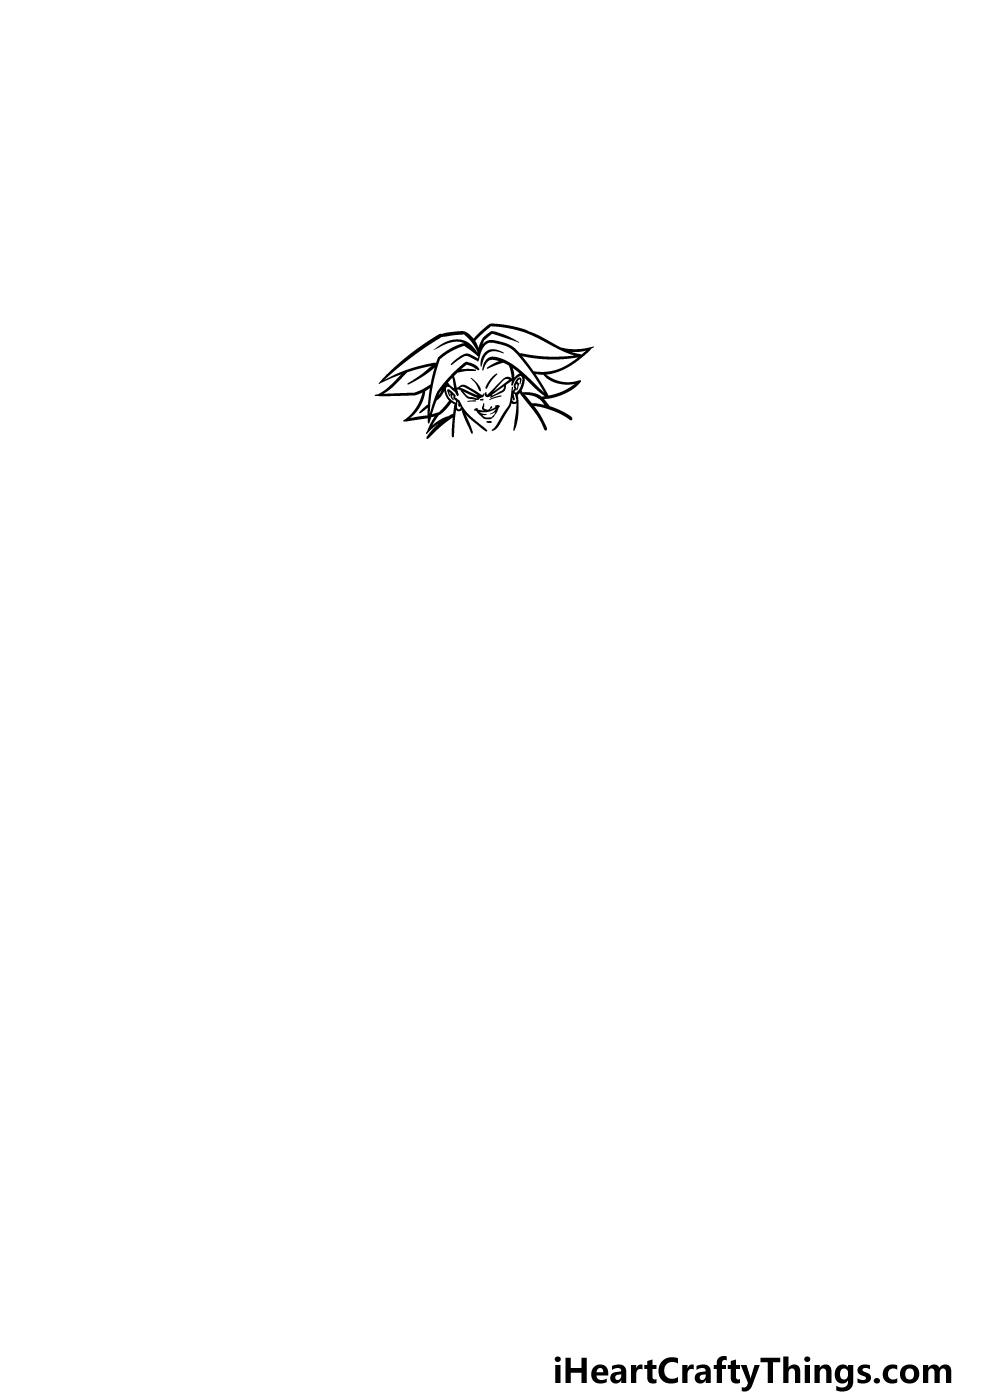
Much like the other characters in the Dragonball series, Broly has a rather detailed design.
This portrayal of the character also has him in his transformed state, and this means that he is incredibly muscular.
These aspects can make it tricky to draw him, but we will go slowly throughout this guide!
For now, we will be starting with his face and a bit of his hair. For his face, you may want to zoom in nice and close to our example image to get a good look at the details you’ll want to draw for his facial expression.
Then, we will use some curved lines to create some thin shapes with sharp points at the ends for his hair.
Once you have drawn these parts as they appear in our reference image, we can then move on to step 2!
Step 2 – Now, draw more of his hair and body
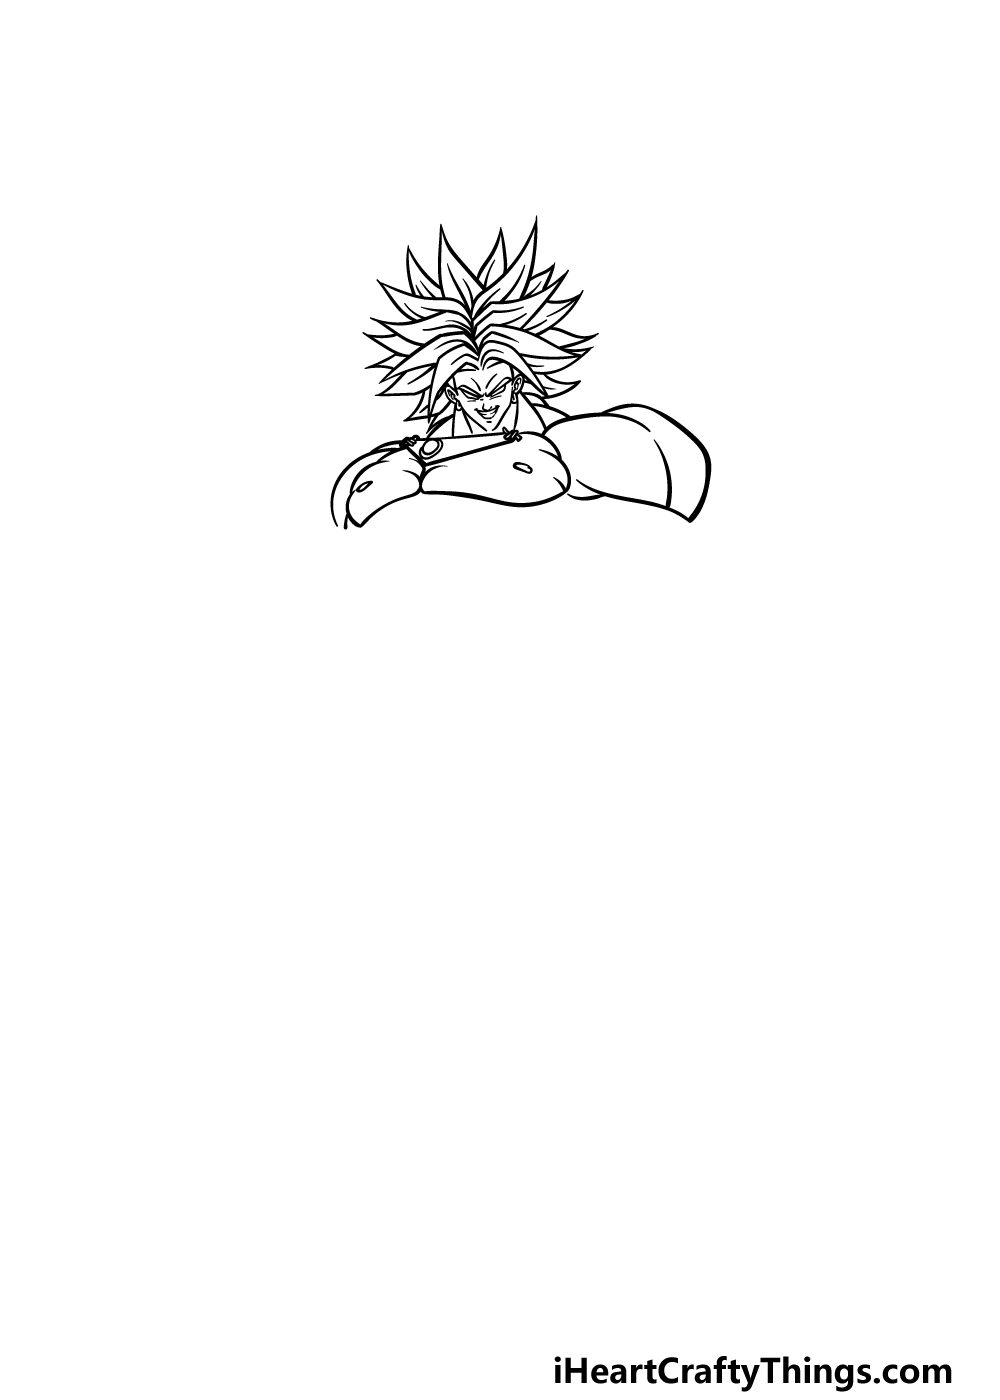
Many characters in this series have a distinctive spiky hairstyle, and this is especially the case when they make the Super Saiyan transformation.
That is the case in this image, so we will make his hair even larger in this second step of your Broly drawing.
To do this, add some more of those thin, pointy shapes that you started in the previous step to make his hairstyle even larger.
Then, we will start drawing his shoulders and chest. He is absurdly muscular in this image to highlight his powerful transformation, and for that reason you will be drawing some large, rounded shapes for his various muscles.
Once you have replicated his shoulders and chest as they appear in the reference picture, you’ll be all set for step 3.
Step 3 – Next, draw more of his arms and his waist
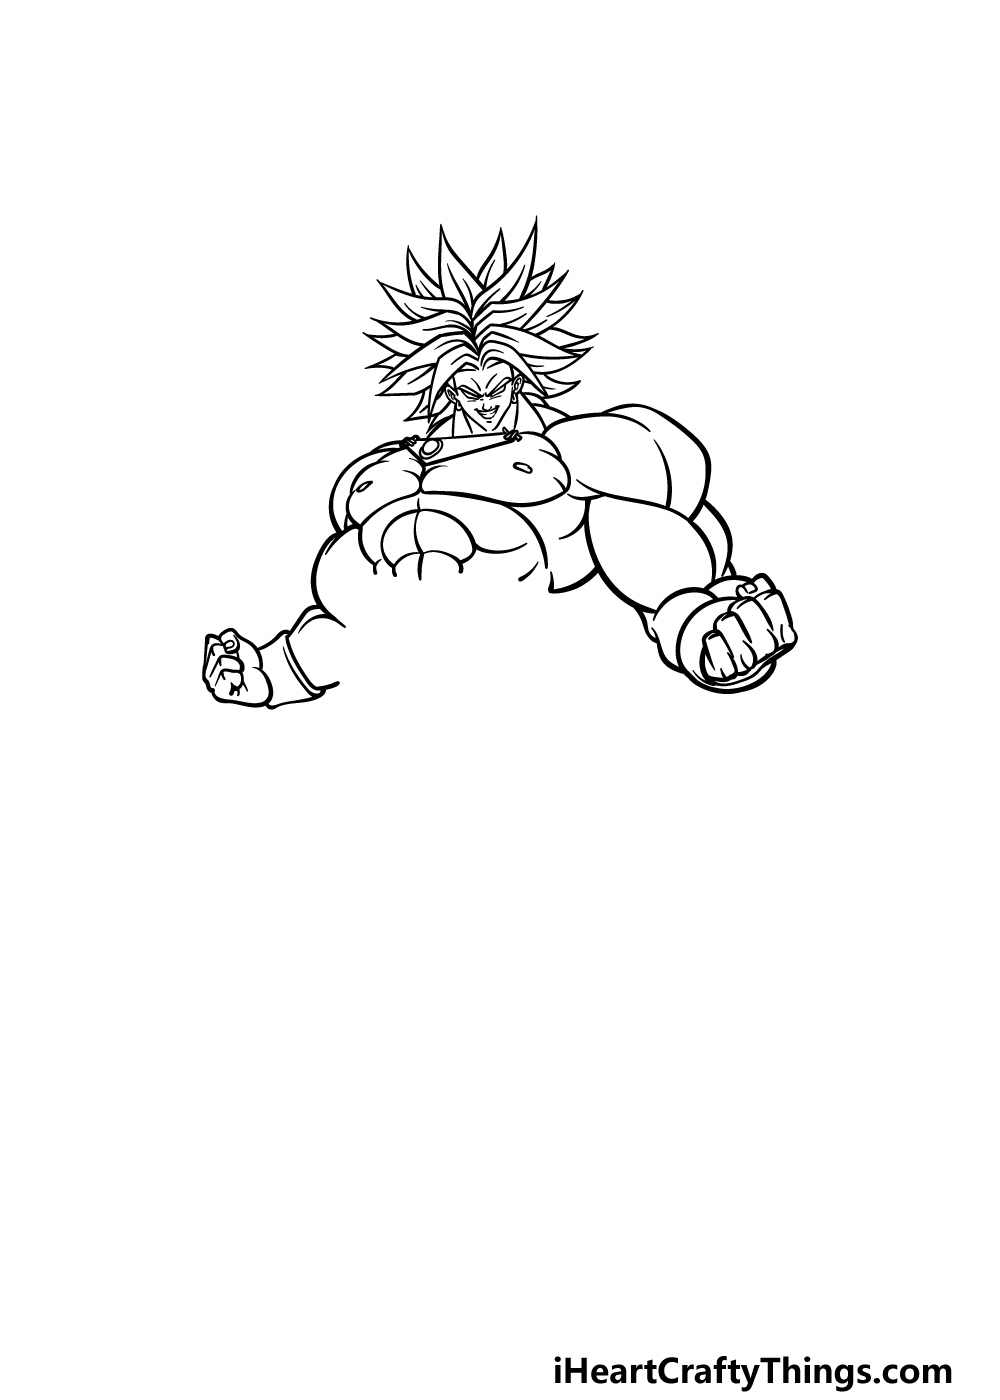
Continuing on with this step of our guide on how to draw Broly, we will be drawing more of his arms. He will be holding his fists up a bit to give him a powerful pose in this picture.
To draw his arms, simply keep drawing more of those rounded muscles that you started for his shoulders and chest. We will then also draw his ab muscles to finish this step off.
Step 4 – Draw his pants
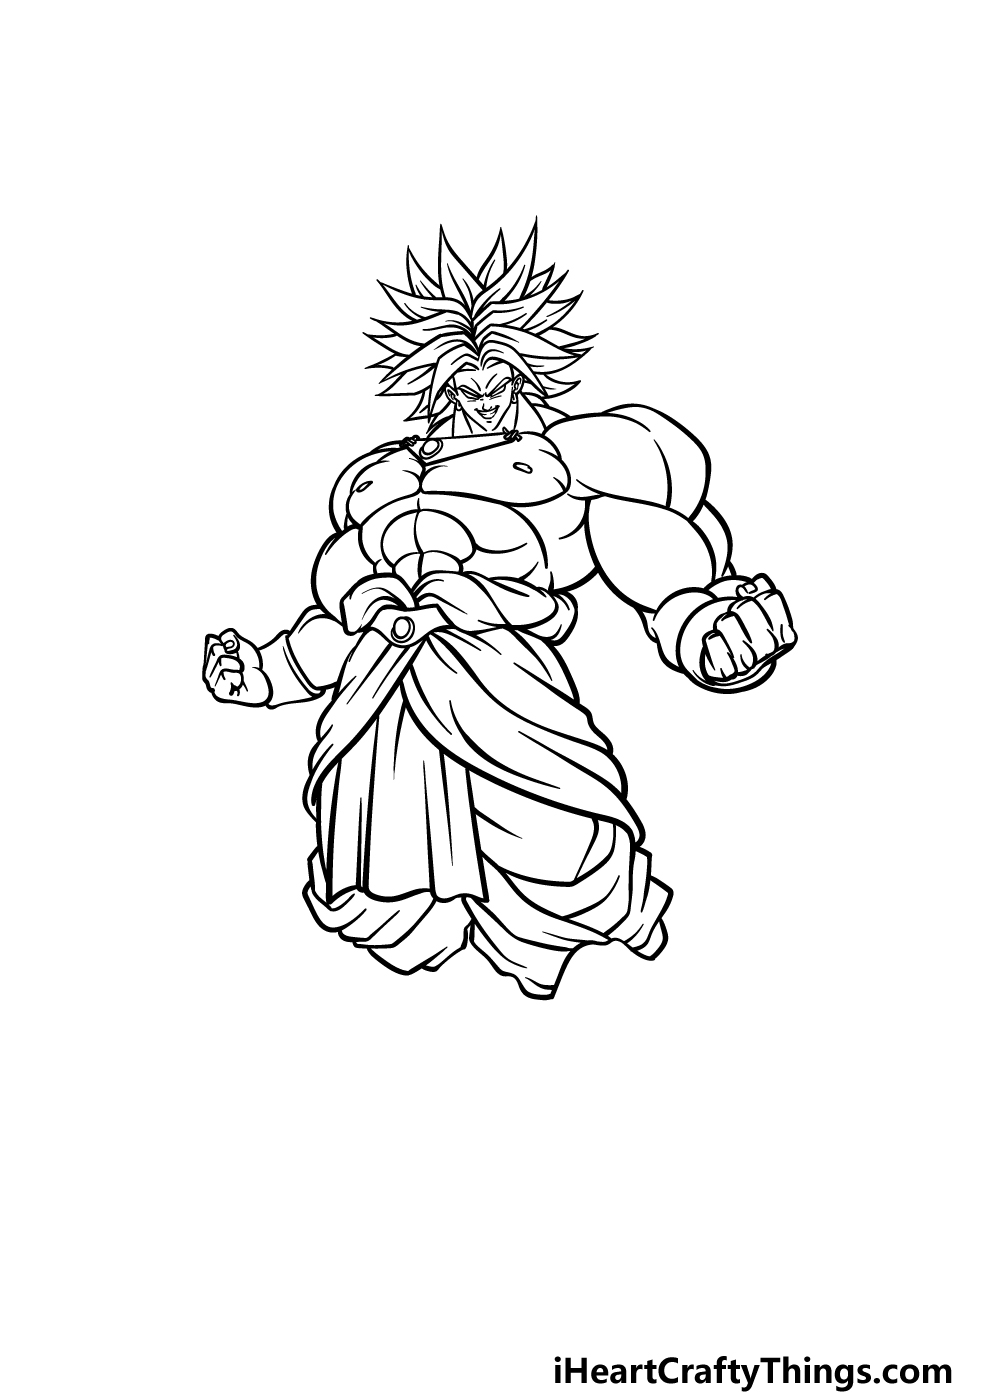
The next step of this Broly drawing may actually prove to be one of the trickier steps in the guide.
We will be drawing his pants, and if you’re wondering why that will be tricky, then take a look at our example image! His pants are made up of lots of layers of fabric with plenty of creases to them.
Even though it may look intimidating, as long as you closely follow the example image then you won’t have any trouble!
First, use some curved lines to create the belt that he is wearing. Then you can start drawing the layers of his pants.
Try to focus on one layer at a time as you draw, and you should find it much easier to get it right.
Then we can finish off his legs and feet in the next step, so when you’re ready then we can proceed!
Step 5 – Add the final touches for your Broly drawing
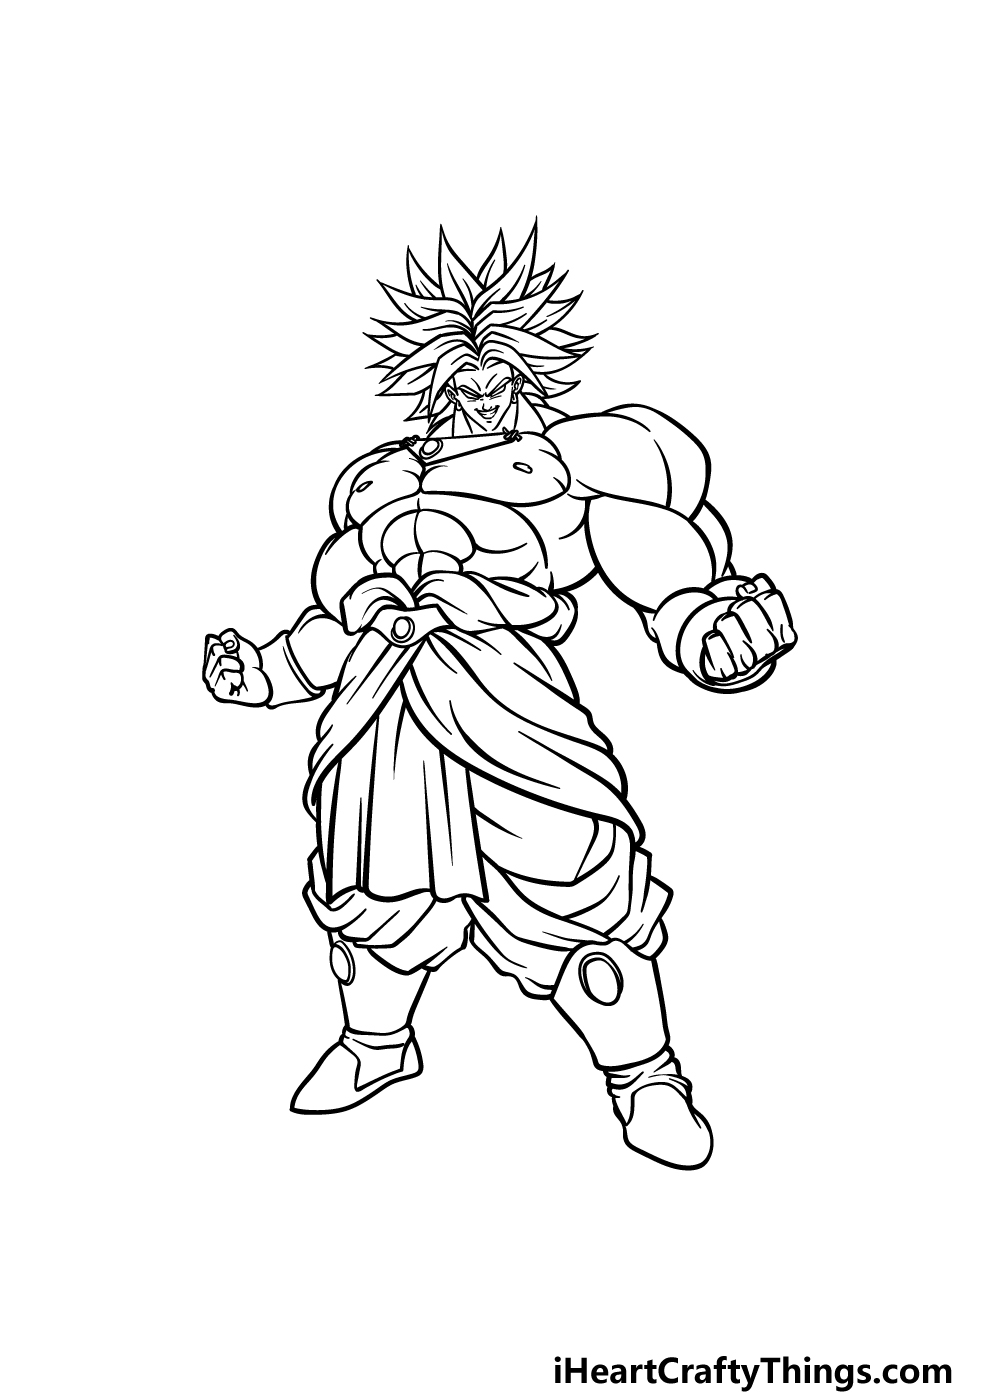
Now that you have finished one of the trickier steps in this guide on how to draw Broly, you can move on to this easier step where you will be drawing his boots.
Unlike the pants which were made up of many layers, the boots are drawn using a small number of sections. Use some more rounded lines to draw his bulky boots, and then you are finished and ready for the final step!
Before you do go to that final step, you can also add to this drawing. It could be fun to draw a background to show off your favorite scene or moment that Broly has been involved in. How would you like to finish this drawing off?
Step 6 – Finish off your Broly drawing with some color
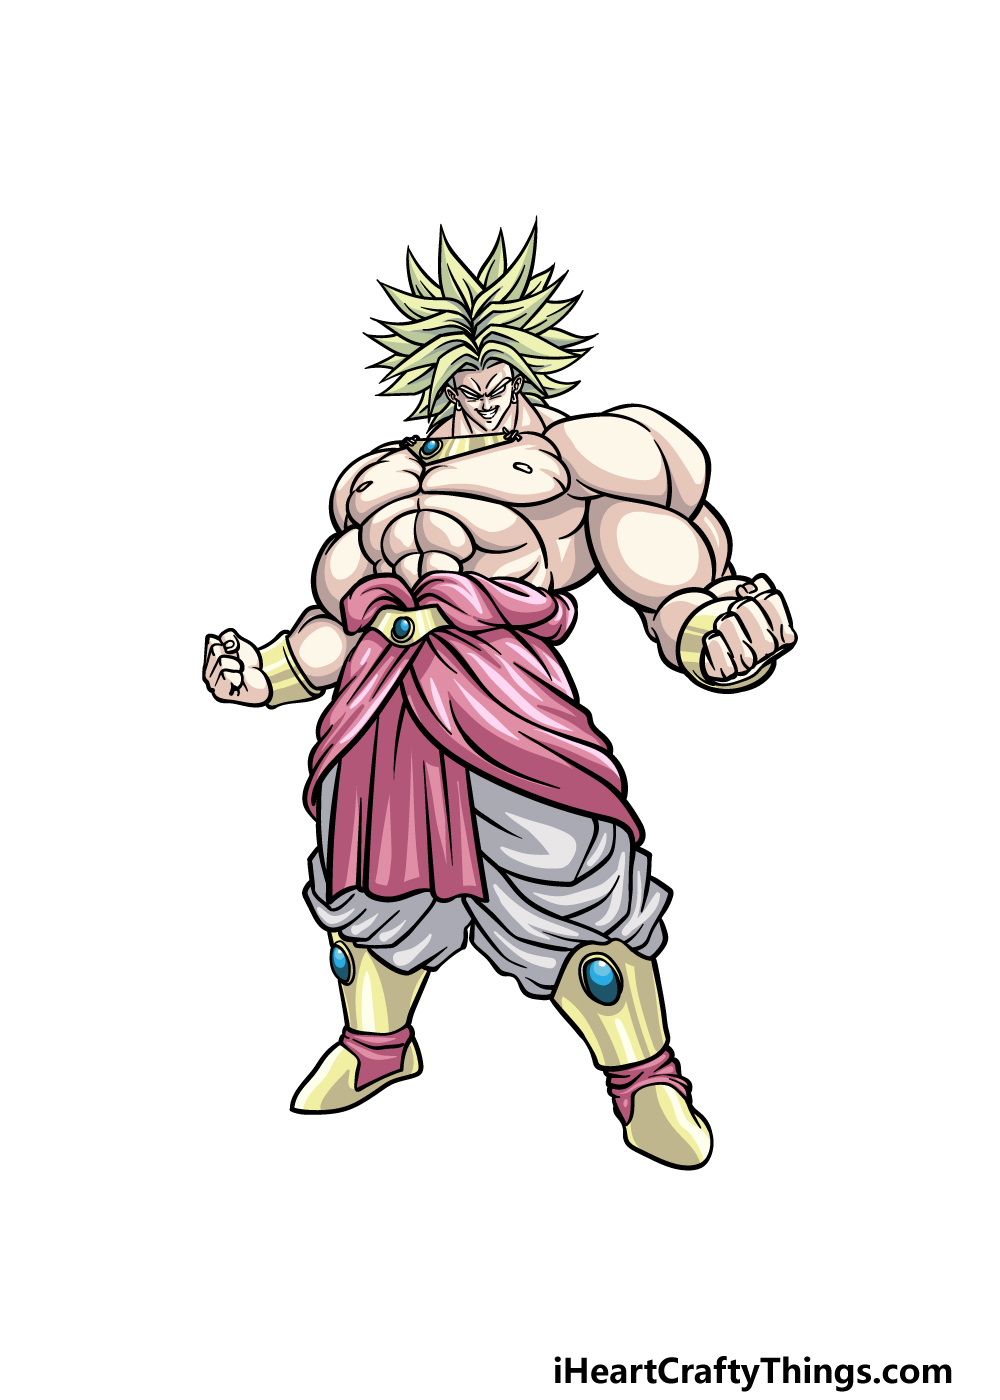
This is the final step of your Broly drawing, and now you can have some fun coloring him in! In our reference image, we kept him looking accurate to the show by using some reds and golds for his clothing.
He is portrayed in his Super Saiyan form here, so we also used some light yellow for his hair to reflect this.
You could go ahead and use this color scheme for your own drawing to maintain accuracy, but you could also change up the colors and shades that you choose as well!
We can’t wait to see what colors and art mediums you use to finish off this Broly drawing!
3 More tips to make your Broly drawing easy!
Make this powerful character even easier to draw with these tips for your Broly sketch!
In order to create an accurate representation of this character, we made this drawing of Broly highly detailed.
There are so many details in his muscles and clothing, and they can make the drawing overwhelming.
These details can be simplified or outright removed if they are proving too tricky to draw. For example.
You could remove many of the crease details on his clothing and make them look smoother.
The same could be done for his muscles, but we would recommend keeping the changes minimal, as they may impact the flow and realism of the drawing if they are too drastic.
The images in this guide were created to make creating this Broly drawing easier, but you can make it even easier by using other resources as well.
One of the best ways to do this would be by using the anime and manga that Broly appears in. you can find him in similar poses and then use them along with the images in our guide.
Not only could these make the drawing easier, but they could also help if you wish to draw Broly in different poses or scenarios.
They could also be handy if you wanted to try and use a different art style for the drawing.
Finally, it could also make things easier if you used real life references for this Broly sketch. You can use photos of athletes and bodybuilders to help you as you draw the muscle details and posture.
Broly is quite an exaggerated character, so not many people look like him in real life. Despite this, it can still make things much easier as you will see how muscles connect to one another.
If you can find reference images of people in a similar pose, then that would be even better!
Just as it was in the previous tip, using these photos could also make it easier to try and draw different poses.
Your Broly Drawing is Complete!
This was a rather challenging drawing to take on, so you should be really proud of the fact that you have completed this guide on how to draw Broly!
Even though this was a detailed drawing, we really hope that it was made much easier for you to take on.
As long as you carefully follow all of our steps then you will be mastering this drawing in no time!
If you had fun with this drawing guide, you can visit our website for many more awesome drawing guides like this one.
We have many more coming soon that you won’t want to miss, so stay tuned for those!
We would love to see the culmination of your hard work, so please share your Broly drawing on our Facebook and Pinterest pages for us to enjoy.