


There are many different fruits and vegetables to enjoy in nature, and there are different kinds to suit every taste!
Vegetables are common in many meals, and there is usually at least one kind of vegetable in every meal, and many people have a favorite vegetable.
Broccoli is one of the most controversial vegetables you can find, as people either love it or hate it.
Regardless of how you feel about the taste, it is quite a nice-looking little vegetable, and that can make it fun to learn how to draw broccoli.
If you would like to know how you can go about that, then this is the guide for you!
Our step-by-step guide on how to draw broccoli in just 6 easy steps will show you how to draw this love-it or hate-it vegetable.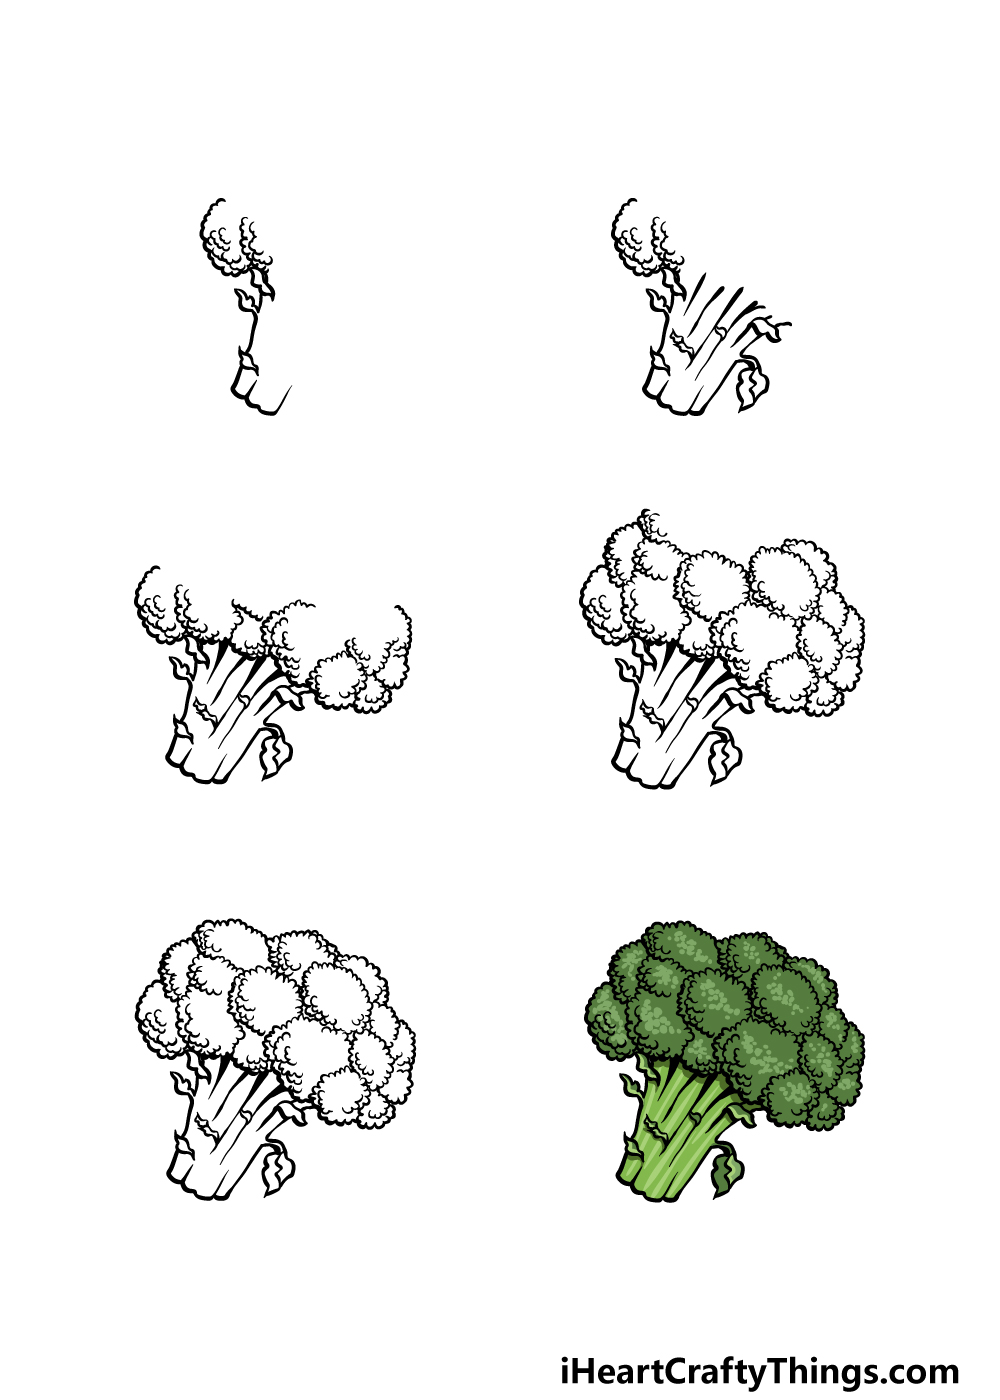
How to Draw Broccoli – Let’s Get Started!
Step 1

In this first step of our guide on how to draw broccoli, we will start with the left-hand side of the broccoli.
For the stalk of the broccoli, we will be using some smooth lines for the flat base that will be made up of a few curved lines connecting to one another.
These will extend to the left-hand side of the stalk, and we will also draw some small leafy sections poking off.
We will also start drawing the head of the broccoli. We will be drawing this by using lots of small, bumpy lines for the bulbous head of the vegetable.
That will be all we will be drawing for this step, and then you can move on to step 2!
Step 2 – Now, draw the rest of the stalk
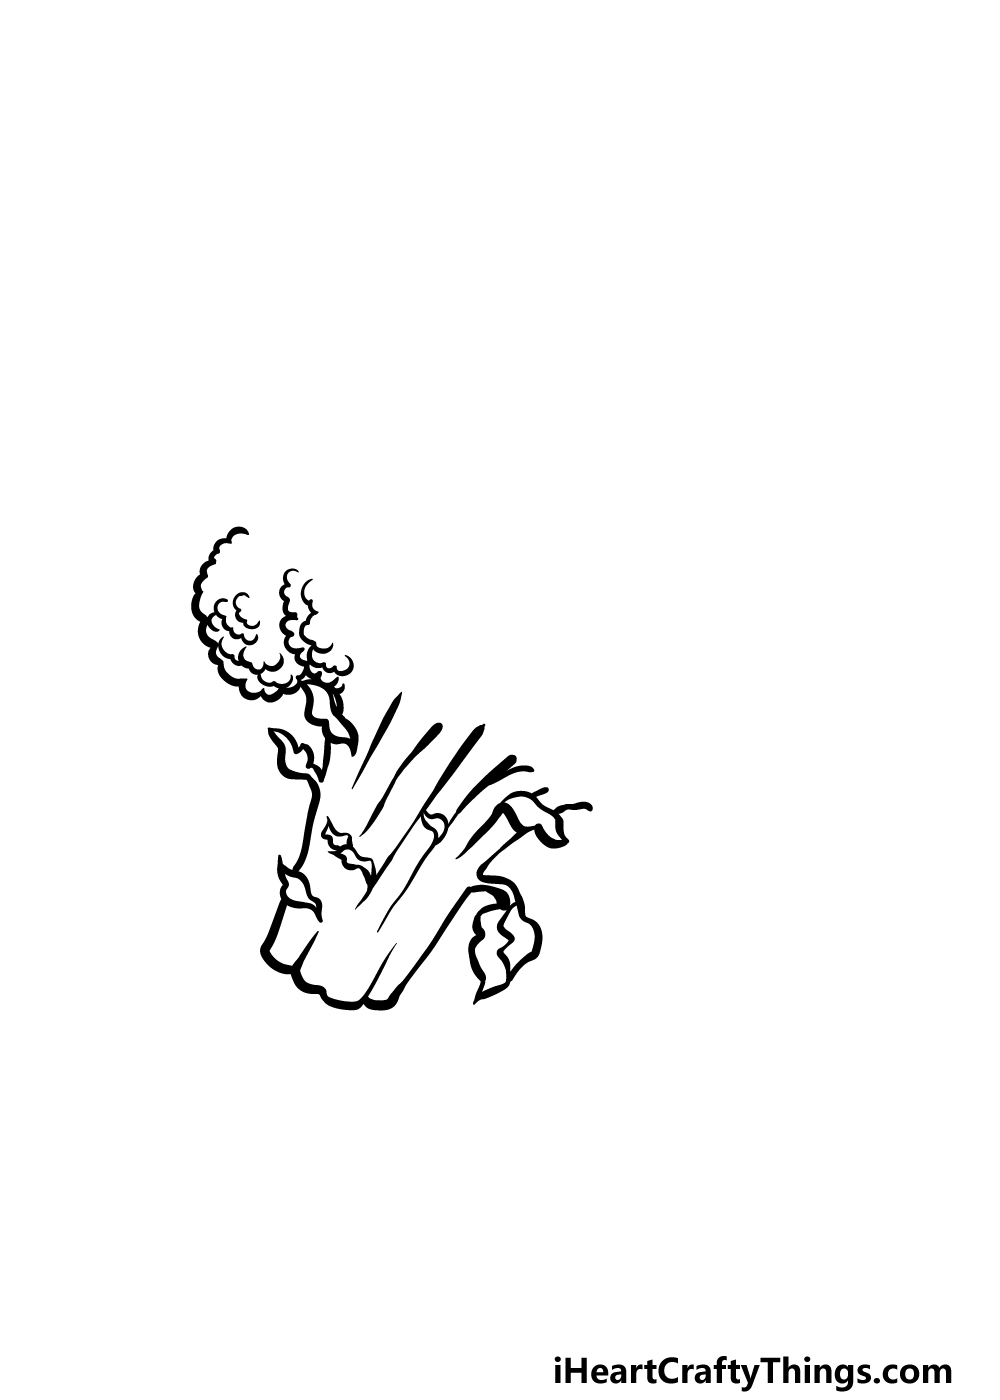
This step of your broccoli drawing will see you finishing off the other side of the stalk. The stalk for the broccoli starts off relatively thin at the base, and then it gets thicker the further you go up.
We will be drawing the right-hand side of the stalk in this step, and once again these lines will connect to one another in different sections, and this will help to give the stalk a more textured look.
You can also add some more small leaves poking off the right-hand side of the broccoli stalk as you did with the other side. Once that is done, we shall proceed to step 3.
Step 3 – Draw some more of the head of the broccoli
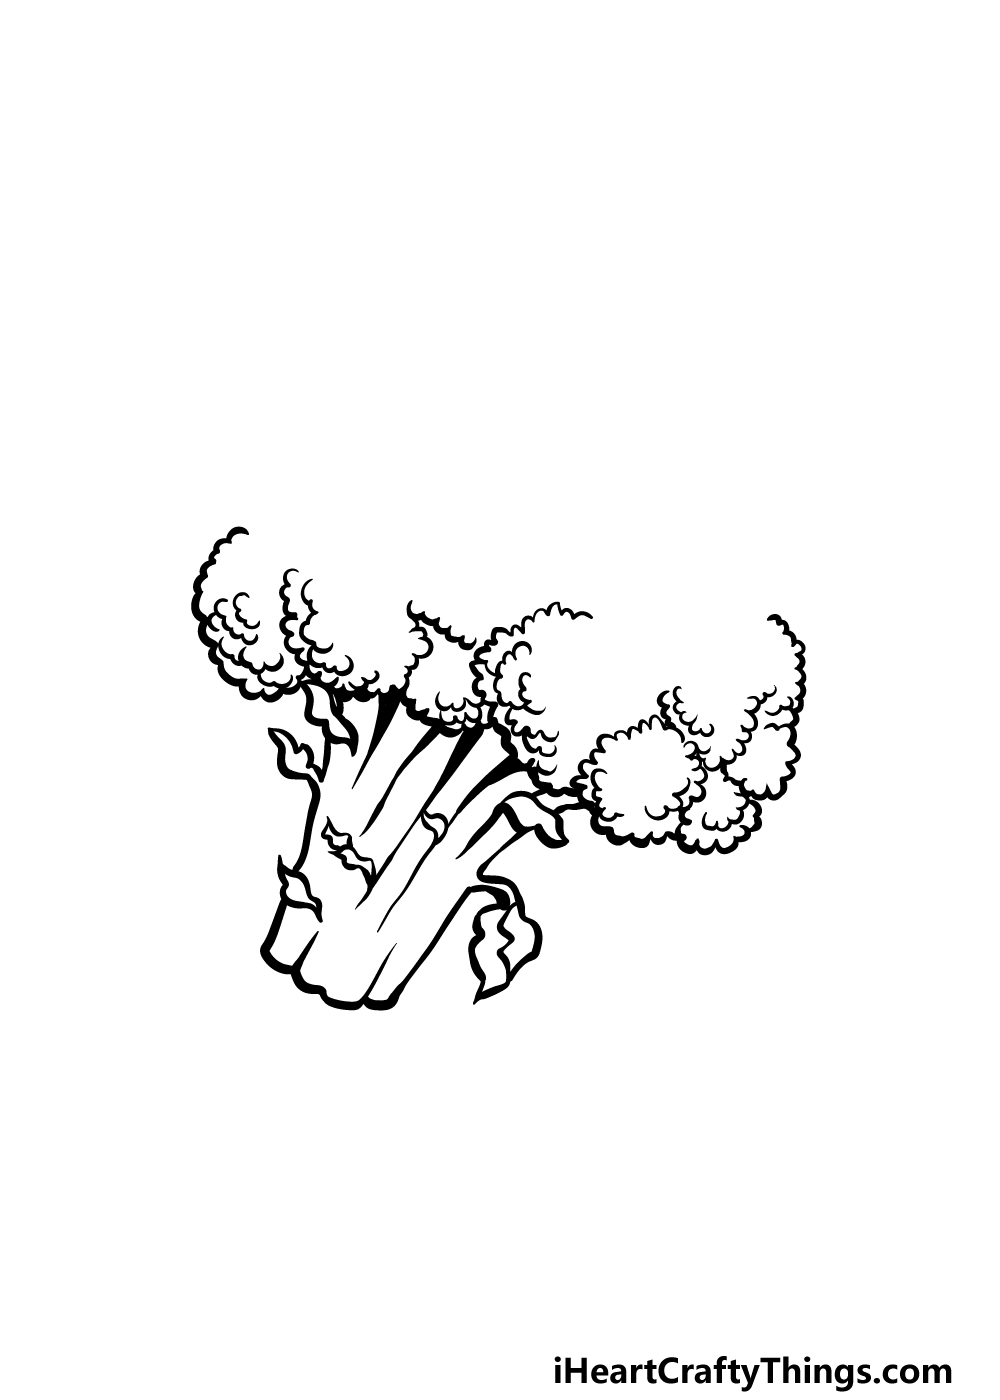
To continue this guide on how to draw broccoli, we will be drawing more of the head of the broccoli.
We will be going for that almost bushy look that broccoli has, so to do this we shall be extending what you started in the first step.
That means that you can use some bumpy lines for the outlines of the various sections of the fluffy broccoli head. These will be attached to various smaller stalks extending from the main stalk.
If any of this sounds confusing, the reference image will show you how it should look.
When you’re happy with how this section is looking, it will be on to step 4 where we will continue drawing the broccoli head.
Step 4 – Next, draw some more sections of the broccoli head
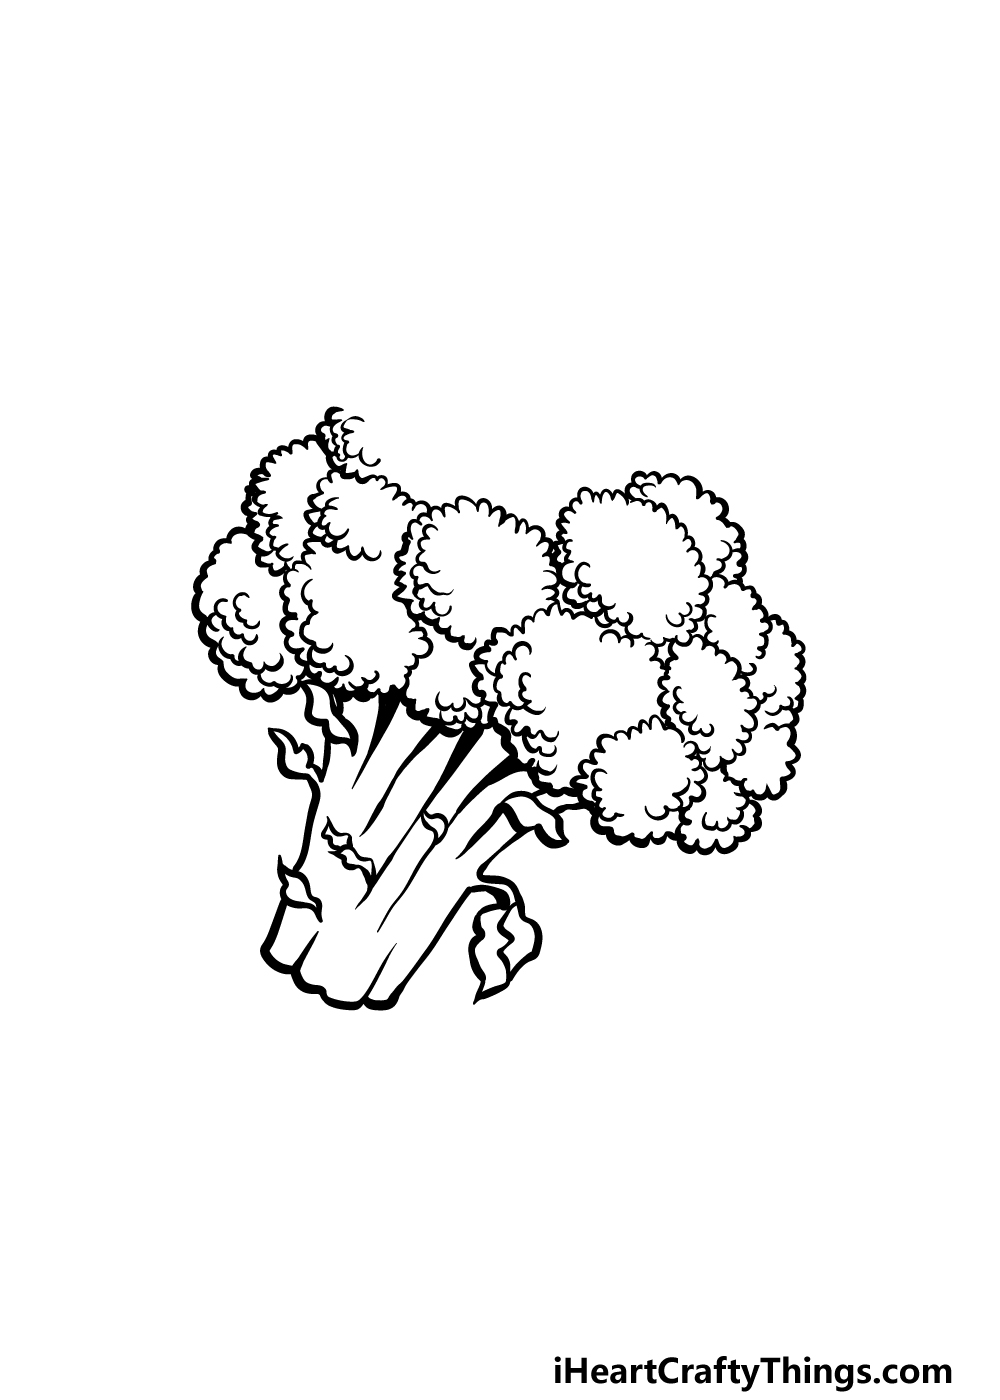
For this and the next step of this guide, we will be focusing on adding more sections to the head of the broccoli drawing.
As we mentioned earlier, the head of the broccoli is made up of a few smaller clumps of bumpy leaves, and these are what we will be adding in this step.
To do this, add some more rounded sections for the broccoli head using those same bumpy lines you’ve been using for the rest of the head.
These latest clumps will primarily cover the top center of the broccoli, as shown in the reference image.
There will then be one last blank section left on the head of broccoli, and we will fill that in as we move to the final details in the next step.
Step 5 – Add the final details to your broccoli drawing
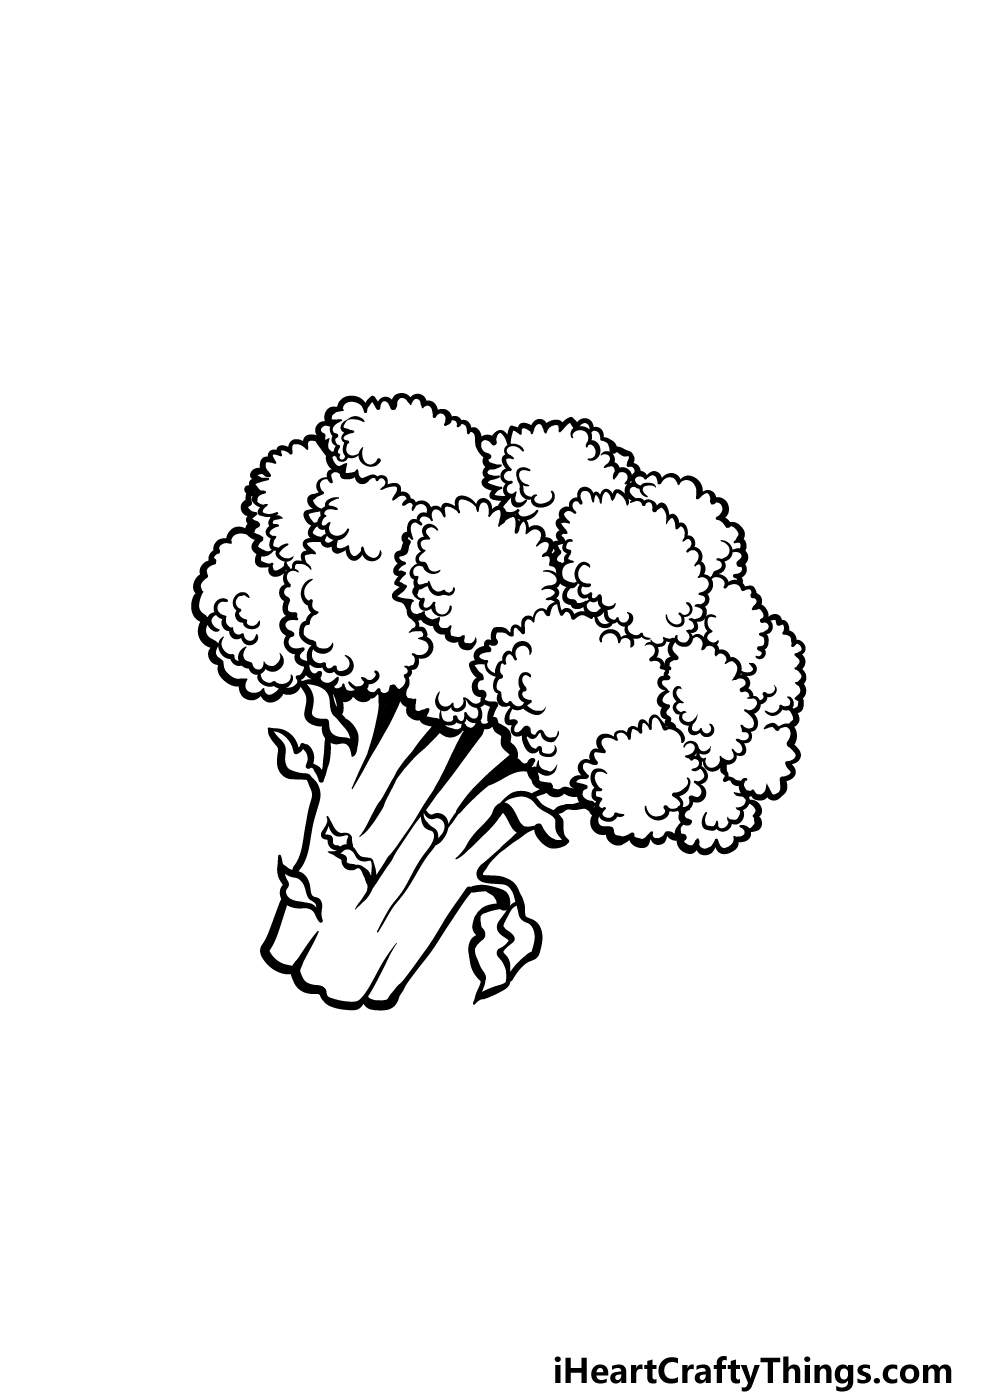
Now you’re ready to finish off the final details in this guide on how to draw broccoli. To do this, we will be adding a few more clumps of the bumpy broccoli head.
You should have the hang of this by now, so adding these next sections should be no problem for you!
Once they are added, you’re ready to move to the final step. Before you do, you could also add some details and ideas of your own.
One idea would be to draw a background, and this would be a great way to show what you would enjoy with this broccoli. How will you finish this drawing off?
Step 6 – Finish off your broccoli drawing with color
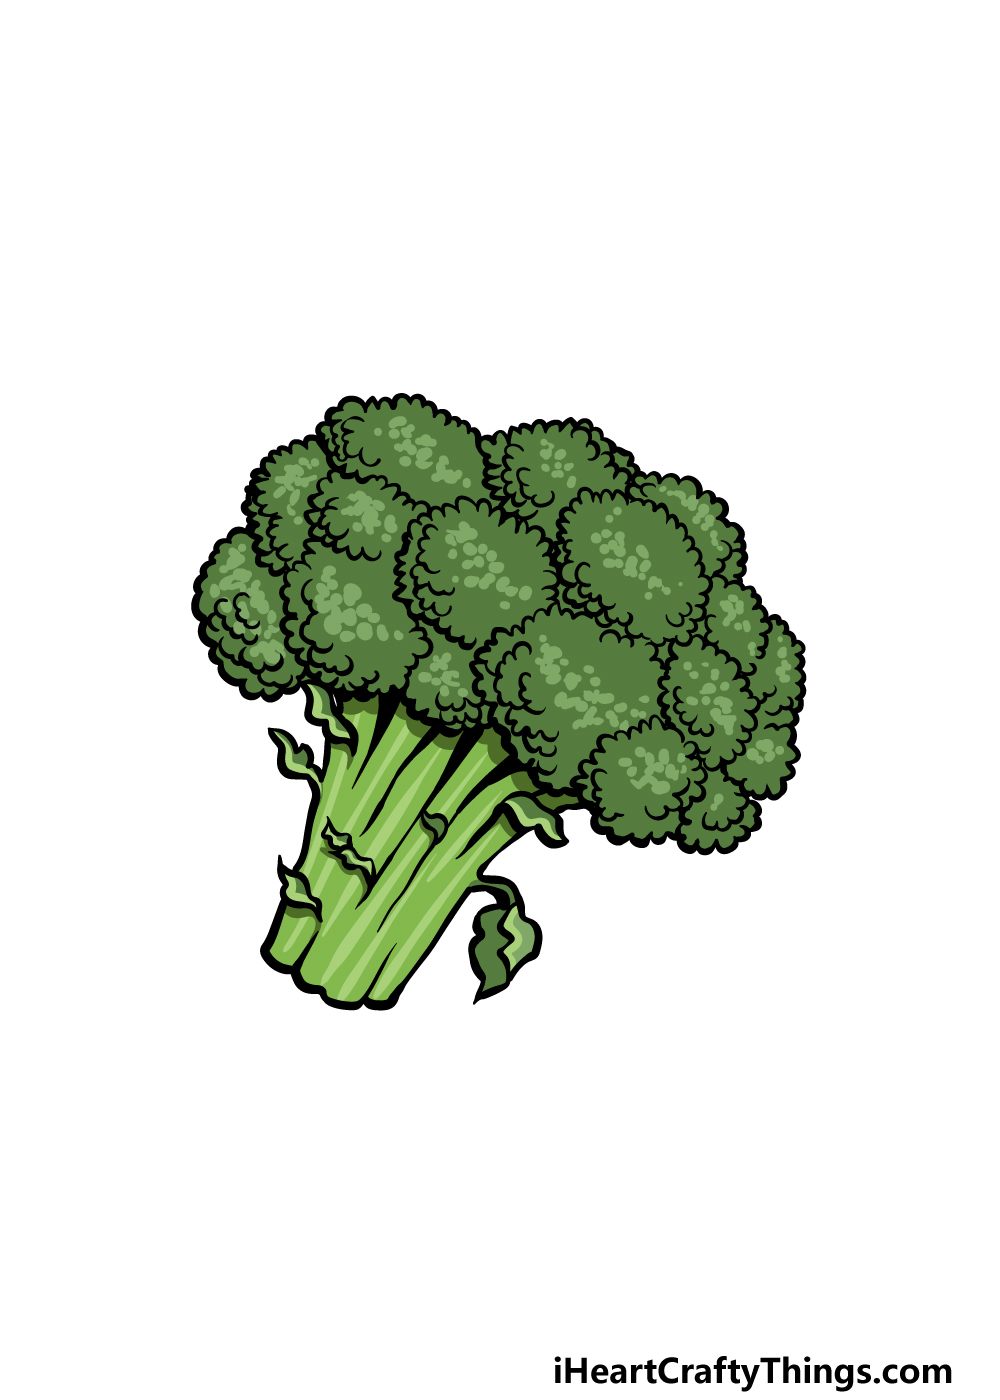
In this final step of your broccoli drawing, you can finish it off with some color. As you’re probably well aware, broccoli is usually completely green, but even if you stick with that color scheme there are ways to shake it up.
In our reference image, we used some light greens for the stalk and then variations of darker shades for the head of the broccoli.
You could use similar colors for your own drawing, but don’t be afraid to use some unique colors of your own!
You can also change up the art mediums you use, so how will you color this awesome picture in?
4 More Ways To Make Your Broccoli Drawing Unique
Bite into these 4 tasty tips we have for your broccoli sketch that will make it even better!
If you were cooking broccoli for a meal, you likely wouldn’t have just one piece of broccoli.
For that reason, we think you could take what you have learned in this guide and add some more to your drawing of broccoli!
Pieces of broccoli tend to look pretty similar with some small variations, so you could follow through the guide again and add as many pieces as you like to the picture.
How many pieces of broccoli do you think this picture needs?
Once you have all the broccoli you need for the picture, you could then add other vegetables that you would like to enjoy with it. You don’t need to stick to just vegetables, however!
You could also add meat, pastries, pasta or anything else you like to eat with broccoli. This is your chance to show off what your favorite meals that incorporate broccoli would be.
Next, once you have all of the food that you need for this broccoli drawing, you could then incorporate a background.
This could be as simple as having the broccoli on a plate with all the food you wanted to include.
You could also include elements such as cutlery or even chopsticks to show what you would use to eat this plate of food.
Then, it would be fun to also include a background setting to show where you would enjoy this meal!
In these tips, we have covered a few ways that you could make this broccoli sketch into a meal. There are some other fun ways that you can alter the drawing though!
One would be to turn the broccoli into a cartoon character. This could be as simple as drawing some cartoony eyes and limbs.
Then, you could have some fun with text as you add a speech bubble above the broccoli and have it saying some kind of catchphrase.
What cartoon style would you use if you were to do this?
Your Broccoli Drawing is Complete!
Some people may not find eating broccoli very fun, but even if that may be the case we hope that it was lots of fun for you to work on this guide!
Even though broccoli is a simple vegetable, it can still be complicated to draw it. By following the steps in this guide, you will definitely be able to master this drawing, however!
When you have finished the guide, be sure to also add your own final touches and details to put your own spin on it!
We mentioned a few ways that you could go about this, but what other ideas do you have?
If you had fun with this guide, you can find more drawing guides on our website to enjoy. We upload new ones often, so be sure to keep checking in!
Please also go ahead and share your finished broccoli drawing on our Facebook and Pinterest pages so we can see how it turned out!