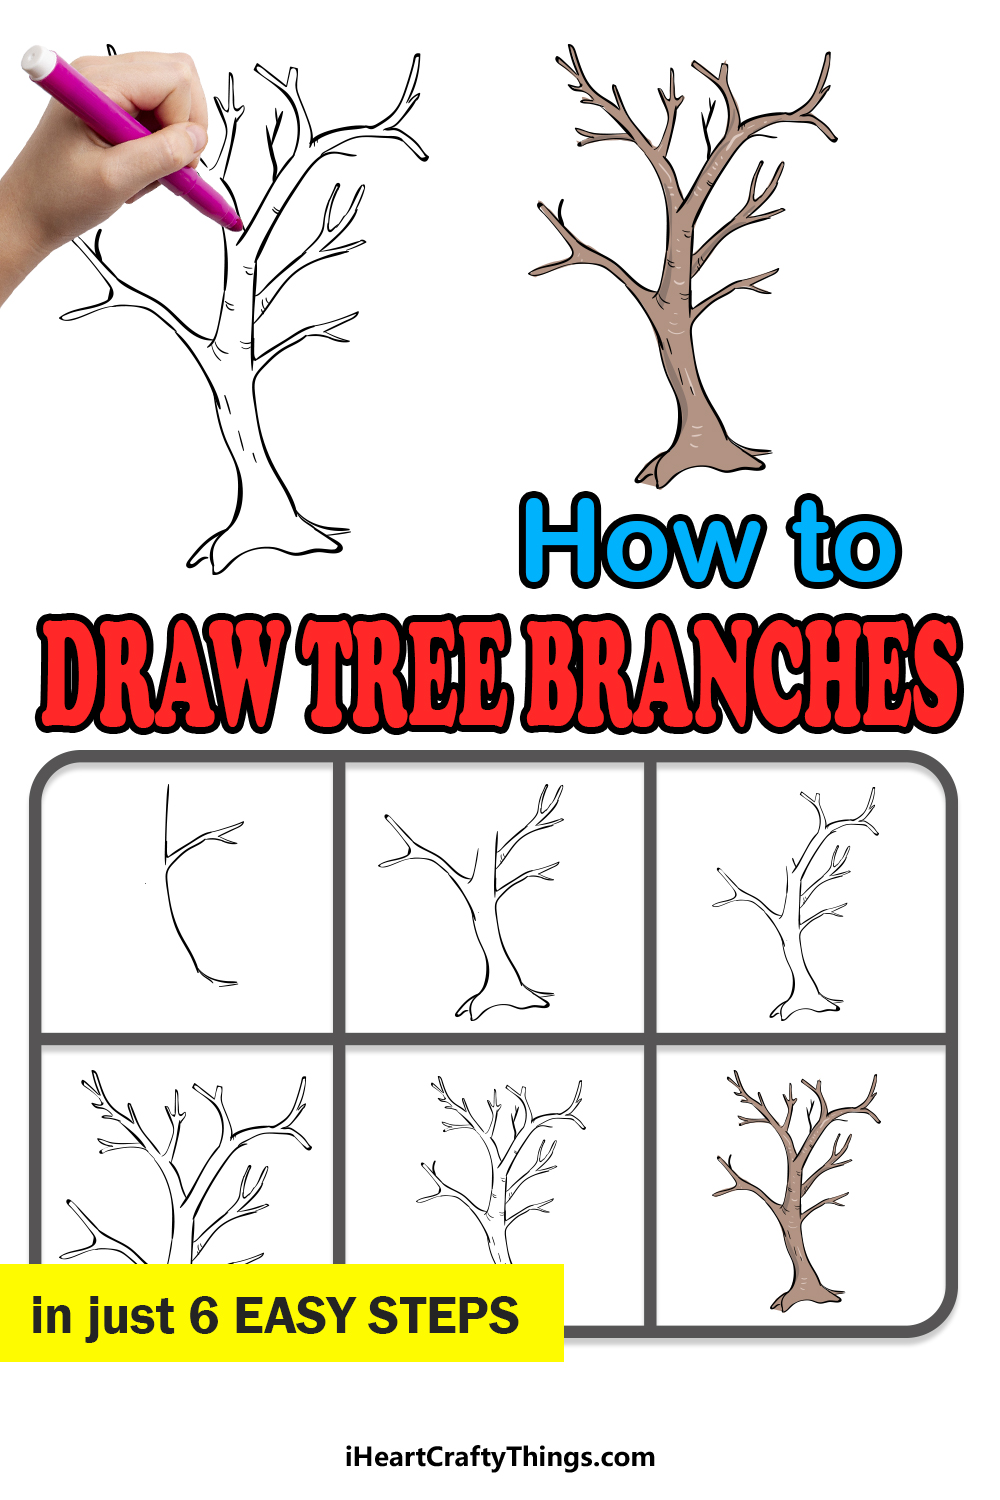
When going out into nature, it’s always great to see some beautiful trees. Whether they are filled with leaves or bare in the Winter months, they bring beauty to any landscape they’re in.
Their complex branch structures can make it quite difficult to learn how to draw branches yourself, however.
If you would like to create some of your own realistic branches, then this is the guide for you!
By the time you reach the end of this tutorial, you should have no problem drawing some incredible branches.
Our step-by-step guide on how to draw branches will show you how easy it can be when you know what to do!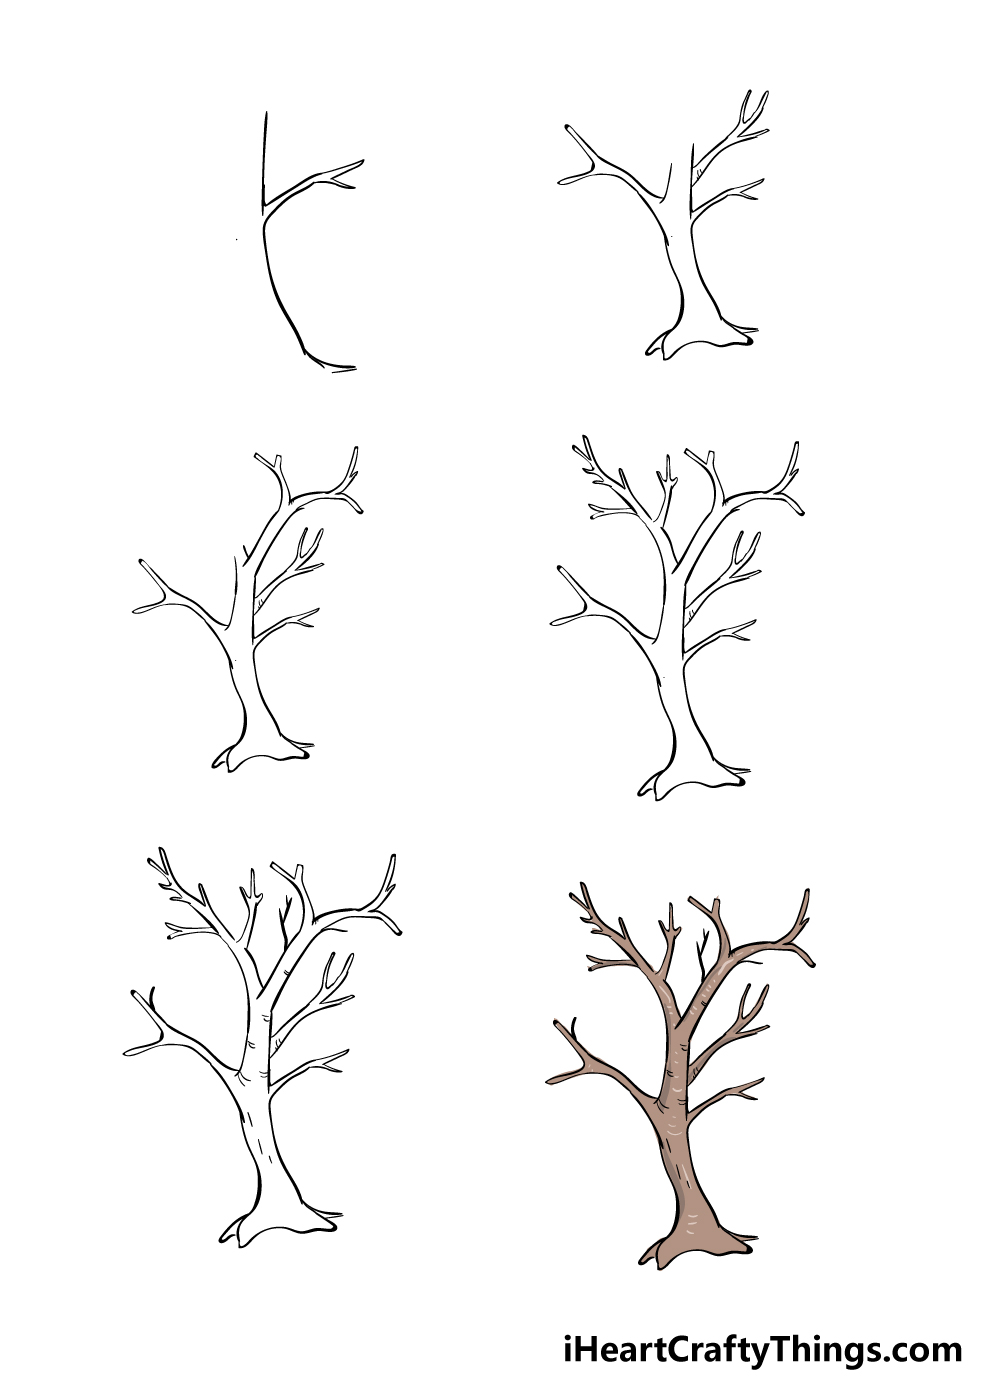
How to Draw Branches – Let’s Get Started!
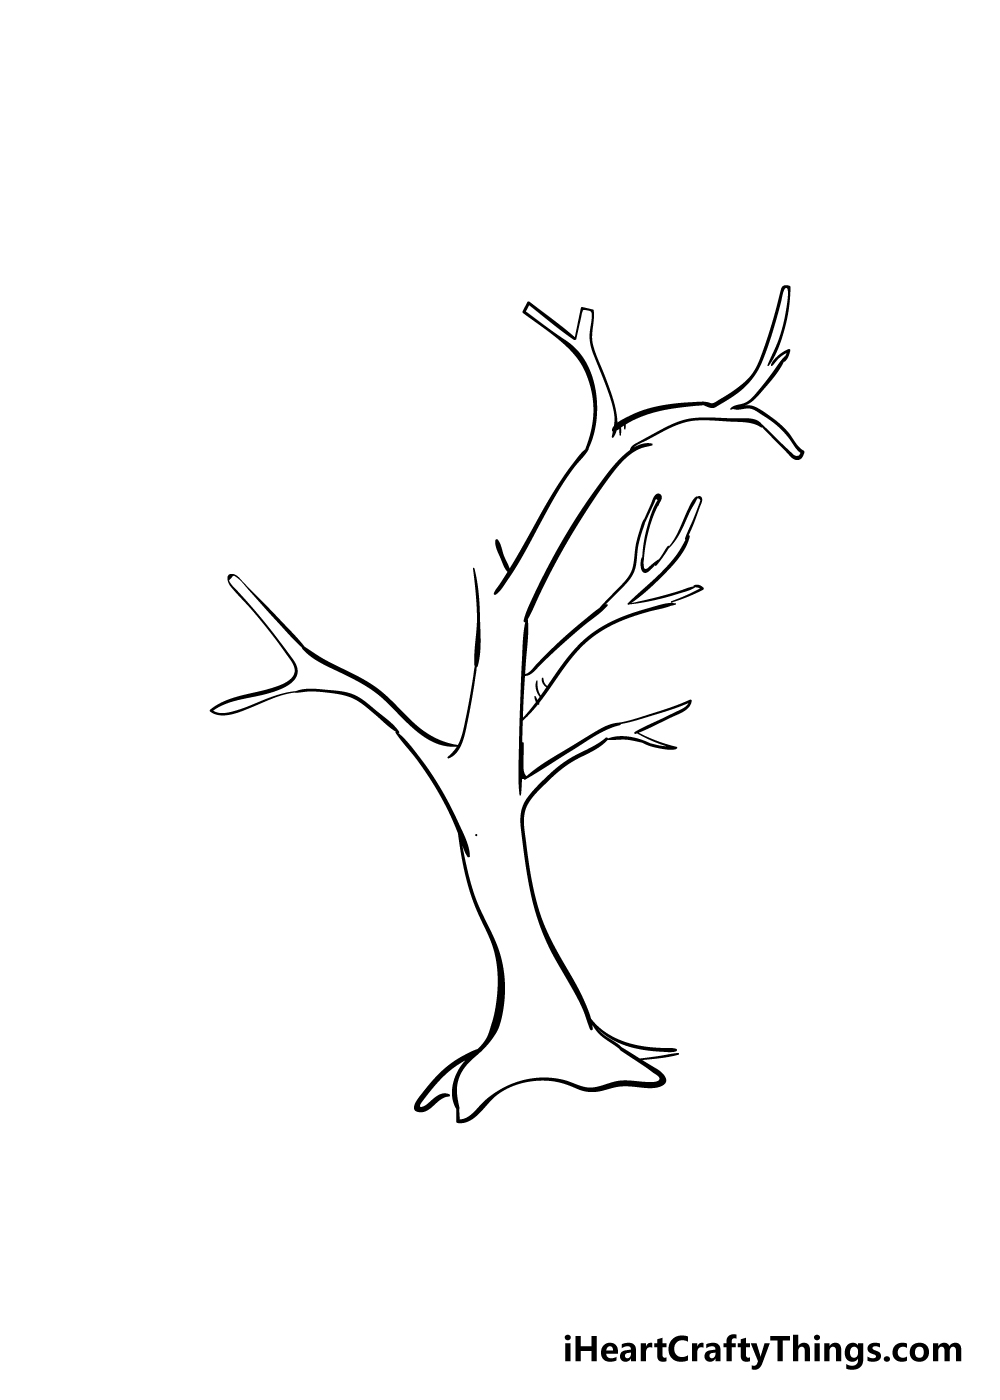
Step 1
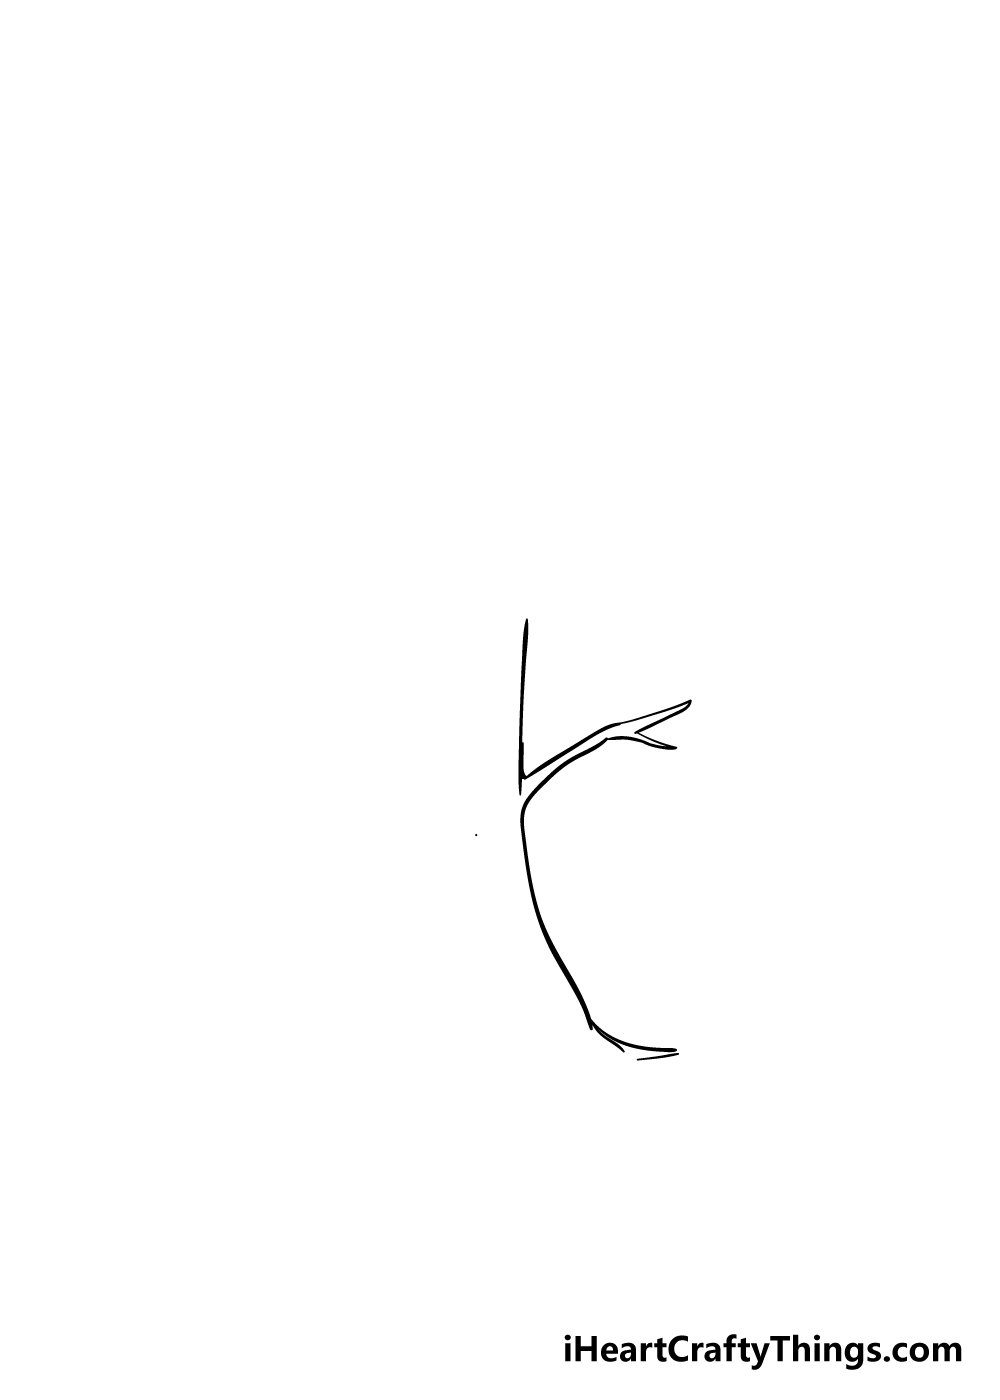
To get this guide on how to draw branches going, we will be starting with one side of the tree along with one thin branch on the side.
To do this, you can draw a slightly curved vertical line for the side of the tree. You shouldn’t worry too much about using a smooth line, as a slightly rougher line will help give the appearance of bark.
Just be sure to leave a small space in the line, as we will be adding a branch there. This branch will be very thin and angling upward slightly.
You can also be sure to add a fork at the end of it, as shown in the reference image. Once you’re happy with how it looks, we’re on to step 2!
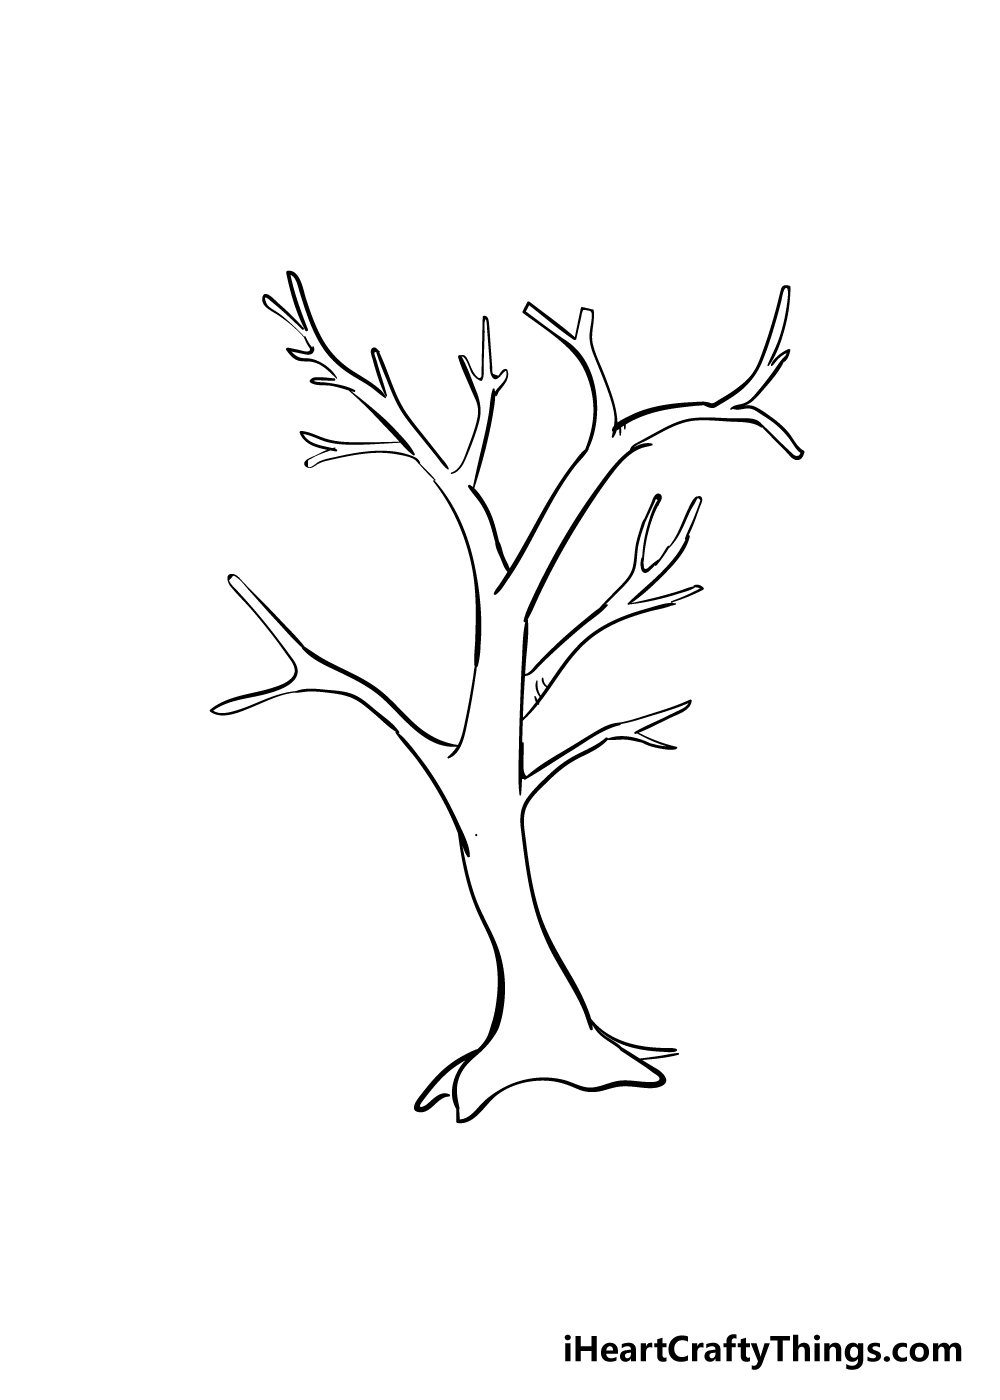
Step 2 – Keep adding more branches in this step
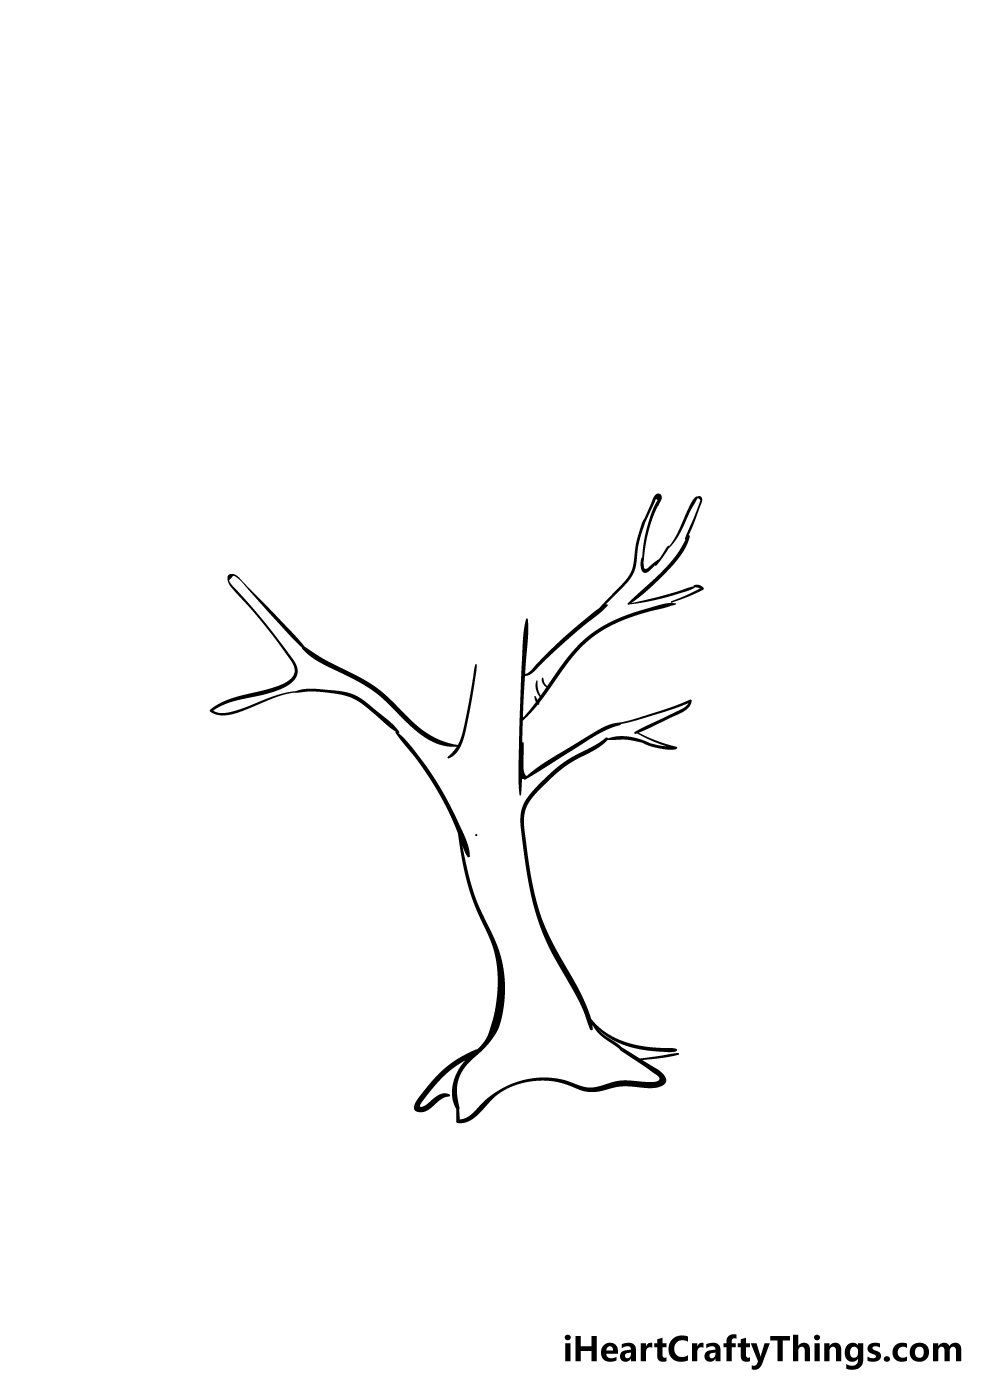
You will be using the method with which you drew the first branch for the next few you will be drawing in this guide. These next ones will have variations, but the general structure is the same.
You can add a large branch on the left-hand side that also has a fork in it, except this fork will be much larger than the first branch.
Then, you can draw the left-hand side as well as the remainder of the base of the tree.
Finally for this part of your branches drawing, you can draw a three-pronged branch near the upper right-hand side.
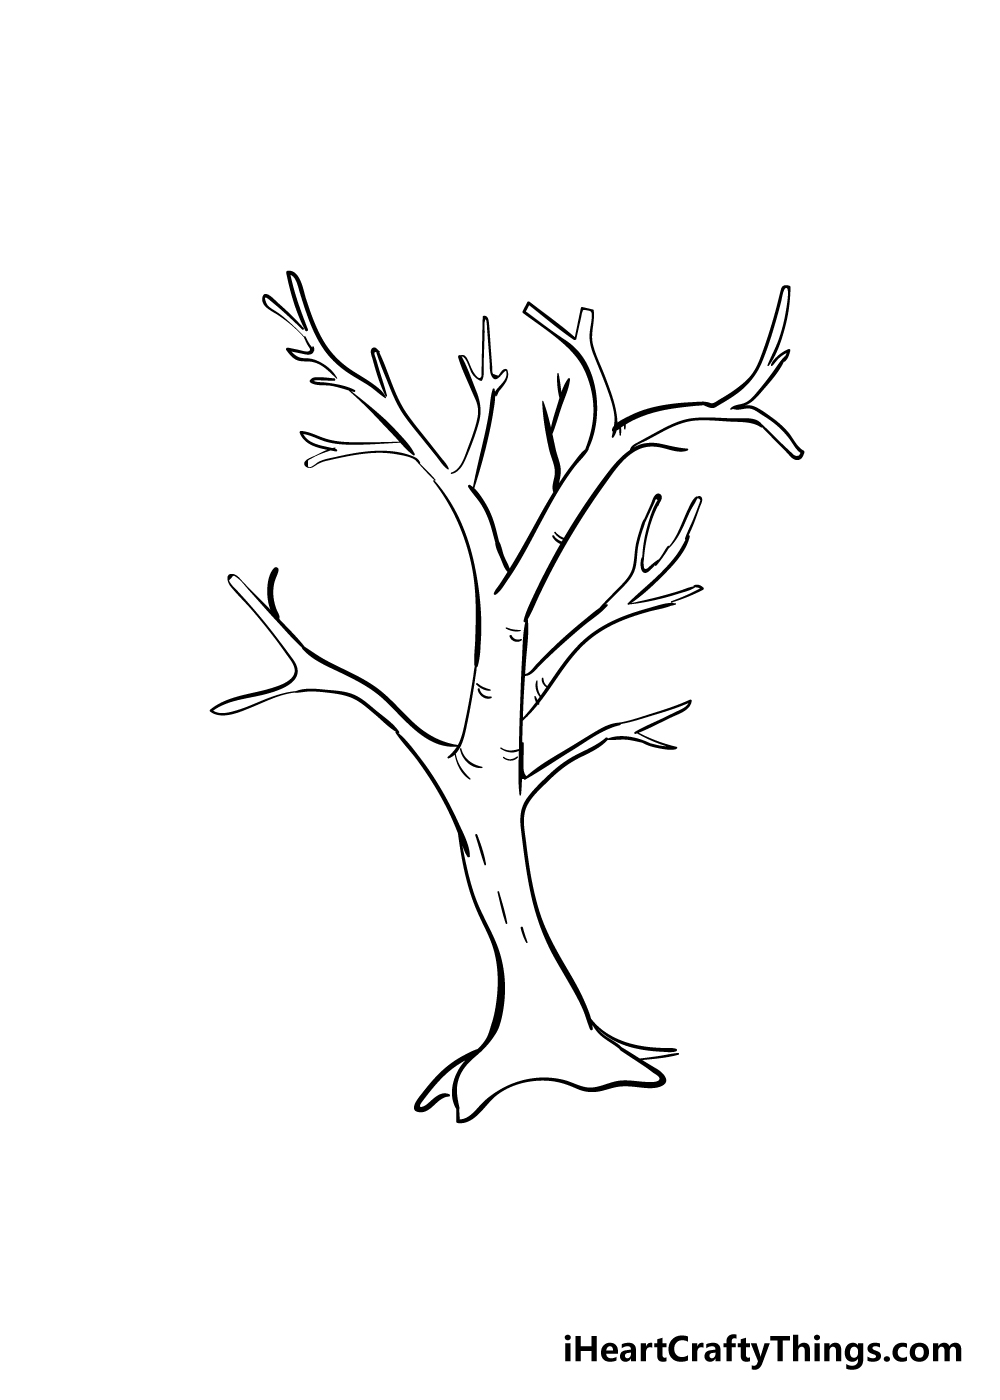
Step 3 – Now, keep extending the tree upward
We will continue extending the tree upward in this next step of our guide on how to draw branches.
To do this, you can extend a long branch going up toward the right. This branch will fork at the end, with the branches splitting into two directions.
Each of these branches will also have their own forked ends. It may sound complicated but the reference image will make it clear!
Step 4 – Finish the final branch of the tree
The final branch that we will be adding to your branches drawing will go on the upper left-hand side of the tree.
It will be quite a long branch with several smaller ones coming off of it, and as with the other ones each of these smaller branches will also have branches coming off of them.
That will finish off the structure of your branches drawing, so now you can move on to the final details!
Step 5 – Now, you can add the final details to your branches drawing
We will be adding some final touches and details before coloring in for this step of our guide on how to draw branches.
The details that we have added are quite simple, but they will make a big difference in really finishing off your drawing!
Most of these details are drawn with some fairly small lines, with some being vertical and others going at the bends of the branches. You can also draw on some very thin twigs coming off of the tree.
These are the details that we would add, but you should feel free to add any details of your own that you would like!
One great way to put your own spin on the drawing could be to draw a cool background for it.
Maybe it’s part of a dark, spooky forest with an owl perched on it or it could have a bed of fall leaves underneath it.
There are plenty of ways that you can get creative with it, and we can’t wait to see what you come up with!
Step 6 – Finish off your branches drawing with some color
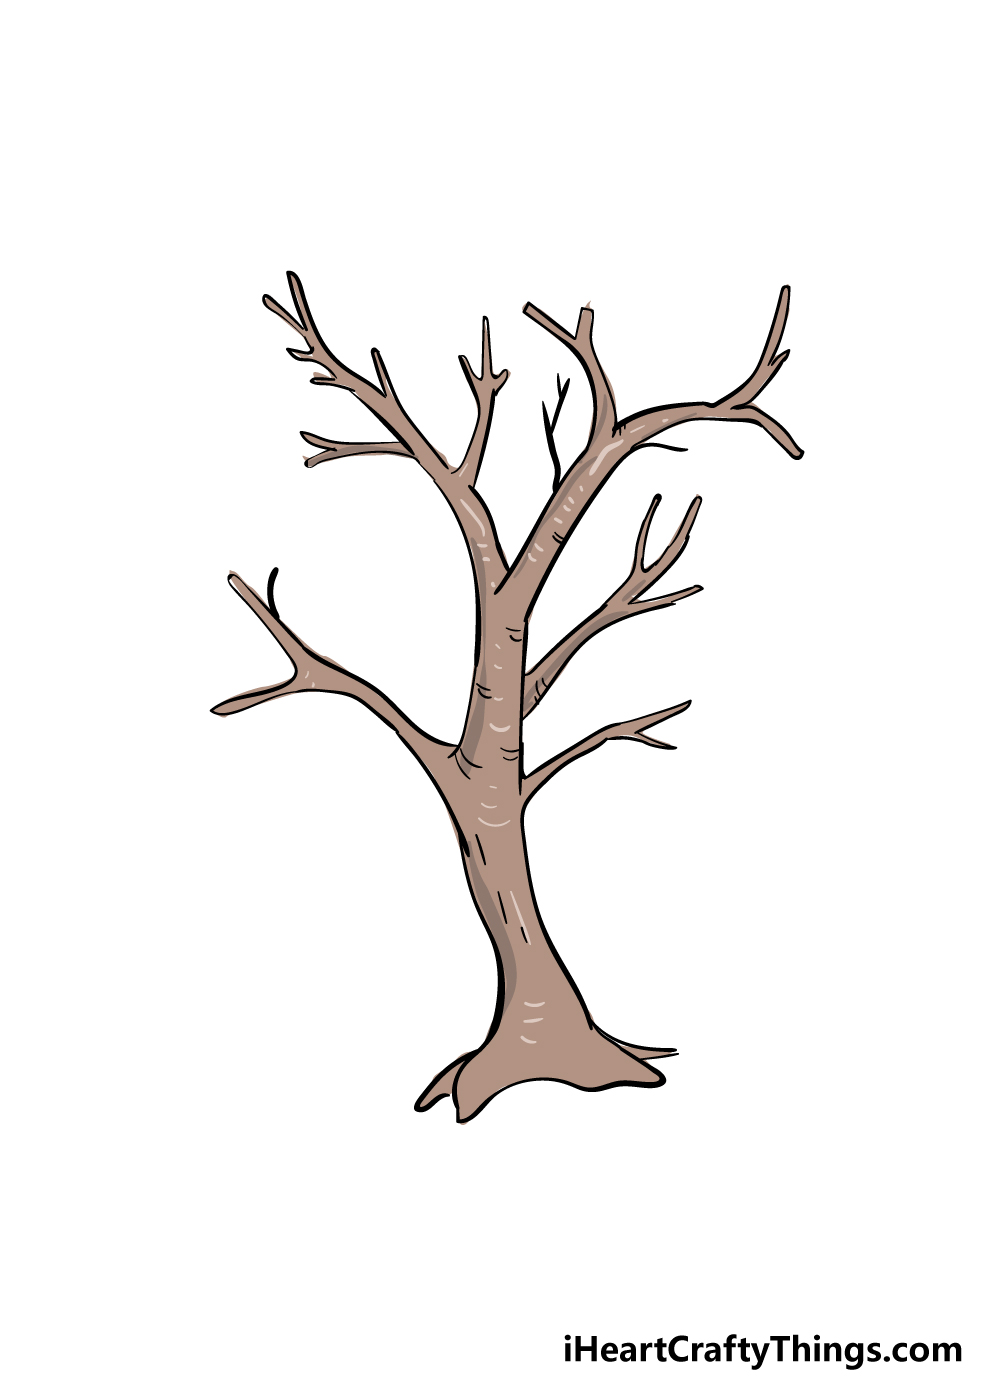
Now that your branches drawing is complete, it’s time to finish it off with some incredible colors!
For our example, we went with a simple yet effective brown color scheme, but there are so many other ways that you could bring other colors into the equation.
If you drew a background in the previous step, then coloring that in is a great way to add any other colors that you would like to include.
For example, if you drew some leaves underneath the tree then you could work in colors like green, brown, yellow and orange for some splashes of color.
Then, once you know which colors you would like to use you can have some fun choosing some great art mediums to bring the colors to life!
For images dealing with nature, it can be great to use watercolor paints or colored pencils for a softer look.
Alternatively, acrylic paints, colored pens and marks can create a bright and striking image.
What do you think you will use to bring your branches drawing to life?
3 More tips to make your branches drawing easy!
Branch out as you discover how to make these easy to draw branches even easier!
We see trees all over, but it can still be hard to draw them convincingly. That also means that you have plenty of models around you to use for this branches drawing!
If you have a yard, you may find some trees to look at there. Otherwise, there may be a park or even a botanical garden that you could ask an adult to take you to.
If all else fails, you could find plenty of tree photos online or in books. You may be surprised how much it can help as you work on your drawing!
For this drawing of branches, we kept the tree bare to focus on the design of the branches themselves. This makes it easier to learn the drawing, but it also means the focus is on the intricate branches.
This may be surprising, but you could make it easier by adding some elements to the drawing! The easiest way to do this would be by adding some leaves to the tree.
When doing this, you could draw many individual leaves in order to make it look more realistic. Or, you could draw some rounded shapes onto the branches and then add some leafy texture details for a simplified look.
Whatever you choose, these will help to hide parts of the design you may be having a hard time with. It would also make the image even more interesting!
The best tools you have for making this branches drawing easy to do could be as simple as some pencils and some patience. With pencils, we can plan out the drawing as much as we need without fear of making mistakes.
When using pencils, the best way to do it is by making progressively darker layers of detail using different pencils. That way you can start building it up as you prepare for the final lines.
Then, when you’re ready, you can use your pen to draw the final lines and then it’s done!
Your Branches Drawing is Complete!
That brings us to the end of this step-by-step guide on how to draw branches! As we mentioned before, it can be tricky drawing a tree due to the many branches making things a bit more intricate.
We hope that by following this guide you found it to not only be much easier than expected but that you also had a ton of fun doing it!
Now you can take over and make this drawing your own by adding some of your own details and elements!
Whether you do this with a creative background or by using some fun art mediums we know it will look incredible!
We have many more awesome drawing guides for you to enjoy on our website! We upload new ones all the time, so be sure to visit often so you never miss out!
Once you have finished your branches drawing, we would love to see it! You can show us by sharing your picture on our Facebook and Pinterest pages for us to admire!