


There are so many different species of birds in nature, and each one has its own unique structure, color scheme and attributes. One of the prettiest little birds you can find is the blue jay.
These cute little birds are well known for their lovely blue and white color scheme. This has made them popular around the world, and many fans of this bird would like to learn how to draw a blue jay.
If you’re one of those fans then this guide was made for you!
Our step-by-step guide on how to draw a blue jay will show you how to recreate this beautiful bird.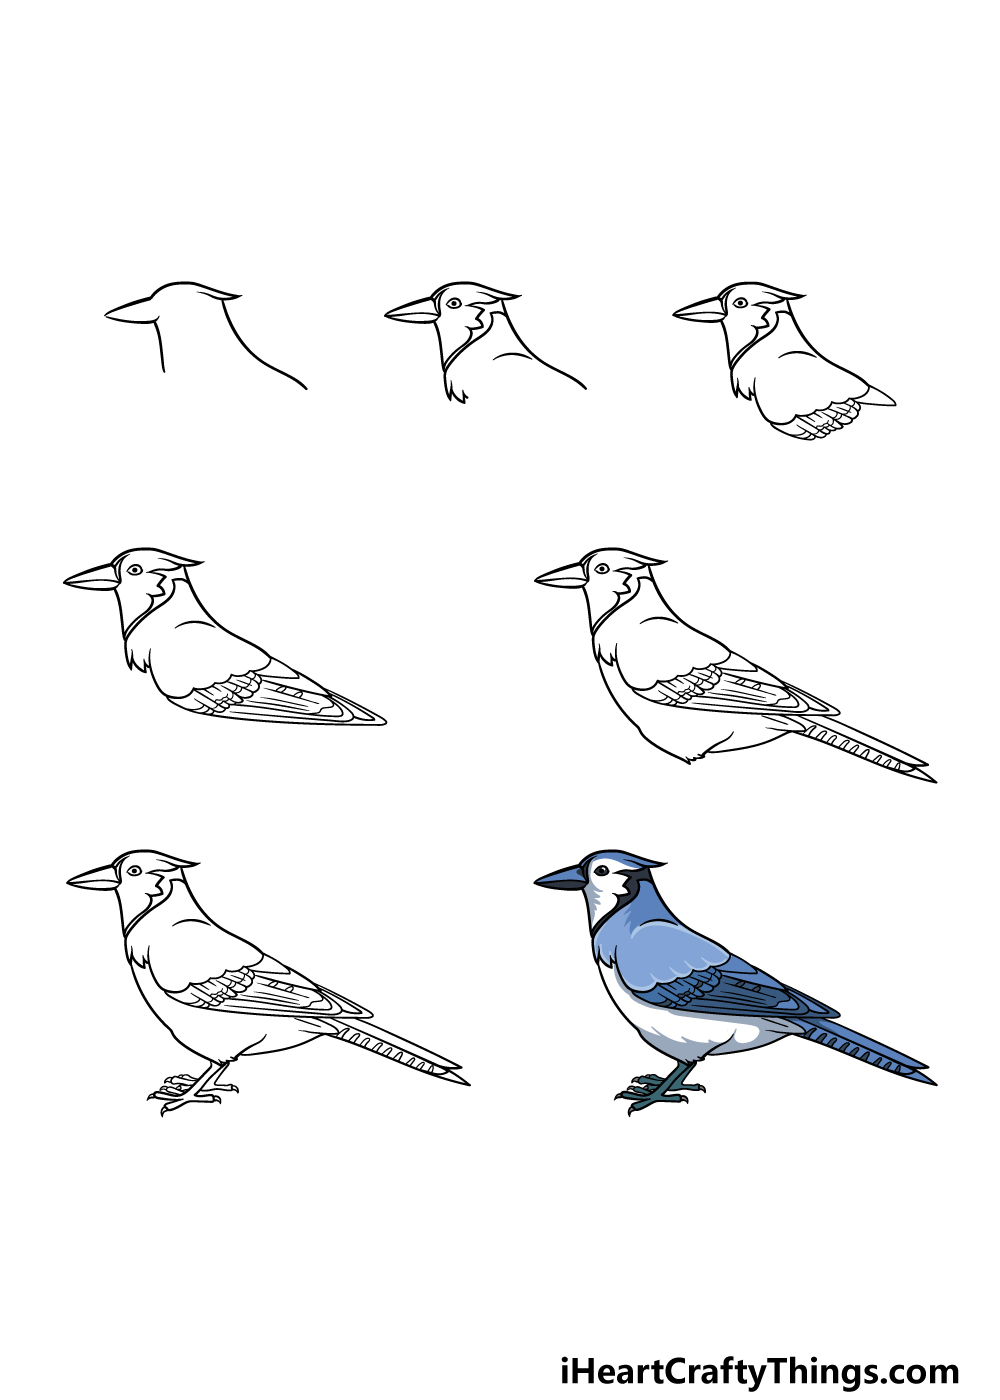
How to Draw A Blue Jay – Let’s get Started!
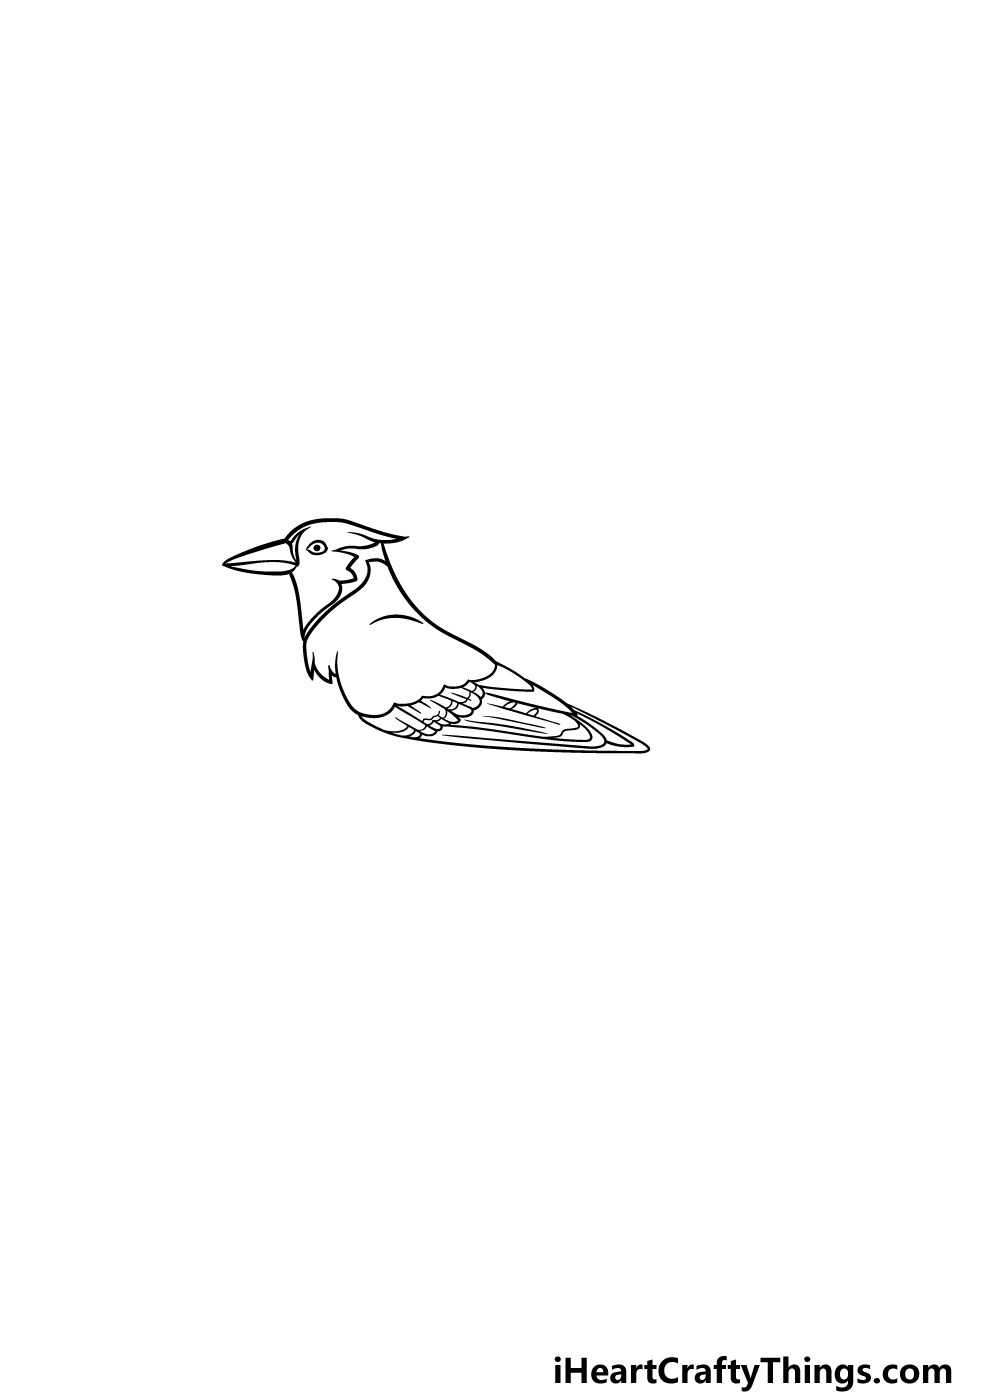
Step 1
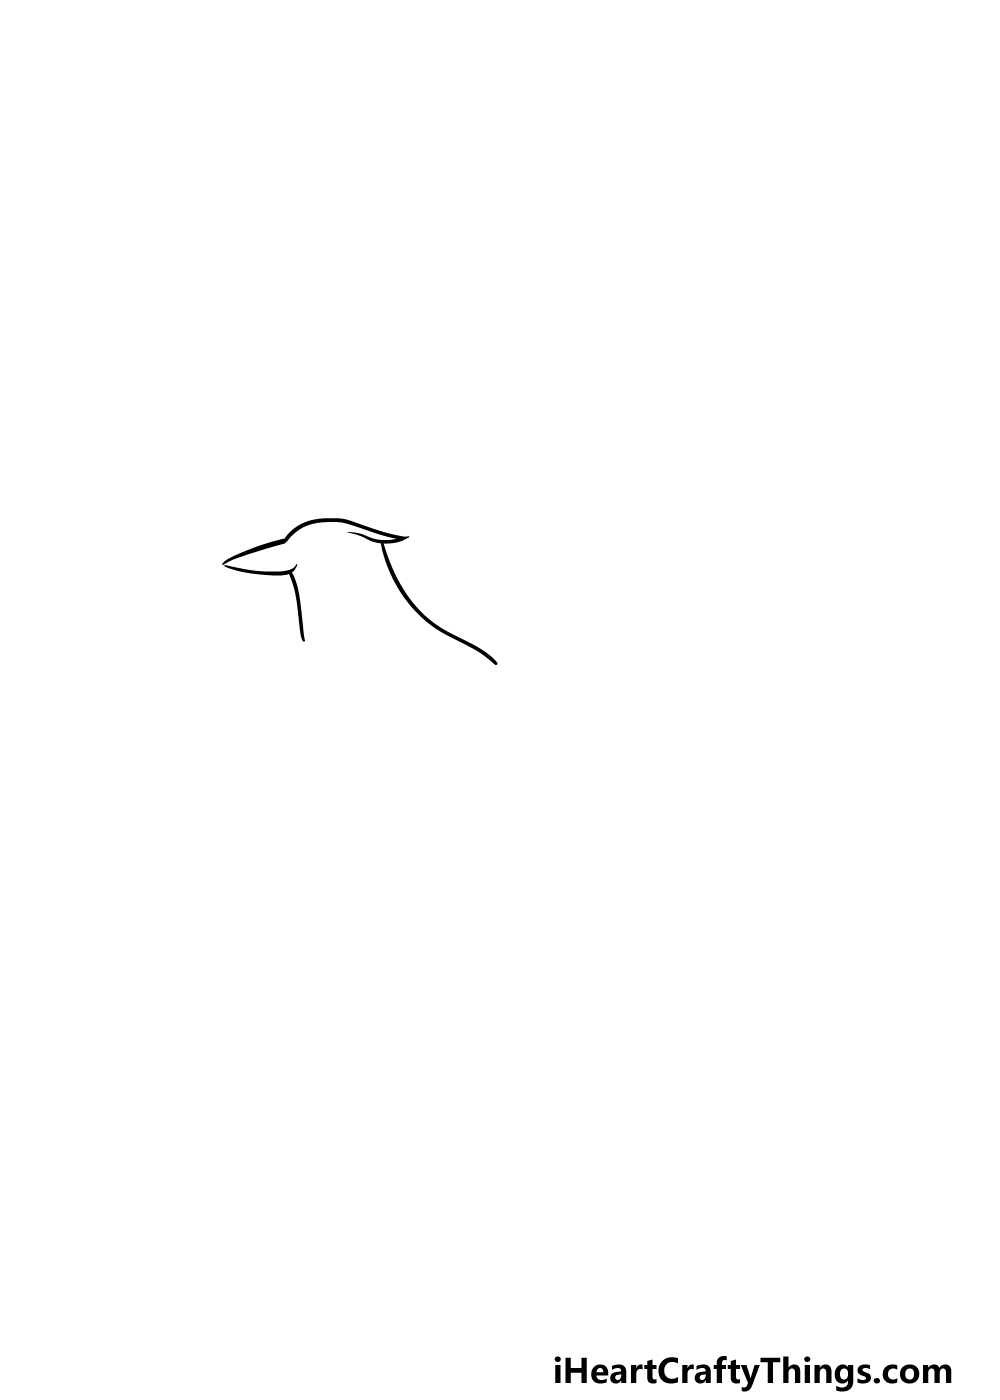
We will be starting with the outline for the head and the beak in this first step of our guide on how to draw a blue jay.
We will be using some curved lines to create the head and beak of the bird, as shown in the reference image.
There will also be a small, sharp crest extending behind the head. We will be adding more detail soon, so let’s move on!
Step 2 – Draw some details for the head in this step
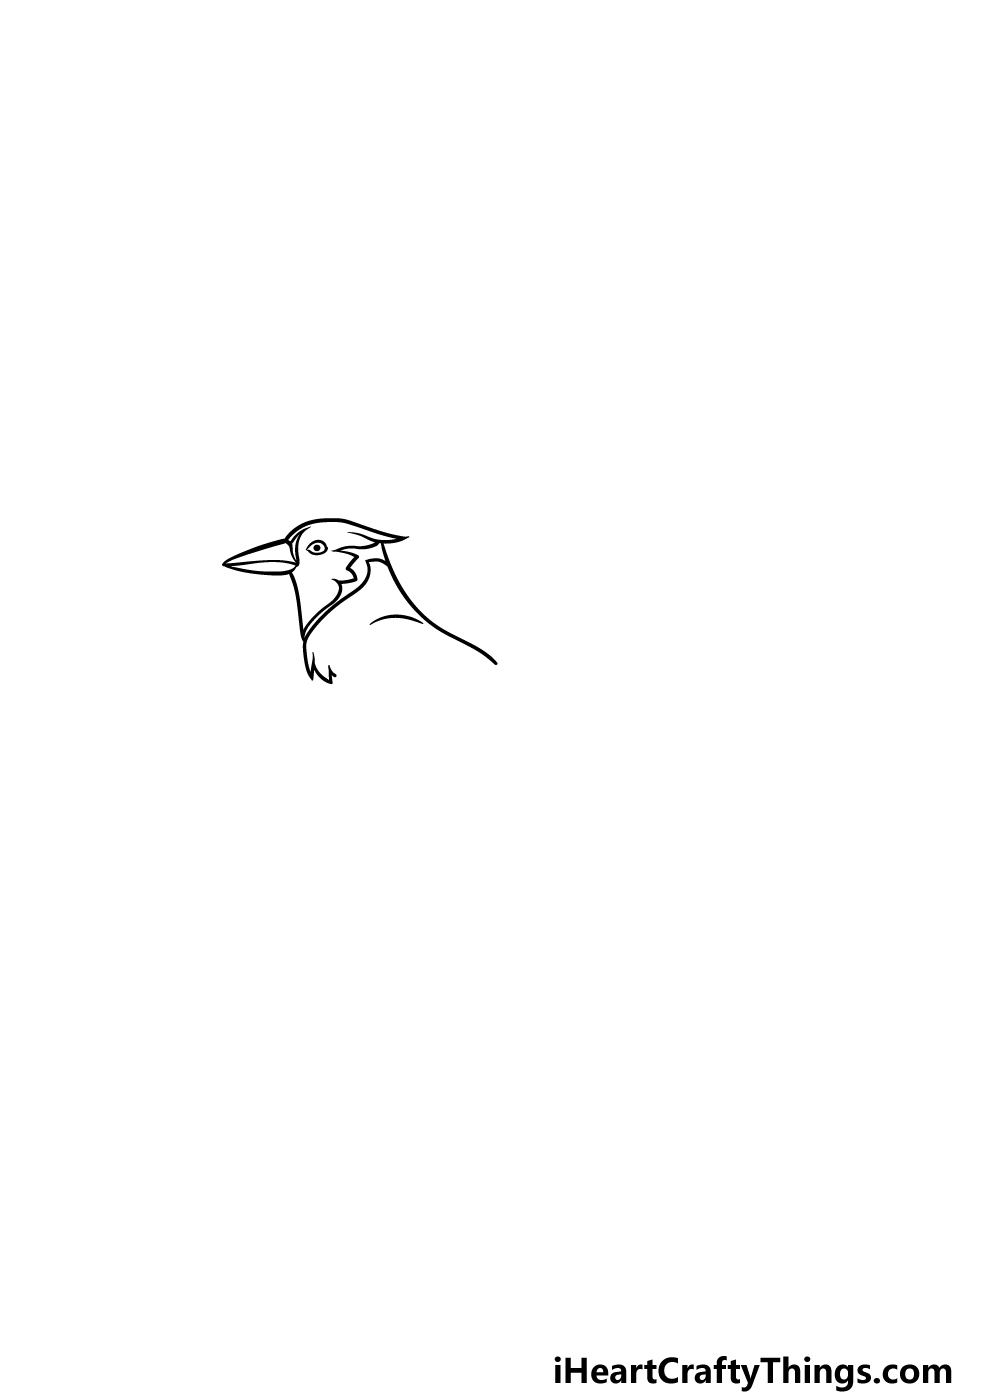
We mentioned adding detail to the head and beak, and that’s just what we’ll be doing in this part of your blue jay drawing. You can start by drawing a small circle with a dot within for the eye of the bird.
Then, we will use some sharply curved lines inside the head to add some feathery detail to that area.
You can then finish off this step by creating the small chest of the blue jay with some sharp lines there.
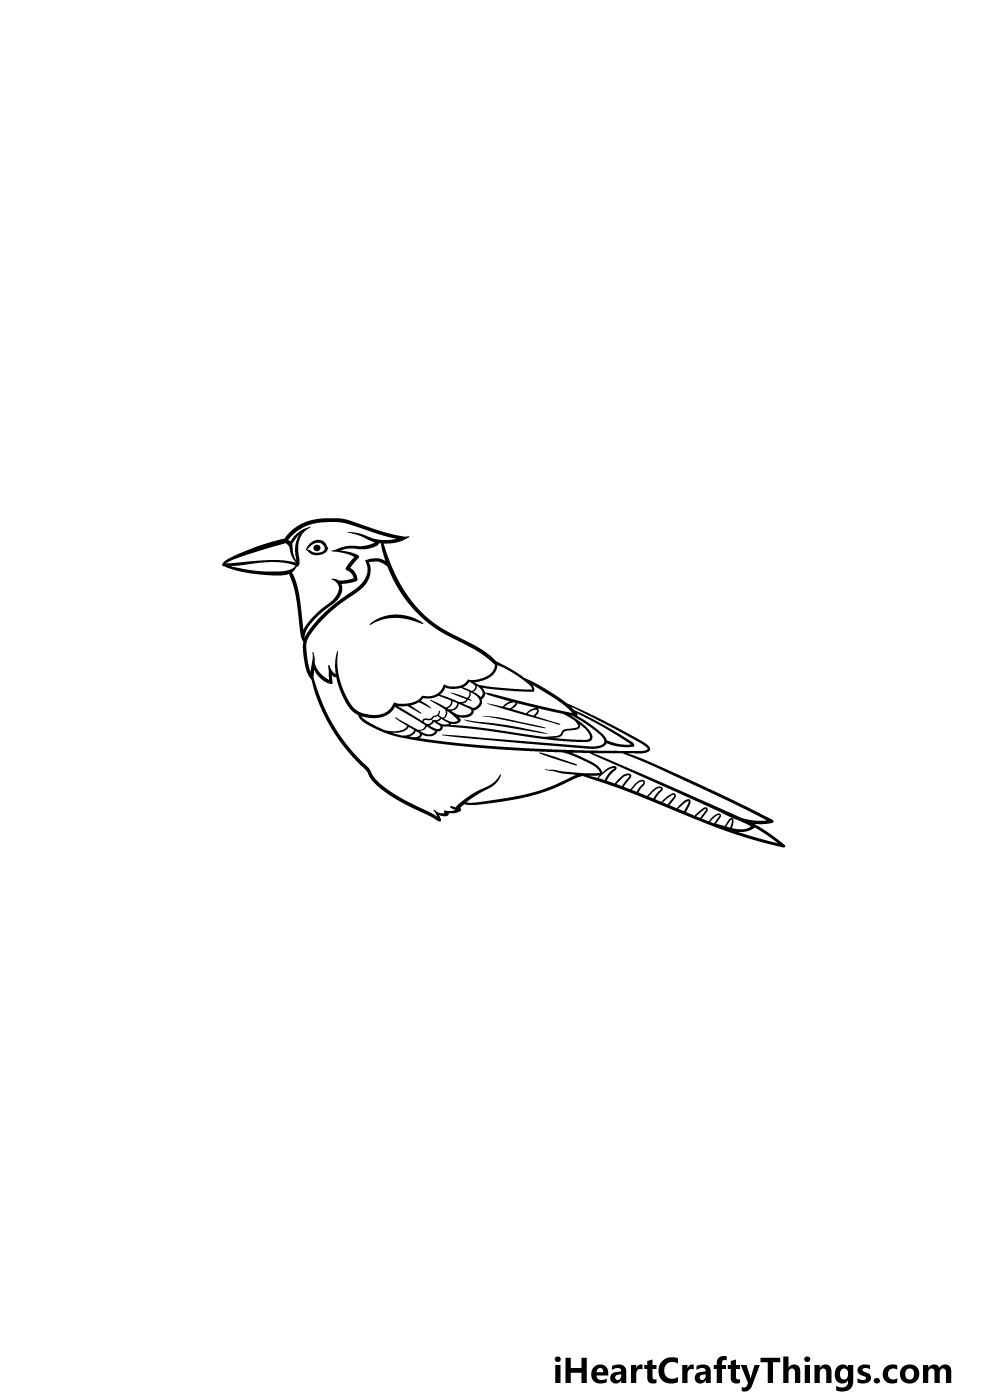
Step 3 – Start drawing the wing in this next step
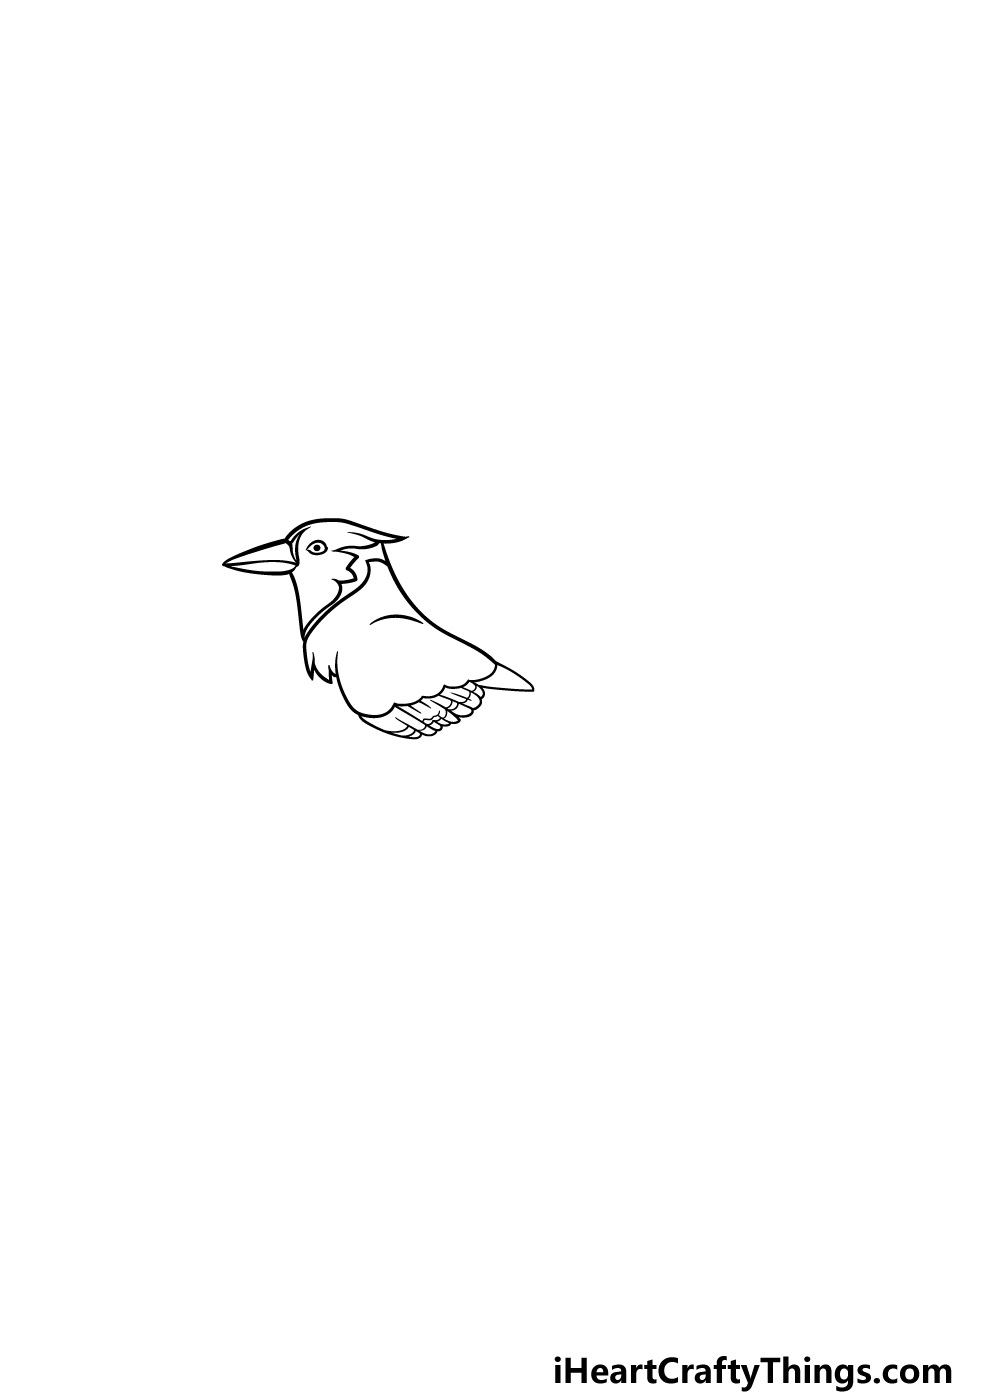
For this third part of our guide on how to draw a blue jay, we will be starting on the wing of the bird.
This first section of the wing will be separated into two parts. The first will be drawn with some bumpy lines.
Then, you can draw a series of longer, sharp shapes from this bumpy line for the feathers on the wing.
Once you have it looking as it does in our reference image then you’re ready to proceed!
Step 4 – Finish off the wing in this step
We will be finishing off the wing that you started in the previous step of your blue jay drawing in this part.
First, use some more sharp lines to create the outline of the wing extending backward and ending in a fairly sharp point.
Then, we will be adding lots of feather details inside of the wing to finish it off. These feather details can be drawn using a combination of straight and curved lines.
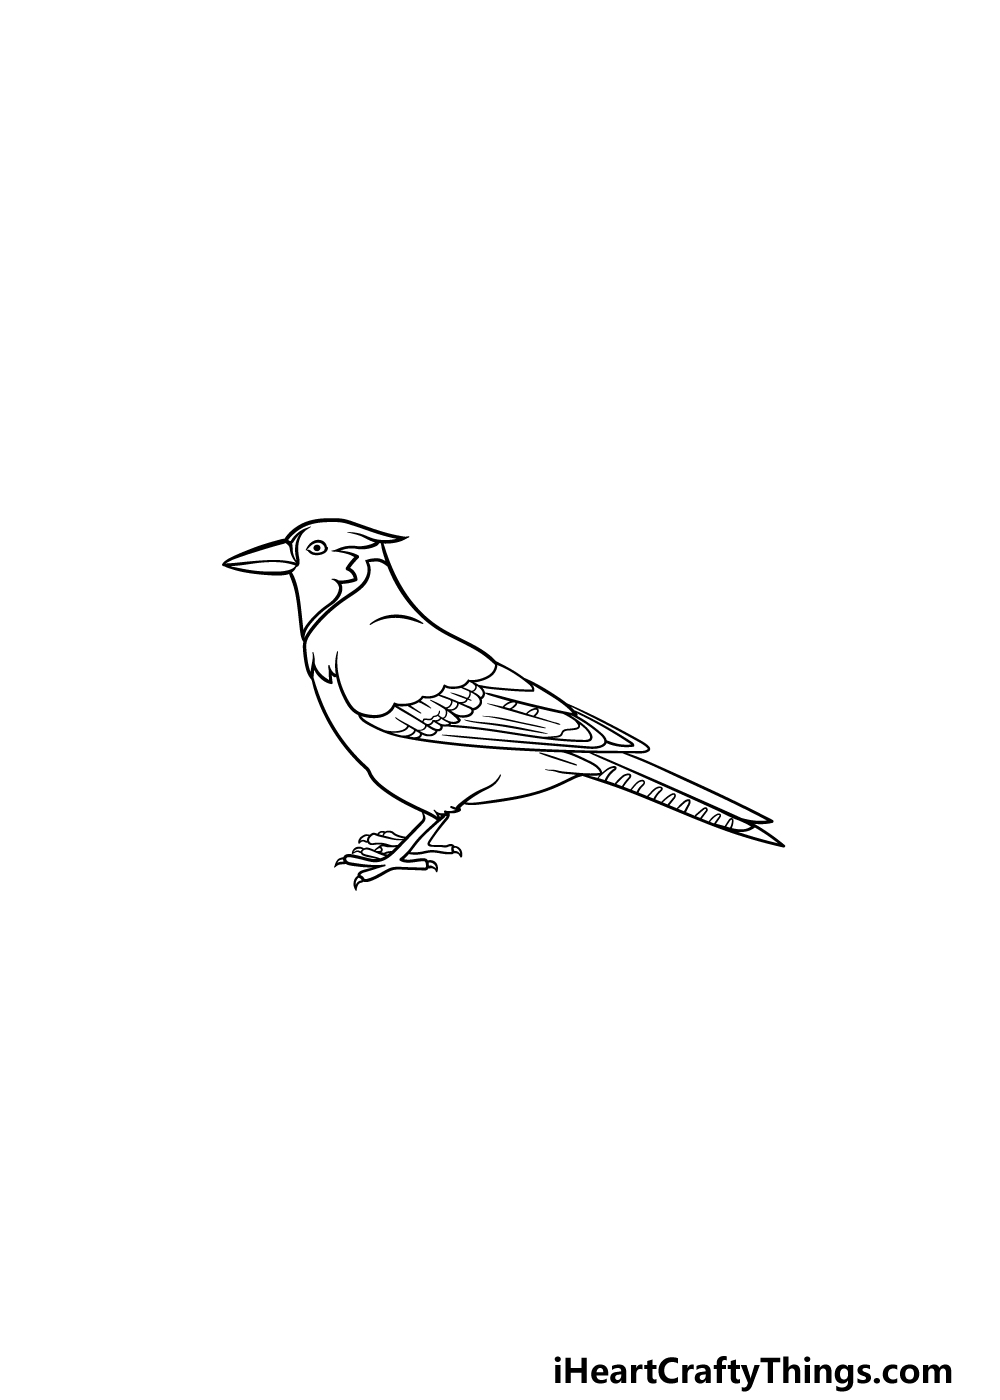
Step 5 – Draw the belly and tail of the blue jay in this part
We will be adding the final elements and details to your picture in the next few steps of this guide on how to draw a blue jay.
In this part, we will be focusing on the lower portion of the bird along with the tail. The belly of the bird will be drawn using some more curved yet smooth lines.
There will be a small portion at the bottom that is drawn with a more jagged line, as this is where the leg will be poking out of.
Then, we will be drawing the tail of the blue jay. The tail will be drawn using some straight lines, and then we will be drawing some small, pointy shapes in a line on the tail for some decoration on the tail.
If it sounds complicated, the reference image will show you how it should look!
Then we have just a few more final touches before you color in your picture.
Step 6 – Now, add the legs for your blue jay drawing
This blue jay drawing of yours is already looking incredible! In this part, we will add the final touches to the picture before the final part.
The main element of this step is to add the thin legs underneath the blue jay. These will be drawn with more straight, smooth lines, and there will be some claws at the ends of the toes.
That will finish off the details in this guide, but feel free to add any of your own! You could draw a background to show where this blue jay is hanging out, and you could even draw more birds and animals if you’re feeling ambitious.
These are just a few ideas, but be sure to get creative with it and see what you come up with!
Step 7 – Finish off your blue jay drawing with some color
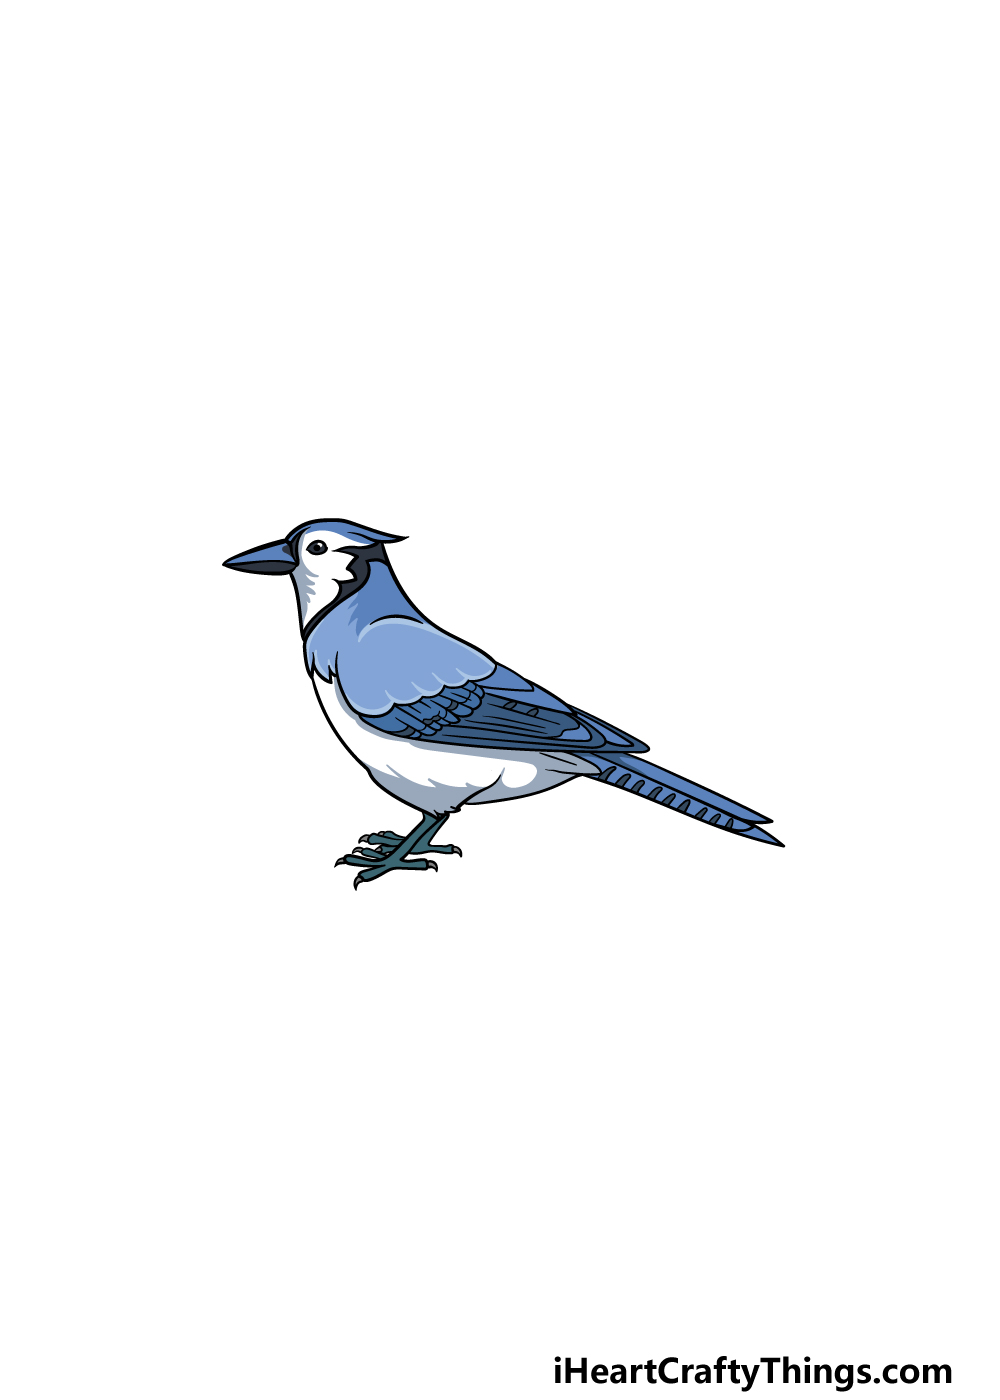
You have arrived at the final step of this guide on how to draw a blue jay, and this is the one where you can have a great time coloring your artwork.
As is suggested by the name, a blue jay will typically have a lot of blue in its color scheme, but this is contrasted by some white in their coloring as well.
These are the colors we went with in our example image, so this can be a reference point if you would like to keep the colors looking natural.
You could also change up the colors for your own variation, and you can also get some unique looks for the colors by using different art mediums and tools.
We can’t wait to see how you finish off this picture!
3 More tips to make your blue jay drawing easy!
Make your pretty blue jay sketch look even better with these fun tips!
We tried to make this drawing of a blue jay nice and detailed in order to make it look more realistic. When something is drawn in this realistic style, it can sometimes make the drawing more difficult.
If that is the case, then you could try drawing this blue jay in a different style. What style you choose would depend mostly on what you feel comfortable drawing.
If you like drawing in a simpler cartoon style, then that could be adapted for this blue jay. You could still use the guide we created but change a few details to fit your chosen art style.
If you’re finding this blue jay drawing to be too tricky, you can prepare the drawing a bit more in order to make it more manageable. The best tool you could use for this would be a pencil.
First, use your pencil to draw a rough outline of the blue jay. Then, you can add more layers that incorporate more details and elements of the design.
You can even start with basic shapes that form the outline of the bird. This way, you don’t have to worry about getting it right the first time.
Once you are happy with how it all looks, you can add finer feather details and other more subtle elements. Finish off with your pen and then you’re good to go!
Finally, you could also use pictures of real birds to help you with making this blue jay sketch much easier.
If you search online, you will find many images of blue jays that are both photographic and drawn.
Try to find one that is posed fairly similarly to our example in order to make creating the drawing a lot easier.
Using these extra pictures along with our reference images will make drawing the outlines, proportions and smaller details easier.
These would also be handy if you want to try and create alternate poses.
Your Blue Jay Drawing is Complete!
With the final details and colors complete, you have finished this guide on how to draw a blue jay!
There were some small details and tricky lines in this guide, so we hope that by having some steps to follow it was made easier and more fun than you may have expected.
We know that you will do a great job if you take it slowly and do your best!
When you would like to embark on your next drawing journey, be sure to check out our website for more drawing guides! Be sure to visit often, as we upload new guides frequently.
We would be thrilled to see your beautiful blue jay drawing, so once it’s done please be sure to share it on our Facebook and Pinterest pages.