There are millions of talented music artists in the world, but few manage to reach such incredible success at such a young age as artist Billie Eilish has.
Combining a darker edge with some interesting and unique music and lyrics, she has managed to gain followers and fans of all ages from around the world.
She also has a distinct visual style, and that can make it fun to learn how to draw Billie Eilish in order to express admiration for this singer.
Drawing a real person can be a challenge, however, and a guide showing you how to do it can be essential.
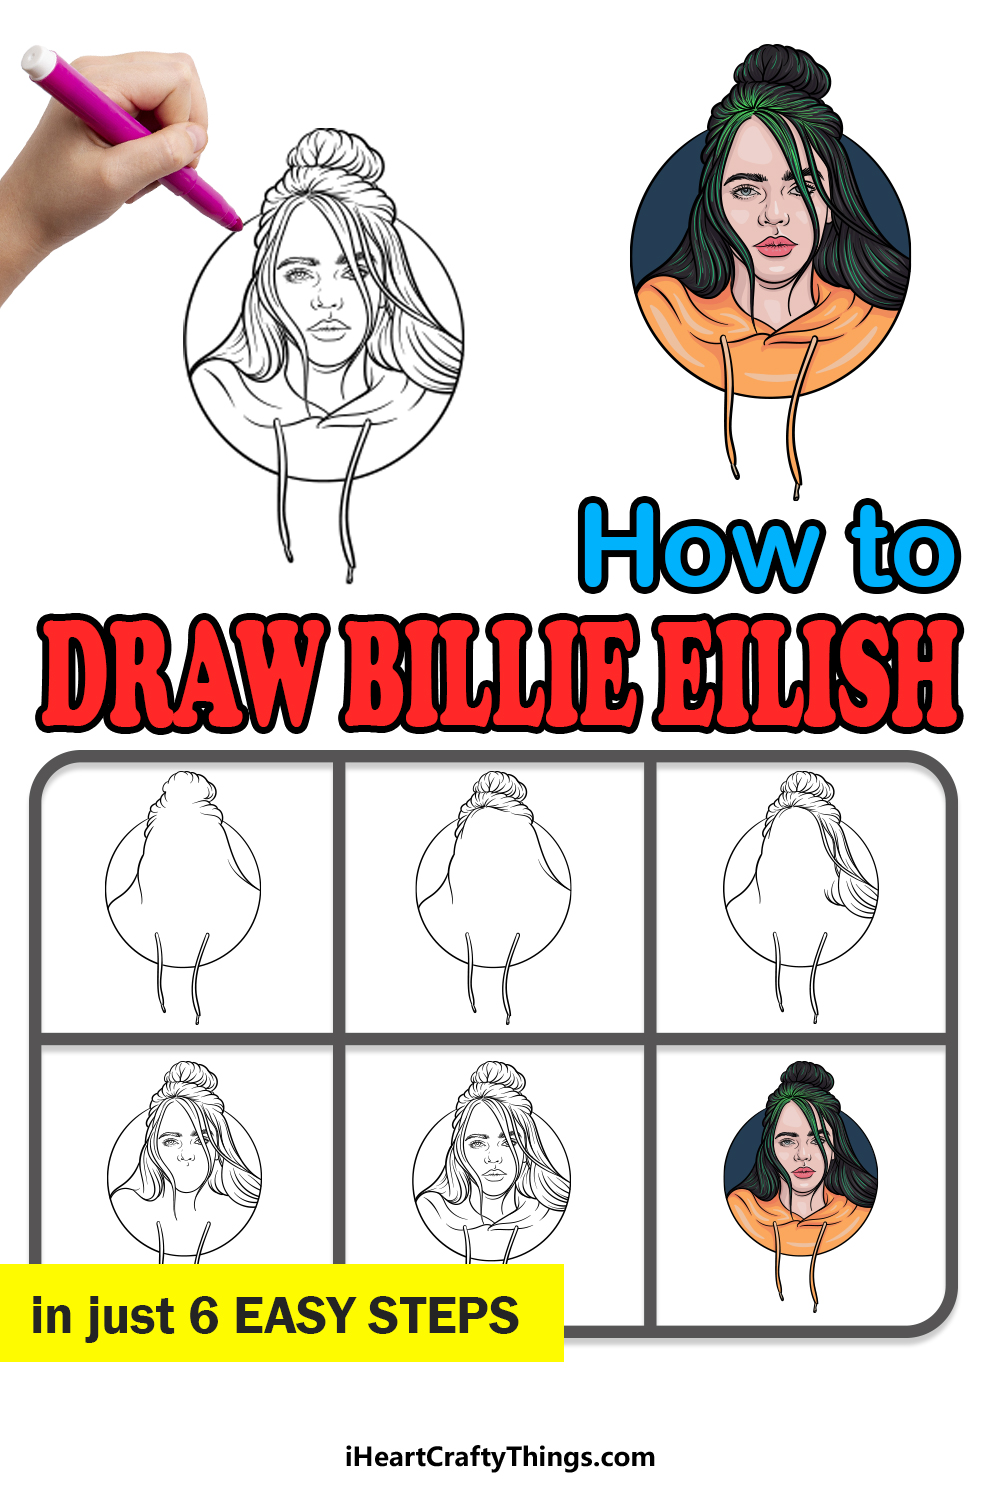
This step-by-step guide on how to draw Billie Eilish will show you how to create some great art featuring this talented artist!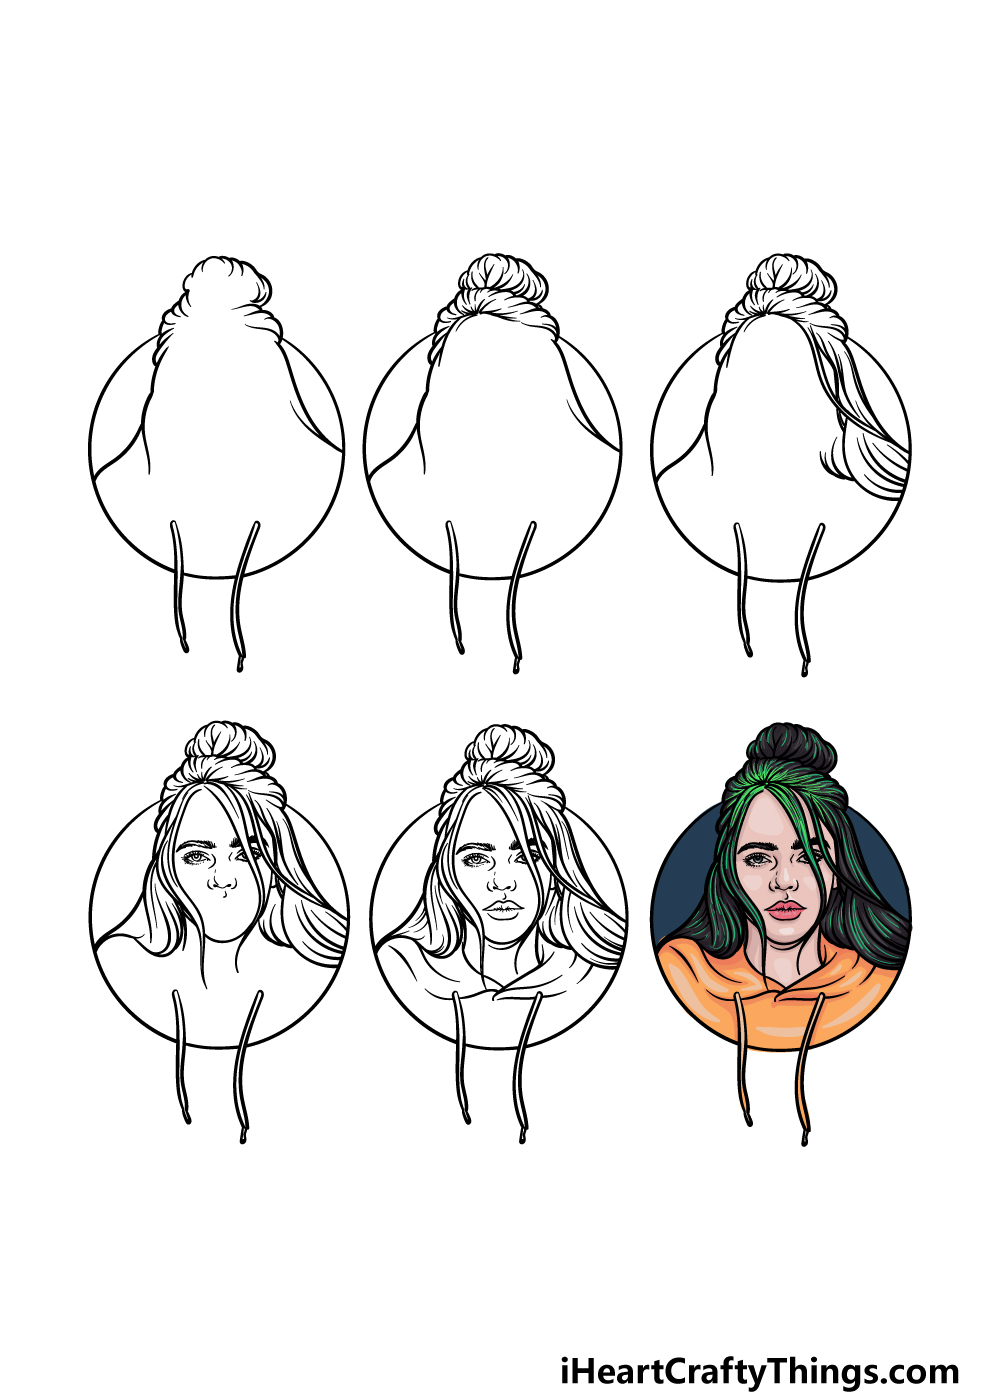
How to Draw Billie Eilish – Let’s Get Started!
Step 1
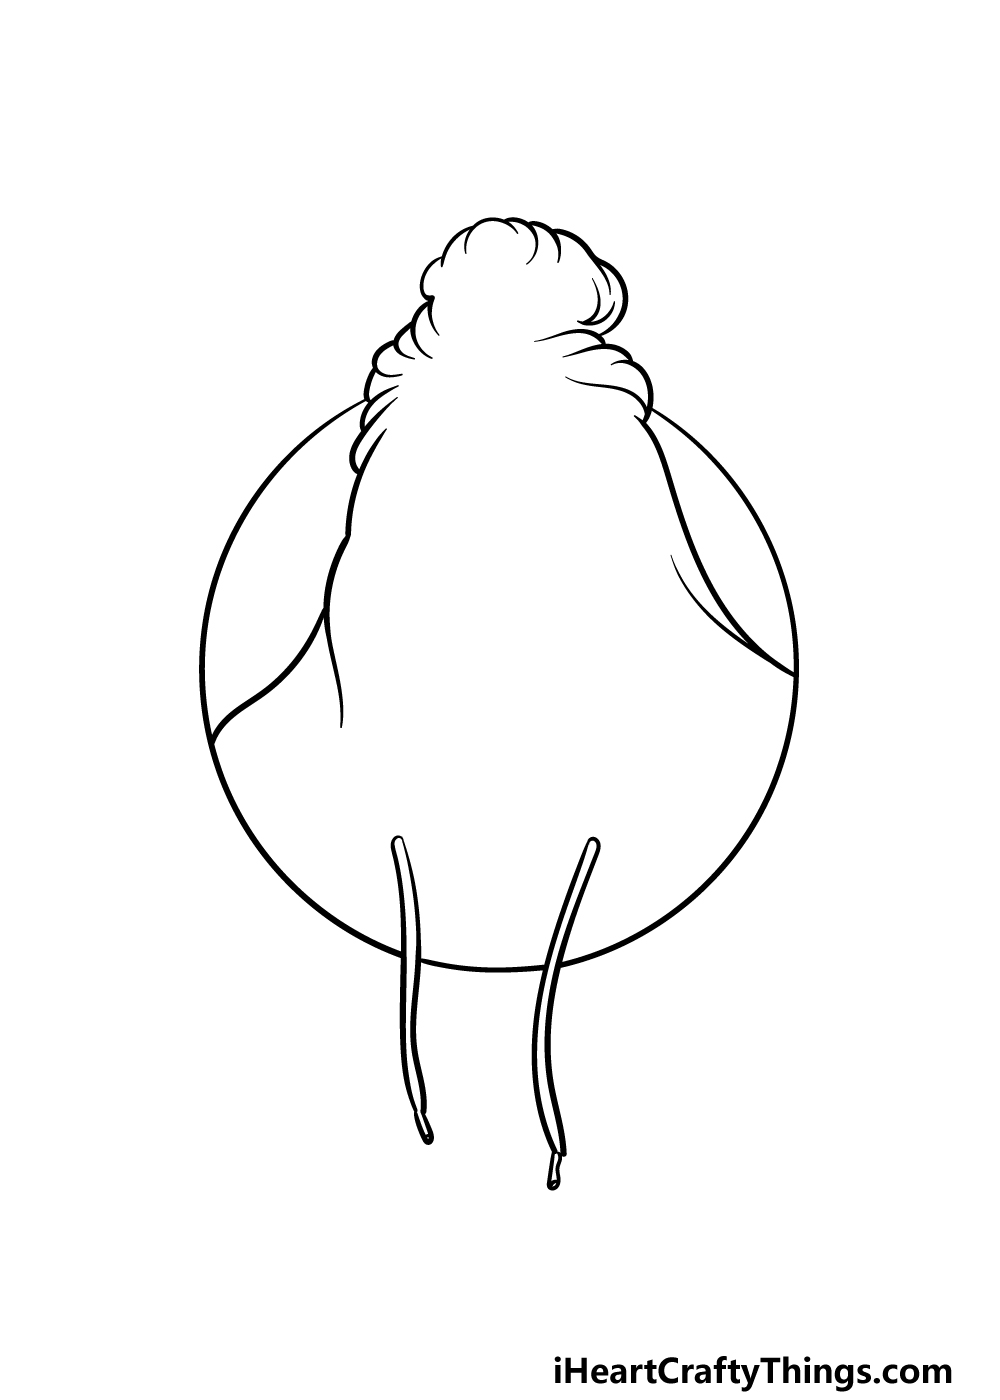
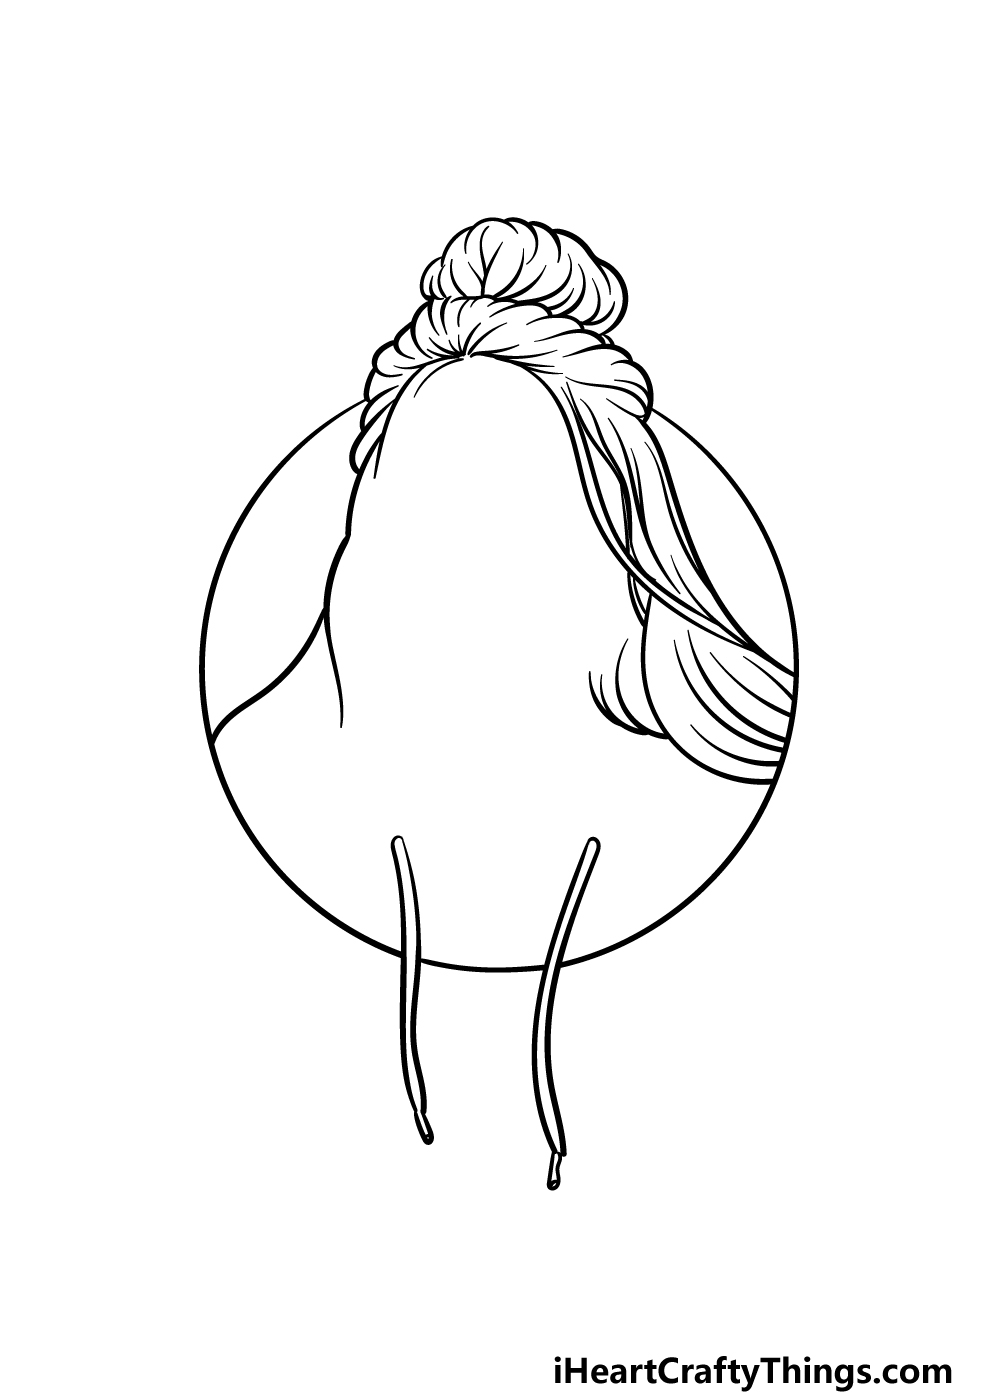
For this first step of our guide on how to draw Billie Eilish, we will start with the outline of her face.
She will also be inside of a large circular shape to make the image more stylistic, but the top of her head will poke out of the top of this circle.
The strings from the hoodie she is wearing will also dangle down the outline of the circle.
With that in mind, we can start to draw the outline of her hair. We will be using some curved lines connecting to one another for the top bun of her hair.
Then, we will draw those dangling strings that we mentioned earlier. Then you’re ready to move on to step 2!
Step 2 – Next, draw some details for her hair bun
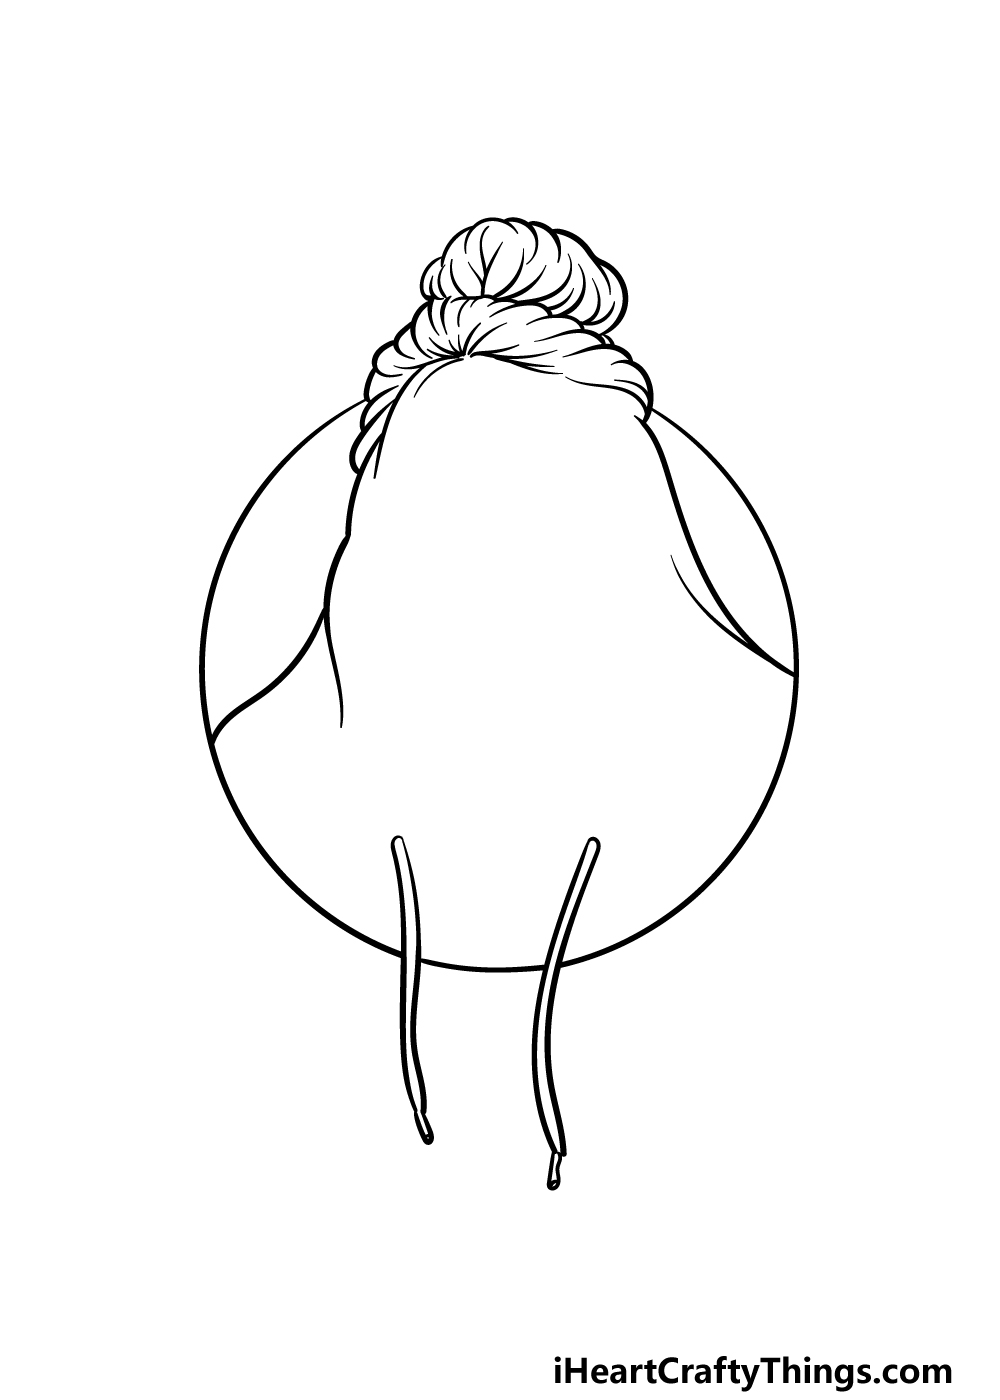
Now that you have started the outline, you can start to add some details in this step of your Billie Eilish drawing.
To do this, simply add some more of those curved lines that you used to start the outline of the hair that you started in the previous part of the guide, and these will help to give the hair more detail.
Step 3 – Draw some of her hair dropping down
You’ve finished the bun for now, so for this next part we will draw her hair flowing down in this step of our guide on how to draw Billie Eilish.
To draw these lines, you can add some more curved lines, but these will be longer and flowier than the ones for the bun.
There will also be a long, curvy strand coming down from the center of the hair that drops down over the rest of her hair.
Then, you’ll be ready to start drawing her facial details in the next step, so let’s proceed!
Step 4 – Now, draw some of her eyes and some more of her hair

Drawing human eyes can be difficult in the best of times, so you’ll want to follow the reference picture closely for this part of your Billie Eilish drawing.
First, use some more curved lines to create more strands of hair dropping down from the top of her hair, and then we can start on the eyes.
Use some small shapes for her eyebrows above her eyes. Then, we will start on the eyes themselves.
Billie has got very distinctive eyes, so as we mentioned earlier you will want to try and replicate the lines as they appear in the reference picture.
Finally for this step, use some small, thin lines for her nose.
Step 5 – Finish off the facial details and touches of your Billie Eilish drawing
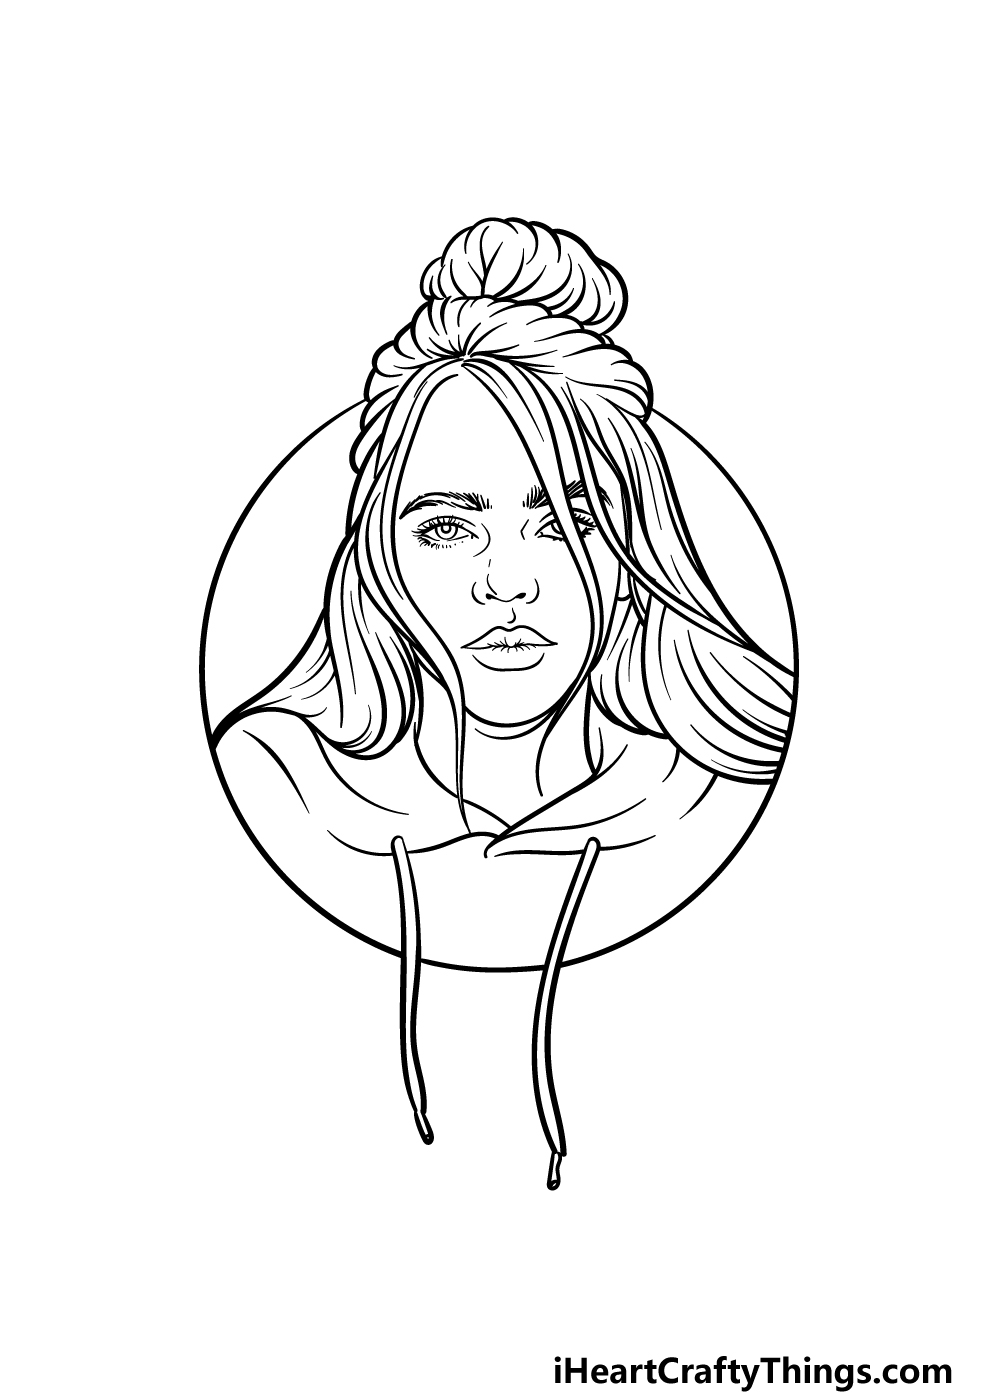
This step of our guide on how to draw Billie Eilish will have us adding the final details and touches before you color her in. First, we will be using some rounded lines for her lips beneath her nose.
You can then finish off her face by adding her chin beneath it. When drawing, try your best to follow the proportions of the face as defined in the reference picture.
That will finish off the face of Billie, and then we will use some wavy lines for the hoodie that she is wearing.
That will finish off the details of your Billie Eilish drawing, but you don’t have to stop there! You could also add some background details like some shapes or other pictures to personalize it even more.
Perhaps you could draw some covers from your favorite album of hers or change up some of your own details!
How will you finish off this drawing before adding some colors to it?
Step 6 – Finish off your Billie Eilish drawing with some color
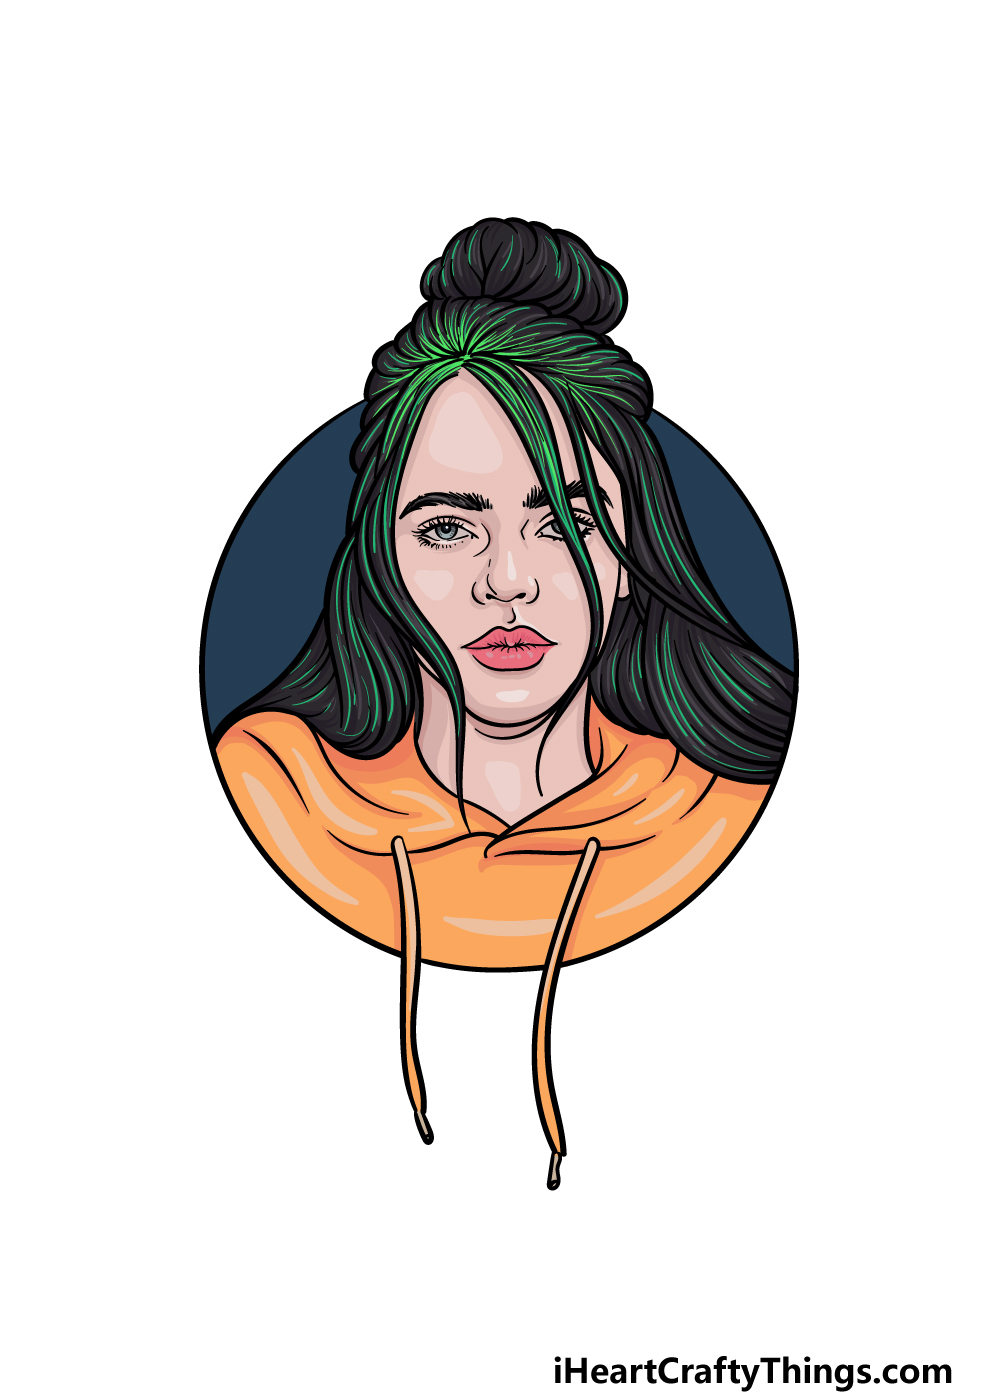
We will finish off this Billie Eilish drawing with some amazing colors in this final part of the guide!
Billie often sports a look of black hair with green highlights, and that is what we went for in our reference image.
Then we used some orange for her hoodie along with some dark blue for the background in the circle.
These are the colors we chose for our example, but you could also change up the colors that you use for it!
This is your chance to incorporate your favorite colors to make this image pop! You have many different options for art mediums and tools you can use to achieve the colors you want as you finish off this picture.
We can’t wait to see the incredible colors and mediums you use to finish off the image!
Do this to take your Billie Eilish drawing to the next level
Make this iconic pop star look ready for the stage with these tips for your Billie Eilish sketch!
For this Billie Eilish drawing, we focused on just her head and shoulders for the portrait. Once you have finished the drawing, you could add some more to the image.
This could be some more of her shoulders and her chest, but you could draw as much as you want! You may even want to draw her entire body to create some fun poses.
You may want to use some pictures of Billie Eilish online to help you if you want to draw her in more realized poses.
Many fans around the world like to watch and study Billie’s fashion sense, and you could give her a new look in this drawing of Billie Eilish!
There are many ways you could act as her fashion designer with this picture. For one, you could use real looks that she has had over the years to style her here.
Or you could go for an entirely unique appearance for her instead. Which approach will you take?
When you have decided on whether you should draw more of her or change her style, you could also try out some backgrounds.
This is another case where you could use Billie Eilish’s concerts or appearances to help you while you draw. Or you could imagine her in some of your favorite venues or places.
This is a great way to make this picture look even more unique!
Finally, the best way to bring this Billie Eilish sketch to life is with some colors. Not only the colors, but also the art tools and mediums you use can really bring your vision to life.
We showed you one set of colors you could use, but there are many colors she has used in her appearances through the years.
When you have picked the colors you would like to use, you can then pick the art tools and mediums you would like to bring them to life!
Your Billie Eilish Drawing is Complete!
We hope that you enjoyed this step-by-step guide on how to draw Billie Eilish.
Drawing real people can be really difficult, so our aim was to show you that it can be not only easy but also tons of fun to draw this amazing artist!
Hopefully we achieved both these goals for you as we broke it down into smaller, more manageable steps.
Now you can show us your love for this artist by how you add your own details and elements. We suggested a few ideas that you could try, but this is your chance to get creative with it and show us what you can do!
When you’re ready for more, we have tons of guides featuring classic characters, other real people and dozens of cool objects for you to enjoy. We upload more guides often, so be sure to check in often!
Once your Billie Eilish drawing is complete, we would be thrilled to see it! Please share it on our Facebook and Pinterest pages for us to admire.