Every year, there are many new toys and other products that come out, each hoping to become the next big thing.
It’s quite rare that a new creation will achieve this goal, but every so often a new toy will become a huge sensation. Beyblades are an example of one of these toys.
These spinning tops not only look really cool, but they have different attributes that allow them to compete against each other in tense battles.
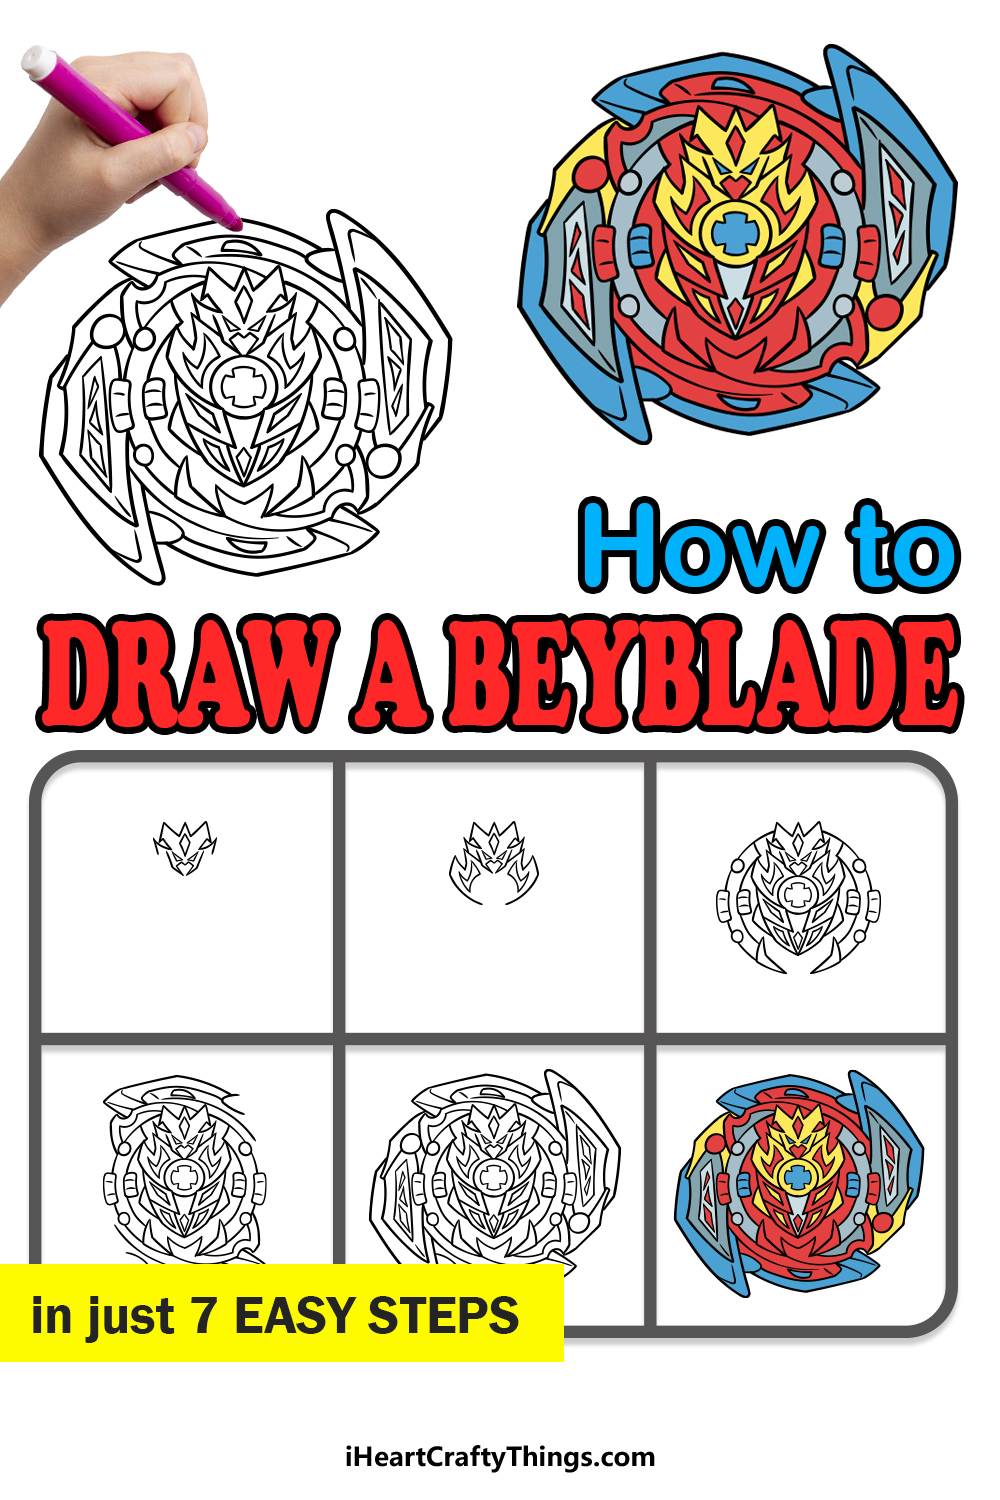
Learning how to draw a Beyblade is a great way to imagine what your very own Beyblade design may look like.
This is the tutorial for anyone who loves these awesome competitive spinning tops.
So get ready as we prepare to take this step-by-step guide on how to draw a Beyblade in just 6 easy steps for a spin!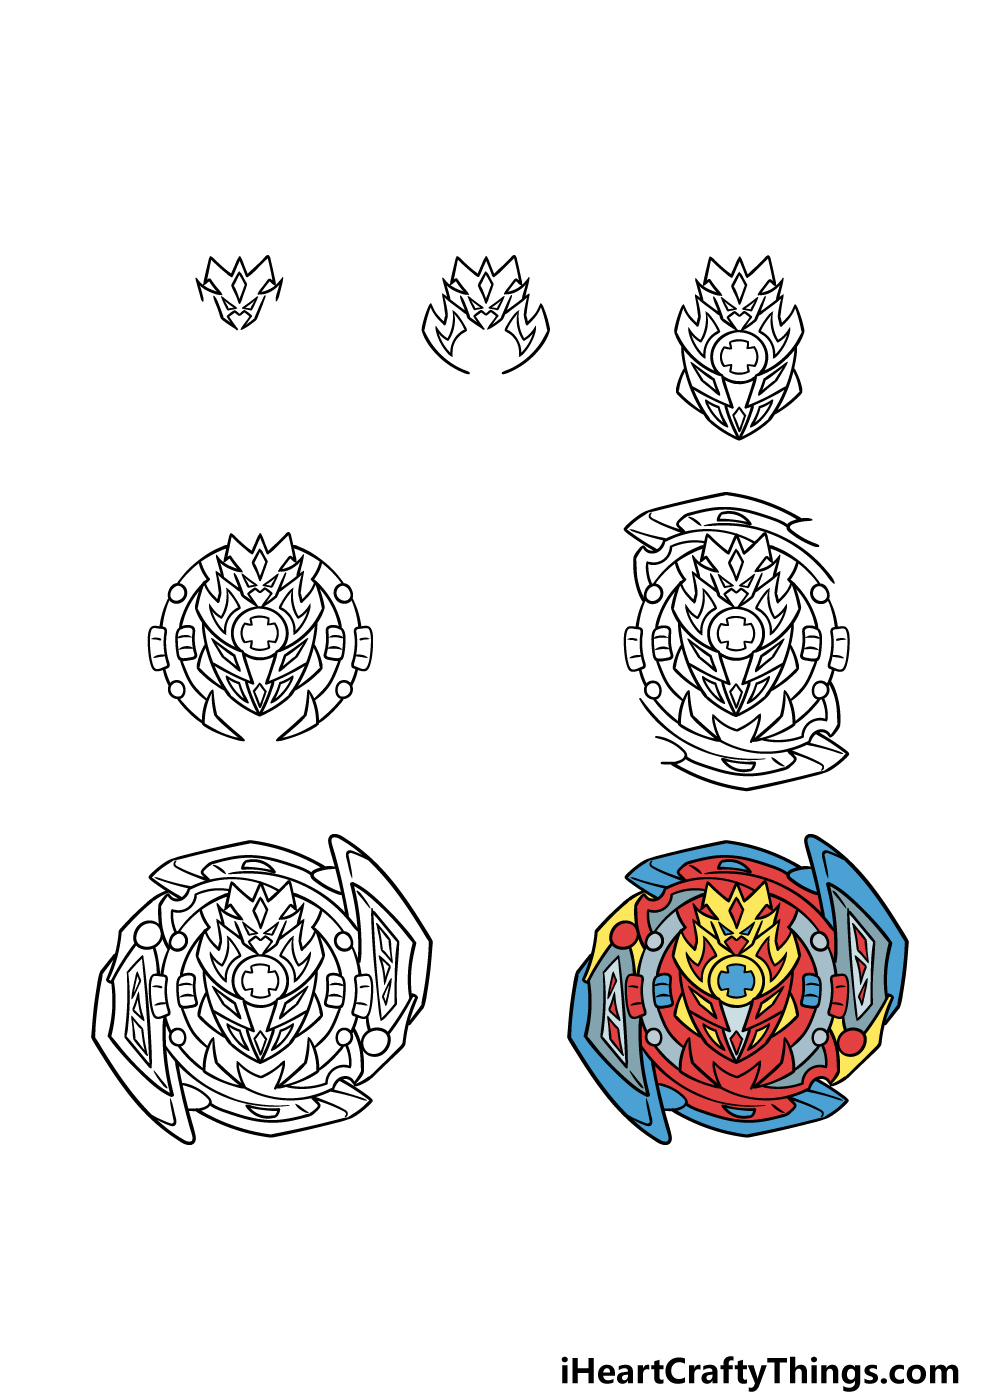
How to Draw A Beyblade – Let’s Get Started!
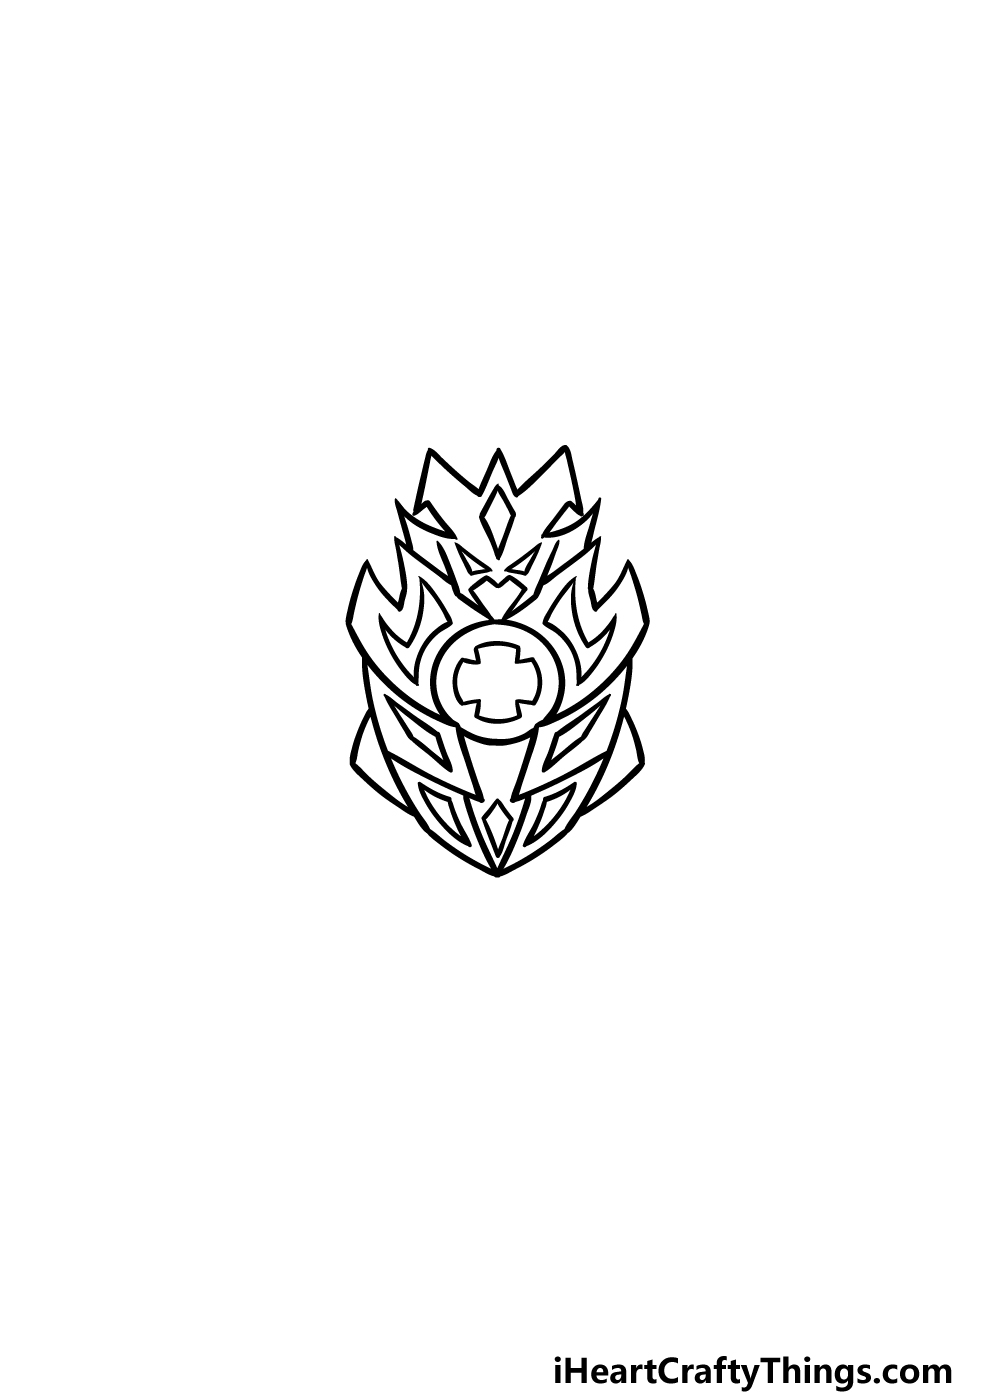
Step 1
The design that we will be drawing in this guide on how to draw a Beyblade may look complicated and intimidating, but there’s no need to worry!
We shall be breaking it down into smaller steps to make sure you won’t get overwhelmed throughout the process.
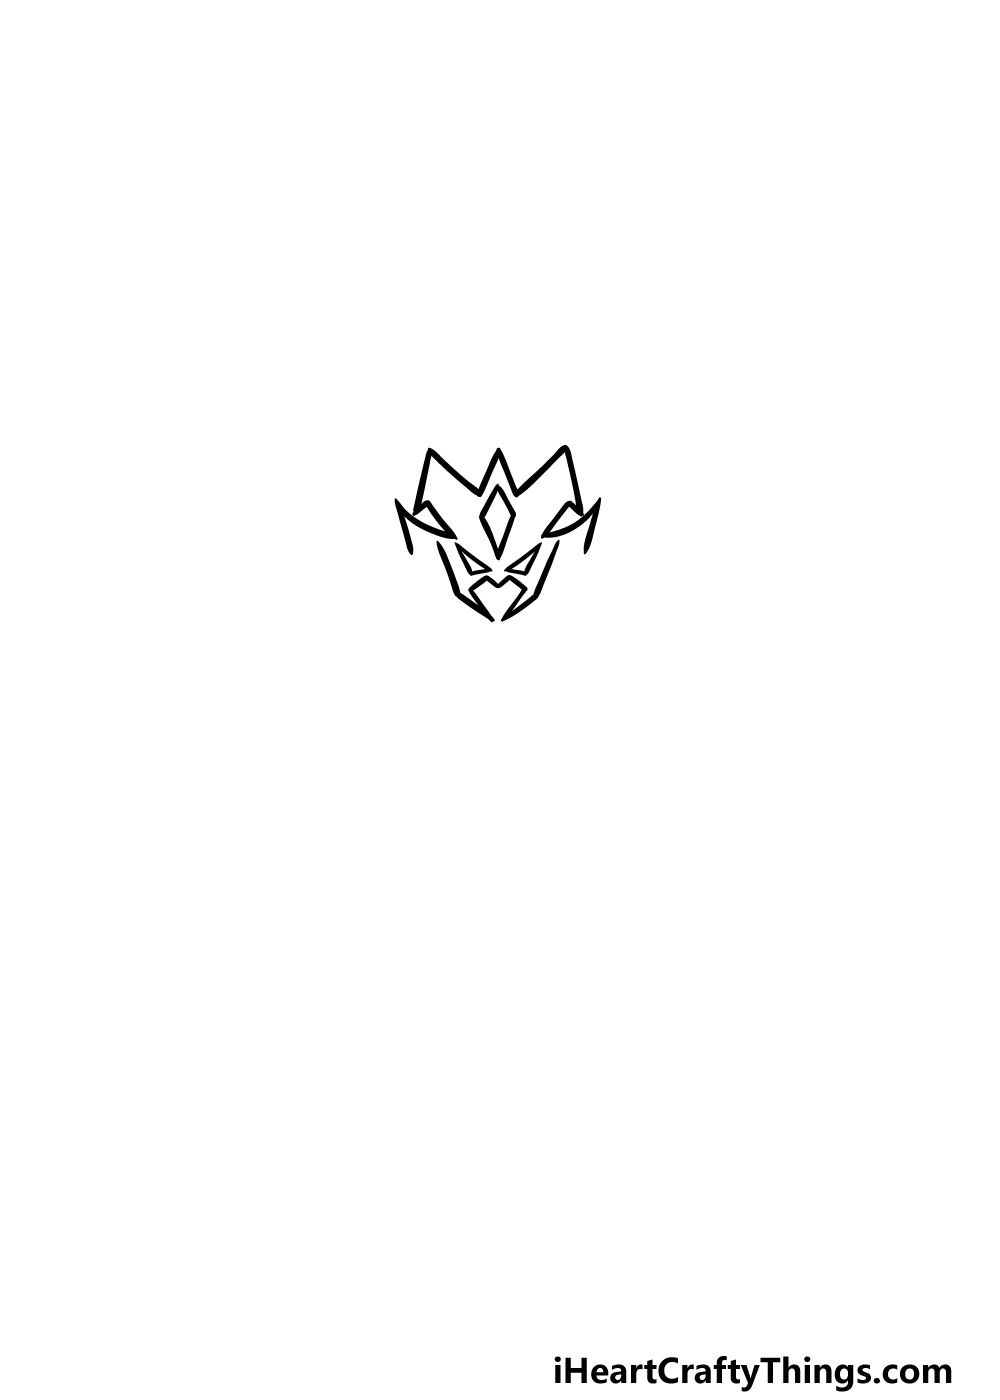
Beyblades often have the likeness of robots and other characters worked into their designs, and we will begin with the head of one of these characters.
This head will serve as the focal point of this design.
First, draw some small triangular shapes for the eyes of the character. Then, we will be drawing some angular lines around these eyes to form the pattern of the head and face around it.
Once you have drawn this part as it appears in our reference image, we can move on to step 2.
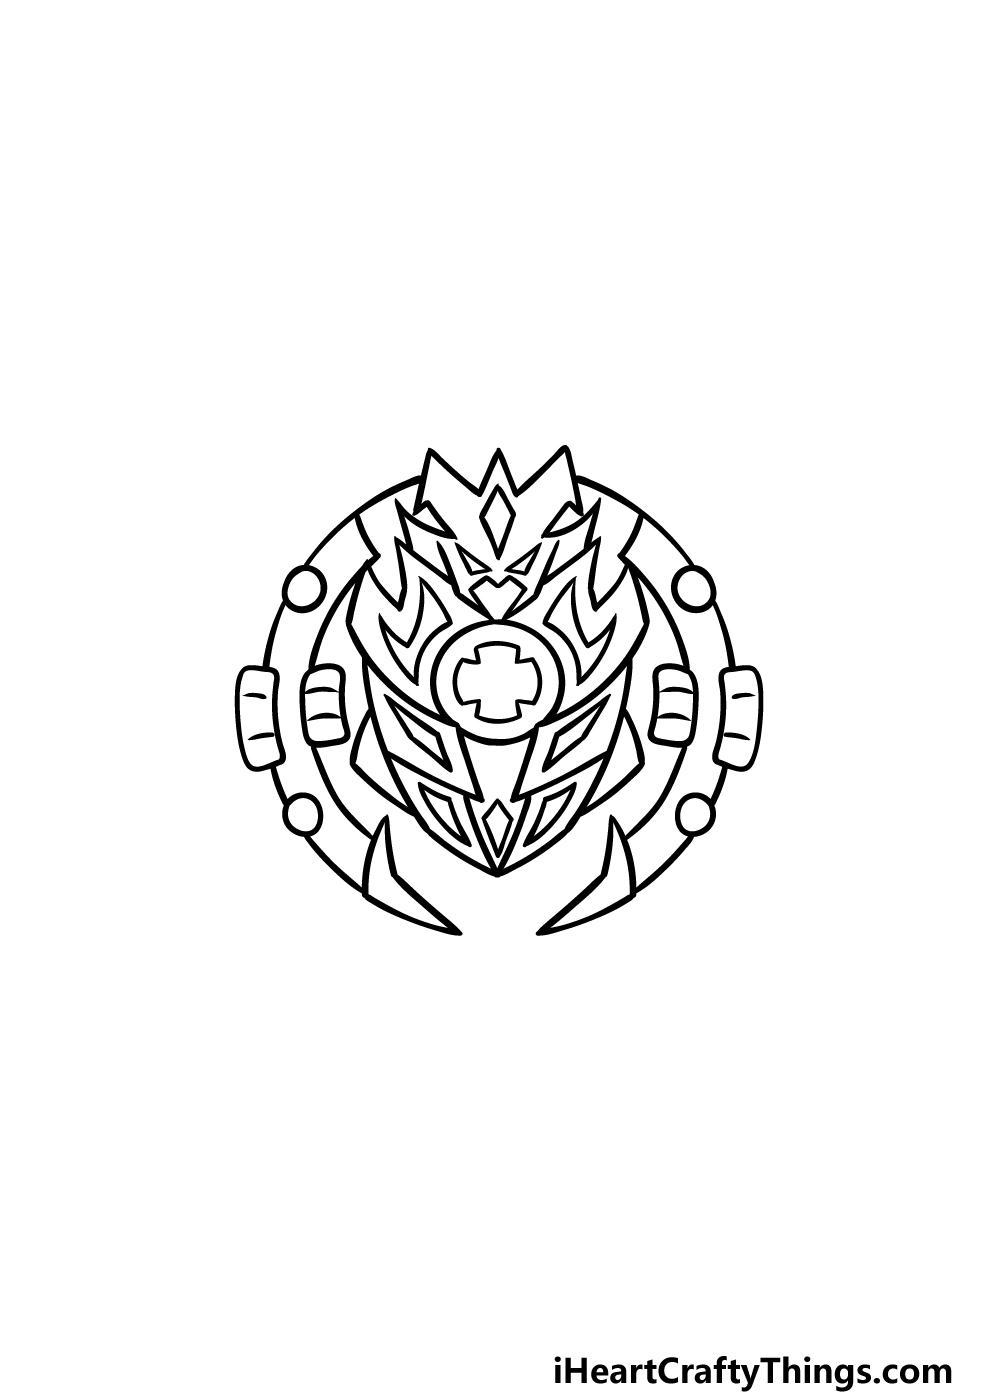
Step 2 – Now, add some more to the design on the Beyblade
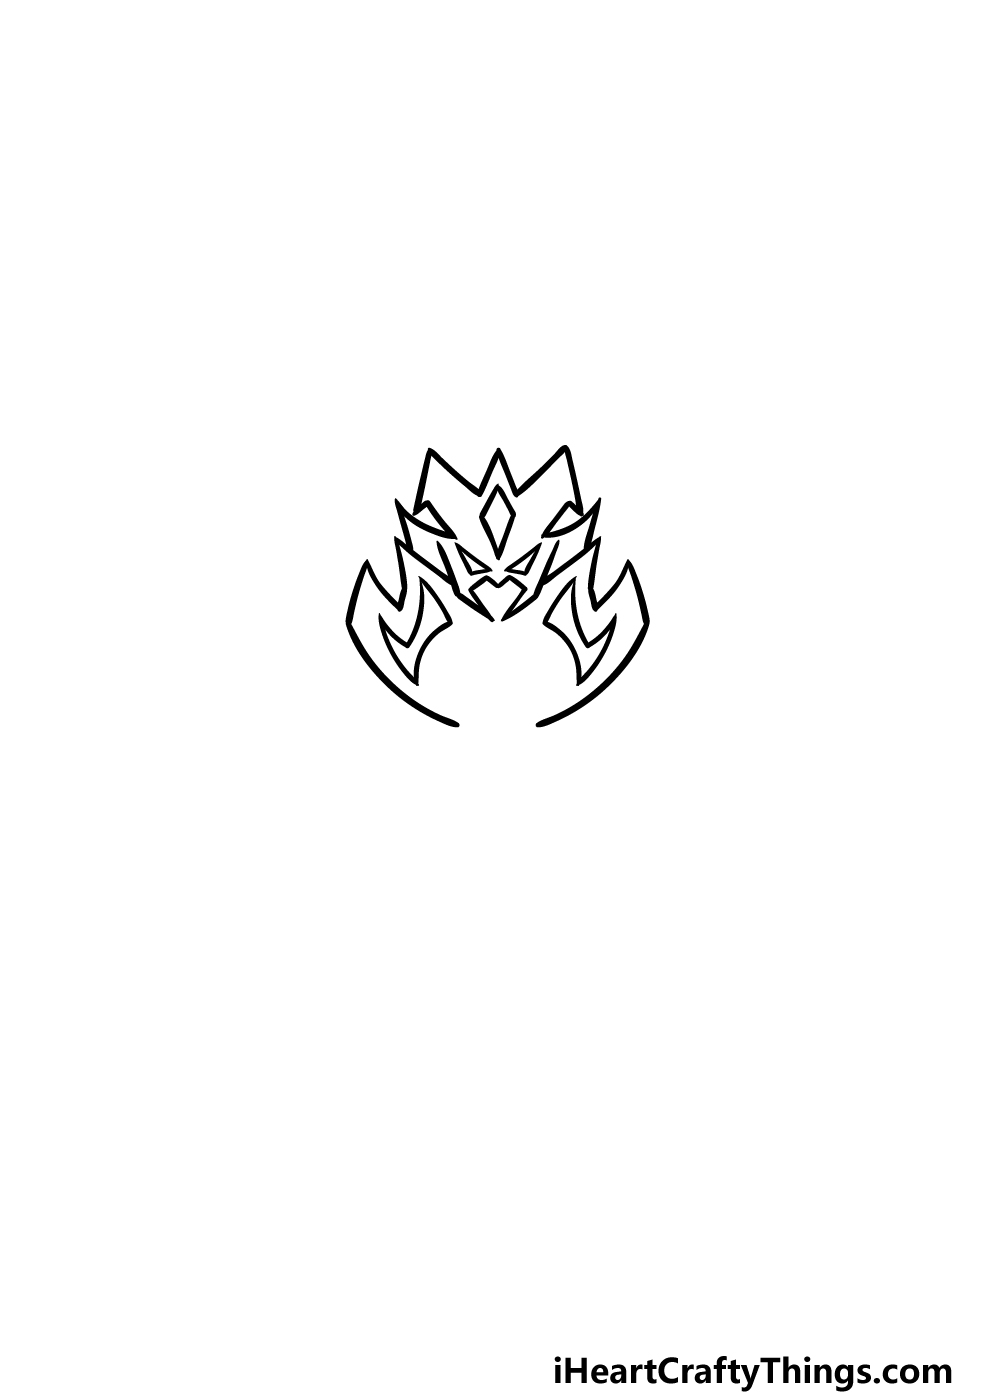
As you proceed with this Beyblade drawing, we will start to add more and more layers to the design.
It can be easy to get lost in such an intricate design, so try your best to take it slowly and follow the reference picture as closely as you can.
For this section, we will be drawing more curved and sharp lines coming down from the head that you drew in the previous part.
We will then be adding some more angular, pointy shapes into these sections as is shown in the reference picture.
Step 3 – Add a body section for this design
The lines and shapes that we have been drawing so far in this guide on how to draw a Beyblade have been pretty curved and sharp.
This third part will see you adding some more rounded shapes to the mix to create a body for the character woven into the pattern design.
Start by drawing a circular shape into the space left over at the center of the design that you drew in the last step. Then, draw a shape that has four thick, short arms to form a thick cross.
Below that, we will then draw four angular shapes connecting to one another, and these will have smaller shapes inside of them along with other small shapes connecting to their edges.
Step 4 – Next, draw the rounded section around the design
We will again be adding some more rounded elements to your Beyblade drawing in this next step.
There will be a thin, rounded shape going around the sections that you have drawn so far. They will almost form a complete circle, but there will be a small gap at the base of it.
Add some smaller rectangular and circle shapes around this circle shape, and then we can proceed.
Step 5 – Add the top and bottom sections of the Beyblade
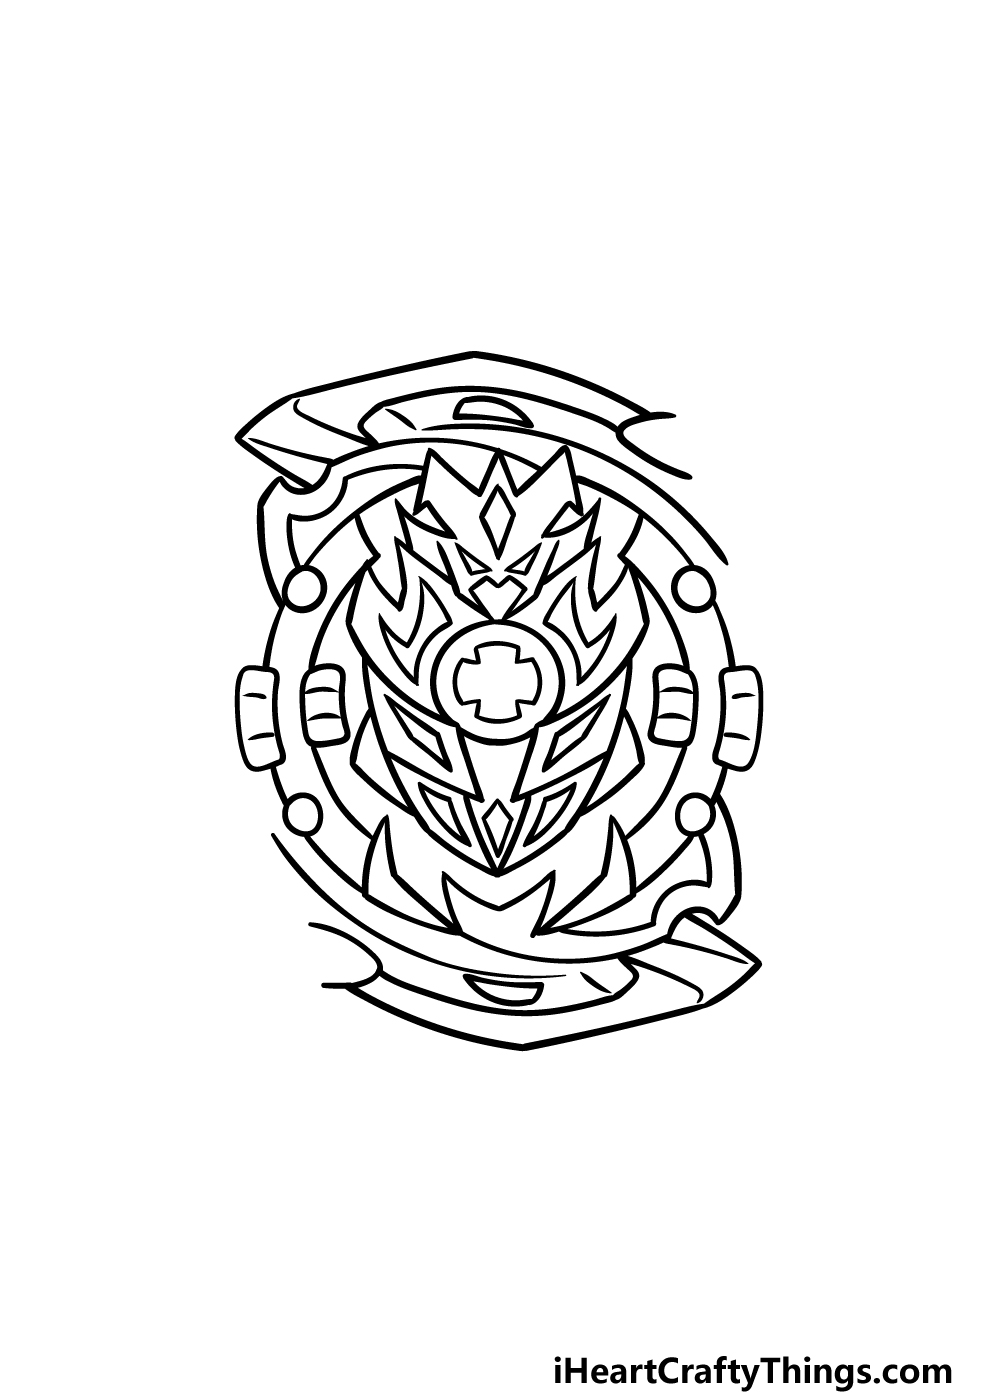
We will be moving on to the final elements in the next few steps of this guide on how to draw a Beyblade! In this part, we will be drawing some sections above and below the Beyblade.
These will be quite rounded, and they can be drawn with lots of curved lines and shapes.
This is another step where you should try your best to replicate the lines exactly as they appear in our reference image!
Then we can move on to the final details in the next step.
Step 6 – Now, add the final elements of this Beyblade
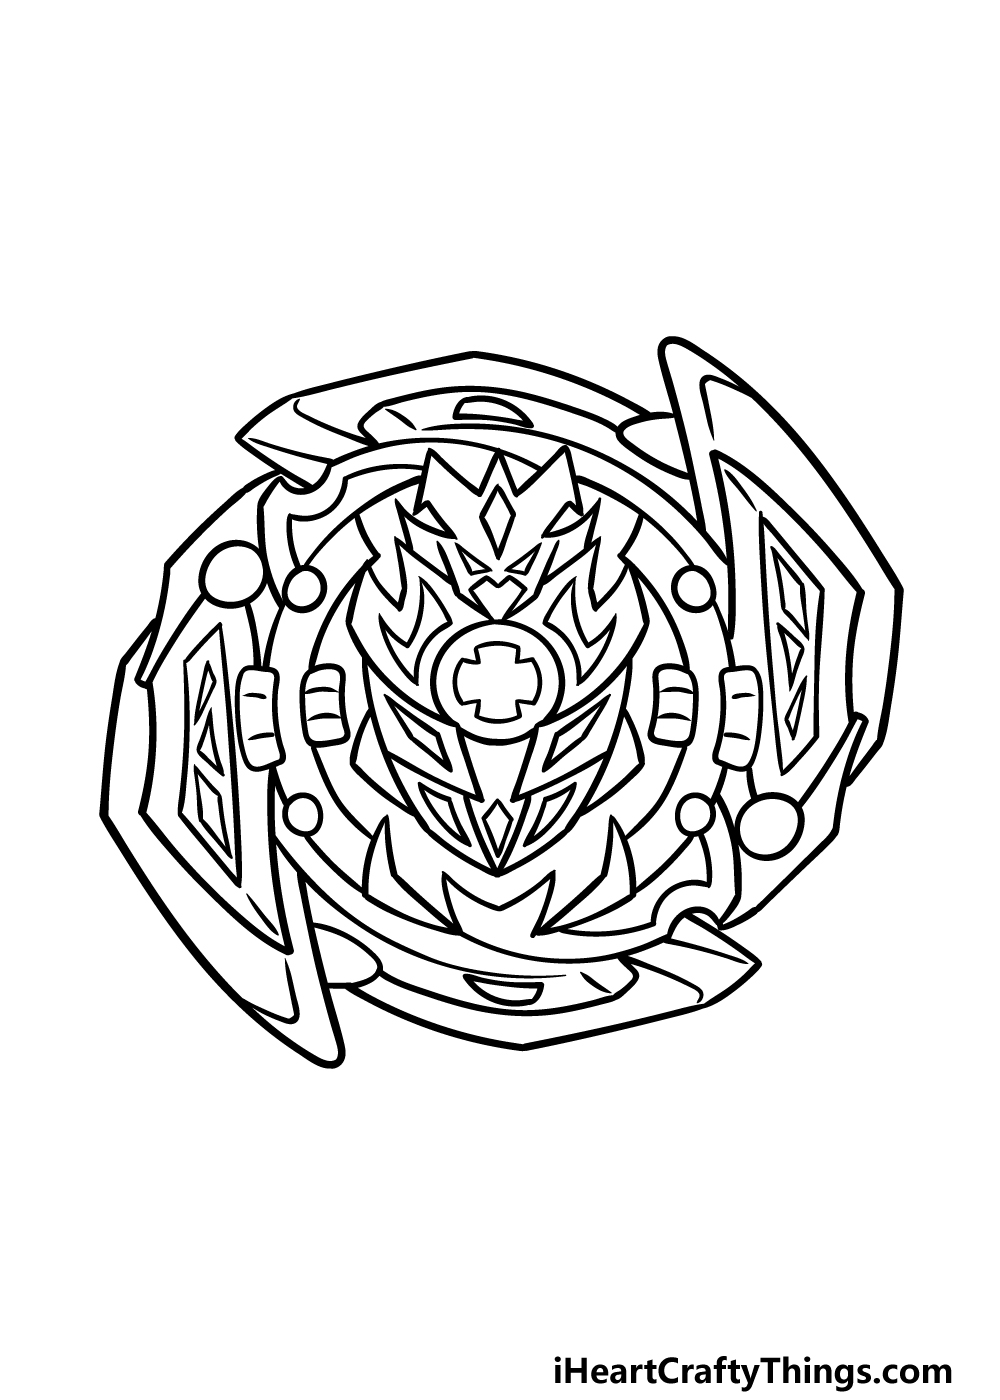
The edges of a Beyblade will often jut out in angular shapes, and this helps them to attack their opponent Beyblades. We will be drawing these sections in this part of your Beyblade drawing.
These sections will go on the left and right sides, and they will jut out and have some triangular, angular shapes within them.
You could also change up some of the details or add some more elements to create your own unique design!
Another idea would be to draw a background that could show which Beyblade this one will be up against.
Step 7 – Finish off your Beyblade drawing with color

Now you’re ready to finish off by adding some colors in this final step of our guide on how to draw a Beyblade!
Beyblades will usually be brightly colored, and this is the approach that we went for in our example image.
We used colors like blues, reds and yellows to really make this one stand out. What colors do you think would best suit it?
Using high-precision art mediums like colored markers or thin-tipped brushes would be recommended due to the fine details of this design. What colors and mediums will you choose?
Do this to take your Beyblade drawing to the next level
Take a spin at making this Beyblade sketch even more unique with these 4 tips we have for you!
Any fan of Beyblades will know that they will be spun in competitive matches, and you could portray that in this drawing of a Beyblade.
Doing this could be as simple as drawing some curved lines around the Beyblade. These kinds of lines would help to create a sense of motion around the Beyblade and make it look like it’s spinning.
The more lines you add, the faster it will appear to be spinning! What other details could you use to create a sense of motion?
Whether you went with our first suggestion or not, it could also be fun to add a background. There are many different places that could be turned into a Beyblade arena, so you would have many options.
It could be something like a school playground or a backyard. Or, you could imagine the ultimate Beyblade arena and show the ideal place you would like to do a Beyblade battle!
A Beyblade can come in many different designs, and this Beyblade drawing shows just one of many. Once you have the hang of this particular Beyblade, you could customize it to look like a unique one.
This new design could be based on an existing Beyblade you may own, or you may even want to create your very own unique design!
Do you have a Beyblade design in mind that you could use for this image?
Finally, you could also use colors to make your Beyblade sketch more unique. This would go well with our previous suggestion, but you could also use this one if you kept the design as is.
We showed you some great colors you could use, but you may have other colors that you prefer over these. If so, you could use any of your favorite art tools and mediums to add these colors to the design.
Maybe you could draw a few and then experiment with some color variations!
Your Beyblade Drawing is Complete!
This guide on how to draw a Beyblade was no easy task to complete due to the many intricate details and design elements involved.
We hope that this guide helped to show you just how fun and easy it can be, however! You should be very proud of doing such a great job on it.
Now you can take it further by adding details, a background, color choices or even by creating your own unique Beyblade design by using what you’ve learned in this guide!
There is also more drawing fun to be had on our website. You can find some amazing drawing guides to enjoy there, and we have many more on the way.
Please also be sure to share your finished Beyblade drawing on our Facebook and Pinterest pages, as we would love to see how it turned out!