Bells can come in many shapes and sizes, and they can be used for a variety of different purposes.
They have been used in everything from emergency situations to schoolyards, festivals and as the calling card of town criers. Despite their simple function, it can actually be a bit of a challenge learning how to draw a bell.
It can be made much easier with the right guide to follow, and this happens to be that guide!
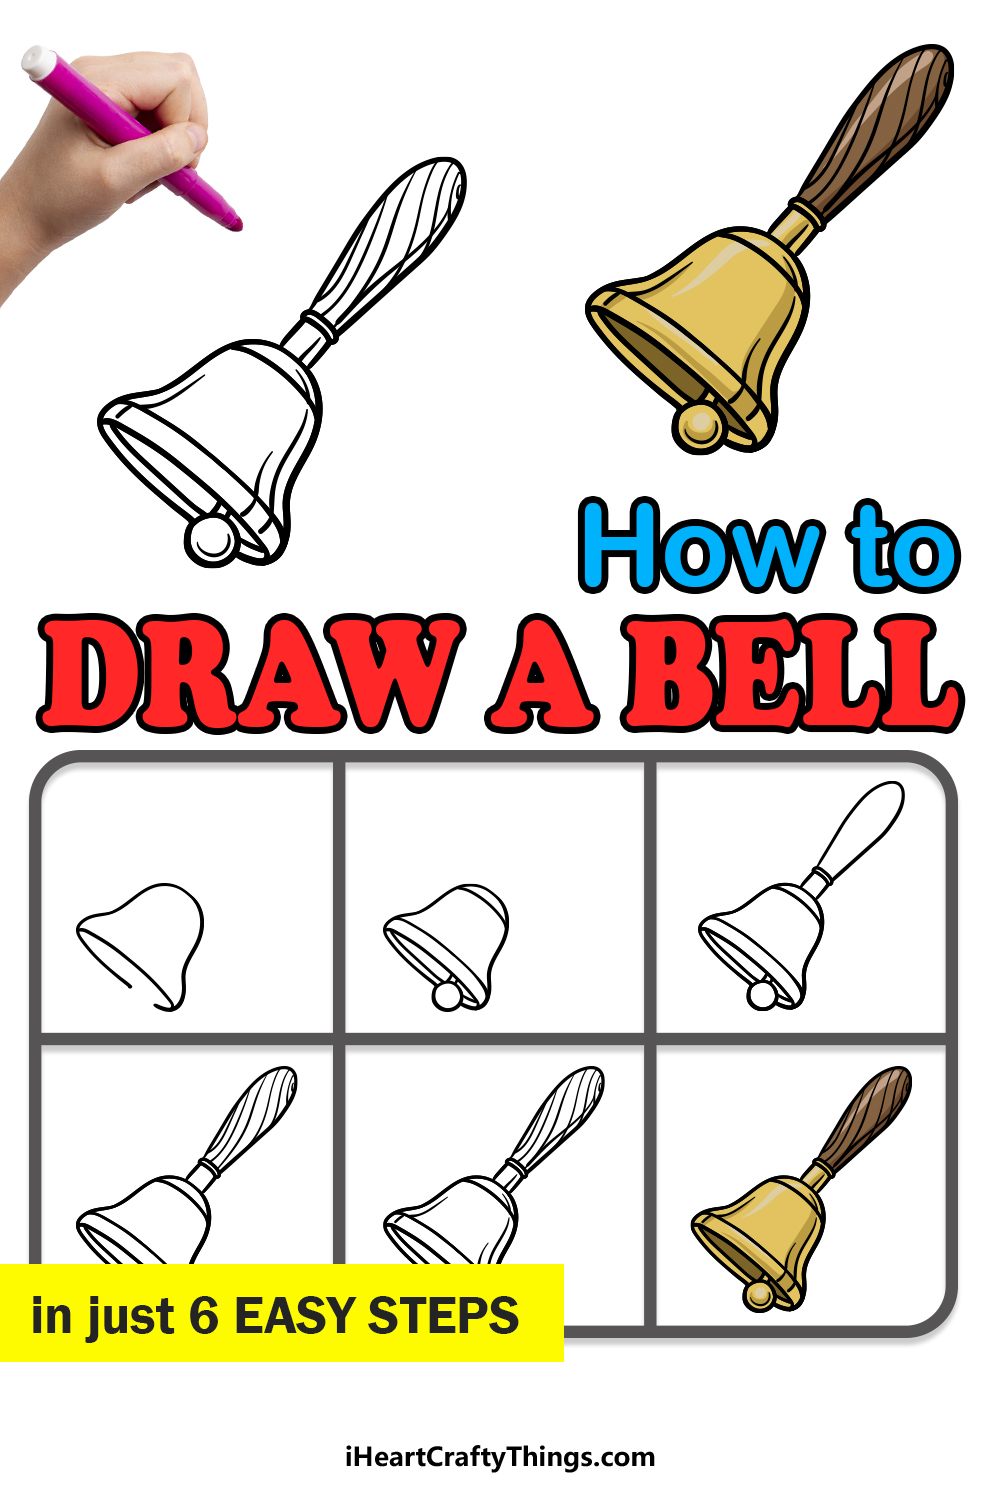
This step-by-step guide on how to draw a bell in just 6 easy steps will show you how easy and fun it can be!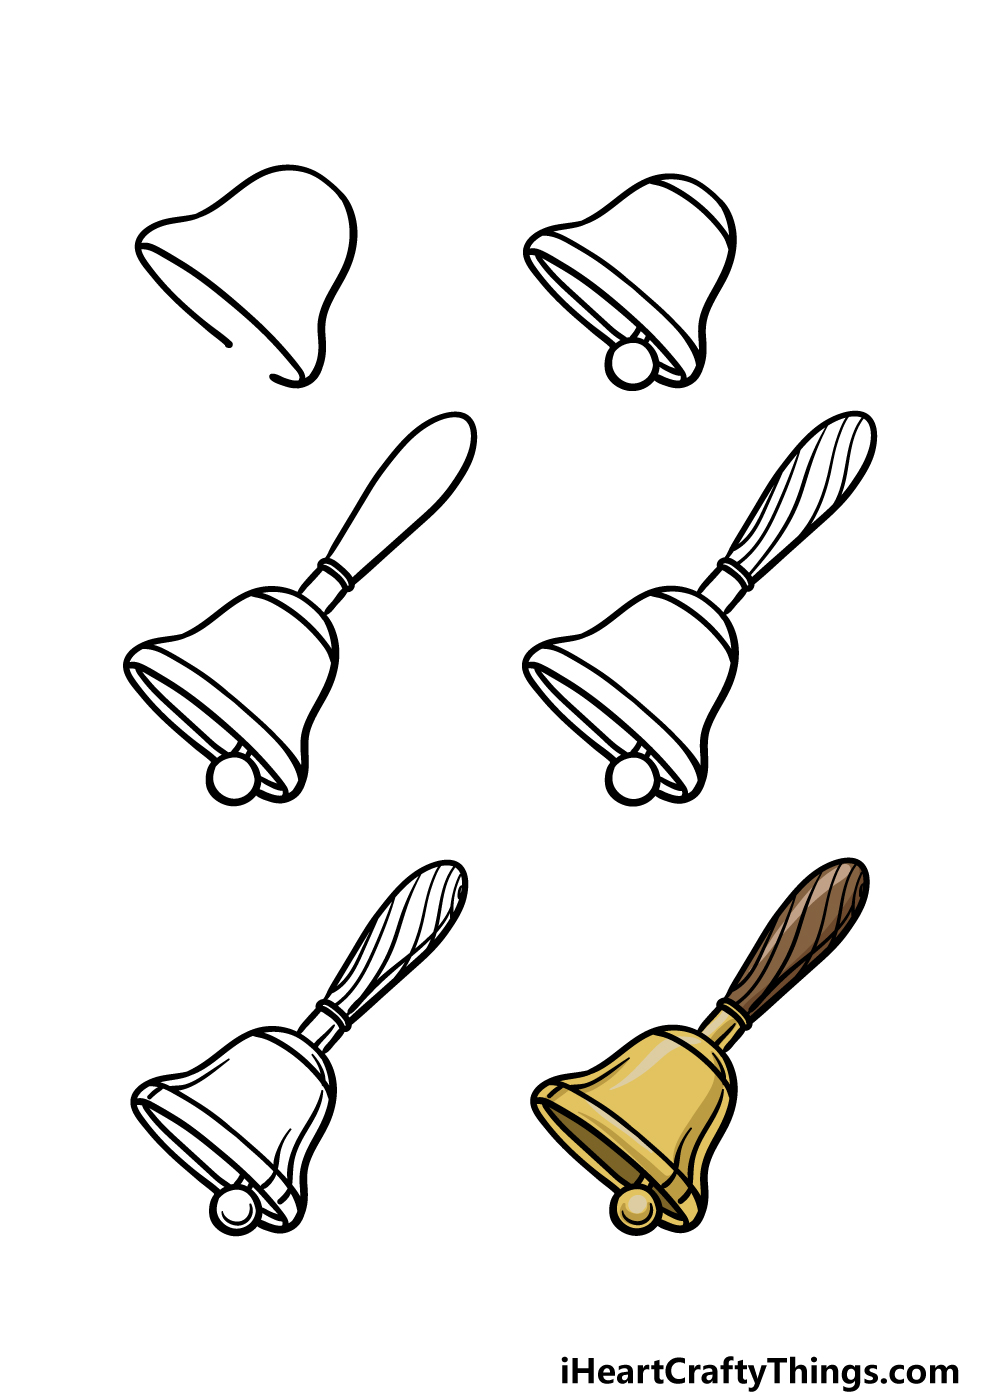
How to Draw A Bell – Let’s get Started!
Step 1
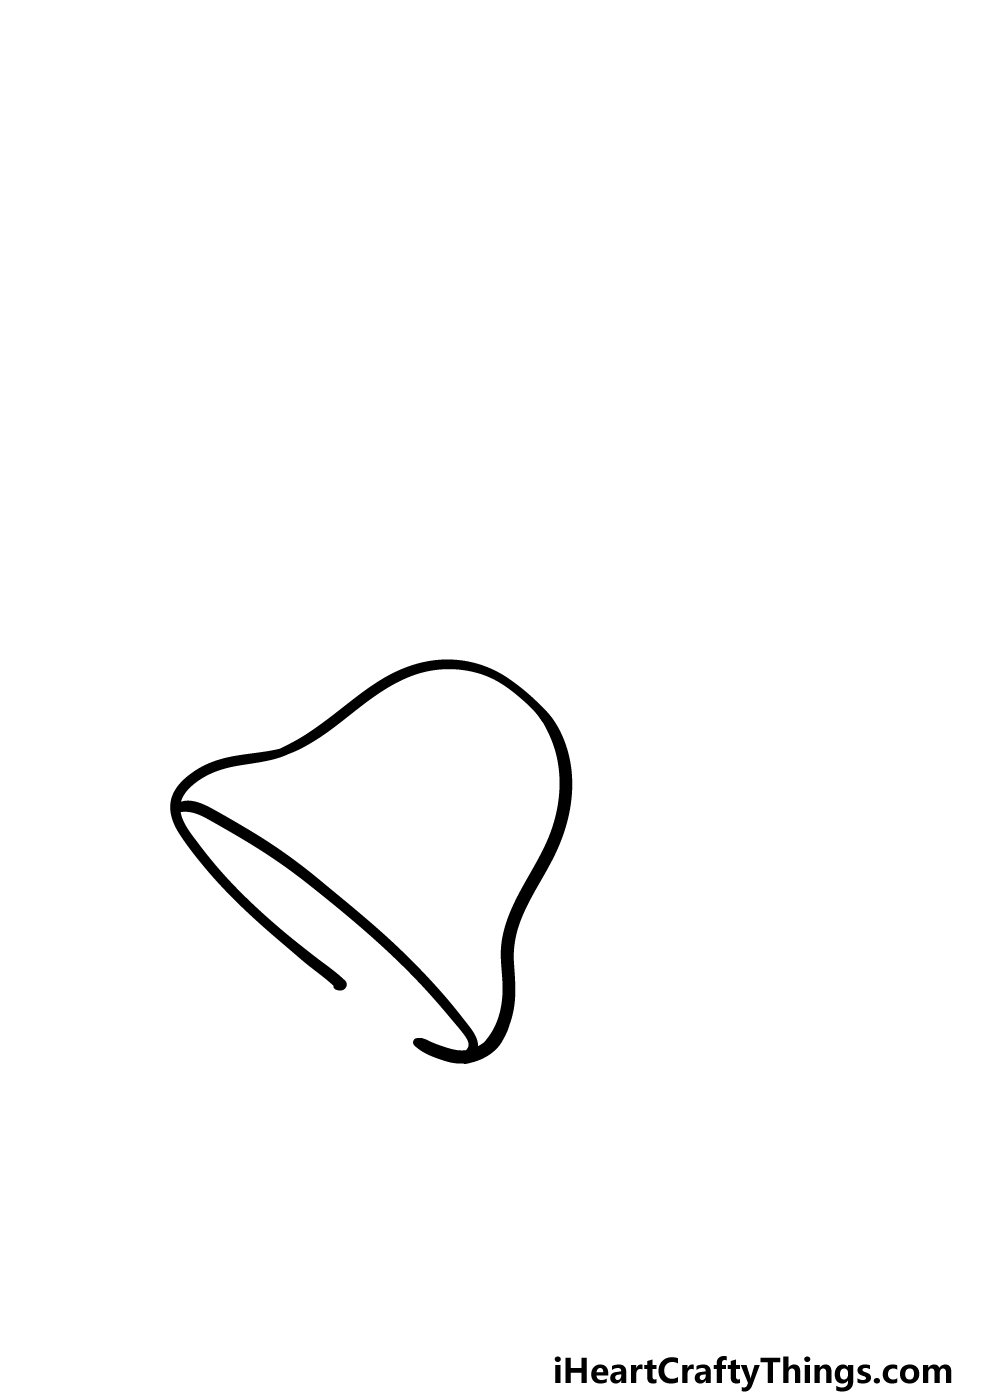
In this first part of our guide on how to draw a bell, we will start on the outline of the bell. We will be using a rounded line for the top of the bell, and that will bulge out into the mouth of the bell.
Then, draw a curved line horizontally along the bell to finish off the mouth of the bell. At the very bottom of the bell, there will be a gap that you will be drawing the clapper of the bell into later.
That will set you up for the next few steps, so let’s move on to step 2!
Step 2 – Next, draw the clapper and some detail for the rim of the bell
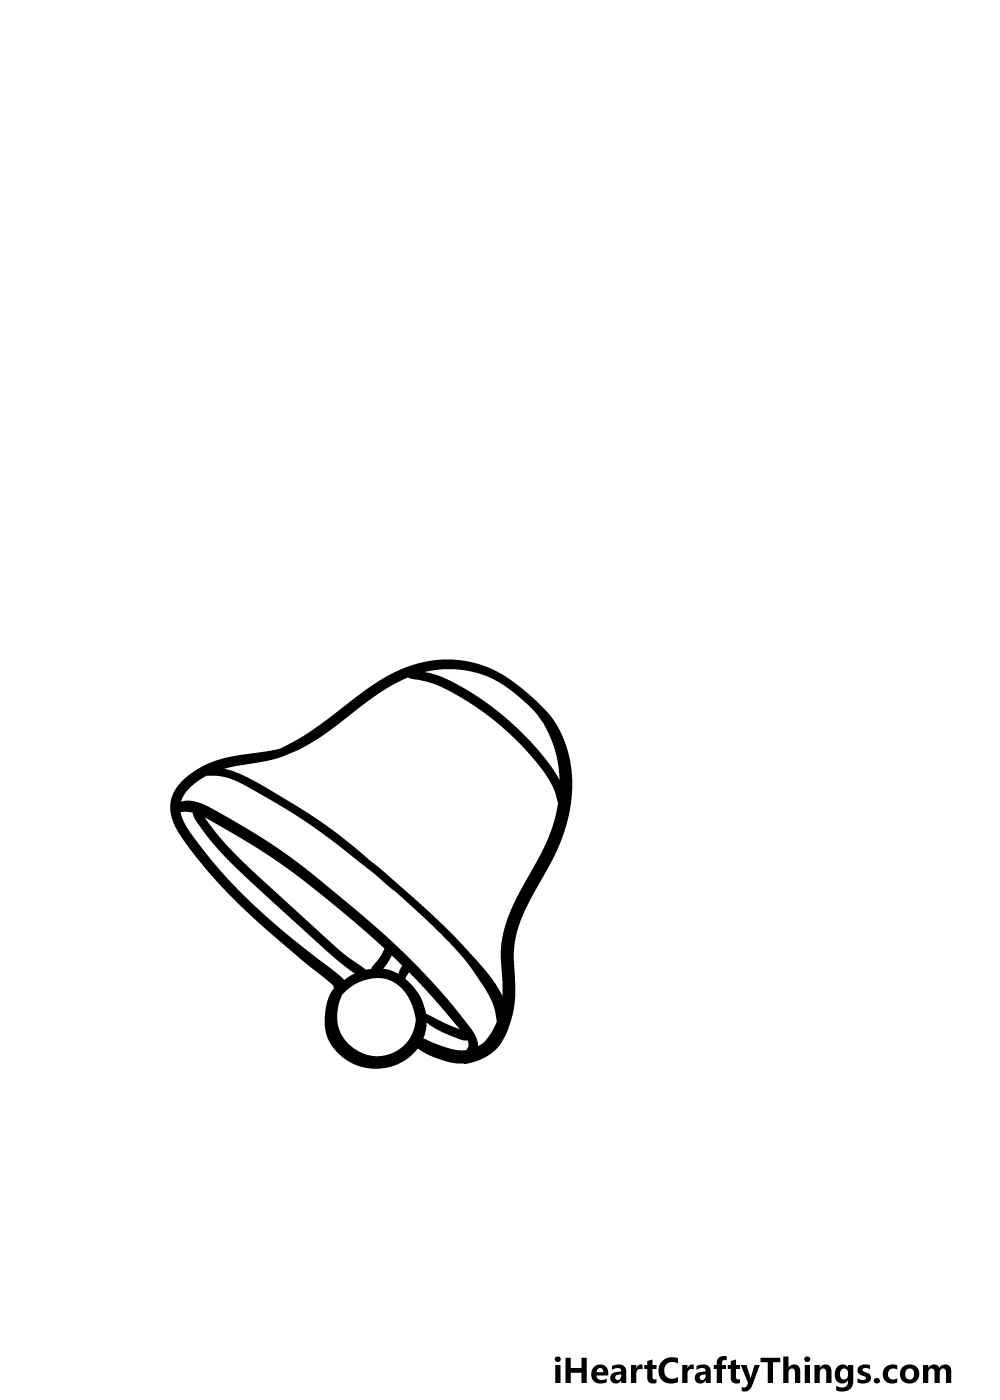
Now that you have the outline of the bell drawing, you can start to draw some details into the picture.
A bell wouldn’t work very well without a clapper, so we shall draw that first in this step. To draw this, draw some short lines from the gap and then draw a circle onto the lines, as shown in the reference image.
Then, draw another curved line along the mouth of the bell to create a lip for it. Finally, we will finish off this step by drawing another line near the top of the bell.
Step 3 – Now, draw the handle of the bell
Much as a bell wouldn’t be very useful without a clapper, it also wouldn’t be easy to wield without a handle.
That’s why we’ll add one now in this step of our guide on how to draw a bell. To draw this handle, first extend two short, fairly straight lines up from the tip of the bell. Then, draw a thin band along the width of the handle.
Then, draw a line curving up for the rest of the handle, as shown in the reference image. This will have it ready for some details in the next step!
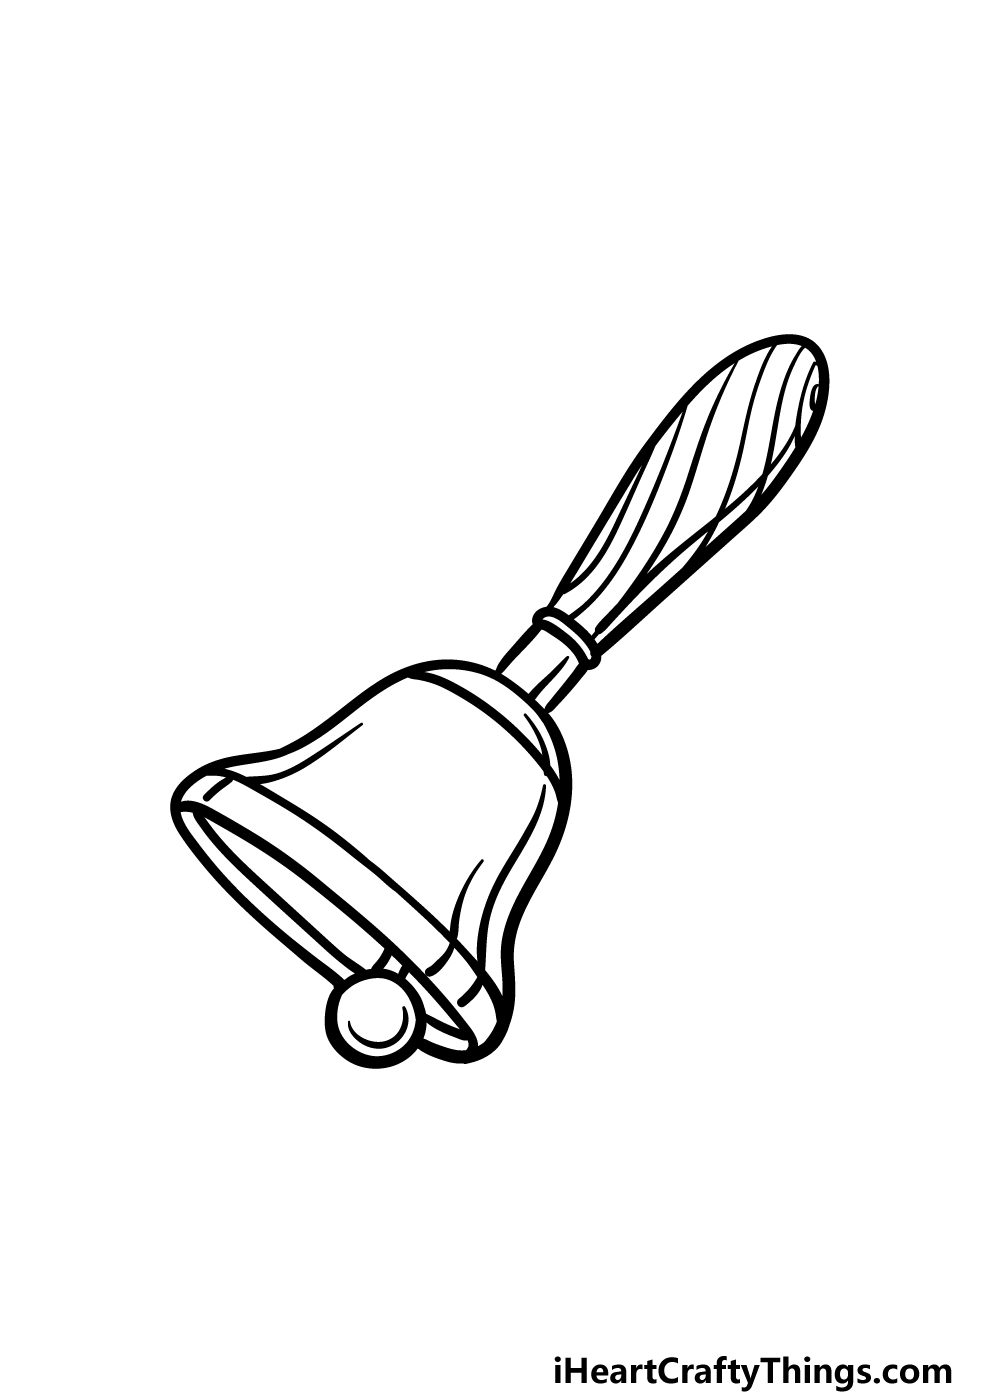
Step 4 – Next, draw some details onto the handle

Bell handles will often be made out of polished wood, and we shall draw some wood detailing onto the handle in this step of your bell drawing.
To do this, we will be drawing a series of wavy lines onto the handle, and this will help to replicate the look of the wood.
That will finish the majority of this drawing, and in the next two steps we will be adding some final details as well as some amazing colors to really finish it off.
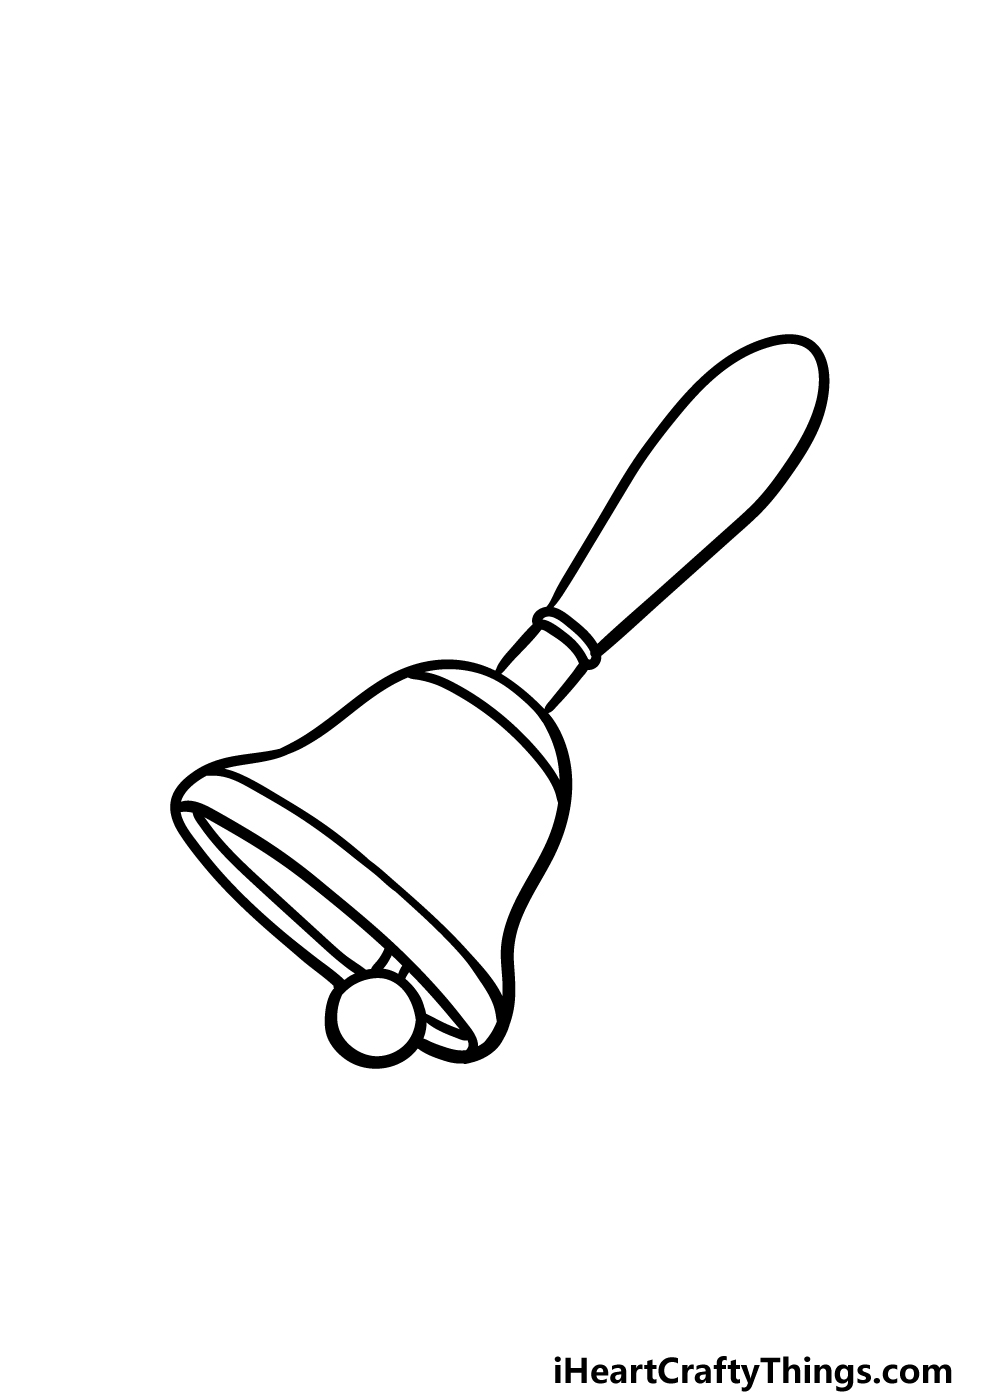
Step 5 – Now, you can finish off the final details of your bell drawing
In this fifth part of our guide on how to draw a bell, we will be finishing off the final details and touches before moving on to the final part.
These final touches should be pretty simple to add, but they will also be really effective in bringing the drawing together nicely.
We will take it step by step to finish off these details, and we will start with the clapper. You can add a small curved line into the ball at the end of the clapper.
Then, we will be drawing some more curved lines in the interior of the bell, extending from the mouth and further in. these lines will be curved in such a way that they will suggest the curvature of the bell.
Finally, we will add some straighter lines along the handle for a bit of extra detail there as well. That will finish off the details in this guide, but now you can add some more of your own that you may want for your picture!
You could add some elements such as a background, a hand holding the bell or maybe a pattern that the bell can be incorporated into.
There are so many cool ideas that you could go for, and we can’t wait to see what you decide to go with to finish this off!
Step 6 – Finish off your bell drawing with some color
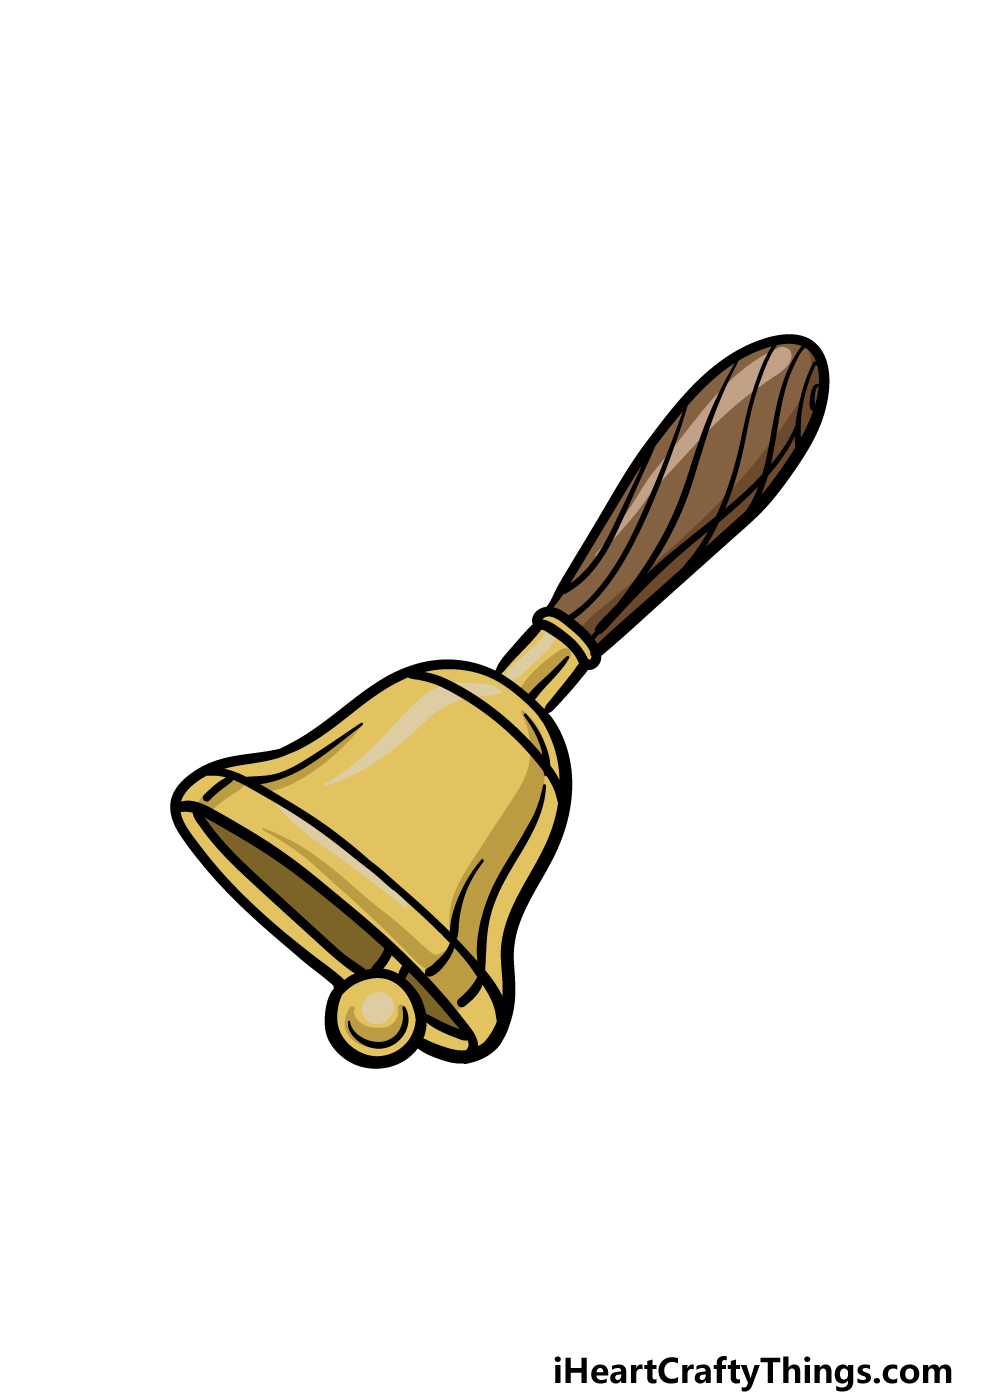
You’ve worked hard on this bell drawing of yours, so now you can have some fun coloring it in to finish it off!
In our reference image, we used some shades of yellow for the metal of the bell to give it a metallic look.
Then, we used some shades of brown for the polished wood of the handle. That is how we chose to color in our example, but this is a step where you can get creative with it and show us what colors you think would best suit this picture.
You could also play around with and experiment with your favorite art tools and mediums to really bring the colors to life.
We can’t wait to see what awesome colors and mediums you use to finish off this awesome bell drawing!
4 More Ways To Make Your Bell Drawing Unique
Find out how to make your bell sketch even more special with these fun tips!
The bell we created in this guide is the kind you hold on a handle, but there are many other types. You could modify this bell drawing to look like one of these variations!
For example, by removing the handle and hanging the bell from a ceiling, you could turn this into a church bell.
That’s one idea for a different bell variant, but there are many others you could go for! What other bells could you turn this one into?
Whether you keep this drawing of a bell as it is or change it, you could also add some small details. These kinds of details can make a big difference even if they are small and subtle.
For example, you could make this look like the famous Liberty Bell and add a big crack to the side. The details could also just be some scuff marks or other small touches.
How can you think to make this bell more realistic with small details?
Another great way to put your own spin on this bell sketch would be by adding a fun background setting. This is a tip that could be used in conjunction with the previous tips as well!
We mentioned creating a church bell in the first step, and you could take that even further by drawing the bell tower as a background. If you went with a different variation or even kept it as is, then the background could match that.
Finally, there are some fun art tools and mediums you can use to bring this bell drawing to the next level.
There are all of the more common tools such as paints or colored pens, but there are also some more unusual ones.
For instance, you can buy certain craft pens that create a more metallic color. These would be perfect for this bell, as they would make it look like it’s made of real metal.
What other crafts can you think to use?
Your Bell Drawing is Complete!
We hope that you had a great time working alongside us on this guide on how to draw a bell!
As mentioned earlier, drawing a bell can be a bit difficult to get right, so we hope that this guide made it much easier for you.
Now you can take this drawing even further by showing us what cool extra details and ideas you can think of to put your own spin on it. We look forward to seeing your creative artwork!
When you’re ready to keep the drawing fun going, we have plenty of amazing drawing guides for you on our website. Be sure to visit us there often to never miss out on the fun!
We would appreciate it if you would share your finished bell drawing on our Facebook and Pinterest pages. It will be great to see your incredible artwork!