There is a huge amount of variety when it comes to different kinds of insects.
Even when you look at a more specific type of insect there are still many different kinds of shapes, sizes and appearances to see.
When it comes to beetles, this is certainly true! While they have some common characteristics, there are many different kinds that are all unique in their own way.
Learning how to draw a beetle is a great way to show off this incredible and unique insect.
That’s what this tutorial is here to show you how to do, so you’ll definitely want to see this one all the way to the end!
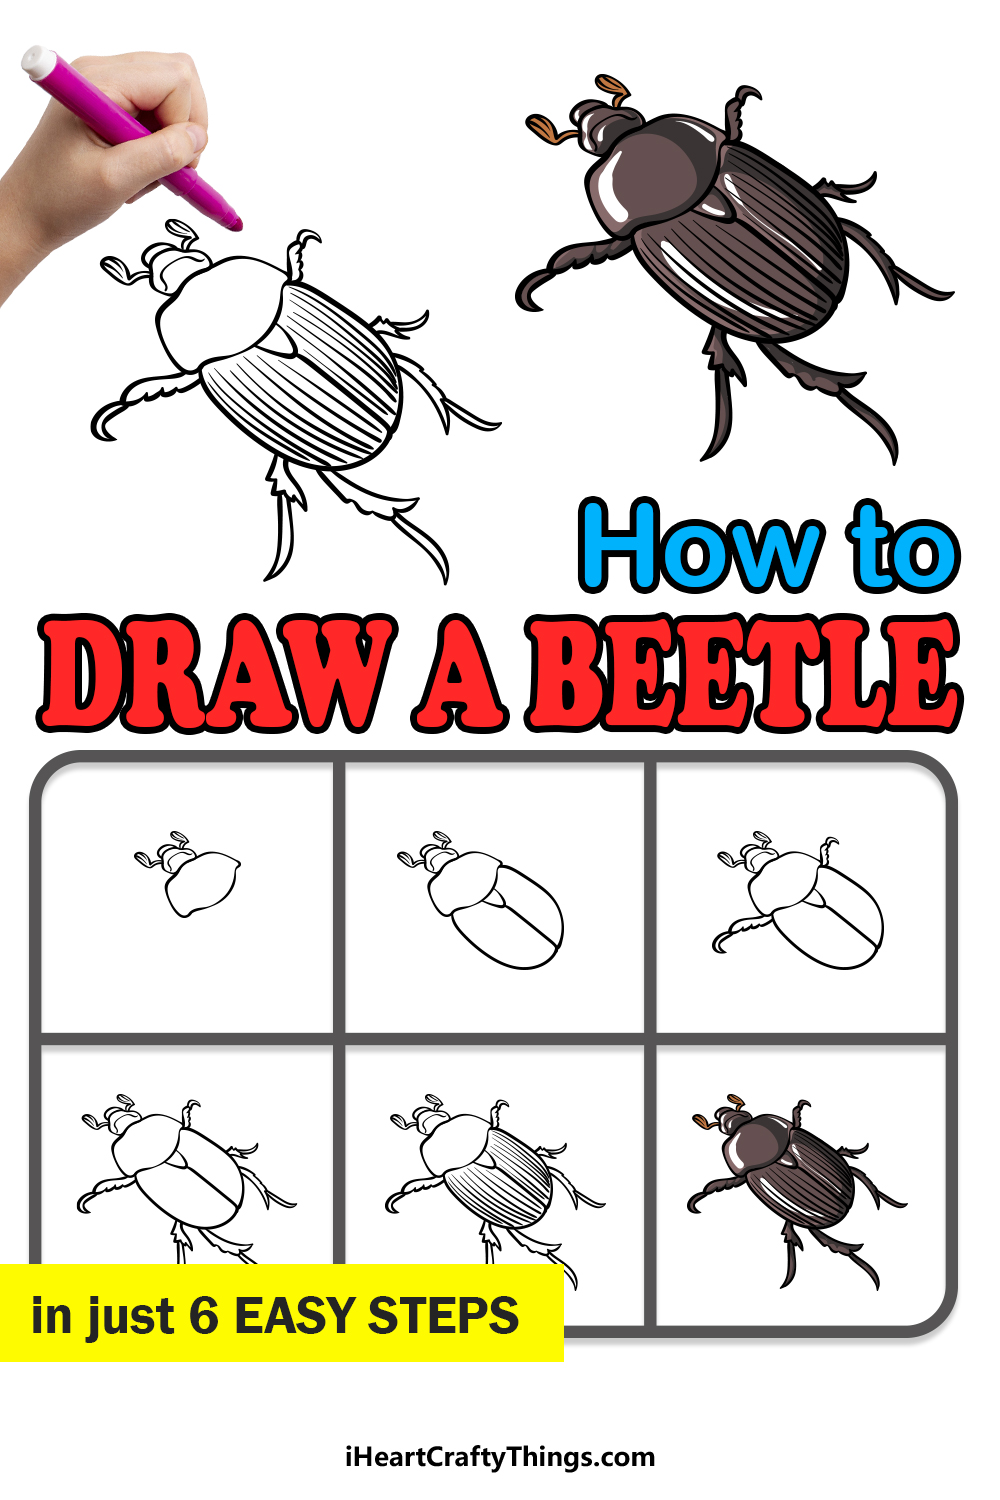
With that, let’s begin this step-by-step guide on how to draw a beetle in just 6 easy steps!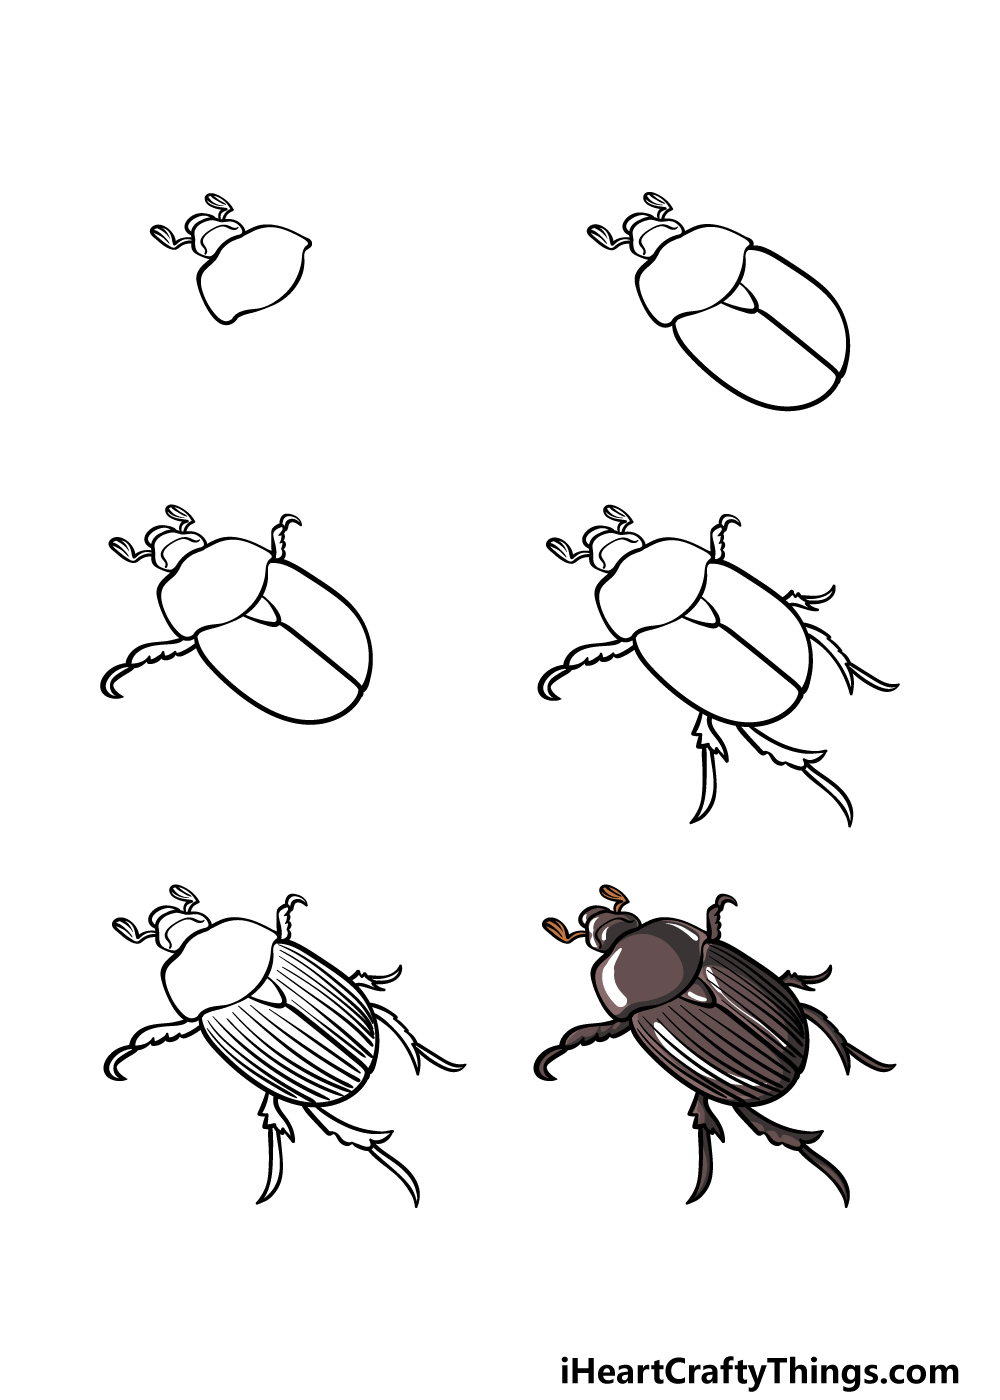
How to Draw A Beetle – Let’s Get Started!
Step 1

Beetles will typically have a hard exterior on the top of their short, squat bodies, and that is certainly the case with the example we will work on in this guide on how to draw a beetle.
To get this process started, we will begin with the head of the beetle as well as the first section of the armored back.
The head of this beetle is quite small compared to most of the body, and it has a wider base that gets a bit thinner as it goes.
There are also some short feelers on the sides of the head, and they each have a thin stalk with thicker sections at the ends.
Finally, use some rounded lines to create the first section of the armored back that will connect directly to the head that you just drew. Then, you will be ready for step 2 of the guide!
Step 2 – Now, draw the rest of the armored back
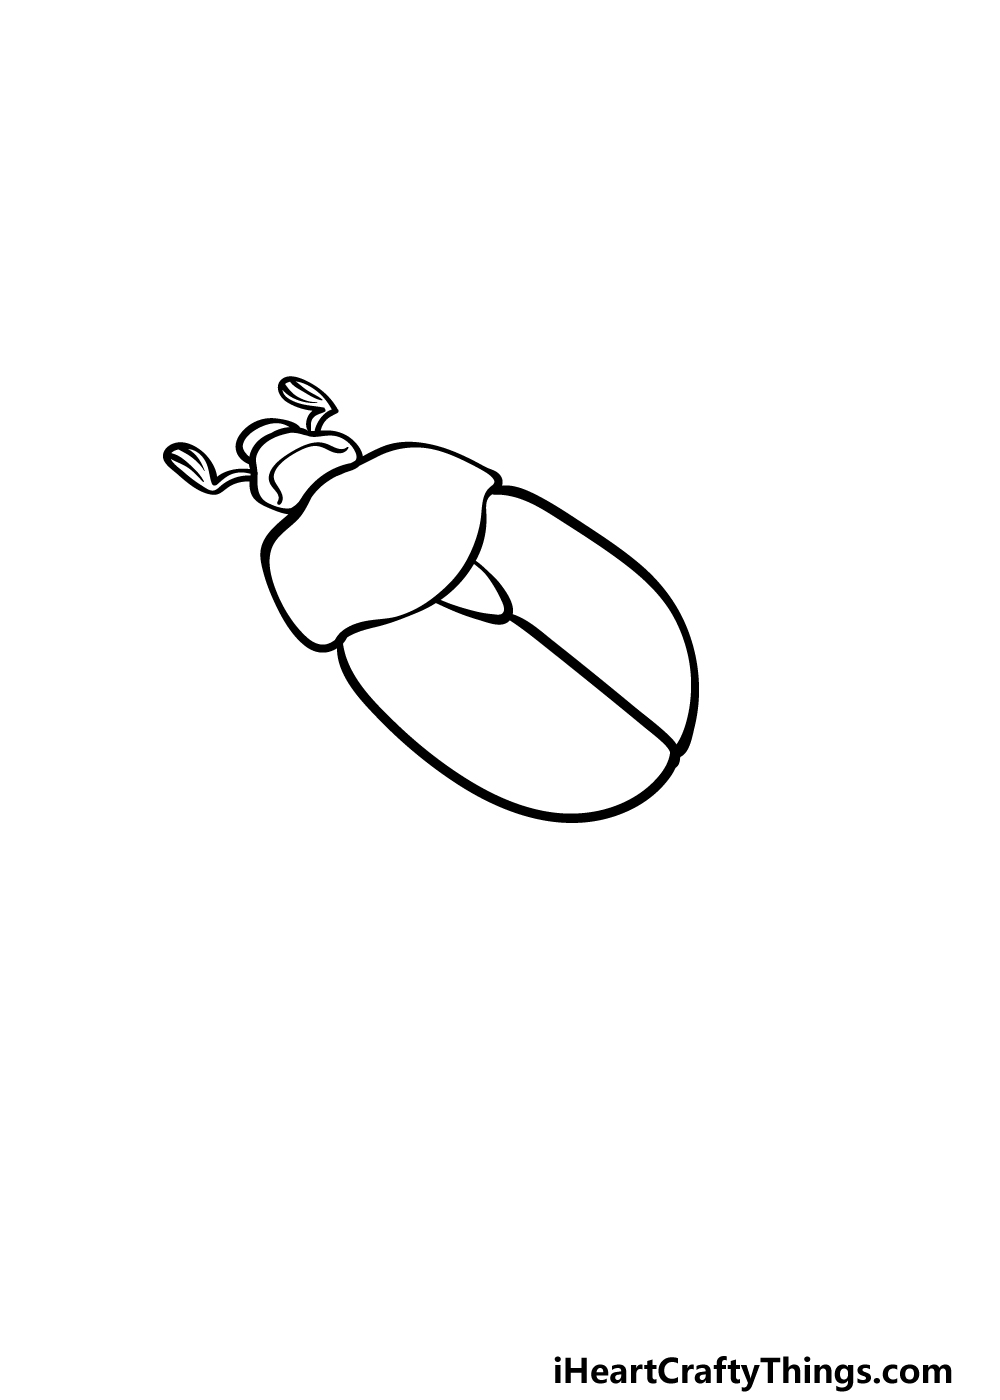
This second step of this beetle drawing will see you adding the rest of the armored back for this beetle.
To do this, we will be adding a large, rounded shape connecting to the first section of the back. This section will cover the entire rest of the body, as shown in the reference image.
Once the outline is drawn, we will also add some inner details. You can draw a small rounded shape near the center of the back, and then extend a line from the tip of that shape to the tip of the back.
This line will show where the armored section separates when the beetle is flying. With these elements finished, it is time to move on to step 3 of the guide.
Step 3 – Draw the first two legs for the beetle

Beetles have six legs, and in this third step of our guide on how to draw a beetle we will be adding the first two of these legs.
These ones will go near the front of the beetle, at the point where the two sections of the armored back meet.
The legs will both be separated into two sections, with the first being thin and smooth on one edge and bumpier on the other.
The second section will be drawn with some sharply curved lines for a sickle shape. We will then be able to add more of these legs as we move further into the guide.
Step 4 – Next, draw the remaining legs
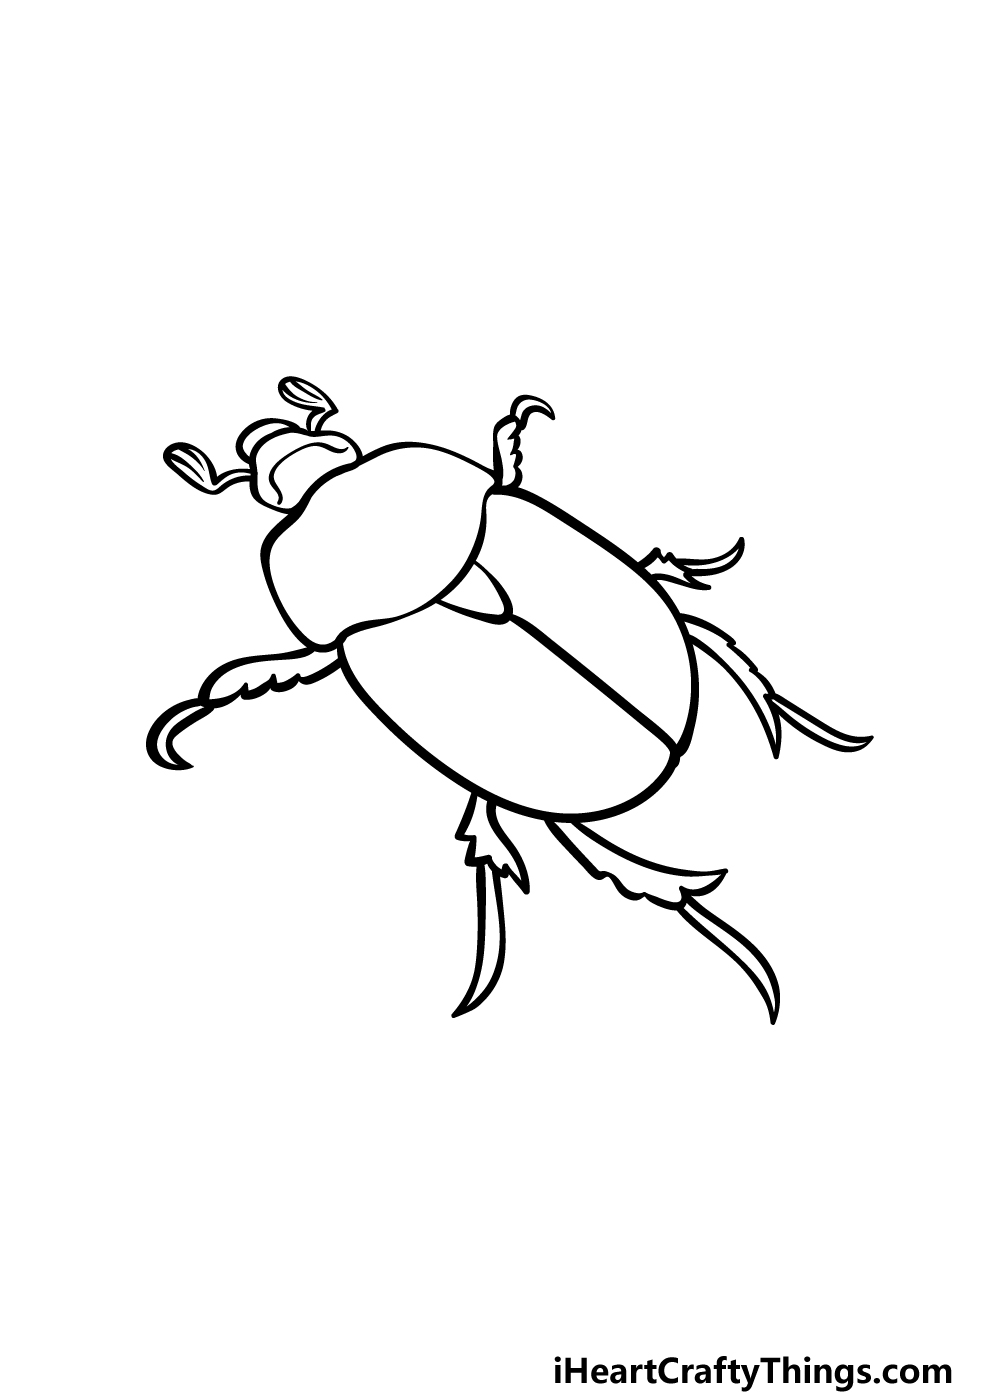
You completed the first two legs of this beetle drawing in the previous step, and in this one you will be able to add the remaining four.
In terms of structure, these legs will look identical to the first two, in that they will be made up of two sections.
The main difference will be that the middle legs will be shorter than any of the others. Additionally, the legs at the back of the beetle will be significantly longer.
Try your best to position these legs exactly as they appear in our reference image for a more natural look! You’ll then be able to add some final details in the next step of the guide!
Step 5 – Add the final details to your beetle drawing
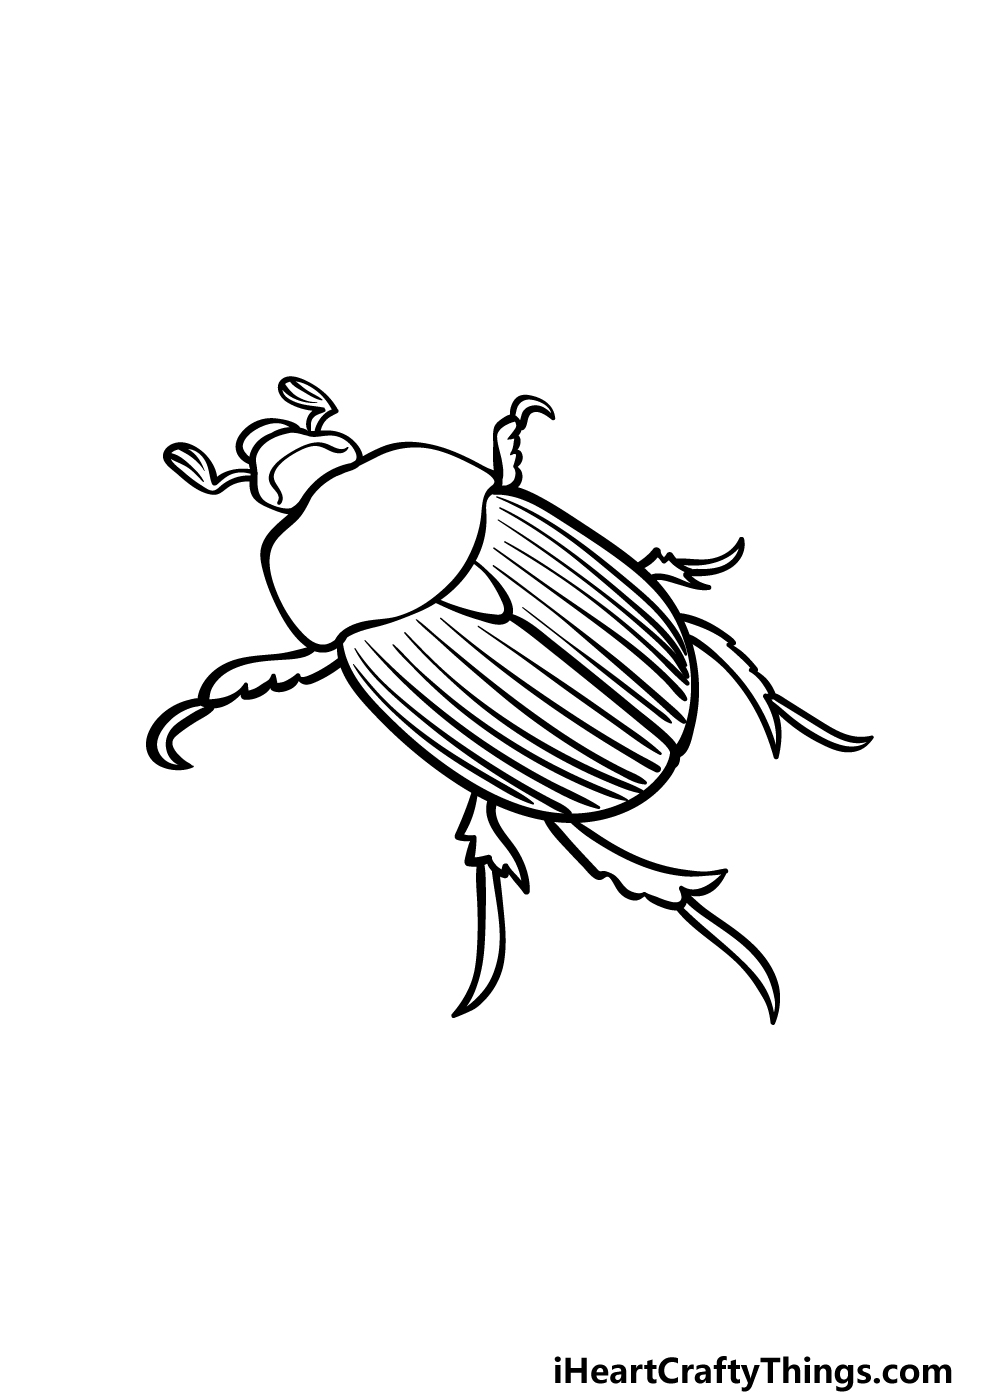
It’s almost time to finish off with some coloring fun, but first there are a few details to add in this fifth step of our guide on how to draw a beetle.
These details will mainly fo on the main section of the armored back. To finish them off, simply draw some straight lines going along the length of the section.
Once these details are drawn, you can then add some extra details of your own!
Beetles can be found in many different environments, so if you wanted to draw a background then you would have many options for the kind of background you add.
How will you complete this beetle drawing before moving on to the final step of the guide?
Step 6 – Finish off your beetle drawing with color
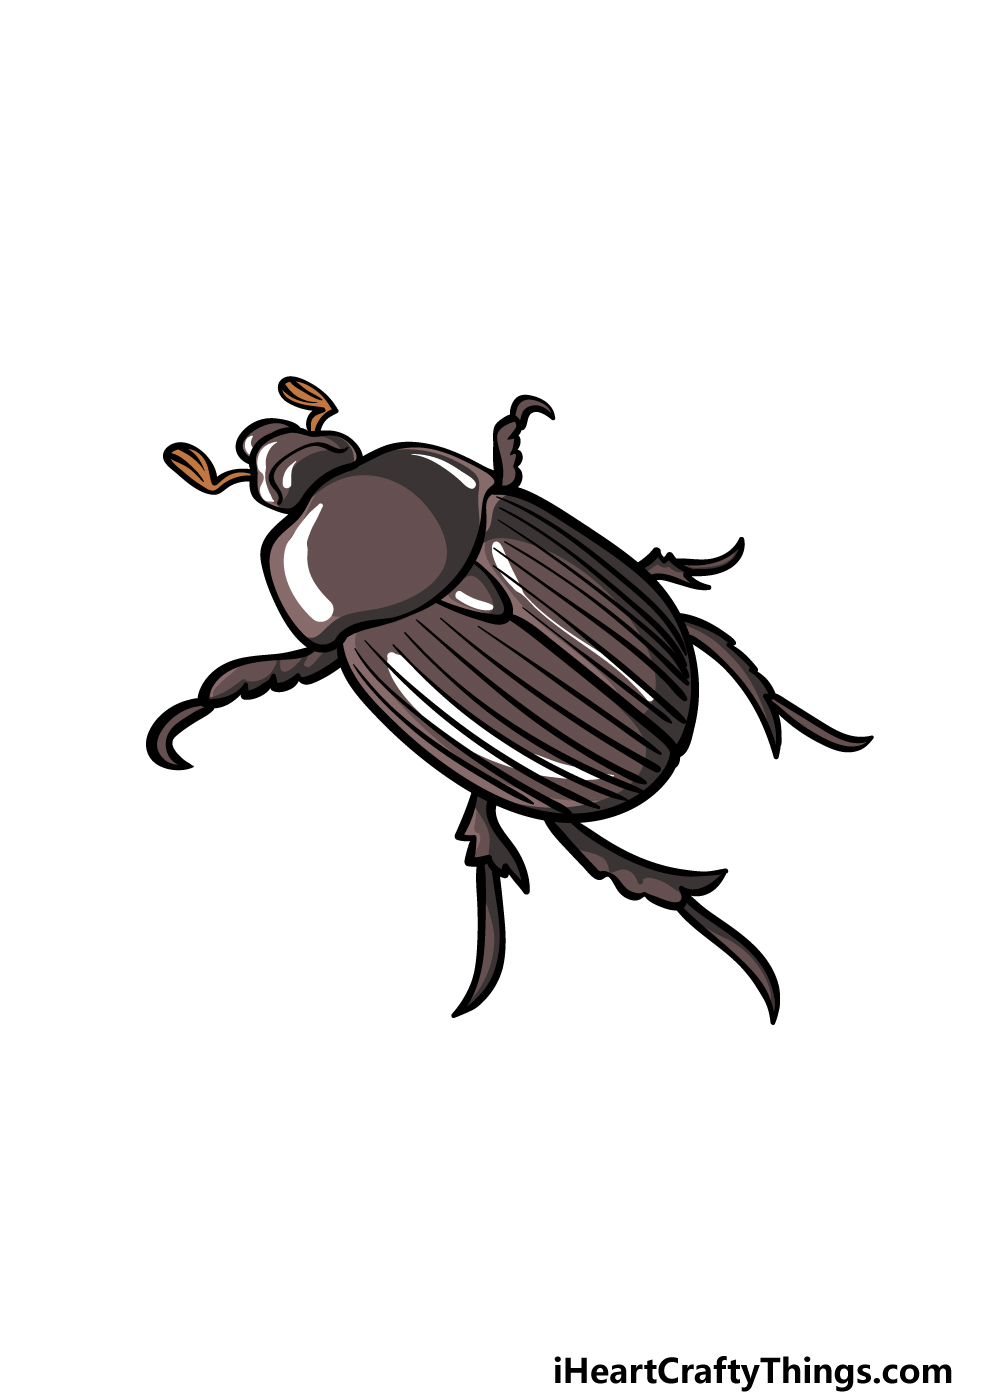
This is the final step of this beetle drawing, and in it we will complete the image with some colors.
We used a primarily brown color scheme for our example image, but we changed up the shades of brown and added some spots of white to make the exterior seem shinier.
Beetles can come in many different colors, however, so you could incorporate other colors you love as well!
Do you think you’ll go for a more muted scheme as we did or will you go for a unique set of colors? We can’t wait to see what colors and mediums you go for!
Do this to take your beetle drawing to the next level
Check out how you can make your beetle sketch even better with some fun tips!
In this beetle drawing, we created just one kind of beetle. There are many different species of beetles that you could add to the image if you wanted to create some real beetle mania!
Some beetles are small while others can get surprisingly large. If you already have some favorite beetles then you’re good to go already.
If not, you could look up some different beetles online to get some inspiration. Do you already have some favorite beetles that you would like to add to your artwork?
You don’t need to just stick to this species if you would like to populate this drawing of a beetle, however. You could also add different insects to the image to make it look even more interesting.
Once again, these could be some insects you’re already a fan of or you could look up some ideas. If you were to add some insects, you could make them in scale to this beetle or change their sizes.
However you want to show off some cool insects would be the right way to do it!
It could also be fun to create a background for your beetle sketch. This is a great way to elevate an artwork, and there are many settings you can create.
The fun of making a background for such a small creature is that you can show how big certain objects would look from the beetle’s perspective. Adding a background would also be great with the previous tips!
If you’ve ever seen real beetles, you will know that they come in all sorts of amazing colors and patterns. That means you have all the colors of the rainbow and more available to you as you color!
When adding colors, you could try and recreate the look of a specific beetle species, or you could create your very own one. It’s all up to you, and you may want to try out some fun new art mediums too.
Your Beetle Drawing is Complete!
All of the steps in this guide on how to draw a beetle have been completed, and you have a really great picture to show for it!
Beetles have a very specific body structure, and it can be a challenge to get them looking exactly right. Hopefully the steps in this guide helped to show you how fun and easy it can be!
Now it’s up to you to show off what details, background elements and other ideas you would like to add to the picture to personalize it even further!
This guide is one of many more we have waiting for you on our website! You can visit us there for more, and you’ll want to keep checking in as we have many more coming soon.
Finally, you can show off how great your beetle drawing looks by sharing it on our Facebook and Pinterest pages!