


Beavers are one of the most industrious animals in nature, and the phrase “busy as a beaver” is well earned! If they aren’t felling trees, these little animals are creating dams in streams and rivers.
While often associated with Canada, they can also be found in a few places throughout the world. They are also very popular, and many fans of the critter may want to know how to draw a beaver.
If you are one of those fans, then look no further than this guide!
Our step-by-step guide on how to draw a beaver will show you how to draw one of these hard-working creatures.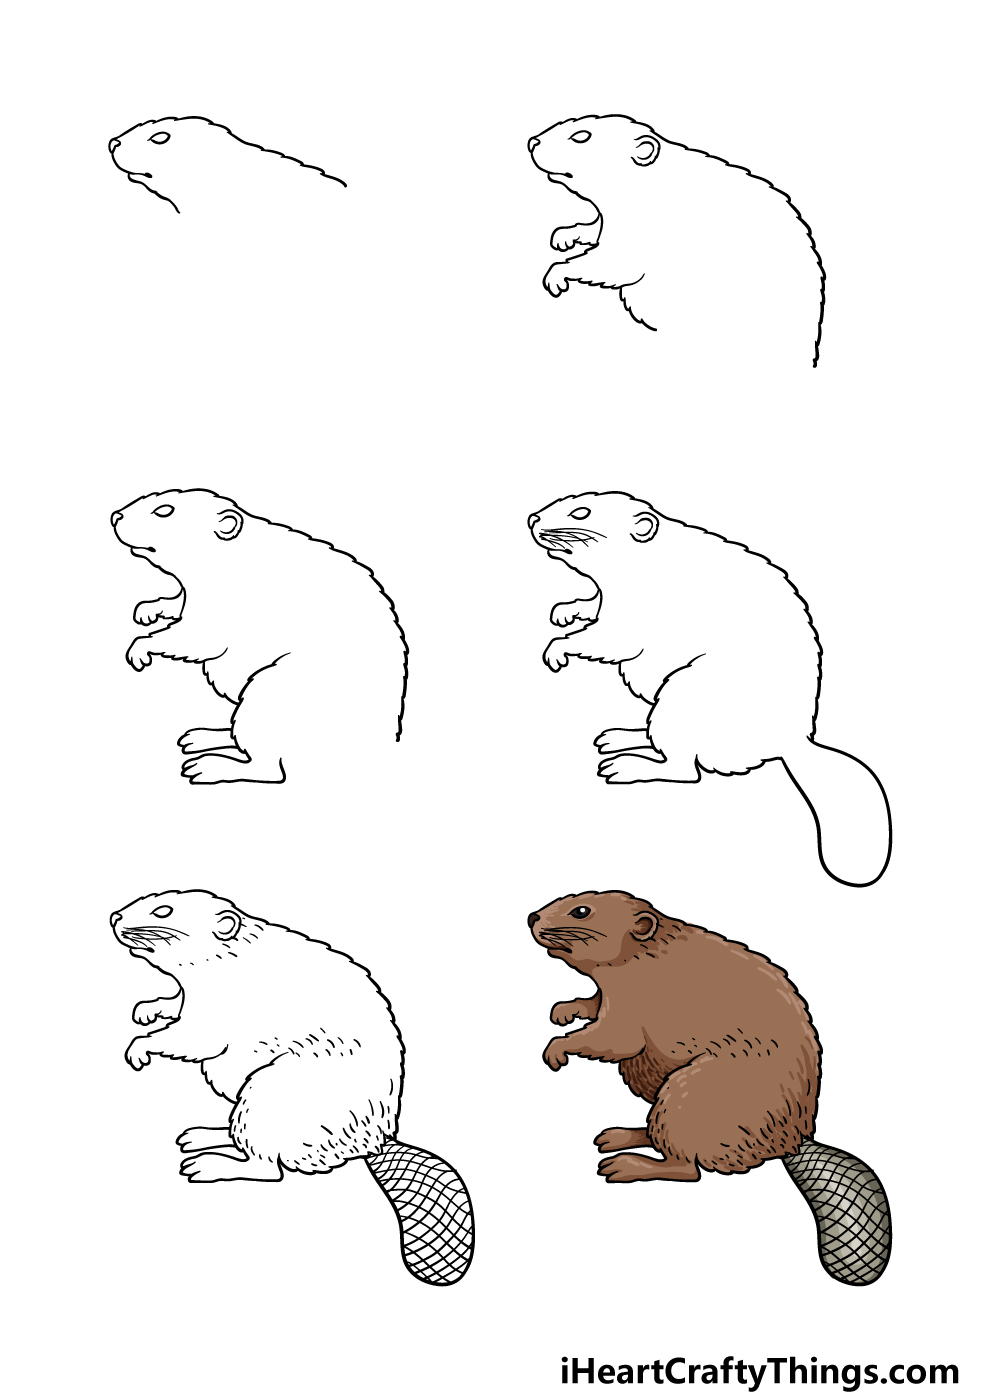
How to Draw A Beaver – Let’s get Started!
Step 1
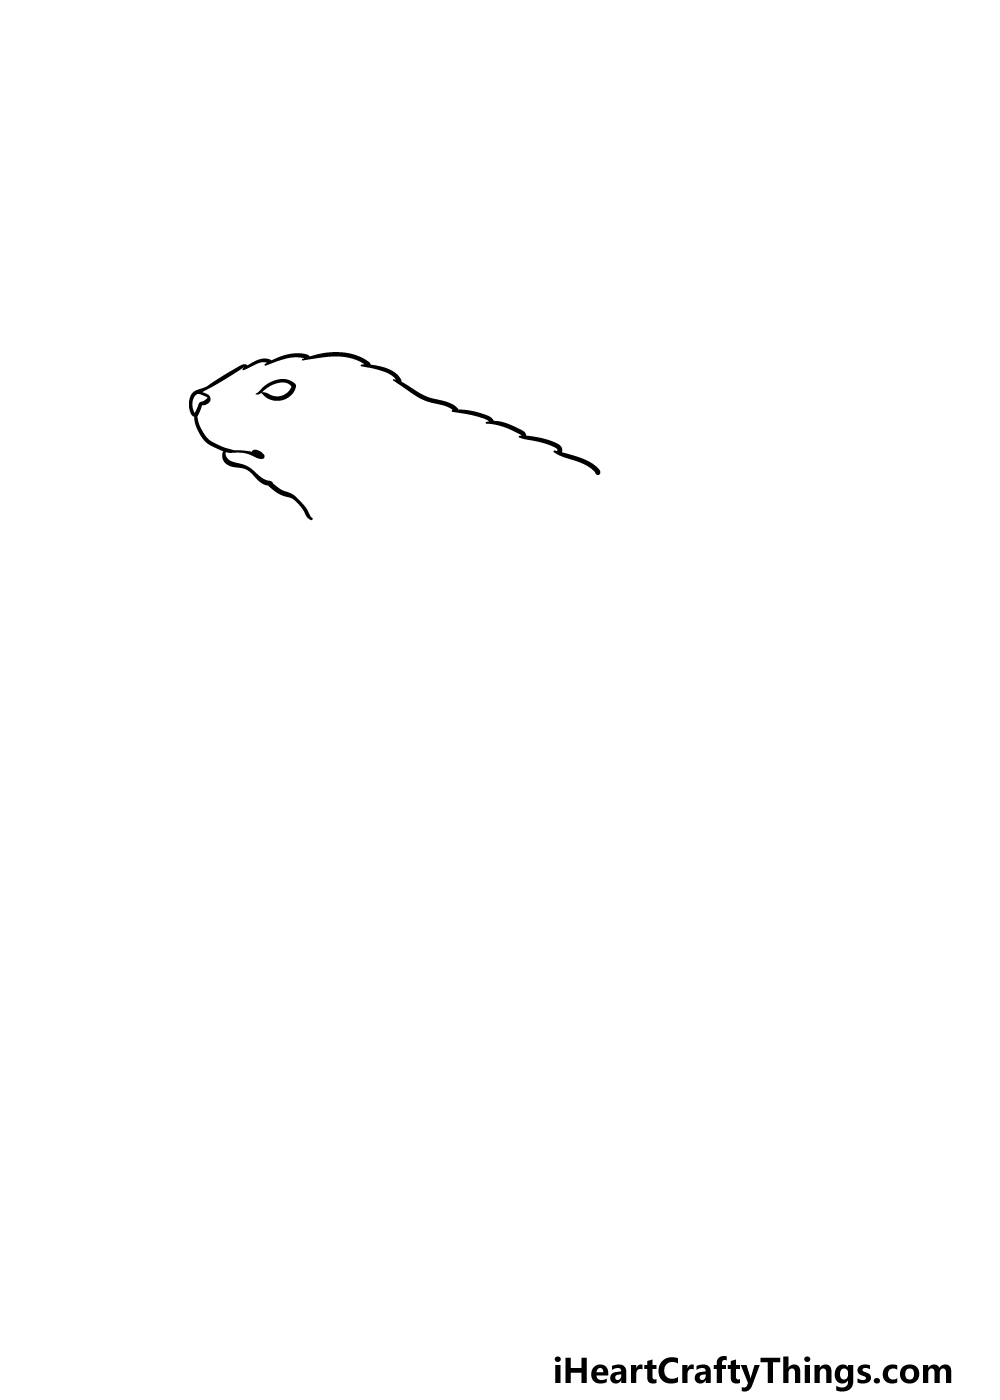
In this first part of our guide on how to draw a beaver, we will be starting with the cute little face of the beaver.
First, you can use a small, rounded oval shape with some sharp points at the ends for the eye of the beaver.
Then, we will be drawing the head and neck. For this, we will be using a somewhat jagged line to show that the beaver is furry. We will also be adding the nose at the far left side of the face, and we will also draw the mouth with a simple line.
That will cap off this first step, and next we will move on to step 2.
Step 2 – Next, draw the front legs and the back of the beaver
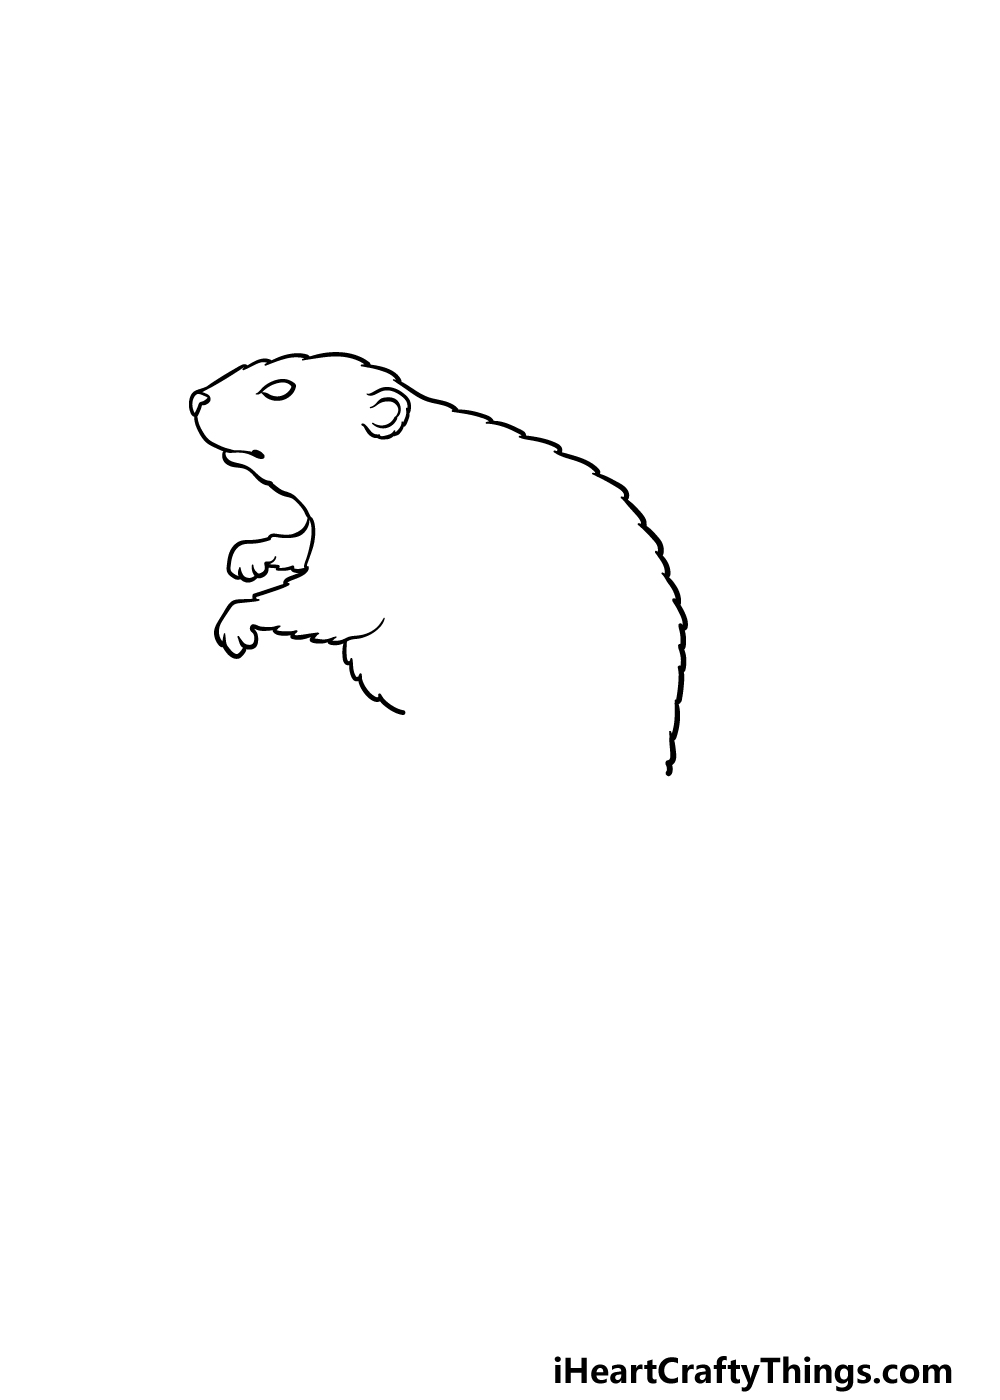
We will be adding the front legs and some other details in this step of your beaver drawing.
First, use some more jagged, furry lines for the base of the legs and then add some small paws to the ends of them. Then, you can use another jagged, curved line for the belly.
Finally for this step, we will be extending the back of the beaver further down, and this line will also be jagged like the others that we have used to show how furry the beaver is.
Step 3 – Now, draw the back legs of the beaver
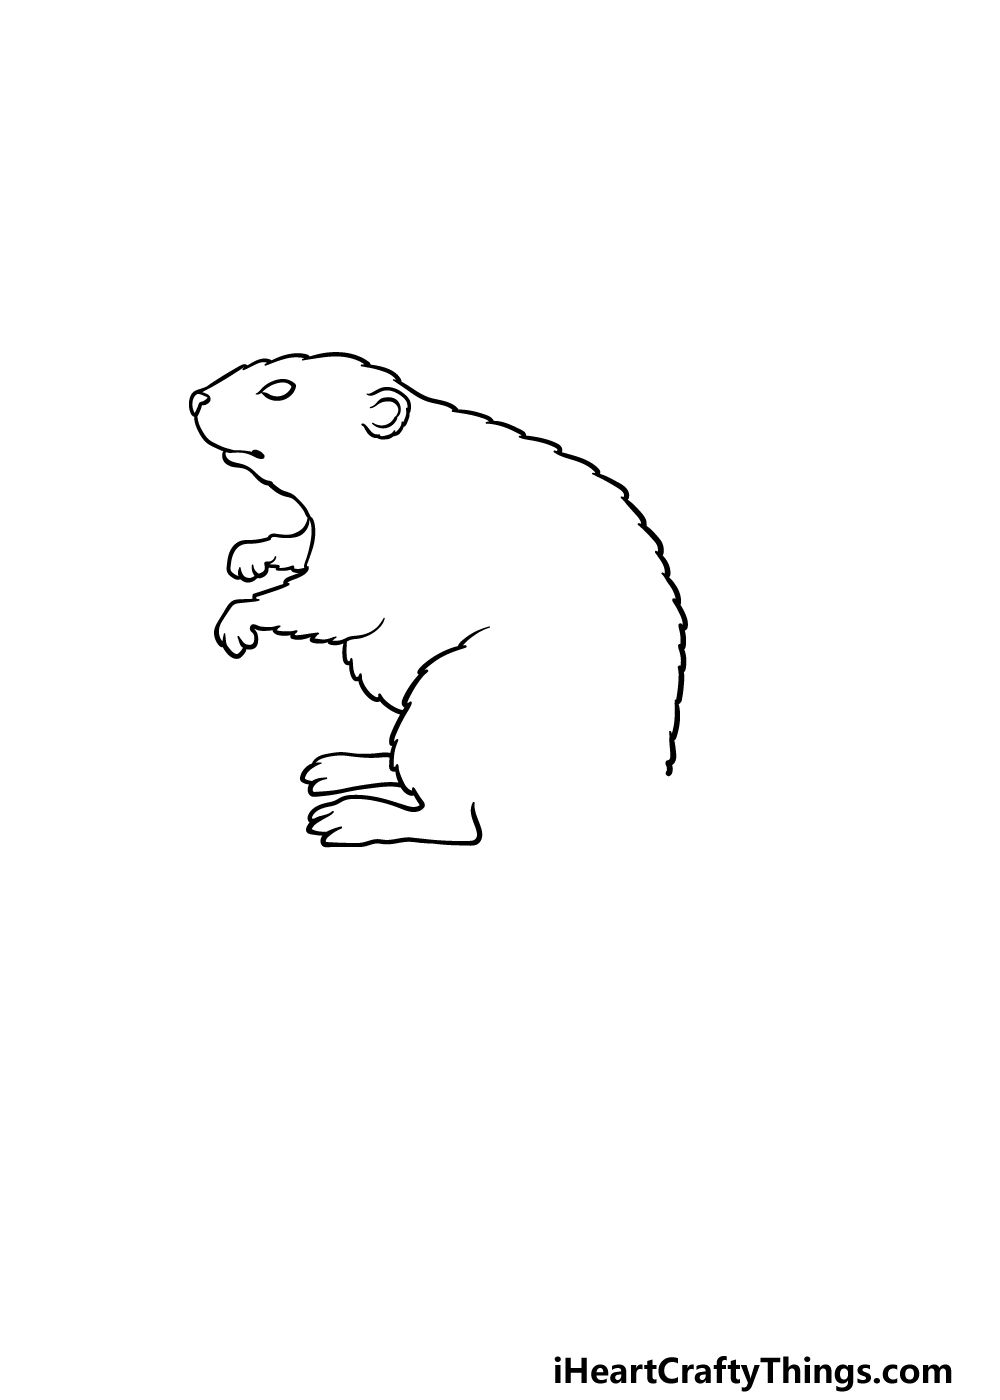
It’s time to draw the back legs of the critter in this third step of our guide on how to draw a beaver.
For the bend of this leg, we will be using that jagged line you should be pretty used to drawing by now!
Then, we will be drawing the back feet. Unlike the first ones, these ones will be longer and flatter against the ground.
Once you have these legs looking as they do in our reference image then you’re ready for the next steps, so let’s proceed!
Step 4 – Next, draw the tail and whiskers of the beaver
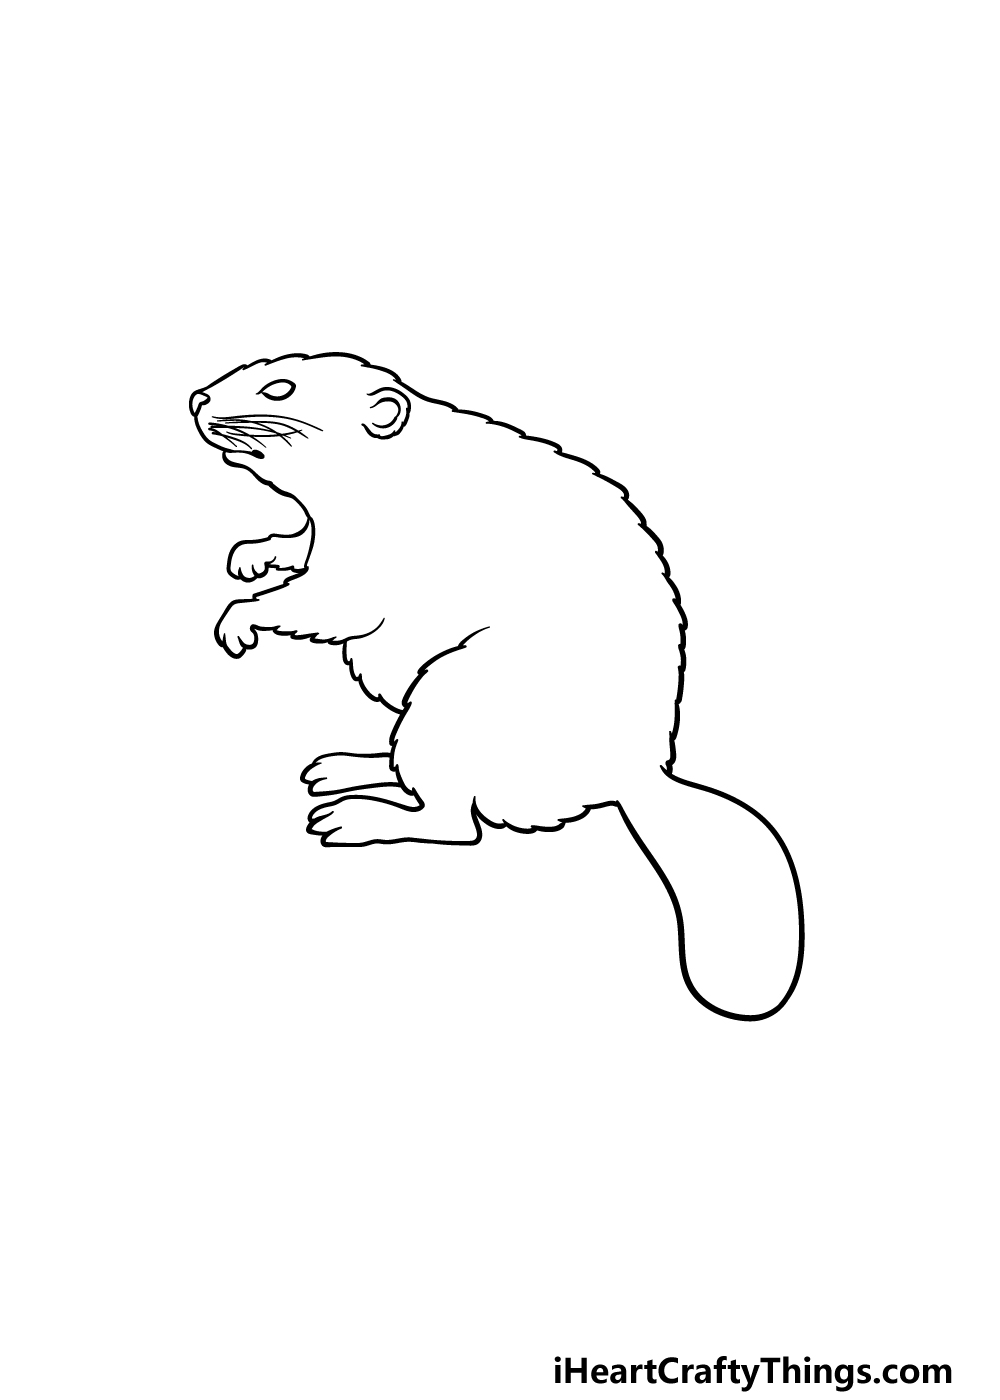
One of the many distinguishing features of a beaver is its large, flat tail. That will be the main part we will be adding in this part of your beaver drawing.
For once, we won’t be using a furry, jagged line but will instead use a smooth, curved line at the back of the beaver to create the tail.
There should be a small gap between the bottom of the tail and the rest of the body, and that will be your last chance to draw that furry kind of line as you connect this empty space.
Then, before you move on you can add lots of thin lines to the face for the whiskers of the beaver. Then we just have a few final details to add in the next step before you color in your drawing.
Step 5 – Now, you can finish off the final details of your beaver drawing
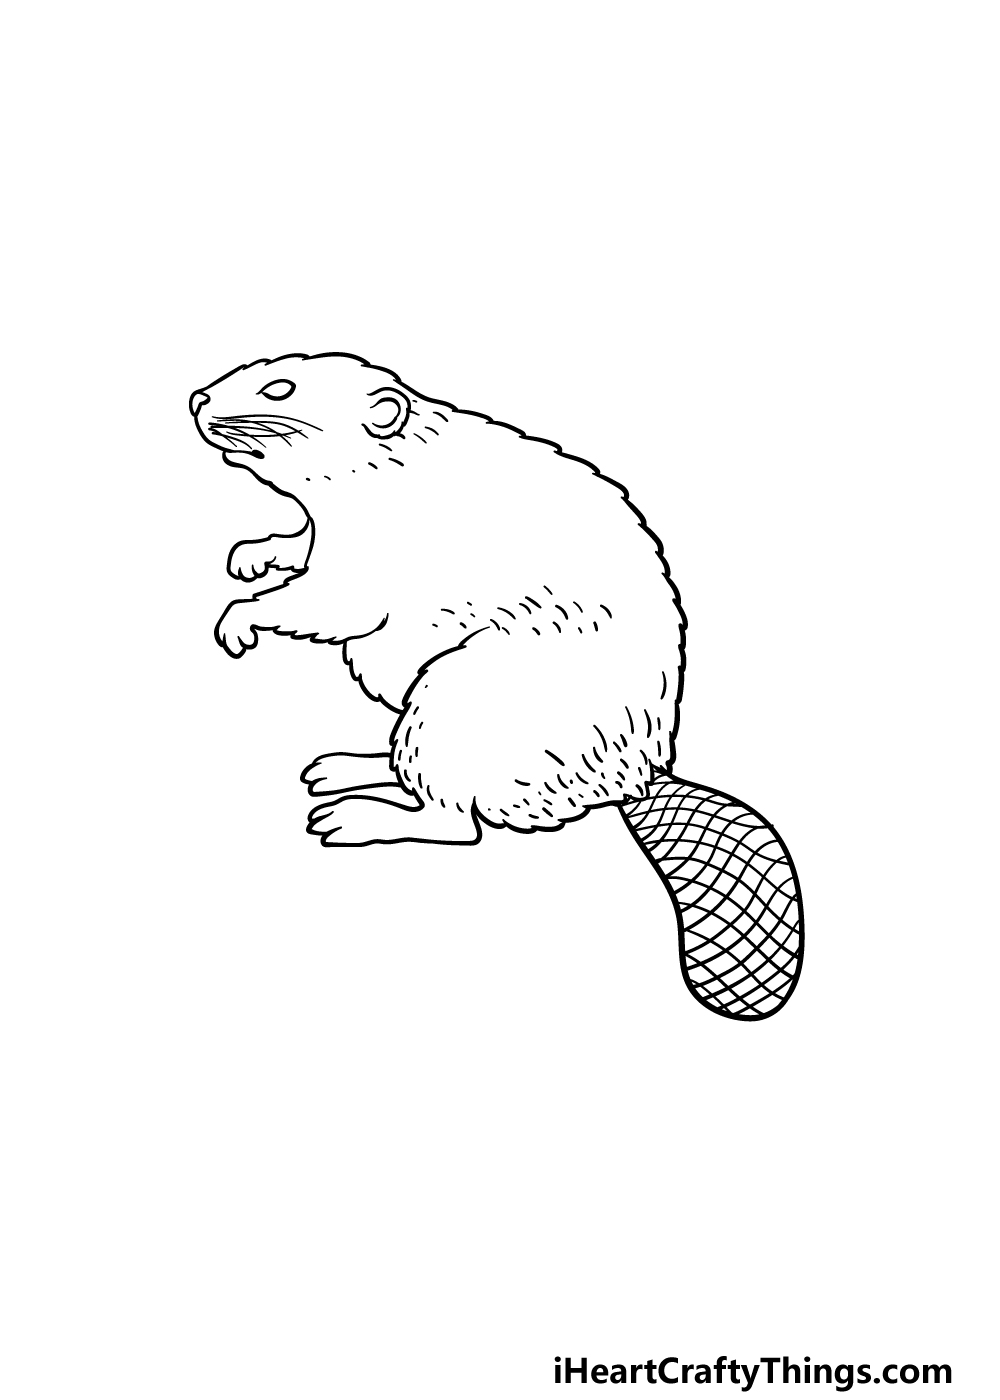
This step of our guide on how to draw a beaver will be all about finishing it up with some final details to have you ready for some coloring fun in the last step!
First, we will focus on the tail of the beaver. The shape of this tail isn’t the only notable thing about it, as it also has quite a unique and rough texture to it.
To create this texture, we will be using something of a crosshatch effect on the tail. This step may require a bit of patience and a steady hand, but it will look really cool when done!
Once you have the tail looking as it does in our reference picture then you can finish off the other details. You can also add lots of small lines throughout the interior of the beaver’s body.
Then you can also add some details of your own such as a background or other animals, for just two ideas. We can’t wait to see what you come up with!
Step 6 – Finish off your beaver drawing with some color
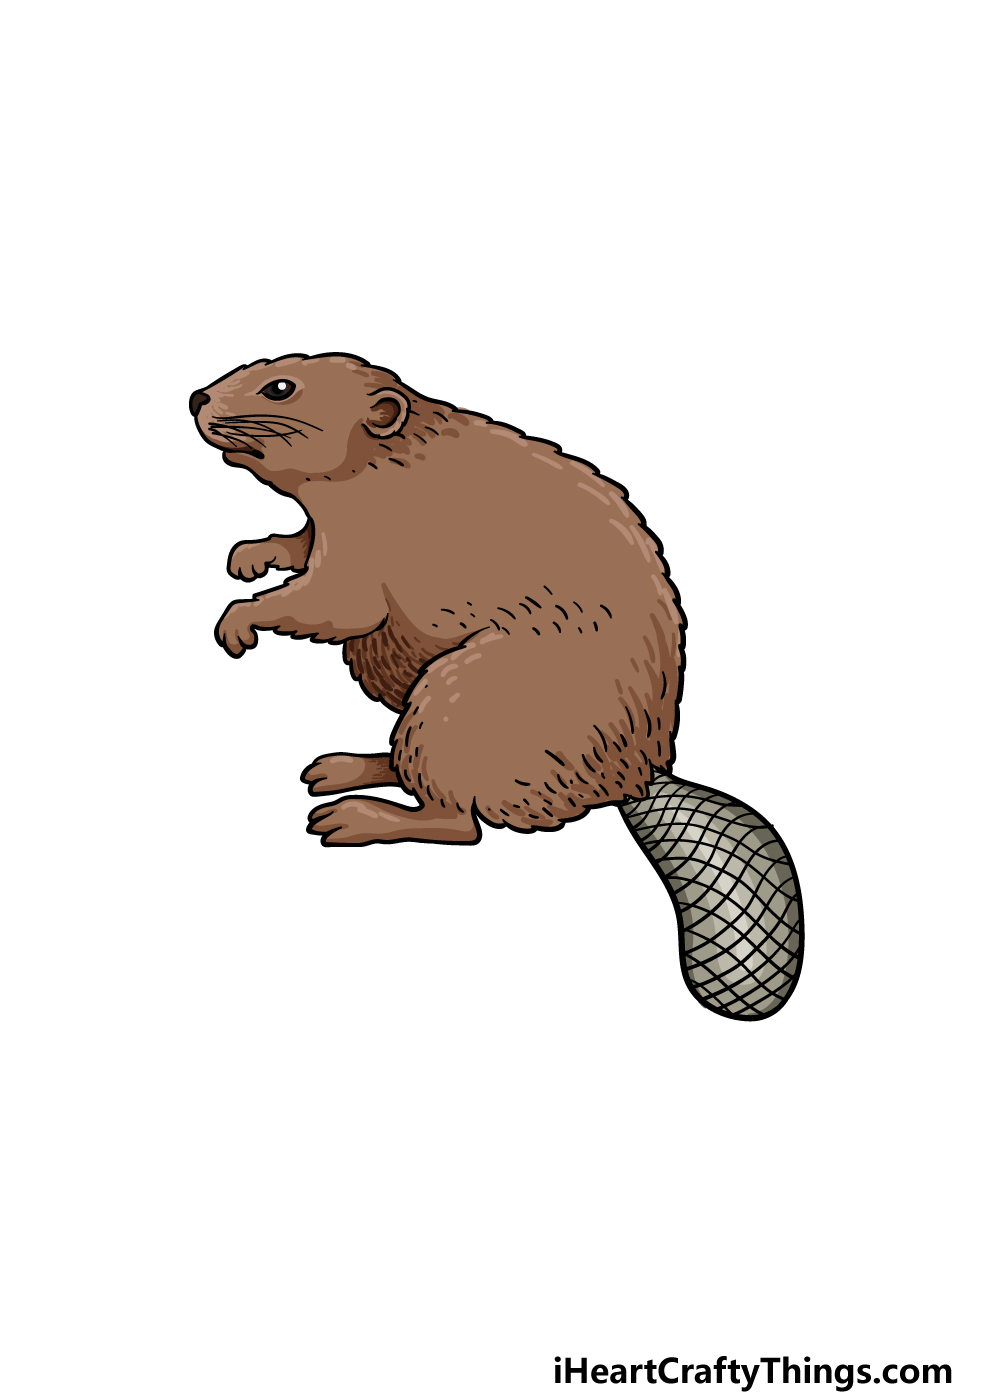
You have finished drawing all of the final details of your beaver drawing, and now you can relax with some coloring fun to finish it off!
In our reference image, we used some nice shades of brown to color in the beaver, but this is just our suggestion.
You should definitely feel free to use any shades and colors that you want for this picture. This is a great chance to unleash your creativity and express yourself with colors!
You can also color in the background or other elements that you may have added. Then, you can play around with your favorite art tools and mediums to help bring these colors to life.
We will be looking forward to seeing how you express yourself in this final part of your beaver drawing!
3 More tips to make your beaver drawing easy!
Build up your beaver sketch as we show you 3 tips to make it even easier!
This drawing of a beaver was created with a fair amount of detail to make it more realistic. If you find drawing things in this more realistic style to be tricky, then you could use a different art style.
For instance, if you find it easier to draw in a simpler cartoon style, then you could adapt the beaver to fit that style.
Not only could this make it easier, but it could also help to create a drawing that you prefer.
What are some other art styles that you could use for this beaver to make it easier?
If you wish to maintain the style of this beaver drawing as it appears in our guide, then you can help to prepare yourself for it. We would suggest using a light pencil for this purpose.
With your pencil, try to break down the beaver into simple shapes and outlines. If you make a mistake, all you need is to erase them and try again!
This can help you be more confident as you draw. Then, you can start to add more and more layers of details to the drawing until it resembles the finished drawing.
Once you have a drawing you’re happy with, simply draw the final lines with your pen and erase any pencil lines that remain.
In real life, beavers aren’t afraid to call in some extra help, and you can do the same for this beaver sketch!
What we mean is that you can use some additional resources along with the guide we created.
One of the best ways to do this would be to use some photos of real beavers. You will find many online, and some may even be posed similarly to the one that we have in our guide.
These photos will help to show what the proportions and details can look like. This can also help you to add more to our design to make it more unique!
Your Beaver Drawing is Complete!
Getting to this point of our guide on how to draw a beaver means that you have successfully created an incredible drawing!
Remember that whenever you take on a new drawing challenge it can always be made much easier when you break it down into smaller, more manageable steps.
You can also keep the fun going by adding your own details or by showing off your favorite colors and art mediums. Be sure to have fun with it and see what happens!
Then, we look forward to seeing you on our website so you can check out our many drawing guides! Be sure to visit often to catch the new guides we upload often.
We also hope you will share your beaver on our Facebook and Pinterest pages. We can’t wait to admire your artwork!