


No magic is required to make it through this guide on how to draw a witch hat! Discover the easiest way to make this iconic headgear by going through this guide for kids.
Witches appear in many different stories and legends. From Macbeth to Harry Potter, they have played a large role in culture, and they’re also popular to use as Halloween decorations to this day.
Of course, every witch worth her broom will have a pointy witch hat on her noggin. Drawing one of these iconic hats can be easier said than done, but I know the way to make it simpler!
I promise you that it’s not witchcraft! All you need to do is follow along with my steps and you will have a witch hat of your own. You could even design a witch character to wear it once you have the hang of it.
See How To Easily Make A Witch Hat Drawing
How to Draw A Witch Hat – Let’s Get Started!
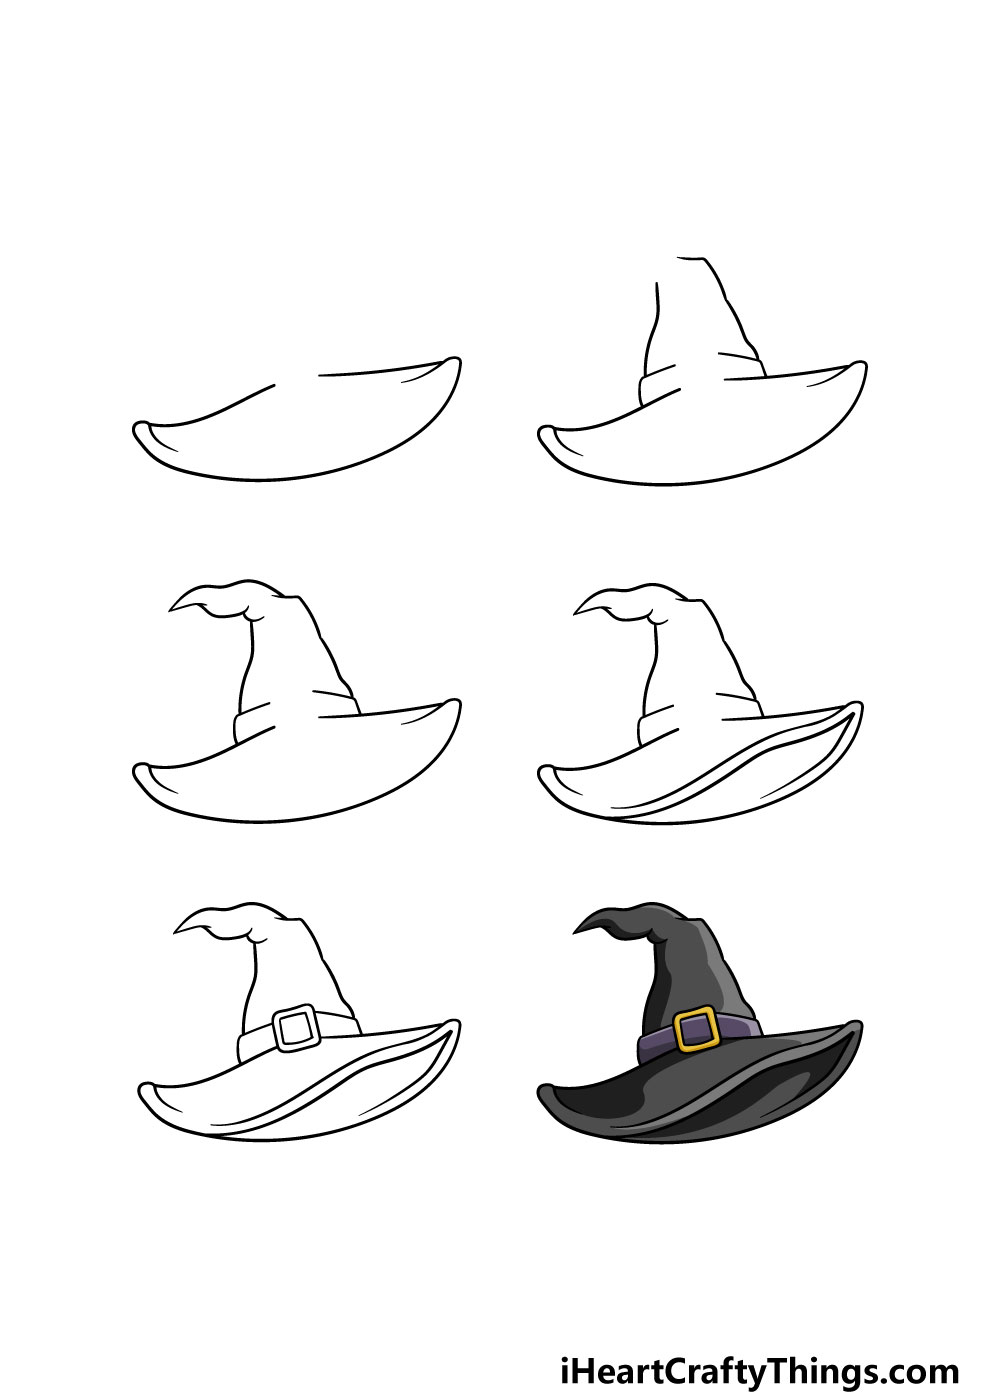
Step 1
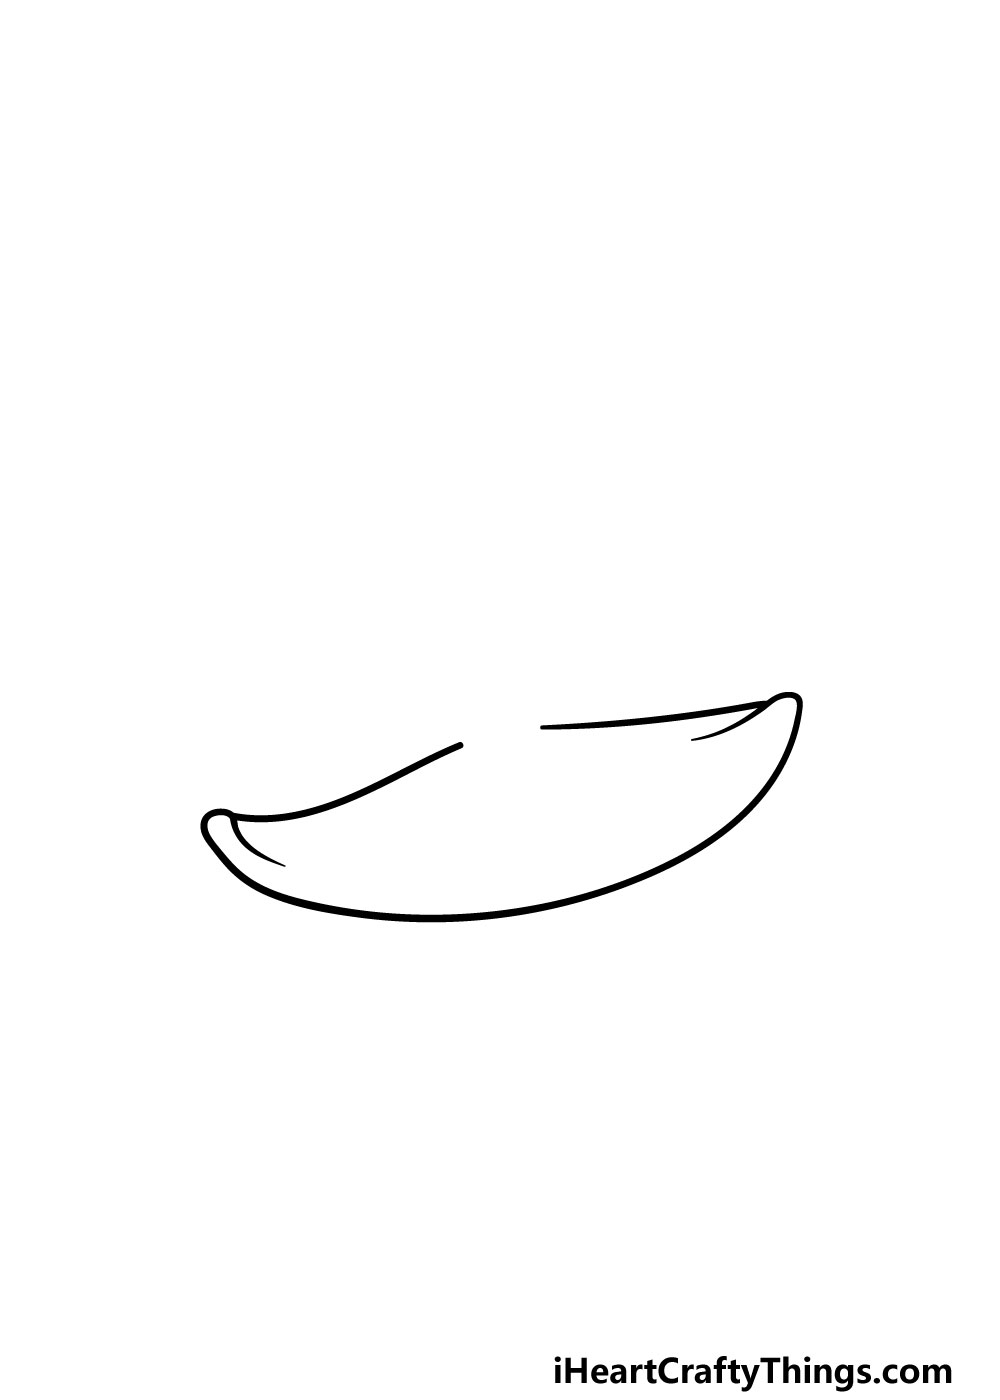
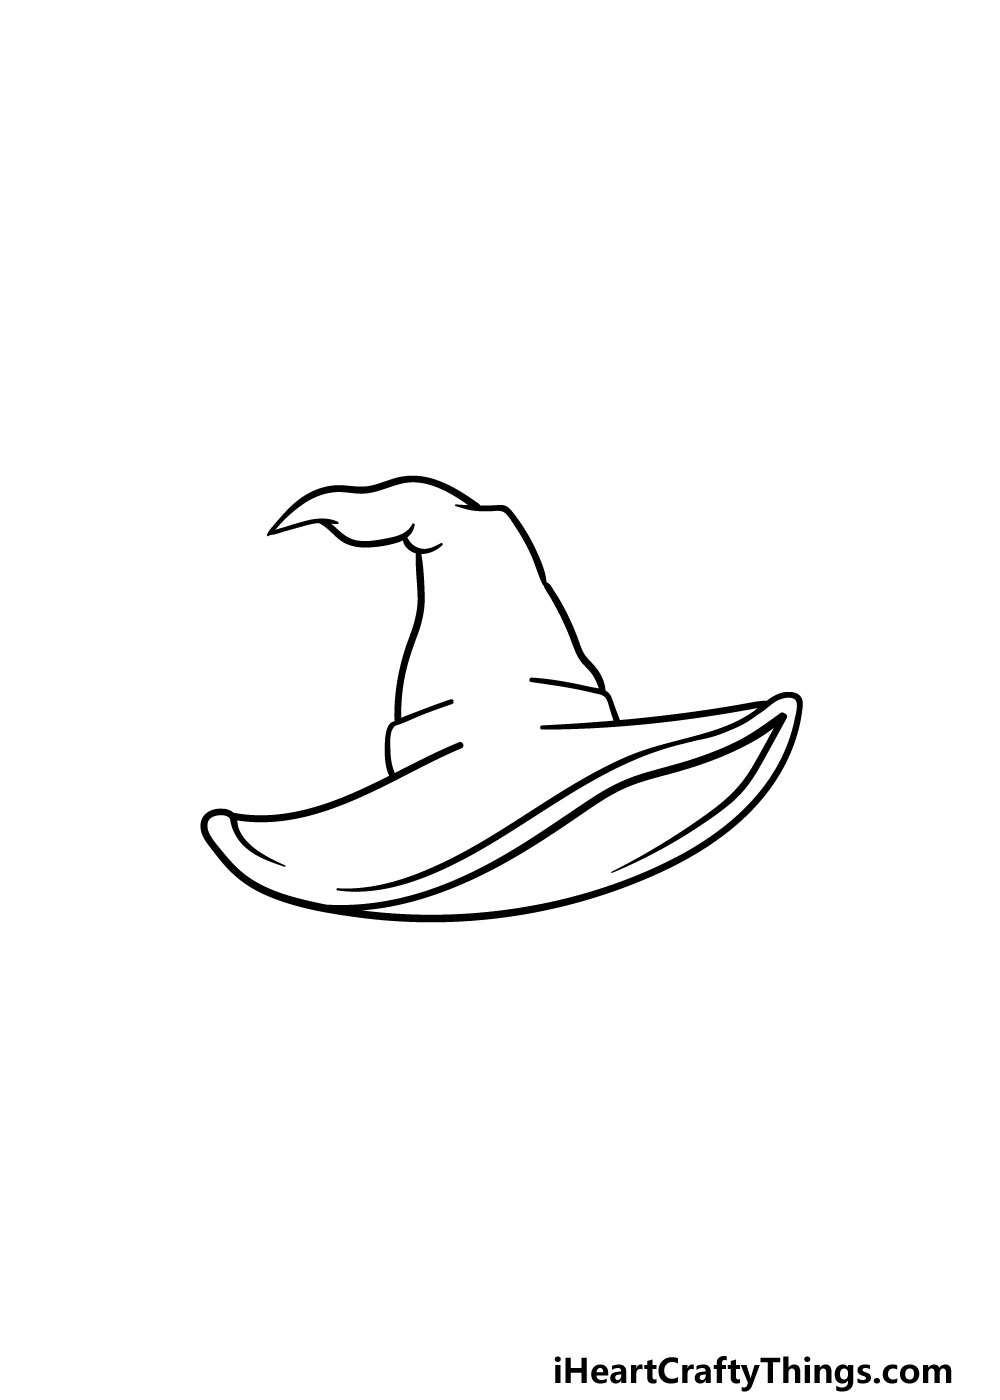
There are two distinctive features of a classic witch hat. These include the pointy tip of the hat along with a wide, flat rim.
We will start with the second one of these features for this step of our guide on how to draw a witch hat! To start with this rim, we will be using a long, curved line for the base.
These will curl over in on themselves at the ends of the line. Then, you can finish off the start of the rim by adding two more fairly straight lines moving inward from the corners of the rim.
That’s all for now, so let’s move on!
Step 2 – Draw the start of the body of the hat
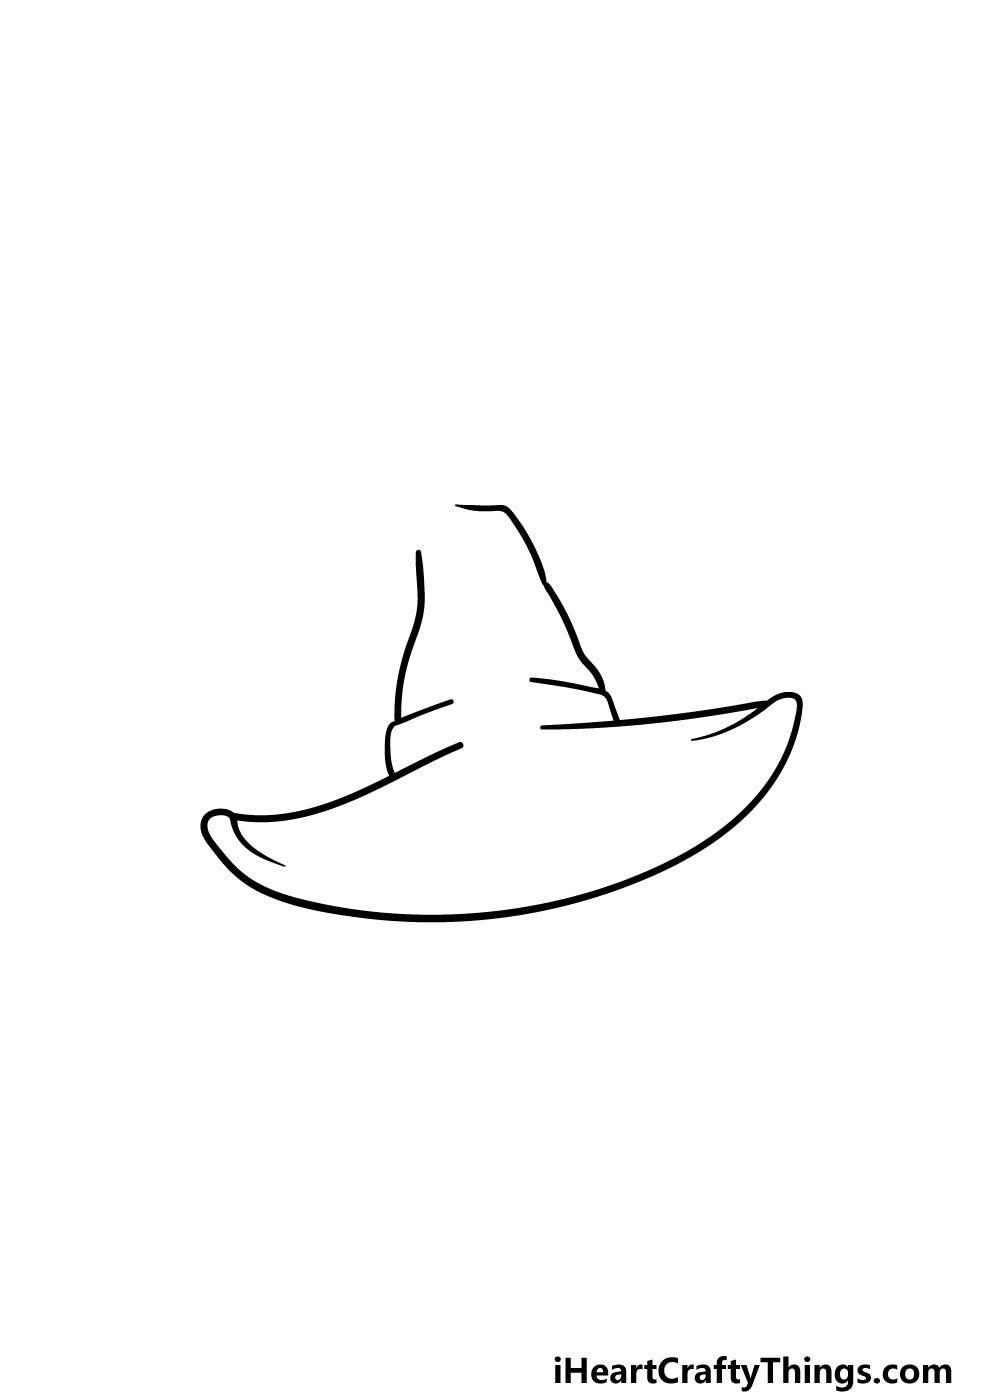
We will be leaving the rim of your hat drawing for now, and instead focus on the body of the hat that will lead to the tip on the top. First, there will be a band along the base of the body of the had.
This will have a small gap in it, as we will be adding a buckle there later on. Then, you can use some slightly humpy lines coming up from that band to continue the body, as shown in the reference image.
Step 3 – Next, draw the tip of the hat
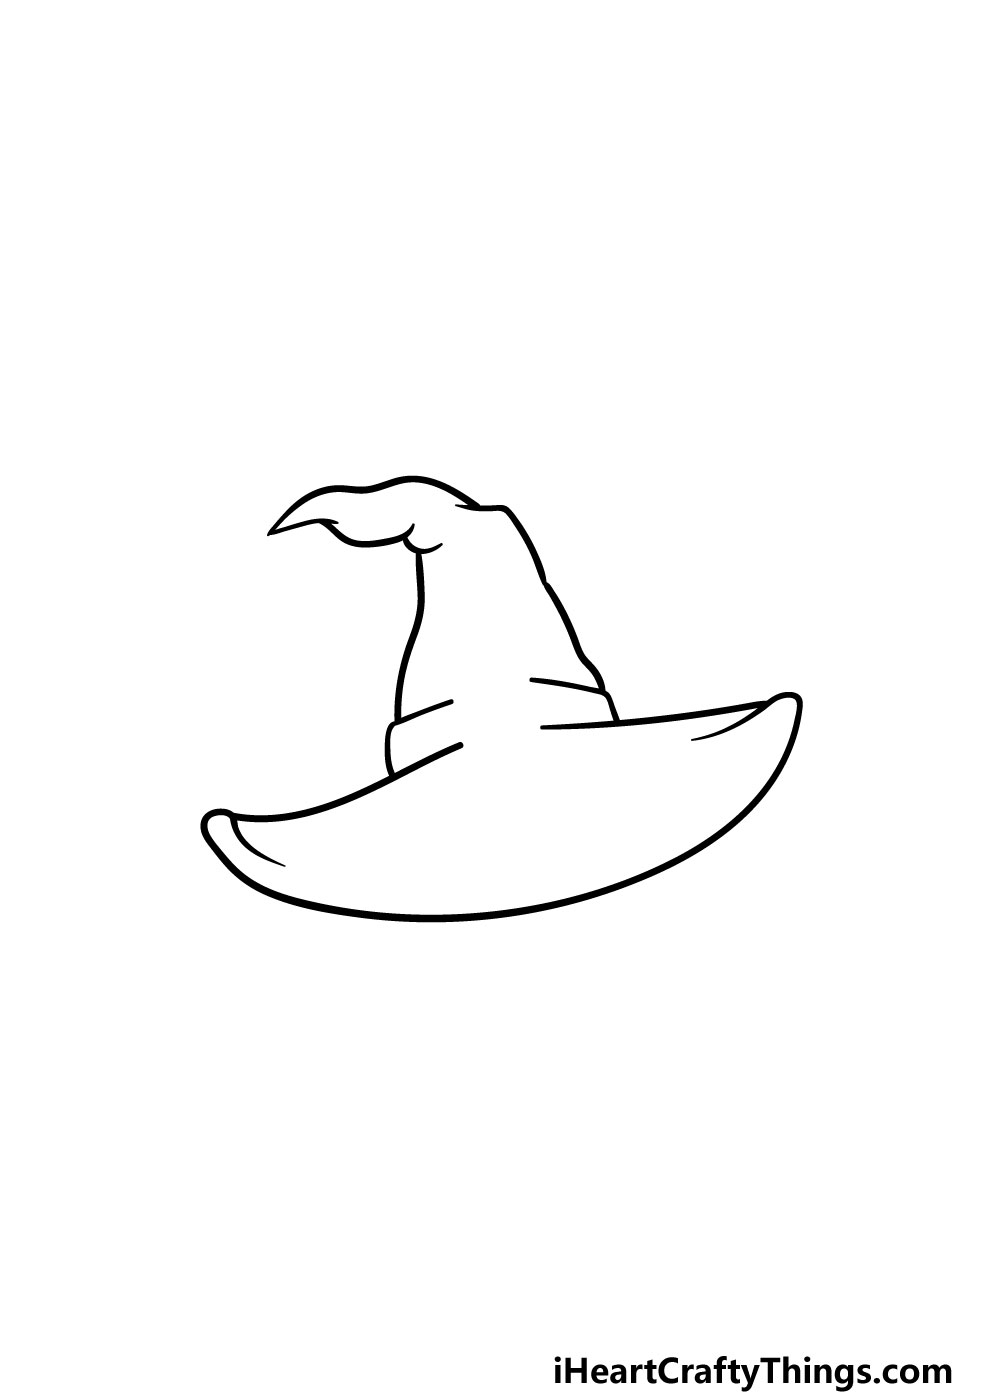
There have been a few mentions of the famous tip of the hat in this guide on how to draw a witch hat, so now it’s about time that we drew it! To do this, we will be using some curved and rounded lines to create the tip going left.
This tip will be connected right onto the body of the hat that you drew previously. If you prefer, you could also have it pointing straight up or to the right. This is your drawing so it’s up to you!
Once you’re happy with how it looks, you’ll be ready to add some final details in the next few steps.
Step 4 – Now, finish off the rim of the hat
Your witch hat drawing is already looking nice and spooky! There are just a few more details to add before we bring it to life with some colors. In this step, we will be finishing off the rim of the hat.
To do this, we will be adding two bumpy lines running parallel to one another inside the interior of the hat. That will finish off the rim and show that the hat is at a bit of an angle.
Step 5 – Add the buckle and final details
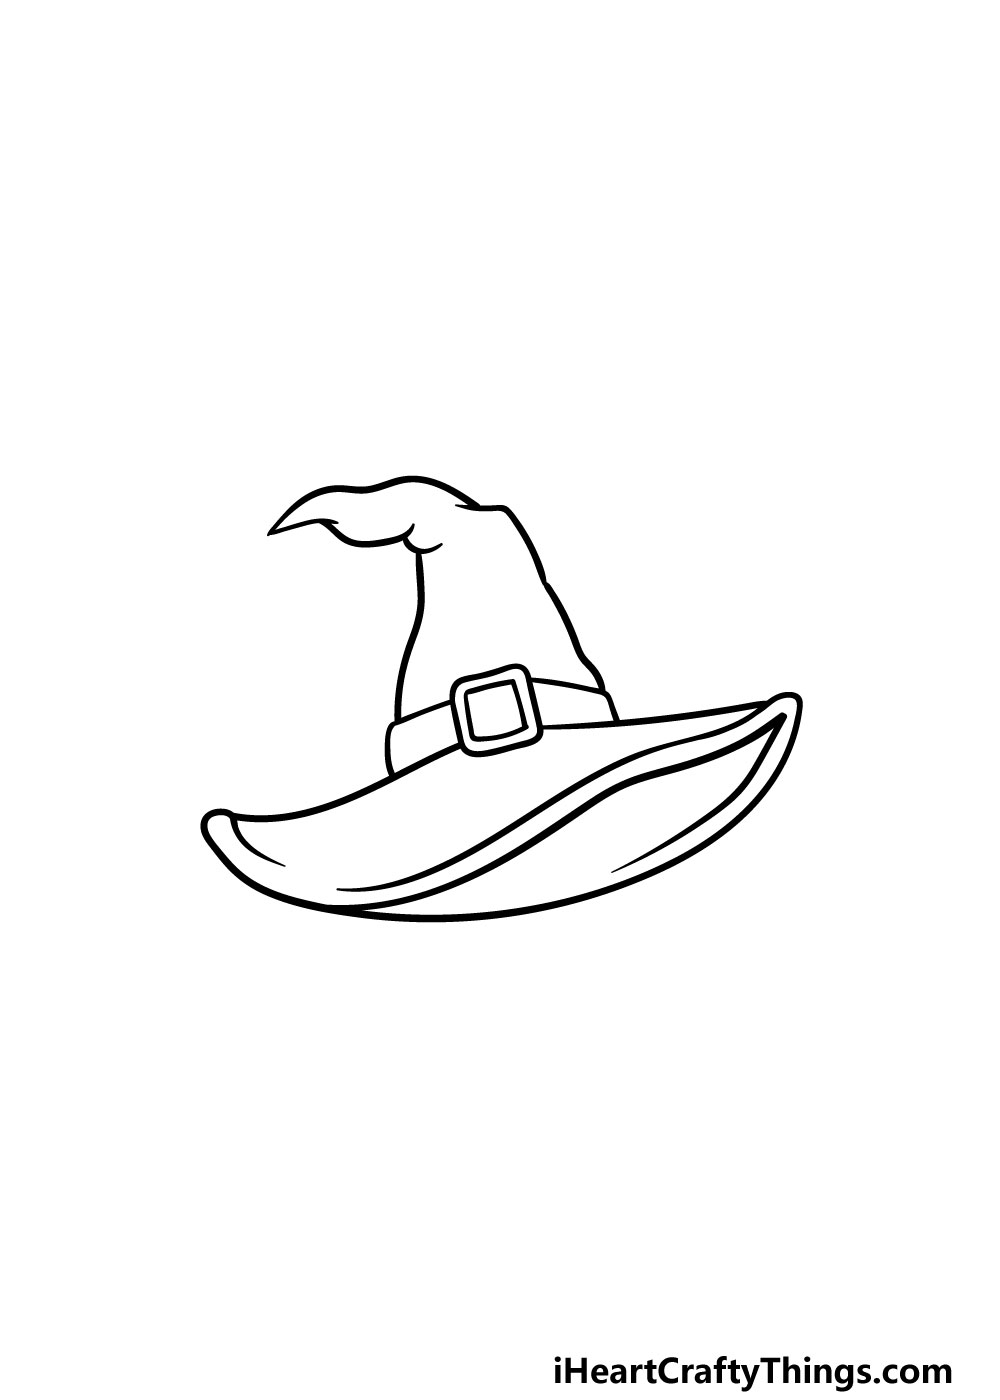
We mentioned the buckle on the band of the hat previously, so in this step of our guide on how to draw a witch hat we will add that along with the final touches.
To draw this buckle, simply add a square shape to the space in the band that you left earlier on. Then, draw another small square within it to finish off this element.
And with that, you have finished the drawing! You can take it even further, however, and you can add any details of your own that you may want.
Perhaps you could draw a background where this hat is sitting beside a broomstick, cauldron, spellbook and other witch-related paraphernalia.
Or, if you’re feeling extra creative you could draw a witch head wearing the hat! These are just a few ideas that you could go for, but there is a world of possibilities open to you.
We can’t wait to see what creative ideas you can think of to finish off this picture.
Step 6 – Finish off your witch hat drawing with some color
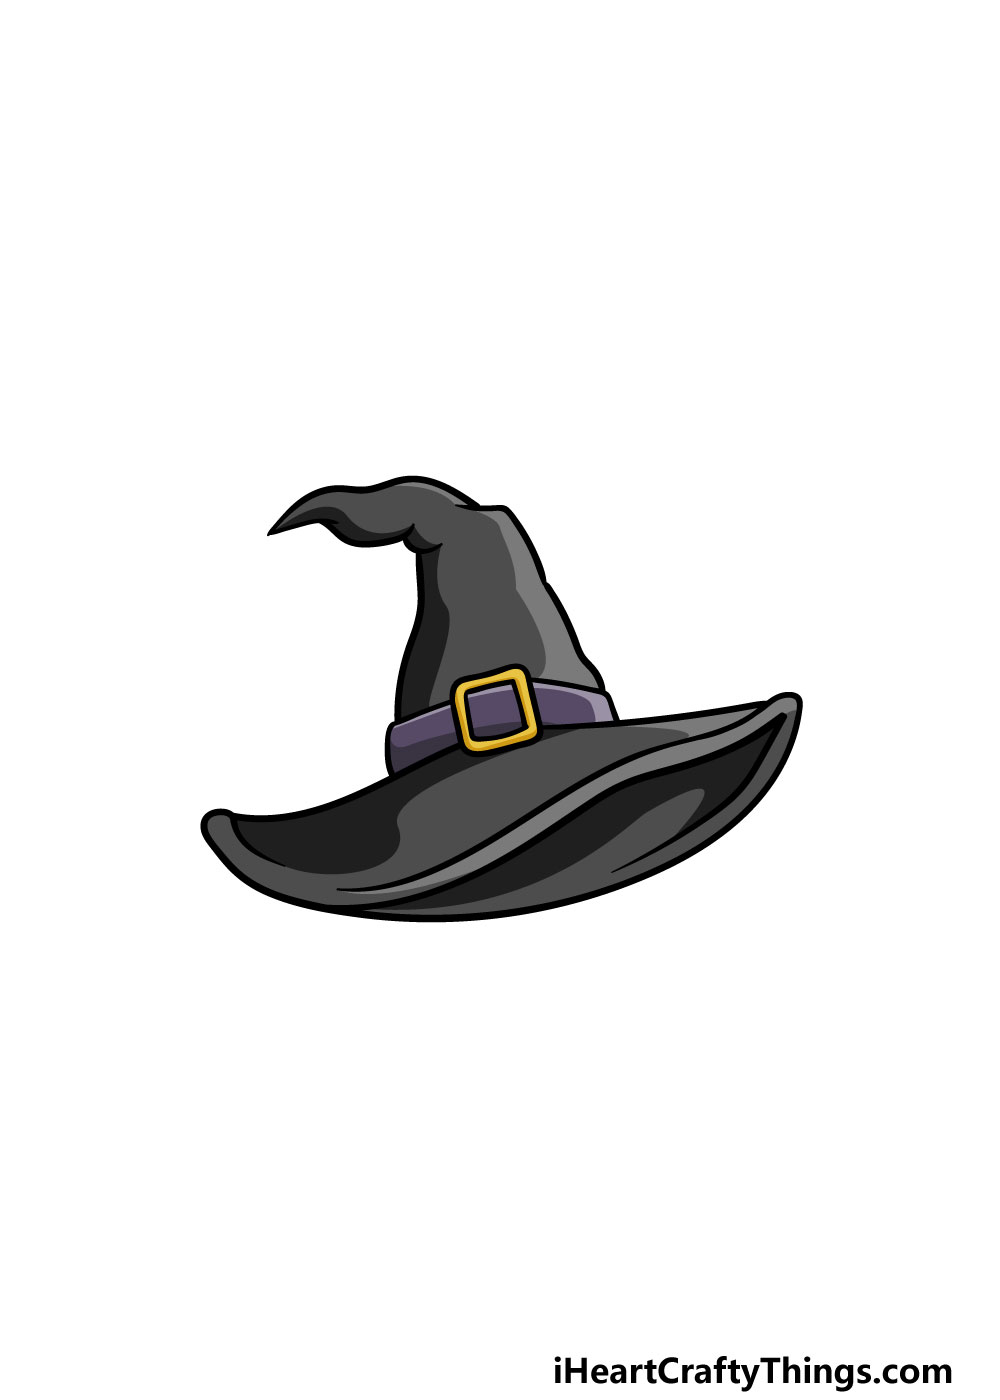
This is the final step of your witch hat drawing, and this should be a really fun step! This is where you get to relax with some coloring fun as you bring this drawing to life.
In our reference image, we went with dark grey, purple and yellow for the main colors of the hat. You can use this as a reference if you like these colors for this drawing, but you can also use any of your favorite colors instead!
Once you know which colors you would like to choose, all that remains is to pick your favorite art tools and mediums. A more muted, cold tone could be achieved with some watercolor paints or colored pencils.
Alternatively, you could make the image brighter by using some colored pens and acrylic paints. How do you think you will bring this picture to life with color?
3 More tips to make your witch hat drawing easy!
Create some art magic with these 3 tips on making your witch hat drawing even easier.
We tried to make this witch hat sketch nice and detailed, but details can make it much harder to draw! If you wanted to make this drawing a bit easier, you could simplify some of the details.
There are many ways that you could do this as well. You could make the overall shape of the hat a lot simpler, or you could take away some of the crease details.
Removing the belt around the hat is another change you could make. Removing details won’t necessarily make the drawing worse, as sometimes less can really be more!
Another way to make this witch hat drawing easy would be to change the angle it is sitting at. We have it at a bit of a tilted angle in our guide, but this is far from the only way that you could draw it.
If you were to portray the witch hat at more of a sideways angle for instance, you wouldn’t need to draw the interior of the hat. A change like this can be more effective than you think, and it can even serve to make the drawing more unique.
Do you think you will change the angle of this hat?
We’ve spoken about removing details from this easy to draw witch hat, but what if we told you you can make it easier by adding some?
When drawing an object floating like this, it can be hard to visualize how it should exist in the space.
For example, you could draw a simple witch’s face beneath the hat to make it look like she is wearing it.
It doesn’t have to be a super complex drawing of a witch’s face, but it will help to put the hat into perspective.
You can find lots of drawings of cartoon witch faces to use as inspiration if you wanted to try this! What other things can you think of that you could add to this witch hat sketch?
Your Witch Hat Drawing is Complete!
We hope that this guide on how to draw a witch hat was spooky and scary only in fun ways!
Taking on a new drawing can sometimes be a bit challenging and intimidating, so we crafted this guide to make this witch hat fun and easy for you to learn to draw. We hope that this guide was both of those aspects for you!
Now you can take this drawing even further with your own final touches. We mentioned a few ideas such as drawing a background or a witch head under the hat, but we look forward to seeing your own creative ideas as well!
We have lots of awesome guides covering a huge variety of subject matter on our website for you to enjoy! We upload new ones constantly, so check in often to catch your new drawing challenge as it comes out.
Once your witch hat drawing is done, we would love to join the spooky fun! You can show us your artwork by sharing it on our Facebook and Pinterest pages.