In the modern age, we have many gadgets and appliances that serve to make our lives a little easier. All of these inventions need power, however, and that’s where batteries come in.
Batteries make it so that we’re not tied down by a charging cable, and they give a sense of mobility to these gadgets.
Batteries come in many shapes and sizes to fit many needs, but the small cylindrical design of common batteries is probably what comes to mind first.
This is the type we will be focusing on as we learn how to draw a battery.
If you would like to know how it can be done, then this will be the perfect tutorial for you!
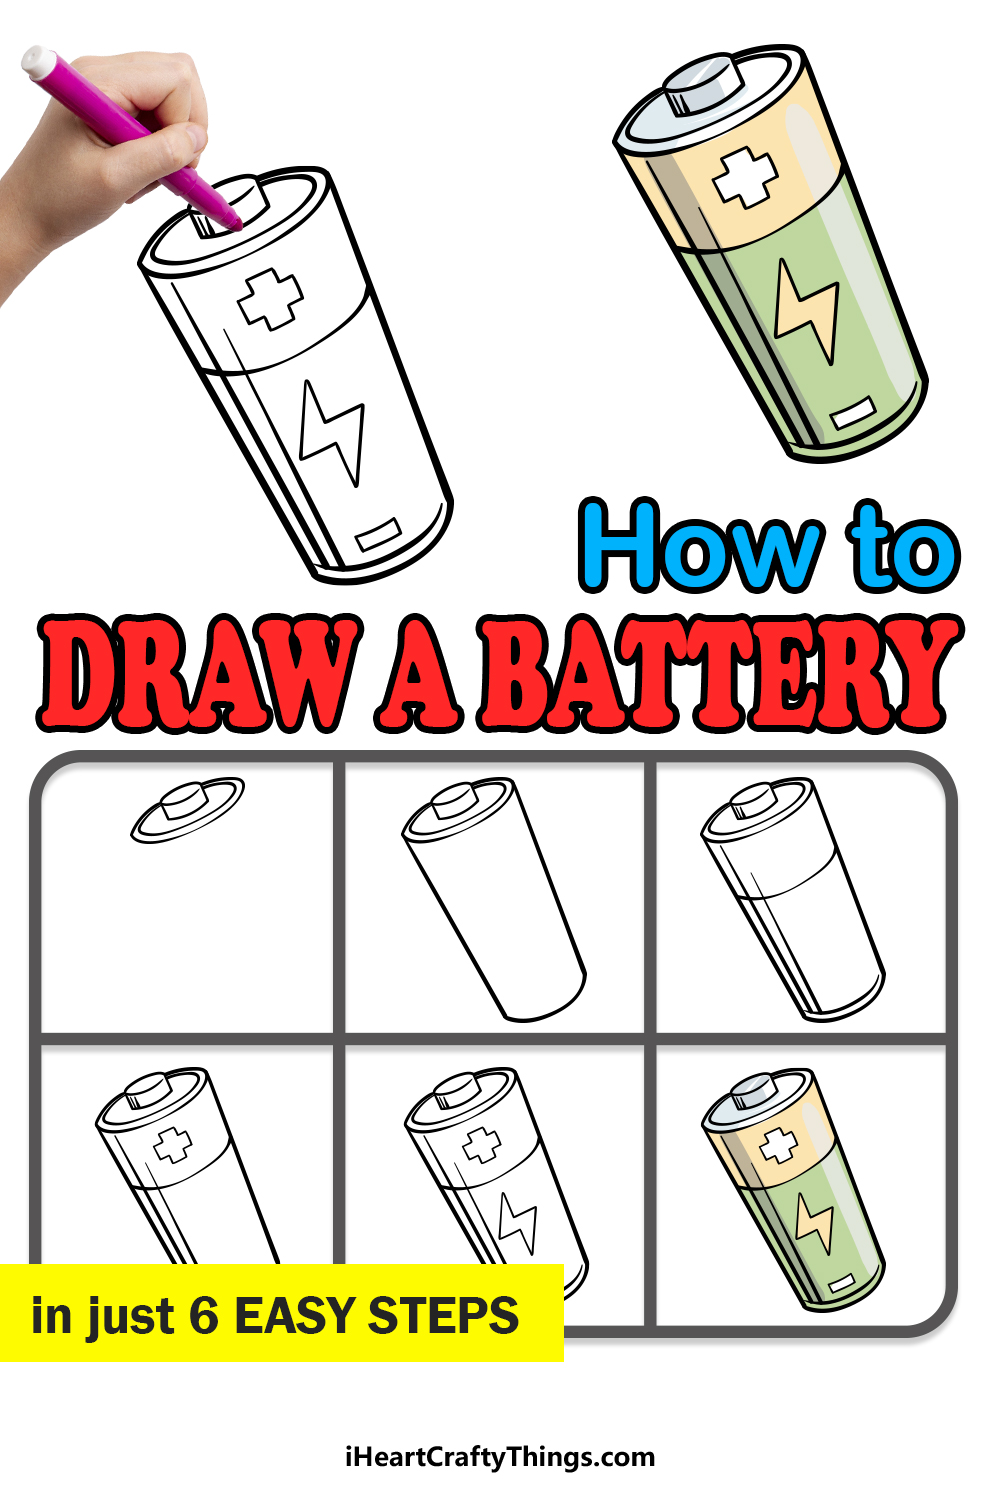
Our step-by-step guide on how to draw a battery in just 6 easy steps will show you how you can accurately replicate a common household battery.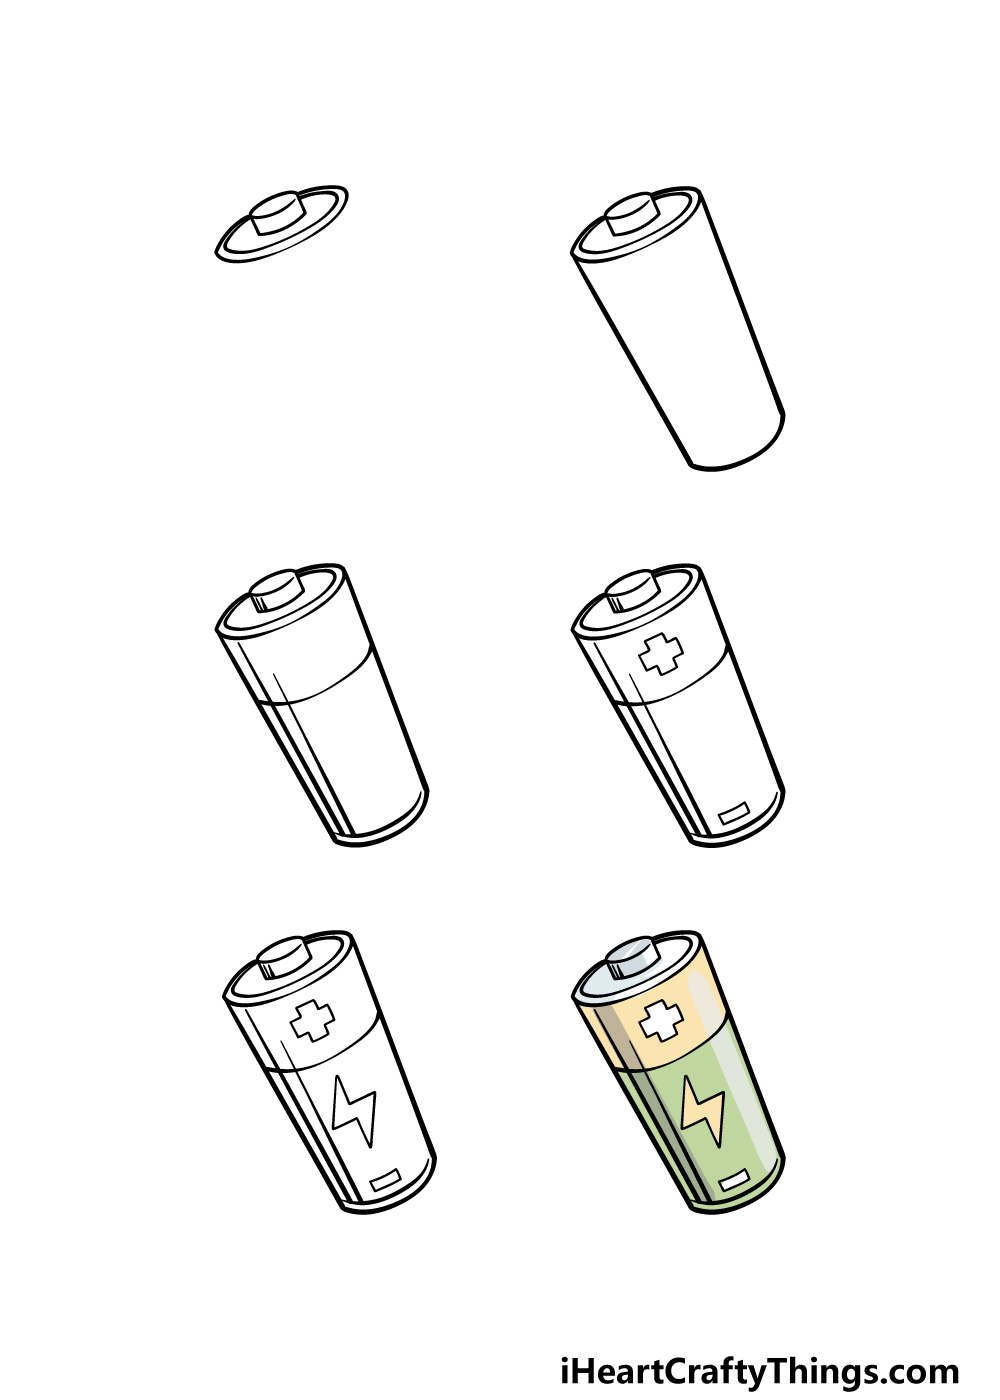
How to Draw A Battery – Let’s Get Started!
Step 1

To get this guide on how to draw a battery started, we will begin with the top of the battery.
This will be the positive side of the battery, and that means that there will be a small rounded section sticking off of it.
We will draw this now, and you can start with a flat oval shape for the top of it. Then, draw two straight lines down from it and connect them with a slightly curved line.
Finally for this step, draw another larger flat oval shape surrounding this piece, and then draw another one closely along the perimeter to finish off this surface of the battery.
Then it will be on to step 2!
Step 2 – Now, draw the rest of the battery outline
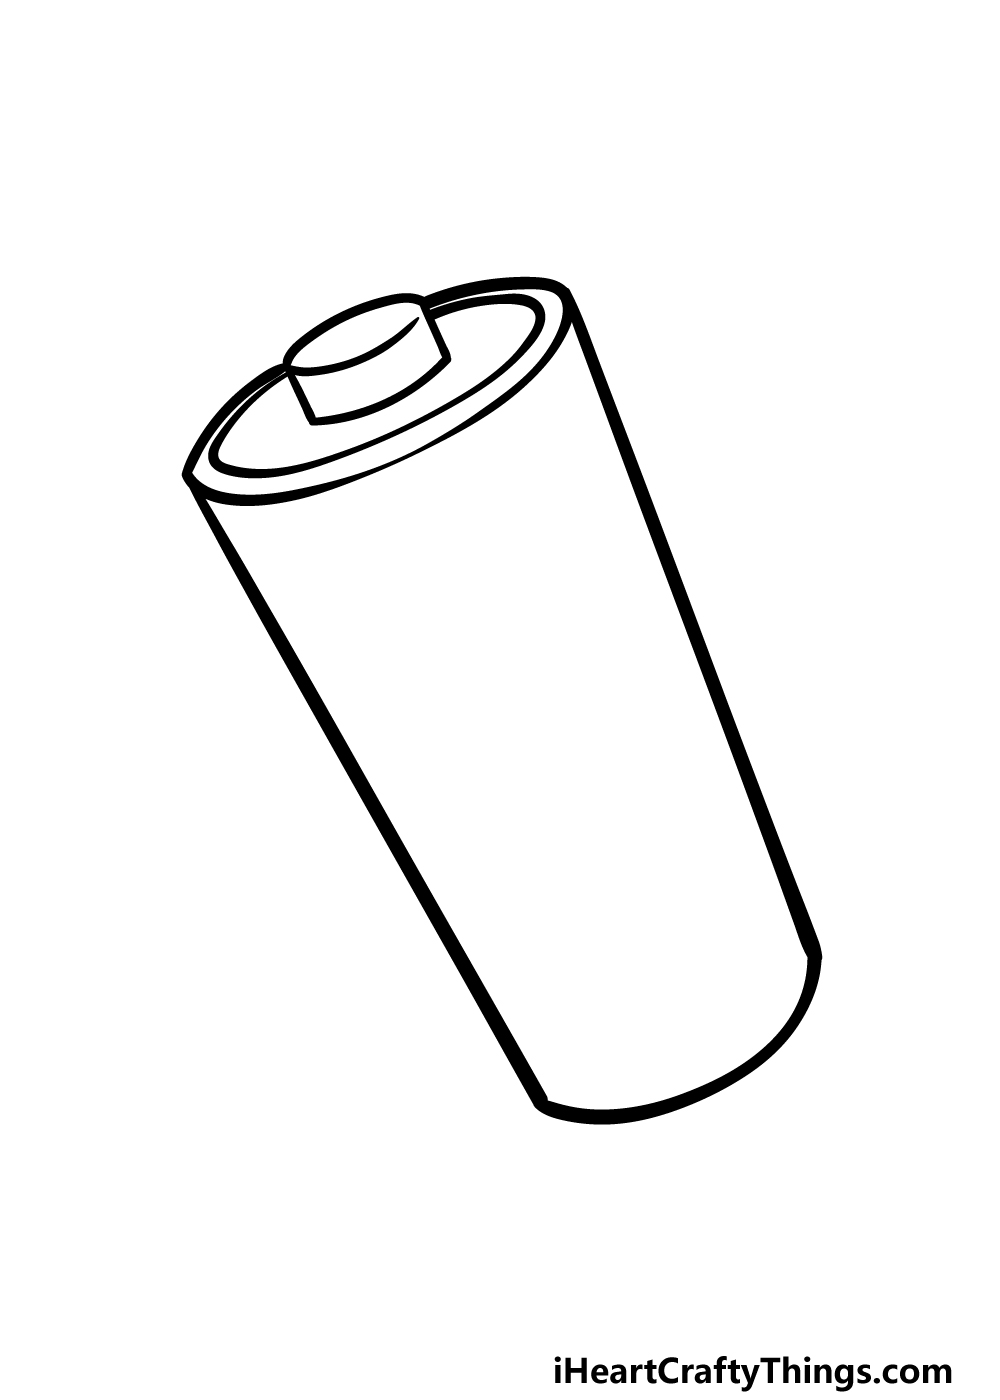
You have the top surface of your battery drawing done, and in this next step we will draw the outline for the ‘body’ of the battery.
To start this, draw some straight lines down from the sides of the top surface of the battery.
These will angle inward very slightly, as this will create some perspective. Doing this should make the base of the battery a little narrower than the top edge.
For that base, draw a slightly curved line to connect the two sides before you proceed to step 3.
Step 3 – Draw some more details for the battery
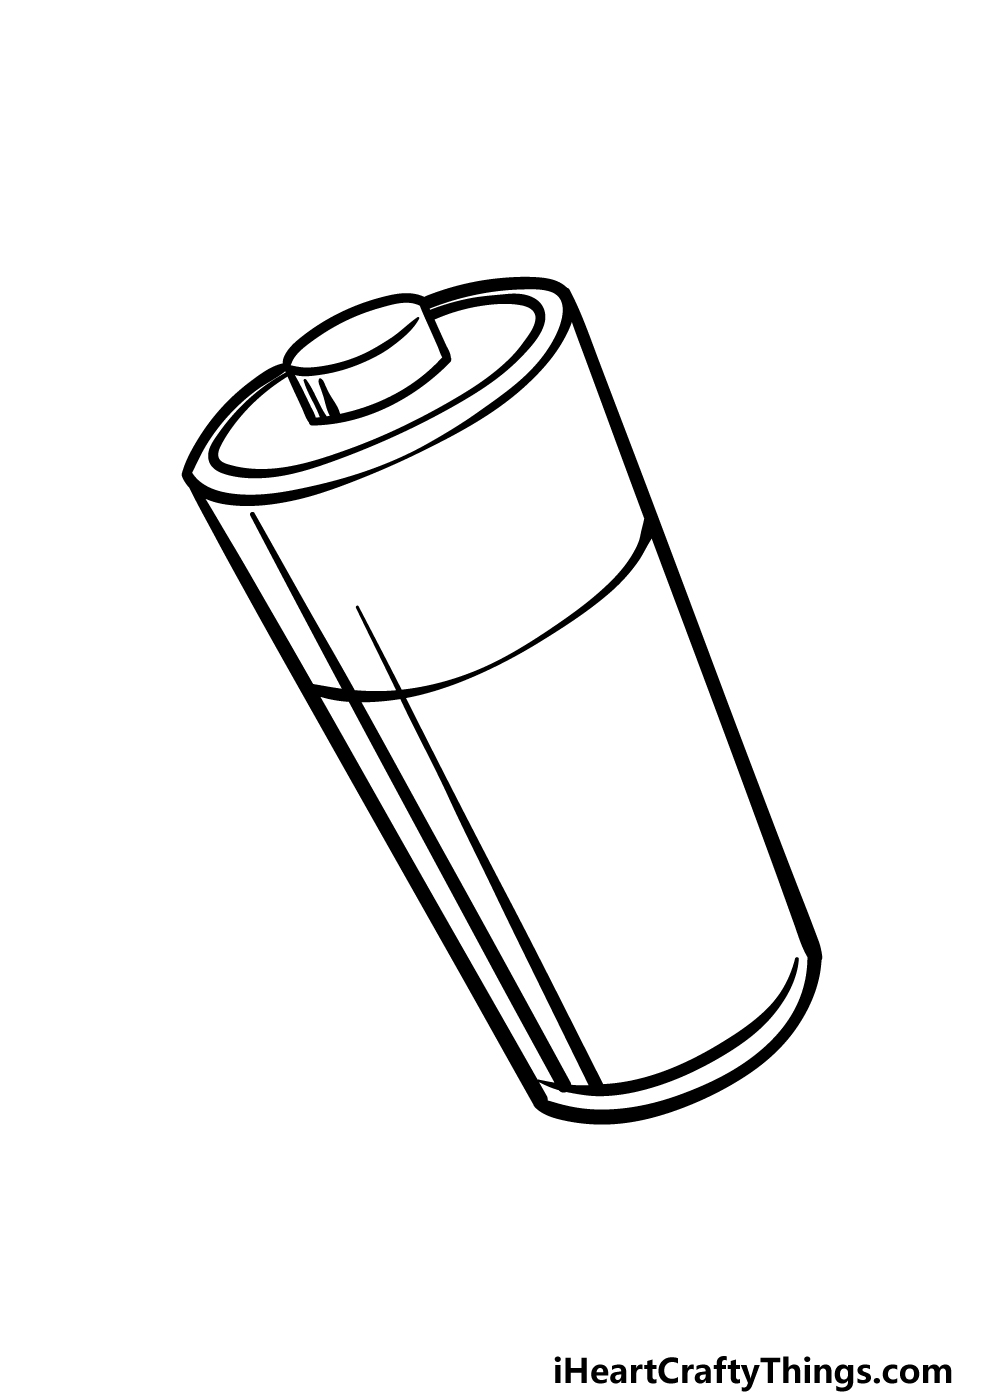
With the outline completed, we can now start adding some of the inner details in this step of our guide on how to draw a battery.
First, draw a curved line across the width of the batter around a quarter of the way down from the top.
Then, we will be drawing two straight lines vertically down the left-hand side of the inside of the battery. These will help to represent the curve of the cylindrical battery.
Finish off with some minor line details on the top surface of the battery, and then we can tackle step 4 of the guide.
Step 4 – Next, draw the positive and negative symbols for the battery
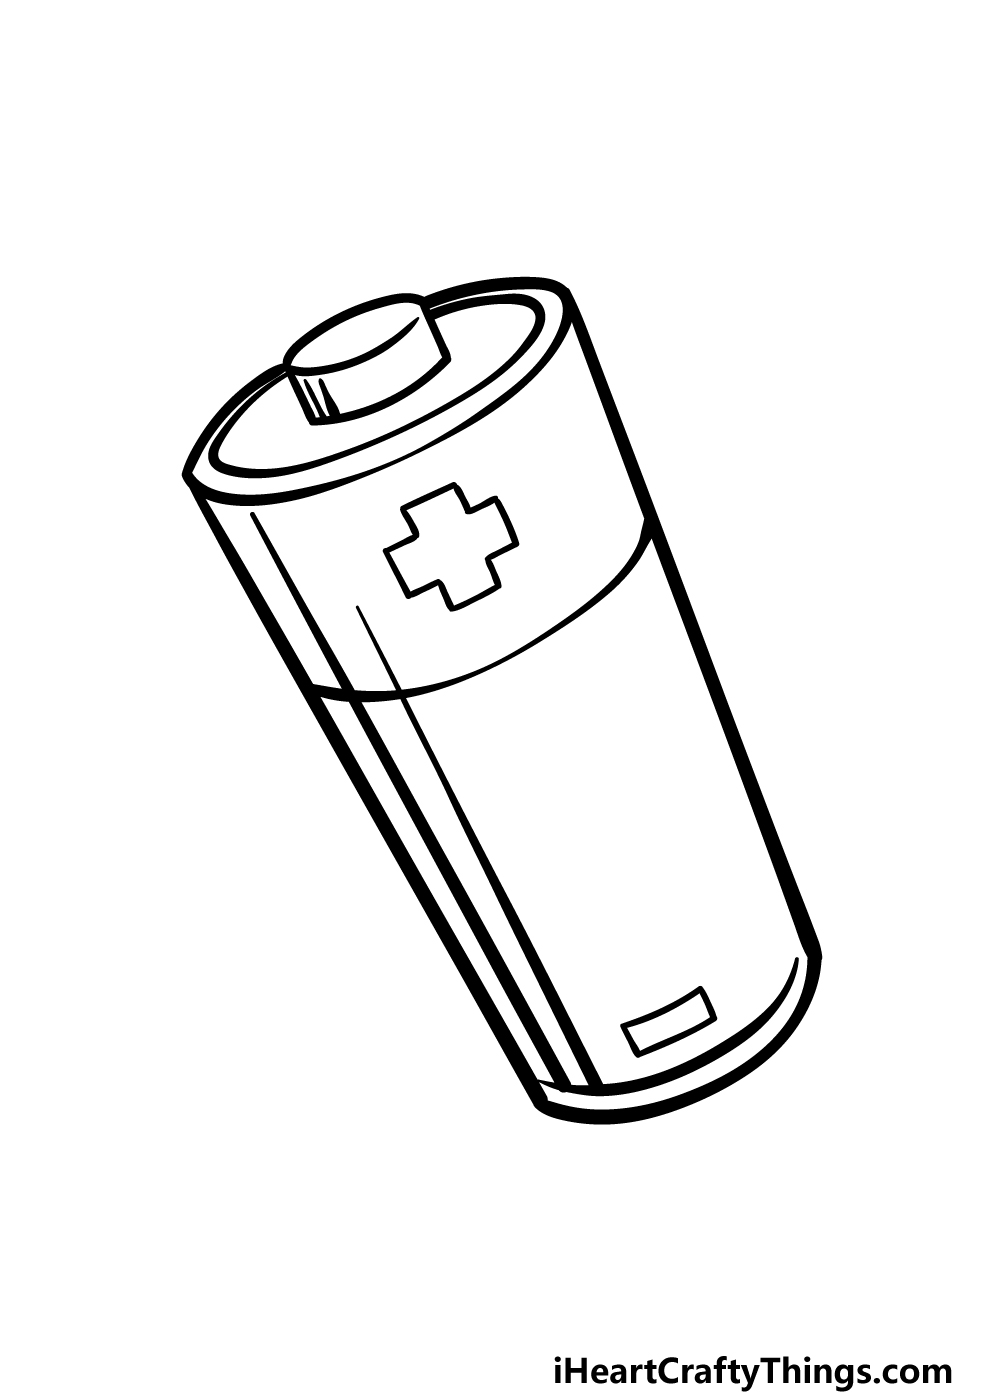
Each battery you find will have a positive and a negative side. These are easy to recognize, and the label on a battery will often make it even easier by printing symbols to show which side is which.
This is what we will be adding in this step of your battery drawing. The positive symbol will go into the upper section of the battery.
This will be drawn as a thick plus sign symbol, as shown in the reference image.
The negative symbol will go near the base of the battery, and this will look like a thin rectangle. Once you have drawn these, we can move on to the final touches in the next step of the guide!
Step 5 – Add the final details to your battery drawing
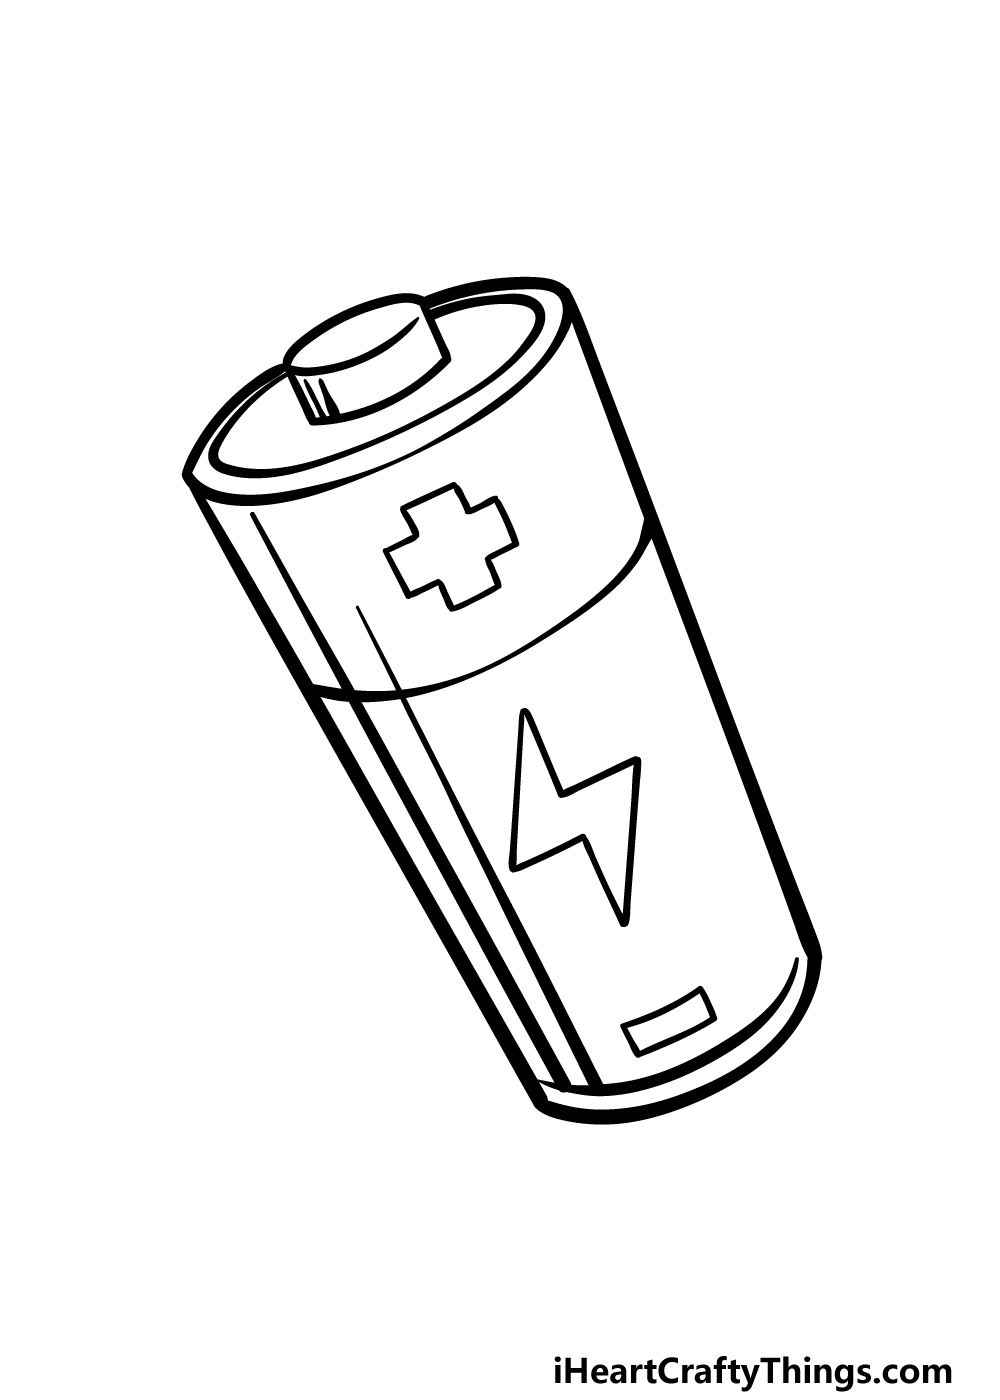
Before you move on to the final step of this guide on how to draw a battery, we have a few final touches to add.
For our design, we finished off by drawing a thick electrical symbol onto the body of the battery. You could also go for this design, but you should also feel free to use any additional ideas of your own!
You could draw a unique label to make it look like an established battery brand or create your own new one.
Then, you could finish off with a background for the image. This could be anything from a pattern background to showing off some devices that this battery may soon be powering.
It’s up to you now, so have fun getting creative as you gear up for the final step!
Step 6 – Finish off your battery drawing with color
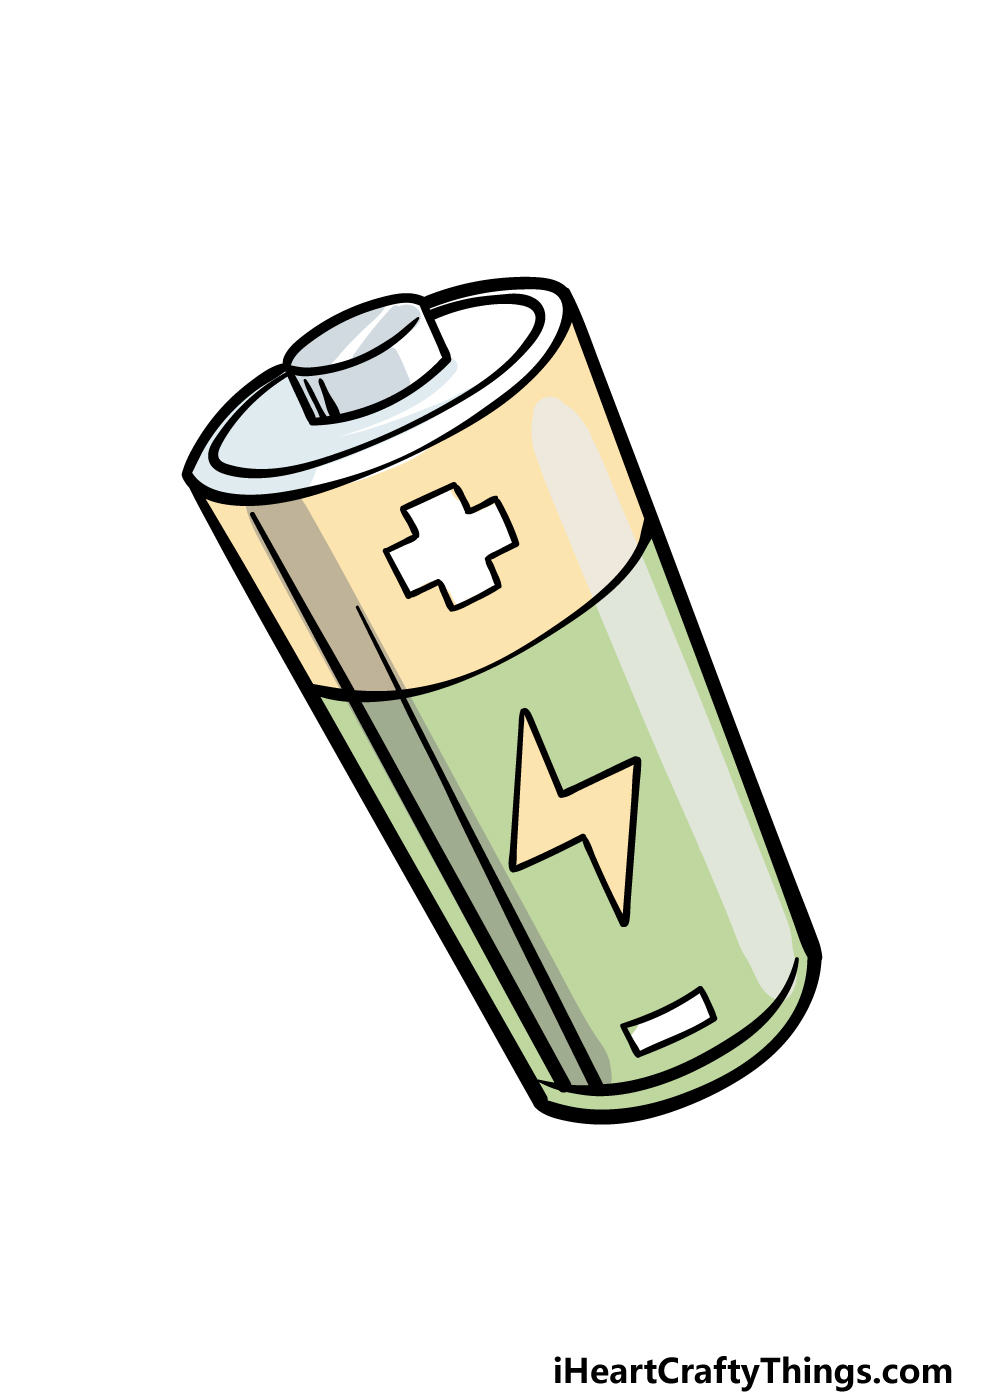
Now it’s time to finish off this battery drawing with some colors! In our reference image, we showed you our color interpretation for this image.
For the top portion, we used some light yellows, and then for the lower part e used some shades of greens.
By changing up how bright some of the colors are, you can create a reflective effect on the shiny surface of the battery.
Do you think you would like to use these colors or go for some unique choices? Perhaps you could color it in to make it look like the go-to battery brand that you use in real life!
We can’t wait to see what you choose to finish off your image.
Here’s how you can make your battery drawing even better…
Charge up your battery sketch with these fun tips to try out!
Whenever you use a battery, chances are you will use more than one. That’s why we think it would be great to add a second one to your drawing of a battery!
It would be easy to do this, as all you would need to do is follow through the guide again. Then you could change a few details such as the angle and position of the second battery to make it unique.
You could also add a few more if you wanted!
The design for the label of the battery in our picture is pretty simple and generic. It looks great like this, but you could also make it more personalized.
One way of doing this would be to make the label look more like the label of an actual battery brand. Or, you could even design your very own battery label with a logo and text of your own design.
What sort of look would you like for the battery?
If you wanted to add some more batteries to your battery drawing but want some variety, you could draw other kinds of batteries.
Batteries come in all sorts of shapes and sizes depending on what they’re used for, so you’d have many options.
If you need some help, you could look at various batteries in your house or look up some pictures online. You could have a really interesting image that shows off all of the different variants!
Finally, you could make this battery sketch more complete by showing what the battery will be going into.
There are so many devices that use batteries that you would have many different things to choose from.
It could be something practical such as a flashlight or maybe a radio, and these would be easy to find pictures of online. There are other fun things you could use it for too!
For example, they could go into a toy robot or maybe a game controller. It’s up to you to decide!
Your Battery Drawing is Complete!
That brings you to the end of this guide on how to draw a battery!
Even simple objects such as this can sometimes be tricky to pull off in a drawing, so this guide was created to break it down and make it much easier for you to do.
Hopefully with the help of this guide completing this drawing was positive and not negative!
Now you can take over with your own additional elements, ideas and details. If you drew a background, maybe you could show off what you would be using this battery for.
What ideas would you have for this kind of extra detail?
If you had fun drawing this battery, then you will be glad to know that we have tons of awesome guides for you to enjoy on our website. Be sure to check in often, as we upload new ones frequently!
We would also appreciate it if you would share your finished battery drawing on our Facebook and Pinterest pages, as we always love to see how your artwork turned out.