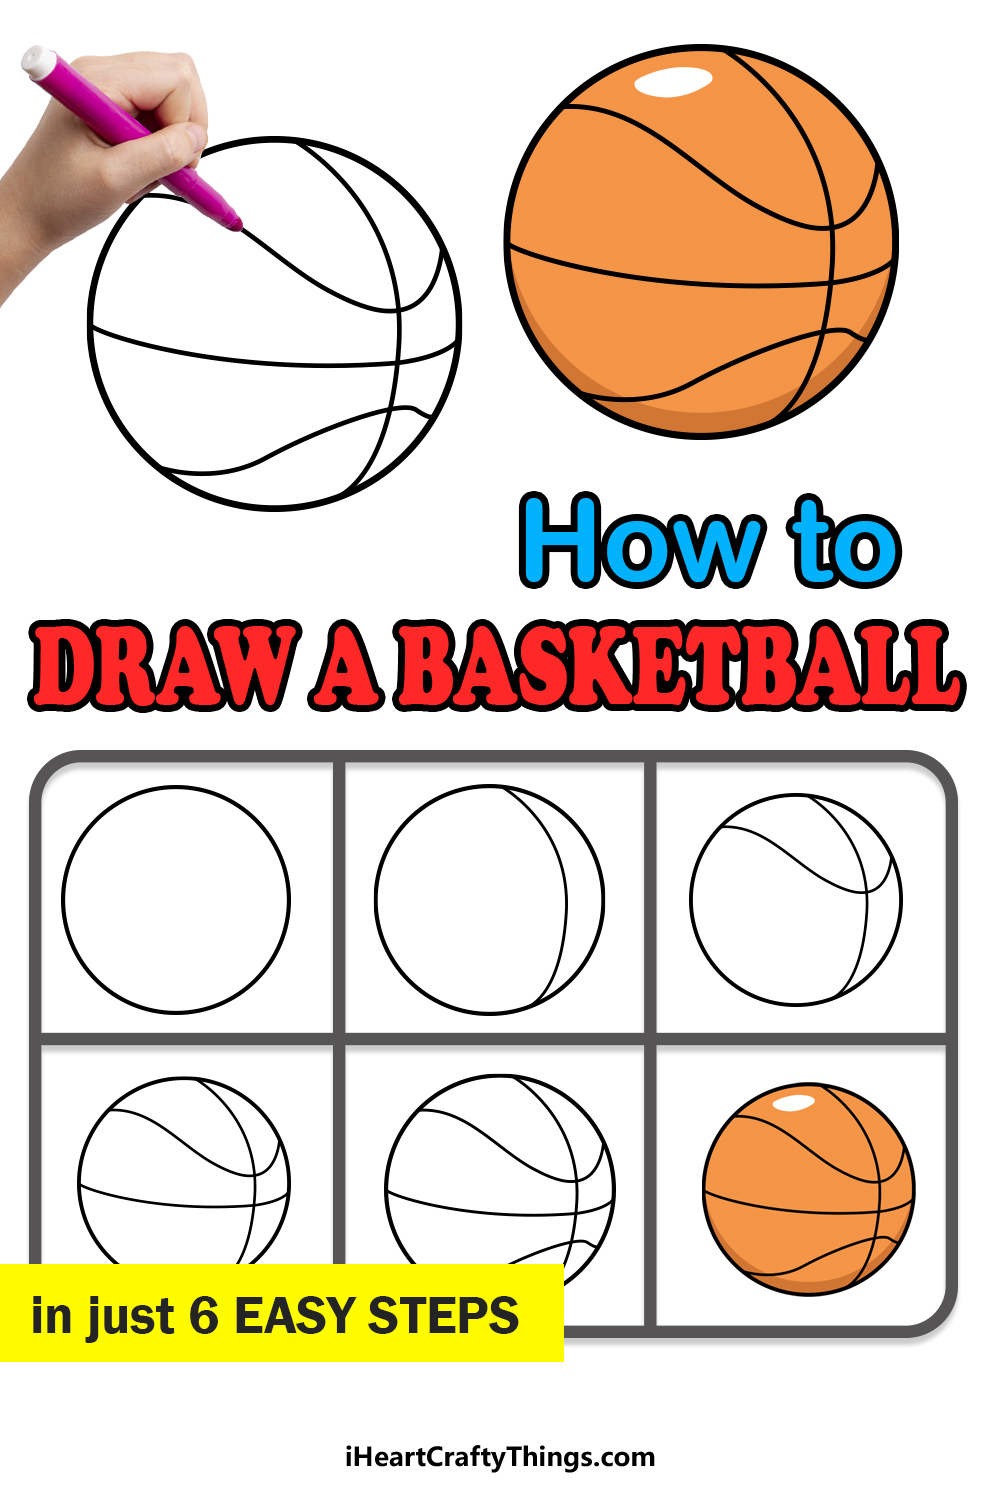
Sports fans can learn how to draw a basketball easily thanks to this step-by-step guide for kids! You’re going to be amazed at just how simple it is once you know what to do.
Basketball is one of the most popular sports in the world, yet have you ever tried to draw a basketball before? I can tell you that it’s not as easy as it seems, as the lines on it are so specific.
Also, how do you ensure that you draw a perfect circle? This and many more questions will be answered in this guide. I will show you the drawing tools you need as well as how to draw the lines.
I’ll even show you one of the ways you can color your basketball! Then, once it’s done, you could take it further by drawing a basketball court or even your favorite player next to your drawing.
It all begins now, so let’s blow the starting whistle and get going.
Watch These Steps On How To Draw A Cartoon Basketball
How to Draw A Basketball – Let’s get Started!
Bonus: Add To The Drawing Before You Color
Many people falsely assume that drawing is easy, but it has challenges no matter how simple your subject may seem. As with any task, the more you prepare the easier it will be.
Before we begin the first step, we want to make learning how to draw a basketball as easy as possible by giving you some ways that you can prepare for it.
First, you will need the right tools for the job. Art teachers will always say that using a variety of different pens and pencils is important when drawing.
It can be easy to find one pencil that works for you and then stick to it, but if you vary up the pencils you use then your pictures will look so much better.
For example, you should ideally not be using the same pencil that you used for the outline for the smaller details on the basketball. Other tools will also make your drawing easier.
We talk about using a drawing compass in the first step, and this will make drawing the circular outline much easier. This will be a great tool to buy if you don’t have one already, as you will find it comes in handy frequently.
Lastly, you could look up pictures and photos of basketballs and basketball accessories to keep in mind when you add your own additional details and ideas later on in the guide.
These are just a few of the ways you can prepare yourself for creating this basketball drawing, so we hope that it seems more manageable as you begin the first step.
Remember to take it slowly and use all of the tools available to you as you draw and you will have an incredible drawing in no time!
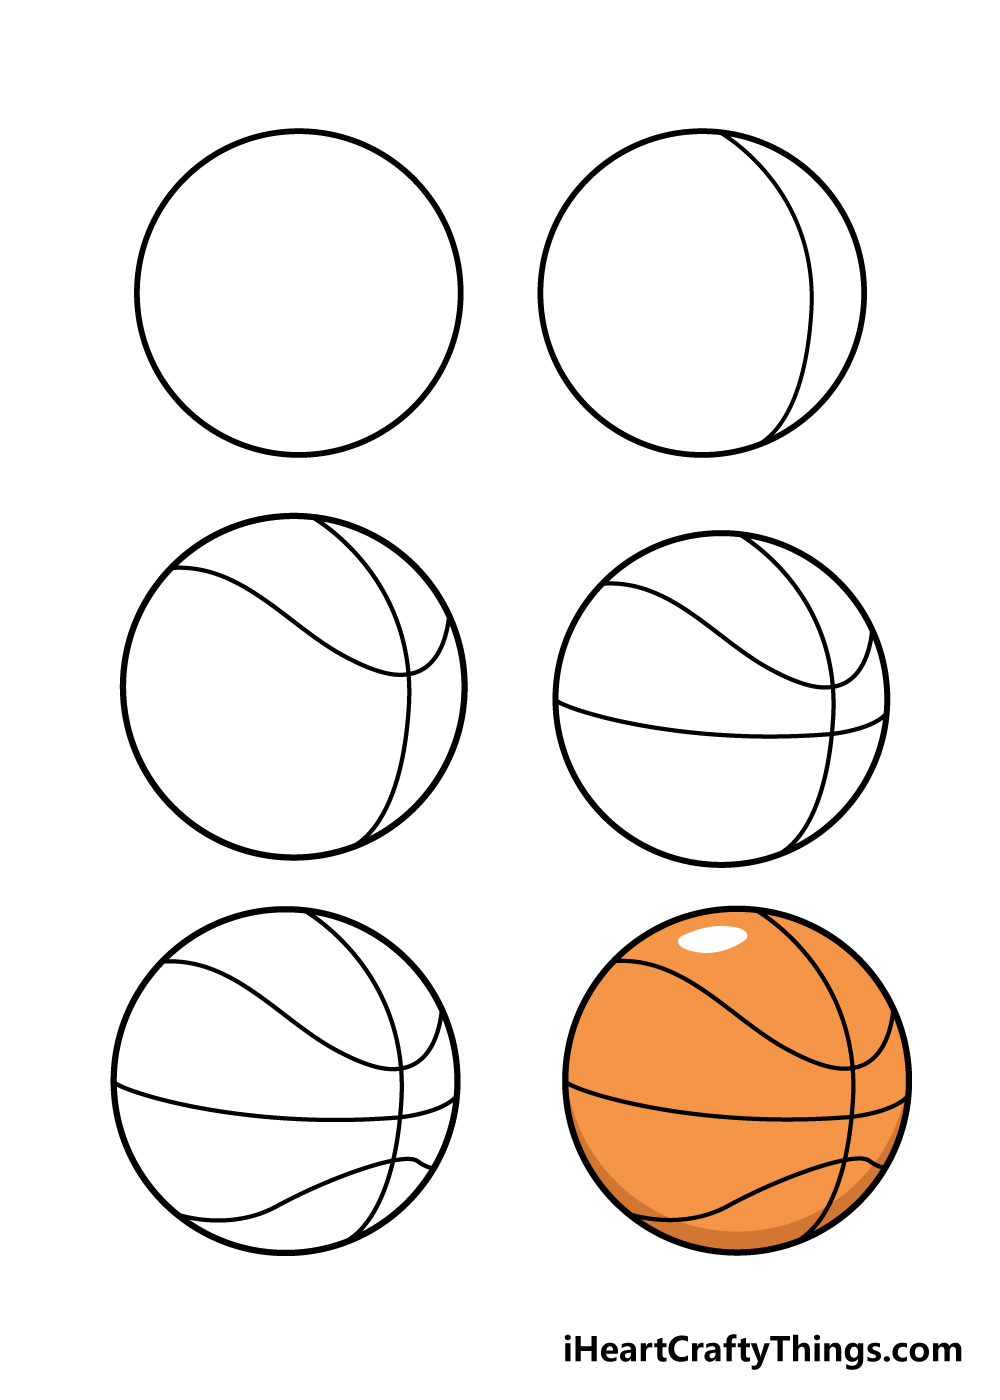
Step 1

The first step of this guide on how to draw a basketball is going to be simple to start with. For this step, we shall be drawing a perfect circle that will be the outline of your basketball.
Drawing a perfect circle freehand can be really difficult, so there are some tools you can use to help you.
The best tool for drawing a circle is a drawing compass. This tool helps you draw a circle with ease, so if you have one then it would be great for this step!
If you don’t have one, you could also use a circular object like the cap of a glue stick and then draw around it to make a circle.
Step 2 – Draw in the first lines in your basketball
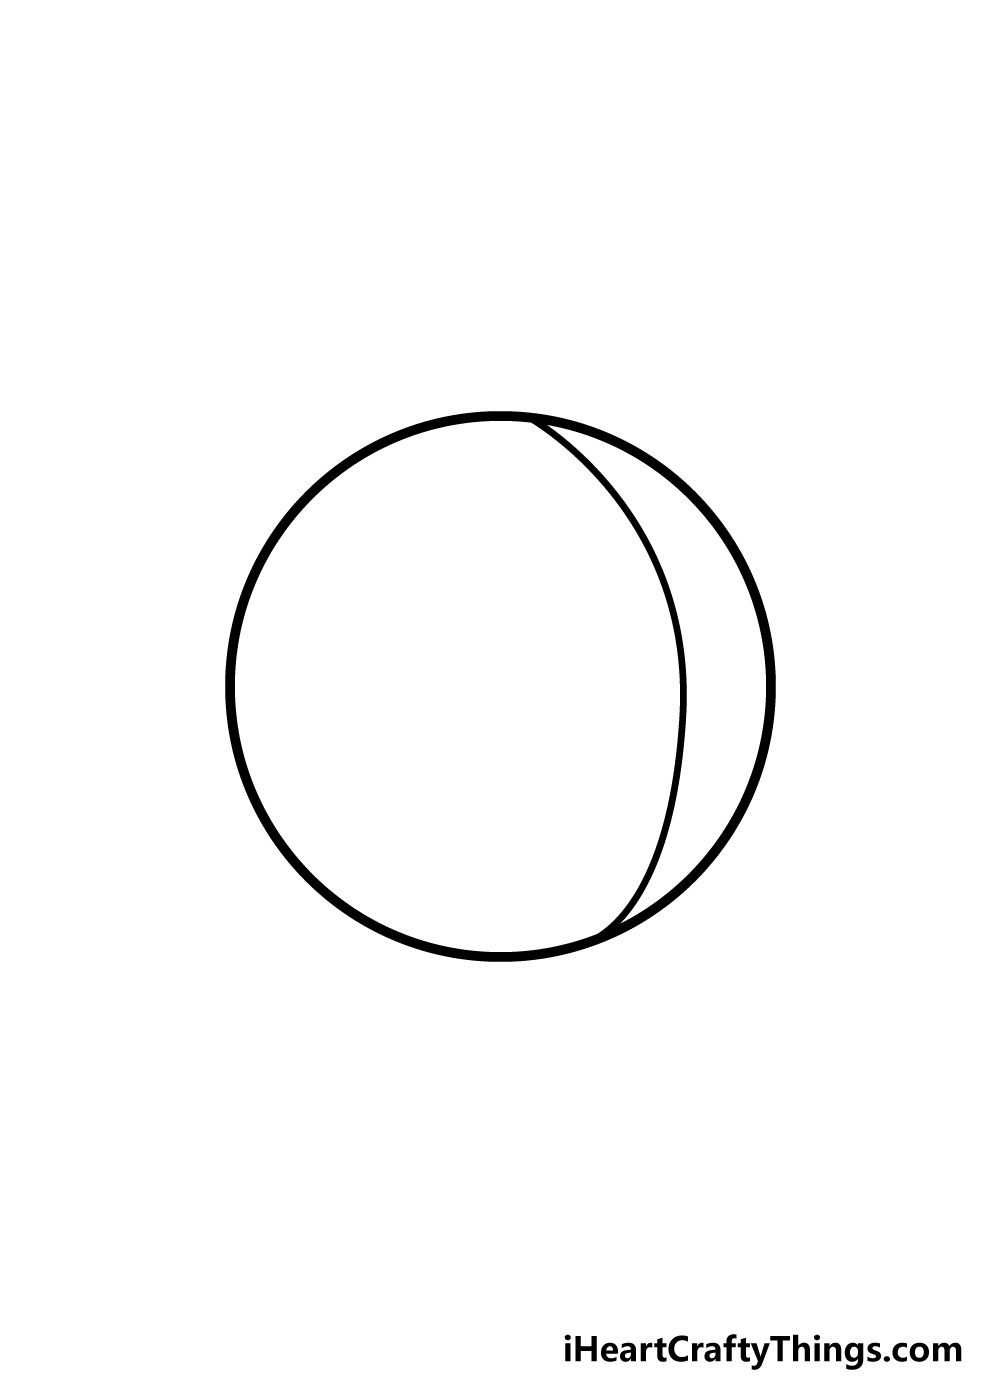
Now that you have the outline of your basketball, you can start to draw in some lines of the ball. For this step of your basketball drawing, we shall add in one curved line.
This first line will extend from the top to the bottom of the basketball with a slightly curved line.
If you do have a compass, you can also use it to make this curved line down the ball.
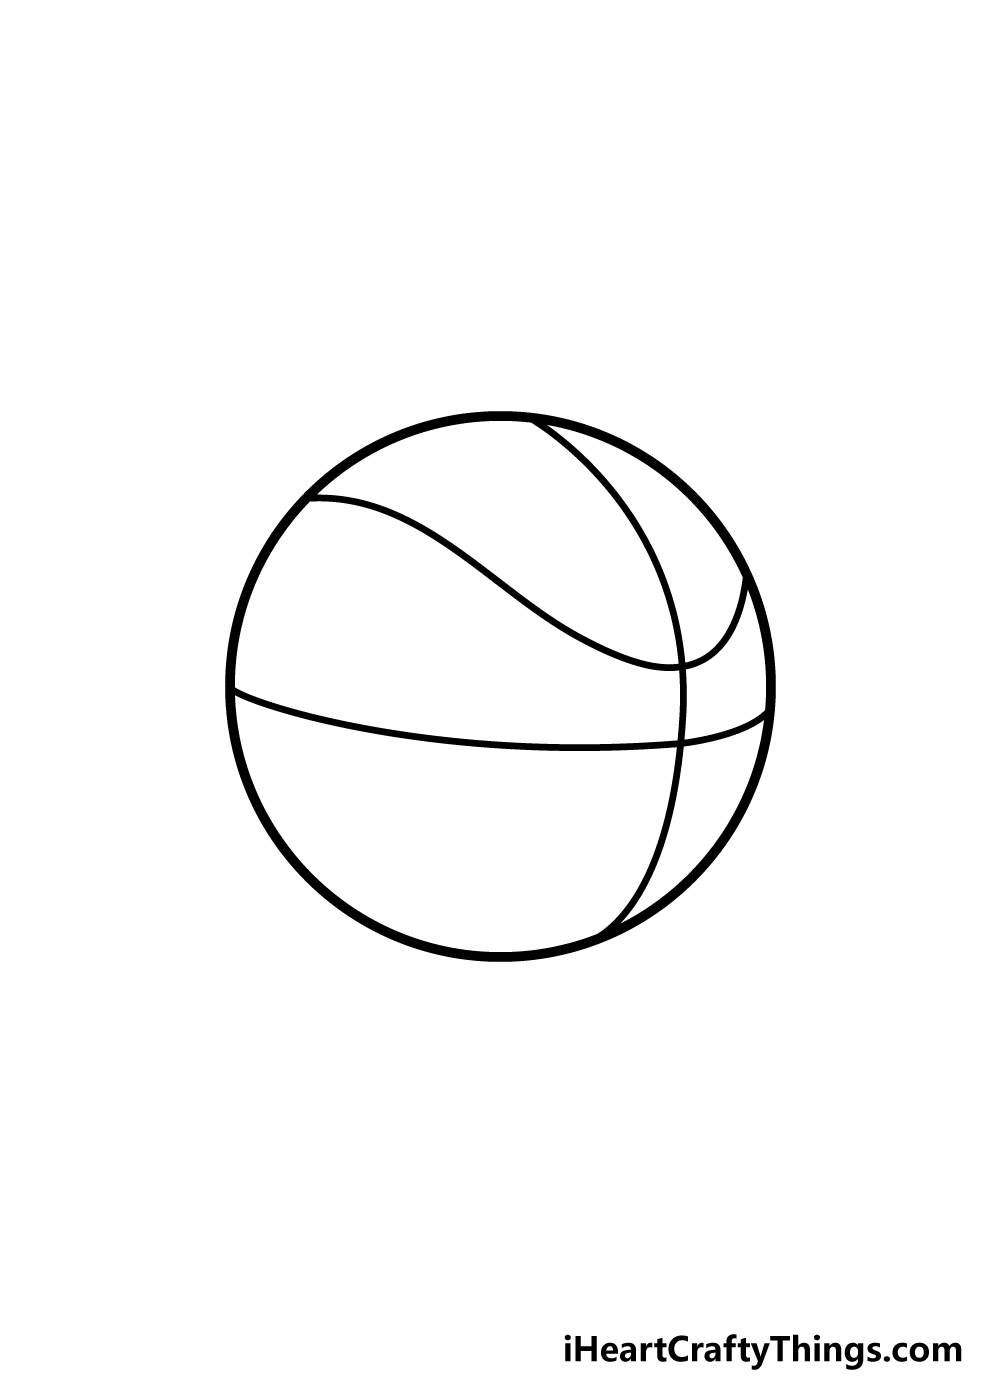
Step 3 – Next, let’s add in some more lines to your basketball
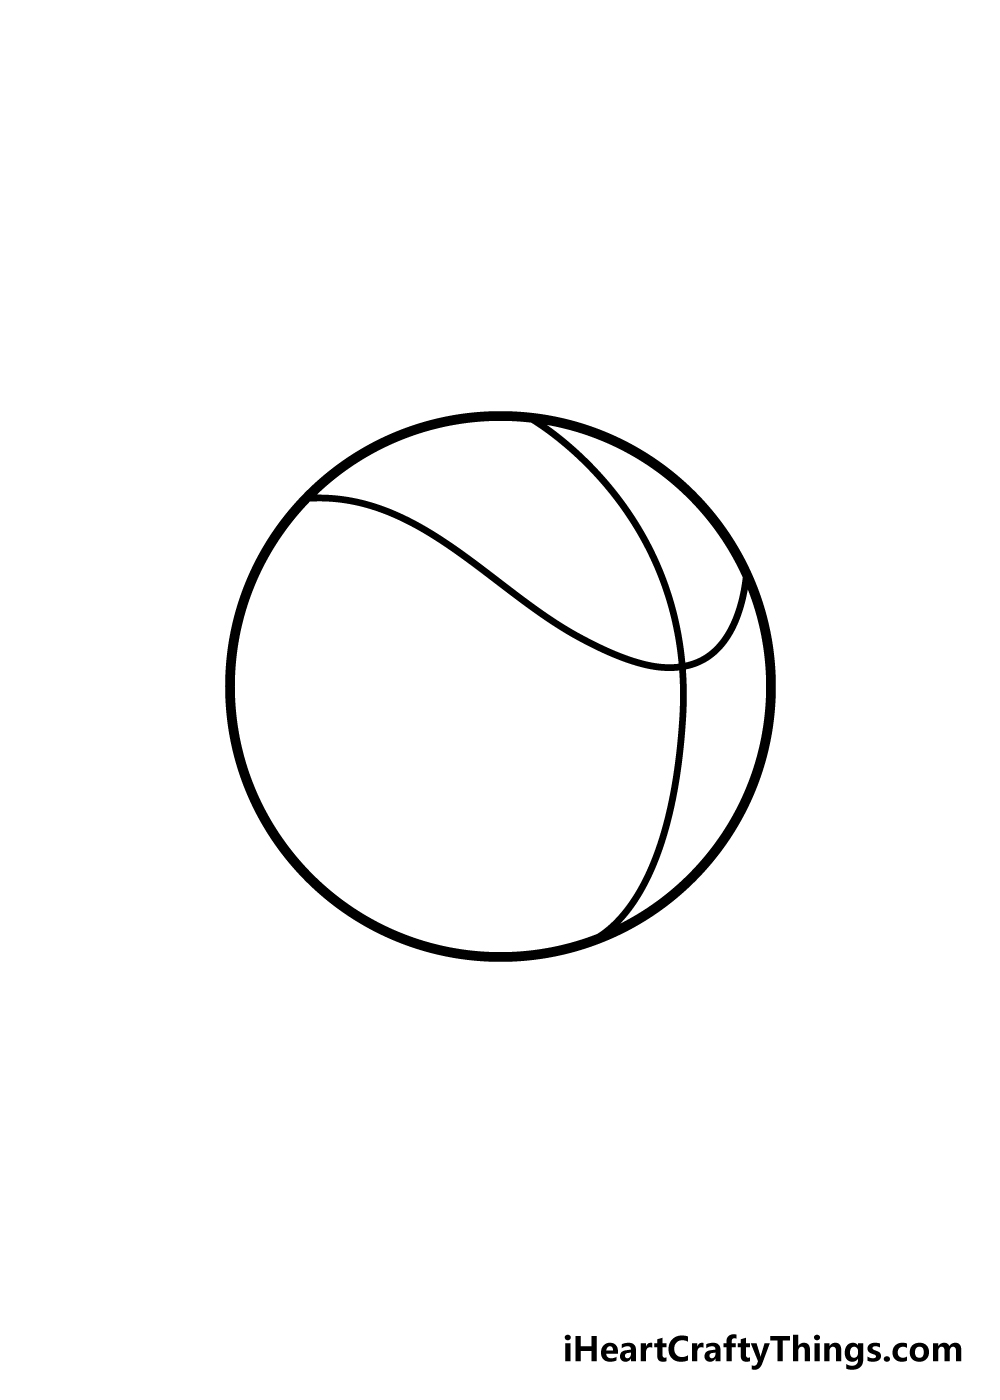
We’re slowly building up the details of your basketball drawing, so we shall add in some more as we go along.
For this step, we shall be adding in a very curved line horizontally to the basketball as it appears in the reference image.
These lines could be a bit tricky to get right, so you could use a pencil to draw in the lines and then use a pen to go over it when it looks good to you.
Step 4 – Now, add in a vertical line for your basketball
For step 4 of this guide on how to draw a basketball, we will continue to draw in more details. For this step, carefully draw in another horizontal line to the basketball.
This line should be only slightly curved at a horizontal angle.
With this line done, we can move on to the next step!
Step 5 – Next, add in the final details
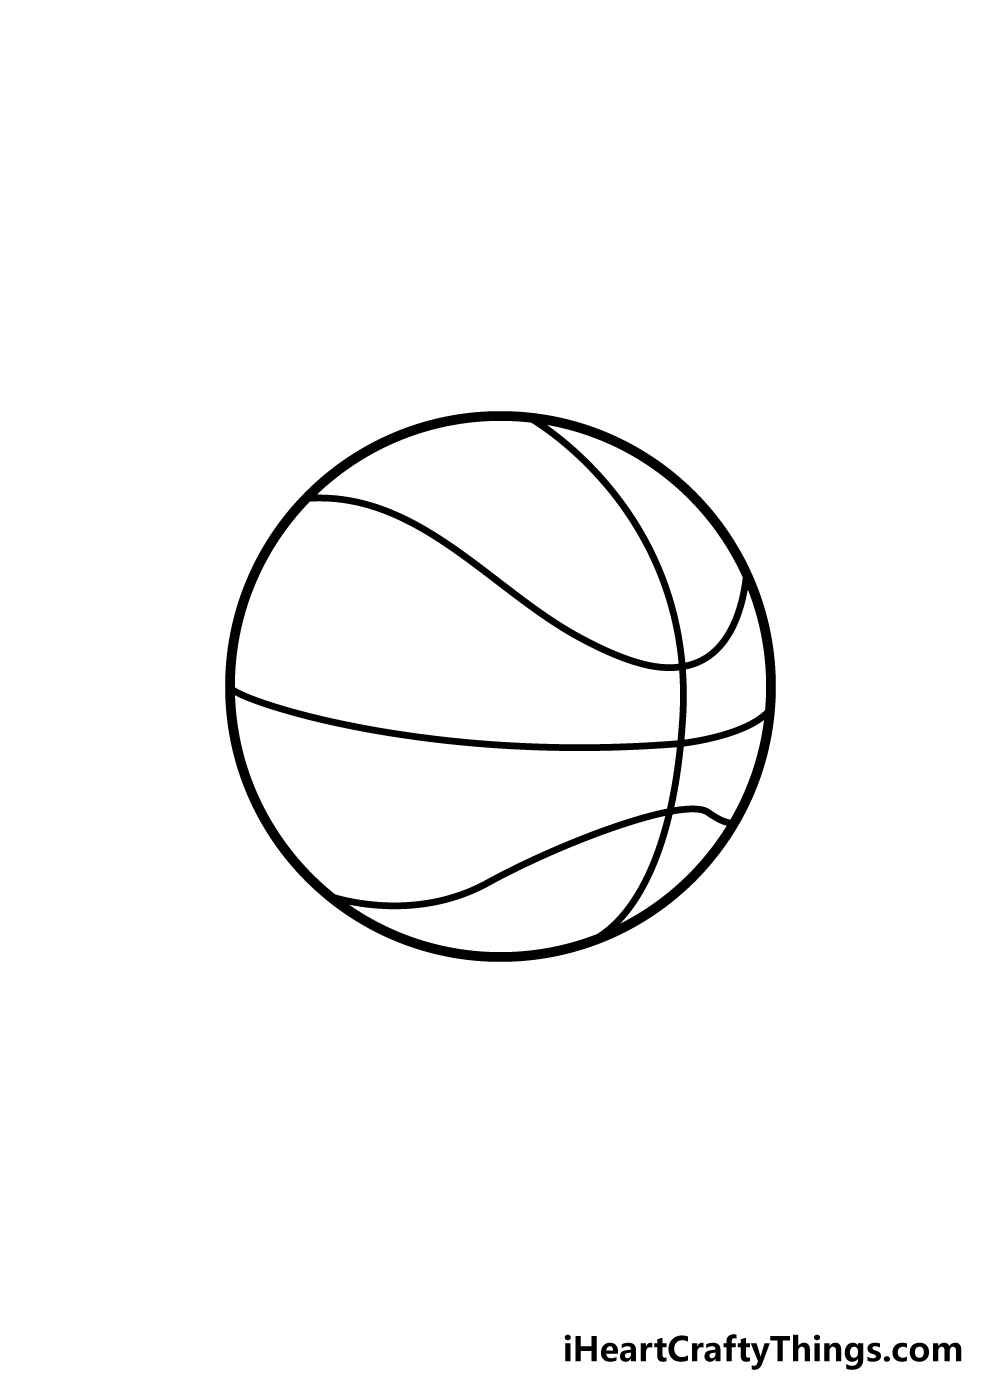
You’ve very nearly finished your basketball drawing at this point, and it only needs one more line to be complete! This final line will be a mirror image of the upper line you drew in step 3.
As you can see in the reference image, it will look exactly like that line except inverted.
Once you have that line drawn, you’re essentially finished with the drawing! If you want to add in some extra details, you could also do that to set it apart a bit.
An example of what you could do is draw on the brand logo of your favorite basketball brand onto your basketball! How will you personalize your basketball drawing?
Step 6 – Finish off your basketball drawing with some color
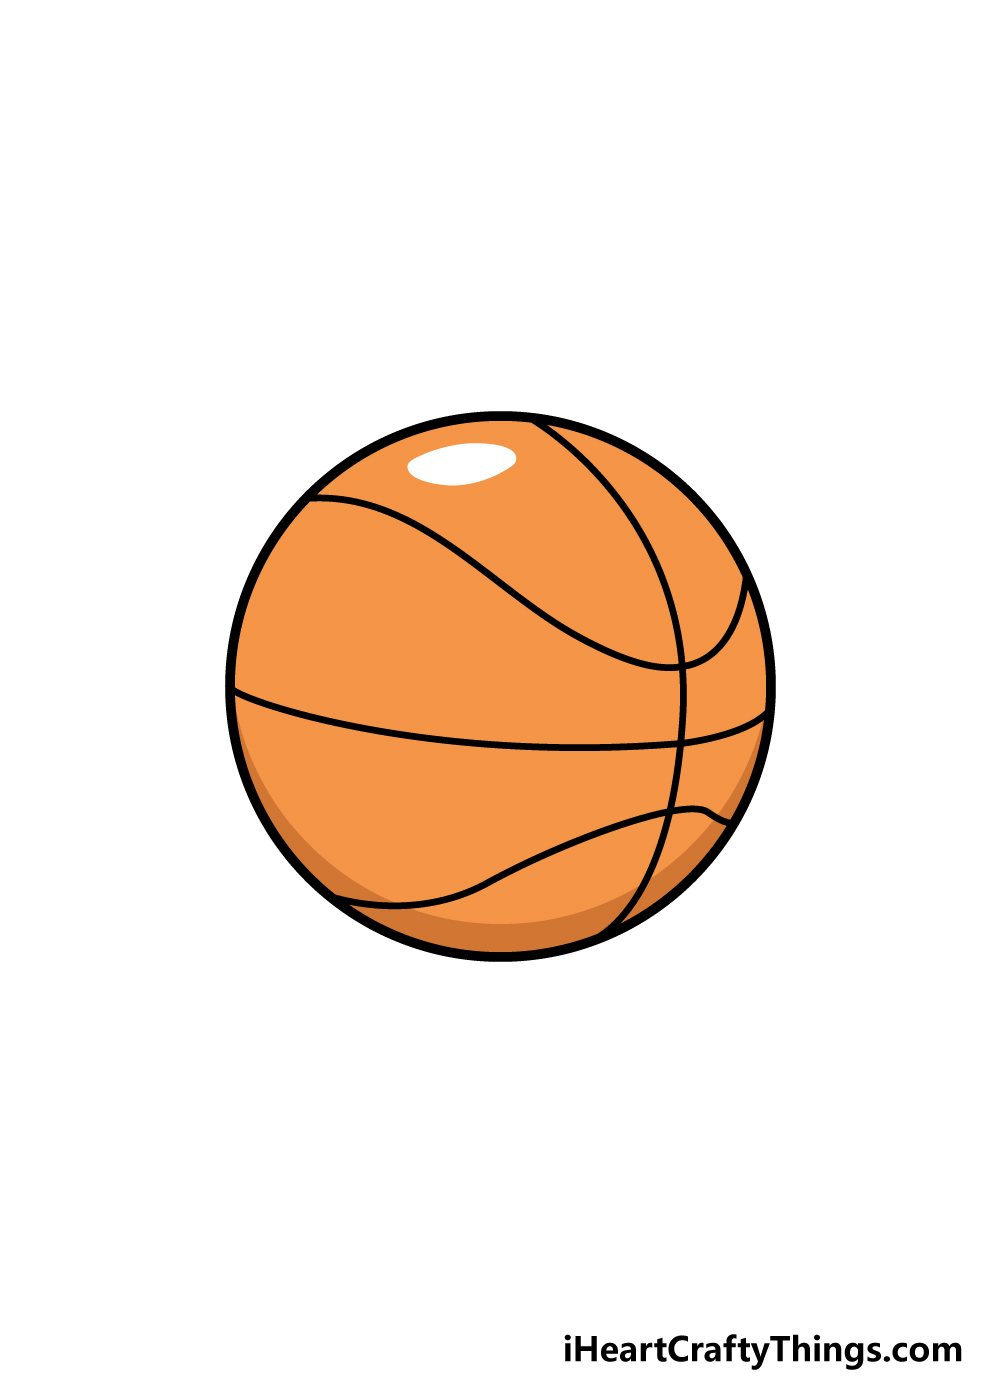
With those final details drawn in, you have successfully learned how to draw a basketball! Now that you have it drawn, there’s just one more step for you to do and it’s a fun step!
Your basketball drawing needs some color, and there are a few ways that you can make this your own.
Basketballs traditionally come in a bright orange, so that should make for a beautiful picture! You could also get creative and use some of your own favorite colors as well.
Once you choose some colors, you can have some fun with which art mediums and tools to use.
You could play around with some paints, watercolors or colored pens to bring some amazing color variations to your drawing.
You could also try to draw in a background for your drawing. You could maybe draw in a basketball court in the background and maybe draw in a hand above it to show the basketball is about to be intercepted! How will you finish off your basketball drawing?
Here’s how you can make your basketball drawing even better…
Get your head in the game as we make your basketball sketch look even better!
This drawing of a basketball has no logos on it, and that would be something you could add to make it even more distinct.
If you have a favorite basketball brand in real life, then that could be something you could add.
On the other hand, it could also be fun to create your very own basketball brand logo that you could add to this one. Which logo would you like to add to this basketball?
A basketball is one of many things you will need to play this incredible game. You could show off some of the other equipment you would need for a basketball by adding them to the picture!
For example, you will need the right footwear for the job, and you could show what you would like to wear during a basketball game.
Then, you could show the uniform you would also like to wear during a game.
If you can think of any other basketball equipment, then be sure to add them here!
If you’re adding equipment to your basketball drawing, you could take it even further by adding a character to your basketball drawing. There are a few options you could go for if you were to do this.
One would be to show yourself interacting with the basketball. Another would be to draw your favorite professional basketball player performing some cool moves.
What kind of art style would you use for a character in the image?
Once you have everything you want in your basketball sketch, you could then show where it is all taking place by adding a background.
Basketball can be played in all sorts of places, so you have options!
It could be as simple as a backyard court with a basket attached to the wall. Or, you could draw a massive stadium with lots of fans cheering in the background.
It all depends on where you would like to play basketball yourself!
Your Basketball Drawing is Complete!
With the final details drawn in and the colors finished, you have learned how to draw a basketball!
We really hope that you had a great time using this guide, as our aim was to make sure that it was not only helpful but also fun to use.
If you follow the guide steps and take it slow, you will definitely do a great job at drawing your basketball!
Drawing and coloring is just half the fun, though, as there is still plenty you can do to add in more fun details to your drawing.
We spoke about how you can use different colors and art mediums to personalize your drawing, and also how you could draw in a great background for it.
You could also maybe cut out a drawing of your favorite basketball player and stick it on to make it look like the player will be intercepting the ball!
The possibilities are endless, and the only limit is your imagination! We can’t wait to see what you come up with to finish your drawing.
This step-by-step guide is just one of many more that we will be bringing out!
We really hope that you will keep checking out our site to make sure you never miss out on our great drawing guides we will have for you.
Lastly, we would love to see how you finish off your basketball drawing, so once it’s done we hope that you will share it on our Facebook and Pinterest pages for us to enjoy!
We can’t wait to see your incredible drawing!
Here Is A Basketball Drawing To Inspire You!

We wanted to give you something to get your imagination going, so our artist Freddy whipped up this adorable basketball sketch for kids! This has to be the happiest, cutest basketball there ever was.
You’ll see that he gave it a cute cartoon face, and just this small detail gives the drawing so much life and personality. You could use the same face that Freddy used, but you could also use a different face if you prefer.
If you wanted to make the ball more realistic, then you could also leave out the face as well. At the end of the day, it’s your drawing and you can draw it in any way that you choose!
To make it even more unique and true to you, you can also draw some extra details, background elements and even additional characters.